
As the first step, create a new scene and add a plane to it with a scale of X equal to 10, Y equal to 1, and Z equal to 10 to give us a floor where characters can walk around (and if you want, change its material so it's not white). Then, add the penelope model to your scene that's at Assets/Objects/penelopeFX. Next, we'll do our basic RAIN setup and add a navigation mesh by going to RAIN | Create NavMesh. Make sure the navigation mesh will cover the floor, so change its Size to 100 and then generate the mesh. Next, create a waypoint route by going to RAIN | Create Waypoint Route, rename it PenelopeRoute, and add a few points in front of the penelope model for the character to walk. Lastly, add a RAIN AI object by selecting penelope and going to RAIN | Create AI. Your screen should look similar to the following screenshot:
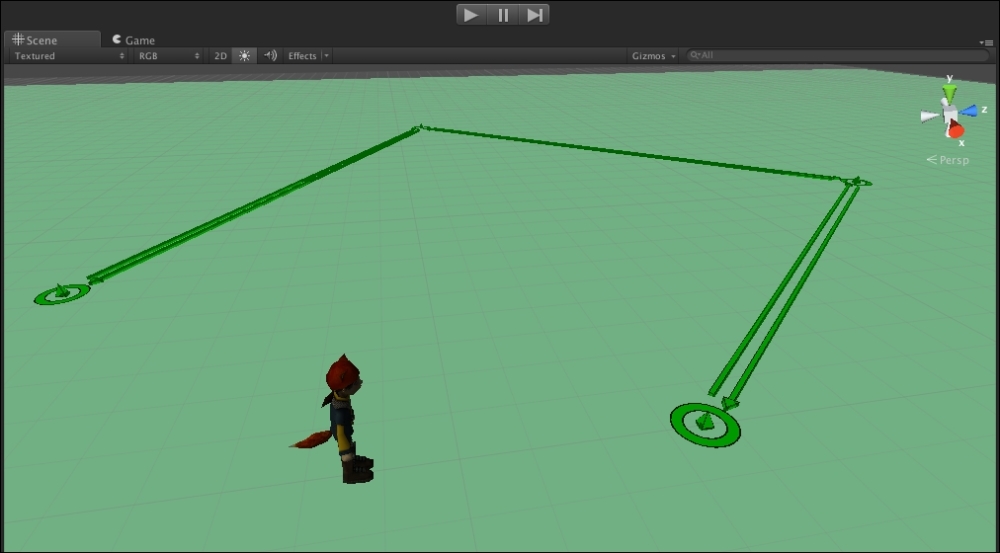
The scene for the AI animation demo
Note
If you need more details on how to set up a scene with a character patrolling a path, refer to Chapter 2, Patrolling.
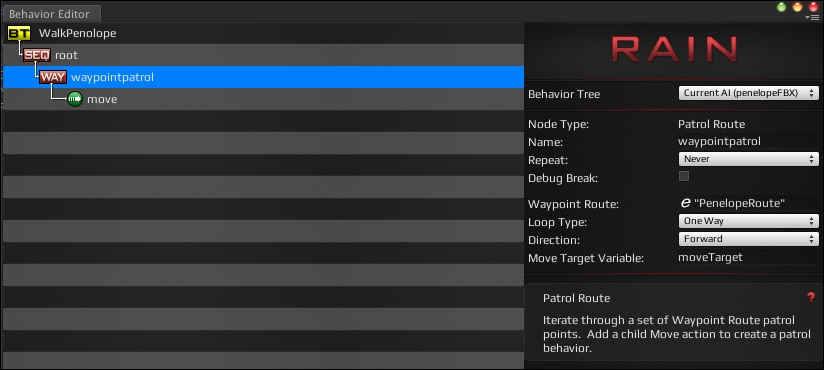
Now that we have a scene, let's create a behavior tree for Penelope; we want her to just walk following the path and stopping at the end. Select Penelope's AI object and open Behavior Editor. Create a new behavior tree called WalkPenelope and add a patrol route node to the root. Set the route to "PenelopeRoute". We just want Penelope to walk the route once and then stop, so set the Repeat field to Never and the Loop Type field to One Way. Lastly, set the Move Target Variable field to moveTarget and create a child move node that uses moveTarget to move. The tree should look like the following screenshot:
If you run the demo now, Penelope will travel around the path, but there will be no character animation; she will just slide on the ground. To fix this, we'll add animation to our character.
To configure animation for Penelope on her RAIN menu, select the Animation tab. (Again, this is the tab with a little figure running on it.) RAIN supports two animation systems: BasicAnimator and MecanimAnimator. Since the Penelope character doesn't use Mecanim, leave the animator as basic. The Add Animation State dropdown will then be automatically populated with the different animation clips available. Choose the animation states run and idle.
Your animation tab should look like the following screenshot:
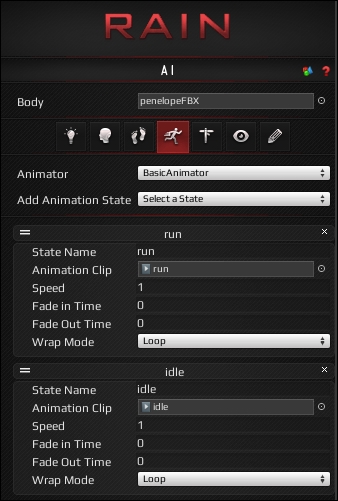
Here are some of the animation parameters:
- State Name: This specifies the name of the animation clip; this is what we'll use in the animate node in the behavior tree when calling animations.
- Animation Clip: This specifies the legacy animation clip associated with this state.
- Fade in Time, Fade Out Time: This specifies the amount of time required to fade in and out of the animation. This can be useful to create smooth transitions between animation clips.
- Wrap Mode: This provides the wrap mode for the animation. This can be left to default to use the clip's default settings. Other options are to loop or to play the animation once and go to the beginning or end of the clip.
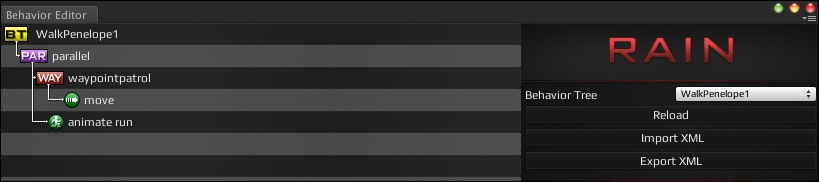
Now we need to configure the behavior tree to play the animations. As our first step, let's get Penelope running. Right-click on the root node in the WalkPenelope behavior tree and go to Switch To Parallel and then rename the node to parallel. By being parallel, we can add an animate node and have it update the animation at the same time as the patrol node is being executed. So add an animate node, rename it to animate run, and set Animation State to run. Your setting should look like the following screenshot:
If you run the demo now, you'll see the Penelope character perform the animation while it's moving. But the timing seems a little off. Change the moving speed of the move node to 3. Then slow down the animation a little by going back to the Animation tab and setting the Speed field to 0.75. If you run the demo now, the animation is a bit better. But when Penelope gets to the end of the route, the run animation just keeps on playing. To fix this, let's track a variable in the memory called stopped. When it is false, the run animation will play as it does now, and when stopped is true, an idle animation will be played instead.
The first thing you need to do to fix the animation's issues with ending is add a selector node as the new root. Remember, the selector node is used for the if/else logic, so we'll use it to switch between its running state and playing an idle animation. Add a constraint node under selector and rename it to is stopped. Set Constraint to stopped == false. Then add a new animate node under the selector node, name it animate idle, and set Animation State to idle. This will only start running when stopped is true, so we need to add an expression node to run the expression node after our moving is done. Make a new sequencer node and make it the parent of waypointpatrol. Then add an expression node under the sequencer node with an Expression value of stopped = true.
This should look like the following screenshot:
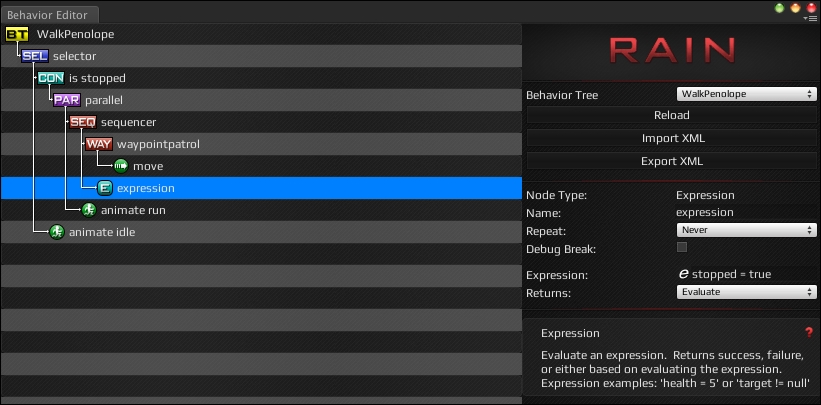
To summarize, the selector acts as if/else using the stopped variable in the memory, which is automatically created in the tree when we start using it. Then the run animation is played in parallel while the character is moving, and when the moving is done, the expression sets stopped = true and the idle animation is played. If you run the animation now, Penelope will run and then switch to idle at the end of the path.
However, there is one problem: the transition from the running to the idle state is very abrupt. If you run the demo, you'll easily notice a visual jump from the running to the idle state for Penelope at the end of the path. To help with this, you can adjust the ramping parameters for the animations. Go back to RAIN's Animation tab and set the Fade Out Time field of the run animation to 2. Now, if you run the animation, Penelope will start to transition out of the running state for two seconds, and although everything doesn't look perfect, the transition is much smoother than before. Feel free to play with other ramp settings to get a better effect.
This shows how RAIN works with Unity's legacy animation system; now, let's look at Mecanim.
Mecanim is Unity's latest animation system that's able to play animations on arbitrary characters. We won't go into detail on how Mecanim works and instead focus just on RAIN's usage.
For this demo, we will use a character already set up for Mecanim from Unity's sample. If you haven't already done so, download and import Unity's Mecanim demo, Mecanim Example Scenes v1.0, which is free on the Asset Store. Add the teddy bear character from Character/Teddy2/TeddyBar.fbx to your scene. Then, in the Animator component for Teddy, set the Controller field to IdleRunJump from Controllers. Then, add a RAIN AIRig to Teddy by going to RAIN | Create AI. We'll have Teddy walk on a different route, so create a new waypoint patrol route and name it TeddyRoute. Your scene should look like this:

In the preceding screenshot, you can see Teddy with a new path set up in your scene.
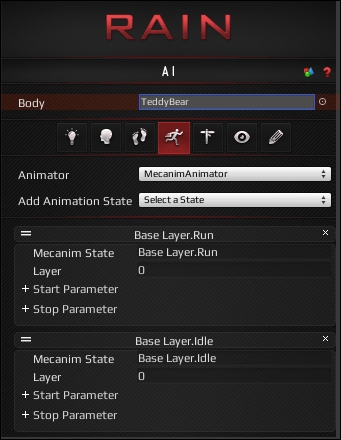
Next, we need to configure animations for Teddy. Go to the Animation tab in Teddy's RAIN AIRig and select MecanimAnimator. Then, we need to add states for running and idling. Select Base Layer.Run and Base Layer.Idle from Add Animation State.
Your screen should look like the following:
These are the basic animations added to Teddy. Besides adding the states, we need to set Mecanim parameters. From the teddy bear object's Animator component, open Controller for IdleRunJump. The following is the Teddy Mecanim diagram:
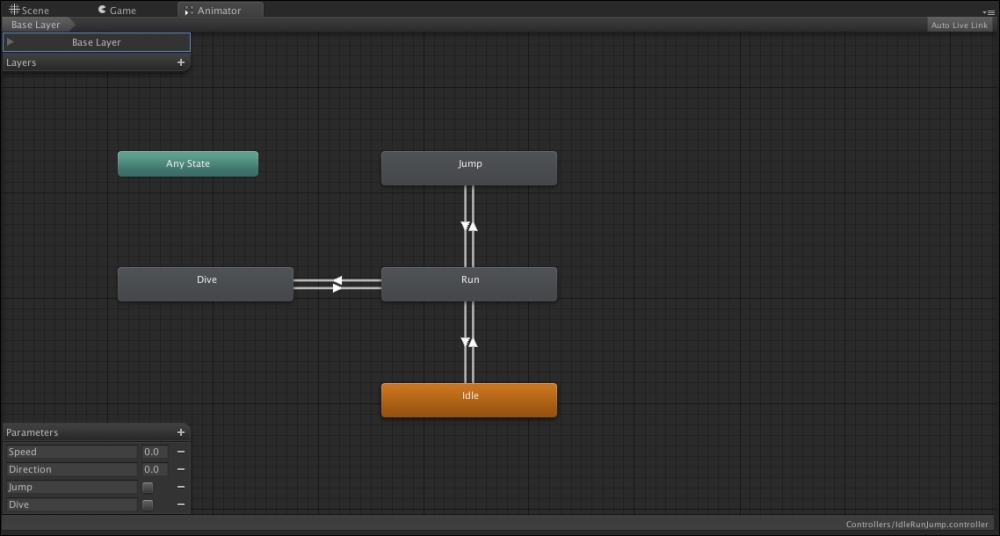
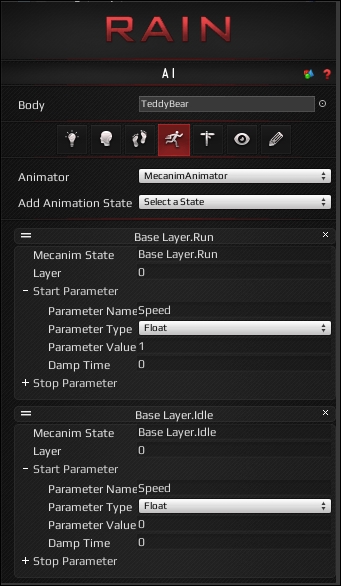
This shows the different parameters for the Teddy character; we'll only be setting Speed. Go back to the Animation tab for Teddy to set up Start Parameter under Base Layer.Run. Set the Parameter Name field to Speed and leave the Parameter Type field to Float and the Parameter Value field to 1. Then, do the same for Base Layer.Idle, except set the Parameter Value field to 0. The new settings should look like this:
This sets up the animation. Now we can set up the behavior tree for Teddy. Create a new behavior tree called WalkTeddy and recreate the behavior tree from WalkPenelope.
From the animate node's perspective, it doesn't matter whether the animator is Mecanim or not, so we only need to make a few simple changes. Change the waypoint patrol node's waypoint route to "TeddyRoute". Then, in the animate run node, set Animation State to Base Layer.Run and set animation idle's Animation State field to Base Layer.Idle. And one important change for Mecanim is to set the animate node's Repeat field to Forever. The following screenshot shows the new behavior tree:

If you run the demo now, you'll see Teddy running along the path and then be in the idle state at the end, just like Penelope. But there is one problem: Teddy is running way too fast. The reason is that RAIN is moving the model and the animation system is also applying movement to the character, making Teddy move fast artificially. To fix this, go back to the Animator component of Teddy and uncheck Apply Root Motion. This will keep the animation system from applying movement and Teddy will now run at a better rate. Running the demo now, Teddy will run and idle at the end.