
If you are an independent developer who works according to your own schedule, you might not want to worry about a repository manager. However, if you are part of a larger team, doing day-to-day development with Maven, then you must evaluate the need for a repository manager. A Maven repository manager addresses two concerns in enterprise application development.
An organization with more than 100 developers who are continuously working on Maven based projects can easily burst out the outbound network traffic. To do an online build, it might take from 1 hour to 5 hours, based on the size of your project. This becomes much worse if you have many SNAPSHOT dependencies. The Maven repository manager, which can act as a proxy for external remote repositories, addresses this concern. With a repository manager in place, you do not need to download each and every artifact per each developer. Once a given artifact is being downloaded, it will be cached/stored at the repository manager. There is no need to go back to the remote repository and download it again and again.
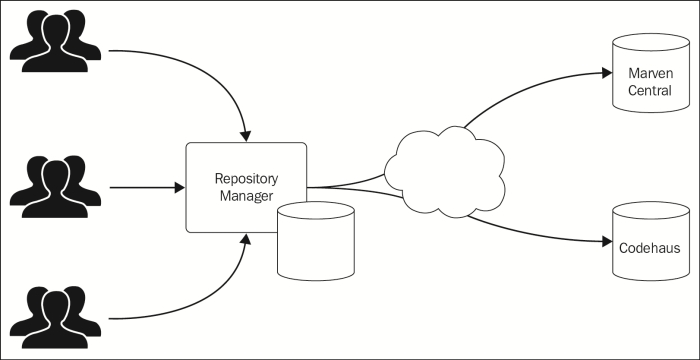
Other than just acting as a proxy, the repository manager can also act as the central point of governance. Here, you can enforce policies to specify which artifacts are allowed to use and which are not. For example, you can allow any artifact that has the Apache 2.0 open source license, but restrict anything with a GPL license. Apache 2.0 is the most business-friendly license, while GPL is a bit restrictive.
Your organization might not just be consuming Maven artifacts, but also producing some. If you produce Maven artifacts and want the public to use them, you have to make them available in a Maven repository, which is publicly accessible. This is the second concern addressed by the Maven repository manager. The Maven repository manager itself can act as a repository. This is quite useful, even for internal projects. If you have multiple internal projects where developers are simultaneously working on and sharing dependencies, you can use the repository manager to act as a snapshot repository. On a daily basis, each project can publish its artifacts to the snapshot repository, while the others that have dependencies to those can get the latest from the repository, rather than building each and every dependent project locally by each developer.
Nexus, Archiva, and Artifactory are three very popular open source repository managers. In the next section, we will have a look at the Nexus repository manager.
Note
A detailed feature comparison between Nexus, Archiva, and Artifactory is available at http://docs.codehaus.org/display/MAVENUSER/Maven+Repository+Manager+Feature+Matrix.
Nexus has bit of a history. The original idea was initiated by Tamas Cservenak who was working on Proximity, which was the most popular Maven proxy at that time, in December 2005. Tamas and his colleagues, who were working for a small organization, were fed up with their extremely slow ADSL connection and tried to come up with a workaround to improve the productivity. Proximity was the result. With Proximity, you do not need to always download Maven artifacts when you perform a build. These artifacts will be cached and stored locally for future use. Later in 2007, Tamas joined a company called Sonatype to build a similar product, which is the most popular Maven repository manager today, Nexus.
Nexus comes in two versions: the open source version and the Nexus professional version. In this chapter, we will only focus on the open source version.
The open source version of Nexus was released under Eclipse Public License (EPL) version 1.0, which is compatible with the Apache 2.0 license. The following list shows some of the key features available in the Nexus open source version. From here onwards, if we just say Nexus, it means the open source version has:
- The ability to host and maintain repositories.
- Proxying requests to remote Maven repositories.
- Grouping of repositories. With Nexus, you can group a set of repositories together and each group will have its own repository URL, which developers can use.
- The ability to host project websites.
- Fine-grained access controlling. Each action you perform on Nexus can be protected and will require a privilege check.
- The ability to search artifacts by groupId, artifactId, version, classifier, packaging, Java class names, keywords, and artifact checksums.
- Scheduled tasks for repository management.
- RESTful services to perform repository management functions.
- Extension points. The out-of-the-box functionality of Nexus can be further improved or added more by writing plugins.
You can download Nexus as a ZIP file distribution or as a WAR file from http://www.sonatype.org/nexus/go. If it's the WAR file that you download, then you have to deploy it in an application server. The zip distribution of Nexus comes with its own application server: Jetty.
To install from the zip distribution, you simply need to unzip it:
$ unzip nexus-2.9.1-02-bundle.zip
If it is the WAR file distribution, then you simply need to copy it to the web application deployment directory of your application server, for example, in Apache Tomcat, to TOMCAT_HOME/webapps.
You can start Nexus in two different ways. Execute the following command from the nexus-2.9.1-02 directory, which will start Nexus in the console mode. If you close the console, you kill Nexus. This is for Unix- or Linux-based systems. If you are using Microsoft Windows, you need to use the corresponding bat file.
$ sh bin/nexus console
The following command will start Nexus and will detach from the console. You close the console, but Nexus will still be running:
$ sh bin/nexus start
In the nonconsole mode, to view the startup logs, you can use the following command under a Unix- or Linux-based system:
$ tail -f logs/wrapper.log
The following command will stop the running Nexus server:
$ sh bin/nexus stop
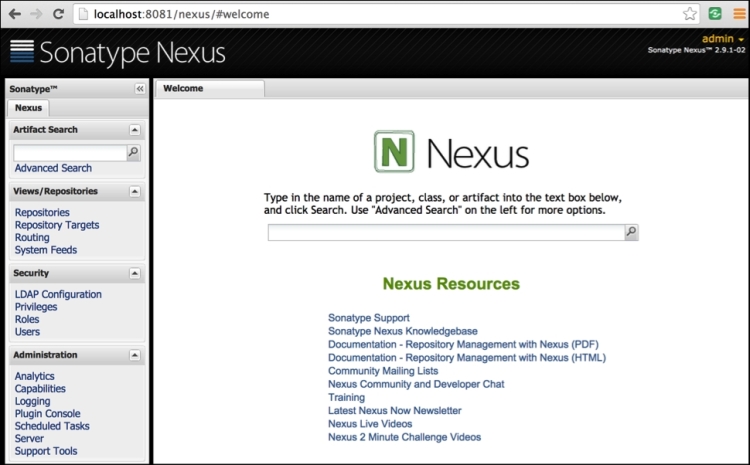
By default, Nexus will start running on the port 8081. If you have executed the installation correctly, you should be able to access the http://localhost:8081/nexus URL. Now, you can log in to the system with the default username as admin and password as admin123. Once you are logged in to the system, you will see the following view. The first thing you should please delete do is to change the default password by performing the following steps:
- Go to
http://localhost:8081/nexus/#profile;Summary. - Click on Change Password to reset the default password:
Let's see how to create a Maven repository with Nexus and then deploy artifacts to it:
- Go to
http://localhost:8081/nexusand login asadmin. - Navigate to Views/Repositories | Repositories | Add | Hosted Repository.
- Now, you will see a view as shown in the following screenshot. Fill in the required details appropriately. The default storage location is set to
file:/nexus-2.9.1-02-bundle/sonatype-work/nexus/storage/{repository-id}/. If needed, you can override it. - Repository Policy can be either release or snapshot.
- Deployment Policy can be Allow Redeploy, Disable Redeploy, or Read Only. If set to Allow Redeploy, you can deploy the same artifact again and again with the same Maven coordinates. This is needed for a snapshot repository.

- Now, we have configured our own Maven repository with Nexus, it is ready to use. You need to add a reference (as shown in the following code snippet) to the repository in the POM file to deploy the project artifacts:
<distributionManagement>
  <repository>
    <id>packt</id>
    <url>http://localhost:8081/nexus/content/
      repositories/packt</url>
  </repository>
</distributionManagement>
Let's create a simple Maven project and deploy the artifact it produces to the Maven repository that we just created.
The following command will create a Maven project with the maven-archetype-quickstart archetype. We discussed Maven archetypes in Chapter 7, Maven Archetypes.
$ mvn archetype:generate -DgroupId=com.packt.samples-DartifactId=com.packt.samples.archetype -Dversion=1.0.0-DinteractiveMode=false
- You will see the following project structure that is being created with a sample POM file:
com.packt.samples.archetype |-pom.xml |-src |-main/java/com/packt/samples/ |-test/java/com/packt/samples/ - Open the
com.packt.samples.archetype/pom.xmlfile and add the following code snippet directly under theprojectroot element:<distributionManagement> <repository> <id>packt</id> <url>http://localhost:8081/nexus/content/repositories/packt</url> </repository> </distributionManagement> - Execute the following Maven command to build the project and deploy the artifact to the Nexus Maven repository. As we discussed in Chapter 5, Maven Plugins,
deployis a phase that belongs to the Maven default lifecycle. When you execute the command, Maven will run all the plugins registered with each phase up to and including the deploy phase. The actual work is done by themaven-deploy-pluginregistered under thedeployphase:$ mvn deploy - Even though you expect to see the artifact appearing in the Nexus repository, you will get the following error. The error message clearly indicates the reason for the failure. Any random person cannot deploy artifacts into the Nexus repository, only the authorized parties can do it:
[ERROR] Failed to execute goal org.apache.maven.plugins:maven-deploy-plugin:2.7:deploy (default-deploy) on project com.packt.samples.archetype: Failed to deploy artifacts: Could not transfer artifact com.packt.samples:com.packt.samples.archetype:jar:1.0.0 from/to packt (http://localhost:8081/nexus/content/repositories/packt): Failed to transfer file: http://localhost:8081/nexus/content/repositories/packt/com/packt/samples/com.packt.samples.archetype/1.0.0/com.packt.samples.archetype-1.0.0.jar. Return code is: 401, ReasonPhrase: Unauthorized.
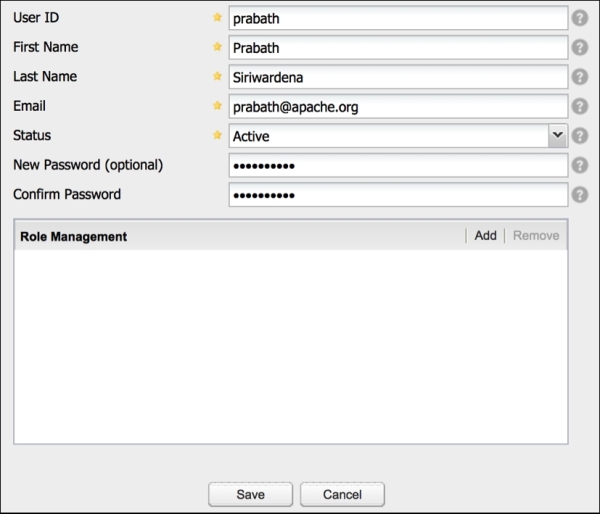
Let's see how to create a new user in Nexus and assign the user a role with the privileges to deploy Maven artifacts to the repository:
- Go to
http://localhost:8081/nexusand log in asadmin. - Navigate to Security Users | Add | Nexus Users. You will see a view similar to what is shown in the following screenshot. Fill in the details appropriately.
- Make sure the value of the Status field is set to Active.
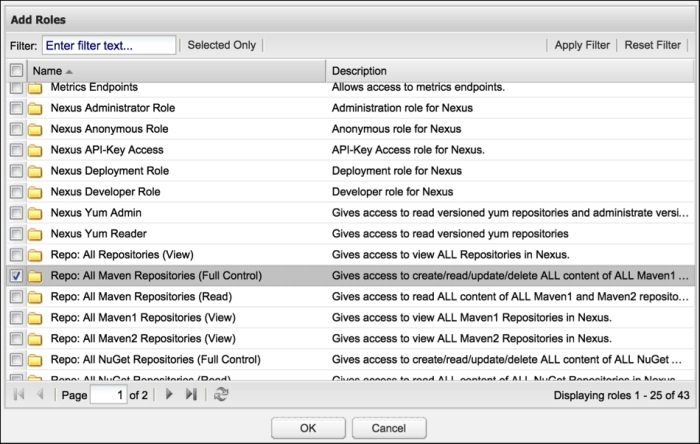
- Click on the Add button in the Role Management section and select Repo: All Maven Repositories (Full Control), as shown in the upcoming screenshot:
- Nexus comes with a set of roles where each role has a different set of privileges. Any user that belongs to the Repo: All Maven Repositories (Full Control) role has the rights to deploy artifacts into the Maven repository.
- Once done, click on Save to complete the function.
- Maven repositories can be protected for legitimate access. If a given repository is protected with HTTP Basic Authentication, as in this case, the corresponding credentials should be defined under the
serverselement ofMAVEN_HOME/conf/settings.xml, as shown in the following code snippet. The value of theidelement must match the repository ID. How to encrypt the credentials insettings.xmlwas covered in the Encrypting credentials in settings.xml section of Chapter 4, Build Lifecycles.<server> <id>packt</id> <username>username1</username> <password>password23</password> </server>
- Now, you can execute the following Maven command from the
com.packt.samples.archetypedirectory and it should succeed this time:$ mvn deploy - If you see the following error, it means that the user configured in the
MAVEN_HOME/conf/settings.xmlfile might not have the required privileges to deploy artifacts:[ERROR] Failed to execute goal org.apache.maven.plugins:maven-deploy-plugin:2.7:deploy (default-deploy) on project com.packt.samples.archetype: Failed to deploy artifacts: Could not transfer artifact com.packt.samples:com.packt.samples.archetype:jar:1.0.0 from/to packt (http://localhost:8081/nexus/content/repositories/packt): Access denied to: http://localhost:8081/nexus/content/repositories/packt/com/packt/samples/com.packt.samples.archetype/1.0.0/com.packt.samples.archetype-1.0.0.jar, ReasonPhrase: Forbidden. -> [Help 1] - If the artifact was successfully deployed to the repository, you should be able to see it in Nexus. Navigate to Views/Repositories | Repositories. Click on the name of the repository that you created (packt-repo) and then click on Browse Index. You will see the artifact that we just deployed, as shown in the following screenshot:

- Let's try the command
mvn deployonce again from thecom.packt.samples.archetypedirectory. If you see the following error, when creating the hosted repository in Nexus, you have set Disable Redeploy as the deployment policy:[ERROR] Failed to execute goal org.apache.maven.plugins:maven-deploy-plugin:2.7:deploy (default-deploy) on project com.packt.samples.archetype: Failed to deploy artifacts: Could not transfer artifact com.packt.samples:com.packt.samples.archetype:jar:1.0.0 from/to packt (http://localhost:8081/nexus/content/repositories/packt): Failed to transfer file: http://localhost:8081/nexus/content/repositories/packt/com/packt/samples/com.packt.samples.archetype/1.0.0/com.packt.samples.archetype-1.0.0.jar. Return code is: 400, ReasonPhrase: Bad Request. -> [Help 1]Note
Even though we created a hosted repository in Nexus from scratch, you do not always need to do this. Nexus comes with three hosted repositories out-of-the-box.
The release repository is for the released artifacts available at
http://localhost:8081/nexus/content/repositories/releases.The snapshots repository is available at
http://localhost:8081/nexus/content/repositories/snapshotsis for the snapshot artifacts.Nexus also comes with a hosted repository for third-party artifacts, which is available at
http://localhost:8081/nexus/content/repositories/thirdparty.