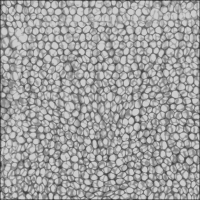
So, the first thing to do is to obtain a tileable grayscale reptilian scales image; we'll start from an already existing image obtained from an old and larger texture I had painted in Gimp for a dinosaur model some years ago… but that's a different story.
In any case, if you prefer, you can paint a new reptilian scales image from scratch by using painting software such as Gimp or Photoshop or open source applications such as MyPaint (http://mypaint.intilinux.com/) or Krita (https://krita.org/).
We are taking for granted that in your Blender User Preferences window, you still have the Import Images as Planes addon enabled; if not, start Blender and just enable it as already explained in Chapter 1, Modeling the Character's Base Mesh. Then, follow these steps:
- Select and delete the default Cube primitive in the scene. Select the Camera and the Lamp and move them to the 6th scene layer.
- Click on the main File menu and then on the Import item; select the Images as Plane item.
- Browse to the
textures_makingfolder and select the providedscales.pngimage texture, which is a gray painted scales image:
The "scales.png" image provided with this cookbook
- Press the period (.) key on the numpad to center the view on the selected Plane and then the 7 key on the numpad to switch to the Top Ortho view.
- Go to the Object Modifiers window and assign an Array modifier to the Plane; check the Merge item and leave all the other settings as they are.
- Click on the Copy button to assign a new identical Array modifier, and in the new Array modifier, under the Relative Offset item, change X to 0.000 and Y to 1.000.
- Save the file as
4886OS_10_scales_tiles_01.blend. - Press the period (.) key again on the numpad to center the view on the enlarged Plane, then switch the Viewport Shading mode to Texture (Alt + Z):

The UV mapped Plane with the Array modifiers assigned
As you can see in the preceding screenshot, the mapped Plane is now repeated 4 times.
By zooming towards the middle seams, it's clear that the mapped scales image is not tileable yet:

The visible seams at the borders of the Plane instances
At this point, the file is ready and we can start to paint on the image to make it tileable:
- Click on the mode button (Sets the object interaction mode) on the viewport toolbar to select the Texture Paint mode item.
- Put the mouse cursor on a bright value in the scales image and press the S key to sample it, then go near the color selector in the Brush subpanel under the Tool Shelf to the left and click on the Toggle foreground and background brush colors button (the one with the two opposing arrows) to switch the active color. Otherwise, simply press the X key, put the mouse cursor on a dark area, and press S again to sample it as the opposite color.

Sampling the light and dark colors of the image
- Set the brush's Radius and Strength values, and if you are using a graphic tablet, be sure to have the two tablet pressure sensitivity buttons at the sides of the previous items enabled.
- Start to paint by fixing the scales on the image at the seams areas. Because we can also paint on the Planes duplicated by the Array modifier, and because we are always painting on the same instanced image, it's quite simple to visually join the scales at the four sides, actually making the image tileable:

Painting on the image at the borders to make the scales seamless
It's enough to fix the areas along the middle horizontal and vertical axes of the Planes to cover all the four edges (in fact, fixing two edges is automatically fixing four).
- When you are done, go back into Object Mode and open a new window with UV/Image Editor; press Tab to go into Edit Mode, make the revised image appear, and save it (by clicking on Image | Save as Image in the toolbar or simply press the F3 key) in the
textures_makingfolder asscales_tiles.png:
Saving the tileable scales image with a different name
- Save the file as
4886OS_10_scales_tiles_02.blend.
You might wonder why we didn't use the Make Seamless filter of Gimp (Filters | Map | Make Seamless) to obtain a tileable image in one click; well, the answer is simple: the Make Seamless plugin actually offsets and blends together whole areas of the image, and this can work in several cases, but not for a complex pattern made by scales, where a simple fading is not good enough. In this case, I prefer to paint the joining line between them by hand.
