It's time to talk a bit about a very useful Blender tool: the Quick Edit tool.
Through this tool, it's possible to export a screenshot of the model in our favorite 2D painting software (Gimp or Photoshop, or whatever), paint on it using a new alpha background layer, and reassign the painted layer to the model in Blender, which is UV-mapped on the selected UV coordinates layer. All this, in just a few clicks.
In our case, we don't actually need to use this tool to refine the textures for the Gidiosaurus, so this recipe is going to be just an example. By the way, to fully understand how to use the tool, I suggest you to follow all the steps; just don't save the file at the end (or save it with a different name in a different directory if you want to keep it). So, carry on with the following:
- Start Blender and call the User Preferences panel (Ctrl + Alt + U); go to the File tab and, in the Image Editor slot (Path to an image editor), write the path to your 2D image painting software installation (this is also done by clicking on the open/browse button at the right end of the slot). The path, of course, changes based on your OS; in my case, in Linux Ubuntu, it's enough to write
gimp:
The Image Editor path in the File tab of the User Preferences panel under Linux Ubuntu
- Click on the Save User Settings button at the bottom-left of the panel and close it.
Once you've set the path to the image editor, let's load our Gidiosaurus file:
- Load the
Gidiosaurus_painting_BI.blendfile and maximize it as much as possible in the 3D viewport.You can use both the User or the Camera view; it doesn't make any difference for the tool to work. By the way, it would be a good idea to use the Camera view so as to have a fixed point of view for any other case.
- If necessary, press the T key to call the Tool Shelf panel; select the Gidiosaurus object and then go in Texture Paint mode.
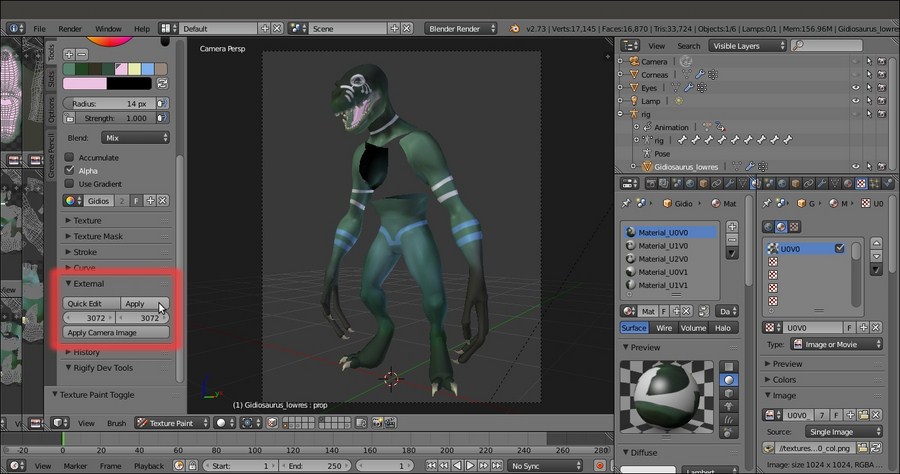
- Go to the External subpanel under the Tools tab; set a size for the screenshot to be exported (by default, it's 512 x 512 pixels; I set it to 3072 x 3072 pixels) and then click on the Quick Edit button:

The External Image Editor subpanel
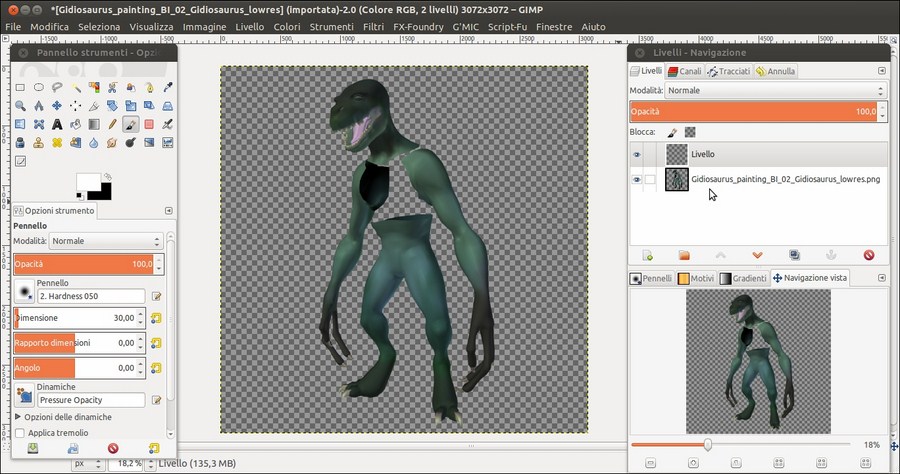
After a while, the image editor automatically starts (in my case, it's Gimp 2.8) and opens the screenshot of the model:

The screenshot previously visible in the Blender Camera view opened in Gimp
- Add a new transparent layer and start to paint on it, adding some kind of tribal make-up decoration to the Gidiosaurus:

Tribal painting on the Gidiosaurus warrior
- When you are done, deselect the visibility for the export layer and export the transparent painted one by saving it with the same name as the exported one. That is, the Quick Edit tool exported the screenshot by saving a
.pngimage inside the blend file directory with the nameGidiosaurus_painting_BI_02_Gidiosaurus_lowres.png; export the painted layer by saving it asGidiosaurus_painting_BI_02_Gidiosaurus_lowres.pngas well:
The Gimp layer with the tribal painting "a solo"
This is necessary for Blender to find it in the next step.
- Back in Blender, click on the Apply button under the External subpanel and watch the new layer added to the model in the 3D viewport:

- To make the textures editing permanent, click on the Save All Images button, both under the Slots tab and the Image item on the UV/Image Editor window toolbar:

The tribal painting transferred on the 3D model
The editing we did in Gimp is now correctly transferred on the image textures:

The tribal painting transferred on the image map
