With time, code tends to grow both in complexity and size. This occurs in the software industry by its nature. All products evolve constantly and new requirements are made and implemented across a product's life. Build tools offer a way to make managing the project life cycle as straightforward as possible, by following a few code conventions, such as the organization of your code, in a specific way, and by the usage of naming a convention for your classes or a determined project structure formed by different folders and files.
Some of you might be familiar with Maven or Ant. They are a great couple of Swiss army knives for handling projects, but we are here to learn so we decided to use Gradle. Some of the advantages of Gradle are its reduced boilerplate code, resulting in a much shorter file and a more readable configuration file. Among others, Google uses it as its build tool. It is supported by IntelliJ IDEA and is quite easy to learn and work with. Most of the functionalities and tasks are obtained by adding plugins.
Before proceeding forward, make sure that Gradle is installed on your system.
Let's analyze the relevant parts of a build.gradle file. It holds project information in a concise way, using Groovy as the descriptor language. This is our project's build file, autogenerated with IntelliJ:
apply plugin: 'java'
sourceCompatibility = 1.7
version = '1.0'
A Java plugin is applied since it is a Java project. It brings common Java tasks, such as build, package, test, and so on. The source compatibility is set to JDK 7. The compiler will complain if we try to use the Java syntax that is not supported by this version:
repositories {
    mavenCentral()
}
Maven Central (http://search.maven.org/) holds all our project dependencies. This section tells Gradle where to pull them from. The Maven Central repository is enough for this project, but you can add your custom repositories, if any. Nexus and Ivy are also supported:
dependencies {
    testCompile group: 'junit', name: 'junit', version: '4.12'
}
Last, but not least, this is how project dependencies are declared. IntelliJ decided to use JUnit as the testing framework.
Gradle tasks are easy to run. For example, to run tests from the command prompt, we can simply execute the following:
gradle test
This can be accomplished from IDEA by running the test task from the Gradle Tool Window that can be accessed from View|Tool Windows|Gradle.
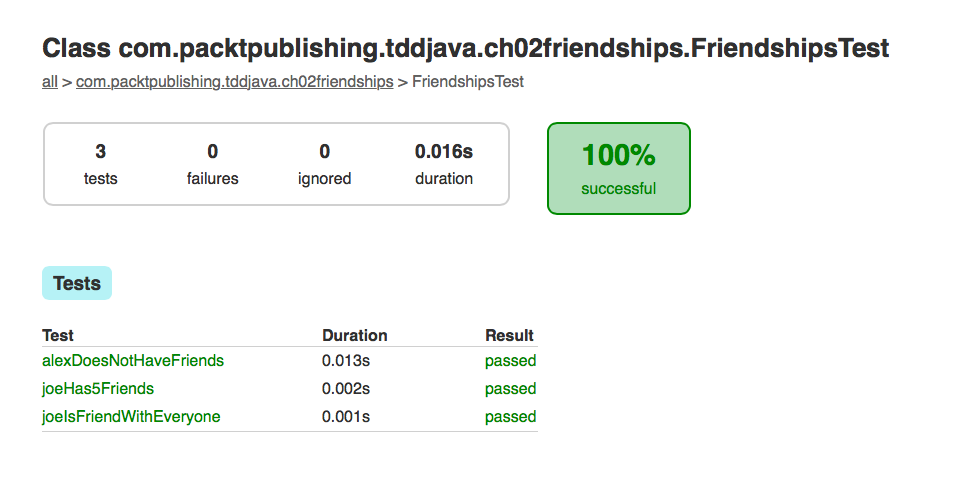
The tests result is stored in the HTML files that are located in the build/reports/tests directory.
The following is the test report generated by running gradle test against the sample code: