
Chapter 8: Deploying Your Apps and Going Further
This chapter concludes our introduction to Uno Platform, but there's still a lot more to cover before we finish. You already know that Uno Platform allows for the creation of apps that run in multiple environments. This does not apply just to new apps. A large part of the appeal of Uno Platform is that it enables developers to also take existing apps and run them in new environments. Because it is built on UWP and WinUI, Uno Platform provides an excellent way for you to take existing apps and run them in new environments.
In this chapter, we'll cover the following topics:
- Bringing Xamarin.Forms apps to WebAssembly
- Deploying a Wasm Uno Platform app to the web
- Deploying your app to a store
- Engaging with Uno Platform community
By the end of this chapter, you'll know how to deploy your applications, and you'll be confident about the subsequent steps to take in your journey with Uno Platform.
Technical requirements
This chapter assumes that you already have your development environment set up, including installing the project templates. This was covered in Chapter 1, Introducing Uno Platform.
This chapter will also use source code that was created in Chapter 6, Displaying Data in Charts and with Custom 2D Graphics. This is available at the following URL: https://github.com/PacktPublishing/Creating-Cross-Platform-C-Sharp-Applications-with-Uno-Platform/tree/main/Chapter06.
Check out the following video to see the code in action: https://bit.ly/3xDJDwT
Bringing Xamarin.Forms apps to WebAssembly
If you use .NET for your development and have previously created a mobile (iOS and/or Android) app, you may have used Xamarin.Forms. If you have mobile apps built with Xamarin.Forms that you now want to run on WebAssembly, you may be worried that a rewrite of code is in order, but it's not.
Xamarin.Forms can create UWP apps. Uno Platform allows UWP apps to run on other platforms. Therefore, it's possible to use the UWP app produced by Xamarin.Forms and pass that as input for Uno Platform to use to create a Wasm app. Fortunately, and for simplicity, all the connecting of project inputs and outputs is taken care of by a provided template.
Tip
It's also possible to use Uno Platform controls within a Xamarin app. Doing so is simple, and there's a guide showing how at the following URL: https://platform.uno/docs/articles/howto-use-uno-in-xamarin-forms.html.
To show how a UWP app created by Xamarin.Forms can be used by Uno Platform to create a Wasm app, let's create a new Xamarin.Forms app and add a Wasm head using Uno. You can, of course, do the same thing with an existing Xamarin.Forms app, but only if it has a UWP head. If you have an existing Xamarin.Forms app without a UWP head, you'll need to add one before you can create a Wasm head:
- Inside Visual Studio, create a new project with the Mobile App (Xamarin.Forms) project template.
- Give the project (and solution) the name UnoXfDemo. You can, of course, use a different name, but you will need to need to adjust all subsequent references accordingly.
- Check the place solution and project in the same directory box.
- Select the Blank template option and be sure to check the option to say you plan to develop for Windows (UWP).
We'll use a blank application template for simplicity. Most Xamarin.Forms-specific content should work fine. However, you are advised to test this early in your process to identify any possible issues you may encounter with custom UI or third-party controls.
- Right-click on Solution node in Solution Explorer and select Open in Terminal.
- The Developer PowerShell windows will open in the directory of the solution. In it, type the following:
dotnet new -i Uno.ProjectTemplates.Dotnet::*
This will ensure that you have the latest versions of the templates installed.
- Now type the following:
dotnet new wasmxfhead
This will add the new project to the solution.
- Select Reload, when prompted, to reload the solution and you'll see UnoXfDemo.Wasm as a new project inside the solution.
- Downgrade all the references of Xamarin.Forms to be version 5.0.0.1931, as this is the latest version supported by Uno Project.
- Add a reference to the Xamarin.Forms package in the Wasm project, as follows:
Install-Package Xamarin.Forms -Version 5.0.0.1931
Note that all versions of Xamarin.Forms referenced from the projects in the solution should be the same, and they must also match the version supported by the Uno.Xamarin.Forms.Platform package. If they don't, you'll get an error explaining the different versions referenced and how to address them.
- Update the version of Uno.Xamarin.Forms.Platform used by the Wasm project to 5.0.0-uno.1799. This is to ensure compatibility with version 5.0 of Xamarin.Forms that, at the time of writing, is referenced in the latest version of the templates.
- Set the UnoXfDemo.Wasm project as the start up project, and then start debugging. You'll see something that looks similar to Figure 8.1:
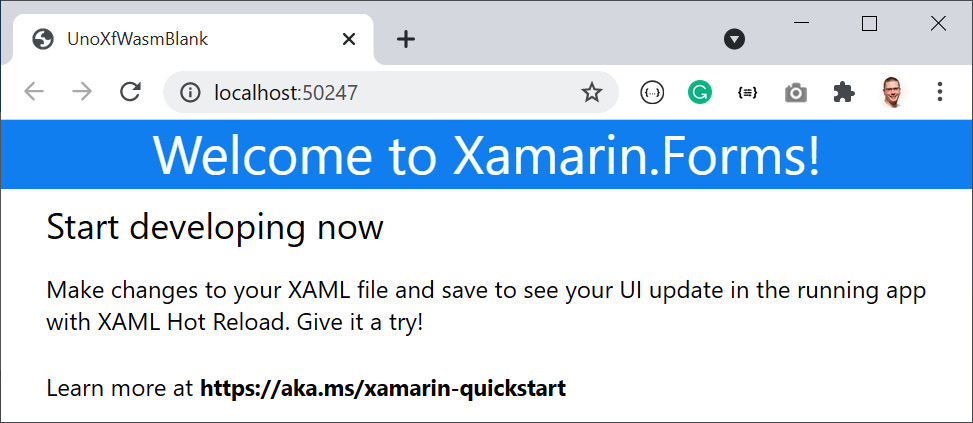
Figure 8.1 – A default (blank) Xamarin.Forms app running through WebAssembly
Of course, you can continue developing the app, adding or changing features or functionality, and then deploy the latest version to WebAssembly like any other project in the solution.
Now, we've seen how simple it is to use Uno Platform to have a Xamarin.Forms app run as a Wasm app.
Important note
In addition to being able to take an existing Xamarin.Forms app and have it work with Uno Platform, it's also possible to take an existing UWP app and convert that to use Uno Platform to target other operating systems too. The Uno Platform team has published an official guide on how to do this at the following URL: https://platform.uno/docs/articles/howto-migrate-existing-code.html.
After you've created the Wasm version of your app (whether it started out as a Xamarin.Forms app or not), you'll want to make it available on the web so that other people can use it. We'll look at that now.
Deploying a Wasm Uno Platform app to the web
Building a Wasm app and having it running locally on your machine is an exciting step that shows the power and potential of Uno Platform. However, running locally on your machine makes it hard for other people to use it. What you need to do is host the app somewhere that everyone can access it.
Probably the most popular choice for hosting a .NET-based web application is on Azure. You can host your app anywhere, and the process is very similar for all services as there is no server-side processing needed. On the assumption that Azure is where you're likely to want to host your app, let's now see how this is done. If you've never deployed a web app or used Azure before, it can seem daunting, but you'll see how easy it is and that there's nothing to fear.
Try Azure for free
If you don't already have an Azure account, you can sign up for a free trial by visiting the following URL: https://azure.microsoft.com/free/.
Rather than create a new app purely to show it being deployed, let's use the app we created in Chapter 6, Displaying Data in Charts and with Custom 2D Graphics:
- Open the Dashboard app you created previously (or download the version from https://github.com/PacktPublishing/Creating-Cross-Platform-C-Sharp-Applications-with-Uno-Platform/tree/main/Chapter06).
- Right-click on the WASM project and select Publish….
- You'll see that there are many places you can publish your app to, but as we want to publish the app to Azure, select the Azure option and click Next.
- For the specific target, we'll select the Azure App Service (Windows) option, although you could use any of the other options.
Important note
Static Web Apps is another suitable way of hosting a Wasm app. See https://azure.microsoft.com/services/app-service/static/ for more details.
- If you haven't already done so, sign in to your Azure linked account.
- We'll create a new app service to host the app, so click on the plus sign for Create an Azure App Service.
- A default name for your app will be automatically assigned. As this will be used as the subdomain where the app will be made available, this must be unique. The default name will have a number appended to the project name based on the current date and time. You can change this if you wish, but if the value you specify isn't unique, you'll see a warning that the name is not available, and you must choose another.
- If you have multiple subscriptions linked to your account, select the one you want to use for this app.
- Select or create new resource groups and hosting plans. For demonstration purposes, you can use a Free hosting plan for now. If the needs of your app mean this is insufficient, you can change this in the future.
Important note
When you move on from the free trial and have an app in production, it's vital that you fully understand the options and billing-related choices you have configured for your web app. This will avoid any unexpected charges to your credit card, or a critical app being disabled when you run out of credit. The appropriate settings for you and your app will depend on your app and individual requirements. Details of the billing options can be found at the following URL: https://azure.microsoft.com/pricing/details/app-service/windows/.
- Click the Create button and the service will be created for you. This may take a few seconds, and a message will be shown in the corner of the screen while this takes place.
- You'll now see something like Figure 8.2. This shows I've used the name UnoBookRailDashboard, so the app will be available at the following URL: https://unobookraildashboard.azurewebsites.net/. Now click Finish, and the app will be built ready for deployment:

Figure 8.2 – The Azure Publish dialog ready to publish the app
- Now that you've set up your web app, you're ready to publish the app. Click the Publish button at the top right of the window.
It might take a minute or two, but eventually, the browser will open a new tab with your app running from Azure. This should look similar to Figure 8.3:

Figure 8.3 – Dashboard app running on Azure
If you're not hosting your app on Azure, you may find helpful guidance by searching how to deploy a Blazor app, as the process is likely to be similar. Ultimately, an Uno Platform-based WebAssembly app is all static files and can be deployed to any server capable of hosting static content.
Publishing from Visual Studio is convenient. However, it is not desirable in terms of creating a tracked, repeatable process. Ideally, you should set up an automated process to deploy your app. Having continuous integration and deployment (CI/CD) processes is what we'll look at next.
Automating build, tests, and distribution
Ideally, you'll be using an automated process to build, test, and deploy your application, and not rely on doing it all manually, as manual processes are more error-prone.
This is where a CI/CD process is essential. As we've just manually deployed a Wasm app to Azure, let's start by looking at automating that process. Fortunately, the Visual Studio tooling makes it simple.
If you go through the Publish wizard for a project that is in a source control repository, after creating the web app, you'll be presented with an extra step (as seen in Figure 8.4). This can be used to create a YAML file with the workflow configured for you:

Figure 8.4 – Creating a GitHub action to publish your Wasm app via the Publish wizard
The generated file will only need a single modification to account for the solution structure used by the Uno Platform templates. The working directory will need to be changed to DashboardDashboard.Wasm.
Once you've made any changes and pushed them to GitHub, the code will be built and deployed automatically.
You can see an example of a GitHub Actions workflow file that deploys an Uno Platform-based Wasm app at the following URL: https://github.com/mrlacey/UnoWasmGithubActions/blob/main/.github/workflows/UnoWasmGithubActions.yml.
GitHub isn't the only place where you may store your code, and GitHub Actions isn't the only CI/CD pipeline option. For developers working with .NET, Azure DevOps (previously Visual Studio Online) is a popular solution.
Nick Randolph has created a comprehensive guide to creating an Azure DevOps-based build pipeline for Uno Platform apps at the following URL: https://nicksnettravels.builttoroam.com/uno-complete-pipeline/.
Lance McCarthy has also created an example repository that shows multiple Azure DevOps build pipelines being used with a repository hosted on GitHub. This can serve as a helpful reference if you need to do something similar, and can be found at the following URL: https://github.com/LanceMcCarthy/UnoPlatformDevOps.
Due to the number of platforms that Uno Platform allows you to create, and the variety of ways you can build and deploy those apps, it is impractical to provide walk-throughs of all scenarios. Fortunately, because Uno Platform is built on top of other well-known technologies, the build processes for those other technologies are also the same ones you'll use to build your Uno Platform-based apps. For example, because the Android, iOS, and macOS apps are built on top of Xamarin, the build and deployment processes are likely to be the same as if building with Xamarin directly.
We started this section on CI/CD by looking at deploying the Wasm-based version of an app built with Uno. This isn't the only place you may need to deploy your app. App stores are where you're likely to need to deploy at least some of the apps you build, so we'll look at them next.
Deploying your app to a store
Suppose you're building an app for public use. In that case, you'll likely need to deploy it via the appropriate app store for that operating system. The rules, policies, and restrictions that a store applies for an app built with Uno Platform are the same as for an app built with any other toolset.
The policies for each store can change frequently (typically, at least a couple of times each year) and are also quite long. For this reason, we saw no value in reproducing them here. Instead, you should look to the official documentation in the following list:
- Windows Store (for UWP): https://docs.microsoft.com/windows/uwp/publish/
- Google Play Store (for Android): https://support.google.com/googleplay/android-developer#topic=3450769
- iOS App Store: https://developer.apple.com/ios/submit/
- macOS App Store: https://developer.apple.com/macos/submit/
The process for distributing your Uno-based app is the same as for any other app. You'll need to create a developer account for each of the stores you wish to deploy through, and then upload the relevant files, packages, and bundles to the store as required.
As the Android, iOS, and Mac apps are all built on top of platform-specific Xamarin technologies, you may also find their publishing-related documentation useful:
- Google Play Store: https://docs.microsoft.com/xamarin/android/deploy-test/publishing/publishing-to-google-play/
- iOS App Store: https://docs.microsoft.com/xamarin/ios/deploy-test/app-distribution/app-store-distribution/publishing-to-the-app-store
- macOS App Store: https://docs.microsoft.com/xamarin/mac/deploy-test/publishing-to-the-app-store/
The preceding links point to general information for each of the stores. If you do encounter any specific Uno-related issues, there is a large community ready to help you.
Engaging with the Uno Platform community
That Uno Platform is an open source project is part of its appeal for many people. Like many open source projects, a core team helps lead a community of contributors. It's this broad community that you can look to for information, help, and become a part of.
Sources of information
Beyond this book (obviously!), the central place to go for information is the official website at the following URL: https://platform.uno/. On the website, you'll find documentation, guides, samples, and a blog. Subscribing to the blog is an excellent way of keeping up with all future announcements, as is following the official Twitter account at the following URL: https://twitter.com/unoplatform.
The official website also includes information on topics beyond the scope of this book, such as using Uno Platform to target Windows 7 or on Linux (see https://platform.uno/uno-platform-for-linux/).
The official website is chock full of information, but with so many features and things you might want to do in your apps, you'll reach a point where you have questions that need answering.
Sources of help
There are four places you can go to for help relating to working with Uno Platform:
- Stack Overflow
- Discord
- GitHub
- Professional support
Stack Overflow is the internet's repository of software development-related questions and answers. It's your first port of call for questions about how to use Uno Platform. You'll find many of the core team and regular contributors answering questions there. Make sure your questions are tagged with uno-platform, and ask at the following URL: https://stackoverflow.com/questions/tagged/uno-platform.
How to ask for help
As with most things, you get more out when you put in more effort. This applies to asking for help too. If you're not familiar with it, Stack Overflow has a guide to asking questions at the following URL: https://stackoverflow.com/help/how-to-ask.
There are two general principles behind asking for help well. Firstly, remember that you're asking for help, not for someone else to do the work for you. Secondly, making it easier for someone to help you increases the likelihood that they can and will do so.
A good request for help includes all and only the necessary specific information needed to provide an answer. A vague description of a problem or your code is a lot less helpful than providing details of what you've tried or a simple, minimal way of reproducing the problem.
If your questions relate to the internals of Uno Platform, or you're working with the latest preview versions, you're better off asking your questions on Discord. The UWP community server has an uno-platform channel that includes lots of enthusiastic community members and members of the core team. You can join this by going to the following URL: https://discord.com/invite/eBHZSKG.
Using Uno Platform, as with any open source project, comes with a level of responsibility. Open source software is a collective process where everyone is working to enable everyone to have better software. This means there is an expectation that you will report a bug, even if you can't fix it yourself. If you think you have found a bug in the platform, a sample, or the documentation, you should file an issue on GitHub at the following URL: https://github.com/unoplatform/uno/issues/new/choose. As with a request for help, you should provide as much appropriate information as possible, including a minimal way of reproducing the issue, to make it easy for the issue you have found to be reproduced and fixed. Be sure to provide all the requested information, as this helps issues be addressed quickly and without wasted effort, or the need for people to ask for more information.
Finally, if you need an issue addressed promptly, or you have deeper support requirements than can be handled on Stack Overflow or Discord, professional paid support is also available from the company behind Uno Platform. Go to https://platform.uno/contact to discuss your requirements.
Contributing
There's a common misconception that contributing to an open source project means adding code, but as with any software project, there is a lot more involved in having something successful and valuable than just the code. Of course, if you want to help contribute code, you'll be warmly welcomed. Start by looking at issues labeled good first issue, and check out the contribution guide at the following URL: https://platform.uno/docs/articles/uno-development/contributing-intro.html. But remember, there are lots of other things you could do instead.
It's a cliché, but it's true that everything helps, no matter the size. Sharing your experiences is one of the easiest but also most valuable things you can do. This could be providing a formal how-to guide or code sample. Alternatively, it might be as simple as answering the question of someone who wants to know how to do something you've already done.
Whether large or small, we look forward to seeing how you contribute.
Summary
In this chapter, we've looked at various areas to round out your introduction to Uno Platform. You've seen how Uno Platform can extend an existing Xamarin.Forms app so that it can run via WebAssembly. You saw how to deploy the Wasm version of your app to Azure. We looked at continuous integration and deployment. You saw where to go to further your learning, and we looked at how you can engage with the Uno Platform developer community.
With that, we have come to the end of this book. If you've worked your way through each chapter, you will now have the knowledge and confidence to use Uno Platform to build apps that run on multiple operating systems. We look forward to seeing what you create.
Thanks for reading!