In this chapter, we will cover:
- Creating a Maven project with Eclipse 3.7
- Importing a Maven project with Eclipse 3.7
- Creating a Maven project with NetBeans 7
- Importing a Maven project with NetBeans 7
- Creating a Maven project with IntelliJ IDEA 10.5
- Importing a Maven project with IntelliJ IDEA 10.5
Advanced, modern Integrated Development Environments (IDEs) are being used by an overwhelming majority of developers and professional programmers in the industry. This holds true for most technologies, regardless of the underlying programming language/framework being used.
In previous chapters, most of what we covered eventually involved the running of and execution of Apache Maven commands on the terminal/console. This is the way Apache Maven works; it is, after all, a command-line tool.
In this chapter, many of the same commands will be executed by the IDE in the background while the developer works and interacts with the IDE's graphical UI.
It must be said that it isn't too hard to switch between the command line and your IDE in most modern operating systems, and it is this "is a command-line tool" property of Maven and its well-defined standards and conventions that has enabled its easy integration with other tools in the development infrastructure, including the developer's IDE.
The three most popular development IDEs for developers today would surely be Eclipse, NetBeans, and JetBrains IntelliJ IDEA. Each of these has excellent integration with Maven, Maven projects, and the extended Maven ecosystem.
This integration is provided through IDE plugins that strictly adhere to the Maven standards.
A project that has been integrated with the IDE almost always remains uncorrupted and independent of the IDE, fully compliant with Maven standards, and thus ready for use from the console/terminal, if the developer (or any third-party application) chooses to do so.
For many years now, Eclipse remained a popular IDE for enterprise and open source development in Java and other technologies. Eclipse is free and open source and shares its roots and origin with VisualAge. According to Wikipedia:
"Eclipse began as an IBM Canada project. It was developed by Object Technology International (OTI) as a Java-based replacement for the Smalltalk-based VisualAge family of IDE products, which itself had been developed by OTI. In November 2001, a consortium was formed to further the development of Eclipse as an open source product and platform. In January 2004, the Eclipse Foundation was created."
Eclipse is more than just an IDE; it also is a platform for extension and plugin/add-on development. Here then comes M2Eclipse , which is an Eclipse plugin developed by Sonatype providing extensive Eclipse-Maven integration.
M2Eclipse isn't the only Eclipse-Maven integration plugin, but it is definitely one of the most complete yet easy-to-use plugins. As of Eclipse 3.7, M2Eclipse is pre-installed in the Java-specific bundle.
To get started, you need to download and install Eclipse 3.7 from the Eclipse website:
http://www.eclipse.org/downloads/.
Make sure you download a Java-specific package of Eclipse so that the Maven M2Eclipse plugin is bundled. If your Eclipse installation does not have M2Eclipse pre-installed, you can manually install the plugin from the Eclipse Marketplace.
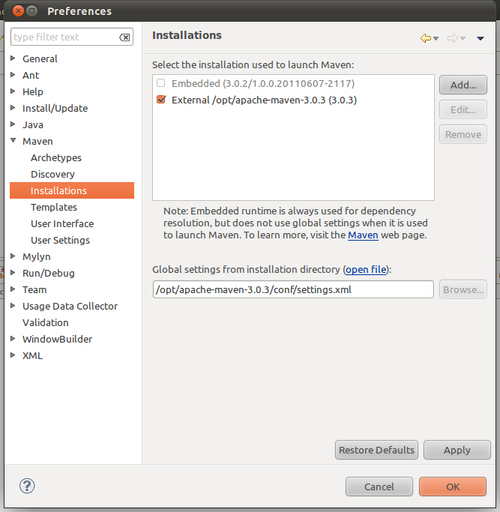
- Make sure the correct installation of Maven is configured in Eclipse. You can ind this setting in Window | Preferences | Maven | Installations. You can continue to use the Eclipse embedded Maven or choose an external installation, as shown in the following screenshot:
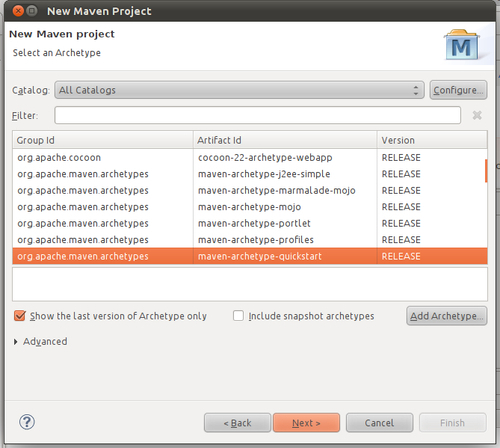
- Create a new project (Ctrl+N), select Maven Project, and continue on the wizard to select an archetype and set up the project co-ordinates.
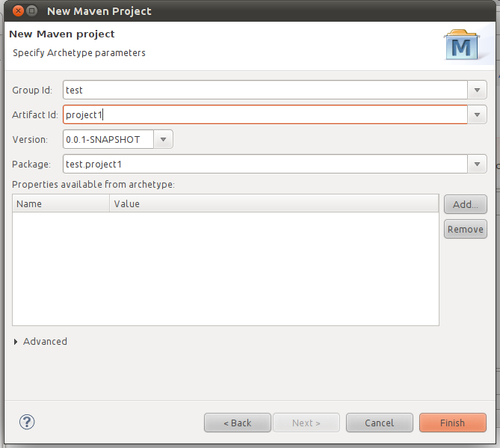
A new project has been created, which is both a valid Eclipse project and a valid Apache Maven project.
- Now we would like to execute Maven commands through Eclipse. This is done by creating Eclipse Run Configurations for Maven goals. We start by selecting the Run | Run configurations. Select Maven Build and create a new configuration.
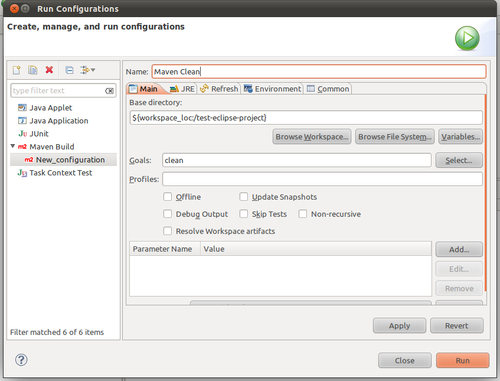
The Base directory, Goals, Profiles, and other settings can be configured while creating or modifying the Run configuration.
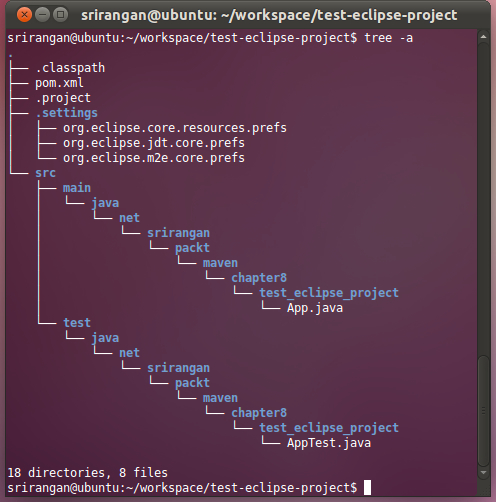
We just created a project that is an Eclipse and Maven project. If you inspect the filesystem, you will find that a valid pom.xml file exists in the project root, which makes it a valid Maven project.
In addition, you will also find .classpath and .project files and the .settings folder which are Eclipse-specific resources, making it a valid Eclipse project as well.
Once you create and execute a Maven build run configuration, Eclipse starts a read-only console at the path defined in the Run configuration. Then the goals defined in the Run configuration are executed using Maven APIs and the output is shared on the read-only console.