
If you are already having a continuous integration system, it might already be Jenkins as it is quite common in the Java world. If you do not want to set up another system, you should try to use Jenkins as well to run automated tests of your play applications. This recipe will help you to do a quick setup of Jenkins and make it ready to deploy on a Play application.
You can find the source code of this example in the examples/chapter7/test-jenkins directory.
A running Jenkins is essential of course. Either use the current running one, or get a fresh copy from http://www.jenkins-ci.org, download the WAR file and just start it with the following:
java -jar jenkins.war
Again, we will also set up a repository using mercurial. This time we will also access the repository via HTTP instead of file system, as it would be done in a real world setup as well. First, you should install the mercurial plugin of Jenkins. Go to http://localhost:8080, click on Manage Jenkins on the left, then click on Manage Plugins. Just select the mercurial plugin there and click on Install at the bottom of the page. After the installation is finished, you need to restart Jenkins. Create a Play application, a mercurial repo inside of it, and start serving the repository in order for it to be accessible via HTTP:
play new test-jenkins
cd test-jenkins
hg init
hg add
hg commit -m "initial import"
hg serve
You can go to http://localhost:8000/ now and check the first commit. The preceding hg serve command started a web server and can be used to check out the Play application using the hg clone command. We will use this URL in Jenkins later.
In order to have support for Cobertura, you should install the Cobertura plugin for Jenkins the same way you installed the mercurial plugin. Furthermore, you also need to install the Cobertura plugin for Play. Add Cobertura to your conf/dependencies.yml file and commit it via hg commit –m "added cobertura dependency":
require
    play -> cobertura 2.1
There is a final plugin you should install for Jenkins. This is the HTML publisher plugin, which allows you to link special pages for each build. This makes it easy to link to the HTML results of the tests—the same you usually see in the browser test runner under the /@tests/ URL. When checking your Jenkins plugin page it should now look like the following. Note that all plugins except the mercurial, Cobertura, and HTML publisher plugin are a part of core Jenkins:
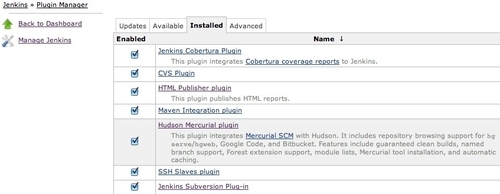
Configuring the job in Jenkins is relatively straightforward. Here are three screenshots. First you should create a free style project for your Play project:
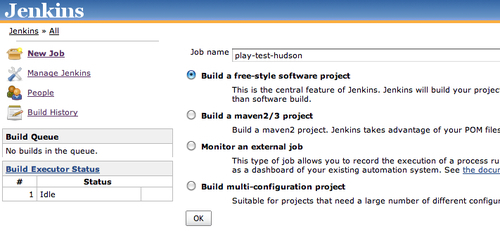
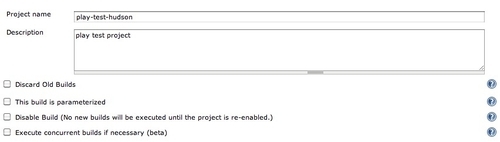
After creating the project, you can add a small description in the next screen, where you configure the complete build process of the project:
The next step is to specify the source code repository to get the application from for each build. You should add the repository URL, optionally a branch, but also a cron-like time expression, how often the repository should be checked—every 5 minutes in this example by using */5 * * * *, which is a cron-like expression. For more information about timing, read the crontab(5) man page on most Unix systems.
The Poll SCM option ensures that a new build is only triggered on changes:
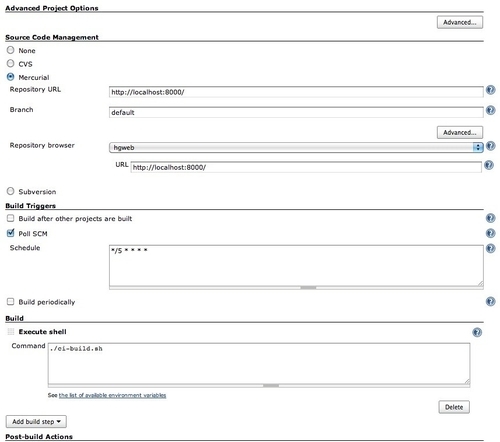
The next step is to care for the code execution itself. You need to configure the start of a shell script there, which should be put in the repository as well. This makes it easy to track changes for it. You can see the configuration for it in the preceding screenshot. The ci-build.sh script is called, which looks like the following:
#!/bin/bash

set –xe
PLAY_PATH="/path/to/play/installation/"

$PLAY_PATH/play deps
$PLAY_PATH/play auto-test

cd test-result
(
echo "<html><head><title>Test results</title></head><body><ul>"

for i in *.failed.html ; do
        if [ -e $i ] ; then
                echo "<li><a href="$i">$i</li>"
        fi
done

echo "</ul><p><ul>"

for i in *.passed.html ; do
        if [ -e $i ] ; then
                echo "<li><a href="$i">$i</li>"
        fi
done

echo "</ul></body></html>"
) > index.html

if [ -e result.failed ] ; then
  return -1
fi

cd -
The shell script runs the headless test runner of Play and creates an additional index.html which summarizes and links to all failed and passed tests. As a last feature it returns a non-zero code if failed tests occur, in order to notify the developers about unsuccessful test runs.
The last step is to enable Cobertura reports and to link to the HTML files of the test reports in order to examine the reasons for failed tests.

You need to configure the path to the Cobertura coverage XML file and can optionally set some thresholds to define the build as successful, if these have been passed. The Cobertura is at test-result/code-coverage/coverage.xml.
Below the Cobertura settings is the setup of the HTML publish plugin, which links to the index.html file in the test-result directory. This is the reason why the ci-build.sh script created this file. It has a nice overview now.
After setting up everything as needed and executing a successful build, you should have the following menu for every build record on the left, as shown in the following screenshot:
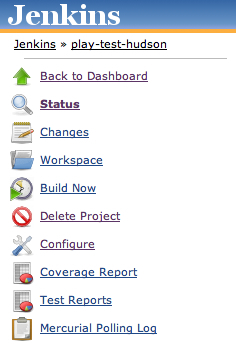
Now you have a Jenkins configuration, which builds your Play project on changes and creates Cobertura reports, as well as showing the test messages from the Play compilation.
As all functionality is already explained, it is noteworthy here to mention the shortcomings. And there is a big one, depending on what your test and build philosophy is. Usually you have three states in Jenkins: success, build failure, and failing tests.
With this setup there are only two states: success and failure. There is no exact display of the amount of failing tests on the front page, only notification that something has gone wrong.
Usually a deployment only happens if all tests are successful, so it does not matter if either tests fail or the complete build fails.
Jenkins has a very nice plugin system, which makes it pretty easy to write custom plugins and enhance them for a specific use case. If you need a better and deeper integration, you should check the plugins or even consider writing your own, if you have special requirements.
You should definitely check out the plugin page of Jenkins. There are lots of plugins and perhaps by the time of this writing, there is a plugin that allows you to count tests with the help of a shell script. This would allow some extension. Or the Play framework itself writes out the xUnit XML file like the Maven surefire plugin. The Jenkins plugin page is available under http://wiki.jenkins-ci.org/display/JENKINS/Plugins.
Play plugin for Jenkins has recently been added. You can install it by selecting it from the plugin list and configuring the path of your Play installation in the system-wide configuration. It features a similar behavior as the shellscript in this recipe in order to supply the HTML test results to the client.