
The web application that we just created serves as the frame or scaffolding of our site collection. It is only the bare bones. Now, we need to give it some flesh so it will take some form and functionalities. To do that, we need to create a site collection.
Perform the following steps for creating site collection:
- Before you click on the OK button on the confirmation message after creating the web application, you might have noticed the link that says Create Site Collection. Click on that link.
- That displays the Create Site Collection dialog box. Type SQL Reporting Collection on the Title field.
- On Web Site Address, select /sites/ for the site prefix. And type SQLReporting on the Site Name field.
- On the Template Selection window, go to Enterprise | Business Intelligence Center. This gives us the components we need for our reporting purposes.
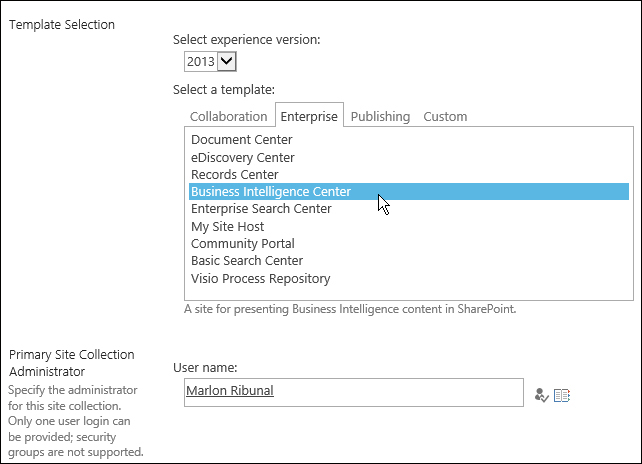
- On the Primary Site Collection Administrator and Secondary Site Collection Administrator fields, provide the usernames that will have administrator privileges to the site (domain account). Click on OK when done.
- You should get a confirmation message if the site is successfully created. Take note of the URL of your new site.

- Go to the new site by clicking on the link from the confirmation message or type it directly in your URL bar. This is what the new website looks like using the
Business Intelligence Centertemplate:
Now that your site is set up, you're ready to deploy SSRS projects. Look for SharePoint 2010/2013 resources on how to manage and customize your site. Unfortunately, we do not cover that topic in this book.
..................Content has been hidden....................
You can't read the all page of ebook, please click here login for view all page.