Let's continue to tag along on John Kirkland's SSRS journey. He was excited that he was able to build a report out of the data he migrated to the company's new SQL Server 2012 instance.
John showed the report to the finance group and they were happy that they now have a more convenient reporting solution with SSRS. This might just be the one reporting solution they've been hoping for, and have finally got. They knew that what John has shown them is just scratching the surface of what they can build for all their reporting requirements.
John wanted to make everything right, so he consulted the Records Manager of the company for any documentation compliance that he might need to be aware of. According to the Records Manager, all documents in any form must adhere to the company's rules of documentation. He wants John to make sure that the structure of all reports be consistent with the company's brand.
We've learned to build a report from the ground up and used different types of parameters in a SSRS report in Chapter 1, Let's Breakdown the Numbers. In this chapter, we will polish a slightly modified version of that report to demonstrate some of the settings provided by the SSRS designer.
In this chapter we will learn the following:
- Report formatting
- Grouping
- Simple drilldown
- Grand total and subtotal
- Pagination
- Header and footer
- Report structure
- Adding images
- Report template
Let's render our report from Chapter 1, Let's Breakdown the Numbers, into Portable Document Format (PDF). This is what we've got so far:

Obviously, the report looks bland. The width of the table overflows into a second page, and the text in the report is not properly formatted.
Create a new report, or just copy the RDL file from Chapter 1, Let's Breakdown the Numbers, into a new report. For the purpose of our demonstration in this chapter, we have removed the @IsOnline parameter.
The parameters we are using in this chapter are @Category, @Subcategory, and @Product—all set as cascaded multivalued parameters.
If you want to build a new report from the ground up, run the script called uspSalesDetails2_Ch02.sql, which is included in this book, to create a new dataset.
You can also find the script to create the dataset for our @Product parameter in the file called uspProduct_Ch02.sql, also included in the book.
The size of the report table is greater than the page width if the page layout is set to the portrait orientation. To accommodate all the columns of the table in a single page, let's change the orientation of the report to Landscape.
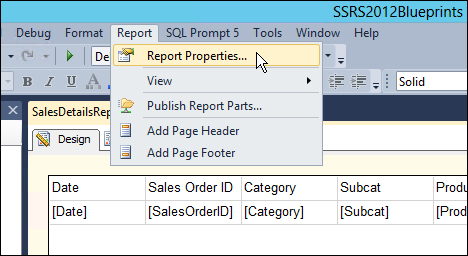
- Go to the menu bar, and navigate to Report | Report Properties as shown in the following screenshot:
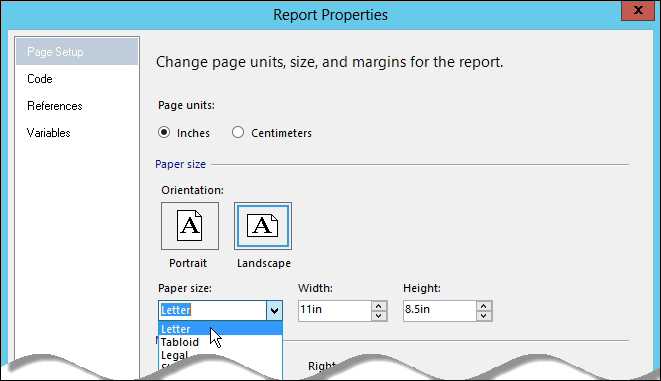
- That displays the Report Properties dialog box. Select Landscape for Orientation and Letter from the Paper size drop-down list as shown in the following screenshot. Of course, depending on your requirements, you can choose whatever is appropriate.
Now let's take a look at the rendered PDF:

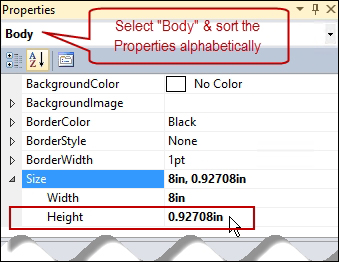
If you're getting an empty page at the end of the report, you need to adjust the body size (height) of the report. You usually get blank pages in a rendered PDF because the body height of your report is greater than the page height. You can either drag the body of the report to resize the body height or do it manually by setting the properties of the report at design time.
- If the Properties Window is not already open, go to the Menu | View | Properties Window, or simply press F4. Set the Height of the report Body appropriately: