
We use an indicator to gauge something against a set standard. Let's say that sales amounting to 75 percent of the target quota at a certain point in time is a good indicator of a good sales performance.
Let's add an indicator to the gauge report we created previously. If you don't want to mess with that, just copy that RDL file into a new report and modify that instead.
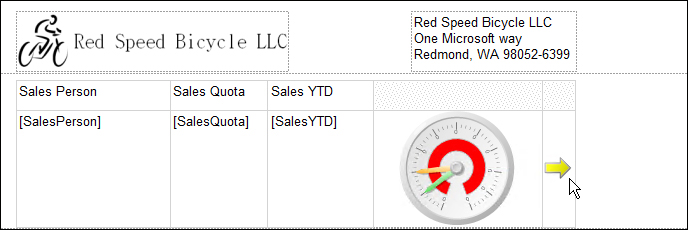
Let's add a new column to the right of the gauge column. Adjust all the columns appropriately. When the Select Indicator Type dialog box is displayed, select the 3 arrows (colored) directional indicator:
Select and right-click on the Indicator, then select Indicator Properties. On the Value and States tab, click on the expression button next to the Value drop-down list, and enter the following expression:
=(Fields!SalesYTD.Value/Fields!SalesQuota.Value)*100
What we're trying to do here is find out the percentage of SalesYTD against the given SalesQuota.
Let's just say that our predefined indicators of sales performance are the following:
- 0-45 is definitely not a good sign (red)
- 45-65 means doing just OK (yellow)
- 65-100 means good

Let's add a tool tip to the indicator. On the General tab of the Indicator Properties window, enter the following expression for the tool tip value:
=FormatPercent(Fields!SalesYTD.Value/Sum(Fields!SalesQuota.Value),0)
The FormatPercent function converts the argument into percentage value. So, 75 becomes 75 percent.
Let's take a look at our completed report:
