
ReSharper provides you with a very powerful template mechanism that generates code for the most commonly used actions, such as creating a new class, constructor, and the const variables.
Visual Studio provides you with simple templates called snippets by default. ReSharper extends these templates with Live Templates. Live Templates can be accessed using the Ctrl + E, L shortcut or by using an associated name.
Do you need a GUID? Just write nguid and press Tab. Do you need an iterator? Write iterindex. Maybe you need to override the Equals() method? Write equals.
By pressing Ctrl + E, L, you can review all the available Live Templates.
With Live Templates, you can generate some parts of code but ReSharper allows you to generate whole files too.
Creating a new file from a template can be done by pressing Ctrl + Alt + Insert in the code editor or by pressing Alt + Insert in the Solution Explorer.
Each ReSharper template can be configured. Also, you can add new templates if needed.
Templates can be managed through the Templates Explorer window. To access this window, navigate to RESHARPER | Templates Explorer… from the Visual Studio toolbar. A sample view of this Templates Explorer window is shown in the following screenshot:
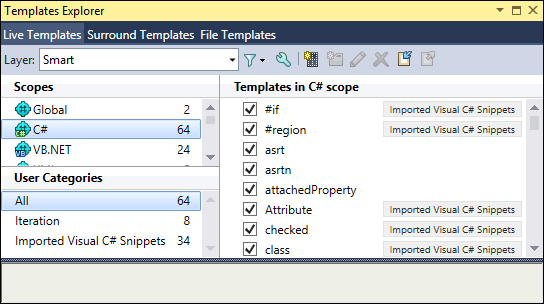
Separate tabs to manage Live Templates, Surround Templates (we have described them in the first part of this chapter), and File Templates are available.
To present how adding new templates work, let's do something useful and add a new Live Template for the unit test method. To do this, select C# in the Scopes area and click on the new template icon (third from left in the toolbar). This will open the template editor. Put test as your Shortcut name and the following code as your template body:
[Test]
public void $NAME$()
{
$END$
}
Let's look at the $NAME$ and $END$ parameters. $END$ is a built-in parameter and means a place in your code where the cursor will be placed. $NAME$ is our custom parameter and we need to configure it. You can do this by clicking on the Choose macro link below the NAME parameter and selecting Constant value. After this, a new textbox will be displayed that allows you to put the default value for this parameter. Let's put a test word there. Save your template and try it. In the same way, you can add Surround and File templates.
ReSharper v8 comes with a new feature that allows you to create many files from one template.
How can this be useful?
Let's say that you often create a class and test this class at the same time. For now, you are probably creating two files in two steps. Why not do this in one step? Or maybe, according to your architecture, you need to create a couple of files to add new application modules, such as UserRepository, UserManager, and UserSomething. With ReSharper, you can create all these files in one step.
By default, ReSharper does not provide any multifile templates. You can add your custom template in the File Templates tab in the Templates Explorer window. Start by adding the standard file template. In the file template editor, there are two additional buttons available: Add new file and Add file from existing template, which allow you to add more files to your template.
A sample view of a template with two files is shown in the following screenshot:
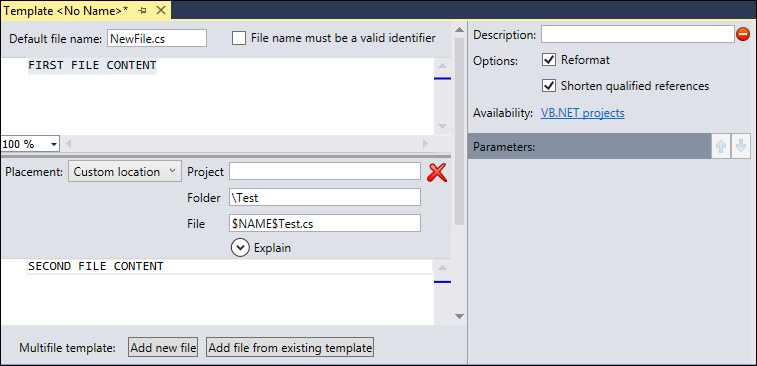
As you can see, you can specify a different destination folder and even a different project for different files.