
Chapter 1. Deploy Windows
The MD-100 Windows 10 exam focuses on how to install Windows 10 efficiently and with the least amount of administrative effort. You need to understand how to plan and prepare the Windows 10 installation, along with the installation process itself, activation, and any blockers along the way. You’ll be expected to know how to perform an in-place upgrade from another version of Windows and how to migrate user data, configure hardware devices, how to manage device drivers, and how to perform post-installation configuration. For users who operate Windows 10 using a different language, you also will be expected to know how to configure additional languages and regional settings.
Skills covered in this chapter:
Skill 1.1: Deploy Windows 10
Devices will be shipped with a ready-to-use version of Windows. For a number of reasons, you may want to replace it with a newer version of Windows. In a corporate environment, you may need to install Windows 10 on many devices, which requires careful consideration, planning and preparation. This skill explores the requirements and preparations necessary for the deployment of Windows 10.
It is important to select the appropriate edition of Windows 10 for your users. Windows 10 is available across many device types, including tablets, laptops, and desktop computers. Also, also it is available in multiple editions and in both 32-bit and 64-bit architecture versions. You need to choose the appropriate edition and version to provide the necessary capabilities that your users require.
After determining which edition you want to install, consider how best to deploy Windows 10. You can choose between simple interactive installations using local Windows 10 media, or you can deploy Windows 10 to your organization’s devices by using one of several deployment technologies.
Select the appropriate Windows edition
Windows 10 is available in several different editions and you should choose the most appropriate version for your personal or business needs. The specific editions of Windows 10, listed in Table 1-1, are designed to address the varying needs of this diverse user base.
Table 1-1 Windows 10 editions
Edition |
Features |
|---|---|
Windows 10 Home |
Designed primarily for home users and includes similar features to those found in Windows 8.1 Home, plus:
Note that in Windows 10 Home, you cannot control Windows feature and quality updates as was possible on earlier Windows versions; these are received and installed automatically. |
Windows 10 Pro |
Includes the same features as in Windows 10 Home but additionally provides:
In Windows 10 Pro, updates are provided by Windows Update for Business. This provides control over when and how devices can receive Windows feature and quality updates. |
Windows 10 Pro for Workstations |
Includes the same features as in Windows 10 Pro but additionally provides:
In Windows 10 Pro for Workstations, you can utilize powerful PC hardware with up to 4 CPUs and 6 TB of memory. |
Windows 10 Enterprise |
Windows 10 Enterprise builds on the features of Windows 10 Pro, providing additional features of relevance to larger organizations, including:
In addition to the ability to manage updates to Windows with Windows Update for Business, Enterprise customers can also access the Long-Term Servicing Channel (LTSC) deployment version of Windows 10 Enterprise. |
Windows 10 Enterprise LTSC |
This specialized edition of Windows 10 Enterprise receives security and other important updates in the normal way but does not receive feature updates. This enables organizations to know that their environment does not change over time. Windows 10 Enterprise LTSC does not include built-in apps that are subject to change including:
|
Windows 10 Education |
Provides the same features as Windows 10 Enterprise but does not offer support for LTSC. Windows 10 Education is only available through Academic Volume Licensing. |
Windows 10 Mobile & Windows 10 Mobile Enterprise |
Designed for phones and smaller tablets, with broadly the same feature set as the Windows 10 desktop edition. It includes many of the same universal Windows apps as well as a touch-optimized version of Microsoft Office. Microsoft has ended development of the Windows 10 Mobile platform, and the most recent version released in October of 2017, is scheduled to have support end on December 10, 2019. |
Following the Windows 10 April 2018 Update, the Windows 10 S edition was replaced with Windows 10 in S mode. This is a mode of Windows 10 and not an edition. It is designed to be the safest and most stable version of Windows ever. Windows 10 in S mode is a limited, locked-down version of Windows 10. To reduce the total cost of ownership (TCO) you can only install applications from the Microsoft Store and browse the Internet using the Microsoft Edge browser.
Microsoft Edge only.
Bing search engine.
Microsoft Store apps only.
Not able join Active Directory Domain Services (AD DS) domain.
Azure AD Domain Join is available in Windows 10 Pro in S mode and Windows 10 Enterprise in S mode.
PCs ship with one of three versions of Windows 10 in S mode:
Windows 10 Home in S mode
Windows 10 Professional in S mode
Windows 10 Enterprise in S mode
Users can freely opt to leave S mode—for example, to switch to Windows 10 Pro—by installing the Switch out of S mode app from the Microsoft Store. This action is a one-time decision—once you’ve taken the PC out of S mode, it cannot be put it back into S mode.
Note Windows 10 Business
Microsoft also provides a special business-focused license that can be applied to the Windows 10 Pro edition. This is called Windows 10 Business, and the upgrade license is included as part of Microsoft 365 Business. You can upgrade Windows 7, 8, and 8.1 Professional to Windows 10 Pro and then apply the Windows 10 Business license. You cannot purchase the standalone version of Windows 10 Business edition; therefore, it is not listed in Table 1-1. To review further details about Microsoft 365 Business, visit the Microsoft website at https://docs.microsoft.com/microsoft-365/business/support/microsoft-365-business-faqs.
Also, Microsoft has released Windows 10 Internet of Things (IoT) editions—Windows IoT Core and Windows IoT Enterprise. These can be used to operate small industrial devices, such as control devices and specialist industrial computing systems.
For businesses that require a long period of support for their IoT installations, Microsoft has released Windows 10 IoT Core Long Term Servicing Channel (LTSC) together with Windows 10 IoT Core Services, which provides a subscription with access to 10 years of support for the IoT releases.
Need More Review? Learn More About the Windows 10 Editions
To find out more about these Windows 10 editions, visit the Microsoft website at https://www.microsoft.com/en-us/windowsforbusiness/compare.
Choose 32-Bit or 64-Bit Versions
You can choose between 32-bit and 64-bit versions of all desktop editions of Windows 10. Nowadays, you should choose 64-bit versions unless there is a compelling reason to use 32-bit versions, such as your hardware does not support the 64-bit architecture.
The various edition features described in Table 1-1 are applicable for both 32-bit and 64-bit versions. However, 64-bit versions of Windows 10 do provide a number of advantages, including:
Memory The 64-bit versions of Windows 10 can address more physical memory than 32-bit versions. Specifically, 32-bit versions are physically limited to just under 4 GB of RAM, whereas 64-bit versions of Windows are limited by the edition of Windows 10 installed.
Security Features such as Kernel Patch Protection, mandatory kernel-mode driver signing, and Data Execution Prevention (DEP) are available only in 64-bit versions of Windows 10.
Client Hyper-V This feature is only available on 64-bit versions of Windows 10. Your hardware must also support second-level address translation (SLAT).
Performance The 64-bit processors can handle more data during each CPU clock cycle. This benefit is only realized when running a 64-bit operating system.
![]() Exam Tip
Exam Tip
You cannot perform a direct upgrade from a 32-bit version of Windows 10 directly to the 64-bit version. Therefore, ensure that you know that in this scenario, you must perform a wipe-and-load installation.
Determine Windows 10 Edition requirements for particular features
A number of general and security features available in some editions of Windows 10 require specialist hardware or software configuration that you should know. This section covers how to
Identify hardware and configuration requirements for general Windows 10 features
Identify hardware and configuration requirements for Windows 10 security features
![]() Exam Tip
Exam Tip
It is important to know that some features of Windows 10 are available only on computers and devices that support specific hardware components.
General Features
These features provide for general usability and functional improvements and include:
Client Hyper-V Enables you to create, manage, and run virtual machines that you can install with different guest operating systems to support, perhaps, earlier line-of-business (LOB) apps that will not run natively on Windows 10. Requirements of the Client Hyper-V feature are:
A 64-bit version of either the Windows 10 Pro or Windows 10 Enterprise edition.
A computer that supports SLAT.
Additional physical memory to support running the virtual machines. A minimum of 2 GBs of additional memory is recommended.
![]() Exam Tip
Exam Tip
To use Client Hyper-V to run virtual machines, you also need additional physical memory in your computer. It is recommended to add at least 2 GB of RAM to support this feature.
Cortana You can use Cortana as a digital assistant to control Windows 10 and perform tasks such as writing email, setting reminders, and performing web searches. Because Cortana is voice-activated and controlled, your Windows 10 device requires a microphone.
Continuum Windows 10 is available on a variety of devices types and form factors. With Continuum, Microsoft endeavors to optimize the user experience across device types by detecting the hardware on your device and changing to that hardware. For example, Windows 10 determines when you are using a non-touch desktop computer and enables traditional interaction with the operating system by use of a mouse. For users of hybrid devices, such as the Microsoft Surface Pro, when you disconnect a keyboard cover, Windows 10 switches to Tablet Mode.
Miracast Windows 10 uses Miracast to connect your Windows device wirelessly to an external monitor or projector. You will need a Miracast-compatible external monitor or projector to use this functionality. If your display device doesn’t support Miracast, you use a Miracast adapter, such as a Microsoft Wireless Display adapter.
Touch Windows 10 is a touch-centric operating system. Although you do not need touch to use Windows 10, some features are made more usable through the use of touch. To use touch, your tablet or display monitor must support touch.
OneDrive Users of OneDrive are entitled to 5 GB free online storage. OneDrive provides this storage. OneDrive functionality is built into the Windows 10 operating system and it is easy to use. You must have a Microsoft account to use OneDrive.
Sync your settings When you use more than one Windows 10 device, it is convenient for your user settings to move with you to the new device. You can use the Sync Your Settings feature of Windows 10 to ensure that settings such as theme, Internet Explorer and Edge settings (including favorites), passwords, language, and ease of access are synchronized between your devices. You must have a Microsoft account to use this feature.
Note Active Stylus Support
Some touch devices have screens that support active stylus input. Active styluses provide for pressure-sensitive input and enable you to use your device for accurate note taking and drawing. Passive styluses are supported on all touch devices but do not support these more advanced features.
Security Features
Windows 10 also includes a number of features that can help make your device more secure, including:
BitLocker Drive Encryption A Trusted Platform Module (TPM) version 1.2 or higher works with BitLocker to store encryption keys. This helps protect against data theft and offline tampering by providing for whole-drive encryption. Requirements for BitLocker include:
A device installed with either Windows 10 Pro or Windows 10 Enterprise.
Optionally, you should use a TPM. Using a TPM with BitLocker enables Windows to verify startup component integrity. You do not require a TPM in your computer to use BitLocker, but using a TPM does increase the security of the encryption keys.
Device health attestation With the increase in use of users’ own devices, it is important to ensure that Windows 10 devices connecting to your organization meet the security and compliance requirements of your organization. Device health attestation uses measured boot data to help perform this verification. To implement device health attestation, your Windows 10 devices must have TPM version 2.0 or higher.
Secure Boot When Secure Boot is enabled, you can only start the operating system by using an operating system loader that is signed using a digital certificate stored in the UEFI Secure Boot signature database. This helps prevent malicious code from loading during the Windows 10 start process. Requirements for Secure Boot include
Computer firmware that supports Unified Extensible Firmware Interface (UEFI) v2.3.1 Errata B, and for which the Microsoft Windows Certification Authority is in the UEFI signature database.
Multifactor authentication (MFA) This is a process that provides for user authentication based on at least two factors: something the user knows, such as a password; and something the user has, such as a biometric feature (fingerprint or facial features), or a device, such as a cell phone. Requirements for two-factor authentication include:
Biometric devices that support the Windows Biometric Framework, such as a fingerprint reader, a smartphone, or an illuminated infrared camera using Windows Hello.
A biometric attribute, such as facial recognition, iris detection, or a fingerprint.
Note Windows Hello
When Windows 10 first shipped, it included Microsoft Passport and Windows Hello. These components worked together to provide multifactor authentication. With Windows 10, version 1703, to help to simplify deployment and improve supportability, these technologies are combined into a single solution called Windows Hello. Windows Hello for Business provides enterprises with the tools and policies to implement and manage multifactor authentication within their organization’s infrastructure.
Virtual Secure Mode This feature moves some sensitive elements of the operating system to trustlets that run in a Hyper-V container that the Windows 10 operating system cannot access. This helps make the operating system more secure. Currently, this is only available in the Windows 10 Enterprise edition.
Virtual Smart Card This feature offers comparable security benefits in two-factor authentication to that provided by physical smart cards. Virtual smart cards require a compatible TPM (version 1.2 or later).
![]() Exam Tip
Exam Tip
If your organization requires the use of Windows Hello and your existing devIces do not have the necessary hardware, then you can use an aftermarket add-on. You can purchase USB-connected infrared cameras, which provide secure facial recognition and USB-connected external fingerprint readers to the specifications required to support Windows Hello.
Perform a clean installation
Although most computers are purchased preinstalled with Windows 10, many organizations prefer to reinstall the operating system to avoid the additional software that original equipment manufacturers (OEMs) often include with their computers. This software is often referred to as bloatware and can include utilities and tools or trial versions of software such as Microsoft Office or anti-spyware software that are unwanted.
As shown in Table 1-2, there are several methods of installing Windows 10 on a device, and you should familiarize yourself with each prior to taking the exam.
Table 1-2 Windows installation methods
Installation Method |
Description |
|---|---|
Install from DVD |
Windows 10 is no longer shipped on DVDs. You can use the downloadable media obtained from the Microsoft Windows 10 website, Microsoft Volume Licensing Service (MVLS), or Visual Studio Subscriptions and burn it to DVD media. |
Install from USB |
Use this method to install the operating system on one computer at a time. Installation from a USB device is quicker than using a DVD. You must modify BIOS or UEFI settings to enable booting from USB. |
Install from Windows Deployment Services |
Requires Windows Deployment Services (WDS), which is a role installed on Windows Server 2019. WDS also requires Dynamic Host Configuration Protocol (DHCP) on the network. The target computer network card must support Pre-Boot Execution Environment (PXE). Using WDS allows automated installation of system images and deployment of Windows to multiple computers simultaneously by using multicast. |
Install an image from Windows Preinstallation Environment (Windows PE) |
Boot the device by using Windows PE, and then use one of the following deployment options.
Both MDT and Configuration Manager are enterprise-level solutions that enable you to deploy Windows to hundreds or thousands of devices at once and configure lite-touch installation (LTI) or zero-touch installation (ZTI) for either minimal user interaction or no user interaction, respectively, during the deployment. |
Install over the network |
Start the computer by using Windows PE and connect to a copy of the installation files stored on a shared network folder. You would use this method when you are unable to use a USB device, WDS, MDT, or Configuration Manager. |
Note Create Windows 10 Installation Mediaxs
To obtain the latest version of Windows 10 that you can use to upgrade a device or download to create installation media on a DVD or USB, you should visit https://www.microsoft.com/software-download/windows10.
If you intend to start your PC from your installation media, such as a USB drive, you may need to configure your BIOS or UEFI to allow this. This can be achieved by modifying the BIOS or UEFI setting or choosing a custom boot order during the startup process.
During a clean installation on a new hard drive, perform the following steps to install Windows 10.
Insert your installation media and start your computer.
At the Windows Setup screen, choose the appropriate language and regional settings and then click Next.
In the Windows Setup window, click Install Now.
On the Applicable Notices And License Terms page, accept the License Terms and click Next.
On the Which Type Of Installation Do You Want? page, choose Custom: Install Windows Only (Advanced).
On the Where Do You Want To Install Windows? page, select Drive 0 Unallocated Space and click Next.
Note Existing Operating System Drive
For a clean installation of Windows 10 on a device on which an operating system is already installed, erase this partition either by formatting or deleting any partitions present during the setup process.
The installation begins. To install Windows 10 for personal use, perform the following steps:
On the Let’s Start With Region. Is This Right? page, select the regional settings.
On the Is This The Right Keyboard Layout? page, select the keyboard layout settings.
On the Want To Add A Second Keyboard Layout? page, add a layout, or select Skip.
On the Let’s Connect You To A Network page, select a network connection.
On the How Would You Like To Set Up? Page, choose Set Up For Personal Use and click Next.
On the Sign In With Microsoft page, create a local offline account by selecting Offline Account. Or enter your Microsoft account and password or select Create Account.
On the Create A PIN page, click Create PIN and enter a PIN.
On the Link Your Android Or iPhone To This PC page, enter your phone number and click Send and then click Next. Or click Do It Later to skip this step.
On the Protect Your Files With OneDrive page, click Next. Or click Only Save Files To This PC to skip this step.
On the Make Cortana Your Personal Assistant? page, choose whether to enable Cortana.
On the Do More Across Devices With Activity History page, choose whether to enable the timeline feature.
On the Choose Privacy Settings For Your Device page, choose the privacy settings that you require.
The remainder of the setup process will continue.
You are now signed in.
Depending on your hardware performance, Windows should complete the clean install process within 10–15 minutes, and the machine will restart several times. A device with a solid-state drive (SSD) will outperform slower traditional hard drives with spinning platters. During the final stages of installation, the Getting Ready notification appears while Windows installs device drivers specific to the hardware.
Identify an installation strategy
You can choose from among a number of methods when considering how best to install Windows 10. Generally, the size of your organization and the number of devices that you must install will determine the strategy that you select. The available strategies have different prerequisites, and some might require additional software components and configuration before you can begin installing Windows 10. Table 1-3 describes the strategies available.
Table 1-3 Windows 10 installation strategies
Deployment Option |
Description |
|---|---|
High-touch retail media deployment |
Suitable for small organizations with few devices to install with Windows 10. Requires no specialist IT skills or additional services or components. All that is required is one or more copies of the Windows 10 installation media, which can be provided on a DVD, or on a USB storage device, or even from a shared folder on a network file server. |
Low-touch deployment |
Suitable for larger organizations that intend to install a few hundred devices, using limited installer intervention. Because the strategy relies on the use of image deployment and additional services, such as Windows Deployment Services (WDS) and, optionally, Microsoft Deployment Toolkit (MDT), some specialist IT skills are also required. |
Zero-touch deployment |
For very large organizations with thousands of devices. Requires a considerable investment in IT skills to facilitate this strategy. Also requires the use of MDT and System Center Configuration Manager (Current Branch) to deploy Windows 10, using no installer intervention. |
Determine the appropriate installation media
Windows 10 uses an image-based installation and deployment model with the Windows operating system installation files packaged inside an image file that is used as an installation source during the installation process.
A default installation image, Install.wim, is provided on the installation media in the Sources folder. Although you can choose to use this default image, you can also configure it to create custom installation images that better suit the needs of your organization. Customizations might include:
Selecting a particular edition of Windows 10.
Choosing which Windows features are enabled.
Including Wi-Fi profiles and virtual private network (VPN) profiles.
Adding universal apps or desktop applications.
The Windows Assessment and Deployment Kit (Windows ADK) contains a number of tools that you can use to create and manage Windows 10 images to support your installation needs. These are:
DISM The Deployment Image Servicing and Management (DISM) command-line tool enables you to capture, deploy, and manage Windows images. You can use the tool to install, uninstall, configure, and update Windows features, packages, drivers, and international settings in a .wim file or VHD, which can be either online or offline.
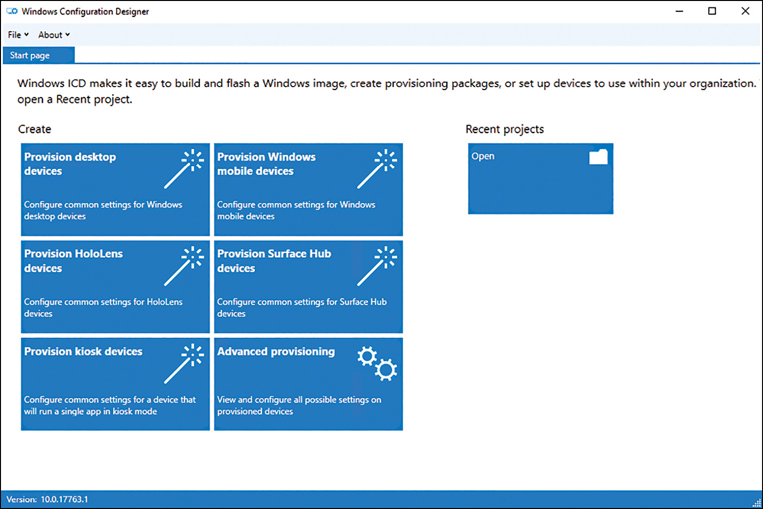
Windows Configuration Designer This tool, as shown in Figure 1-1, enables you to provision Windows 10 features and runtime settings by using provisioning packages (.ppkg) to quickly configure a Windows 10 device without having to install a new image.
You can then deploy these custom images and packages to target computers within your organization that require Windows 10. You can perform this deployment in a number of ways and by using a variety of deployment technologies and tools, depending on the installation strategy you previously selected. Options include:
DVD installation You can create installation DVD media, or you can use a customized image that you created. The device you are installing to requires an optical drive.
USB installation You can use the default or custom Windows images. This method is quicker than DVD, and although it does not require an optical drive, you might need to reconfigure your computer’s BIOS or UEFI firmware settings to support startup from USB.
![]() Exam Tip
Exam Tip
You can perform an unattended installation using these methods, provided an unattended answer file is present on the media. Answer files are discussed in the following section.
WDS deployment To use this method, Dynamic Host Configuration Protocol (DHCP) must be available to network clients on your network, and your target computers running Windows 10 must support Pre-Boot Execution Environment (PXE). Combined with unattended answer files and custom images, you can use this method to deploy multiple images to multiple computers at the same time by using multicast.
Image-based installation By starting your computer into Windows Preinstallation Environment (Windows PE), you can use DISM to apply an image locally to the target computer. Alternatively, you can use MDT and System Center Configuration Manager (Current Branch) to deploy the image and desktop apps to the target devices.
Shared network folder installation You can use Windows PE to start your computer and map a network drive to installation files and images on a network file shared folder. This is a comparatively inefficient method and has been replaced by the other methods previously described.
Windows SIM The Windows System Image Manager (Windows SIM) shown in Figure 1-2 enables you to create installation answer files for use in automated deployments. These answer files contain the configuration options used to install Windows 10. You can then associate these answer files with a local copy of the installation media, perhaps on a USB memory stick to provision Windows 10 using a semi-automated interactive installation.

Figure 1-2 Windows System Image Manager
Note Naming the Answer File
If you copy the answer file you create by using Windows SIM to the location of the installation media, name the file autounattend.xml. Windows setup knows to search for this named file in the root of the installation media.
Windows PE Windows PE (WinPE) is used to start a computer that is being deployed with Windows 10. It enables access to Windows file systems and is, in essence, a small Windows operating system. You can use the generic Windows PE provided on the product DVD, or you can create your own using tools found in the Windows ADK to address your specific deployment needs. You can then launch Windows PE from a DVD or a USB memory stick or across the network using PXE.
Perform an in-place upgrade
The most efficient method of installing Windows 10 on existing computers is to perform an in-place upgrade. This method is fully supported and recommended by Microsoft.
It is important to understand the terminology used when describing the process of upgrading to Windows 10. Upgrade is often used generically to explain the licensing process of upgrading from an earlier version of Windows to a later version. You can also upgrade the edition of Windows which replaces an existing operating system, such as Windows 7 Home edition to Windows 10. On a semi-annual basis, Windows 10 will automatically perform an in-place upgrade of Windows 10 to the latest version of Windows 10.
When manually upgrading to Windows 10, you update the existing operating system and perform what is called an in-place upgrade on existing hardware. All user data and settings are retained. For most users, this is now the recommended procedure.
Supported upgrade paths
Performing an in-place upgrade can be the simplest option, especially when you have only a few computers to upgrade. However, you cannot perform an in-place upgrade on computers running a Windows version that does not share the same feature set as the edition of Windows 10 that you want to install.
Table 1-4 lists the supported upgrade paths based on the Windows edition.
Table 1-4 Supported upgrade paths to Windows 10
Earlier Windows Edition |
Windows 10 Home |
Windows 10 Pro |
Windows 10 Enterprise |
|---|---|---|---|
Windows 8/8.1 |
X |
|
|
Windows 8/8.1 Pro |
|
X |
|
Windows 8/8.1 Enterprise |
|
|
X |
Windows 7 Starter |
X |
|
|
Windows 7 Home Basic |
X |
|
|
Windows 7 Home Premium |
X |
|
|
Windows 7 Professional |
|
X |
|
Windows 7 Ultimate |
|
X |
|
Windows 7 Enterprise |
|
|
X |
You will notice from Table 1-4 that direct upgrades between different editions are not supported. That is, you cannot upgrade directly from Windows 7 Home to Windows 10 Enterprise.
Note Upgrading From Windows 7 Home
If you want to upgrade from Windows 7 Home to Windows 10 Enterprise, you can achieve that in a two-stage process. First, upgrade to Windows 10 Home and then upgrade to Windows 10 Enterprise.
After you have determined whether your upgrade path is supported, choose how to perform the process of upgrading to Windows 10.
Considerations for Performing an In-Place Upgrade
When determining whether to use the in-place upgrade method to upgrade to Windows 10, consider the following factors.
It is a simple process and is ideal for small groups of computers.
It provides for rollback to the earlier version of Windows.
User and application settings and user data files are retained automatically.
Installed applications are retained; however, retained applications might not work correctly after upgrading from an earlier Windows version.
You do not need to provide for external storage space for data and settings migration.
It does not allow for edition changes and is available only on supported operating systems (see Table 1-4).
It does not provide the opportunity to start with a clean, standardized configuration.
Perform an in-place upgrade to Windows 10
As you have seen, there are three ways to upgrade to Windows 10. The recommended method by Microsoft is to use an in-place upgrade. This is the method that will be utilized for all future upgrades of Windows 10 using Windows Update. Using an in-place upgrade enables you to retain all the users’ applications, data files, and user and application settings. During the in-place upgrade, the Windows 10 setup program automatically retains these settings.
Important Back Up Data Files
It is important to perform a backup of user data files that may be stored locally prior to launching an in-place upgrade to guard against possible data loss.
You perform an in-place upgrade to Windows 10 when your users will continue to use their existing computers. To perform an in-place upgrade, complete the following procedure.
Evaluate the user’s computer to determine that it meets minimum hardware requirements for Windows 10 and that Windows 10 supports all hardware.
Verify that all applications work on Windows 10.
Optionally, back up the user’s data files.
Run the Setup.exe program from the root of the Windows 10 installation media.
Choose Upgrade when prompted and complete the setup wizard.
Note Upgrading Devices Within a Corporate Environment
If your existing operating system is unstable or runs slowly, you may not want to perform an in-place upgrade to Windows 10. If the device is in a corporate environment and you previously deployed the earlier version of Windows using an automated deployment method, you can re-deploy the operating system again. Once complete, allow the corporate apps and settings to be applied and then perform an in-place upgrade to Windows 10. This two-stage process will take longer to perform, but it can provide an alternative method of deploying Windows 10 until you evaluate your deployment strategy.
The in-place upgrade process works well and is now the recommended deployment method Microsoft suggests for upgrading devices that run Windows 7 or Windows 8.1 to Windows 10.
Upgrade using installation media
An enterprise will normally obtain Windows 10 media through the volume licensing channel and can download it from the Volume Licensing Service Center (VLSC) at https://www.microsoft.com/licensing/servicecenter/default.aspx. VLSC media use either a Multiple Activation Key (MAK) or Key Management Service (KMS) which is used during the installation process and is tied to the enterprise license agreement with Microsoft.
Alternatively, purchased retail media can be used, which is supplied on a USB thumb drive or by a direct download from the online Microsoft Store.
Another option is to use the Media Creation Tool (MCT), which generates a ready-to-use, bootable USB flash drive. You can also download an ISO file that can be used for the installation, which would need to be burned to a writeable DVD. Media created with the MCT cannot be used for upgrading a Windows Enterprise edition client. When you run the MCT, when prompted, on the What Do You Want To Do? page, click Create Installation Media and then click Next.
Note Media Creation Tool (MCT)
You can download the MCT at: https://www.microsoft.com/software-download/windows10.
If you encounter issues while upgrading to Window 10, you should inspect the installation log file found at C:WindowsPantherUnattendGCSetupAct.log. If you are trying to use the wrong media or if you are trying to upgrade from an unsupported operating system, there should be an entry such as the following:
Info [windeploy.exe] OEM license detected, will not run SetupComplete.cmd
With all upgrades, you must ensure that you understand the requirements for a successful upgrade, such as having at least 2 GB RAM and enough disk space. In the exam, you might face scenarios in which you are asked to upgrade from one architecture to another architecture which is not supported. You may be presented with the current system drive having insufficient disk space. To resolve disk space issues, you could attempt one of the following resolutions to complete the upgrade:
Run Disk CleanUp Wizard, remove any unwanted files, and empty the Recycle Bin.
Uninstall apps, files, and language packs that you do not need.
If possible, expand the volume by using the Disk Management tool.
Move personal files off the system drive and onto another drive or external drive.
If the system fails during the upgrade due to a compatibility issue, you can troubleshoot the cause by reviewing the setupact.log found at: C:$Windows.~BTSourcespanthersetupact.log. Some of the most common codes are shown in Table 1-5.
Table 1-5 Setuperr.log errors relating to upgrading
Error Code |
Description |
|---|---|
CsetupHost::Execute result = 0xC1900200 |
PC not meeting the system requirements for Windows 10. |
CsetupHost::Execute result = 0xC190020E |
Insufficient free hard drive space. |
CsetupHost::Execute result = 0xC1900204 |
Migration choice (auto upgrade) not available—wrong Windows 10 SKU or architecture. |
CsetupHost::Execute result = 0xC1900208 |
Compatibility issues found (hard block). |
CsetupHost::Execute result = 0xC1900210 |
No issues found. |
If you want to check the system for compatibility only, you can run Setup.exe with a command-line switch, which will check for compatibility but not perform the actual upgrade.
An example command is:
Setup.exe /Auto Upgrade /Quiet /NoReboot /DynamicUpdate Disable /Compat ScanOnly
Windows 8.1 supports mounting an ISO disk image directly in File Explorer. You can download the Windows 10 ISO and upgrade Windows 8.1 without first having to create installation media such as a DVD or bootable USB. For Windows 7, you must use bootable media, extract the files contained in the ISO, or use a third-party tool to mount the ISO.
A major advantage of upgrading rather than performing a clean installation (sometimes referred to as a wipe-and-load scenario) is that all the applications, settings, and data on the PC are retained during an upgrade. This often results in a much quicker process, and the device can be returned to the user in the shortest possible time.
Need More Review? Windows 10 Enterprise: Faq For it Professionals
This Microsoft resource is useful to obtain answers to common questions about installation for Windows 10 Enterprise. Visit https://docs.microsoft.com/windows/deployment/planning/windows-10-enterprise-faq-itpro#administration.
As part of the pre-upgrade checks, Windows 10 will validate the following.
Whether UEFI is used (UEFI v2.3.1 or later is required for Secure Boot).
System Host is not configured to boot from VHD.
The system is not installed as a Portable Workspace (for example, using Windows To Go).
Details of the setup compatibility checks can be reviewed in the log file found at C:$WINDOWS.~BTSourcesPanthersetupact.log. The installation process proceeds in the same way as the in-place upgrade using Windows Update.
Migrate user data
With the rapid adoption of Office 365, more data than ever before is now stored in cloud-based storage such as OneDrive for Business and SharePoint Online. Despite this trend, file server-based shared storage and local storage is still the most common data storage location for businesses.
Both cloud-based and server-based storage data storage backup and migration are outside of the scope of this exam, but you need to know how enterprises can migrate both user data and Windows settings from an earlier version of Windows to Windows 10. The procedure for migrating user data has not changed over the years, but you will be expected to understand the process.
Migrate from previous versions of Windows
The amount of user affinity with their devices is often overlooked by support professionals. If allowed, users can invest significant time and effort to customize and personalize their working environment, and this can include the Windows operating system and applications. When upgrading from an older operating system, it is very common for the user to be presented with a new device running the new version of Windows after the old device is removed. This can sometimes cause significant loss of productivity while the user becomes familiar with the updated operating system and reconfigures settings to their preferences.
The level of user personalization of the device can include the following.
Desktop appearance, sounds, themes, and backgrounds
Start-menu customization
Icons and file associations
Files and folders stored locally
Device and power settings
Application settings, such as autotype and template locations
Migration strategies
You perform a migration to Windows 10 when your users have new computers on which to install Windows 10 and you want to preserve settings and data from their old computers. During the process, you perform the following high-level procedures.
Verify that all existing required applications work on Windows 10.
Ensure that the appropriate edition of Windows 10 is installed on the user’s new computer.
On the new computer, install the required applications.
Back up the user’s data files and settings from the old computer using USMT (User State Migration Tool).
Restore the user’s data files and settings on the new computer using USMT.
You can use either a side-by-side migration or wipe-and-load migration strategy to perform a migration. These migration scenarios are summarized as follows.
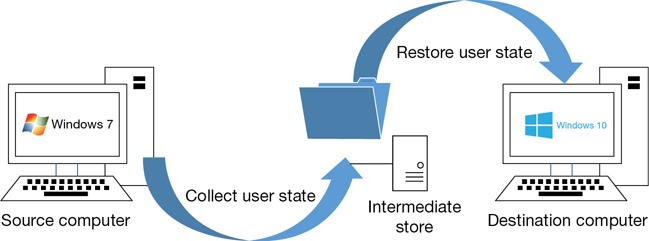
A side-by-side migration In this scenario, the source and destination computers for the upgrade are different machines. You install a new computer with Windows 10 and then migrate the data and most user settings from the earlier operating system to the new computer.
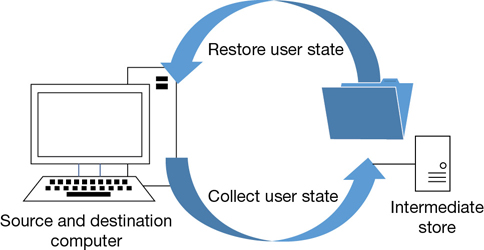
A wipe-and-load migration In this scenario, the source and destination computer are the same. You back up the user data and settings to an external location and then install Windows 10 on the user’s existing computer. Afterward, you restore user data and settings.
Perform a Side-by-Side Migration
When you opt to use the side-by-side migration strategy, illustrated in Figure 1-3, use the following procedure to complete the task.
Either obtain a computer with Windows 10 preinstalled or install Windows 10 on a new computer. When Setup.exe prompts you, choose Custom (Advanced). This is the destination computer.
Install the same applications on the destination computer as are presently on the source computer.
Create an external intermediate storage location, such as a file server–shared folder or an external hard drive, for the storage of user data and settings. This storage must be accessible from both the source and destination computers.
Use the USMT to collect the user’s data and settings from the source computer and store them to the external intermediate store.
Use the USMT to collect the user’s data and settings from the external intermediate store and install them in the destination computer.
Perform a Wipe-and-Load Migration
When you opt to use the wipe-and-load migration strategy, illustrated in Figure 1-4, use the following procedure to complete the task.
Create an external storage location, such as a file server-shared folder or an external hard drive, for the storage of user data and settings.
Use the USMT to collect the user’s data and settings and store them in the external location.
Install Windows 10 on the existing computer. When Setup.exe prompts you, choose Custom (Advanced).
Reinstall the applications on the computer.
Use the USMT to restore the user’s data and settings from the external location.
Considerations for Performing a Migration
When determining whether to use one of the two migration methods outlined to upgrade to Windows 10, consider the following factors.
You have an opportunity to create a clean installation, free from remnant files and settings.
You can reconfigure the existing disk partitions.
You can upgrade to any Windows 10 edition, irrespective of the earlier Windows edition.
Migration is a more complex process, and you must use migration tools such as User State Migration Tool (USMT) to migrate user data and settings.
You need to provide storage space for user settings and files to be migrated.
Applications are not retained, and you must manually reinstall these.
Perform a user state migration
When computers are being replaced or refreshed on a large scale, the loss of user productivity can be significant. In this scenario, you can use the User State Migration Tool version 10 which is available as part of the Windows ADK.
![]() Exam Tip
Exam Tip
You should always use the version of the Windows ADK for your version of Windows 10. For example, ensure you download Windows ADK, version 1809, if that’s the version of Windows 10 you are deploying. At the time of writing this book, Windows 10 1809 is the current feature release.
The Windows ADK is available from the following Microsoft website at: https://developer.microsoft.com/windows/hardware/windows-assessment-deployment-kit.
User state migration is performed in two phases as follows.
Settings and data are captured (collected) from the source computer and stored in a secure migration store using the ScanState tool.
Captured settings and data are restored on the destination computer, using the LoadState tool.
USMT is a collection of three command-line tools that can be scripted to capture and migrate data efficiently and securely and is intended for performing large-scale automated deployments.
ScanState.exe
LoadState.exe
UsmtUtils.exe
You choose which data is captured, and these settings are stored in migration XML files as follows.
MigApp.xml
MigDocs.xml
MigUser.xml
Custom XML files that you can create
The XML files provide the migration rules that USMT needs to process.
You can also create a Config.xml file that is used to specify files or settings, which will be excluded from the migration.
Important Install Applications
The USMT does not migrate applications; only the supported applications’ settings are migrated. Therefore, any required applications must be already installed on the destination computer so that the captured app settings can be reinstated.
As part of both migration strategies, you must migrate user data and settings to the destination computer. Consequently, it is important to determine where these data and settings reside. The types of data that USMT can capture and migrate are shown in Table 1-6.
Table 1-6 Data types accessible by USMT
Data Type |
Example |
Description |
|---|---|---|
User data |
Documents, Video, Music, Pictures, Desktop files, Start menu, Quick Launch settings, and Favorites |
Folders from each user profile. |
|
Shared Documents, Shared Video, Shared Music, Shared Desktop files, Shared Pictures, Shared Start menu, and Shared Favorites |
Folders from the Public profiles. |
|
File |
USMT searches fixed drives, collecting files that have any of the file name extensions that are defined in the configuration XML file. |
|
Access control lists (ACLs) |
USMT can migrate the ACL for specified files and folders. |
Operating system components |
Mapped network drives, network printers, folder options, users’ personal certificates, and Internet Explorer settings. |
USMT migrates most standard operating system settings. |
Supported applications settings |
Microsoft Office, Skype, Google Chrome, Adobe Acrobat Reader, Apple iTunes, and more |
USMT will migrate settings for many applications, which can be specified in the MigApp.xml file. Version of each application must match on the source and destination computers. With Microsoft Office, USMT allows migration of the settings from an earlier version of an Office application. |
Need More Review? Usmt Migapp.Xml Supported Applications
This Microsoft resource provides the list of applications that you can specify in the MigApp.xml file for USMT to migrate the settings. Visit https://technet.microsoft.com/library/hh825238.aspx.
The following settings are not migrated when you use USMT.
Local printers, hardware-related settings
Device drivers
Passwords
Customized icons for shortcuts
Shared folder permissions
Files and settings, if the operating systems have different languages installed
After you have installed the USMT included in the Windows ADK, you have the following components as described in Table 1-7.
Table 1-7 USMT components
Component |
Description |
|---|---|
ScanState |
Scans a source computer and collects files and settings, writing them to a migration store. (The store file can be password protected and can be compressed and encrypted if required, although you cannot use the /nocompress option with the /encrypt option.) You can turn off the default compression with the /nocompress option. |
LoadState |
Migrates the files and settings from the migration store to the destination computer. |
USMTUtils |
Compresses, encrypts, and validates the migration store files. |
Migration XML files |
MigApp.xml, MigUser.xml, or MigDocs.xml files, and custom XML files USMT uses to configure the process. |
Config.xml |
Used with /genconfig to exclude data from a migration. |
Component manifests |
Controls which operating system settings are to be migrated. These manifests are specific to the operating system and are not modifiable. |
Need More Review? User State Migration Tool Command-Line Syntax
To review further details about using USMT or the syntax of the ScanState.exe and LoadState.exe commands, refer to the Microsoft website at https://docs.microsoft.com/windows/deployment/usmt/usmt-command-line-syntax.
To initiate the collection of the files and settings from the source computer, use the following steps.
Ensure that you have a backup of the source computer.
Close all applications.
Open an elevated command prompt, and run ScanState, using this command:
ScanState \remotelocationmigrationmystore /config:config.xml / i:migdocs.xml /i:migapp.xml /v:13 /l:scan.log
Run UsmtUtils with the /verify switch to ensure that the migration store is not corrupted, using UsmtUtils /verify C:mystorestorename.img.
On the destination computer, install the operating system, install any applications that were on the source computer, and then close any open applications.
Run the LoadState command, specifying the same .xml files that you used when you ran ScanState using the command
LoadState \remotelocationmigrationmystore /config:config.xml / i:migdocs.xml /i:migapp.xml /v:13 /l:load.log
Restart the device and verify whether some of the settings have changed.
Note Usmt Tools
You can find the USMT tools within the C:Program Files (x86)Windows Kits10Assessment and Deployment KitUser State Migration Tool folder on your computer. You need to use the tools that match your architecture (amd64, arm64, and x86).
The ScanState tool can also migrate user settings from an offline Windows system including the Windows.old folder. A Windows.old folder is created when you perform an in-place upgrade of a modern version of Windows to Windows 10. The ability to access user settings contained within the offline Windows.old folder can be advantageous in the following scenarios.
Improved performance if the Windows.old folder is local
Simplified end-to-end deployment process by migrating data from Windows.old by enabling the migration process to occur after the new operating system is installed
Improved success of migration because files will not be locked for editing while offline
Ability to recover and migrate data from an unbootable computer
The migration can be performed at any time
Need More Review? Usmt Technical Reference
Microsoft has updated the technical reference relating to USMT 10, including support for Microsoft Office 2016; You can find it at https://docs.microsoft.com/windows/deployment/usmt/usmt-technical-reference.
Configure Windows for additional regional and language support
When Windows 10 was released, it offered support for 111 languages spanning 190 countries and regions. You can download any of the additional languages for Windows 10, which allows users to view menus, dialog boxes, and other user interface items in their preferred languages.
To add an additional input language to your device, perform the following steps.
Open Settings > Time & Language > Language.
Under Language, click Add A Language.
Select the language you want to use from the list or enter the language name in the search bar.
Click Next.
Choose to install the optional language features available for the selected language as shown in Figure 1-5.
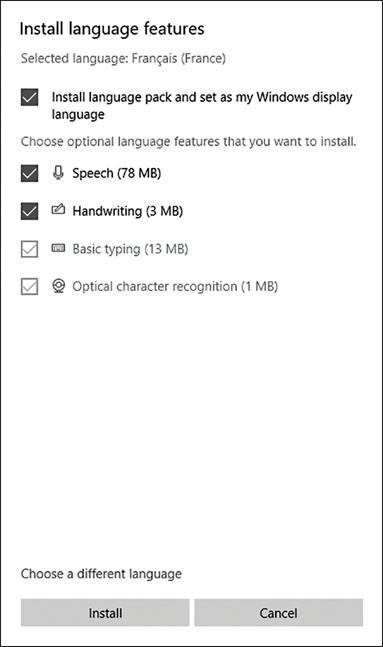
Figure 1-5 Choose a language to install The language pack is downloaded and installed.
Log out of the device and then sign in to display the new default display language.
When adding an additional language to Windows 10, you can see which language features are available. These include.
Display language
Text-to-speech
Speech recognition
Handwriting support
You also have the option to set the language as your primary Windows display language after the language pack has been installed. There are additional language options available for common languages. Select the installed language and then click the Options button to configure features such as region-specific fonts (such as accents), regional formats, handwriting, pen settings, keyboards, and spell-checking options.
Installing Local Experience Packs
You can also modify the default language used by Windows 10 by adding a Local Experience Pack from the Microsoft Store. These packs perform the same configuration changes as the Language options within the Settings app, allowing you to enhance Windows with your chosen language, including navigation, menus, settings, and help topics.
To add a local language using the Microsoft Store, search for the required language and download it or use the link to add a Local Experience Pack on the Language page within the Settings app. If you need to add a Local Experience Pack to an offline image, you can add the Language Interface Packs (LIPs) .appx files and their associated license files, which can be found in the LocalExperiencePack folder on the Language Pack ISO. OEMs and System Builders with Microsoft Software License Terms can download the Language Pack ISO and Feature on Demand ISO from the Microsoft OEM site or the Device Partner Center. IT Professionals can find ISOs containing all available Language resources on the Microsoft Next Generation Volume Licensing Site at https://licensing.microsoft.com.
![]() Exam Tip
Exam Tip
In previous versions of Windows 10, LIPs are delivered as .cab files, for example, C:Languageses-ESlp.cab. Ensure that you know that since Windows 10, version 1809, LIPs are delivered as Local Experience Packs (LXPs) .appx files, for example, LanguageExperiencePack.am-et.neutral.appx.
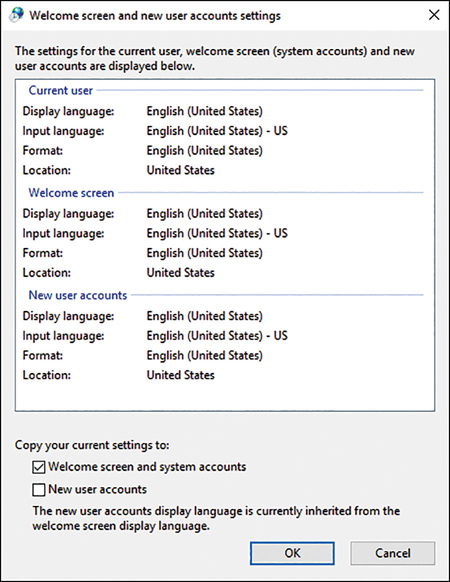
After the language is installed, you can set it to be the default language for your device or remove the language. Within the Language page in the Settings app, you can also configure the Administrative Language Settings to copy your international settings to the Windows welcome screen, system accounts, and new user accounts as shown in Figure 1-6. System-wide changes require administrative privileges.
To save space, you can remove language components; for example, you could remove English when deploying devices to non-English regions.
Using the Dism Command Line Tool
You can also use the DISM command prompt to perform deployment of language components. As an example, if you want to modify an offline Windows image to add a language pack, first mount the Windows image, mount the Language Pack ISO and the Features on Demand ISO with File Explorer, and then use the following command.
Dism /Image:"C:mountwindows" /Add-Package /PackagePath="D:x64langpacksMicrosoft-Windows-Client-Language-Pack_x64_fr-fr.cab"
To add the Luxembourgish language, which requires the fr-FR base language and is delivered as an LXP, use the following command.
DISM /Image:"C:mountwindows" /Add-ProvisionedAppxPackage /PackagePath= "D:LocalExperiencePacklb-luLanguageExperiencePack.lb-LU.Neutral.appx" /LicensePath: "D:LocalExperiencePacklb-luLicense.xml"
To remove the same LIP, which was added through LXP, you would use the following command.
Dism /remove-provisionedappxpackage /packagename:Microsoft.LanguageExperiencePack.lb-LU._neutral__8wekyb3d8bbwe
Once you have completed the configuration, you need to capture the changes by committing the changes to the Windows image using the following command.
Dism /Commit-Image /MountDir:"C:mountwindows"
Using the Lpksetup Command Line Tool
You can also use the Lpksetup tool to perform language pack operations on language pack CAB files.
To launch the Lpksetup wizard, use the following steps:
Download and then mount the Language Pack ISO.
Press the Windows logo key+R to open the Run dialog box.
Type lpksetup.exe, and then select OK.
Step through the wizard and browse to the Language Pack location on the mounted ISO.
Locate the language pack as shown in Figure 1-7 and click Next.
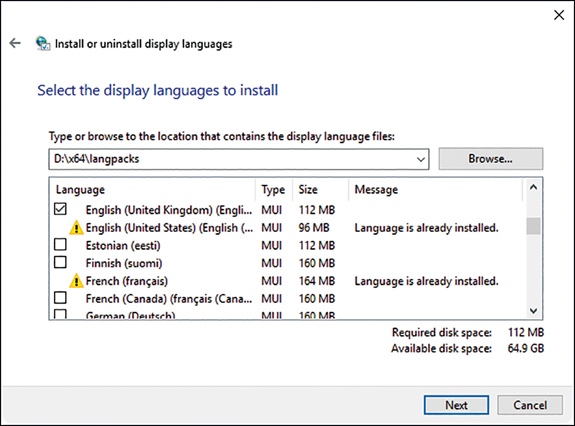
Figure 1-7 Perform language pack operations using Lpksetup On the Review And Accept The Microsoft Software License Terms dialog box, click I Accept The License Terms and click Next.
The language pack installation completes.
Click Close.
If you want to automate the process or bypass the user interface (UI) and perform unattended or silent-mode language pack installations, you can also use the Lpksetup command-line tool. You need to run Lpksetup using an elevated command prompt. The syntax is:
lpksetup.exe /i * /p <path>
This example installs all language packs that are located on installation media specified in the <path> location. The command-line options available for Lpksetup.exe are shown in Table 1-8.
Table 1-8 Lpksetup.exe command-line options
Option |
Description |
|---|---|
/i |
Installs the specified language packs. If you do not include * or language after/i, you are asked to continue the installation through the UI. |
* |
Wildcard character that represents all language packs found in the language_pack_path or the directory where lpksetup.exe is located. |
Language-region |
Specifies the language pack or packs to be installed or uninstalled. |
/u |
Uninstalls the specified language packs. If you do not include * or a language after /u, you are asked to continue the uninstall through the UI. |
/r |
Suppresses the need to restart after an operation is complete. |
/p language_pack_path |
Indicates the path of the language packs to install. |
/s |
Performs a silent and unattended operation that requires no user input. |
/f |
If the computer is required to restart, forces a restart even if other users are logged on to the computer. |
Note Full Language Packs are not Interchangeable
Language components are not interchangeable between Windows 10 and Windows Server, but some LIPs are. You must also match the version of Windows to the language pack. For example, Windows 10, version 1809 must use the Windows 10, version 1809 language pack.
Implement activation
Activation is a very important part of configuring and managing Microsoft products and remaining within the Microsoft Software License Terms.
In some environments, the activation process will be fully automated, or silent, and it is easy to overlook it. This section explores Windows 10 activation options and procedures that you need to understand.
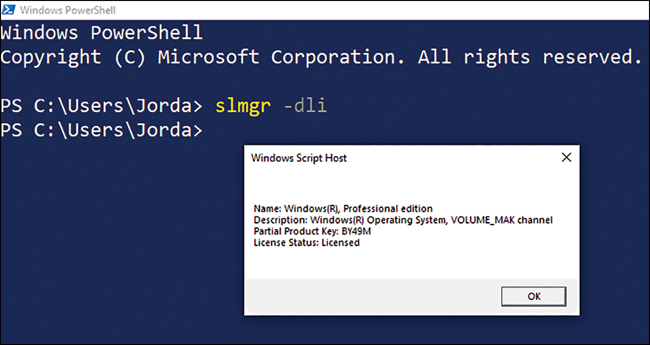
Like most Microsoft products, Windows 10 requires activation. Activation verifies that your copy of Windows 10 is genuine and that it hasn’t been used on more devices than the license terms allow. Only a valid product key can be used to activate Windows 10. Figure 1-8 shows the current activation status of a computer running Windows 10 Professional.
You can activate Windows 10 in several ways—by using an Internet-accessible service at Microsoft, by telephone, and by using bulk activation methods such as Key Management Service (KMS) and Active Directory–based activation. This section explores activation and the methods you can use to manage your organization’s Windows 10 activation.
Select an activation method
To activate Windows 10, you might need a product key, a 25-character code which looks like this:
PRODUCT KEY: XXXXX-XXXXX-XXXXX-XXXXX-XXXXX
Not all Windows 10 installations require the use of a product key to activate, relying instead on a digital license (called a digital entitlement in Windows 10, Version 1511). A digital license is a method of activation in Windows 10 that doesn’t require you to enter a product key; instead, digital licenses are connected to your Microsoft account. Once your PC is connected to the Internet and you log in to your Microsoft account, the activation takes place.
You must use a product key for activation when:
You purchase Windows 10 from a retail store or authorized reseller, either as a physical product or as a digital download.
You do not have a digital license.
Your organization has a Microsoft volume licensing agreement for Windows 10.
You purchased a new device on which Windows 10 is preinstalled.
You do not need a product key for activation and can rely on a digital license when:
You upgrade to Windows 10 from an eligible device running a genuine copy of Windows 7 or Windows 8.1.
You purchase Windows 10 from the Microsoft Store.
You purchase Windows 10 Pro upgrade from the Microsoft Store.
You use Windows 10, version 1803 or later on a device with a firmware-embedded activation key.
You are a Windows Insider and upgrade to the newest Windows 10 Insider Preview build on an eligible device that was running an activated earlier version of Windows and Windows 10 Preview.
The method you use to activate Windows 10 is determined by a number of factors, including how you obtained Windows 10 and whether your organization has a volume license agreement in place with Microsoft. The following scenarios determine how you activate Windows 10.
Retail If you purchase Windows 10 from a retail store or from an authorized retailer, it should come with a unique product key, which can be found on a label inside the Windows 10 box. For a digital copy of Windows 10, you should have access to the product key, which may be stored in a digital locker accessible through the retailer’s website. You can enter the key during or after installation to activate your copy of Windows 10.
OEM If you purchase a new computer on which Windows 10 is preinstalled, it comes with a product key, which is included with the device packaging or included as a card or on the Certificate of Authenticity (COA) attached to the device. You can activate Windows by using this product key.
Microsoft volume licensing Microsoft offers several volume licensing programs to suit different organizational sizes and needs. These programs support both Active Directory–based activation and KMS.
![]() Exam Tip
Exam Tip
Retail versions of Windows 10 cannot be activated using volume licensing methods.
Volume Activation Services
For large organizations with many hundreds or even thousands of devices, using manual product key entry and activation is impractical; it is both error prone and time-consuming. For these reasons, Microsoft provides three methods for volume activation. These are:
Key Management Service (KMS) You can use this Windows Server role service to activate Windows 10 in your organization’s network. Client computers connect to the KMS server to activate, thereby negating the need to connect to Microsoft for activation. It is not necessary to dedicate a server computer to perform activation with the KMS role.
![]() Exam Tip
Exam Tip
KMS is designed for organizations with either 25 (physical or virtual) client devices persistently connected to a network or organizations with five or more (physical or virtual) servers. KMS requires a minimum threshold of 25 computers before activation requests will be processed.
Active Directory–based activation Any device running any Windows 10 that is connected to your organization’s domain network and is using a generic volume license key (VLK) can use Active Directory–based activation. Periodically, the client must renew the license from the licensing service. Therefore, for the activation to remain valid, the client device must remain part of your organization’s domain. As with KMS, you do not need to dedicate a server to the Active Directory–based activation role.
![]() Exam Tip
Exam Tip
You cannot use Active Directory–based activation to activate devices running Windows 10 that are not members of your domain.
Multiple Activation Key Multiple Activation Key (MAK) uses special VLKs that can activate a specific number of devices running Windows 10. You can distribute MAKs as part of your organization’s Windows 10 operating system image. This method is ideal for isolated client computers, which will benefit from a one-time activation using the hosted activation services provided by Microsoft.
To use either KMS or Active Directory–based activation to manage your volume activations, the Volume Activation Services server role must be running on a Windows Server 2016 or Windows Server 2019 computer and be configured to use either KMS or Active Directory–based activation. You need to activate the role with Microsoft so that the service can activate devices. This involves entering and validating a KMS host key with Microsoft, either online or by telephone.
An administrator can manage the organization’s volume activations centrally using the Volume Activation Management Tool (VAMT) from a Windows 10 or Windows Server 2016 R2 computer. You can download the VAMT as part of the Windows Assessment and Deployment Kit (Windows ADK).
Activate Windows 10
If you are using one of the volume activation methods, you do not need to perform any task on your Windows 10–based devices because Windows 10 will automatically remain in an activated state whilst the volume license agreement is in place. However, if you are manually managing activation on Windows 10–based devices following installation, you must complete the following procedure.
Click Start > Settings.
Click Update & Security > Activation > Change Product Key.
In the Enter A Product Key dialog box, type your 25-character product key.
On the Activate Windows page, click Next.
When prompted, click Close.
After you have activated Windows 10, you can view the activation status on the Activation tab of the Update & Security section of the Settings app. Also, you can view and manage the activation status of your Windows 10–based product by using the Slmgr.vbs command. For example, Figure 1-8 showed the result of typing the Slmgr.vbs -dli command. You can see that Windows 10 Pro is licensed properly.
Activate Windows 10 Virtual Machines
For Windows 10 virtual machines running on Windows 10, version 1803, a new feature called Inherited Activation allows Windows 10 virtual machines to inherit an activation state from their Windows 10 hosts.
When a user creates a new Windows 10 virtual machine (VM) using a Windows 10 local host, the VM will automatically inherit the activation state from a host machine. Inherited Activation requires that both the host computer and the VM are running Windows 10, version 1803 or later and that the host computer has been activated using a Windows 10 E3 or E5 license.
Troubleshoot activation issues
When a device running Windows 10 is not activated, the user is presented with a watermark on the lower-right corner of the screen requesting that you activate Windows. Additionally, you cannot personalize the device, such as changing wallpaper, accent colors, lock screen, themes, or sync settings between devices.
Unlike earlier versions of Windows, there is no grace period for how long you can use Windows 10 without activation. In the Windows 10 license agreement, users are authorized to use Windows 10 only if they are properly licensed and the software has been properly activated with a genuine product key or by another authorized method.
If you are having trouble activating Windows 10, you could try these actions to resolve common activation issues.
Volume License Activation Renewal
If you are using one of the volume activation methods, and your device falls out of activation, you should ensure that the device has network connectivity and that the user has signed onto the device successfully using their corporate credentials. If the activation process does not trigger automatically within two hours there may be an issue with KMS.
Client computers that use KMS must have their activation status renewed at least once every 180 days. Clients achieve renewal by connecting to the network-located KMS host. By default, devices will attempt to renew their activation every seven days following a reboot, or restart of the KMS client service. If KMS activation fails, then the client will retry every two hours, and after 180 days have elapsed following activation, the device will fall out of activation.
If client devices are within the renewal window but fail to automatically activate (perhaps they are present on the network for only a short time), you can force a manual activation while the device is on the network by running or scripting the command slmgr /ato using administrative privileges.
Checking Activation Status
To check activation status in Windows 10, follow these steps:
Open the Settings App.
Select Update & Security and then click Activation.
View the activation status.
If Windows 10 isn’t activated, click the Troubleshoot link, as shown in Figure 1-9.
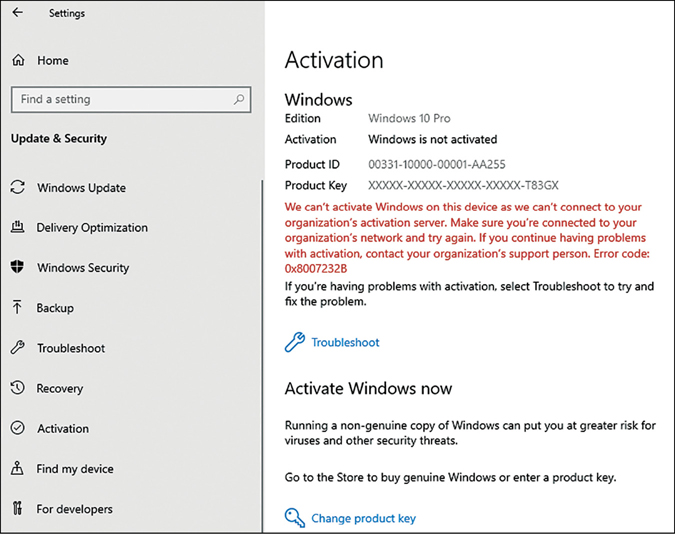
Figure 1-9 Troubleshoot activation
Activating Windows 10 for the First Time
Most new devices purchased are pre-installed with Windows 10. These devices will automatically activate once the device is connected to the Internet.
If you manually install Windows 10 on a device that has not previously had an activated copy of Windows 10 on it, you’ll need to use a valid product key to activate the device. This scenario also covers if you install a different edition of Windows 10 that wasn’t previously activated on the device. For example, if you install Windows 10 Pro on a device that had Windows 10 Home installed on it, then you will need to provide a valid Windows 10 Pro product key to activate the device.
Activating After Reinstalling Windows 10
If you need to reinstall Windows 10, this could cause issues with your activation status depending on how Windows 10 was originally installed on your device.
If you bought Windows 10 from the Microsoft Store, or if you activated a free upgrade to Windows 10, then you have a digital license for the device.
So long as you reinstall the same edition of Windows 10 onto your device, you won’t need a product key. If you’re asked to enter a product key during reinstallation, you should skip this step. Windows 10 will automatically activate online after the installation is complete.
Activation Issues After a Hardware Configuration Change
If significant hardware changes are made to a device (such as replacing the motherboard), Windows 10 might fall out of activation. Devices running Windows 10, version 1607 or later that have been used with a Microsoft account will have a digital license linked to the device. If the activation error codes 0x803f7001 or 0xC004C008 appear on the Activation page of the Settings app, you should use the Activation troubleshooter to reactivate Windows.
If the motherboard was replaced under warranty—such as by the original equipment manufacturer (OEM)—then the device should reactivate automatically, or a replacement product key should have been provided.
Note Firmware Upgrade
Consider checking whether the motherboard manufacturer has a firmware update available. This should be applied prior to installing Windows; otherwise, upgrading the firmware after activation might require the system to fall out of activation.
Activating Refurbished Devices Running Windows 10
A refurbished device running Windows 10 can be activated using the product key on the Certificate of Authenticity label that will be attached to the device using the following procedure.
Open the Settings App.
Select Update & Security and then click Activation.
Select Change product key.
Enter the 25-character product key found on the Certificate of Authenticity and follow the instructions.
Use the Activation Troubleshooter
The Activation troubleshooter is available for all users on the Activation tab within the Settings app. If the device has not been activated, running the troubleshooter can locate a digital license linked to the Microsoft account used on the computer and then prompt you to try activation again.
Sometimes when you run the Activation troubleshooter or attempt to activate a device the activation will fail, and an error code and message will be presented to the user.
Common Activation Errors
If you see an error code relating to Windows 10 activation, you can check the list of error codes in Table 1-9 and follow the suggested steps to resolve it. It is not necessary to remember the error codes for the exam, though it is useful to understand the various issues that can arise when activating Windows.
Table 1-9 Windows 10 activation errors
Error |
Description |
|---|---|
0xC004F211 |
Windows reported that the hardware of your device has changed. Use the Activation troubleshooter to reactivate Windows 10 after a hardware change or purchase a new Windows license. |
0xC004F212, 0xC004F034, 0xC004F210, 0xC004E016 |
The product key does not match the installed edition of Windows 10. Re-install the correct edition of Windows 10 or enter a different product key. You might also see this error if the current edition of Windows installed on the device doesn’t match the edition of the digital license. |
0xC004F213 |
Windows reported that no product key was found on your device. A digital license is associated with the device hardware, but this is no longer available if the hardware of the device has changed. Use the Activation troubleshooter to reactivate Windows 10 after a hardware change or purchase a new Windows license. |
0x803f7001 or 0x800704cF |
A valid Windows 10 license couldn’t be found to activate Windows 10. If you have a valid product key, select Change product key, and then enter the 25-character product key. If you don’t have a valid product key, you will need to purchase a new Windows license. |
0xC004C060, 0xC004C4A2, 0xC004C4A2, 0x803FA067L, 0xC004C001, 0xC004C004, 0xC004F004, 0xC004C007, 0xC004F005, 0xC004C00F, 0xC004C010, 0xC004C00E, 0xC004C4A4, 0xC004C4A5, 0xC004B001, 0xC004F010, 0xC004F050 |
The product key entered can’t be used to activate Windows. Enter a different product key or buy a new product key. The activation servers were busy, wait a while and then select Activate. If you upgraded to Windows 10 using the free upgrade offer, Windows 10 should automatically be activated if you didn’t make any significant hardware changes to your device (such as replacing the motherboard). If you continue to have problems with activation, contact customer support. |
0xC004C003 |
The Windows 10 product key entered isn’t valid. Product keys are unique; if a key has already been used, it’s marked as not valid. |
0xC004FC03 |
If you’re not connected to the Internet or your firewall settings are preventing Windows from completing the activation process online, Windows will not be able to activate. You could try to activate Windows by phone. |
0xC004E028 |
This error is shown if a device is already in the process of activation. Wait for the first request to complete. |
0x8007267C |
This error appears if the device is not connected to the Internet or the activation server is temporarily unavailable. |
0xD0000272, 0xC0000272, 0xc004C012, 0xC004C013, 0xC004C014 |
If the activation server is temporarily unavailable, Windows will automatically be activated when the service comes back online. |
0xC004C008, 0xC004C770, 0x803FA071 |
The product key has already been used on another PC, or it’s being used on more PCs than the Microsoft Software License Terms allow. |
0xC004F00F |
You might see this error if a product key for the Enterprise edition of Windows is used to activate Windows 10 Home or Windows 10 Pro. |
0xC004C020 |
A Volume License has been used on more PCs than the Microsoft Software License Terms allow. |
0x8007232B, 0xC004F074, 0xC004F038, 0x8007007B |
A product key for the Enterprise edition of Windows has been used to activate Windows 10 Home or Windows 10 Pro, or a work device is trying to activate, but the device is not connected to the workplace’s network. |
0x80072F8F |
The date and time for the PC is incorrect, or Windows has trouble connecting to the online activation service and can’t verify your product key. Use the network troubleshooter to identify and repair any network problems. |
0xC004E003 |
If third-party software has changed system files, then Windows activation may fail. Restore the system files back to an earlier point in time and try to activate again. |
0x80004005 |
Windows activation has failed. Use the Activation troubleshooter, and if this doesn’t work, you might need to reset your PC. |
0x87e10bc6 |
An error occurred with the activation server or licensing service. Wait a few minutes, try again, and then use the Activation troubleshooter. Alternatively, launch the Microsoft Store app and if the Microsoft Store app shows there was a problem, select Try Again, which should resolve the issue. |
Note Activate Windows by Phone
Sometimes, you will not be able to connect to the Internet to complete the activation process. You can activate Windows 10 by phone. To find your local freephone telephone number, type SLUI 04 in the search box on the taskbar and select the SLUI 04 command. Select your country and then use the telephone number and installation ID provided to access the automated phone system to activate Windows. Phone activation cannot be used for Windows 10 Pro, Edu or Windows 10 Pro for Workstations editions.
Skill 1.2: Perform post-installation configuration
After you have provisioned Windows 10, you must ensure that the user is productive as soon as possible. Enabling a consistent Windows environment that looks and behaves the same regardless of the device used can be helpful. Users should be able to browse the Internet safely and in accordance with corporate policies. Devices that are used by mobile users can be configured dynamically to provide them with optimal power settings, and pre-configured connectivity to resources such as secure VPNs and Wi-Fi networks.
Configure sign-in options
After you have activated Windows 10, you can customize the user interface. In some respects, the Windows 10 user interface is familiar to users of Windows 7. It has a Start menu, a desktop, and a taskbar. These things all appear in Windows 7. However, because Windows 10 is designed to work across a variety of device types, including phones, tablets, and traditional desktop computers, it provides additional ways for users to interact.
As an IT pro, it is important for you to understand how to customize the Windows 10 user interface, including Start, taskbar, desktop, and notification settings. This enables you to ensure that the operating system interface meets the needs of the users in your organization.
Configure Microsoft accounts
A Microsoft account (previously called Windows Live ID) provides you with an identity that you can use to securely sign in on multiple devices and access cloud services. You can also use the account to synchronize your personal settings between your Windows-based devices.
If Windows 10 detects an Internet connection during setup, you are prompted to specify your Microsoft account details, though you can skip this step and create a local account instead. You can link your Microsoft account to a local or AD DS domain account after setup is complete.
Microsoft accounts are primarily for consumer use. Domain users can benefit by using their personal Microsoft accounts in your enterprise, though there are no methods provided by Microsoft to provision Microsoft accounts within an enterprise. After you connect your Microsoft account to Windows 10, you can:
Access and share photos, documents, and other files from sites, such as OneDrive, Outlook.com, Facebook, and Flickr.
Integrated social media services providing contact information and status for your users’ friends and associates are automatically maintained from sites such as Hotmail, Outlook, Facebook, Twitter, and LinkedIn.
Download and install Microsoft Store apps.
App synchronization with Microsoft Store apps. After user sign-in, when an app is installed, any user-specific settings are automatically downloaded and applied.
Sync your app settings between devices that are linked to your Microsoft account.
Use single sign-on with credentials roaming across any devices running Windows 10, Windows 8.1, Windows 8, or Windows RT.
![]() Exam Tip
Exam Tip
You can browse the Windows Store even if you do not sign in using a Microsoft account. However, you cannot install Store apps without using a Microsoft account.
If Microsoft accounts are allowed in an enterprise environment, you should note that only the owner of the Microsoft account is able to change the password. A user can perform a password reset in the Microsoft account sign-in portal at https://account.microsoft.com.
Signing up for a Microsoft Account
To sign up for a Microsoft account, use the following procedure.
Open a web browser and navigate to https://signup.live.com.
To use your own email address for your Microsoft account, type it into the web form; otherwise, provide a telephone number to verify that you are not a robot.
To create a new Hotmail or Outlook.com account, click Get A New Email Address and then complete the email address line, specifying whether you want a Hotmail or Outlook suffix.
Press Tab to verify that the name you entered is available.
Complete the rest of the form and then agree to the privacy statement by clicking I Accept.
After you have created your Microsoft account, you can connect it to your local or domain account and access cloud services.
Connecting Your Microsoft Account to Your Device
To connect your Microsoft account to your local or domain user account, use the following procedure.
Sign in with your local account.
Open the Settings app and click Accounts.
On the Your Info page, click Sign In With A Microsoft Account Instead.
On the Make It Yours page, enter the email address and then click Sign In.
On the Enter Password page, enter the password associated with your Microsoft account and click Sign In.
If prompted, enter your local account password to verify your local identity and click Next.
The device will now use your Microsoft account to log on.
If you want to add additional Microsoft accounts to Windows 10, you can use the Add A Microsoft Account option found on the Email & Accounts tab of the Accounts page in the Settings app.
Need More Review? Setting up Microsoft Accounts on Devices
For more information about setting up Microsoft accounts on devices, refer to the Microsoft website at https://account.microsoft.com/account/connect-devices.
Limiting the use of Microsoft Accounts
Within an enterprise, you may want to prevent users from associating their Microsoft accounts with a device and block users from accessing cloud resources using their Microsoft accounts.
You can configure Microsoft account restrictions using two GPOs:
Block All Consumer Microsoft Account User Authentication This setting can prevent users from using Microsoft accounts for authentication for applications or services. Any application or service that has already been authenticated will not be affected by this setting until the authentication cache expires. It is recommended that you enable this setting before any user signs in to a device to prevent cached tokens from being present. This GPO is located at Computer ConfigurationAdministrative Templates Windows ComponentsMicrosoft account.
Accounts: Block Microsoft Accounts This setting prevents users from adding a Microsoft account within the Settings app. There are two options: Users Can’t Add Microsoft Accounts and Users Can’t Add Or Log On With Microsoft accounts. This GPO is located at Computer ConfigurationWindows SettingsSecurity SettingsLocal PoliciesSecurity Options.
Understand Multifactor Authentication
Traditional computer authentication is based on users providing a name and password. This allows an authentication authority to validate the exchange and grant access. Although password-based authentication is acceptable in many circumstances, Windows 10 provides for a number of additional, more secure methods for users to authenticate with their devices, including multifactor authentication (also referred to as two-factor authentication).
Multifactor authentication is based on the principle that users who wish to authenticate must have two (or more) things with which to identify themselves. Specifically, they must have knowledge of something, they must be in possession of something, and they must be something. For example, a user might know a password, possess a security token (in the form of a digital certificate), and be able to prove who they are with biometrics, such as fingerprints.
Explore Biometrics
Biometrics, like a fingerprint, provides more secure and often, more convenient methods for both user and administrator to be identified and verified. Windows 10 includes native support for biometrics through the Windows Biometric Framework (WBF), and when used as part of a multifactor authentication plan, biometrics is increasingly replacing passwords in modern workplaces.
Biometric information is obtained from the individual and stored as a biometric sample which is then securely saved in a template and mapped to a specific user. To capture a person’s fingerprint, you can use a fingerprint reader (you “enroll” the user when configuring this). Also, you can use a person’s face, her retina, or even her voice. The Windows Biometric service can be extended to also include behavioral traits such as body gait and typing rhythm.
Windows includes several Group Policy settings related to biometrics, as shown in Figure 1-10, that you can use to allow or block the use of biometrics from your devices. You can find Group Policy Objects here: Computer ConfigurationAdministrative Templates Windows ComponentsBiometrics.
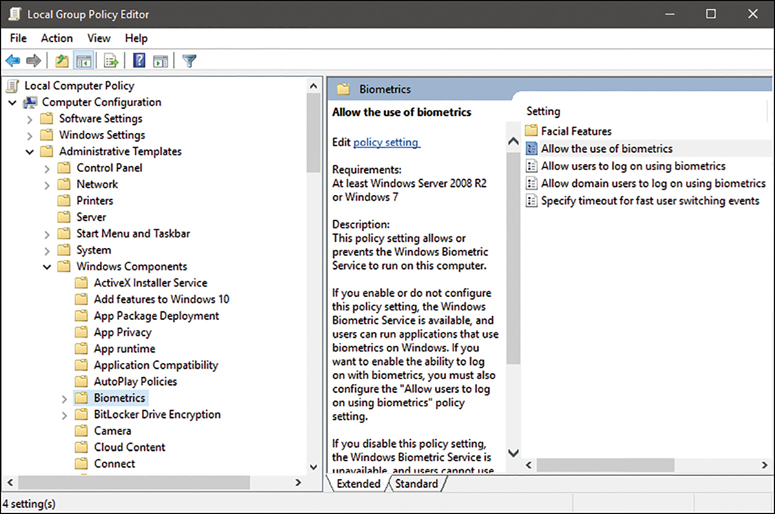
Configure Windows Hello and Windows Hello for Business
Windows Hello is a two-factor biometric authentication mechanism built into Windows 10, and it is unique to the device on which it is set up. Windows Hello allows users to unlock their devices by using facial recognition, fingerprint scanning, or a PIN.
Windows Hello for Business is the enterprise implementation of Windows Hello and allows users to authenticate to an Active Directory or Azure Active Directory account, and it enables them to access network resources. Administrators can configure Windows Hello for Business using Group Policy or mobile device management (MDM) policy and uses asymmetric (public/private key) or certificate-based authentication.
Windows Hello provides the following benefits.
Strong passwords can be difficult to remember, and users often reuse passwords on multiple sites which reduces security. Windows Hello allows them to authenticate using their biometric data.
Passwords are vulnerable to replay attacks, and server breaches can expose password-based credentials.
Passwords offer less security because users can inadvertently expose their passwords because of phishing attacks.
Windows Hello helps protect against credential theft. Because a malicious person must have both the device and the biometric information or PIN, it becomes more difficult to hack the authentication process.
Windows Hello can be used both in cloud-only and hybrid deployment scenarios.
Windows Hello logs you into your devices three times faster than a password.
To implement Windows Hello, your devices must be equipped with the appropriate hardware. For example, facial recognition requires that you use special cameras that see in infrared (IR) light. These can be external cameras or cameras incorporated into the device. The cameras can reliably tell the difference between a photograph or scan and a living person. For fingerprint recognition, your devices must be equipped with fingerprint readers, which can be external or integrated into laptops or USB keyboards.
If you have previously experienced poor reliability from legacy fingerprint readers, you should review the current generation of sensors, which offer significantly better reliability and are less error-prone.
After you have installed the necessary hardware devices, you can set up Windows Hello by openings Settings, clicking Accounts, and then, on the Sign-In Options page, under Windows Hello, reviewing the options for face or fingerprint. If you do not have Windows Hello- supported hardware, the Windows Hello section does not appear on the Sign-In Options page.
To configure Windows Hello, follow these steps:
Open the Settings App and select Accounts.
On the Accounts page, click Sign-in options.
Under the Windows Hello section, click Set Up under Face Recognition.
Click Get Started on the Windows Hello setup dialog page.
Enter your PIN or password to verify your identity.
Allow Windows Hello to capture your facial features, as shown in Figure 1-11.
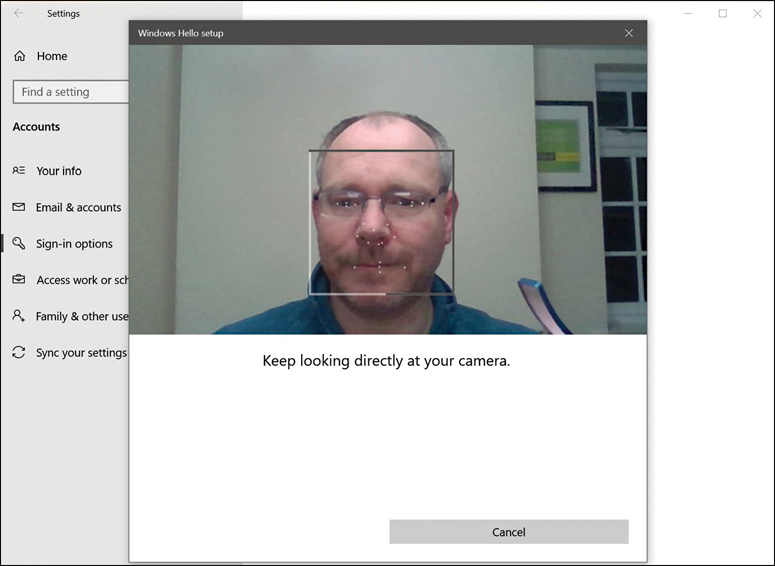
Figure 1-11 Configuring Windows Hello Once complete, you are presented with an All Set! message that you can close.
Users can use Windows Hello for a convenient and secure sign-in method that is tied to the device on which it is set up.
For Enterprises that want to enable Windows Hello, they can configure and manage Windows Hello for Business. Windows Hello for Business uses key-based or certificate-based authentication for users by using Group Policy or mobile device management (MDM) policy or a mixture of both methods.
Need More Review? Windows Hello Biometrics in the Enterprise
To review further details about using Windows Hello in the enterprise, refer to the Microsoft website at https://docs.microsoft.com/windows/access-protection/hello-for-business/hello-biometrics-in-enterprise.
Configure PIN
To avoid authentication with passwords, Microsoft provided an authentication method that uses a PIN. When you set up Windows Hello, you’re asked to create a PIN first. This PIN enables you to sign in using the PIN as an alternative to when you can’t use your preferred biometric because of an injury or because the sensor is unavailable or not working properly. The PIN provides the same level of protection as Windows Hello.
Windows Hello PIN provides secure authentication without sending a password to an authenticating authority, such as Azure AD or an AD DS domain controller. Windows Hello for Business provides enterprises compliance with the new FIDO 2.0 (Fast IDentity Online) framework for end-to-end multifactor authentication.
Within a domain environment, a user cannot use a PIN on its own (known as a Convenience PIN). You will see from the user interface shown in Figure 1-12, that the PIN settings are within the Windows Hello section of the Sign-In Options. A user must first configure Windows Hello and be already be signed in using a local account, a domain account, a Microsoft account, or an Azure AD account. The user is then able to set up PIN authentication that is associated with the credential for the account.
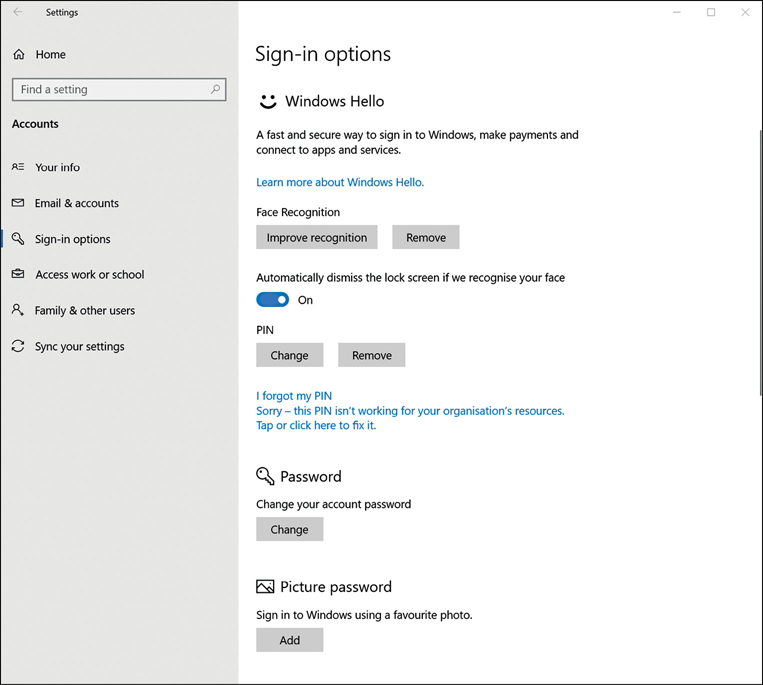
After a user has completed the registration process, Windows Hello for Business generates a new public-private key pair on the device known as a protector key. If installed in the device, the Trusted Platform Module (TPM) generates and stores this protector key; if the device does not have a TPM, Windows encrypts the protector key and stores it on the file system. Windows Hello for Business also generates an administrative key that is used to reset credentials if necessary.
Note Pairing of Credentials and Devices
Windows Hello for Business pairs a specific device and a user credential. Consequently, the PIN the user chooses is associated only with the signed-in account and that specific device.
The user now has a PIN gesture defined on the device and an associated protector key for that PIN gesture. The user can now securely sign in to his device using the PIN and then add support for a biometric gesture as an alternative for the PIN. The gesture can be facial recognition, iris scanning, or fingerprint recognition, depending on available hardware in the device. When a user adds a biometric gesture, it follows the same basic sequence as mentioned in the previous section. The user authenticates to the system by using the PIN and then registers the new biometric. Windows generates a unique key pair and stores it securely. The user can then sign in using the PIN or a biometric gesture.
Need More Review? Windows Hello for Business
To review further details about Windows Hello for Business, refer to the Microsoft website at https://docs.microsoft.com/windows/security/identity-protection/hello-for-business/hello-identity-verification.
You can use MDM policies or GPOs to configure settings for Windows Hello for Business in your organization. For example, you can configure a policy that enables or disables the use of biometrics on devices affected by the policy.
Note Enhancing the Security of a Pin
When we think of a PIN, we generally think of ATM cash machines and 4-digit PINs. For securing Windows 10 with Windows Hello for Business, you can significantly increase the level of security by imposing rules on PINs so that, for example, a PIN can require or block special characters, uppercase characters, lowercase characters, and digits. Something like t496A? could be a complex Windows Hello PIN. The maximum length that can be set is 127.
To configure Windows Hello for Business in your organization, you use the appropriate GPOs within the following location:
Computer ConfigurationPoliciesAdministrative TemplatesWindows Components Windows Hello for Business
To configure PIN complexity with Windows 10 (with and without Windows Hello for Business), you can use the eight PIN Complexity Group Policy settings, which allow you to control PIN creation and management.
These policy settings can be deployed to computers or users. If you deploy settings to both, then the user policy settings have precedence over computer policy settings and GPO conflict resolution is based on the last applied policy. The policy settings included are:
Require digits
Require lowercase letters
Maximum PIN length
Minimum PIN length
Expiration
History
Require special characters
Require uppercase letters
In Windows 10, version 1703 and later, the PIN complexity Group Policy settings are located at: Administrative TemplatesSystemPIN Complexity under both the Computer and User Configuration nodes.
Need More Review? Windows Hello for Business Group Policy Settings
To review more detailed configuration steps for Windows Hello for Business, refer to the Microsoft website at https://docs.microsoft.com/windows/security/identity-protection/hello-for-business/hello-cert-trust-policy-settings.
If an organization is not using Windows Hello for Business, they can still use the option to set a Convenience PIN. A Convenience PIN is very different to a Windows Hello for Business PIN because it is merely a wrapper for the user’s domain password. This means that the user’s password is cached and substituted by Windows when signing in with a Convenience PIN.
Since the Anniversary release (Windows 10, version 1607), the option to allow a Convenience PIN is disabled by default for domain-joined clients. To modify the option to sign in with the Convenience PIN you can use the Turn On Convenience PIN Sign-In GPO at Group Policy Computer ConfigurationAdministrative TemplatesSystemLogon.
Configure Picture Password
A picture password is another way to sign in to a computer. This feature does not use Windows Hello or Windows Hello for Business and therefore, it is not available to be used within a domain-based environment.
You sign in to a touch-enabled device by using a series of three movements consisting of lines, circles, and/or taps. You can pick any picture you want and provide a convenient method of signing in to touch-enabled, stand-alone devices. Picture password combinations are limitless because the pictures that can be used are limitless. Although picture passwords are considered more secure for stand-alone computers than typing a 4-digit PIN, a hacker may be able guess his way into a device by holding the screen up to a light to see where most of the gestures are (by following the smudges on the screen). This is especially true if the user touches the screen only to input the password and rarely uses touch for anything else.
To create a picture password follow these steps:
Open the Settings App and click Accounts.
Click Sign-in options.
Under Picture Password, click Add.
Input your current account password and click Choose Picture to browse to and select the picture to use.
Adjust the position of the picture and click Use This Picture.
Draw three gestures directly on your screen.
Remember that the size, position, and direction of the gestures are stored as part of the picture password.
You are prompted to repeat your gestures. If your repeated gestures match, click Finish.
There is only one GPO relating to this feature. To disable Picture Password using Local Group Policy, you can use the Turn Off Picture Password Sign-In GPO in the following location:
Computer ConfigurationAdministrative TemplatesSystemLogon.
Configure Dynamic Lock
Users with smartphones can take advantage of Dynamic Lock, which was introduced with the Creators Update for Windows 10. Dynamic Lock allows users to automatically lock their devices whenever they are not using them. (At the time of writing, the iPhone does not support this feature.)
The Dynamic Lock feature relies on a Bluetooth link between your PC and paired smartphone.
To configure Windows 10 Dynamic Lock, use the following steps:
Open the Settings App and click Accounts.
Click Sign-in options and scroll to Dynamic Lock.
Check the Allow Windows To Detect When You’re Away And Automatically Lock The Device option.
Click the Bluetooth & Other Devices link.
Add your smartphone using Bluetooth and pair it.
Return to the Dynamic Lock page and you should see your connected phone, as shown in Figure 1-13.
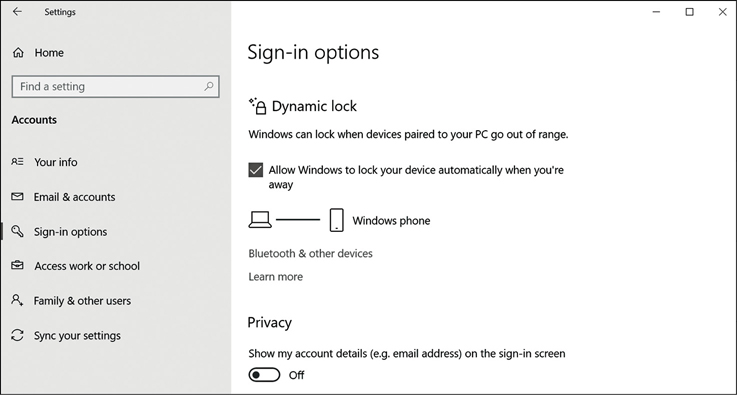
Figure 1-13 Configuring Dynamic Lock Your device will be automatically locked whenever Windows detects that your connected smartphone has moved away from your desk for 30 seconds.
You can configure dynamic lock functionality for your devices using the Configure Dynamic Lock Factors GPO. You can locate the policy setting at Computer ConfigurationAdministrative TemplatesWindows ComponentsWindows Hello for Business.
Customize the Windows desktop
After Windows 10 has been activated, you can customize the user interface and personalize Windows. Devices enrolled in Microsoft Intune or joined to Azure Active Directory will be activated automatically if a digital license has been assigned. The Windows 10 user interface may be familiar to users of Windows 7 because it has a Start menu, a desktop, and a taskbar.
It is important for you to understand how to customize the Windows 10 user interface, including Start and taskbar layout, desktop, and notification settings. This allows you to ensure that the operating system interface meets the needs of the users in your organization.
Customize Windows 10 Start
For users of earlier versions of Windows, the appearance of Start may be significantly different to what they have been used to. Start is dynamic, and its appearance depends on your device type. For example, a device with a small screen such as a tablet, Start appears full-screen, by default, which is easier to navigate when using a touch device.
If you are using a non-touch device, then, by default, Windows 10 displays Start as a menu that combines aspects that may be similar to the Start menu found in Windows 7 and Windows 8.1 (see Figure 1-14). This is more easily navigable by using a mouse than by using touch.
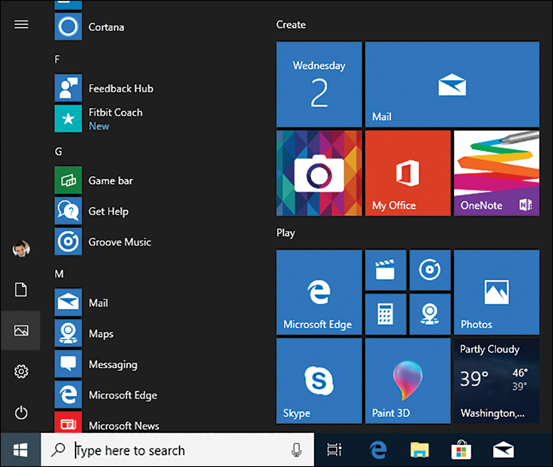
You can configure the Start menu behavior from the Settings app. Open the Settings App, click Personalization, and then click the Start tab. You can then select the option to Use Start full screen, as shown in Figure 1-15.
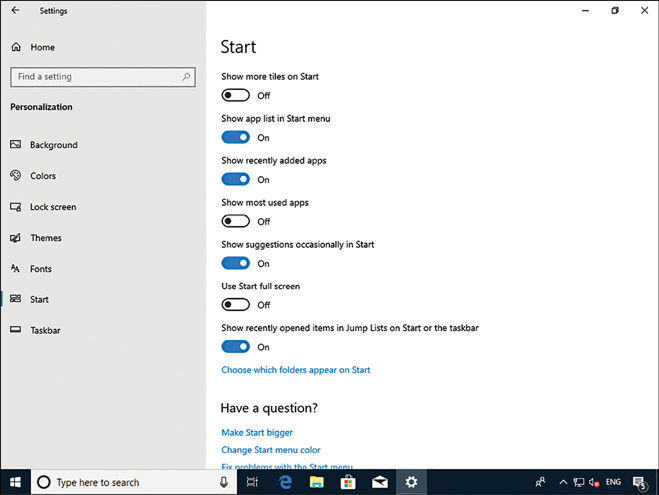
The Start customizations shown in Figure 1-15 are:
Show More Tiles On Start This setting enables you to display more tiles when Start is configured for partial-screen mode.
Show App List In Start Menu Enables an alphabetical list of all apps on the left side of the Start screen.
Show Recently Added Apps Any recently installed apps are marked as new in Start.
Show Most Used Apps Windows 10 tracks your app usage and lists your most frequently used apps in a Most Used Apps list in Start.
Show Suggestions Occasionally In Start This setting enables or disables app suggestions in Start.
Use Start Full Screen Enables Start to display full screen. This is more useful on a tablet device than on a device with a mouse.
Show Recently Opened Items In Jump Lists On Start Or The Taskbar This setting enables Windows 10 to remember recently opened files and list those in the context menu of apps appearing in Start or on the taskbar.
Choose Which Folders Appear On Start This setting enables you to set shortcuts for the following folders on Start: File Explorer, Settings, Documents, Downloads, Music, Pictures, Videos, Network, and Personal Folders.
Convertible Devices
Convertible devices, including the Microsoft Surface Pro, can switch in and out of Tablet Mode with the removal and reattachment of the keyboard, or by reorienting the device. When a device switches like this, you can choose whether Windows should switch to full-screen Start (Tablet Mode) automatically, as shown in Figure 1-16.
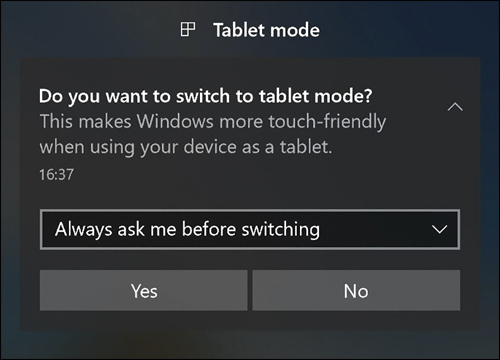
You can configure the default behavior through the Settings app. Click System and then open the Tablet Mode tab. As shown in Figure 1-17, you can then configure the following options.
When I Sign In:
Use Tablet Mode
Use Desktop Mode
Use The Appropriate Mode For My Hardware
When This Device Automatically Switches Tablet Mode On Or Off:
Don’t Ask Me And Don’t Switch
Always Ask Me Before Switching
Don’t Ask Me And Always Switch
Hide App Icons On The Taskbar In Tablet Mode
Automatically Hide The Taskbar In Tablet Mode
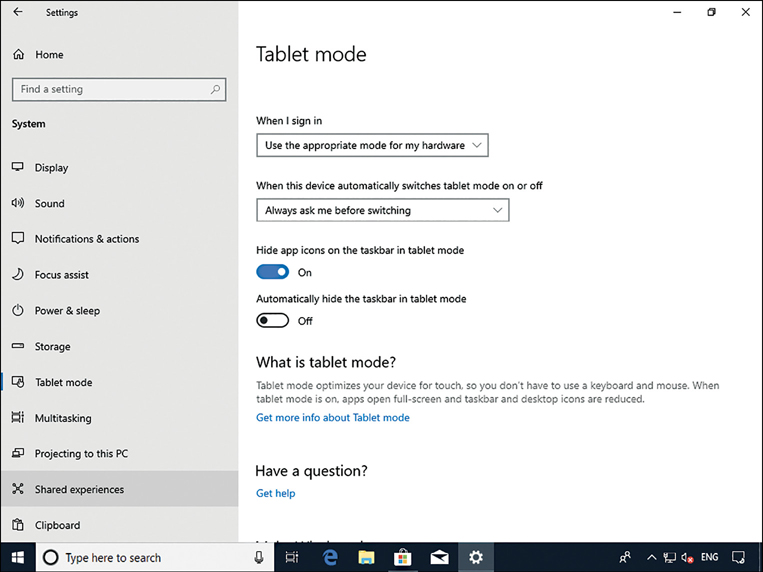
Note Tablet Mode
Tablet Mode also changes applications so that they run full screen.
Configuring Start Tiles
In addition to enabling or disabling Start Full-Screen behavior, you can also customize the application tiles that appear on Start and how those tiles look and behave. From Start, right-click the appropriate app, as shown in Figure 1-18. Click Pin To Start.
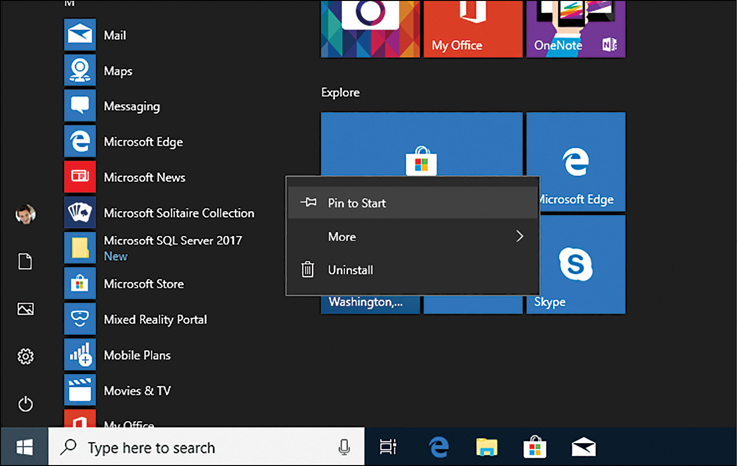
When a tile is pinned to Start, you can configure it. Right-click the tile and, from the context menu, you can choose:
Unpin From Start
Resize
Choose from Small, Medium, Large, and Wide, depending on the app.
More
If the app is a Microsoft Store app, choose from Turn Live Tile Off, Pin To Taskbar, App Settings, Rate And Review, and Share.
If the app is a desktop app, choose from Pin To Taskbar, Run As Administrator, and Open File Location.
Uninstall
Note Uninstalling Desktop Apps From Start
If the app you select to uninstall is a desktop app, Programs And Features opens in Control Panel allowing you to manually remove the desktop app.
If your device is touch-enabled, the procedure is slightly different from using a mouse to configure tiles. Rather than right-clicking a tile from Start, you must touch and hold a tile. Then you can unpin the tile by using the Unpin icon. Use the ellipse button (three dots) to access the context menu, as shown in Figure 1-19.
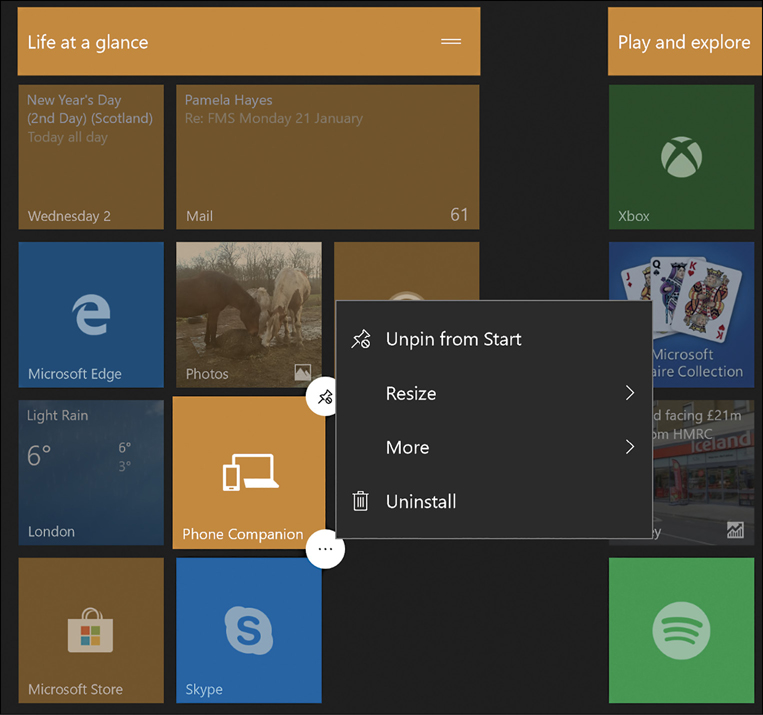
Grouping Start Tiles
After you have added the required tiles to Start, you might want to group the tiles. You can perform the following actions on groups.
To create a new group of tiles, simply drag a tile to an area of unused space on Start.
To name a group, hover your mouse or tap the screen immediately above the group of tiles and then type the name for your group in the text box that appears.
To move tiles between groups, drag the required tile to the new group.
Export Start Layout
Although you can manually drag and resize tiles on Start for each computer in your organization, this is not practical at scale. Within a corporate environment, you can control the Start layout by creating a customized Start screen on a test computer and then export the layout to other devices.
Not all editions of Windows 10 support customizing Windows 10 Start and taskbar with Group Policy. These are shown in Table 1-10 as follows:
Table 1-10 Windows 10 Start and taskbar support
Windows Version |
Supported Edition |
|---|---|
Windows 10, version 1607 |
Windows 10 Enterprise and Windows 10 Education |
Windows 10, version 1703 |
Windows 10 Pro, Windows 10 Enterprise, and Windows 10 Education |
You can choose to export a layout that applies a full or partial Start layout.
Full Start layout Users cannot pin, unpin, or uninstall apps from Start. Users cannot pin any apps to Start.
Partial Start layout The contents of the specified tile groups cannot be changed. Users can move groups and can create and customize their own groups.
The Start layout is exported as a .xml file, which can then be deployed to devices using:
Group Policy
Windows Configuration Designer provisioning package
Mobile device management (MDM)
On your test computer, you can customize the Start layout prior to exporting the layout. Customization can include:
Pin apps to Start.
Unpin the apps that you don’t want to display.
Drag the tiles on Start to reorder or group apps.
Resize tiles.
Create your own app groups.
Name groups.
Once you have configured the desired Start layout, you use the Export-StartLayout Windows PowerShell cmdlet to export the Start layout to an .xml file using the following procedure.
Open Windows PowerShell.
Run the
Export-StartLayout –path <path><file name>.xmlcmdlet.You can optionally edit the .xml file to add a taskbar configuration.
Copy the exported file to a shared folder.
Deploy the .xml file using any of the deployment methods.
If you use Group Policy, you must specify the .xml file in the GPO: User Configuration PoliciesAdministrative TemplatesStart Menu and TaskbarStart Layout. To do this, complete the following procedure.
Open Group Policy Management Console (GPMC) to configure a domain-based GPO.
Navigate to the appropriate AD DS container, such as your domain.
Open an existing GPO for editing or create a new GPO, link it to your chosen container, and open it for editing.
Navigate to the User ConfigurationPoliciesAdministrative TemplatesStart Menu And Taskbar folder and open the Start Layout GPO.
Enable the GPO and, in the Start Layout File text box, type the full UNC path name to your XML file, for example, \LON-SVR1MarketingMarketing.XML as shown in Figure 1-20.
Click OK and close Group Policy Management.
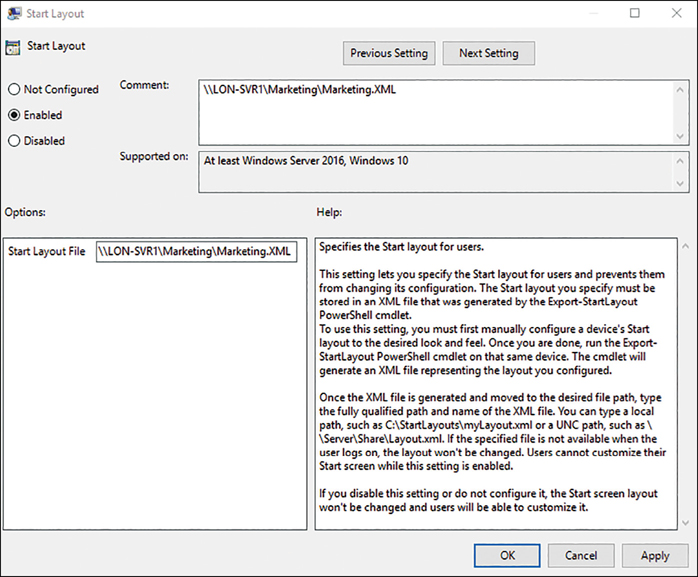
For the policy to be effective, users must sign out and sign back in. Alternatively, you can issue a Gpupdate.exe /force command from an elevated command prompt to force GPO propagation.
To configure a partial Start screen layout, you should export the Start layout and then open the layout .xml file. You should then add LayoutCustomizationRestrictionType=“Only SpecifiedGroups” to the <DefaultLayoutOverride> element as follows:
<DefaultLayoutOverride LayoutCustomizationRestrictionType="OnlySpecifiedGroups">
Then save the file and deploy the settings.
If you like, you can update an existing Start layout by replacing the .xml file that is specified in the Start Layout policy settings with an .xml file that has a newer timestamp.
Need More Review? Manage Windows 10 Start and Taskbar Layout
For more information about customizing Start and taskbar layout, visit the Microsoft website at https://docs.microsoft.com/en-us/windows/configuration/customize-and-export-start-layout.
In addition to the Start layout, you can control other aspects of Start with Group Policy. Table 1-11 shows the elements that you can control with GPOs and the respective values to use within GPOs. Unless otherwise noted, the path for these GPO settings is User ConfigurationPoliciesAdministrative TemplatesStart Menu And Taskbar.
Table 1-11 Using Group Policy to configure Start
Start Element |
Policy |
|---|---|
User tile |
Remove Logoff On The Start Menu |
Most Used |
Remove Frequent Programs List From The Start Menu |
Suggestions |
Computer ConfigurationPoliciesAdministrative TemplatesWindows Components Cloud ContentTurn Off Microsoft Consumer Experiences |
Power |
Remove And Prevent Access To The Shut Down, Restart, Sleep, And Hibernate Commands |
All Apps |
Remove All Programs List From The Start Menu |
Jump lists |
Do Not Keep History Of Recently Opened Documents |
Start size |
Force Start To Be Either Full Screen Size Or Menu Size |
All Settings |
Prevent Changes To Taskbar And Start Menu Settings |
Note Manage Windows 10 Start and Taskbar Layout
If you have a workgroup environment, you may want to create a default Windows 10 Start and taskbar layout xml file. For the settings to be applied to all users on a device, copy the xml file to C:UsersDefaultAppDataLocalMicrosoftWindowsShelllocation.
Customize the Desktop
In addition to customizing Start to your requirements, you can configure the desktop and related settings. To configure the desktop, click Start > Settings > Personalization.
From the Personalization Settings app, you can configure the following settings.
Background You can select and configure a desktop background color or picture image, or you can select a slideshow of images.
Colors On the Color tab, you can choose a color scheme and optionally configure the following options.
Enable transparency effects.
Show accent color on the following surfaces: Start, taskbar, Action Center, title bars, and window borders.
Choose the default app mode: Light or Dark.
Access the High Contrast Settings.
Lock Screen From the Lock Screen tab, as shown in Figure 1-21, you can select and configure a background image to display when your Windows 10 device is locked. A feature called Windows Spotlight allows you to display different background images on the lock screen each day and will occasionally suggest Windows 10 features that the user hasn’t tried yet, such as Snap Assist. In addition, you can
Choose a lock screen background image.
Choose An App To Show Detailed Status (for example, Calendar).
Choose Apps To Show Quick Status (for example, Facebook, Mail, Calendar, or Alarms & Clock).
Configure Cortana Lock Screen Settings.
Show Lock Screen Background Picture On The Sign-In Screen.
Configure Screen Timeout Settings and Screen Saver Settings.
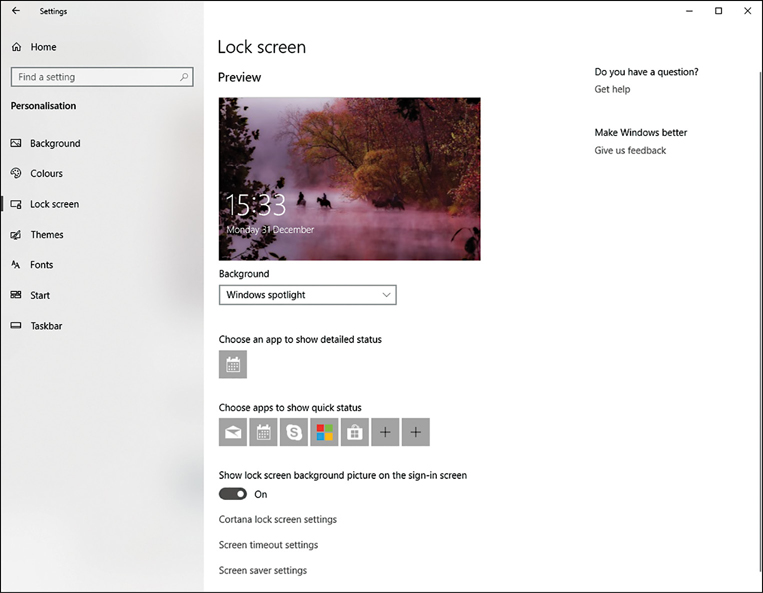
Themes This setting enables you to configure and apply theme settings. Themes enable you to define combinations of background, color, sound, and mouse cursor settings. You can also configure desktop icon settings, such as whether to display the Recycle Bin on the desktop. You can download from the dozens of additional themes available free from the Microsoft Store, as shown in Figure 1-22.
Start You can also configure Start settings, as previously discussed.
Taskbar From this tab, among other settings, you can.
Lock the taskbar.
Automatically hide the taskbar when in Desktop or Tablet Mode.
Use small taskbar buttons.
Configure the way running tasks and apps combine on the taskbar.
Configure whether the Command Prompt will appear instead of Windows PowerShell on Start; you can also configure whether the Command Prompt appears in the menu when the Windows key + X is pressed.
Change the taskbar location.
Customize the notification area.
Turn system icons on or off.
Customize the taskbar appearance when using multiple displays.
Customize the People settings.
Multiple desktops
Windows 10 provides support for multiple desktops. This provides a simplistic multitasking view. Rather than running apps in multiple windows on the same desktop, you can create additional desktops for groups of apps or individual apps. Multiple desktops can be useful for keeping unrelated windows or projects organized; multiple desktops are also useful for quickly switching to a clean desktop before a meeting.
To add a new desktop, click the Task View button on the taskbar and then click New Desktop in the upper-left of the display. You can also add a new desktop by pressing Windows key + Tab on your keyboard, or you can swipe with one finger from the left of your screen if you have touch.
To switch between desktops, click the Task View button, press Windows key + Tab, or swipe with one finger from the left of your touchscreen. You can then select the appropriate desktop as shown in Figure 1-23.
To remove a desktop, click the Task View button on the taskbar and then hover over the desktop that you want to delete and then click the X on the desktop.
Configure Action Center and taskbar
In Windows 10, Microsoft introduces an improved Action Center, as shown in Figure 1-24. This is accessible by swiping from the right or by clicking the Notifications icon in the system tray.
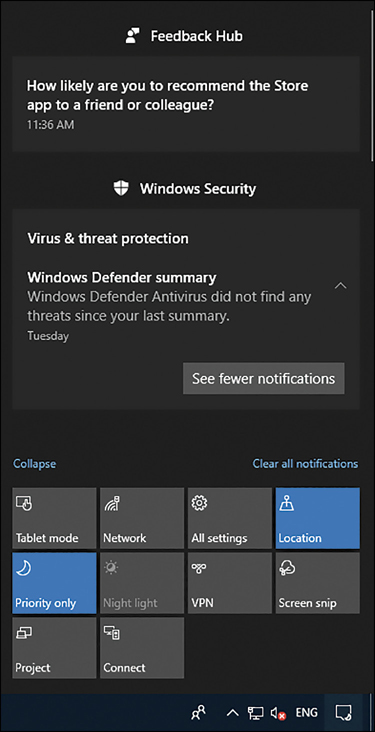
Action Center includes the following elements:
Quick Action tiles As shown at the bottom of Figure 1-24, the displayed tiles are configurable and dependent on your device.
Notifications area You can configure how Windows notifies you of events.
Configure Quick Action Tiles
The Quick Action tiles are shortcuts to commonly used features of the Windows 10 operating system. The expanded view allows a larger number of tiles to become visible as shown in Figure 1-24. The specific tiles that appear in the expanded view will depend on your device type and orientation. For example, if your computer is not a tablet and is not capable of converting into a tablet, the Tablet Mode tile is not available. By default, in the expanded view, the following tiles are available.
Tablet Mode Enables you to switch between Tablet and Desktop Modes.
Rotation Lock Enables or disables the rotation lock. Normally, the display orients itself based on the orientation of your Windows 10 device, switching between landscape and portrait modes. Use this option to lock the orientation irrespective of physical orientation.
Airplane Mode Disables all internal radios in the device, including Wi-Fi and Bluetooth for use when you travel on an aircraft. This is also a convenient when you want to conserve battery power.
All Settings Provides a convenient shortcut to the Settings app.
Connect Enables you to find and connect to media servers. This includes Xbox and other devices running Windows that are sharing their media files. It can also include devices, such as TV set-top boxes.
Project Enables you to link your device to an external monitor or wireless display.
Battery Saver Only available when your device is running on battery alone; helps reduce power consumption. You can configure Power Options and Battery Saver in the Settings app.
VPN Switches to the VPN tab in the Network & Internet Settings app. From there, you can set up, configure, or connect to a VPN.
Bluetooth Enable or disable the Bluetooth radio.
Brightness Enables you to control display brightness. Click this tile to step through brightness levels in 25 percent increments.
Wi-Fi Enables or disables the Wi-Fi connection.
Focus Assist (Called Quiet Hours in earlier versions of Windows 10) allows you to avoid distracting notifications when you need to stay focused by reducing the notifications you receive.
Night Light Toggles your display to remove white light. You can configure Night Light in the Settings app.
Location Enables or disables location services. Many services use location to customize services, such as mapping apps, for your device.
You can modify which quick action tiles are displayed by clicking the Add Or Remove Quick Actions and rearrange the location of the tiles by dragging and dropping them within the Settings app, as shown in Figure 1-25.
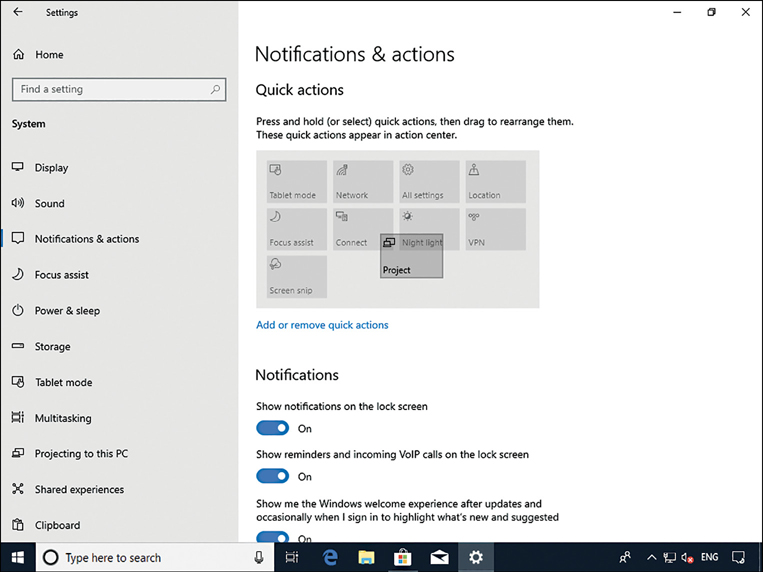
Configure Notifications
When Windows 10 wants to inform you about something, it raises a notification. You can see and act on the notifications in a list shown in Action Center. To respond to a notification, click it. You can remove notifications by clicking Clear All at the top of the page.
Windows notifies you about a variety of operating system events and situations, including the need to obtain updates or perform an antivirus scan, and Windows also prompts you about which actions you want to take when a new device, such as a USB memory stick, has been detected.
As shown in Figure 1-26, you can configure which notifications you receive by opening Settings. Click System > Notifications & Actions. Under Notifications, you can configure the following options.
Show Notifications On The Lock Screen.
Show Reminders And Incoming VoIP Calls On The Lock Screen.
Show Me The Windows Welcome Experience After Updates And Occasionally When I Sign In To Highlight What’s New And Suggested.
Get Tips, Tricks And Suggestions As You Use Windows.
Get Notifications From Apps And Other Senders.
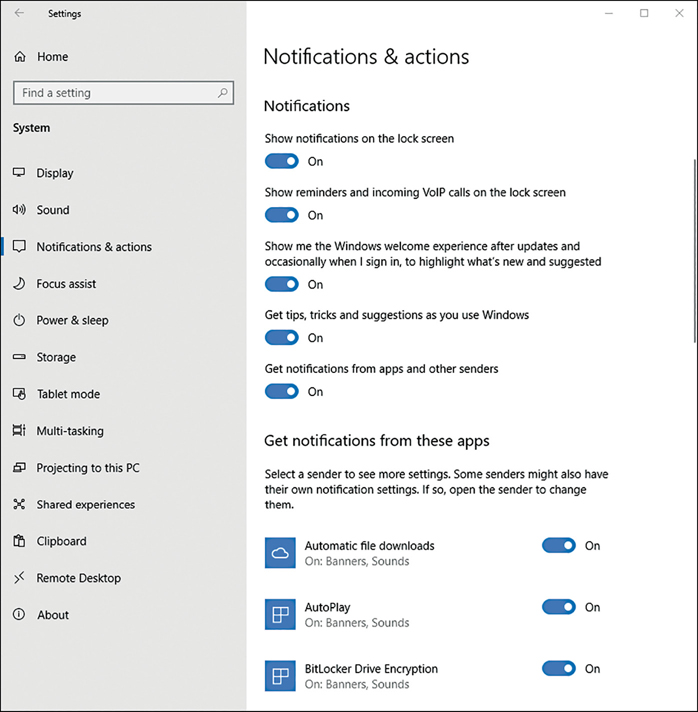
You can also configure notifications from individual apps. As shown in Figure 1-26, under the Get Notifications From These Apps heading, you can enable or disable notifications for each listed app. If you select an app from the list, such as for Microsoft Edge, as shown in Figure 1-27, you can fine tune the notifications for the application, including turning them on or off:
Notifications
Show Notification Banners
Keep Notifications Private On The Lock Screen
Show Notifications In Action Center
Play A Sound When A Notification Arrives
Number Of Notifications Visible In Action Center
Priority Of Notifications In Action Center
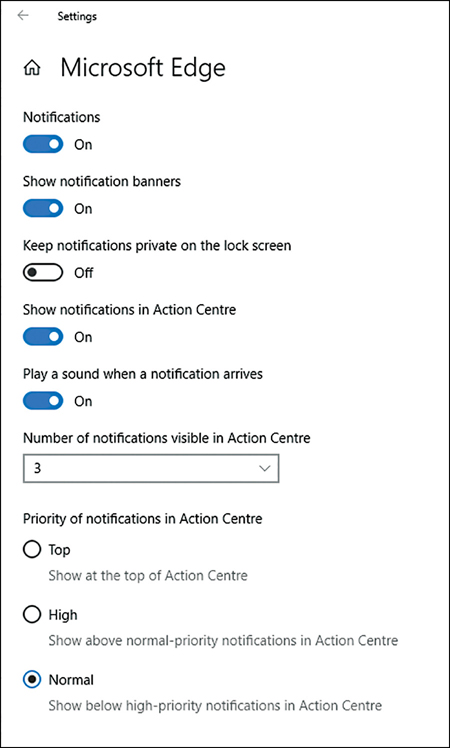
![]() Exam Tip
Exam Tip
You can remove the Notification & Action Center from the notification area on the taskbar using Group Policy. Notifications will pop up, but users won’t be able to review any notifications they miss. Use the User ConfigurationPoliciesAdministrative TemplatesStart Menu
And Taskbar node and enable the Remove Notifications And Action Center GPO.
Configure the Taskbar
You have seen how to configure the taskbar using the Settings app. The same functionality is available if you right-click the taskbar. Administrators can also pin additional apps to the taskbar and remove default pinned apps from the taskbar.
This is achieved by adding a <TaskbarLayout> section to a layout modification XML file used to configure the Start screen.
You can specify which apps are added the taskbar using the Application User Model ID (AUMID) or Desktop Application Link Path (the local path to the application). The easiest method to obtain the AUMID or Desktop Application Link Path is to extract the information from the Export-StartLayout cmdlet we saw earlier by following these steps:
Pin the required application to the Start menu on a reference or testing PC.
Open Windows PowerShell and run the Export-StartLayout cmdlet.
Open the generated XML file.
Identify the entry corresponding to the app you pinned.
Look for a property labeled AppUserModelID or DesktopApplicationLinkPath.
Once you have obtained the app information, you can configure the taskbar using these steps:
Create the XML file and include the <CustomTaskbarLayoutCollection> section.
Use the AUMID or Desktop Application Link Path to identify the apps to pin to the taskbar.
Add xmlns:taskbar=“http://schemas.microsoft.com/Start/2014/TaskbarLayout” to the first line of the file, before the closing >.
Use <taskbar:UWA> and AUMID to pin Universal Windows Platform apps.
Use <taskbar:DesktopApp> and the Desktop Application Link Path to pin desktop applications.
The layout modification XML file can be applied to devices using Group Policy or a provisioning package created in Windows Configuration Designer.
Need More Review? Configure Windows 10 Taskbar
This Microsoft resource contains sample taskbar configuration XML files which can help you configure the taskbar and discusses how to remove default apps. Visit https://docs.microsoft.com/windows/configuration/configure-windows-10-taskbar#sample-taskbar-configuration-added-to-start-layout-xml-file.
Configure the Notification Area
As shown in Figure 1-28, you can also configure taskbar options from the Personalization area of the Settings app. Open the Personalization area and then click the Taskbar tab. There are two headings under the Notification Area with options for each:
Select Which Icons Appear On The Taskbar
Options include:
Always Show All Icons In The Notification Area
Power
Network
Volume
Windows Security notification icon
Microsoft OneDrive
Location notification
Turn System Icons On Or Off
Options include:
Clock
Volume
Network
Power
Input Indicator
Location
Action Center
Touch Keyboard
Windows Ink Workspace
Touchpad

Configure Microsoft Edge
Microsoft Edge, shown in Figure 1-29, is a web browser that provides a consistent interface across device types, such as Windows 10-based tablets, laptops, and smartphones. The interface is simple and touch-centric, making it the ideal browser for devices running Windows 10. Microsoft Edge is also available on Android and iOS devices.
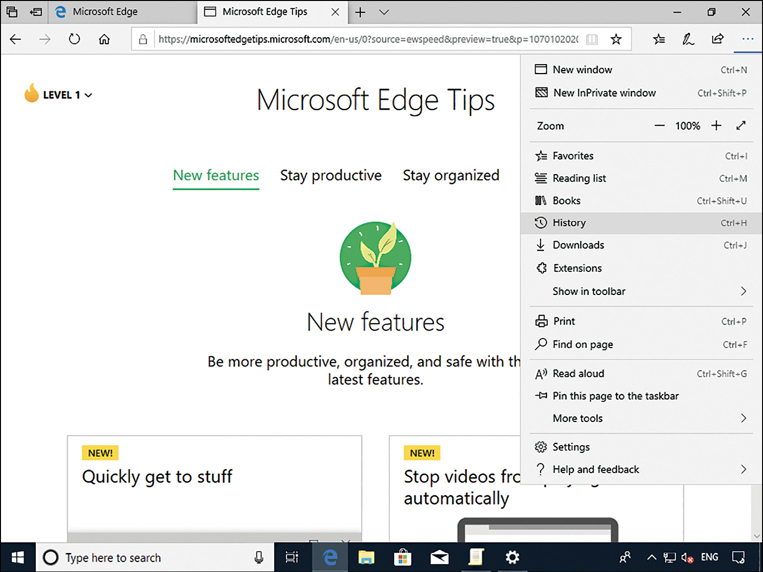
For readers not familiar with Microsoft Edge, it is the default browser for all Windows 10 devices. Windows 10 ships with both Microsoft Edge for modern websites and Internet Explorer 11 for compatibility with enterprise web apps that use older web technologies like ActiveX.
Because Microsoft Edge supports only the latest web standards, it offers users a fast and safe browsing experience. Microsoft Edge is like Windows 10, in that it is regularly updated. Because it was first introduced with Windows 10, many new features and functionality have been added, including the ability to manage tabs, read e-books, write on webpages, and more.
Microsoft Edge includes a number of features not available in Internet Explorer 11. These are:
Reading mode, which enables you to view webpages in a simplified layout.
Kiosk mode, which allows only Microsoft Edge to display a specific site in full-screen mode as used in digital/interactive signage or for public browsing.
The Hub, a feature that consolidates several items, including:
Favorites
Reading List
Books
Extensions
History
Downloads
Web Notes, which enable you to use tools to make notes, draw, write, and highlight webpages.
It is important to know how to configure Microsoft Edge, including how to migrate web Favorites to this new browser, to support your organization’s users. Microsoft Edge has streamlined settings that you can easily configure from the More Actions link in the browser, as shown in Figure 1-30.
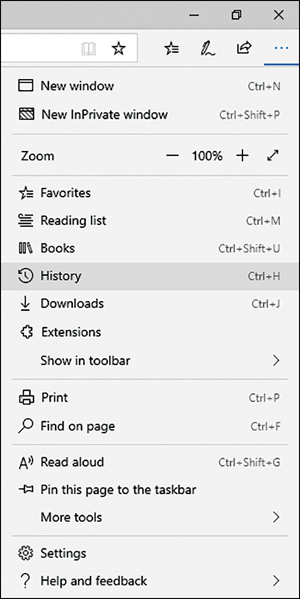
From this window, you can access the following options:
New Window Enables you to open a new browser window.
New InPrivate Window Provides the same privacy options enabled by InPrivate browsing in Internet Explorer.
Zoom Enables you to zoom in or out on a webpage.
Favorites Opens your webpage favorites.
Reading List Opens your saved reading list items.
History Opens your webpage history.
Extensions Opens your browser add-ins and offers a list of suggested extensions.
Downloads Opens your download history.
Print Enables you to print the webpage.
Find On Page Searches for content on the current webpage.
Read Aloud Narrates the content on the current webpage.
Pin This Page To The Taskbar Enables you to pin frequently accessed webpages directly to the Taskbar.
More Tools Provides additional tools:
Add Notes Uses OneNote to capture annotations, inking, and notes on a webpage
Share This page Allows you to share the webpage to your contacts or create a link to the page
Cast Media To Device Enables you to send content, such as a video, to wireless media devices
Open With Internet Explorer Opens the current webpage in Internet Explorer 11
Pin This Page To Start Enables you to pin frequently accessed webpages directly to your Start page
Developer Tools Opens a new developer console
![]() Exam Tip
Exam Tip
Microsoft Edge does not support ActiveX controls, Browser Helper Objects, VBScript, or other earlier technology. If your users access websites that rely on these features, you can configure Microsoft Edge to switch to Internet Explorer 11 automatically when these sites are accessed, enabling you to use Microsoft Edge as your default browser. To do this, enable and configure Enterprise Mode.
From the Settings Cog at the bottom of the window, you can access four submenus: General, Privacy and Security, Passwords and Autofill, and Advanced:
General The general settings include:
Choose A Theme Enables you to choose between light and dark themes. The dark theme might display better in low-light situations.
Open Microsoft Edge With Enables you to specify what you see when you open Microsoft Edge, such as a specific webpage or multiple tabbed webpages.
Open New Tabs With Enables you to set how new tabs are displayed. You can configure it to match the Open With setting, or you can define another value.
Transfer Favorites And Other Info You can import your favorites and other information from another web browser, such as Internet Explorer.
Show The Favorites Bar You can enable a list of the sites on your Favorites bar.
Show The Home Button You can show or hide the Home button.
Set your home page You can configure the home page to be displayed when Microsoft Edge loads.
Show Sites I Frequently Visit In {{#}}8220;Top Sites{{#}}8221; You can configure Microsoft Edge to prioritize your most frequently visited sites.
Show Definitions Inline For You can turn on or off the display of dictionary definitions for words in Reading View, Books, and PDFs.
Downloads You can configure where you want Microsoft Edge to save downloads and if the user should be prompted each time.
Account You can view the Microsoft account that Microsoft Edge will use for sync.
Sync Your Favorites, Reading List, Top Sites And Other Settings Enables you to sync your Microsoft Edge settings to your other devices to provide a consistent browsing experience.
About This App Displays the current Microsoft Edge and Microsoft EdgeHTML versions.
Privacy And Security Includes several options:
Browsing Data
Clear Browsing Data
Cookies
Media Licenses
Privacy
Send Do Not Track Requests
Search And Site Suggestions
Show Search History
Use Page Prediction
Security
Block Pop-Ups
Windows Defender SmartScreen
Passwords And Autofill Includes several options:
Passwords
Save Passwords
Manage Passwords
Autofill
Save Form Data
Manage Forms
Save Cards
Manage Cards
Advanced Settings Includes several options:
Site Settings
Adobe Flash: Use Adobe Flash Player
Media Autoplay
Website Permissions: Manage Permissions
Proxy Set-up
Open Proxy Settings
Open Sites With Apps
Choose Which Sites Open In Apps
Cortana
Allow Cortana To Assist Me In Microsoft Edge
Address Bar Search
Change Search Provider
Customize Microsoft Edge
One of the benefits of the integration between Windows 10 and Microsoft Edge is the extensive ability to customize Microsoft Edge for your organization. These settings cover every aspect of the modern browser including configuring default tabs, security settings, allowed extensions and browser experience preferences, and more.
A list of the configuration options relating to Microsoft Edge, together with a link to the Group Policy and Microsoft Intune reference webpage, can be found in Table 1-12.
Table 1-12 Microsoft Edge configuration options
Configuration Area |
Description & Url |
|---|---|
Address bar |
Configure Microsoft Edge to show search suggestions in the address bar. https://docs.microsoft.com/microsoft-edge/deploy/group-policies/address-bar-settings-gp |
Adobe Flash |
Configure Microsoft Edge to load Adobe Flash content automatically. https://docs.microsoft.com/microsoft-edge/deploy/group-policies/adobe-settings-gp |
Books Library |
Set up and use the books library, including creating a shared books folder for students and teachers. https://docs.microsoft.com/microsoft-edge/deploy/group-policies/books-library-management-gp |
Browser experience |
Customize browser settings, such as printing and saving browsing history. https://docs.microsoft.com/microsoft-edge/deploy/group-policies/browser-settings-management-gp |
Developer tools |
Configure Microsoft Edge for development and testing. https://docs.microsoft.com/microsoft-edge/deploy/group-policies/developer-settings-gp |
Extensions |
Configure Microsoft Edge to either prevent or allow users to install and run unverified extensions. https://docs.microsoft.com/microsoft-edge/deploy/group-policies/extensions-management-gp |
Favorites |
Provision a standard favorites list as well as keep the favorites lists in sync between IE11 and Microsoft Edge. https://docs.microsoft.com/microsoft-edge/deploy/group-policies/favorites-management-gp |
Home button |
Customize the home button or hide it. https://docs.microsoft.com/microsoft-edge/deploy/group-policies/home-button-gp |
Interoperability and enterprise guidance |
Use Microsoft Edge and Internet Explorer together. |
Deploy Microsoft Edge kiosk mode |
Configure Microsoft Edge kiosk mode with assigned access. https://docs.microsoft.com/microsoft-edge/deploy/microsoft-edge-kiosk-mode-deploy |
New Tab page |
Configure the New Tab page in Microsoft Edge. https://docs.microsoft.com/microsoft-edge/deploy/group-policies/new-tab-page-settings-gp |
Prelaunch Microsoft Edge and preload tabs in the background |
Pre-launch Microsoft Edge to minimize the amount of time required to start up Microsoft Edge. https://docs.microsoft.com/microsoft-edge/deploy/group-policies/prelaunch-preload-gp |
Search engine customization |
Set the default search engine and configure additional ones. https://docs.microsoft.com/microsoft-edge/deploy/group-policies/search-engine-customization-gp |
Security and privacy |
Keep your environment and users safe from attacks. https://docs.microsoft.com/microsoft-edge/deploy/group-policies/security-privacy-management-gp |
Start page |
Configure the Start pages in Microsoft Edge. https://docs.microsoft.com/microsoft-edge/deploy/group-policies/start-pages-gp |
Sync browser settings |
Prevent the “browser” group and users from syncing. https://docs.microsoft.com/microsoft-edge/deploy/group-policies/sync-browser-settings-gp |
Telemetry and data collection |
Configure Microsoft Edge to collect certain data. https://docs.microsoft.com/microsoft-edge/deploy/group-policies/telemetry-management-gp |
If your organization uses Group Policy, you can locate the majority of the Microsoft Edge Group Policy settings in the following location:
Computer ConfigurationAdministrative TemplatesWindows ComponentsMicrosoft Edge
Microsoft Edge kiosk mode
If you are running Windows 10, version 1809, (Professional, Enterprise, and Education editions only) you can use Microsoft Edge in a kiosk environment using assigned access. The assigned access feature allows you to lock down a Windows 10 device to only run a single-app or multi-app, which can then be used in a public space, such as a kiosk.
Microsoft Edge in kiosk mode allows you to operate a digital signage for presentation in a public area or to deploy devices for members of the public to use for web browsing in InPrivate mode. You can configure the behavior of Microsoft Edge when it’s running in kiosk mode by configuring the appropriate policy as shown in Table 1-13.
Table 1-13 Microsoft Edge kiosk mode policy
Management Tool |
POLICY |
|---|---|
Group Policy |
Configure Kiosk Mode |
Microsoft Intune |
ConfigureKioskMode |
Microsoft Edge in kiosk mode supports four configuration types as shown in Table 1-14. The Group Policy settings are shown in Figure 1-31.
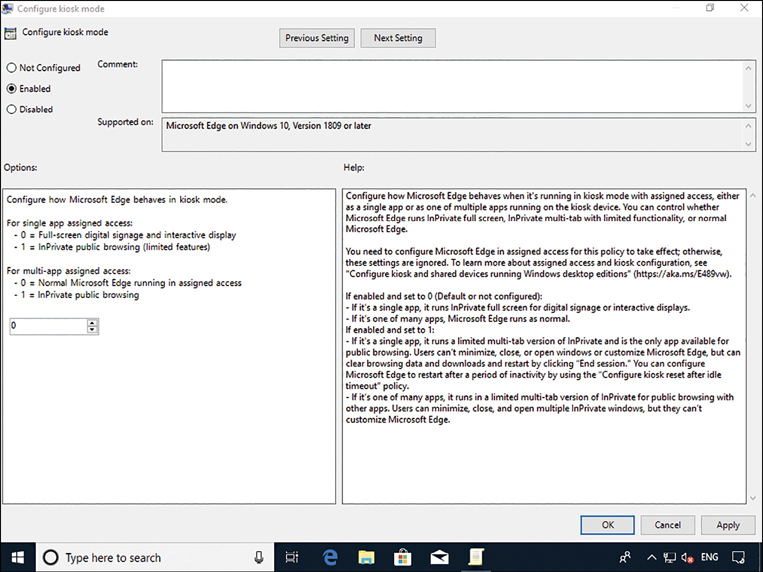
Microsoft Edge kiosk mode can be set up in various configurations depending on your requirements as listed in Table 1-14.
Table 1-14 Microsoft Edge kiosk mode configuration types
Configuration Type |
Description |
|---|---|
Single-app - Digital/ interactive signage |
|
Single-app - Public browsing |
|
Multi-app - Normal browsing |
|
Multi-app - Public browsing |
|
When you use Microsoft Edge in kiosk mode, the default experience includes:
Safer browsing Microsoft Edge in kiosk mode for public browsing runs Microsoft Edge InPrivate mode. This protects user data and deletes the browsing history, temporary Internet files, and cookies once the session has ended or is reset.
Automatic browser session reset Microsoft Edge kiosk mode has a built-in timer, which resets the browser session to the default URL after five minutes of idle time.
Default URLs You must configure the URL to load when the kiosk session launches. The URL sets the Home button, Start page, and New Tab page.
Assigned access required Configuring kiosk mode policy settings for Microsoft Edge are not applied unless Microsoft Edge is run using assigned access.
Configure Kiosk Mode
To set up a single-app device using Microsoft Edge kiosk mode follow these steps:
On the kiosk device, click Start, search for kiosk, and then select Set Up A Kiosk (Assigned Access).
On the Set Up A Kiosk page, click Get started.
Type a name to create a new kiosk local account and click Next.
On the Choose A Kiosk App page, select Microsoft Edge and then click Next.
Select how Microsoft Edge displays when running in kiosk mode:
Digital Sign Or Interactive Display
Public Browser
Select Next.
Type the URL to load when the kiosk launches.
Configure the idle time before Microsoft Edge resets and click Next.
On the Your Done! page, click Close.
Review the settings on the Set Up A Kiosk page.
Under Advanced Settings, you will see that if the device crashes, no error message will be displayed, and the device will automatically restart.
Restart the device for Microsoft Edge kiosk mode to run.
Note Microsoft Edge Kiosk Mode First Run
The Welcome To The Best Windows Ever page will appear the first time you run Microsoft Edge kiosk mode. You should end this session by clicking the End Session button and then click Yes, which will restart Microsoft Edge and display the configured home page.
To end Microsoft Edge kiosk mode, you need to click Ctrl+Alt+Delete and then sign in to the device using another account. Once kiosk mode is enabled, the device will always automatically sign in and launch the configured app as a kiosk using assigned access.
To disable using Microsoft Edge as a kiosk using assigned access, you should follow these steps:
On the kiosk device click Ctrl+Alt+Delete.
On the sign in screen, sign in using another account.
Click Start, search for kiosk, and then select Set Up A Kiosk (Assigned Access). (If Search is not available you can access Set Up A Kiosk within the Settings app > Accounts > Family & Other Users.)
On the Set Up A Kiosk page, under Kiosk Info, select the kiosk username.
Click Remove Kiosk.
On the Remove Kiosk page, click Remove.
Need More Review? Deploy Microsoft Edge Kiosk Mode
This Microsoft resource provides additional information relating to deploying and configuring Microsoft Edge kiosk mode using GPOs and Microsoft Intune including a comprehensive list of the Microsoft Edge policies that you can use to enhance the kiosk experience. Visit https://docs.microsoft.com/microsoft-edge/deploy/microsoft-edge-kiosk-mode-deploy.
Microsoft Edge as a service
The Microsoft Edge web browser will have new features added on a regular basis, as has happened since the initial technical preview release in early 2015. Microsoft Edge is not available as a standalone download for Windows 10, though it is available as an app for Android and iOS devices through their respective app stores.
Microsoft Edge is updated through Windows Update, which will install security fixes, product feature enhancements, group policies and MDM settings for Microsoft Edge in a similar fashion to updates on Windows 10.
You can view the various update cadence in Table 1-15.
Table 1-15 Microsoft Edge update cadence
Update |
Frequency / Content |
|---|---|
Quality updates (Security Enhancements) |
Every second Tuesday of each month. Does not include new features; only issues relating to system stability and security are installed. |
Out-of-band Quality updates |
Ad hoc, outside of standard release schedule. Where devices must be updated immediately either to fix security vulnerabilities or to solve quality issues impacting many devices. |
Cumulative updates |
Minor feature updates, typically monthly. |
Feature updates |
Semi-annual basis. Twice per year, around March and September. |
Enterprises can use several tools to manage the Microsoft Edge updates as part of the new Windows as a Service model, including:
Windows Update (stand-alone)
Windows Update for Business
Windows Server Update Services (WSUS)
System Center Configuration Manager
Every new update published includes all changes from previous updates, as well as new fixes; these updates are known as “latest cumulative update” (LCU) packages. A newly imaged device can simply become “up to date” by installing the most recent LCU.
When updates are available for download to Windows 10 using the Windows Update servicing engine, the operating system can scan the update and will automatically only install the updates that are needed by the device to become completely up to date.
Windows 10 users can expect new LCU packages to be published on the second Tuesday of each month (often referred to as Patch Tuesday), which is classified as a required security update and contains new security, non-security, and browser fixes.
You can check the installed version of Microsoft Edge by using the following steps:
Open the Microsoft Edge web browser.
Select the menu icon (...) and then choose Settings.
Scroll all the way down to the About This App section.
The versions of Edge and EdgeHTML are listed.
Note Microsoft Edge Long Term Servicing Channel
If you use the Long-Term Servicing Channel (LTSC) versions of Windows 10, you will not find Microsoft Edge installed. Because Microsoft Edge and its associated services are frequently updated with new functionality, it is not supported on systems running LTSC operating systems. The LTSC does support Internet Explorer 11.
Enterprise Mode
We have seen how Microsoft Edge offers safer browsing for modern websites and apps, but the majority of the web—including company intranet sites—is still using older versions of HTML, ActiveX controls, and unsupported third-party add-ins. Internet Explorer 11 is included with Windows 10 to allow users to continue to access these websites in a supported, safe, and secure way.
Enterprise Mode is a business-focused feature that allows you to operate a dual-browser experience, using Microsoft Edge as your default browser but automatically switch to Internet Explorer 11 when users need to access sites that cannot be viewed in Microsoft Edge.
It is unrealistic to expect enterprises to only permit viewing of websites and apps that can be viewed by Microsoft Edge. It is expected that newer development projects will be written using modern web standards, which will be supported by Microsoft Edge.
For widespread compatibility problems with your popular, or required, websites and apps opening in Microsoft Edge you can populate the Enterprise Mode site list with these sites, so that they seamlessly open in Internet Explorer 11. Once the user completes browsing the site, they can close the browser, or if they attempt to browse to another website, which is not on the site list, then Microsoft Edge will automatically launch to continue the browsing experience.
Using Enterprise Mode allows that you can continue to use Microsoft Edge as your default browser, while also ensuring that websites and apps needed by your users continue working.
Enterprise Mode includes the following features:
Web app and website compatibility Allows many legacy web apps run unmodified on IE11.
Enterprise Mode Site List Manager Provides a management tool for website lists.
Centralized Control Specify the websites or web apps, which Enterprise Mode will manage and store this XML file on a website or network, or it can be stored locally.
Integrated Browsing Once set up, users can browse the web normally, letting the browser change modes automatically.
Data Gathering Enterprise Mode can be used to collect website compatibility issues from your users’ browsing activity, which you can use to add URLs to your central site list.
Configure Enterprise Mode
To enable and configure Enterprise Mode for Microsoft Edge, use the following steps:
Download and install the Enterprise Mode Site List Manager (schema v.2) tool for Windows 10 from https://www.microsoft.com/download/confirmation.aspx?id=49974.
Open the Enterprise Mode Site List Manager tool.
Add the URLs of websites that you want to direct to Microsoft Edge or Internet Explorer 11. (You don’t need to include the http:// or https:// designation.)
For each URL, select None, IE11, or MSEdge to open the website.
Optionally, add any comments about the website into the Notes About URL box.
Click Save to validate your website and to add it to the site list.
Click File > Save To XML and save the file to a network share.
Open Group Policy Management Console (GPMC) to configure a domain-based GPO.
Navigate to the appropriate AD DS container, such as your domain.
Open an existing GPO for editing or create a new GPO, link it to your chosen container, and open it for editing.
Navigate to Computer ConfigurationPoliciesAdministrative TemplatesWindows ComponentsMicrosoft Edge and enable the Configure The Enterprise Mode Site List policy.
In the Type The Location (URL) Of Your Enterprise Mode IE Website dialog box, type the location of the XML file you saved. For example, type \LON-SVR1MarketingMarketing. XML as shown in Figure 1-32.
Click OK and close Group Policy Management.

Need More Review? Use Enterprise Mode to Improve Compatibility
To review more about using and configuring Enterprise Mode and the Enterprise Mode Site List, visit this Microsoft website article at https://docs.microsoft.com/microsoft-edge/deploy/emie-to-improve-compatibility.
Configure Internet Explorer
Although Microsoft Edge is suitable for most users when browsing modern websites, Internet Explorer 11 is included to provide backward compatibility for websites that require features currently not supported in Microsoft Edge. Because your users might use both browsers, it is important to know how to configure both Microsoft Edge and Internet Explorer.
Internet Explorer contains a number of security and privacy features that can help make browsing safer. Specifically, the Protected Mode, InPrivate Browsing, and InPrivate Filtering features help maintain user privacy, whereas the Windows Defender SmartScreen helps guard against malicious websites and software. To help your users get the best from Internet Explorer, it is important to know how to configure these and other settings.
Note Download Internet Explorer 11
If you have removed Internet Explorer 11, you can download it from the Microsoft Store or from the download page at https://support.microsoft.com/help/17621/internet-explorer-downloads. If you use an earlier version of Internet Explorer, such as on Windows 7 and Windows 8, then you can upgrade to Internet Explorer 11.
To access Internet Explorer settings, open Internet Explorer and click the Tools menu (cog), as shown in Figure 1-33.
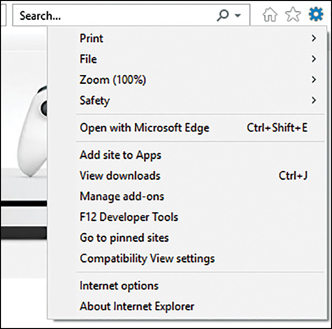
You can then choose from among the following options.
Manage Add-Ons Enable enhancements to some websites, such as providing toolbars and extensions, search providers, multimedia support, and enhanced content. Use this option to enable and disable add-ons.
Compatibility View Settings Most websites render as intended in Internet Explorer 11, but some sites use design standards for earlier versions of Internet Explorer. If you encounter websites that do not render correctly, you can use Compatibility View settings to force Internet Explorer to render the website as if it was using an earlier version of Internet Explorer. To render a website using an earlier version of Internet Explorer, from the Compatibility View Settings dialog box, enter the name of the website and click Add.
![]() Exam Tip
Exam Tip
You can display all intranet sites in Compatibility View by selecting the Display Intranet Sites In Compatibility View check box in the Compatibility View Settings dialog box.
Internet Options To configure additional settings, click Internet Options. This opens the dialog box shown in Figure 1-34.
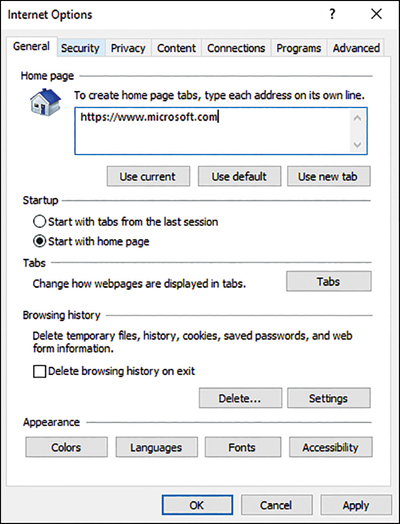
The Internet Options dialog box has the following tabs.
General Available options are:
Home Page Create home page tabs by entering addresses, each on its own line.
Startup Choose Start With Tabs From The Last Session or Start With Home Page.
Change How Webpages Are Displayed In Tabs Clicking the Tabs button opens the Tabbed Browsing Settings dialog box where you can control how tabbed browsing behaves, such as warning you when multiple tabs are closed at once, showing previews for individual tabs in the taskbar, and showing you how to deal with pop-ups.
Browsing History This portion of the dialog box includes options to delete elements of browsing history, such as Temporary Internet Files, History and Caches And Databases.
Appearance Four buttons—Colors, Languages, Fonts, and Accessibility—provide you with options for managing the appearance of websites.
Security Available options are
Security Zone Settings You can configure the four security zones’ settings. The zones are Internet, Local intranet, Trusted Sites, and Restricted Sites. You can add or remove websites from these zones and configure the security settings for each zone. The Internet Zone is the default zone for all websites and has medium-high security settings, which allows users to perform most tasks.
Enable Protected Mode Protected Mode makes it more difficult for malware to be downloaded, thereby helping to protect users from attack by running an IE process with greatly restricted privileges on Windows 10. It is enabled by default.
Privacy Available options are
Sites This option enables you to define cookie handling on a per-site basis.
Advanced This option enables you to define whether to accept, block, or prompt for first-party and third-party cookies.
Never Allow Websites To Request Your Physical Location Select this option if you want to prevent sites from requesting your physical location.
Turn On Pop-up Blocker This is enabled by default. The Settings button enables you to configure per-website settings for notification pop-up handling.
Disable Toolbars And Extensions When In Private Browsing Starts
Content Available options are
Certificates This option enables you to view your certificates and trusted publishers.
AutoComplete This option enables you to define autocomplete options for the address bar, forms, and usernames and passwords. You can also delete autocomplete history here.
Feeds And Web Slices This option enables you to define the default schedule and frequency of when feeds and web slices from online content are updated.
Connections Available options are
Dial-Up And Virtual Private Network These settings are for connecting to the Internet.
LAN Settings This allows you to configure script settings and configuring IE to use a web proxy server.
Programs Available options are
Define How Internet Explorer Opens This allows you to configure the default browser.
Manage Add-Ons This allows you to enable or disable browser add-ons installed on your system.
Configure HTML Editing This allows you to choose the program that you want Internet Explorer to use for editing HTML files.
Internet Programs This allows you to select the programs you want to use for other Internet services such as email.
Manage File Associations This allows you to the select file types that you want Internet Explorer to open by default.
Advanced Many options are available, enabling you to fine-tune Internet Explorer configuration and behavior. You can also reset Internet Explorer settings to their default condition.
Although you can manually configure these settings in Internet Explorer on each computer, you can also use more than 1,600 GPOs in an AD DS domain environment to configure the settings for computers at scale.
The GPO settings for Internet Explorer are located in the Computer ConfigurationPoliciesAdministrative TemplatesWindows ComponentsInternet Explorer node.
There are 11 child nodes within the main Internet Explorer node as shown in Figure 1-35, including GPOs that control privacy, compatibility view, and security features. You can configure the same settings on the User Configuration node if necessary.
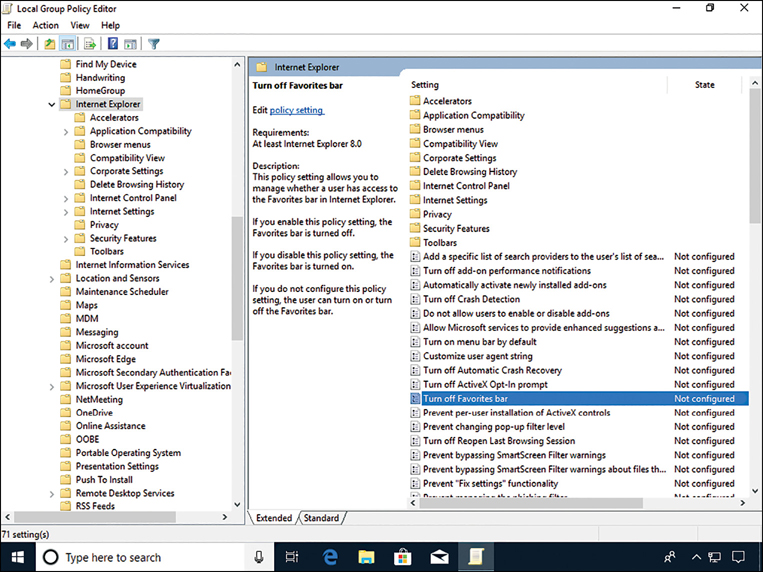
Need More Review? Group Policy and Internet Explorer 11
To review further details about the GPO settings available for Internet Explorer 11, refer to the Microsoft website at https://docs.microsoft.com/internet-explorer/ie11-deploy-guide/group-policy-and-ie11.
Internet Explorer 11 will continue to receive security updates through its supported lifespan. Internet Explorer is a component of the operating system and follows the Lifecycle Policy of Windows 10. Internet Explorer 11 bugs will be evaluated by Microsoft on a case-by-case basis.
Microsoft recommends that users use Microsoft Edge as their default browser, and Microsoft supports Internet Explorer 11 for backward compatibility. The latest features and platform updates will only be available in Microsoft Edge.
Configure mobility settings
A priority for users of mobile devices, such as the Surface range of Windows 10 tablets and laptops, is to be able to conserve battery life so that extended device use is possible. Mobile devices are often used away from the office or home environment, and it is important to know how to configure power settings in Windows 10 to meet your users’ needs.
Mobile devices can be used to display information, such as PowerPoint presentations during meetings, and enabling the presentation settings within Windows 10 can configure the device for a presentation and reduce distractions and interruptions.
Configure basic power options
You can control Windows 10 power settings in several ways. On a mobile device, you can configure basic power options by using the Power & Sleep tab in the System Settings app, as shown in Figure 1-36.
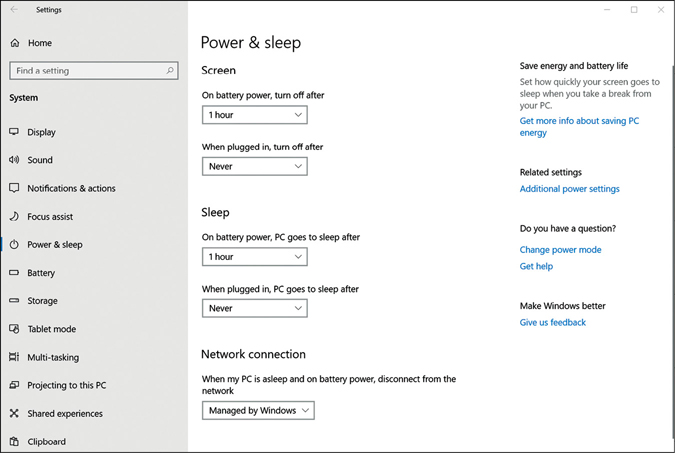
On the Power & Sleep tab, you can configure the following options.
Screen Available options are
On Battery Power, Turn Off After Select a value or choose Never.
When Plugged In, Turn Off After Select a value or choose Never.
Sleep Available options are
On Battery Power, PC Goes To Sleep After Select a value or choose Never.
When Plugged In, PC Goes To Sleep After Select a value or choose Never.
Network Connection Available options are
When My PC Is Is Asleep And On Battery Power, Disconnect From The Network Select Always, Managed By Windows, or Never.
You can configure additional power options by clicking the Battery tab, as shown in Figure 1-37, and set the following options.
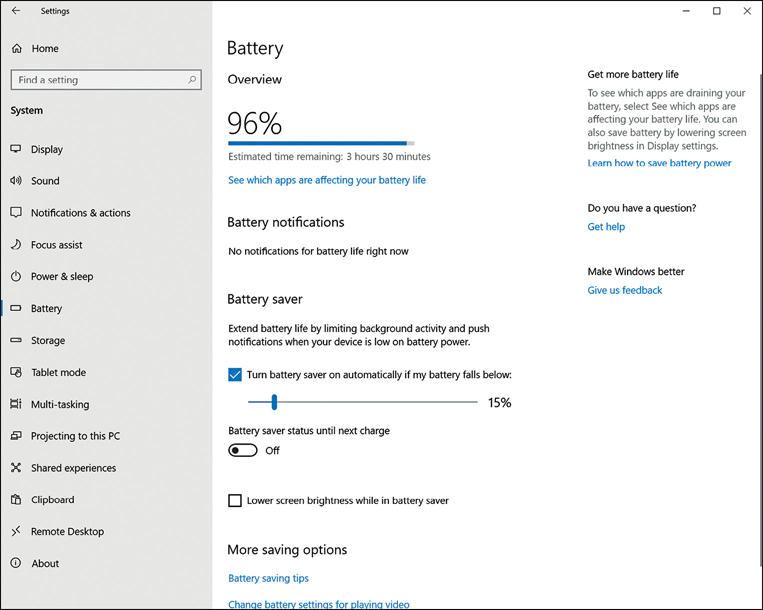
Overview View estimated battery time remaining.
See Which Apps Are Affecting Your Battery Life View a report showing battery usage over the preceding 6 hours, 24 hours, or one week; also, you can filter by Apps with usage, All Apps and Always Allowed Apps.
Battery Notifications See notifications for battery life.
Battery Saver Configure when battery saver is enabled, implement battery saver until the next charge, and configure lower screen brightness while the device is using battery saver.
More Saving Options View battery saving tips and configure battery optimization settings for when watching films and playing video.
Configure power plans
In addition to the battery settings available within the Settings app, Windows 10 provides a number of preconfigured power plans, as shown in Table 1-16. You can access these power plans from the Settings app, by clicking System, Power & Sleep, and then click the Additional Power Settings link.
Table 1-16 Power plans
Plan |
Power Consumption |
Screen |
System Activity |
|---|---|---|---|
Power Saver |
Low |
By default, the display is powered off after five minutes of inactivity. |
Saves energy by reducing system performance whenever possible. |
Balanced |
Medium |
You can configure the plan to turn off the display after a specified amount of time. |
Measures computer activity and continues to use full power to all system components currently in use. |
High Performance |
High |
This sets the screen to 100% brightness. |
Keeps the computer’s drives, memory, and processors continuously supplied with power. |
Ultimate Performance |
High |
This sets the screen to 100% brightness. |
Keeps the computer’s drives, memory, and processors continuously supplied with power. Forces processor state to be 100%. Not available on battery powered devices. |
Note Power Plan Names
The exact names of the power plans might vary depending on the edition and configuration of your device.
You can select from among existing power plans by clicking the desired power plan, or you can create a new power plan by clicking Create A Power Plan. Also, you can configure basic options, such as whether your device will prompt you for a password when it wakes up, and what the power buttons and lid do on your computer. To reconfigure a plan, click Change Plan Settings. Within the settings options, you can also choose Change Advanced Power Settings to configure detailed plan settings.
Windows 10 Pro for Workstations
If you’re running Windows 10 Pro for Workstations, there is a new Ultimate Performance power plan scheme available, as shown in Figure 1-38. This is intended to be used on high-end workstation devices that demand increased performance. The policy implements fine-grained power management techniques that allow devices to run at maximum performance by removing the power management, performance, and efficiency tradeoffs that are normally present in Windows 10.
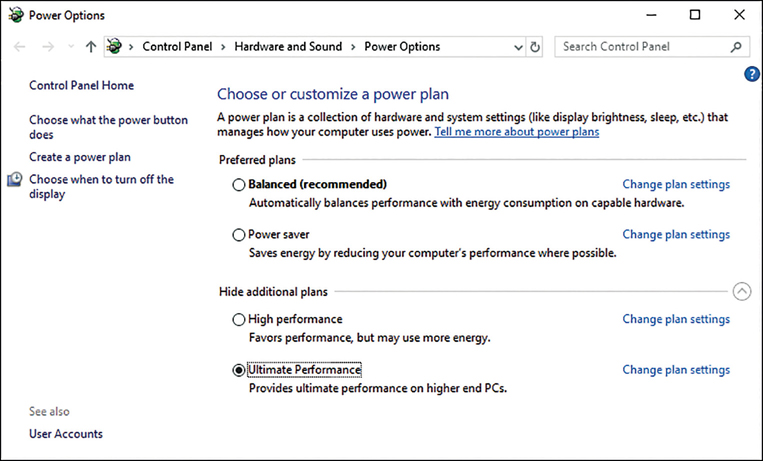
Unless you are using the Windows 10 Pro for Workstations edition the Ultimate Performance power plan will be hidden in Power Options. The plan is not available on battery powered devices.
Configure Power Settings
You can exert more granular control over your computer’s power settings by using the Additional Power Settings link in the Settings app or by opening the Power Options item in Control Panel. You can switch power plans, and you can also configure these options:
Choose What The Power Buttons Do This allows you to specify the actions to be taken when the power button on the device is pressed.
Choose What Closing The Lid Does This allows you to specify the actions to be taken when the device lid is closed.
Create A Power Plan This allows you to create a new device power plan with custom settings.
Choose When To Turn Off The Display This allows you to specify the idle time delay before the system automatically turns off the device display.
Change When The Computer Sleeps This allows you to specify the idle time delay before the system automatically puts the device into sleep mode.
If you aren’t already familiar with these features, take some time now to explore them. Make sure to create your own personal power plan by using the Create A Power Plan option because you might see something about that on the exam. You might also be asked to state how many minutes must pass for each of the three default plans (Balanced, High Performance, and Power Saver) before the computer goes to sleep or turns off the display, when running on its battery, or when plugged in. Additionally, you’ll need to know how to monitor battery usage from the Notification area of the Taskbar and how to change common mobility settings, such as the power plan type and display brightness.
Using Powercfg.Exe
Powercfg.exe is a command-line tool you can use to configure and manage power settings. Using Powercfg.exe, you can view the power plans available and export power plans. Powercfg .exe can be useful when configuring a batch of devices, each with the same hardware specifications, such as a roll out of new laptops. You would create a custom power plan on one device, and then export the power management plan to a file using Powercfg.exe. You would then import the plan to the other devices either using Powercfg.exe or by using Group Policy.
To get a list of the available power plans using this command, type powercfg.exe list at a command prompt. If you haven’t yet created any custom plans, you’ll only see the three default plans that come with Windows 10, as shown in Figure 1-39. Choose the plan to export and note the GUID value. To export the policy, open an elevated command prompt, and run powercfg.exe export power.pow GUID (where the GUID value used is the plan that you want to export).
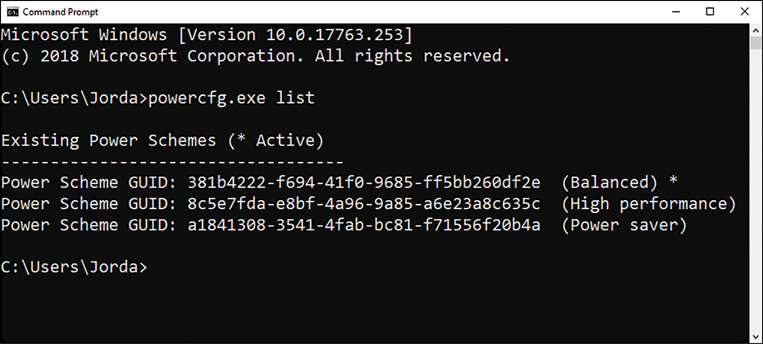
More Info Powercfg Command-Line Options
For more information about Powercfg.exe command line options, visit https://docs.microsoft.com/windows-hardware/design/device-experiences/powercfg-command-line-options.
There are some other parameters you can use with Powercfg.exe. You should review these so that you are familiar with them.
changename This option modifies the name of a power scheme and optionally, its description.
-delete This option deletes the power scheme with the specified GUID.
-setactive This option makes the specified power scheme active on the system.
/deviceenablewake and /devicedisablewake This option enables and disables a device from waking the system from a sleep state.
/systempowerreport This option generates a diagnostic system power transition report.
/batteryreport This option generates a report of battery usage characteristics over the lifetime of the system.
Some of the modern reports, such as the battery usage or system power reports, are generated in HTML format and provide a huge amount of detail, which is invaluable if you are troubleshooting issues with battery life or device power consumption.
Creating Power Policies
You can use Group Policy to set policies related to the available power plans. Use the Group Policy Management Editor to navigate to Computer ConfigurationAdministrative TemplatesSystemPower Management. When you expand Power Management in the left pane, you can see the additional containers: Button Settings, Energy Saver Settings, Hard Disk Settings, Notification Settings, Power Throttling Settings, Sleep Settings, and Video And Display Settings. In the right pane, you can see two options: Specify A Custom Active Power Plan and Select An Active Power Plan, as shown in Figure 1-40.
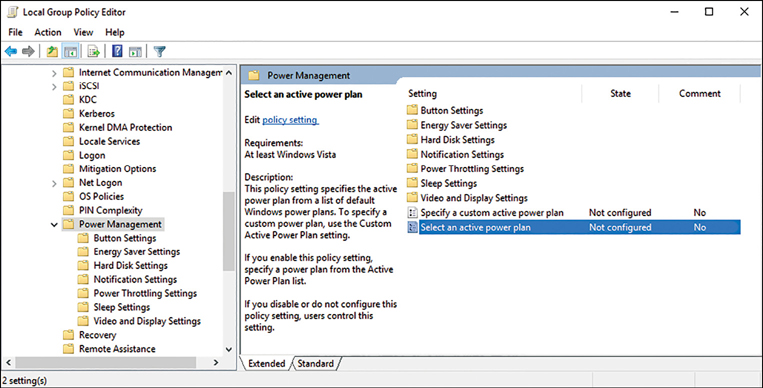
When you click one of the seven nodes under Power Management, more options appear. You can control every aspect of power management here. For instance, in the Sleep Settings node, you can configure, enable, and disable the following (and more).
Specify The System Sleep Timeout (Plugged In) This policy setting allows you to specify the period of inactivity before the system is put into sleep mode while plugged into a power outlet.
Specify The System Sleep Timeout (On Battery) This policy setting allows you to specify the period of inactivity before the system is put into sleep mode while running on battery power.
Require A Password When The Computer Wakes (Plugged In) This policy setting specifies whether the user is prompted for a password when the system resumes from sleep while plugged into a power outlet.
Require A Password When The Computer Wakes (On Battery) This policy setting specifies whether the user is prompted for a password when the system resumes from sleep while running on battery power.
Allow Standby States (S1 S3) When Sleeping (Plugged In) This policy setting specifies whether a device can use standby states other than hibernate when putting the computer in a sleep state while plugged into a power outlet.
Allow Standby States (S1 S3) When Sleeping (On Battery) This policy setting specifies whether a device is able to use standby states other than hibernate when putting the computer in a sleep state while running on battery power.
You should review these policies in each node to familiarize yourself with the various options available.
Viewing Process Power Usage
A new feature within Task Manager allows you to view the instantaneous power usage of apps and services using your device’s power.
Task Manager now includes two new columns in the Processes tab, as shown in Figure 1-41, to show energy impact of the running process on your system. This can be helpful to understand the levels of power that apps and services are using. Task Manager considers the processor, graphics, and disk drive power when calculating power usage. There are two columns available, as follows.
Power Usage Provides an instantaneous view of apps and services using power.
Power Usage Trend Provides a power usage trend over the previous two minutes for running apps and services.
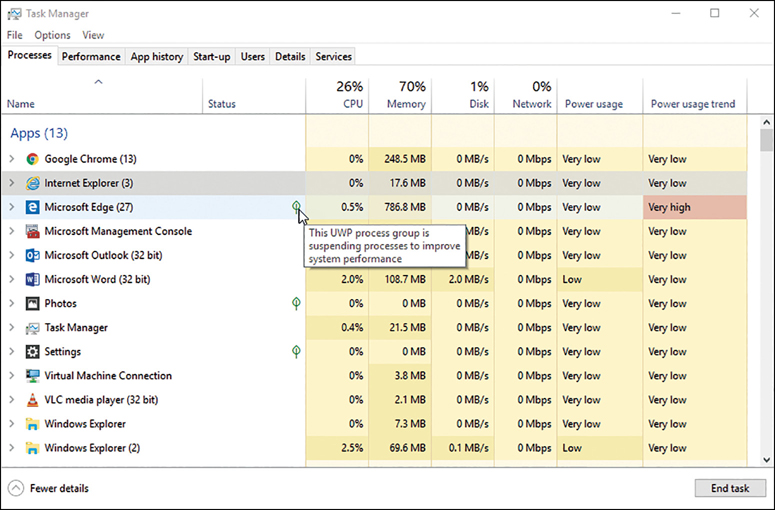
Using Task Manager, you can also see if a process has been suspended. To view suspended apps, look in the Status column of the Processes tab for a leaf icon. You can see that the Photos, Microsoft Edge, and Settings apps have been suspended, as shown in Figure 1-41. You should also see that when the cursor is hovered over the leaf icon next to Microsoft Edge, a tooltip describing the status is displayed.
Configure presentation settings
Windows 10 includes a useful utility called the Windows Mobility Center, which can be used to configure various mobility settings, all from one location. Depending upon your system, some or all the following settings might be available on your mobile device, as shown in Figure 1-42.
Brightness Enables you to adjust the brightness of your display.
Volume Enables you to adjust the speaker volume of your device; also, you can select the Mute check box to silence the speaker.
Battery Status Lets you view how much charge is remaining on your battery and change the active power plan.
Screen Orientation Lets you change the orientation of your device screen from portrait to landscape, or vice versa.
External Display Enables connection to an additional monitor to your device.
Sync Center Enables you to sync with external data sources, such as Offline Files.
Presentation Settings Lets you turn on presentation settings during a presentation.
Enabling presentation settings will temporarily have the following effects.
Disables pop-ups and notifications area pop-ups (such as from Outlook)
Prevents Windows from going into sleep mode
Prevents Windows from turning the screen off
Uses the display background and volume settings defined in the Presentation Settings, as shown in Figure 1-43
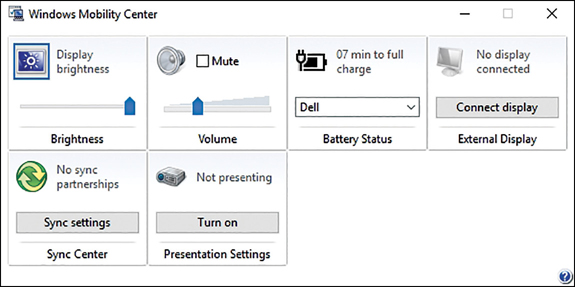
The Windows Mobility Center is only available on mobile devices, such as laptops and tablets.
The Presentation Settings utility, as shown in Figure 1-43, can be used in association with the Windows Mobility Center to configure turning off the screen saver, controlling the volume, and selecting a background image to be displayed when you give a presentation.
You can access the Presentation Settings utility on a mobile device by clicking the Presentation Settings icon or by using these steps.
Click Start and search for Presentation Settings.
In the search results, select Adjust Settings Before Giving A Presentation Control Panel.
The Presentation Settings utility appears, as shown in Figure 1-43.
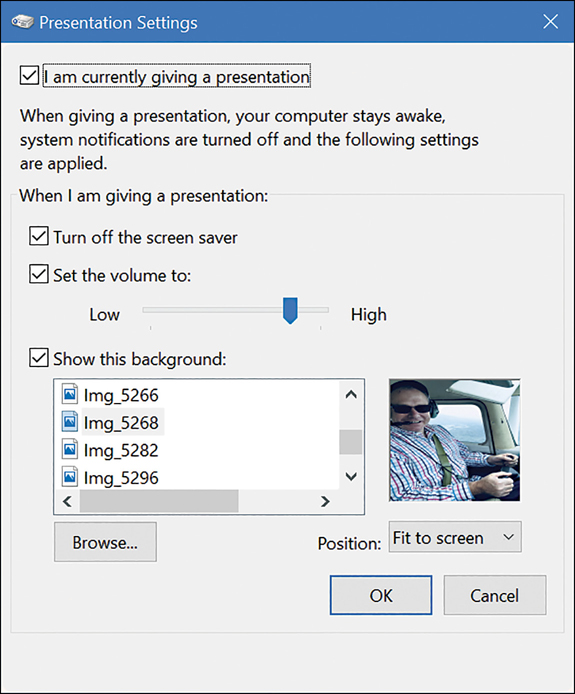
Figure 1-43 Adjust settings before giving a presentation
Thought experiments
In these thought experiments, demonstrate your skills and knowledge of the topics covered in this chapter. You can find the answers to these thought experiments in the next section.
Scenario 1
Adatum has 2,000 workstations running Windows 7. The company plans to implement Windows 10. Adatum management wants to minimize the effects of the changes and so it intends to roll out the new operating system over a weekend. All computers are less than two years old and must be running Windows 10 Enterprise at the end of the project.
As a consultant for Adatum, answer the following questions.
What is the most appropriate method for Adatum to implement Windows 10?
How can you reassure management concern whether devices meet the minimum system requirements?
What deployment method could you use to minimize the disruption to Adatum employees?
How would you plan to activate the devices once they are running Windows 10?
Scenario 2
Adatum has recently implemented Microsoft 365 Business with all devices using Windows 10 Pro. The company has a head office with 200 people using desktop computers, a branch office where 25 members of the design team work, and a remote sales force of 50 people. Each member of the sales team uses a Surface Pro device. Adatum is concerned about security, especially on the mobile devices.
Members of the sales and finance teams need to access the Adatum intranet to produce quotations and manage sales orders. The intranet does not display properly using Microsoft Edge.
Answer the following questions relating to address Adatum concerns.
What sign-on method would you recommend for the mobile devices?
What encryption technology could you implement on the mobile devices?
How would you recommend the sales and finance team access the Adatum intranet website?
Your manager has asked you how to enable the Ultimate Performance power plan on the design team desktop computers.
Thought experiment answers
This section provides the solutions for the tasks included in the Thought experiments section.
Scenario 1
An in-place upgrade from Windows 7 directly to Windows 10 is supported and recommended by Microsoft and could be performed in the timescale required.
Because all devices are less than two years old and currently run Windows 7, they already meet the minimum system requirements for running Windows 10.
By upgrading the devices directly to Windows 10 using an in-place upgrade, all user and application settings will be preserved. This will offer the least disruption to the users.
All devices would be automatically activated using the digital license present on the device if they were previously running a genuine version of Windows 7.
Scenario 2
The Surface Pro devices should be configured to use Windows Hello with users providing either facial recognition or their Microsoft 365 usernames and passwords for sign in.
The Surface Pro devices are running Window 10 Pro and therefore, they should be configured to use BitLocker Drive Encryption.
Adatum could implement Enterprise Mode so that the Adatum intranet website opens automatically in Internet Explorer 11. All other websites would be opened in Microsoft Edge, by default.
The design team desktop computers would need to be upgraded to the Windows 10 Pro for Workstations for them to use the Ultimate Performance power plan.
Chapter summary
Windows 10 is available in many editions including Windows 10 Home, Windows 10 Pro, Windows 10 Pro for Workstations, Windows 10 Enterprise, and Windows 10 Education.
Windows 10 in S mode is a special edition of Windows 10 that is a limited, locked down version of the operating system.
Some features of Windows 10 require special hardware or additional configuration, such as biometric sensors or TPM.
You cannot perform an in-place upgrade from a 32-bit version of Windows to the 64-bit version of Windows 10.
There are multiple methods of implementing Windows 10, including clean installs and upgrading a prior version of Windows.
You can choose between three upgrade strategies: in-place, side-by-side, and wipe-and-load.
You can use a number of tools in Windows ADK, including the Windows Configuration Designer, to customize, and distribute Windows 10 settings for deployment throughout your organization.
Windows Configuration Designer generates provisioning packages with the .ppkg file extension, which can customize Windows 10.
You can migrate user and application settings from one device to another, using the USMT.
USMT uses ScanState and LoadState to migrate data and can use compression or encryption during the migration process.
Windows 10 can be configured with additional language features including the display language, text-to-speech, speech recognition, and handwriting support.
You can use the Lpksetup command-line tool to implement silent-mode language pack installations.
Windows 10 requires activation, which can be performed manually or automatically.
Microsoft provides a number of ways to manage Windows 10 volume activation.
Microsoft provides the Activation Troubleshooter, which can identify issues experienced with activating Windows 10.
Windows Hello is a two-factor biometric authentication mechanism built into Windows 10.
Dynamic Lock allows you to pair a Bluetooth device, such as a smartphone, to your Windows 10 device, which will automatically lock the device when the Bluetooth device is moved away from the PC.
You can customize the Start menu, desktop, taskbar, and notification settings individually or by using Group Policy, provisioning packages, or using mobile device management.
To customize the Start layout using XML templates and GPOs requires Windows 10 Pro, Windows 10 Enterprise, or Windows 10 Education.
Microsoft Edge is a cross-platform web browser for Windows 10 that supports touch devices, inking, reading mode, and secure browsing.
Microsoft Edge kiosk mode allows Microsoft Edge to display a specific site in full-screen mode as used in digital/interactive signage or for public browsing.
Enterprise Mode allows you to configure Microsoft Edge to be the default browser and allow selected websites to open in Internet Explorer 11 for web app and website compatibility.
Windows 10 provides several ways to manage power settings, including creating custom power policies, thereby extending the battery life of your users’ devices.
Desktop computers running Windows 10 Pro for Workstations can use the Ultimate Performance power plan scheme, which allows the device to run at maximum performance.
You can import and export power plans by using the Powercfg.exe command-line tool.