In this chapter, you will find all the important features of Blazor that were not covered in previous chapters as well as some use case examples to go with them. Specifically, you’ll learn about the following:
JavaScript interactions
Local storage with Blazor
Handling files
Background tasks and examples
Interact with JavaScript
Although Blazor runs fully on C#, you will sometimes find cases where you will be required to interact with JavaScript
, such as when executing JavaScript functions from C# or executing C# methods from JavaScript. Or you might want to use third-party JavaScript libraries and access browser features that are not available directly via Blazor.
The project we’ll use to demonstrate this is a server-side project; it simply contains the original Index.razorfile
and the newly added ExampleJS.jsfile
(as shown in Figure 5-1).
A screenshot lists a menu of blazorwithJS, wwwroot, and pages. It includes connected services, properties, app settings, the main layout, and a program.
Figure 5-1
File contents of the example project
For now the JavaScript
simply contains one function (Listing 5-1), which will take a string value from C# and set it in JavaScript. Later we’ll add more code to see how JavaScript can execute C# methods.
var JSvalue;
function SetValue(newvalue) {
Jsvalue = newvalue;
}
Listing 5-1
JavaScript Code
To execute the JavaScript function
from C# (Listing 5-2), you will need to add the IJSRuntimeinjection
. Then use InvokeVoidAsync and set the name of the function followed by any arguments the function takes. If the function returns a value, you will need to use the InvokeAsyncmethod
and declare the type of the returned value.
@page "/"
@inject IJSRuntime js
<p><button @onclick="SetValueInJS" >Set value in JS</button></p>
For the second part, we add two more functions (Listing 5-3): one that will be executed on the click of a button and then execute the C# method
and another that sets the reference for the page (or it could be a component). The C# method is executed by using the function InvokeMethodAsync, which takes the name of the method followed by any parameters it takes.
The UI part (Listing 5-4) has been expanded further too. It now contains the page reference variable (DotNetObjectReference). For this to work, you will need to create the page reference in the setup (before using it); in this case, it is done on the OnInitializedAsyncmethod
, and the function is JavaScript, which is used to set the reference there.
@page "/"
@inject IJSRuntime js
<p><button @onclick="SetValueInJS" >Set value in JS</button></p>
<p><button onclick="RetrieveValue();">Retrieve value from JS</button></p>
public async Task RetrieveJSValue(string newvalue)
{
jsvalue = newvalue;
StateHasChanged();
}
}
Listing 5-4
Blazor Code
The method that is executed from JavaScript must be public and have the JSInvokableAttributeattribute
set. The parameter for that is used in the JavaScript part to find and execute that method. In this case, the method takes a value and sets it to a variable on the page. This requires StateHasChanged to be executed; otherwise, the UI will not be updated.
Code-Behind Files
Code-behind files
can store CSS data and C# logic and are accessible only to that specific file (page or component). This can be useful to keep the code clean and store component-specific CSS styles more easily.
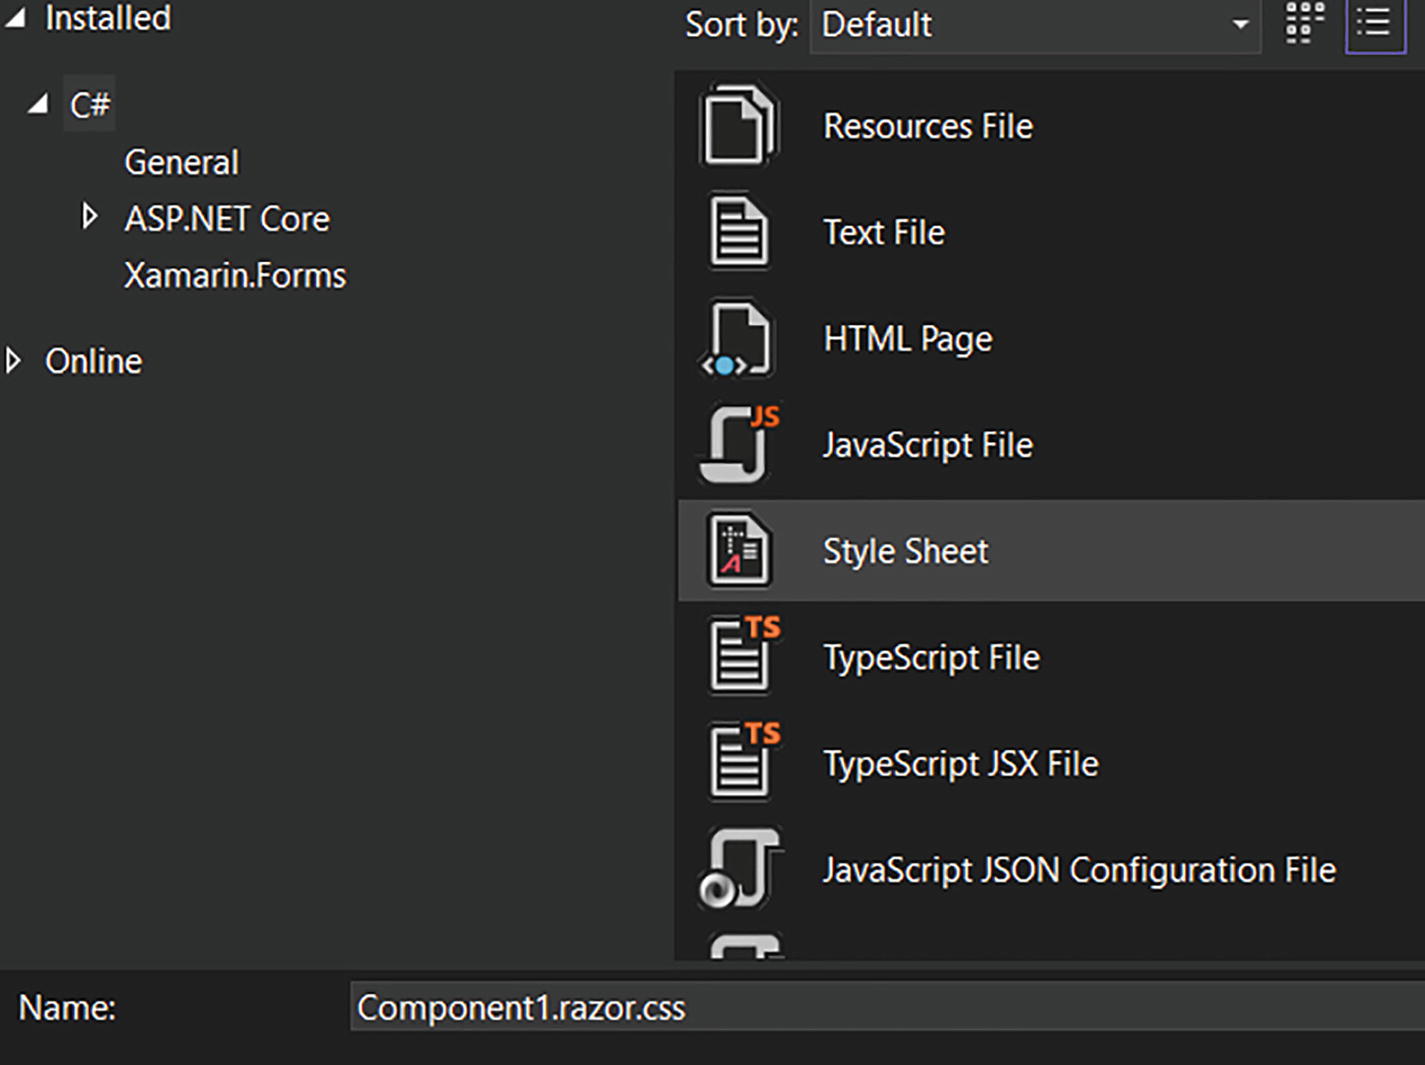
To create a CSS code-behind file, you only need to create a CSS file
where your component (or page) is. The file must be named in a specific way (as shown in the example for Component1.razor shown in Figure 5-2 and Listing 5-5).
A screenshot lists a menu installed, online, and sorted by default. It has a resources file, text file, and H T M L page. Whereas the style sheet is selected.
To make this work, you will also need to add a specific stylesheet Listing 5-6reference
in your _Host.cshtml or index.html file (on the client side). For this, you can use the following format:
[YourProjectName].styles.css
.buttonclass {
width:100px;
background-color:blue;
color: white;
}
Listing 5-6
CSS Code for Example
The example in Listing 5-7 shows a basic style for button.
The example component
contains a button to which the style is applied, and remember, the style can be applied only to elements of this component, as shown in Listing 5-7.
If you try running this example (Listing 5-8), you will see that only the button in the component
has the style applied.
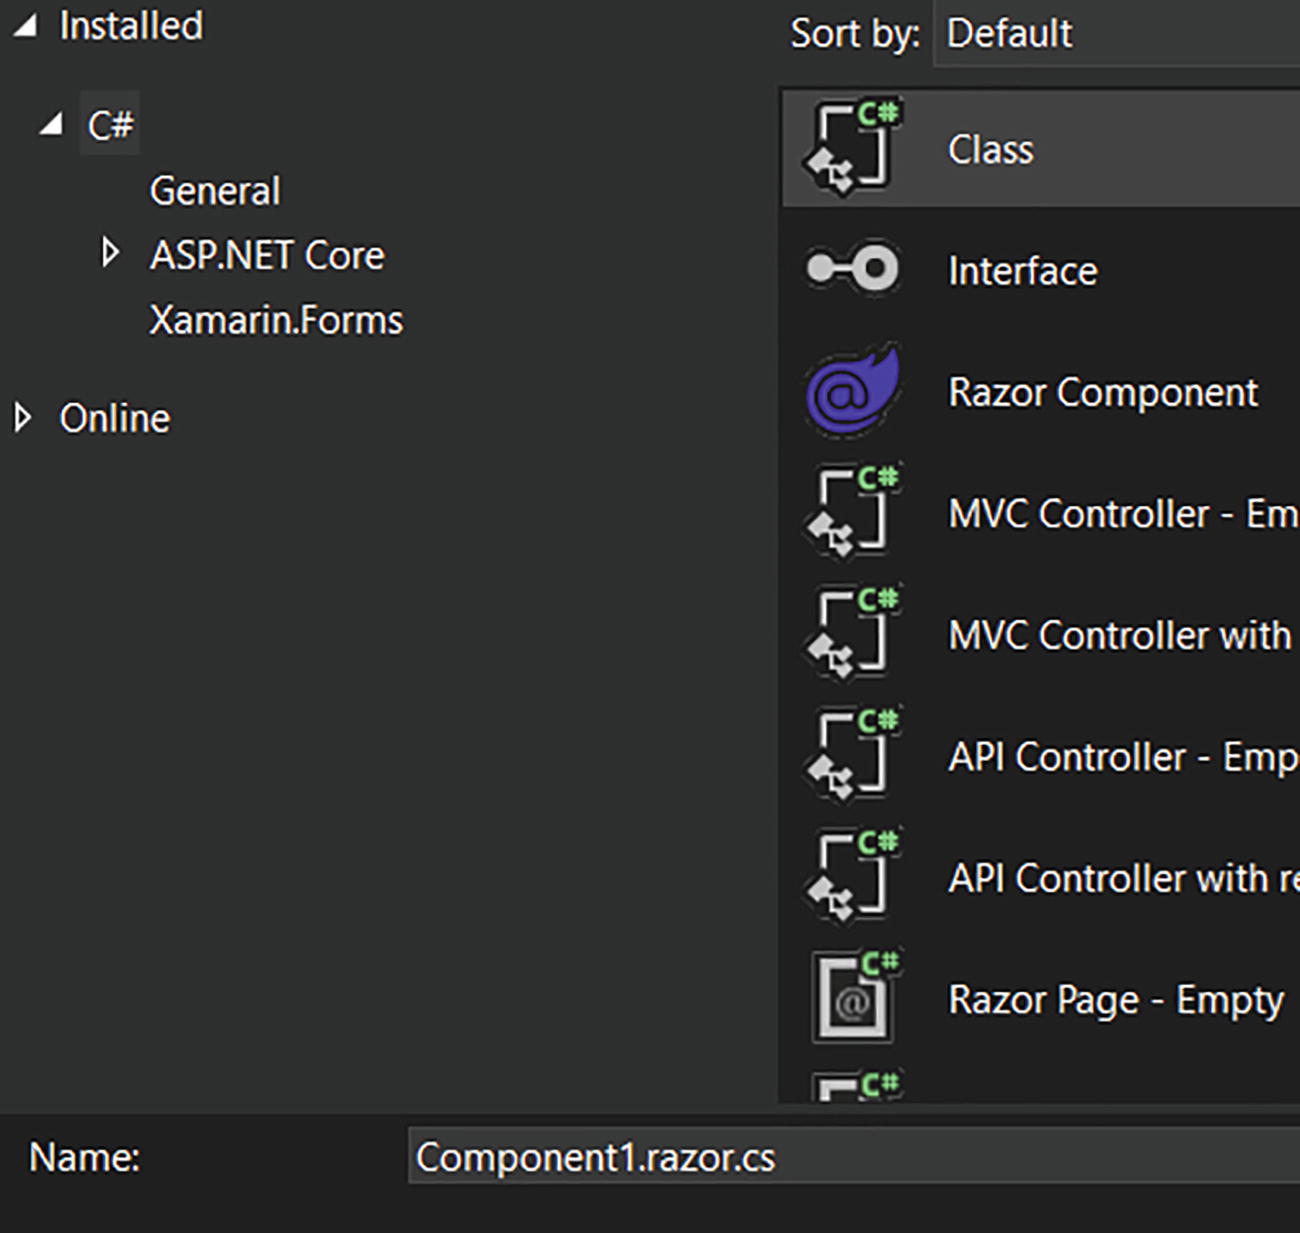
Creating
a code-behind C# file is similar, but it will require some additional work. First, you need to create a C# file (.cs) based on the format shown in Figure 5-3.
A screenshot lists a menu of A S P N E T core. It has an interface, razor component, M V C, and A P I controller. Whereas class is selected.
In the file, you will need to change the class name (without renaming the file itself) and then add inheritance
for the Component base. The example simply has one method that sets the value to a string, which is displayed in the previously shown UI code (Component1.razor).
Finally, in the component itself you need to declare inheritance
(Listing 5-10) for the previously created class. If you miss this step, it will not work.
@inherits Component1Logic
Listing 5-10
Inheritance for C# Code-Behind
Local Storage
Local storage in browsers can be used to store
user-specific data that is carried between sessions. Blazor offers a couple of ways to access local storage, and both have their own upsides and downsides.
The first way is to use ProtectedLocalStorage (Listing 5-11), which is available only for the Blazor server version.
The example (Listing 5-12) here is quite straightforward; it will insert a value, and once you reload the page, you will be able to fetch that value. To add to new value, you will use SetAsync. This takes the key of the value and value itself, a basic key-value pair. Then to retrieve the value, use GetAsync and provide a matching key for your value. This feature allows you to add any type you want: numbers, strings, or your own custom objects.
If you look at the developer tools and check the local storage (Figure 5-4), you will notice that the value is encrypted. This is something to remember if you later want to access your value without using the ProtectedStorage option.
A screenshot with a storage menu. It has local storage, local host colon 44374, and an example value.
Figure 5-4
View of developer tools in browser
If you are working with the Blazor client-side version (WebAssembly), you will have to interact with JavaScript
and connect to the LocalStorage feature directly Listing 5-13.
@inject IJSRuntime js
Listing 5-13
JavaScript Injection Example
For this you will first need to inject IJSRuntime.
To access
local storage, you do not need to write additional JavaScript. To add a new key-value pair, you can simply access the setItem function, as shown in Listing 5-13. This will take the key as the first parameter and your value as the second.
To retrieve your item, you can use getItem, which will only require you to pass the key of the key-value pair. You will also need to declare the type of the value you retrieve. However, this will work only for basic types like double, string, and others. If you need to store something more complex, you can turn it into JSON and deserialize it after retrieving the JSON string.
Pick and Save Files
Blazor provides a way to directly pick files
without having to interact with JavaScript, but for downloading (saving a file) Listing 5-14 that will not be the case.
To pick a file, you will need
to use the default Blazor component InputFile. Styling it can be tricky; therefore, you always want to hide it and use a button for invoking the file picker instead. To do that, you will need to give the InputFile and ID and then in the button use simple JavaScript to invoke the click event Listing 5-15. Notice that we are not using Blazor to interact with JavaScript; it is done directly in the button and by using onclick rather than Blazor’s @onclick. With that, you will also want to add a hidden attribute (to hide the InputFile) and multiple (if you allow users to pick multiple files).
If you have multiple files
picked, you can use GetMultipleFiles to retrieve references to them. This will also work for a single file. For each file you will get some data name, size, and more. To read the file and use it, you will need to use OpenReadStream and make sure to set your custom maximum file size as the default is only around 500KB.
To download a file
, several options exist, although it will have to be a custom solution. This particular example Listing 5-16 will show you one of the ways to deal with it for the Blazor client-side version.
JavaScript Code for Downloading a File in the Browser
For this technique, you will first need to set up a JavaScript function. This takes your desired file name and a base64 string representing your file. Then, the function creates
an element (not visible anywhere), adds href for the file download, and clicks it, which initiates the download Listing 5-17.
C#/Blazor Code for Downloading the File in a Browser
Since this is a JSON file, we first generate a JSON string
from a C# object. Then we need to create a base64 string, which can be created from any object in C#, so this does not have to be JSON file. Finally, for downloading, we need to initiate the JavaScript function
, and it will create a download.
Creating a Blazor Code Library
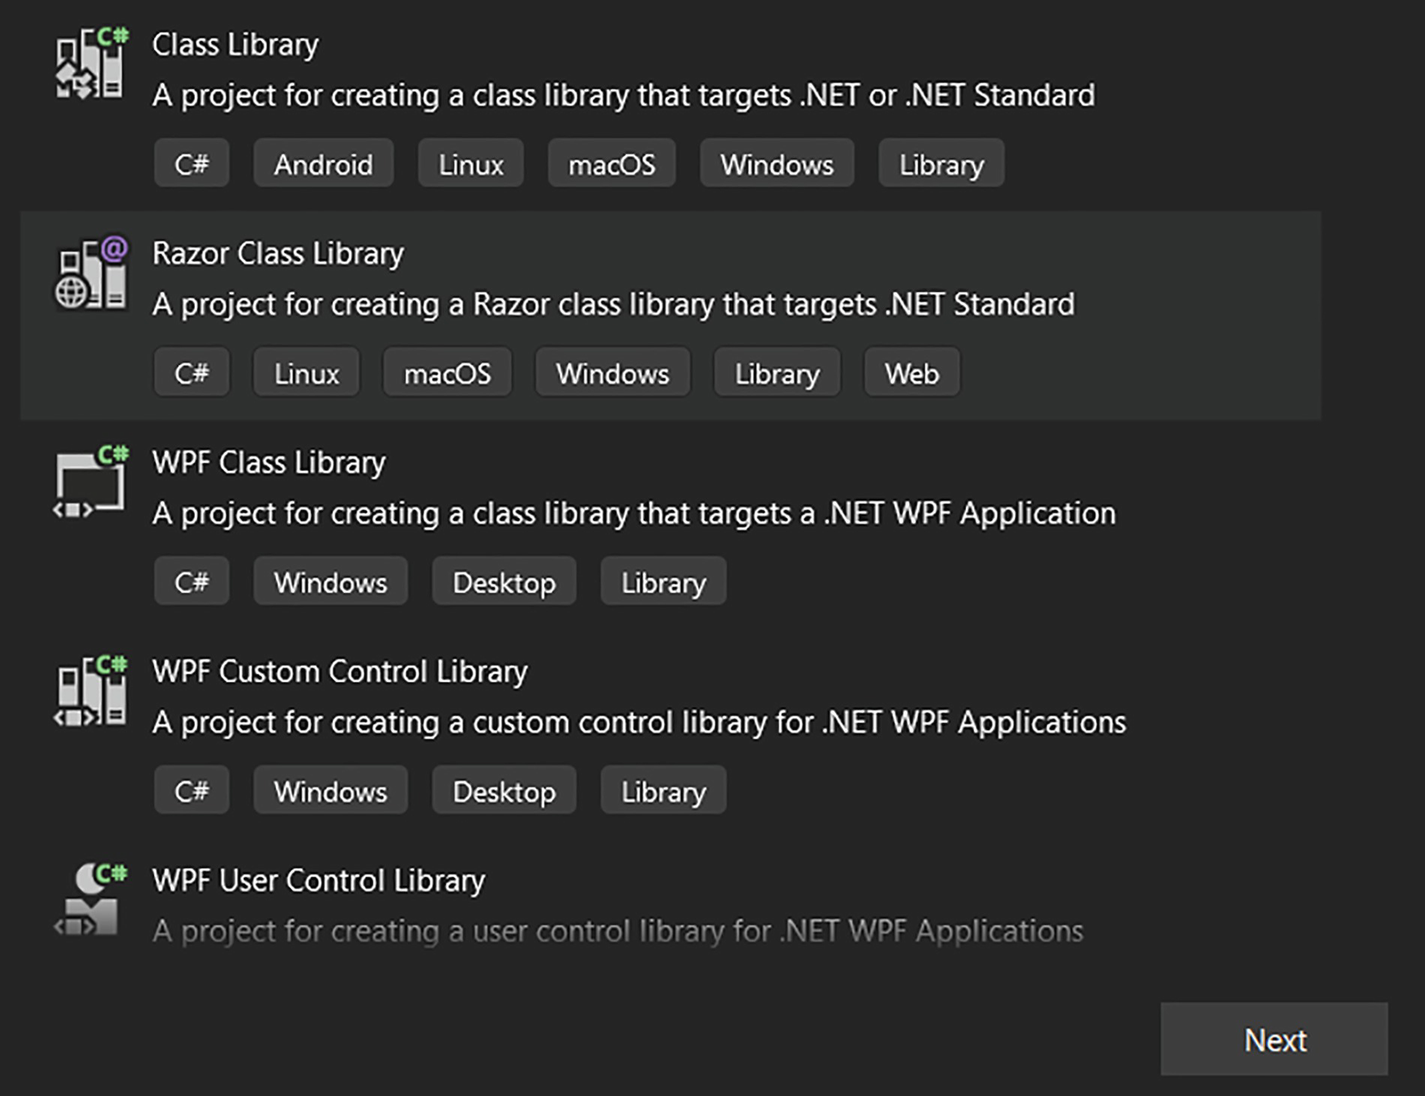
Just like any C# executable project, Blazor can have class libraries
. These libraries are capable of storing not just classes with logic but also components and styling. The Blazor library project template is called Razor Class Library
(Figure 5-5) in Visual Studio.
A screenshot lists a menu of a class, razor class, W P F class, W P F custom control, and W P F user control library.
Figure 5-5
Razor class project setup in Visual Studio
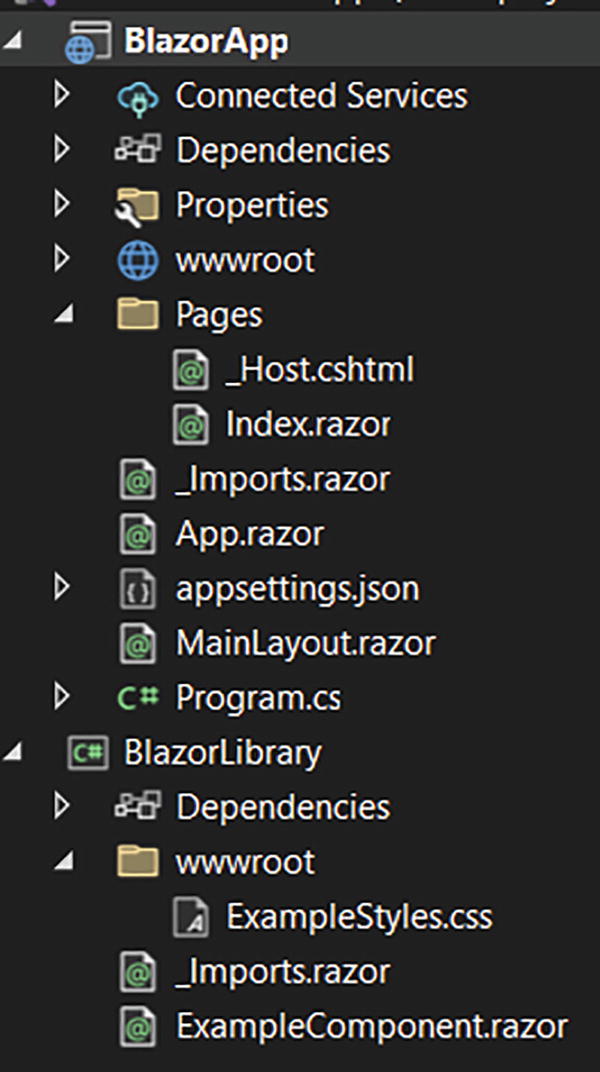
For a basic example, we have one Blazor project and one Blazor code library project
(Figure 5-6). The library contains a new CSS file and a component, which will be displayed in Index.razor.
A screenshot lists a menu of the blazor app option, pages, and the blazor library. It has connected services, dependencies, properties, wwwroot, and app settings.
Figure 5-6
File contents for example projects
There is only one style
here (Listing 5-18) to make a button red Listing 5-19.
Index.razor contains another button, with the same style applied (from the library).
The result of the code is quite simple
(Figure 5-7): two buttons are displayed. One is from the page itself, and one is from the component that comes from the library.
Two text boxes with a text which reads the index page button and example component button.
Figure 5-7
Output view for the example
There are two important things to do for this to work. The first is to add a reference Listing 5-21 to the library in your Blazor project, just like you would add any other code library to a C# project.
The second thing is to add the reference to the stylesheet file in a very specific way. This will apply to any JavaScript stored in the library. You must always use the following format:
Background tasks
in Blazor need to be handled with care Listing 5-22, as any issues related to UI updates can be difficult solve.
<p>@fordisplay</p>
@code {
int fordisplay;
protected override Task OnInitializedAsync()
{
_ = BackgroundTask();
return base.OnInitializedAsync();
}
async Task BackgroundTask()
{
var rnd = new Random();
while (true)
{
await Task.Delay(2000);
fordisplay = rnd.Next(1, 1000);
StateHasChanged();
}
}
}
Listing 5-22
UI Update from Background Task Example
The example here simply
runs a loop and every two seconds (2000ms) sets a new random value. The method BackgroundTask is started in OnInitializedAsync, without await, meaning that it will start running and will move to something else. This also means it will be running in a background.
For this to update the UI, you must use the StateHasChangedmethod
. This should be used whenever a value in the UI needs to be updated.
Countdown Timer Example
This example will show several features
from this and previous chapters joined together in one project.
First, in the code section, we need two variables (Listing 5-23). TimeSpan will be holding the time, and the system will be subtracting from it every second. The Statusinteger
is simply the status for the timer. It is important to note that if you have a bigger project where such statuses would be reused, it might be worth your time to have an enum set up.
TimeSpan timeleft;
// 1- running, 2 - paused, 3 - stopped
int status = 3;
Listing 5-23
Variables for Timer
For the running state (Listing 5-24), we simply have a button, which when clicked will change the status variable, which in turn will change what the user sees. You will later see how the pausing of a timer is done. Once the timer is paused, the user
can see a resume button, which, again, simply changes the value in the status variable.
@if (status == 1 || status == 2)
{
@if (status == 1)
{
<p><button @onclick="@(() => { status = 2; })">Pause</button></p>
}
@if (status == 2)
{
<p><button @onclick="@(() => { status = 1; })">Resume</button></p>
}
<p><button @onclick="@(() => { status = 3; timeleft = new TimeSpan(0, 0, 0); })">Stop</button></p>
<p>Time left: @timeleft</p>
}
Listing 5-24
Timer Setup and Display UI
Both paused and running views allow users to see the timer display (time left) and a stop button
. When the stop button is clicked, the status variable is changed, and with that the TimeSpan variable is reset to zero.
The stopped status view (Listing 5-25) is where the user can start the countdown and set the time in seconds.
Since we have TimeSpan for storing time, we cannot directly bind it to the input. Instead, we need to use the oninput event and get the seconds from that event argument. To complete the two-way binding, we just need to assign value that we set in the event.
Finally, the start button will change its status to running and execute the RunTimermethod
(Listing 5-26) without await; it will run in the background.
The method used in Listing 5-26 contains a loop that will run as long as the status is either running or paused. But, it will only update the value and display it in the UI if the status is running. Every second it will subtract one second from the TimeSpan variable and execute the StateHasChanged event to update the UI. Finally, once the TimeSpan reaches zero, it will change the status to stopped (3) and once again execute StateHasChanged to update the UI.
Error Boundaries
Error boundaries
in Blazor can wrap specific parts of UI code, which then in case of an error would only display an error and break that part of the code. This can be useful when dealing with interactive lists and other such more complex arrangements.
In Listing 5-27, we have a class object that is set to null. Then in the paragraph it is set to display val1, which will throw an exception as the object is null. Normally, this would break the whole page, but since it is wrapped in ErrorBoundary, it will display an error only for that part of code. If you only wrap your code in ErrorBoundary, it will display the default warning. To add your own, you use ErrorContent and then add wrapped content in ChildContent.
<ErrorBoundary>
<ChildContent>
<p>@exampleclass.val1</p>
</ChildContent>
<ErrorContent>
<p >Something went wrong</p>
</ErrorContent>
</ErrorBoundary>
<p>Still works</p>
@code {
ExampleClass exampleclass;
class ExampleClass
{
public string val1 { get; set; }
}
}
Listing 5-27
ErrorBoundary in Blazor Code
Summary
In this chapter, you saw lots of features of Blazor and learned that some things are possible in only one of the Blazor types. Therefore, you should always be careful when you are planning your applications and choosing Blazor types.