Chapter 9. Creative Compositions
Improve Your Pictures with Sound Compositional Elements
Creating a great photograph takes more than just the right settings on your camera. To take your photography to the next level, you need to gain an understanding of how the elements within the frame come together to create a compositionally pleasing image. Composition is the culmination of light, shape, and, to borrow a word from the iconic photographer Jay Maisel, gesture. Composition is a way for you to pull your viewers into your image and guide them through the scene. Let’s examine a few methods you can use to add interest to your photos by utilizing some common compositional elements.
Poring Over the Picture
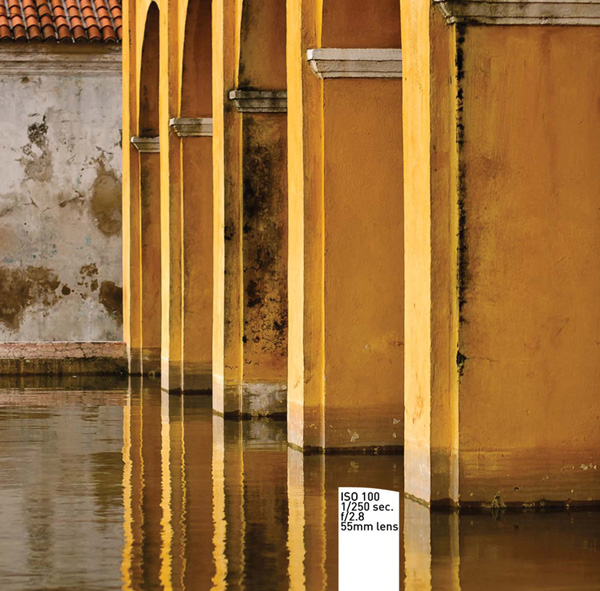
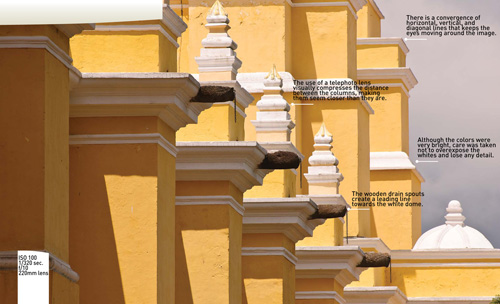
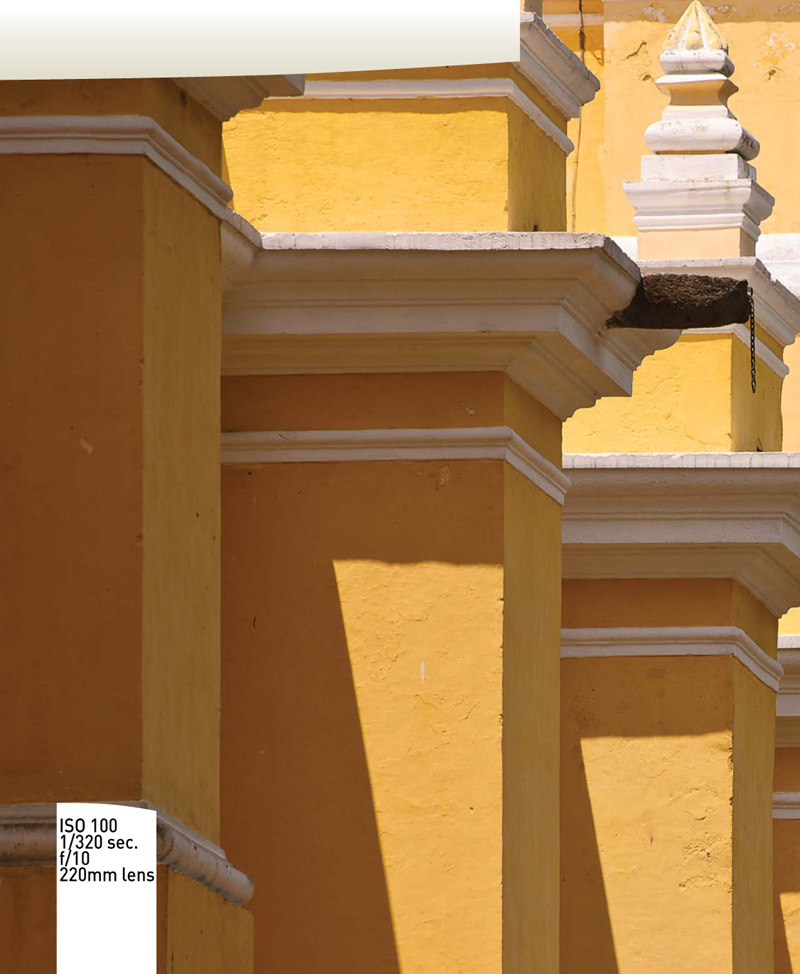
I’m a big fan of architecture photography. I love capturing the spirit of a great building and making the vision of the architect merge with my own reality of how I see their design. Did they intend for me to see what I see or did they have something else in mind? This particular façade belongs to one of the most beautiful churches I have ever seen: La Merced Church in Antigua, Guatemala. I was equally blessed to have some wonderful light that day as the yellows and whites seemed to be especially vivid and added to the compositional possibilities.
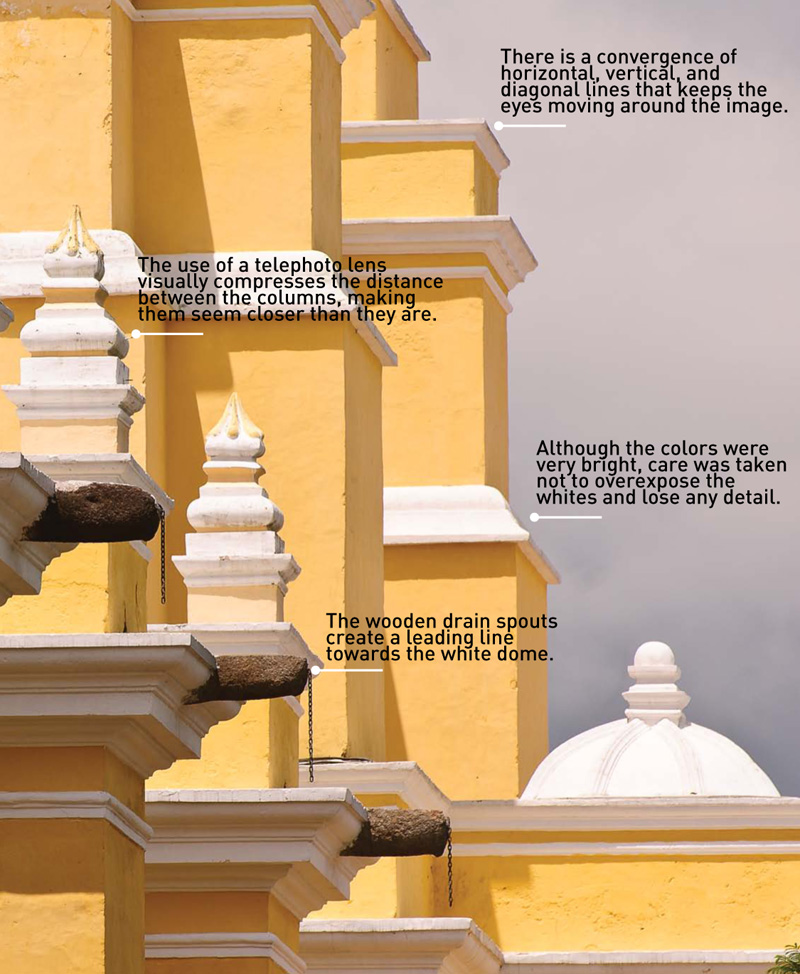
Poring Over the Picture
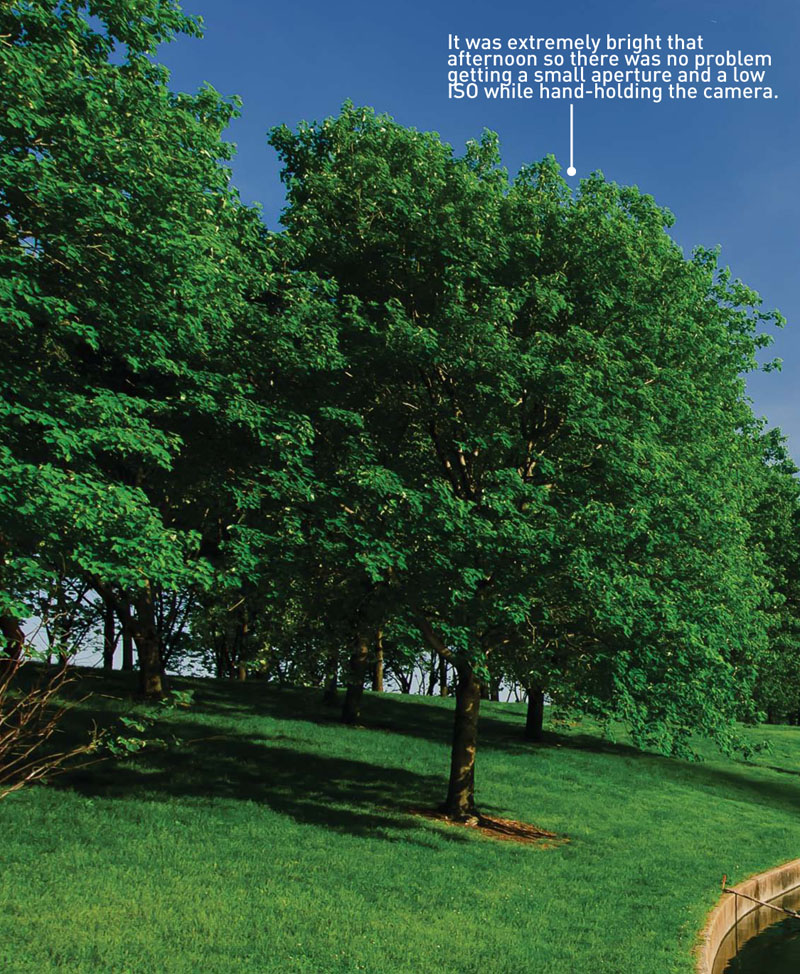
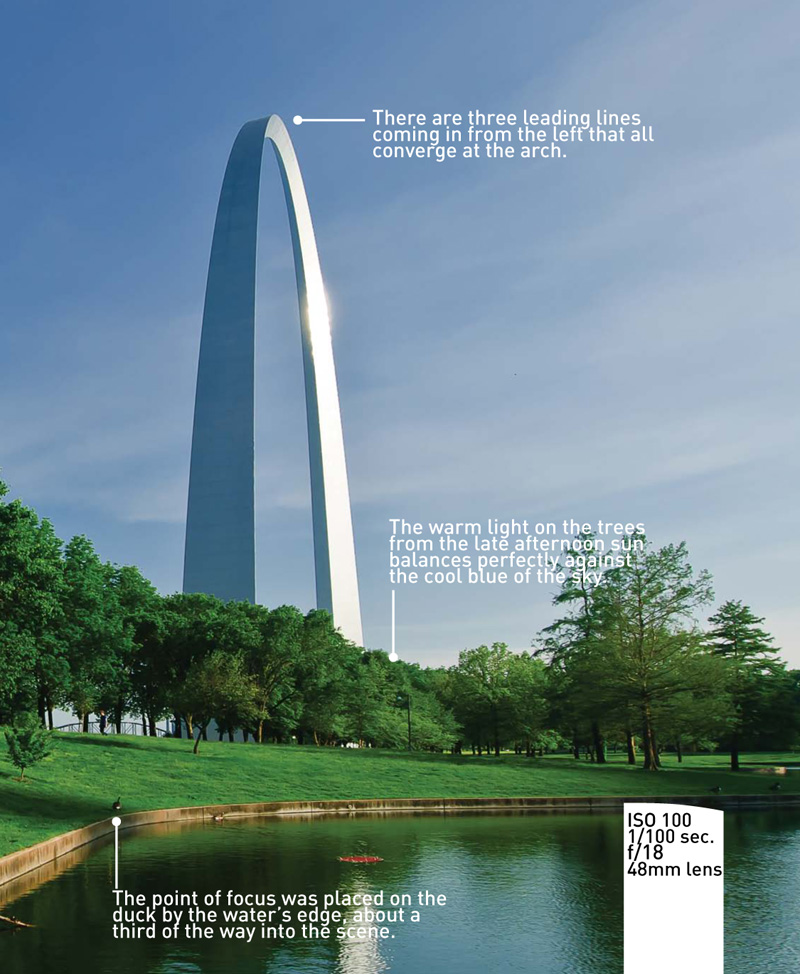
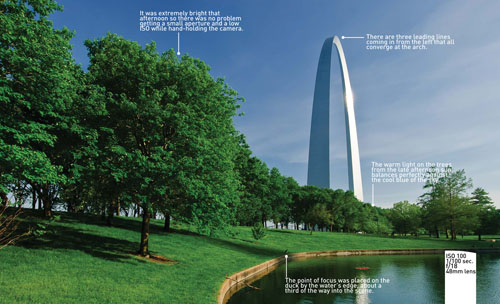
There are so many different ways to photograph a subject. It all comes down to your vision and how you want to express it in your image. On this day in St. Louis, I had circled the arch from every conceivable angle, trying to find just the right shot. I kept coming back to this spot by the pond so I guess it was just the right location for me.
Depth of Field
Long focal lengths and large apertures allow you to isolate your subject from the chaos that surrounds it. I utilize the Aperture Priority mode for the majority of my shooting. I also like to use a longer focal length lens to shrink the depth of field to a very narrow area (Figure 9.1). The closer you are to the subject with a long lens, the shallower you can make the depth of field (Figure 9.2).
Figure 9.1. The combination of a telephoto lens and a large aperture can create a shallow depth of field to isolate the subject.
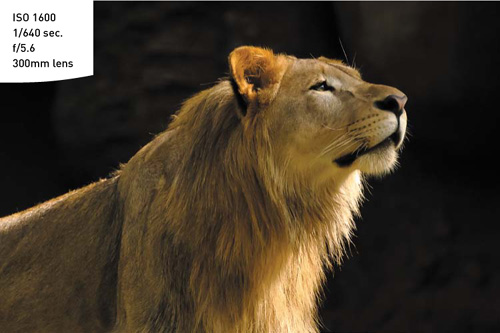
Figure 9.2. The closer you are to the subject, the blurrier you can make the background by using a large aperture.
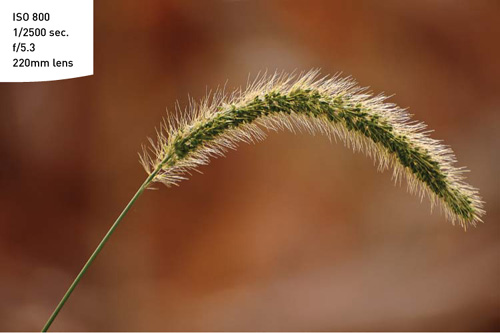
The blurred background helps keep the viewer’s eye concentrated on the sharper, in-focus areas, which gives greater emphasis to the subject.
Occasionally, a greater depth of field is required to maintain a sharp focus across a greater distance. This might be due to the sheer depth of your subject, where you have objects that are near the camera but sharpness is desired at a greater distance as well (Figure 9.3).
Figure 9.3. A wide-angle lens and small aperture made for maximum depth of field.

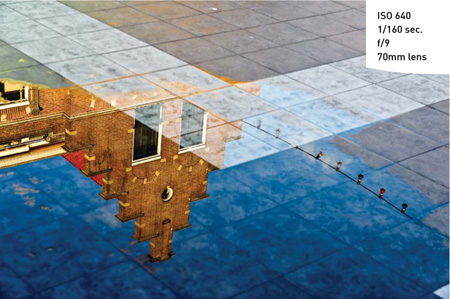
Or perhaps you are photographing a reflection in a puddle or lake. With a narrow depth of field, you could only get the reflected object or the puddle in focus. By making the aperture smaller, you will be able to maintain acceptable sharpness in both areas (Figure 9.4).
Figure 9.4. Getting a distant subject in focus in a reflection, along with the reflective surface, requires a small aperture.
Angles
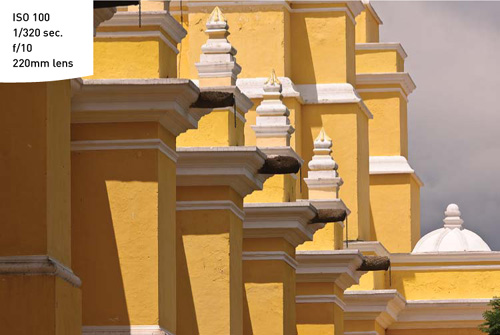
Having strong angular lines in your image can add to the composition, especially when they are juxtaposed to each other (Figure 9.5). This can create a tension that is different from the standard horizontal and vertical lines that we are so accustomed to seeing in photos.
Figure 9.5. The strong angular lines of the building create a dynamic composition.
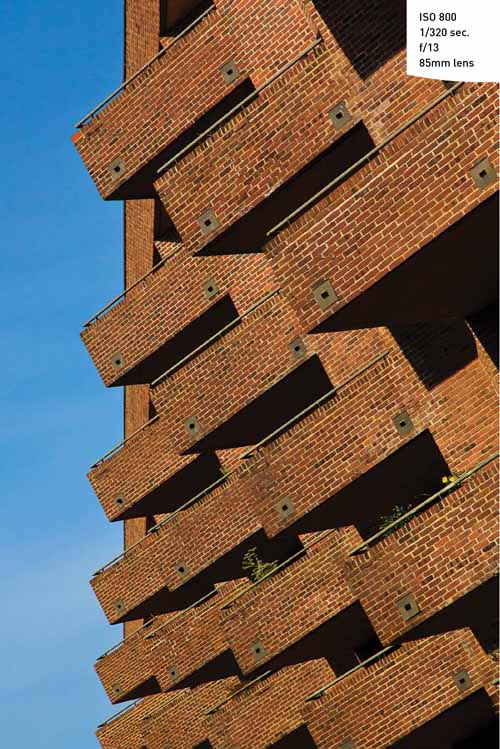
There are times when you can accentuate the angles in your images by tilting the camera, thus adding an unfamiliar angle to the subject, which draws the viewer’s attention (Figure 9.6).
Figure 9.6. By tilting the camera, I was able to create an unfamiliar view of the balconies, which can create more visual interest.
Point of View
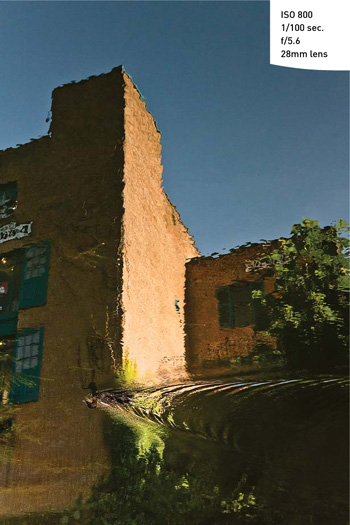
Sometimes the easiest way to influence your photographs is to simply change your perspective. Instead of always shooting from a standing position, try moving your camera to a place where you normally would not see your subject. Try getting down on your knees or even lying on the ground. This low angle can completely change how you view your subject, creating a new interest in common subjects (Figure 9.7).
Figure 9.7. You might not notice at first glance that this was shot to display upside down, giving a unique look to the scene.
Patterns
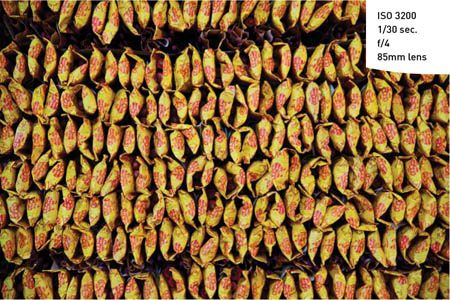
Rhythm and balance can be added to your images by finding the patterns in everyday life and concentrating on the elements that rely on geometric influences. Try to find the balance and patterns that often go unnoticed (Figure 9.8).
Figure 9.8. I moved in close to emphasize the patterns made by the stack of incense sticks.
Color
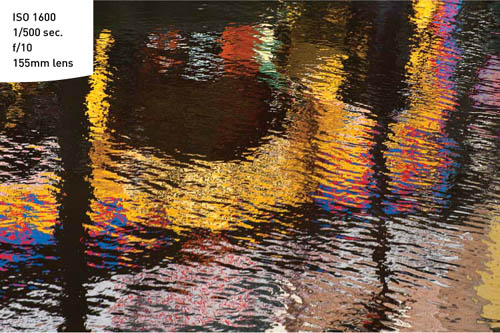
Color works well as a tool for composition when you have very saturated colors to work with. Some of the best colors are those within the primary palette. Reds, greens, and blues, along with their complementary colors (cyan, magenta, and yellow), can all be used to create visual tension (Figure 9.9). This tension between bright colors will add visual excitement, drama, and complexity to your images when combined with other compositional elements (Figure 9.10).
Figure 9.9. I really loved the contrast of this woman in blue sitting in front of the red wall. The vibrant colors are what make the shot.
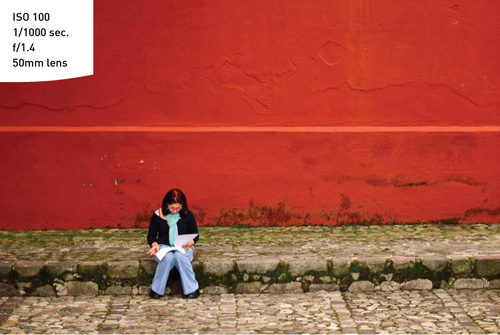
Figure 9.10. The vibrant colors combined with the rippling of the water gives the image an impressionistic feel.
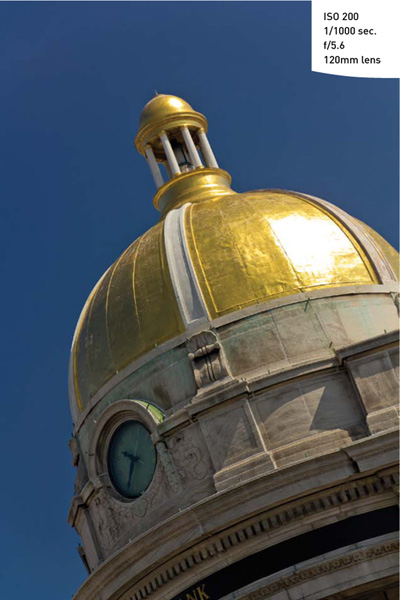
You can also use a color as a theme for your photography. One of the shots that I am known for is something that I call “The Blue Sky Shot.” If I am out shooting when the skies are blue, I can almost guarantee that I will try to use the sky as part of a background for some element of my image (Figure 9.11). The blue sky can act as a color contrast to the subject, giving a pleasing tension, visual interest, and isolation to my subject.
Figure 9.11. The deep blue sky is balanced by the gold dome.
Contrast
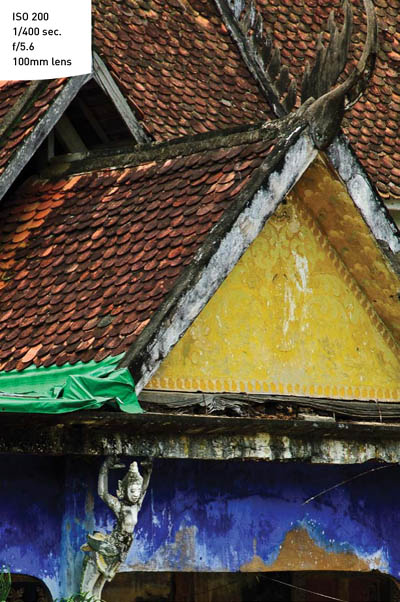
We just saw that you can use color as a strong compositional tool. One of the most effective uses of color is to combine two contrasting colors that make the eye move back and forth across the image (Figure 9.12). There is no exact combination that will work best, but consider using dark and light colors, like red and yellow or blue and yellow, to provide the strongest contrasts.
Figure 9.12. Contrasting colors complement each other and add balance to the scene.
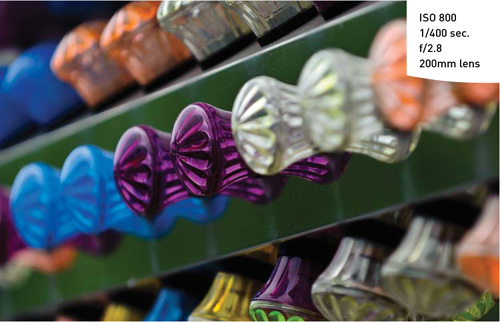
You can also introduce contrast through different geometric shapes that battle (in a good way) for the attention of the viewer. You can combine circles and triangles, ovals and rectangles, curvy and straight, hard and soft, dark and light, and so many more (Figure 9.13). You aren’t limited to just one contrasting element either. Combining more than one element of contrast will add even more interest. Look for these contrasting combinations whenever you are out shooting, and then use them to shake up your compositions.
Figure 9.13. This image is full of contrasting elements. The round shape of the bulbs contrasts with the straight, angular rows of lights. There is also a lot of color contrast going on, as well.
Leading Lines
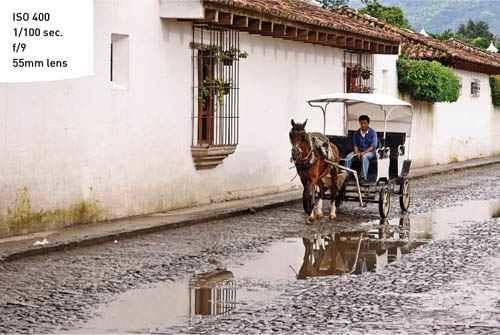
One way to pull a viewer into your image is to incorporate leading lines. These are elements that come from the edge of the frame and then lead into the image toward the main subject (Figure 9.14). This can be the result of vanishing perspective lines, an element such as a river, or some other feature used to move from the outer edge in to the heart of the image.
Figure 9.14. The curb and rooflines lead the eye across the frame towards the horse and carriage.
Splitting the Frame
Generally speaking, splitting the frame right down the middle is not necessarily your best option. While it may seem more balanced, it can actually be pretty boring.
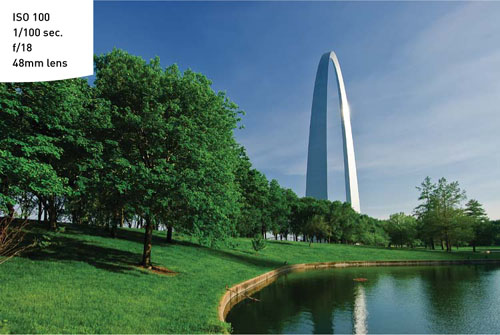
Generally speaking, you should utilize the rule of thirds when deciding how to divide your frame (Figure 9.15).
Figure 9.15. The frame is divided equally in thirds with the tree line at the bottom and the arch rising up vertically on the right-hand third of the image.
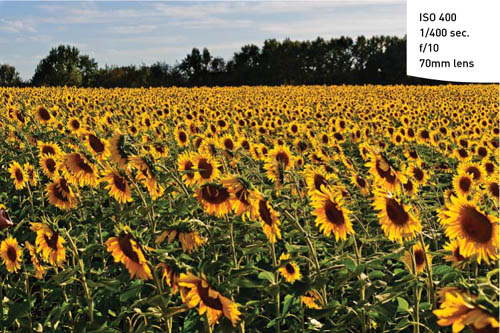
With horizons, a low horizon will give a sense of stability to the image. Typically, this is done when the sky is more appealing than the landscape below. When the emphasis is to be placed on the landscape, the horizon line should be moved upward in the frame, leaving the bottom two thirds to the subject below (Figure 9.16).
Figure 9.16. The star of this show is the field of colorful sunflowers, which is why the horizon was placed in the top third of the frame.
Frames Within Frames
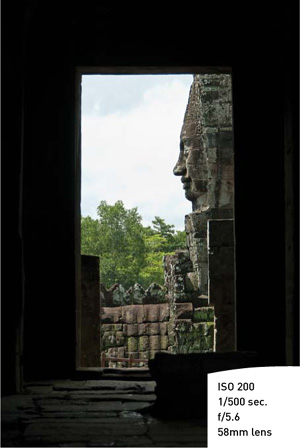
The outer edge of your photograph acts as a frame to hold all of the visual elements of the photograph. One way to add emphasis to your subject is through the use of internal frames (Figures 9.17 and 9.18). Depending on how the frame is used, it can create the illusion of a third dimension to your image, giving it a feeling of depth.
Figure 9.17. The outside window is perfectly framed by the larger window over the stairs, creating the perfect frame within a frame.
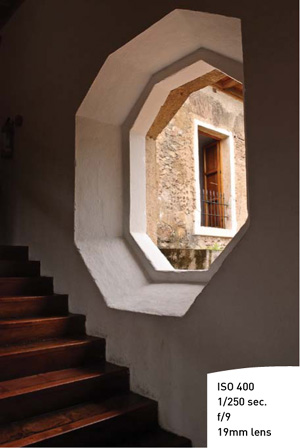
Figure 9.18. The temple doorway created a great frame for the large face lurking outside.
This chapter has just begun to scratch the surface of composition. There are so many different things to consider that it could literally fill a book. In fact, it already has. When you are ready to dive deeper into the creative process of image composition, check out the book from Laurie Excell, John Batdorff, David Brommer, Rick Rickman, and Steve Simon called Composition: From Snapshots to Great Shots.
Chapter 9 Assignments
Apply the shooting techniques and tools that you have learned in the previous chapters to these assignments, and you’ll improve your ability to incorporate good composition into your photos. Make sure you experiment with all the different elements of composition and see how you can combine them to add interest to your images.
Learning to see lines and patterns
Take your camera for a walk around your neighborhood and look for patterns and angles. Don’t worry so much about getting great shots as much as developing an eye for details.
The ABCs of composition
Here’s a great exercise that was given to me by my friend Vincent Versace: shoot the alphabet. This will be a little more difficult but with practice you will start to see beyond the obvious. Don’t just find letters in street signs and the like. Instead, find objects that aren’t really letters but have the shape of the letters.
Finding the square peg and the round hole
Circles, squares, and triangles. Spend a few sessions concentrating on shooting simple geometric shapes.
Using the aperture to focus attention
Depth of field plays an important role in defining your images and establishing depth and dimension. Practice shooting wide open, using your largest aperture for the narrowest depth of field. Then find a scene that would benefit from extended depth of field, using very small apertures to give sharpness throughout the scene.
Leading them into a frame
Look for scenes where you can use elements as leading lines and then look for framing elements that you can use to isolate your subject and add both depth and dimension to your images.
Share your results with the book’s Flickr group!
Join the group here: flickr.com/groups/exposure_fromsnapshotstogreatshots

