
Chapter 8. Adding Data-Driven Features to Gatsby Sites
Over the course of the last several chapters, we’ve explored some of the most important concepts in Gatsby when it comes to working with data, whether that data consists of JSON or assets made available through GraphQL. Now it’s time for us to revisit some real-world applications and use cases that are relevant to those building Gatsby sites for clients and organizations.
In Chapter 3, we focused solely on features that don’t require management of data through Gatsby’s internal data layer, whether because of intelligent defaults or because there is no need for GraphQL. Here, we’ll concentrate on real-life applications and requirements driven by data that obligate the use of GraphQL and other aspects of Gatsby we’ve explored in the intervening chapters. We’ll implement various features that are key for Gatsby sites dealing with data, such as site search, commenting, blog taxonomy, pagination, RSS feeds, and user authentication.
Adding Site Search
Implementing site search can be challenging even for traditional websites, let alone more modern and dynamic sites that need to behave like interactive applications too. Any site search, whether in Gatsby or not, requires three components:
- Search index
- The search index is a corpus of all of the data you wish to make available to a search engine, recorded in a format optimized for search use cases. Without a search index, a site search feature would need to scrape through your site looking for results every time a user wanted to find something instead of using a ready-made index.
- Search engine
- The search engine’s role is to accept a search query, compare it to the search index, and return any matched documents from the search index to the user.
- Search interface
- Finally, a search interface of some sort—for our purposes, typically a React component—needs to be made available to the user so that they can input search queries and view search results.
There are two recommended approaches to adding site search to a Gatsby site, and they are shared with many other JavaScript frameworks as well:
-
Use an open source search service. Leveraging an open source search service (e.g.,
elasticlunr,flexsearch,js-search) to power site search for your Gatsby site comes with the benefit of free and offline-enabled search. But it also comes with a cost: because the entire search index needs to be made available on the client, the client bundle can explode in size, which impacts performance. -
Use an API-driven search service. Leveraging an external search service (e.g., Elasticsearch, Solr, Algolia) can mitigate impacts on scalability, because search users don’t need to retrieve the entire search index to persist on the client side. The drawback, however, is that most API-driven search services require paid hosting or a paid subscription.
In the coming sections, we’ll take a look at implementing search with Algolia, an API-driven search service.
Note
The Gatsby documentation provides a comprehensive tutorial for using the open source js-search library with both small and medium-sized datasets and large datasets, but due to its significant length I won’t summarize its procedures here.
Implementing Site Search with Algolia
Algolia is a popular API-driven site search platform that is intended for use in JavaScript applications. The free tier permits a limited number of searches per month; payment is required for more frequent searches. Because Algolia provides components out of the box, there’s no need to set up your own search server. To use it on any site (not just Gatsby sites), Algolia requires developers to provide a list of pages as well as their locations and navigation scheme, and the Algolia API returns results based on a search query that is compared with an Algolia-hosted search index.
Because Algolia handles the search engine, the only two items you need to worry about as a Gatsby developer are populating the search index and building a search interface. Fortunately, the gatsby-plugin-algolia plugin handles automatic indexing of your Gatsby pages every time you run gatsby build. You can use GraphQL queries to indicate what Algolia should track: this allows you to customize which pages from your Gatsby site and what information to index.
Note
Algolia provides a distinct product known as DocSearch for Gatsby and other developers who wish to offer search across documentation sites. This eliminates the need to conduct any manual indexing via web scraping.
Configuring gatsby-plugin-algolia
Let’s start from scratch with a new Gatsby blog starter, and immediately go ahead and install the Algolia plugin for Gatsby:
$gatsbynewgtdg-ch8-algoliagatsbyjs/gatsby-starter-blog$cdgtdg-ch8-algolia# If using NPM$npminstall--savegatsby-plugin-algolia# If using Yarn$yarnaddgatsby-plugin-algolia
Now you need to add some configuration to your gatsby-config.js file, which will identify your Algolia account to the gatsby-plugin-algolia plugin and authorize it. In the API Keys section of your Algolia dashboard, you’ll find the key credentials required: an Application ID, a Search-Only API Key, and an Admin API Key. Using a library such as dotenv, place those into a separate .env file to keep them safe:
ALGOLIA_APP_ID=your_app_id
ALGOLIA_SEARCH_KEY=your_search_only_api_key
ALGOLIA_ADMIN_KEY=your_admin_api_key
The next step is to add a few options (appI, apiKey, and queries) to your Algolia configuration within the Gatsby configuration file, as follows:
plugins:[{resolve:`gatsby-plugin-algolia`,options:{appId:process.env.ALGOLIA_APP_ID,apiKey:process.env.ALGOLIA_ADMIN_KEY,queries:require("./src/utils/algolia-queries")},},],
As you may have noticed, the configuration of gatsby-plugin-algolia requires the creation of an additional utility file located at src/utils/algolia-queries.js, which will contain what Algolia needs to understand how to index your Gatsby site.
Querying Pages with GraphQL for Indexing
In order to instruct Algolia how to index your Gatsby content, you need to create a new file at src/utils/algolia-queries.js (or wherever the queries option in your Gatsby configuration file points). The GraphQL queries you insert into the queries file will return information that is then converted into a set of Algolia records, which are composed of key/value pairs with data needing to be indexed.
Here’s an example queries file that instructs Algolia how to populate its records. Go ahead and add this to your codebase in the appropriate location (src/utils/algolia-queries.js):
constescapeStringRegexp=require("escape-string-regexp")constpagePath=`content`constindexName=`Pages`constpageQuery=`{ pages: allMarkdownRemark( filter: { fileAbsolutePath: { regex: "/${escapeStringRegexp(pagePath)}/" }, } ) { edges { node { id frontmatter { title } fields { slug } excerpt(pruneLength: 5000) } } } }`functionpageToAlgoliaRecord({node:{id,frontmatter,fields,...rest}}){return{objectID:id,...frontmatter,...fields,...rest,}}constqueries=[{query:pageQuery,transformer:({data})=>(data.pages.edges.map(pageToAlgoliaRecord)),indexName,settings:{attributesToSnippet:[`excerpt:20`]},},]module.exports=queries

-
Each Algolia record must have a unique identifier that is provided as
objectID. Here, we provide an identifier not only to the record, but also theslug(infields), thetitle(infrontmatter), and theexcerpt. 
-
This file’s primary export is a list of queries. Each query defines a single index for Algolia, though multiple indexes are possible with Algolia.

-
Each index must be associated with a GraphQL query that is responsible for fetching the pages and any data to be indexed.

-
A transformer transforms the GraphQL data to an Algolia record according to logic that we write; in this case this logic is contained in
pageToAlgoliaRecord. 
-
Every index must have a name by which it can be identified.

-
Finally, each query has optional settings that we can use to instruct Algolia to do custom work.
Once you’ve finished writing the indexing logic for Algolia, you can test the gatsby-plugin-algolia plugin and ensure that indexing is taking place by running gatsby build. Your terminal output will contain logged events that look like the following:
#gatsby build terminal outputsuccessBuildingstaticHTMLforpages-7.623s-5/50.56/sAlgolia:1queriestoindexAlgolia:query0:executingqueryAlgolia:query0:graphqlresultedin3recordsAlgolia:query0:splittingin1jobs
The number of records that “result” from graphql should match the number of pages you have in your Gatsby site. If you log into your Algolia account and check the newly created Pages index in your list of Algolia indices, you’ll see your indexed content represented.
There are two things to keep in mind when troubleshooting Algolia indexing of Gatsby sites:
-
If you see a GraphQL error such as
Field 'fileAbsolutePath' is not defined by type MarkdownRemarkFilterInput, this is a sign that the plugin wasn’t able to find pages in your Gatsby project. You’ll need to check the GraphQL query and the path you configured forgatsby-source-filesystem. -
If you see an Algolia error such as
AlgoliaSearchError: Record at the position ... is too big, you’ve exceeded Algolia’s limit of 10 KB for a single index entry.
Note
Covering the React InstantSearch library, Algolia’s user interface framework for implementing Algolia search, is outside the scope of this book. The Algolia documentation has information about multiple indices, structuring data into records, and optional query settings. The Gatsby documentation provides a comprehensive tutorial for creating a search widget or user interface with these tools, but you can also use your own.
Adding a Commenting System
Though many blogs lack commenting sections for each post, a commenting system is a common need for blogs that wish to invite engagement from readers. One of the biggest challenges of implementing a commenting system is that there are a variety of options available to choose from, each with its own trade-offs, including Commento, Disqus, Facebook Comments, FastComments, Gitalk, Staticman, Talkyard, and Utterances.
Note
As with many features in Gatsby, it’s also possible to create your own commenting system from scratch. For more information, consult Tania Rascia’s blog post on the Gatsby blog.
For our purposes, due to its ease of use and high degree of adoption and maturity, we’ll implement a Disqus commenting system that displays on every blog post we have. Disqus is widely used by media organizations and hobbyist bloggers alike, and it comes with a feature-rich free tier and first-class support for React. In addition, Disqus benefits from a large user base and a distinctive design that many blog readers will immediately recognize.
Warning
Though Disqus comments are lazy-loaded so as not to block any other loading on the page, introducing Disqus also means that your site is no longer truly static, owing to the fact that Disqus dynamically injects its commenting system into the page through an <iframe> embed. This may be less desirable or even prohibitive for organizations that deal with compliance considerations or personally identifiable information.
Let’s start with a clean slate. First, create a new Gatsby blog starter:
$gatsbynewgtdg-ch8-commentinggatsbyjs/gatsby-starter-blog$cdgtdg-ch8-commenting
Next, install the disqus-react library, which you’ll need to insert Disqus comments into your Gatsby site:
# If using NPM$npminstall--savedisqus-react# If using Yarn$yarnadddisqus-react
If you don’t already have a Disqus account, you can sign up now on the website. Create a Disqus site, and copy the shortname. Now you need to identify your Disqus site to Disqus in Gatsby so it can make the connection between the two. In order to do this, you’ll need to identify your Disqus shortname as an environment variable, as follows:
# .env
# Provides Disqus site shortname to enable Disqus comments
GATSBY_DISQUS_SHORTNAME=myDisqusShortname
In order to make Disqus’s commenting system available on every single blog post page generated by Gatsby, you need to edit the blog post template. In the blog starter, open src/templates/blog-post.js and add an import statement to the very top that imports the DiscussionEmbed component from disqus-react:
import*asReactfrom"react"import{Link,graphql}from"gatsby"import{DiscussionEmbed}from"disqus-react"
Now, just inside the BlogPostTemplate, add another const definition, this time identifying your Disqus shortname in a Disqus configuration object:
constBlogPostTemplate=({data,location})=>{constpost=data.markdownRemarkconstsiteTitle=data.site.siteMetadata?.title||`Title`const{previous,next}=dataconstdisqusConfig={shortname:process.env.GATSBY_DISQUS_SHORTNAME,config:{identifier:post.fields.slug,title:post.frontmatter.title,},}
Note that in order to access the slug value, you’ll need to update your GraphQL query to acquire that value as well. Modify solely the unaliased markdownRemark portion of the GraphQL query so it looks like this:
markdownRemark(id:{eq:$id}){idexcerpt(pruneLength:160)htmlfields{slug}frontmatter{titledate(formatString:"MMMM DD, YYYY")description}}
The final step is to add the Disqus comments component to the section of the blog post template where it should reside:
<articleclassName="blog-post"itemScopeitemType="http://schema.org/Article"><header><h1itemProp="headline">{post.frontmatter.title}</h1><p>{post.frontmatter.date}</p></header><sectiondangerouslySetInnerHTML={{__html:post.html}}itemProp="articleBody"/><hr/><DiscussionEmbed{...disqusConfig}/><hr/><footer><Bio/></footer></article>
Adding Taxonomy to Blog Posts
In Chapter 6, we took a look at programmatic page creation and how to use the gatsby-node.js file to generate pages based on arbitrary Markdown blog posts. Now that you understand how programmatic page creation works, many of the elements in the Gatsby blog starter will make more sense.
A common need for blogs is taxonomy: the combination of tags and categories that enriches the blog reader’s experience by letting them read more content relevant to their interests. In Gatsby, the easiest way to facilitate this is to create tag pages for your blog and insert tag links into your individual blog posts. More complex solutions exist, particularly if you’re integrating with a headless CMS, but we’ll focus on the Markdown use case in this section.
To kick things off, clone a new version of the Gatsby blog starter:
$gatsbynewgtdg-ch8-taxonomy-paginationgatsbyjs/gatsby-starter-blog$cdgtdg-ch8-taxonomy-pagination
The directory structure of this blog starter differs quite a bit from the blog we built in Chapter 6, but we can still find our Markdown posts in the content/blog directory.
Adding Tags and Querying for All Tags
The first thing we need to do is add a new field to the frontmatter in our Markdown blog posts. Let’s add a field called tags to content/blog/my-second-post/index.md with a few sample tags. Note that in Markdown, fields can be strings, numbers, or arrays; we’ll use an array here to enable multiple tags:
---title:MySecondPost!date:"2015-05-06T23:46:37.121Z"tags:["eggs","food","cooking"]---Wow!Ilovebloggingsomuchalready.Didyouknowthat"despiteitsname,saltedduckeggscanalsobemadefromchickeneggs,thoughthetasteandtexturewillbesomewhatdifferent,andtheeggyolkwillbelessrich."?([WikipediaLink](https://en.wikipedia.org/wiki/Salted_duck_egg))Yeah,Ididn'teither.
Let’s add a few tags to the other blog posts included with the starter as well, hello-world and new-beginnings. The following examples are truncated to show only the frontmatter section of each blog post file—the tags don’t necessarily correspond to the posts’ content, but we can work on that later!
---
title: Hello World
date: "2015-05-01T22:12:03.284Z"
description: "Hello World"
tags: ["eggs", "food", "cooking", "books"]
---

---
title: New Beginnings
date: "2015-05-28T22:40:32.169Z"
description: This is a custom description for SEO and Open Graph purposes,
rather than the default generated excerpt. Simply add a description field
to the frontmatter.
tags: ["animals", "food", "books"]
---
Now, once we restart the development server, we can query for those fields in GraphiQL. Issue the following query to see your tags in a GraphQL response:
{
  allMarkdownRemark {
    group(field: frontmatter___tags) {
      tag: fieldValue
      totalCount
    }
  }
}
The response to this query is shown in Figure 8-1. As you can see, we now have a full list of the tags in our blog post, as well as the count of blog posts per tag. The group field used here causes the query to group all blog posts by the tags field before returning each tag with the number of posts in the totalCount field.

Figure 8-1. The result of the preceding query, which returns a list of blog post tags with the total count of blog posts associated with each tag
Adding a Tag Page Template
Th next step is to create a tag page template (we covered template files in Chapter 6) for each individual tag and use it within createPages in gatsby-node.js to generate individual tag pages. Later, we’ll build a Gatsby page that lists all of the tags together in a tag index.
Create a new file named src/templates/tag.js for the individual tag page template, and insert the following code:
importReactfrom"react"import{Link,graphql}from"gatsby"constTag=({pageContext,data})=>{const{tag}=pageContextconst{edges,totalCount}=data.allMarkdownRemarkconsttagHeader=`${totalCount}post${totalCount===1?"":"s"}tagged with "${tag}"`return(<><h1>{tagHeader}</h1><ul>{edges.map(({node})=>{const{slug}=node.fieldsconst{title}=node.frontmatterreturn(<likey={slug}><Linkto={slug}>{title}</Link></li>)})}</ul></>)}exportdefaultTagexportconstpageQuery=graphql`query($tag: String) { allMarkdownRemark(limit: 100, sort: { fields: [frontmatter___date], order: DESC }, filter: { frontmatter: { tags: { in: [$tag] } } } ) { totalCount edges { node { fields { slug } frontmatter { title } } } } }`
-
Create a
tagHeaderthat adds the plural suffixswhen thetotalCountfield for the tag in question is greater than 1. -
Map each of the blog posts in your Markdown files to an unordered list item, provided that the blog post carries the tag in question.
-
Retrieve the first 100 blog posts, sorting them in descending chronological order and filtering based on whether the blog post has the tag assigned or not.
Our work isn’t quite done yet for the individual tag pages. The next thing we need to do is instruct Gatsby to use this individual tag page template to programmatically create the tag pages we need.
Programmatic Tag Page Creation with gatsby-node.js
Now that we have a Gatsby page template for individual tag pages, we need to use the gatsby-node.js file and the createPages API to generate individual tag pages in addition to the individual blog post pages already reflected in the file. Modify the import statements and exports.createPages implementation in gatsby-node.js to the following (note that this example contains only the new state of the exports.createPages implementation of the file; for brevity, the example excludes exports.onCreateNode and exports.createSchemaCustomization):
constpath=require(`path`)const_=require(`lodash`)const{createFilePath}=require(`gatsby-source-filesystem`)exports.createPages=async({graphql,actions,reporter})=>{const{createPage}=actions// Define a template for blog postconstblogPost=path.resolve(`./src/templates/blog-post.js`)// Define a template for individual tagsconsttagTemplate=path.resolve(`./src/templates/tag.js`)// Get all markdown blog posts sorted by dateconstresult=awaitgraphql(`{ postsRemark: allMarkdownRemark(sort: { fields: [frontmatter___date], order: DESC } limit: 100 ) { nodes { id fields { slug } frontmatter { tags } } } tagsGroup: allMarkdownRemark(limit: 100) {group(field: frontmatter___tags) { fieldValue } } }`)if(result.errors){reporter.panicOnBuild(`There was an error loading your blog posts`,result.errors)return}constposts=result.data.postsRemark.nodes// Create blog post pages, but only if there's at least one Markdown file// found at "content/blog" (defined in gatsby-config.js).// `context` is available in the template as a prop and as a variable in// GraphQL.if(posts.length>0){posts.forEach((post,index)=>{constpreviousPostId=index===0?null:posts[index-1].idconstnextPostId=index===posts.length-1?null:posts[index+1].idcreatePage({path:post.fields.slug,component:blogPost,context:{id:post.id,previousPostId,nextPostId,},})})}// Create individual tag pages.consttags=result.data.tagsGroup.groupif(tags.length>0){tags.forEach(tag=>{createPage({path:`/tags/${_.kebabCase(tag.fieldValue)}/`,component:tagTemplate,context:{tag:tag.fieldValue,},})})}}
-
Here, we add a new dependency: the
lodashlibrary, which contains a utility for converting strings tokebab-case. -
We add our individual tag page template as a constant just below the blog post page template, referring to the location of the tag page template (src/templates/tag.js).
-
Our original GraphQL query only had one instance of the
allMarkdownRemarkfield. Because both blog posts and tags require us to access theallMarkdownRemarkfield, our new GraphQL query aliases the firstallMarkdownRemarkfield, which returns blog posts from Markdown files, topostsRemark. -
The second
allMarkdownRemarkfield, which returns tags from Markdown files, is aliased totagsGroup. Within thatallMarkdownRemarkfield, we retrieve each tag. -
Because we needed to alias our original
allMarkdownRemarkfield topostsRemark, we need to modify the const definition of posts toresult.data.postsRemark.nodesinstead of the originalresult.data.allMarkdownRemark. -
Finally, our code culminates in a
forEachloop that invokescreatePagefor each given tag. The tag template we created earlier is used to generate the new individual tag page, located at /tags/{tag}, where {tag} is the tag name converted tokebab-case.
Note that we’ve passed tag.fieldValue into the createPage invocation through the context object. This is the value that is used in the src/templates/tag.js template by GraphQL to limit our search only to posts that carry that tag. If we revisit the GraphQL query in src/templates/tag.js, we can see that tag.fieldValue, found in gatsby-node.js, is passed in as the $tag query variable:
exportconstpageQuery=graphql`query($tag: String) {allMarkdownRemark(limit: 100,sort: { fields: [frontmatter___date], order: DESC },filter: { frontmatter: { tags: { in: [$tag] }}}) {totalCountedges {node {fields {slug}frontmatter {title}}}}}`
Now that we have working individual tag pages at /tags/food, /tags/books, etc., as seen in Figure 8-2, we can move on to creating a tag index page that lists every tag represented in our blog.

Figure 8-2. Our individual tag page template, now working at /tags/food and correctly displaying the three blog posts we assigned the tags to earlier
Adding a Tag Index Page
Our final step doesn’t require us to use gatsby-node.js, because we’ll only ever have one index of tags. For more complex taxonomies, where there is a tree of tags, you might need to use gatsby-node.js to create pages programmatically based on arbitrary tag groups. For our purposes, however, we’ll assume there is only one group of tags that aren’t associated with any higher tags in a hierarchy.
Because we don’t need to do any programmatic page creation for our tag index page, we can simply create a new Gatsby page at src/pages/tags.js. For the tag index page, we’ll want to list out all of the tags, along with the number of posts associated with each tag. Create a new page at src/pages/tags.js and add the following:
importReactfrom"react"import{Link,graphql}from"gatsby"importkebabCasefrom"lodash/kebabCase"constTagIndex=({data:{allMarkdownRemark:{group}}})=>(<><h1>Tags</h1><ul>{group.map(tag=>(<likey={tag.fieldValue}><Linkto={`/tags/${kebabCase(tag.fieldValue)}/`}>{tag.fieldValue}({tag.totalCount})</Link></li>))}</ul></>)exportdefaultTagIndexexportconstpageQuery=graphql`{allMarkdownRemark(limit: 100) {group(field: frontmatter___tags) {fieldValuetotalCount}}}`
When we save this file, restart the development server, and navigate to /tags, we’ll see our tag index displaying properly, as illustrated in Figure 8-3. By extending our GraphQL query even further, we could enrich this tag index page with full blog posts displaying instead of only links to those content items.

Figure 8-3. Our completed tag index page, displaying each tag along with the number of blog posts associated with it
Adding Pagination
Pagination is the act of separating a particularly long page or list of content into multiple pages to avoid overwhelming the user. Given a list of hundreds or thousands of entries, pagination can, from a single Gatsby template, display a limited number of items per page. In Gatsby, the quickest way to achieve pagination is to use the GraphQL API and the gatsby-node.js file.
Let’s take a look at an example. Building off the work we did in the previous section on blog taxonomy, let’s continue from where we left off. When you spin up a new Gatsby blog starter, a page is created at src/pages/index.js that represents the blog post index: a list of blog posts sorted in descending chronological order. At the moment, our blog displays three blog posts. But what if we want to paginate the blog index such that only two blog posts display per page?
Preparing for Pagination in Page Templates
In GraphQL, we can think of pagination as a combination of limit and skip arguments. On the first page of our blog index, we’ll see a limit of two blog posts with no skip. On the second page, however, we need to skip the two blog posts already displayed on the first paginated page, in addition to the standard limit of two blog posts.
The first step is to create a new file at src/templates/blog-list.js. This will become our blog index template that will govern each paginated blog index page:
importReactfrom"react"import{Link,graphql}from"gatsby"exportdefaultclassBlogListextendsReact.Component{render(){constposts=this.props.data.allMarkdownRemark.edgesreturn(<ul>{posts.map(({node})=>{consttitle=node.frontmatter.title||node.fields.slugreturn(<likey={node.fields.slug}><Linkto={node.fields.slug}>{title}</Link></li>)})}</ul>)}}exportconstblogListQuery=graphql`query blogListQuery($skip: Int!,$limit: Int!) {allMarkdownRemark( sort: { fields: [frontmatter___date], order: DESC } limit:$limitskip:$skip ) { edges { node { fields { slug } frontmatter { title } } } } }`
-
Here, we provide query variables to the GraphQL query that will eventually be provided through the
contextobject in gatsby-node.js, as we saw in the previous section on taxonomy. -
Next, we add arguments on our
allMarkdownRemarkfield to add the eventuallimitandskipvalues that will come from thecontextobject in gatsby-node.js.
Generating Paginated Pages with gatsby-node.js
In order to create paginated pages for our list of blog posts, with two blog posts per page, we need to use gatsby-node.js to generate some new pages. Our Gatsby blog starter already has a blog index, namely src/pages/index.js, but our goal here is to create a new page at the path /blog, with further paginated pages taking the paths /blog/2, /blog/3, /blog/4, etc. Open your gatsby-node.js file, scroll to the end of the exports.createPages section of the code, and add the following lines:
exports.createPages=async({graphql,actions,reporter})=>{// ...// Create paginated blog index pages.constpostsList=result.data.postsRemark.nodesconstpostsPerPage=2constnumPages=Math.ceil(postsList.length/postsPerPage)Array.from({length:numPages}).forEach((_,i)=>{createPage({path:i===0?`/blog`:`/blog/${i+1}`,component:path.resolve("./src/templates/blog-list.js"),context:{limit:postsPerPage,skip:i*postsPerPage,numPages,currentPage:i+1,},})})}
This new logic will run through all the blog posts, identifying where the cutoffs are for each pair (since we set postsPerPage to 2). Each page will list two blog posts, adhering to postsPerPage, until there are fewer than two blog posts remaining. When you run gatsby develop after this step, when you navigate to /blog, /blog/2, /blog/3, etc., you’ll see your list of blog posts paginated, as illustrated in Figure 8-4 and Figure 8-5.

Figure 8-4. The first page of our paginated blog index at /blog, displaying the first two blog posts in descending chronological order

Figure 8-5. The second page of our paginated blog index at /blog/2, displaying the last blog post—our blog only has three blog posts, so we only have two pages
Note
For more details about how to add links to the previous or next page in the list as well as the traditional page-by-page navigation found at the bottom of paginated web pages, consult Nicky Meuleman’s tutorial on pagination in Gatsby.
Adding an RSS Feed
Another common need for Gatsby sites, especially those that regularly update content, is an RSS feed. This is an XML file that lists website content in a format amenable to news aggregators or feed readers, which subscribe to the feed but do not carry over any other aspects of the website. Because many Gatsby sites are blogs that update regularly, an RSS feed is another means by which to distribute your content to your readers.
Adding an RSS Feed to a Markdown Blog
If you’re building on top of the Gatsby blog starter, adding an RSS feed requires an additional plugin and some additional code in gatsby-node.js. To begin, let’s clone a new version of the Gatsby blog starter to start from a relatively blank slate:
$gatsbynewgtdg-ch8-rssgatsbyjs/gatsby-starter-blog$cdgtdg-ch8-rss
Now, we need to install gatsby-plugin-feed, a handy plugin that can help us automate what might otherwise be a tedious task of generating an RSS feed:
# If using NPM$npminstall--savegatsby-plugin-feed# If using Yarn$yarnaddgatsby-plugin-feed
The gatsby-plugin-feed plugin will generate a new RSS feed at /rss.xml each time we run gatsby build or npm run build—i.e., on every production Gatsby build. We also need to add the plugin to the Gatsby configuration file, as usual. No additional options are required for the basic functionality of gatsby-plugin-feed in the Gatsby blog starter:
plugins:[`gatsby-plugin-feed`]
One of the things we need for the gatsby-plugin-feed plugin to work properly is a means of identifying content with unique names. For many blogs this will be a URL or a slug value. In gatsby-node.js, our Gatsby blog starter comes pre-equipped with the necessary logic to provide a slug value for each blog post:
exports.onCreateNode=({node,actions,getNode})=>{const{createNodeField}=actionsif(node.internal.type===`MarkdownRemark`){constvalue=createFilePath({node,getNode})createNodeField({name:`slug`,node,value,})}
When you run gatsby build, an rss.xml file will be generated. And if you run gatsby serve afterwards, you’ll be able to see your rss.xml file in production.
Though this solution works perfectly for Gatsby developers who are building on top of the Gatsby blog starter and using a Markdown blog, it doesn’t quite fit the bill for other data sources besides Markdown or for unusual Markdown use cases. We’ll see how to deal with those next.
Adding an RSS Feed for Non-Markdown Content
Fortunately, we can use both gatsby-config.js and gatsby-node.js to customize how our RSS feed displays and how it works with the data we have, whether that means an unusual approach to a Markdown blog or a data source such as a CMS that has its own way of serving content in JSON.
One of the configuration options provided by gatsby-plugin-feed for gatsby-config.js is a serialize option that allows Gatsby developers to customize and rewrite the default RSS feed schema the plugin generates. This is useful for cases where you’re retrieving content from an external source and need to rejigger it so it adheres to a different structure.
Consider the following example configuration for gatsby-plugin-feed, which demonstrates several options:
plugins:[{resolve:`gatsby-plugin-feed`,options:{query:`{ site { siteMetadata { title description siteUrl site_url: siteUrl } } }`,feeds:[{serialize:({query:{site,allMarkdownRemark}})=>{returnallMarkdownRemark.edges.map(edge=>{returnObject.assign({},edge.node.frontmatter,{description:edge.node.excerpt,date:edge.node.frontmatter.date,url:site.siteMetadata.siteUrl+edge.node.fields.slug,guid:site.siteMetadata.siteUrl+edge.node.fields.slug,custom_elements:[{"content:encoded":edge.node.html}],})})},query:`{ allMarkdownRemark( sort: { order: DESC, fields: [frontmatter___date] }, ) { edges { node { excerpt html fields { slug } frontmatter { title date } } } } }`,output:"/rss.xml",title:"My Gatsby RSS Feed",},],},},],
-
The
queryoption retrieves certain information that every RSS feed will need—in this case, namely the site’s name (title) and the URL (siteUrl). Note that this is different from the GraphQL query that is used later to serialize our content into a distinct structure for our RSS feed. -
The
feedsarray contains one or more objects, each of which consists of aserializeoption and a GraphQL query string on which the serialization is based (query). Our example only has one, but you could potentially have multiple objects depending on your requirements. -
Finally, we provide a GraphQL query that is used by the
serializemethod to generate the desired structure for our RSS feed.
There are several other optional configuration options that gatsby-plugin-feed can accept in the Gatsby configuration file, as illustrated by Table 8-1.
Note
Additional options are available as the plugin depends on the rss package, which has its own itemOptions documentation.
| Option | Type | Required? | Description |
|---|---|---|---|
query |
String | Optional | A GraphQL query that retrieves necessary global information for the RSS feed, such as the site name (title) and site URL (siteUrl) |
feeds |
Array | Optional | An array containing options for each generated RSS feed:serialize: A method for assigning site information or content to RSS feed fields (optional but strongly recommended in order to customize feed output)query: A GraphQL query that retrieves necessary content to populate the RSS feed (required)output: A path dictating the eventual location of the generated RSS feed (required)title: A name for the RSS feed (required)match: A regular expression string that dictates whether a given page will be referenced in the RSS feed or excluded (optional; e.g., "^/blog/")link: An external RSS feed path that overrides the output option provided (optional; e.g., https://feeds.feedburner.com/gatsby/blog) |
Note
If you’re creating an RSS feed for a podcast or podcast website, you may wish to include iTunes RSS blocks, which include formats that are incompatible with GraphQL. For more information, consult the Gatsby documentation on syntax for iTunes RSS blocks.
Adding Authentication
Among the most important features that many websites require is user authentication. Whether that involves access to privileged portions of a Gatsby site or authentication into an external service, authentication is a complex and nuanced topic. Given the widening need to protect private and personally identifiable information (PII), authentication is an important skill in any Gatsby developer’s toolkit.
Recently, there’s been a trend for websites, including Gatsby sites, to be decoupled entirely from any server-side backend. For this reason, and because Gatsby is a frontend client as a presentation layer, a third-party service is required to perform authentication in Gatsby. This differs from many monolithic architectures, where authentication can occur as part of the same implementation.
As with site search, which we discussed earlier in this chapter, there are both open source options (e.g., a Node.js app driven by Passport.js or a Ruby on Rails API driven by Devise) and third-party SaaS providers for authentication (e.g., Firebase, Auth0, AWS Amplify, and Netlify Identity). As illustrated in Figure 8-6, in these implementations, a user is verified on the client—in this case, Gatsby—by an authentication provider or service. That provider or service returns an access token that allows a client to access protected or private data.

Figure 8-6. How authentication works in Gatsby implementations—an authentication service returns a token that then grants access to some other data
As this figure shows, the typical authentication process in Gatsby consists of the following steps:
-
Gatsby issues a request to an authentication provider or service to either register a new user or log in as that user if their account exists.
-
If the credentials provided by Gatsby in the request (such as a username/password pair) match a user in the authentication provider or service, it responds with a token (such as a JSON Web Token, or JWT) that grants the user the ability to use the token to access privileged data.
-
With the token in hand, Gatsby then issues a request to an external data source, such as an API or CMS, where privileged data is available for retrieval. The data server reads the key and allows Gatsby to access that privileged information.
-
Finally, the server sends data back to Gatsby so that it can pass that privileged information into React components.
Note
The approach to implement this form of authentication in Gatsby is identical to the patterns found in other React ecosystems, including Create React App.
Preparing for Authentication
To examine how to work with all three of the elements identified in Figure 8-6, let’s spin up a rudimentary Gatsby site that we can use to test authentication and manage private routes that need to handle privileged data. We’ll use the “Hello World” starter:
$gatsbynewgtdg-ch8-authenticationgatsbyjs/gatsby-starter-hello-world$cdgtdg-ch8-authentication
A typical Gatsby site with authentication will require a few links. To make this as simple as possible, we’ll provide three navigation items in a navigation bar:
-
Home (no authentication)
-
Profile (requires authentication)
-
Logout (if logged in)
For now, let’s create a new component at src/components/nav.js with the following code and a few placeholder links:
importReactfrom"react"import{Link}from"gatsby"exportdefaultfunctionNav(){return(<divstyle={{display:"flex",flex:"1",justifyContent:"space-between",borderBottom:"1px solid #d1c1e0",}}><span>Youarenotloggedin</span><nav><Linkto="/">Home</Link>{` | `}<Linkto="/">Profile</Link>{` | `}<Linkto="/">Logout</Link></nav></div>)}
We’ll also add a layout component (src/components/layout.js) that will surround every page’s content and display the navigation bar at the top of the page:
importReactfrom"react"importNavfrom"./nav"constLayout=({children})=>(<><Nav/>{children}</>)exportdefaultLayout
Finally, let’s modify our home page (src/pages/index.js) to use the layout component:
importReactfrom"react"importLayoutfrom"../components/layout"exportdefaultfunctionHome(){return(<Layout><h1>Helloworld!</h1></Layout>)}
Because there is such a wide variety of authentication services available, rather than focus on any one of them in this section we’ll create a fictional authentication provider in our Gatsby code that will handle authentication for us.
To do this, we’ll a new file at src/services/auth.js and insert the following code:
exportconstisBrowser=()=>typeofwindow!=="undefined"exportconstgetUser=()=>isBrowser()&&window.localStorage.getItem("gatsbyUser")?JSON.parse(window.localStorage.getItem("gatsbyUser")):{}constsetUser=user=>window.localStorage.setItem("gatsbyUser",JSON.stringify(user))exportconsthandleLogin=({username,password})=>{if(username===`ahmed`&&password===`pass`){returnsetUser({username:`ahmed`,name:`Ahmed`,:`[email protected]`,})}returnfalse}exportconstisLoggedIn=()=>{constuser=getUser()return!!user.username}exportconstlogout=callback=>{setUser({})callback()}
In short, this rudimentary authentication service will check whether the user’s username and password are available in localStorage, handle a login by returning that user’s profile information, and finally provide logic for login and logout operations.
Creating Client-Only Routes
As mentioned in Chapter 3, Gatsby uses the @reach/router library, now part of React Router, which facilitates the ability to create routes that are only available to users who have undergone authentication. In order to add this functionality, we’ll use the createPage API to detect all routes with the prefix /app/, which will characterize restricted routes.
Because we’re using Gatsby’s “Hello World” starter, there isn’t yet a gatsby-node.js file. Let’s go ahead and create one, in the process implementing the onCreatePage method:
// Implement Gatsby's onCreatePage API, called after every page is created.exports.onCreatePage=async({page,actions})=>{const{createPage}=actions// page.matchPath is a client-only key for matching pages.if(page.path.match(/^/app/)){page.matchPath="/app/*"// Update the page.createPage(page)}}
Now, to account for all of the routes prefixed with /app/, we’ll need to create a generic page (src/pages/app.js) that will eventually be responsible for displaying restricted content:
importReactfrom"react"import{Router}from"@reach/router"importLayoutfrom"../components/layout"importProfilefrom"../components/profile"importLoginfrom"../components/login"constApp=()=>(<Layout><Router><Profilepath="/app/profile"/><Loginpath="/app/login"/></Router></Layout>)exportdefaultApp
The next things we’ll need are components for each of the client-only routes: one for profiles and one for the login process. First, let’s create the profile component that will eventually display privileged user data (src/components/profile.js):
importReactfrom"react"constProfile=()=>(<><h1>Yourprofile</h1><ul><li>Name:[Nameplaceholder]</li><li>:[placeholder]</li></ul></>)exportdefaultProfile
And here’s the login component (src/components/login.js), which handles unauthenticated users’ login processes:
importReactfrom"react"import{navigate}from"gatsby"import{handleLogin,isLoggedIn}from"../services/auth"classLoginextendsReact.Component{state={username:``,password:``,}handleUpdate=event=>{this.setState({[event.target.name]:event.target.value,})}handleSubmit=event=>{event.preventDefault()handleLogin(this.state)}render(){if(isLoggedIn()){navigate(`/app/profile`)}return(<><h1>Login</h1><formmethod="post"onSubmit={event=>{this.handleSubmit(event)navigate(`/app/profile`)}}><label>Username<inputtype="text"name="username"onChange={this.handleUpdate}/></label><label>Password<inputtype="password"name="password"onChange={this.handleUpdate}/></label><inputtype="submit"value="Log In"/></form></>)}}exportdefaultLogin
-
Set up a
stateobject for the user-provided username and password. -
Provide a handler for when form fields are updated so as to update the
stateobject. -
Provide a handler for the submission of the form, which calls our authentication service.
-
Render a form whose submission will trigger the
handleSubmitmethod.
If you start your development server, you’ll notice that access to all of these routes is currently unrestricted; nothing stops us from accessing the profile route, for instance.
Managing Private Routes
Now, we need to perform verification of the user’s privileges to access restricted content. To do that, we can create a PrivateRoute component that checks whether the user is logged in (!isLoggedIn()) and, if so, displays the restricted component containing private data:
importReactfrom"react"import{navigate}from"gatsby"import{isLoggedIn}from"../services/auth"constPrivateRoute=({component:Component,location,...rest})=>{if(!isLoggedIn()&&location.pathname!==`/app/login`){navigate("/app/login")returnnull}return<Component{...rest}/>}exportdefaultPrivateRoute
Our next step is to add the private route to our Router in src/pages/app.js so it uses the PrivateRoute component instead:
importReactfrom"react"import{Router}from"@reach/router"importLayoutfrom"../components/layout"importPrivateRoutefrom"../components/private-route"importProfilefrom"../components/profile"importLoginfrom"../components/login"constApp=()=>(<Layout><Router><PrivateRoutepath="/app/profile"component={Profile}/><Loginpath="/app/login"/></Router></Layout>)exportdefaultApp
-
Import the component.
-
Replace the profile route with our
PrivateRoutecomponent.
Providing Privileged Data to Routes
Though we now have our client-only routes in place, further refactoring is required for us to be able to view the privileged data as an authenticated user. To start, we’ll need to modify the navigation bar component (src/components/nav.js) in order to distinguish between what’s displayed to an authenticated user versus an unauthenticated user:
importReactfrom"react"import{Link,navigate}from"gatsby"import{getUser,isLoggedIn,logout}from"../services/auth"exportdefaultfunctionNav(){letgreetingMessage=""if(isLoggedIn()){greetingMessage=`Hello${getUser().name}`}else{greetingMessage="You are not logged in"}return(<divstyle={{display:"flex",flex:"1",justifyContent:"space-between",borderBottom:"1px solid #d1c1e0",}}><span>{greetingMessage}</span><nav><Linkto="/">Home</Link>{`|`}<Linkto="/app/profile">Profile</Link>{`|`}{isLoggedIn()?(<ahref="/"onClick={event=>{event.preventDefault()logout(()=>navigate(`/app/login`))}}>Logout</a>):null}</nav></div>)}
-
A few additional dependencies are required: namely the
navigatemethod from Gatsby and thegetUser,isLoggedIn, andlogoutmethods from src/services/auth.js. -
Add a new variable called
greetingMessageto replace the string “You are not logged in.” When the user is logged in, they receive a greeting message containing their username. Otherwise, they see the “You are not logged in” message. -
Replace the placeholder string “You are not logged in” with
greetingMessage. -
Replace the placeholder link for our profile route so it points to the route /app/profile instead.
-
Perform another
isLoggedIncheck to verify that the user is logged in. If so, a “Logout” link will display; otherwise no link will display.
We also need to refactor our index page and our profile component to reflect these changes. Our index page will either allow the user to log in or, if already logged in, to navigate to their profile:
importReactfrom"react"import{Link}from"gatsby"import{getUser,isLoggedIn}from"../services/auth"importLayoutfrom"../components/layout"exportdefaultfunctionHome(){return(<Layout><h1>Hello{isLoggedIn()?getUser().name:"world"}!</h1><p>{isLoggedIn()?(<>Youareloggedin,socheckyour{" "}<Linkto="/app/profile">profile</Link></>):(<>Youshould<Linkto="/app/login">login</Link>toseerestrictedcontent</>)}</p></Layout>)}
-
Add the required dependencies, including Gatsby’s
<Link />component and thegetUserandisLoggedInmethods from our authentication service. -
Provide a check of
isLoggedInthat determines whether a user sees a link to their profile as an authenticated user or a link to log in as an unauthenticated user.
The changes we need to make to our profile component are merely to display our privileged information. When our one and only user is logged in, they’ll see their account details:
importReactfrom"react"import{getUser}from"../services/auth"constProfile=()=>(<><h1>Yourprofile</h1><ul><li>Name:{getUser().name}</li><li>:{getUser().}</li></ul></>)exportdefaultProfile
-
Import the
getUsermethod from our authentication service. -
Add the profile information returned by that method.
Now, when we start our development server, we can see our Gatsby site from the perspective of an unauthenticated user (Figure 8-7), a user who is logging in (Figure 8-8), and our sole user, Ahmed, after logging in (username ahmed, password pass; Figure 8-9).
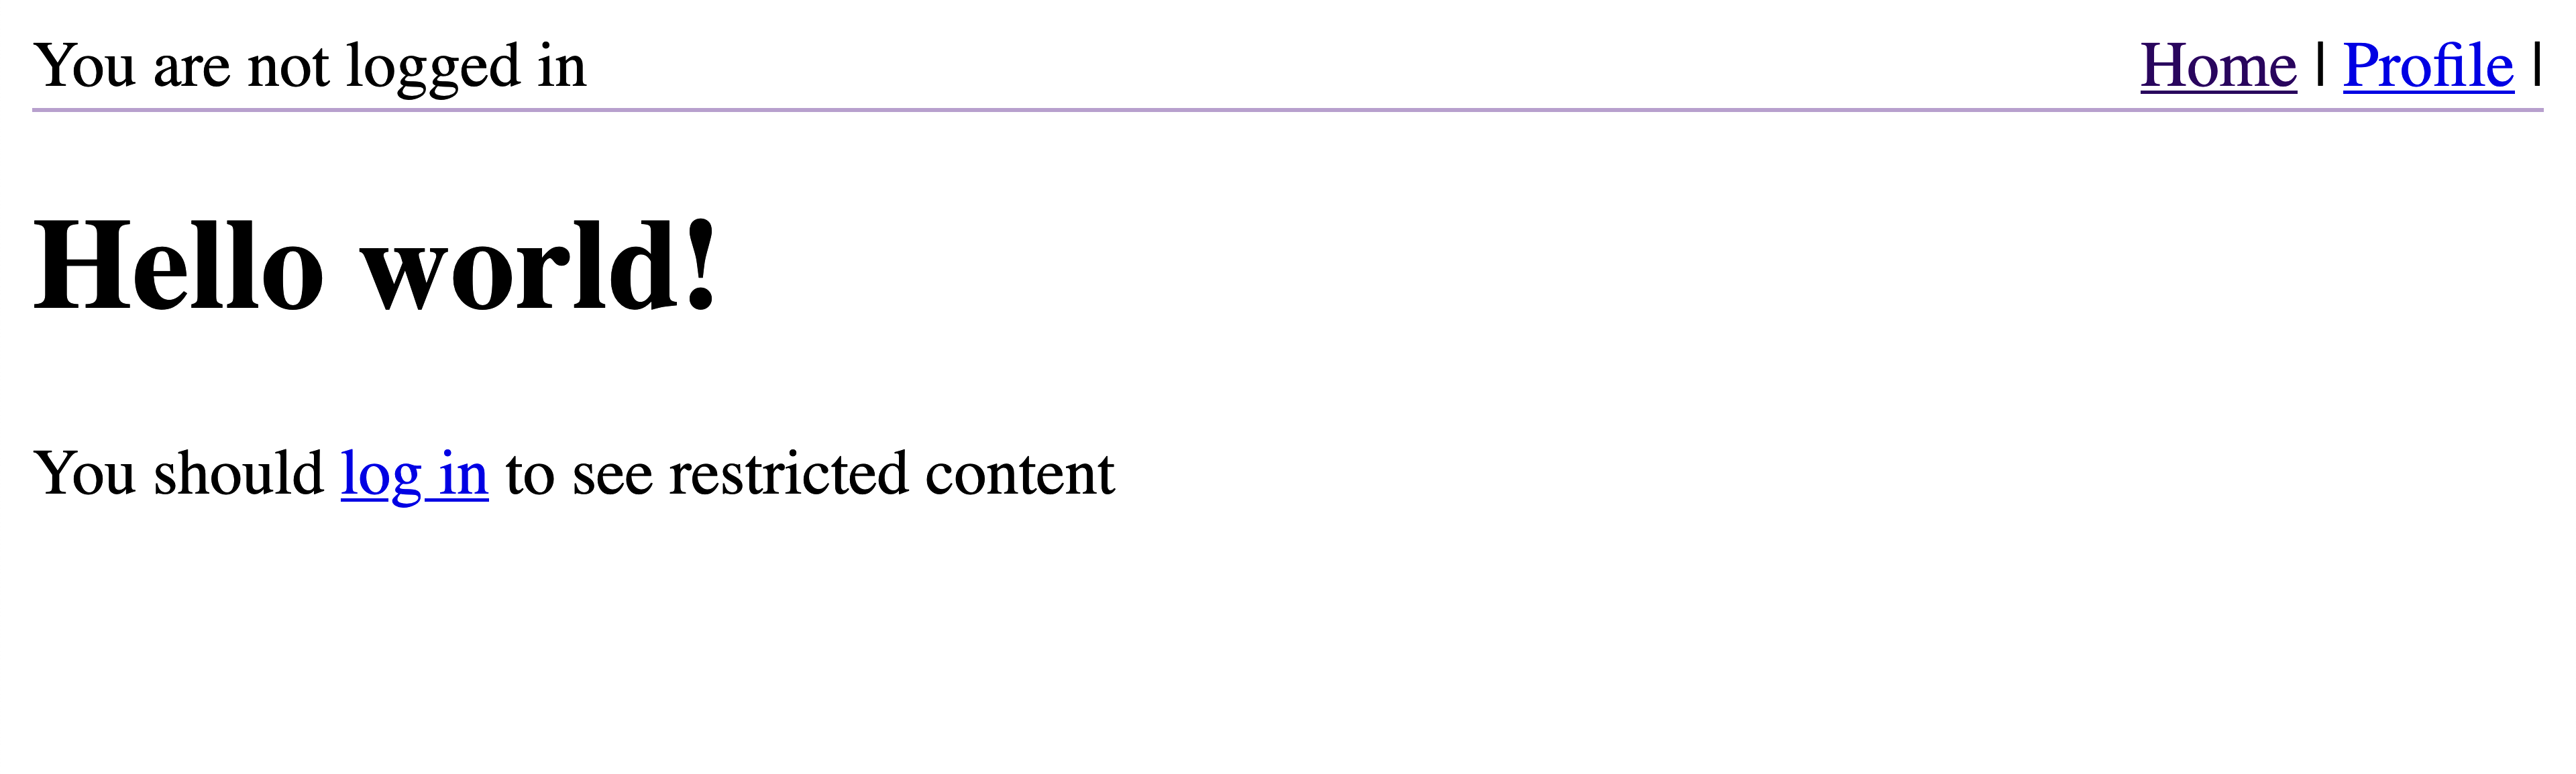
Figure 8-7. Our authentication-enabled Gatsby site from the perspective of an unauthenticated user

Figure 8-8. Our authentication-enabled Gatsby site from the perspective of an unauthenticated user about to log in

Figure 8-9. Our authentication-enabled Gatsby site from the perspective of an authenticated user
There you have it! Though this examination of authentication dispensed with any integration with a real-world authentication service, you can see how Gatsby operates as a bridge between a data source and an authentication service—which could be part of the same system—to serve restricted content in a graceful way without sacrificing security.
Note
Authentication is a common feature request for Gatsby developers. To that end, Gatsby has a bevy of resources available, including a simple authentication example, an example email application, and the open source Gatsby store. There are additional resources available from the Gatsby ecosystem for integrations with Auth0, Firebase, and Netlify Identity.
Conclusion
Over the course of this chapter, we’ve explored how to implement various data-driven features in Gatsby: namely site search, commenting, blog taxonomy, pagination, RSS feeds, and user authentication. Unlike the use cases we examined in Chapter 3, these requirements obligated us to work with the Gatsby data layer, and in particular with the GraphQL API within Gatsby. In the process, we touched on many of the concepts covered in the intervening chapters, including programmatic page creation and working with Markdown.
Armed not only with the data-driven features we’ve inspected over the last several chapters but also the examples demonstrated in this chapter, we can now move on to some of the most important emerging elements in the Gatsby ecosystem: Gatsby themes and Gatsby recipes, both of which are important to the higher-level management of Gatsby codebases and implementations and can accelerate many of the time-consuming procedures involved in boilerplate setup and dependency management.