Installing an enterprise-wide system and services management solution begins with a plan. The plan will evolve as you refine the Service Level Agreements and objectives for the scope of work. After an analysis of the current business environment, you can gather the system and network management requirements and begin to work out the design and implementation details of the hardware and software. Whether you are working with a team or as a team of one, you should answer a few questions in the early phases of planning an OpenView implementation. Some of the questions are listed here for reference:
What services are provided by the business?
Who needs what type of systems and service availability information?
What are the security policies and concerns?
Is the current system management environment adequate?
Will the current system management environment map to OVO?
Is there a need to re-engineer the current environment (for example, moving off obsolete technology)?
Are there current system management tools that will readily integrate with the OpenView platform?
When your enterprise management plan calls for NNM and OpenView Operations (the focus of this book), it is important to collaborate with all the potential users, customers, managers, and other staff who will be impacted by this implementation. Root user access is required to install the agent software and components onto the managed nodes. In this chapter, we focus on some of the primary tasks of preparing the management server for the OVO domain. The topics covered include server installation, configuration, administrator and operator consoles and much more.
The OS platform of the OVO Management Server can either be Hewlett Packard (HP-UXHP-UX) or Sun (Solaris). Another management product is OpenView Operations for Windows (OVOW), a separate product for the Intel architecture. Here the Management Server runs on MS Windows. Again, the managed nodes can be a heterogeneous mixture of various supported platforms.We cover more details about OVOW in Part 4 of this book, “OpenView Operations for Windows.” After the management server hardware and software installation, you have only touched the tip of the iceberg for managing your enterprise with OpenView.
Businesses provide services to customers. The status of the service(s) is important at all levels of an organization. Service offerings might include email, web, or business-to-business. When a service is rendered unavailable, discovering the root cause and the impact to the business are critical steps in the service recovery process. Unplanned application, system, or device downtime may affect the business and the service delivery to the customer. With OpenView, it is possible to implement an enterprise management operations environment that will show you the status of the services that are supported by the back-end network, systems, and applications.
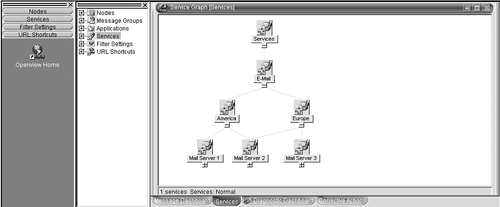
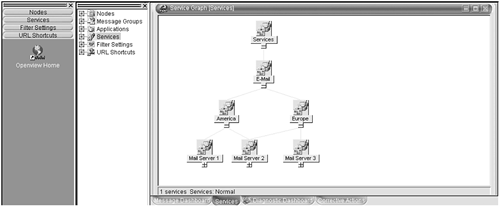
An overall view of the business from a service perspective enables faster resolution of any service impacting problems within the IT infrastructure. For example: You provide email services to customers (internal or external) using several mail servers that are located on different networks. The OV operator Java console can show you a graphical view of the email service. This view is possible as a result of the integration of OpenView Service Navigator at the management server. OV Service Navigator is a separate product but it is tightly integrated with OVO out-of-the-box and is available at no extra cost. The service configuration must be assigned to the operator before service views are visible within the operator's Java console. Figure 13-1 shows an example service view. The OpenView Navigator Concepts and Configuration Guide is available at the OpenView web site: http://ovweb.external.hp.com/lpe/doc_serv/.
The OpenView product solutions guide available at: http://openview.hp.com/solutions is an excellent place to begin if you need to get a better perspective on how the OpenView solutions for Enterprise, Service Provider, and Adaptive Management ensure rapid deployment of the correct solution for your environment. Several of the solution categories are listed here for reference.
Enterprise Solutions—. IT service management, network services, service-driven operations management, windows management, web services and application management, and storage management.
Service Provider Solutions—. Wireless and mobile, fixed voice, broadband access and transmission, cable and multi-service operations, ISP and IP networks, network equipment provider, developers, service assurance, service delivery and fulfillment, service usage and billing.
Adaptive Management Solutions—. Analysis of the business and user demand for resources and uninterrupted, secure, dynamic allocation of resources.
The OpenView products installed on the management server are delivered in CD sets. Oracle for OpenView is a separate CD set. The initial installation of the OpenView management platform includes the following software products:
OpenView Operations (OVO)—. Installed on a server hardware platform the OVO application provides central operations and problem management of multi-vendor distributed systems.
Service Navigator—. Add-on component of the OVO Java-based operator GUI. Service Navigator maps the incidents discovered by OVO to the monitored business or IT services. Provides views of the environment from the service perspective. Integrates with OVO out-of-the-box. (Requires a separate license.)
Smart Plug-Ins (SPIs)—. Pre-configured modules that provide out-of-the-box management of applications, components, services and daemons. The operating system SPI (OS-SPI) is included with the OVO software bundle. (Refer to Chapter 15, “Smart Plug-Ins,” for more information about SPIs.)
Java Operator Console—. Integrates applications, tools, real time monitoring, service views, and much more into one secure operations console.
Remote Ovw Integration—. Starts OV applications and services (such as ipmap) on remote OV systems from the local client console.
Oracle for OpenView (OfO)—. Provides the data store for the run time OVO environment; after the database is installed, all record inserts, updates, and deletes should be done via the OpenView graphical interface, Application Program Interface(s), or using the OVO commands. (Separate CD set.)
Network Node Manager (NNM)—. Performs initial network discovery and monitors the network environment. NNM provides many tools for network management.
This section provides a high-level overview of the OpenView installation tasks. The list in Table 13-1 covers many of the tasks that you will perform during the OpenView implementation project. Depending on the scope of the implementation, you may choose to organize the tasks into one large or several small projects. Whatever you decide, it is important to document the plan and create operations procedures as part of the project deliverables.
Table 13-1. OpenView Operations Implementation Checklist
Project Categories | Summary of Tasks |
|---|---|
General | Project Plan. Budget for h/w and s/w purchases. Budget for h/w and s/w support. Budget for consulting. Read the OpenView Operations Installation Guide, Release Notes and Concepts Guide. Define the service management environment. Involvement and Information sharing with all affected parties. Training for system support staff. Training for operations staff. Review existing operations, security and support policies and procedures and how these will map with overall use of OpenView for systems and service management. |
Management Server Implementation Tasks. | Configure the hardware. Install the operating system (o/s). Install the o/s patches. Configure the o/s kernel for OVO. Configure the file systems for OVO. Create the OVO accounts. Install the Oracle database binaries. Install the Oracle database patches, if applicable. Install NNM and OVO. Install the NNM and OVO patches if necessary. Install the management server agent software and components. Install add-on OpenView products. Backup the management server for disaster recovery. Obtain the permanent software licenses. Test the disaster recovery procedures. |
Verify the managed node h/w and s/w requirements. Configure the nodes for the OV Installation. Verify the network communications between the node and management server. Verify name resolution consistency between the managed nodes and the server. Verify time synchronization within the network domain of the management server(s). Refer to the Network Time Protocol (NTP) documentation, http://www.ntp.org. Install agent software. Test the operation of the agents. | |
External Notification Services | Decide what external notification services (mail, paging or trouble ticketing) will integrate with the OpenView environment. |
Determine which services and applications will be included inside the OV operator environment. Install additional SPIs. | |
Determine what events, errors and resource thresholds shall trigger messages, automatic or operator actions. Determine which events to correlate or message suppression. Define and organize the management environment (such as message groups, node groups, node hierarchies, application groups). Configure new and customize existing service policies and Instrumentation. Deploy the service policies and components. Deploy message-forwarding policies (if necessary). | |
Determine which operators will have OpenView accounts. Define operator accounts. Define operator responsibilities; Includes node groups, message groups and applications. Test the operator accounts. Verify the operator responsibilities. | |
Modify default account passwords. Implement user, application, data and network security policies. | |
Configuration Management and System Maintenance | Configure periodic configuration download and data archiving. Decide on an online or offline backup policy Implement and test the backup strategy. Optimize database operations. (See Appendix C for database-tuning resources.) Consider implementing OV configuration and change management policies and procedures. |
System Implementation Plan. System configuration. System Operations Procedures. System Maintenance Procedures. System Upgrade Procedures. Backup and Restore Procedures. Disaster Recovery Plan. Determine if operations procedures and instructions will be implemented for each event or provided via an external application such as a web browser. Determine which additional reports are necessary, and whether they are produced via the built-in report system or If external reporting applications should be implemented (i.e. OV Reporter). | |
Note: This checklist assumes a standalone server configuration. Refer to specific OpenView High Availability Documentation for failover configurations. | |
Table 13-1 includes implementation tasks you will perform through formal or informal planning. This list is just a start, and not all of the items will apply to every enterprise management scenario. The typical OpenView system implementation will include most but is not limited to only the items in the list. The important thing to remember is found in the form of the following quote: “Let us begin with the end in mind.”—Stephen Covey
The following questions will help with some of the issues you may encounter during or soon after the installation is complete:
Is it possible to change the initial database configuration parameters? The initial database size is determined by the default configuration parameters for the tables and tablespaces, and is located in the file /etc/opt/OV/share/conf/ovdbconf which is called by the OVO configuration script /opt/OV/bin/OpC/install/ovoinstall. After installation, the database files can be recreated with different parameters with the command opcdbreorg -consolidate, and with new parameter values in the file /etc/opt/OV/share/conf/OpC/mgmt_sv/oracle_sizing.cfg. See the manual pages for complete syntax. Ensure that you have performed complete system and database backup prior to executing any commands that make structural changes to the database. Use the default configuration if your initial environment is small or medium with less than 500 nodes. Before taking any steps to tune the database for performance, it is a good idea to discuss the issues with a knowledgeable database expert or OpenView consultant.
Should the database data and Index files be collocated on the same disk? Tablespaces for data and indexes are generally located on different disks for performance improvements. Additional information and recommendations for OpenView Database Performance and best practices are discussed in Chapter 18, “Oracle for OpenView.”
Are there any documents that contain the database entity relationships and database schema? The database schema and entity relationship documentation, Reporting and Database Schema, is available on the management server in the directory /opt/OV/www/htdocs/ito_doc/C/manuals. The manuals are also available online at http://ovweb.external.hp.com/lpe/doc_serv/. Although the schema is published, it is not recommended or supported to modify the data without using either the provided utilities or APIs.
What is the procedure to obtain the permanent software license or check an existing license? The license is based on the IP address of the management server. There is a form available for getting a license in the directory /etc/opt/OV/share/conf/OVLicense/forms/opc. Also, the Installation Guide for the Management Server contains a licensing chapter. Obtain the license via the web at http://www.webware.hp.com. OVO will function using a built-in temporary license out-of-the box for 90 days. (If the server is configured in a cluster, use the IP address of the OVO package for the license.)
How is the DISPLAY variable set for the Oracle and OVO Installations? Users oracle and root set the DISPLAY variable prior to calling the Installation programs. If you are installing via an X-emulation program on a PC, remember to set the DISPLAY variable to the PC hostname or IP address. Example: export DISPLAY=pcname:0.0. If the display variable is not set correctly, the Oracle installer will produce an error message. Also, ensure that the X Display Manager will allow the GUI for Oracle to display on your terminal. Enable the X application permission to display with the command “xhost +”. Refer to the man page for syntax details. Check the display setting with the command /usr/bin/X11/xset -q.
What should you do if you have to re-start the Oracle Installer? If there are any problems during the startup of the Oracle Installer program and you need to stop and re-start, you will need to do some cleanup first. Check for any programs started by the installer using the ps command. If necessary, shut down any of the Oracle Installer programs using the kill command. Remove the directories from /tmp created by the installer.
The time it takes to install the OpenView software onto the management server will vary based upon your familiarity with the system hardware, network and operating system environments. Your experience with prior versions of the application will also prove beneficial with the installation of any new versions of the products. So, whether you are just starting or have the experience of prior installations, the first steps are listed here for reference:
Develop a written plan.
Share the plan with other peers, managers, customers.
Review the impact of this installation into your test, development, or production environment.
Prepare all the necessary resources.
Re-read the installation procedures three times.
Refer to the OpenView Operations Installation Guide for detailed instructions. The OpenView Installation Guide for the Management Server (HP-UXHP-UX or Solaris) is available at http://ovweb.external.hp.com/lpe/doc_serv/.
Read the release notes.
HP-UX operating system examples are used throughout this part of the book. Any significant installation differences for the Solaris are indicated when appropriate.
The hardware and software prerequisite verification is the first step in the installation process. Taking the time to perform this important task ensures that your installation completes in a timely manner and without error. One method to verify the HP server configuration is with the command /opt/ignite/bin/print_manifest; this produces a report that includes information in the following categories:
System Information—. System type and build data
System Hardware—. System model, memory, processors, OS, LAN, SWID, and Language
Storage devices—. HW Path and Interface Name
I/O Interfaces—. Class, HW Path, Driver, and Description
Installed Software—. Product Name, Revision, and Description
Logical Volume Manager (LVM) File System Configuration
JFS File System (JFS or VXFS) Configuration
Disk layout—. LVM Disk, Device file, HW Address, size, and volume group
File System layout—. LVM device file, mount point, size, and file system type
Swap configuration—. Type, size, priority, and device/location
Kernel Configuration—. Drivers and Parameters
System Information—. Hostname, IP Address, Subnet mask, Gateway IP, and time zone
The /opt/ignite/bin/print_manifest command is only available if Ignite/UX client or server is installed. Installing OVO uses HP Distributor and runs a pre-installation check for kernel parameters, disk space, hostname, and so on during the installation. The output of the check can be read form the software distributor logfile.
Produce a similar report on a SUN Solaris server with the commands prtconf and pkginfo. Refer to the man pages for syntax details and optional command line parameters.
The specification and final configuration for the disk, memory, and swap resources depends on a number of factors, including:
How many user sessions will operate in parallel?
How many operators will use Motif GUIs?
How many operators will use Java GUIs?
How many active messages?
How many acknowledged messages?
How large is the IP network?
The disk, memory and swap minimum requirements are summarized in Table 13-2. The information in the table is based on approximately 500 nodes, 3,000 active messages, and 1,000 objects in the Service Navigator tree. The required parameters may vary with different OV software versions. The best practice is to review the most current installation guide.
Table 13-3 is a listing of the recommended kernel parameters.
Verify that you have installed all prerequisite patches. The required patches are listed within the installation materials. Check or download OpenView patches from http://support.openview.hp.com/patches/patch_index.jsp. Vendor updates on the latest patches are available via email if you sign up for the email notification service.
The Oracle for OpenView software and the OVO software products are delivered on two different CD sets. Oracle must be installed prior to running the OVO install command, ovoinstall, which configures the database for use. The Oracle installation procedure is documented in the OVO Installation Guide. A standard version of Oracle is also compatible for use with OVO. After Oracle is installed, you can begin the OVO software installation. The script ovoinstall (new with OVO 8 ) will initialize a terminal window and begin the installation process with a series of prompts that allow the user to verify the prerequisite software patches, configuration parameters, and default settings, such as directory paths and environment variables. The installation default parameters are found in the file ovoinstall.defaults. An example of the file is listed here:
#cat ovoinstall.defaults # This file is parsed by ovoinstall. Values may be changed in this section # Note: English text only. BBCCLIENTS_PATH=/ovo_8/CD2/OV_DEPOT/HPOvOhttpsClients.depot BBCCLIENT_PRODUCTS="OVO-CLT.OVO-UX11-CLT OVO-CLT.OVO-SOL-CLT OVO-CLT.OVO-LIN-CLT OVO-CLT.OVO-DLIN-CLT" RPCCLIENTS_PATH=/ovo_8/CD2/OV_DEPOT/HPOvOrpcClients.depot RPCCLIENT_PRODUCTS="OVOPC-CLT.OVOPC-NT-CLT OVOPC-CLT.OVOPC-SOL-CLT OVOPC-CLT.OVOPC-UX11-CLT" CDROM_DEV=/dev/dsk/c0t0d0 CDROM_INSTALL=false CDROM_MNT_PT=/SD_CDROM DB_CHARACTER_SET= DEFAULT_M10I_PATH=/ovo_8/CD1/OV_DEPOT/HPOvComponents.depot DEFAULT_SERVER_PATH=/ovo_8/CD2/OV_DEPOT/HPOvOServer.depot FORCED=false LANGUAGE=C M10I_PRODUCTS="HPOvLcore.HPOVXPL HPOvLcore.HPOVSECCO HPOvLcore.HPOVBBC HPOvLcore.HPOVSECCC HPOvLcore.HPOVCTRL HPOvLcore.HPOVDEPL HPOvLcore.HPOVCONF HPOvLcore.HPOVSECCC HPOvSext" M10I_PRODUCTS_INSTFLAGS="-x enforce_dependencies=false -x autoselect_dependencies=false" MINIMAL=false ORACLE_HOME=/opt/oracle/product/9.2.0 ORACLE_DATA_DIR=/ora_db PACKAGES_TO_ADD= POLICY_DATA_TYPE= REINSTALL=false SERVER_PRODUCTS="OVOEnglish OVOSvcNavEng" TAR_FILES= this listing is truncated HP-UXHP-UX TAR_FILE_PATH=/ovo_8/CD2/OVOServer_patches VERBOSE=true TIMEOUT=5 INSTALL_DEVKIT=false # NNM installation script options. NNMINSTALL_SCRIPT_NAME=install NNMDEPOT_PATH_CD1=/ovo_8/disk1 NNMDEPOT_PATH_CD2=/ovo_8/disk2 NNM_DISC_NETWORK=n NNM_SHOW_UI=n NNM_SNMPCOMMUNITY=s NNM_BROWSER_PATH=s NNM_VIEW_RELEASE_NOTES=n NNM_INST_JAPANESE=n # Values below here will not be read by ovoinstall when running in silent mode ORACLE_PW_OPC_OP=opc_op ORACLE_PW_OPC_REPORT=opc_report ORACLE_PW_SYSTEM=manager ORACLE_USR_DBA=oracle ORACLE_AUTODBSTART=y ORACLE_SID=openview ORACLE_USE_CURR_DB=y ORACLE_NET=ov_net ORACLE_BASE=/opt/oracle ORACLE_DB_REINIT=y ORACLE_IDX_DIR=/ora_db #
The ovoinstall installation program writes progress messages into the log file /var/opt/OV/log/OpC/mgmt_sv/install.log. The software installation process uses the swinstall command, and you can monitor progress in the log file swagent.log with the command tail –f /var/adm/sw/swagent.log.
The first-time agent installation is onto the management server. This enables the server to become the first managed node. If requested by the user, during OVO server installation process, the default agents and components are assigned and distributed to the management server automatically. Subsequent distributions can be performed from the OVO administrator console or the command line (refer to the man page for the command opcragt). After the initial server components are distributed, messages from the server begin to appear in the message browser. Refer to Chapter 14 for more information about agents and components.
The processes that run on the management server and managed nodes indicate the health of the OpenView environment. If you experience any problems with the standard operation of the OpenView product, check to ensure that all the necessary processes are running. Below are three examples of checking the status of the OpenView processes. Refer to Chapter 18, “Oracle for OpenView,” and Chapter 22, “Troubleshooting Tips and Techniques,” for information about commands to check the Oracle and Operating System processes. Descriptions of the OVO processes appear later in this chapter.
The OV service processes must be running in order for the OpenView server to function properly. Refer to Chapter 4, “Out-of-the-box Network Node Manager,” for more information about the NNM processes. Check the status of the NNM processes with the command /opt/OV/bin/ovstatus –c.
Name PID State Last Message(s) OVsPMD 1422 RUNNING - ovsessionmgr 1424 RUNNING Initialization complete. ovwdb 1425 RUNNING Initialization complete. ovuispmd 1484 RUNNING Successful restart. 0 ovw clients registered. ovtrapd 1455 RUNNING Initialization complete. ovactiond 1456 RUNNING Initialization complete. syslogTrap - NOT_RUNNING - ovalarmsrv 1457 RUNNING Initialization complete. pmd 1427 RUNNING Initialization complete. genannosrvr 1458 RUNNING - httpd - unknown (Does not communicate with ovspmd.) ovtopmd 1453 RUNNING Connected to native database "openview". netmon 1485 RUNNING Initialization complete. snmpCollect 1486 RUNNING Initialization complete. ovas 1492 RUNNING Initialization complete. ovrequestd 1430 RUNNING Initialization complete. ovdbcheck 1459 RUNNING Connected to embedded database. ovctrl - unknown (Does not communicate with ovspmd.) ovoacomm 1490 RUNNING Open Agent Service Server Initialization Complete.For details about Open Agent Service use 'opcsv'. opc 1772 RUNNING OVO Server Initialization Complete. For details about OVO Manager Processes use 'opcsv'. #
The processes are initialized during system startup or manually controlled with the commands ovstart and ovstop. Refer to Chapter 4 for the NNM process descriptions. The ovstop command will stop NNM and all OVO server processes. This will not stop the agent processes running on the server. When the server processes are down no user logins are allowed, and agent processes will buffer messages until the server processes are restarted.
The operation of the management server depends upon the functions provided by the operating system, Oracle, NNM, and OVO. Descriptions of the OVO processes are provided later in this chapter. Check the status of the OVO server processes with the command /opt/OV/bin/OpC/opcsv.
# opcsv
OVO Management Server status:
Control Manager      opcctlm     (4807) is running
Action Manager       opcactm     (4814) is running
Message Manager      opcmsgm     (4815) is running
TT & Notify Mgr      opcttnsm    (4816) is running
Forward Manager      opcforwm    (4817) is running
Service Engine       opcsvcm     (4822) is running
Cert. Srv Adapter    opccsad     (4820) is running
BBC config adapter   opcbbcdist  (4821) is running
Display Manager      opcdispm    (4818) is running
Distrib. Manager     opcdistm    (4819) is running

Open Agent Management status:
Request Sender       ovoareqsdr  (4801) is running
Request Handler      ovoareqhdlr (4804) is running
Message Receiver (BBC) opcmsgrb  (4805) is running
Message Receiver     opcmsgrd    (4806) is running

Ctrl-Core and Server Extensions status:
Control Daemon               ovcd       (4314) is running
BBC Communications Broker    ovbbccb    (1467) is running
Config and Deploy            ovconfd    (4315) is running
OV Certificate Server        ovcs       (4802) is running
#
Server processes that do no appear in the output of the opcsv -status command include the following processes that run to support the user sessions and DCE-RPC data transfers:
opcuiwww—. Java UI Manager (one instance per for each connected Java GUI)
opcuiop—. Operator UI (one instance for each operator session using the MOTIF GUI)
opcuiopadm—. Administrator's Operator UI
ovw—. OV platform GUI session (one for each MOTIF GUI - admin+oper)
opccmm—. Subprocess of Message Receiver for bulk transfers (only if needed temporarily)
There are two commands available to check the agent status: /opt/OV/bin/OpC/opcragt and /opt/OV/bin/OpC/ovc. Both commands report the status of the primary agents responsible for intercepting events, collecting performance data, filtering and forwarding messages. The following example lists the output from the opcagt command:
Execute the command: /opt/OV/bin/OpC/opcagt
opcmsga   OVO Message Agent         AGENT,EA(5129)   Running
opcacta   OVO Action Agent          AGENT,EA(5130)   Running
opcmsgi   OVO Message Interceptor   AGENT,EA(5131)   Running
opcle     OVO Logfile Encapsulator  AGENT,EA(5133)   Running
opcmona   OVO Monitor Agent         AGENT,EA(5135)   Running
opctrapi  OVO SNMP Trap Interceptor AGENT,EA(5137)   Running
opceca    OVO Event Correlation     AGENT,EA         Stopped
opcecaas  ECS Annotate Server       AGENT,EA         Stopped
coda      HP OpenView Performance Core      (3657)   Running
#
The command ovc (-start, -stop, -kill) also controls the agent processes from the command line. Refer to the man pages for ovc complete syntax. The command /opt/OV/bin/OpC/opcagt is now a wrapper for ovc. The output from the ovc command for HTTPS-based agents is listed here.
# ovc
ovcd    Control Daemon                      CORE (4314)     Running
ovbbccb HP OpenView BBC Communications Broker CORE (1467)   Running
ovconfd HP OpenView Config and Deploy     CORE (4315)       Running
ovcs    HP OpenView Certificate Server SERVER               Aborted
opcmsga OVO Message Agent             AGENT,EA (4321)       Running
opcacta OVO Action Agent              AGENT,EA (4322)       Running
opcmsgi OVO Message Interceptor       AGENT,EA (4323)       Running
opcle       OVO Logfile Encapsulator  AGENT,EA (4325)       Running
opcmona     OVO Monitor Agent         AGENT,EA (4327)       Running
opctrapi    OVO SNMP Trap Interceptor AGENT,EA (4329)       Running
opceca      OVO Event Correlation     AGENT,EA              Stopped
opcecaas    ECS Annotate Server       AGENT,EA              Stopped
coda        HP OpenView Performance   Core  4331)           Running
The output shows the processes that are responsible for overall control ovcd, HTTPS communications ovbbccb, distribution and configuration changes ovconfd, and security authentication ovcs. The ovc and opcagt commands work locally, opcragt executes on the management server (both for DCE and HTTPS agents). The ovc command exists only on HTTPS nodes.
You should become familiar with the automatic startup and shutdown process for the management server and the managed nodes. During server startup, it is necessary for several services, such as the Internet services or DNS, to start prior to the OpenView processes. If for some reason the prerequisite services are not enabled, you will experience problems with OVO. Information about the specific startup and shutdown files for Oracle, NNM, and OVO is provided here for reference. In general, the order of startup for the OpenView platform is operating system communication programs, Oracle database, NNM services, OVO server, and OVO agent.
/sbin/init.d/ov500—. This script controls the startup of the OpenView server processes, including OpenView NNM and OpenView Operations. OVO processes start after NNM because the file opc.lrf is registered with the NNM ovsuf startup environment. Refer to the NNM documentation for details about the registration files. You can also check that the opc program was initialized with the command ovstatus –c. During startup the script is called with the following option: /sbin/init.d/ov500 start. This causes the operating system startup program (called rc) to check the file /etc/rc.config.d/ov500 for the variable OV500=1. If the variable is set to the number one, the rc program will initialize the OpenView environment. If the variable is set to zero, OpenView will not start. The paths may be different on other platforms (such as /etc instead of /sbin on Solaris).
/sbin/init.d/OVCtrl—. This script controls the startup of the OpenView agent processes.
/sbin/init.d/ovoracle—. This script controls the startup of the Oracle processes. The rc program is responsible for checking for the startup variable OVORACLE=1 and OVORALISTENER=1 in the configuration file /etc/rc.config.d/ovoracle.
Refer to the operating system documentation for HP-UXHP-UX or Solaris for details on startup and shutdown procedures.
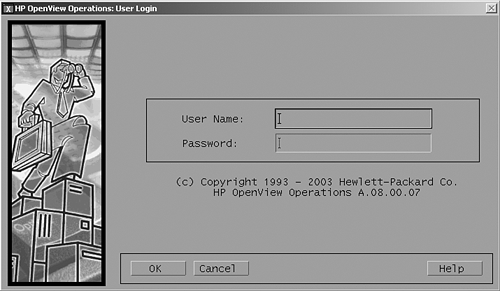
Initiate a new OVO session with the command opc and use the administrators' login account and password (i.e. opc_adm, OpC_adm). It is recommended to change the default password for the administrator and the default user accounts after the server is installed. During the first administrator or operator login, the password change is enforced. When you initially log into the management server you see two windows, Root and Node Bank. Figure 13-2 is an example of the administrator login session.
After the administrator logs into the OVO console, two windows appear by default after login authorization. However, there are many other windows available for the administrator to control and configure the OVO environment. Select the menu item “Actions” or “Window” to access the full set of administrator windows from the Node Bank. It is important to get to know all of the administrators' configuration windows. The windows are also referred to as Banks. The description and examples of using the configuration windows are covered in more detail in Sections 13.9 through 13.15 of this chapter.
The administrators' primary windows include Root, Node Bank, Node Group Bank, Message Group Bank, User Bank, Profile Bank, Node Hierarchy Bank, Message Source Templates, and Message Browser. Each window contains default icons, or you can add an icon to represent a part of the configured components for your environment. When you select an item from the menu, a pull-down menu opens. The pull-down menu contains other actions or configurable components.
Select or highlight an icon with the left mouse button and click once. You will know the icon is selected if a shadow box appears around the symbol. While the symbol is highlighted, activate a pop-up menu and hold down the right-mouse button. The pop-up menu lists items that can be executed against only the highlighted symbol and the object it represents.
Select multiple nodes, hold down the control key, and select multiple icons with the left mouse button. Another method to select multiple nodes is to create a square window around the nodes. Hold down the left mouse button in the upper left corner of the window you want to make around the nodes. Drag the mouse to the right and down, and you will see a box surround the nodes. When the box includes the nodes you want to select release the left mouse button. The nodes that were inside the selection box are highlighted. This is a fast method to select many nodes for tasks that require drag and drop. Figure 13-3 and 13-4 are examples of the Root Banks

Figure 13-3. The Root Bank contains the symbols and icons that represent all of the configuration components.
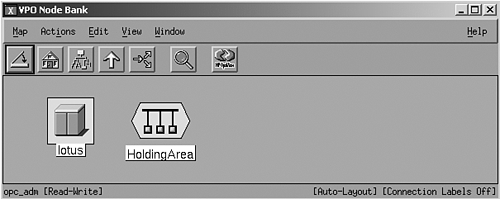
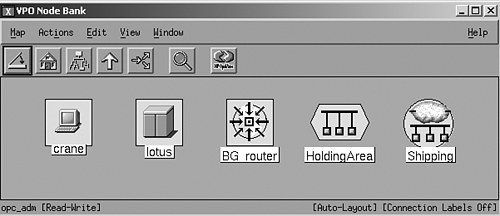
Figure 13-4. The node for the management server is in the Node Bank by default after OVO software installation.
Node icons in the Banks and Groups represent managed nodes in the OVO domain. The Actions and Window pull-down menus at the top of the Node Bank lead to the configurable components or the Message Browser. The messages from the managed nodes will appear in the Message Browser window. Figure 13-5 is a view of the primary message browser window. The messages in the browser are identified with attributes that are listed at the top of the browser window (for example, Severity, Duplicate Count, Flags SUIAONE, Date, Time, Node Name, Application, Message Group, Object, and Message Text). The messages remain in the browser until they are manually acknowledged or automatically acknowledged using message correlation.

Figure 13-5. The Message Browser contains the list of messages from the managed nodes and the management server.
Table 13-4 lists the configuration components available from the Actions and Window pull-down menus. These menus are repeated on each of the administrators' windows (except the root window). This has the advantage of providing quick access to configuration components. These menu items are used often to add, change and remove configuration components. In the case of the Action menu item, it is context-specific depending upon the current active window.
Table 13-4. Actions and Window Menu Items
Actions Menu Items | Window Menu Items | |
|---|---|---|
Node | Root | |
Set Defaults | Home | |
Add | Parent | |
Add for External Events | Quick Navigator | |
Add Node Layout Group | Node Bank | |
OVO Certificate Requests | Node Hierarchy Bank | |
Node Group Bank | ||
Message Group Bank | ||
Agents | ||
Assign Templates | Application Bank | |
Install/Update SW & Config | User Bank | |
Deinstall | User Profile Bank | |
Message Source Template | ||
Subagents | Message Browser | |
Install/Update | ||
Deinstall | ||
Server | ||
Start Services | ||
Stop Services | ||
Assign Templates | ||
Install/Update Server Templates | ||
Regrouping | ||
Configure | ||
Download Configuration | ||
Highlight | ||
Utilities | ||
Reports | ||
Database Maintenance | ||
Notification Service | ||
Trouble Ticket | ||
Instruction Interface | ||
Inform Operators | ||
Send Message to Operators | ||
Change Passwords | ||
Message Browser | ||
Start/Reload | ||
Looking at an OpenView domain is overwhelming at first glance if there are many nodes shown as individual icons inside the Node Bank. There are many components within the Administrator's GUI that help you organize the look and feel of the OVO console. You can organize the nodes by using the built-in tools, such as node groups, node hierarchies, and node layout groups. The next sections explore some ideas on how to organize the nodes within the administrator and operator consoles.
Deciding which nodes to manage is one of the OpenView administrators' primary tasks. Different types of nodes managed by OVO are brought into the configuration, including
Controlled—. Agent installed and allows remote logins, actions and monitoring.
Monitored—. Agent installed but does not allow remote logins or remote actions.
Message allowed—. No agent, node sends SNMP traps (for example, router or printer).
Disabled—. Node is not monitored for status, sends no messages.
External nodes—. Only send events via SNMP that will be processed and transformed into OVO messages. These are referred to as nodes for external events inside the GUI.
After you determine which nodes and or node type to manage, add the node to the Node Bank. Unlike NNM, OVO does not manage any node automatically. You must add the desired node to the Node Bank first. Adding a node can be done by either using the menu in the OVO Node Bank, or even more convenient, by drag/dropping from the NNM ipmap.
If the node is fully managed, a Node Configuration window appears and waits for you to verify the default settings or make changes. After you click OK, the information about the node is stored in the database. The node is not yet installed with the agent software; you will perform this task after the node configuration is complete. (Refer to Chapter 14 for agent installation techniques.) If the node is only sending events to OVO in the GUI, use the Add Node for External Events window. Although the GUI method is described here, there are commands to accomplish the same tasks. The Add Node configuration window is shown in Figure 13-5a for reference.
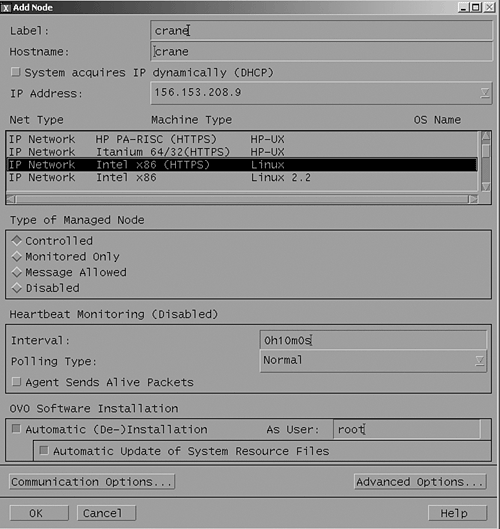
Figure 13-5a. Add Node configuration window contains the fields used to describe information about the managed node.
There are several methods to add nodes to the Node Bank. (Refer to the OVO Administrator's Reference, Volume I for more detailed information.) Examples of the process to add nodes to the Node Bank are shown here for reference. Each example assumes that a selection is made from the menu.
Example 1: Actions→Node→Add
This method is ideal for installing one node at a time. You need to provide the hostname of the node you want to add. OVO then attempts to determine additional attributes (IP address, system type, and so on) by querying the node's SNMP agent. If an SNMP agent is not running on the managed node, you will need to set the machine type manually in the configuration window.
Example 2: Edit→Copy
Locate the node in the root map, by selecting Edit→Find→Object by Selection Name (or some other attribute; see the list in the Selection Window). Once you have identified the node, select the node, and from the menu select Edit. In the OVO Node Bank, select the menu item Edit→Copy. The new node appears in the Node Bank. A drag/drop from the ipmap would also work to add the node to the Node Bank.
Example 3: Open the Node Group Bank, double-click with the left-mouse button on a node group icon, and then select from the menu, Actions→Node→Add
Add a new node to the node group and it will automatically appear in the Node Bank (Holding Area). Here you could also use the Menu option Edit→Copy, Edit→Paste. Node Groups are covered in more detail in Section 13.9.2.
Example 4: Actions→Node→Add for External Events
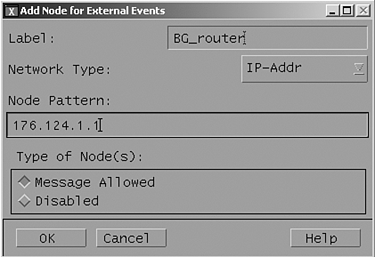
Use this method for managing devices that typically do not have the OVO agent installed but are capable of sending their events to a node that does have an OVO agent (a proxy node) or directly to the server. When the event arrives on the managed node, it is transformed into an OVO massage and sent to the server. A use case is to manage SNMP devices like routers, bridges, network printers this way. The external events icon changes status as the messages from the external nodes are processed on the server. When the window “Add Node for External Events” opens, provide a label name for the icon in the GUI. The dialog box for external events is shown in Figure 13-6.
Select the Network Type, IP-Addr, IP-Name, or Others. This determines what type of entry you will use in the Node Pattern field. For example, if you use IP addresses in the Node Pattern Field, select IP-Addr. Provide a Node Pattern, which is actually a node name pattern (such as *.hp.com). The Node Pattern field can contain wild cards for the IP address range if there are many nodes on one a network that will send events to the server (i.e. 192.14.*.*). Other options for the address range can include and exclude specific IP numbers (i.e. 192.14.123. <5 –le [<#>] –lt 72>. Finally, select the Type of Node, Message Allowed (in order to enable the events from the external node(s) to appear in the browser). The external node icon is located in the node bank with the other node types as shown in Figure 13-7. Configure the external device to send SNMP events to the OVO server.
Example 5: Upload the node configuration from the command line. (Refer to Chapter 17, “Server Administration,” for details on this method)
Example 6: Command line method, see the man page for opcnode.
All the nodes you plan to manage with OVO must appear in at least one Node Group. This is important because the Node Groups (shown in Figure 13-8) are assigned as part administrators' responsibilities and part operators' responsibilities. For example, if you add a node to the node group and the node group is assigned to the administrator or operator, they will begin to see messages from the new node after the next login session. Simplified administration is another advantage of organizing the nodes into a Node Group. For example, you may have a Win2K server (node) running IIS and an Oracle database. This node might appear as a member of multiple Node Groups (such as W2k, Oracle or Database). Also, assignment of Template Groups to node groups as the domain grows helps simplify distribution and configuration changes. Select Window→Node Group Bank→Add.
Use this concept to pre-arrange the nodes within a window hierarchy for your operators. By default, OVO presents all managed nodes in a single, “flat” window (Managed Nodes Window) in the Operator GUIs. When there are so many icons in a window, it is difficult to distinguish which node manages what environment. For example, in the node bank, you might have several hundred nodes in the domain and the icons appear very small. Creating Node Layout Groups lets you create a hierarchy of windows where, for example, you organize your managed nodes by location or geography, by the role these systems fulfill, or by other custom criteria. You could use the features of the window to pan and zoom or create a quick navigator window, but you could also organize the nodes inside the current window.
Create a Node Layout Group from a window that contains individual node icons or other Node Layout Groups. From the menu, select Actions→Node→Add Node Layout Group. Add the name, label and description in the dialog box (Figure 13-9). The icon for the Node Layout Group is now in the window. In this example, we use the Node Bank window.
Create a Node Layout Group for each physical location, department, or type of application (see Figure 13-10). Drag and drop the nodes onto the Layout Group Icon. This allows you to see only the Layout Group icons in the window when you login and open the Node Bank. Drill down into a Layout Group and double-click the left mouse button. Node Layout Groups may contain other Layout Groups.
A node hierarchy is used to configure what organized view in the Motif GUI the operators see when they open the Node Bank. To customize a node hierarchy, use the Node Hierarchy Bank. For example, if the nodes are located in different regions, states, or departments, you can build a node hierarchy to represent the logical organization of the nodes for the operator's console.
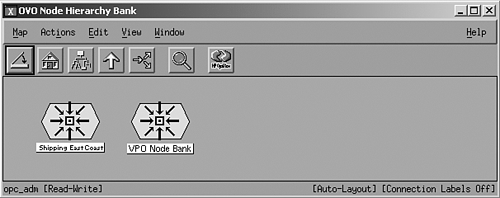
For example, from the Node Bank, select Window→Node Hierarchy Bank. Within the Node Hierarchy Bank, select Actions→Node Hierarchy→Add. After you enter the name, label, and description, the new symbol for this Hierarchy appears in the Hierarchy Bank (see Figure 13-11).
Double-click on the new symbol to view a Holding Area Symbol. All the nodes are available for use within the Node Hierarchy. A Node Hierarchy is assigned to the operator and provides an organized view of the operators managed node responsibilities, for example, Shipping East Coast (see Figure 13-12). A procedure to assign the Node Hierarchy to an Operator is outlined here.
Highlight the Node Hierarchy icon.
Open the User Bank.
Select the operator account to modify.
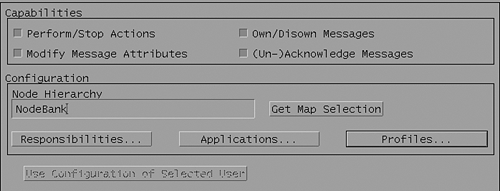
Select the Node Hierarchy button in the Operator Configuration window. (You cannot type in the Node Hierarchy Dialog Box.) Select the Get Map Selection button; this transfers the name of the highlighted Node Hierarchy into the Operators Configuration the next time the Operator logs into the OVO via a Motif GUI. The node bank will be organized into the Layout Groups you defined in the Node Hierarchy. The operator is assigned only one Node Hierarchy at a time.
A Node Hierarchy defines “how” a user will see their assigned nodes. The assigned Node Groups in the user's responsibility matrix define “which” nodes the user sees.
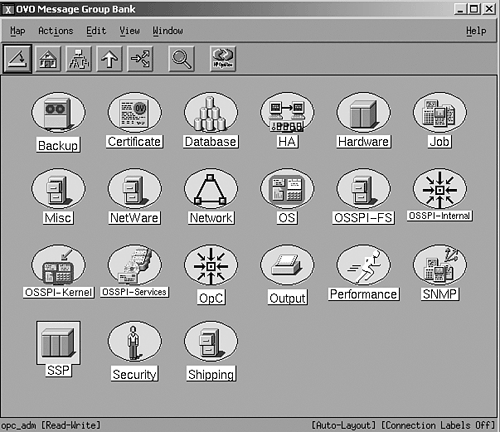
Message groups are an important part of the configuration. An OVO message contains all of the important attributes that help determine who will need to see this event in their message browser. One of the attributes is the message group. For example, a message might contain the message group attribute called Database. The message group attribute of an OVO message will be defined by the OVO administrator as part of the agent's template configuration. See Chapter 14 for more information about templates. If an operator's configuration includes the message group Database, the message will appear in the operator's message browser. All messages must be organized into logical categories called message groups. The default message groups are Backup, Certificate, Database, HA, Hardware, Job, Misc., Netware, Network, OpC, OS, Output, Performance, Security, SSP, and SNMP.
The message group “Misc” plays a special role by catching all undefined messages. If an arriving OVO message contains a message group attribute which is not part of the Message Group Bank, it will be assigned to all OVO users who have the message group “Misc” assigned. However, the original message group value (as part of the OVO message) will be displayed in the message browser.
An example of how to create a new message group is shown here for reference. Select from the menu Actions→Message Group→Add. Enter the name, label, and description for the message group (see Figure 13-13). Click OK. The icon for the new message group appears in the window (see Figure 13-14).
You can change the look of the icon by highlighting it with the left mouse button. Open the pop-up menu with right mouse button. Select Change Symbol Type. This opens the window for the symbol types you may choose from, as shown in Figure 13-15. (Refer to the Administrator's Reference, Volume I for more information.)
The operator responsibilities and tools are assigned to the operator and to the operator account. Each operator's configuration is located in the User Bank. There are three methods to create a new user and assign responsibilities using the GUI. The first method is to assign a profile. A profile is preconfigured with the node groups, message groups and applications (covered in Section 13.12). The components are typically customized for each operator depending on their responsibilities. The profile is typically named and assigned based upon the operator's role. A profile may contain other profiles.
The same profile is reusable for operators who have similar responsibilities. Pre-configured profiles save time when adding new operators—you just create the new account and apply an existing profile.
The second method is to create the user account and define responsibilities and application tools for each individual account. The third method is to use a combination of both of the other methods. The configuration that is assigned to the operator determines what nodes the operator sees in their OVO console. For example, if an operator is responsible for all the mail servers but not the database servers in the management domain, they will only see messages related to events coming from the mail servers. The next section provides a closer look at configuring a new OVO operator using a profile.
The profile is a method to configure an environment that includes all the attributes that an operator needs to perform their tasks. The profile includes the applications that appear on the desktop, the message group, and node groups. If there are responsibilities necessary in addition to those in a profile, they should be selected for the individual requirement of the specific operator account.
The introduction of Smart Plug-Ins (SPIs) includes appropriate operator profiles for managing the environment to which the SPI configuration is assigned. An example of how to assign a profile to an operator is shown in steps 1-8. Fig 13-16 shows the OS-SPI profile.
Locate the default profiles from the menu by selecting Window→User Profile Bank.
Open the operators profile bank.
From the menu, select Window→User Bank.
Select the operator icon, right-click, and select modify; this opens the Modify Operator Configuration window.
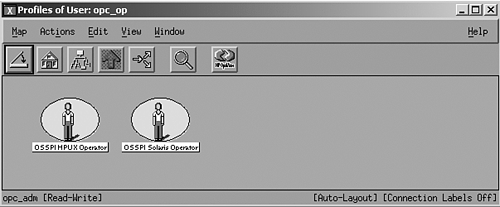
Select the Profile button as shown in Figure 13-17.
After the operator's profile bank is open, drag and drop the appropriate default SPI profile.
The result of the drag and drop operation is shown in Figure 13-18.
After the profile is assigned, close the User Profile Bank and close the Operator Profile.
Configure the other features of the Operator's account, which will be covered in Section 13.14, “Configure a New OVO Operator.”
In the operator's GUI, OVO operations console is a primary tool for resolving problems that have been identified and presented in the message browser. After the decision to further investigate a problem is made, the operator should not have to leave the console to do so. Tools are built into the operator's console to help isolate and resolve problems. In the operator's GUI, the tools are provided in the Application Desktop, as shown in Figure 13-19.
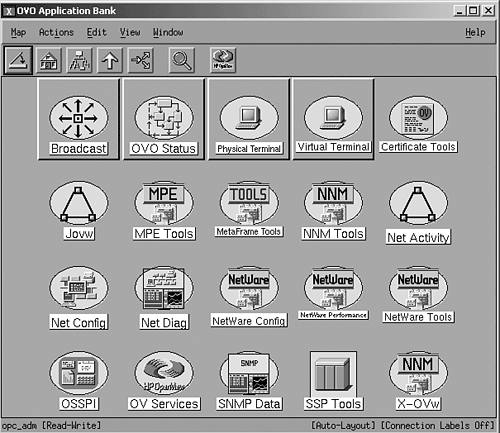
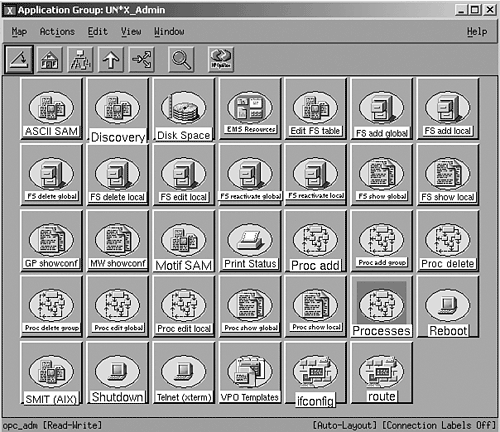
The OVO Administrator has "all" applications available for direct use or for assignment to operators in the Application Bank. This resource area contains symbols that represent categories of tools that are readily available for use. The tools are represented by symbols arranged in a hierarchy starting with a top-level represented by oval shaped symbols, called application groups. If you double-click on the icon, you'll find that the second level contains specific tools for that application group category. The top level of the Application Bank contains square-shaped symbols that are executable. Drag and drop the node onto the application to initialize the program. The Application Bank's oval-shaped symbols represent Application Groups, a collection of applications. Double-click with the mouse on the application group icon to move to the second level of the hierarchy.
The symbols at the second level could represent additional Application Groups within this category if the symbol is oval. There are also square icons, which are ready for use and only require a drag/drop operation, as previously described.
The applications icons are embedded with program instructions that execute programs on the specific node or on the management server. For example, to check the status of a node, drag and drop a managed node symbol from the Node Bank onto the square symbol in the Application Bank called ITO Status. This task executes the command opcragt –status on the OVO server and returns the results to the operator console in a separate window.
Customized application techniques are covered in more detail in the User Guide.
The primary tasks performed by the operator include following troubleshooting procedures to resolve the problems reported in the message browser. The operators accomplish the problem-solving tasks with OVO tools found inside the operator's console. The problem-solving tasks are outlined here for reference. There are two operator user interfaces, Motif and Java. The two desktops provide the same basic functionality; this is covered in more detail later in this section. However, some of the key differences between the two should help you make decisions on which is right for your operations environment. Table 13-6 is a comparison of some key differences between the Motif and Java user interfaces.
Table 13-6. Comparison of Motif and Java User Interfaces
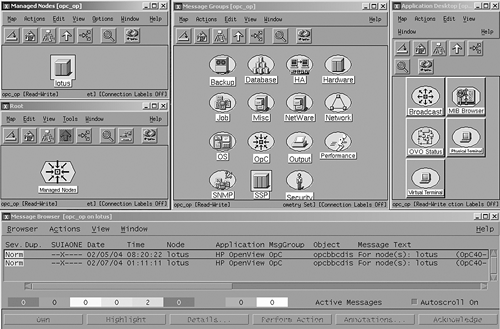
The operator's Motif desktop at login, as shown in Figure 13-21, contains five primary windows, Root, Managed Nodes, Message Groups, Application Desktop and Message Browser.
The Java Console contains a list (on the left pane) of the operators managed nodes, message groups, applications, and services (if configured). (Refer to the OpenView Operator Java Users Guide for more information). Figure 13-22 is an example of the Operator Java User Interface.
The administrator is responsible for defining the customized environment for each operator. The operator configuration is controlled through the Motif graphical user interface by logging on as the OVO Administrator. At this time, there are no administrator functions (such as customization, configuration distribution, and so on) available through the Java console. You can also log on as opc_adm in the JAVA GUI, but you will have operational capabilities only. The administrator can define operator responsibilities based on specific skills or roles via a profile. The profile contains all the tools, applications, node groups, and message groups required by the operator. When the operator account is configured with a name, password, preferences, node hierarchy, the profile is added. Use this method to quickly configure many operators based on the roles they have within the enterprise. Every operator will not see all messages; only those that originate from the nodes which are members of the assigned Node Groups and have a Message Group assigned to the user. By limiting the scope of the messages the operator sees, we maintain focus on the important events that cause messages in the browser. This enables the operations, development, support, and other experts with the knowledge of the applications, servers, and network and services experience to own the problem until it is resolved.
The operator relies upon the tools assigned in their profile to get the job done. In some instances, operators require tools that are not included in the profile. After the application is defined in the administrators' application bank window, assign the application to the operator. Assign the operator's application desktop.
For example, if you want to assign the OV Services to one operator and not a profile, open the application bank in the operators' configuration. Open the application bank window and drag and drop the OV Service application group into the operator's application window. The next time the operator logs into the system he will see new menu items and network tools in the root window. She will also see the Internet icon in the root window.
The following example is meant to give a high-level overview of the major steps required to configure a new operator account.
Start opc and login as opc_adm.
In the Node Bank, select Window→User Bank. This opens the the User Bank.
Select Action→User→Add. This opens another screen for you to customize the new operator account.
Alternately, to modify an existing operator account, select the icon for the account in the User Bank, right-click, and select modify from the pop-up menu.
The Add/Modify User window contains the configuration components for a typical OpenView Operator. Define the user account name, password, Preferences, Node Hierarchy, Responsibilities, Applications, and Profile(s).
If you have configured a Profile or installed SPIs that contain the components for this operator's role, assign the Profile. The steps to assign a profile were described in Section 13.11, “Profiles and User Banks.”
If this is the only customization you require at this time, click OK.
Add the Managed Nodes that will be managed by the operator (covered in Section 13.9.1).
Assign the Managed Nodes to appropriate Node Groups (covered in Section 13.9.2).
When a new operator account is configured (or an existing account modified), perform a few functional tests before you turn the account over to the production operator. Several recommended tests along with suggestions on how to perform them are shown here:
Test the login account—. Login as the operator; use the account name/password.
Test the message environment—. Use the opcmsg command after it is installed.
Test the integrated OVO Applications—. From the operator UI, open the application desktop. Select a node and drag and drop the node onto an application.
Test the integrated OV Services—. Open the Root window, check to see whether the Internet Icon appears, and drill down (double-click) on the icon to see additional network topology (if applicable, not all operators have this service assigned).
Test the integrated tools—. Select items in the Root Menu, for example Tools, SNMP MIB Browser.
Test the Message Browser Layout—. Open the message browser; ensure that the messages are arriving from the nodes. Perform this test this after the managed nodes are configured and assigned to the operator.
Test the Java Client Console—. Start the Java console and use the operator account to login.
There are many configuration tasks for the management server. After the initial installation, customize the server environment. A few of the most popular initial configuration tasks are described in this section.
The management server produces messages immediately after installing the agent software, policies, actions, monitors, and commands. The agent software running on the server generates the messages. Many of the messages are duplicates; this happens if the OVO agent detects the same error condition multiple times. If you disable the policies, you will not see the messages from that node in the message browser. Initially, you just want to suppress the duplicate messages. In the next section, we discuss how to control duplicate messages on the management server. Other message suppression concepts are covered in Chapter 14.
Some messages in the browser indicate that you have successfully installed the agent or distributed the policies. The other platform- and application-specific messages depend on which policies are installed on the managed node.
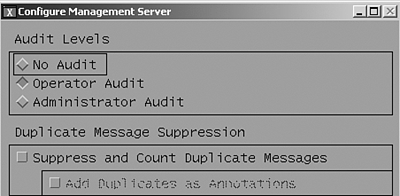
In the beginning, just after a new installation, you may find it necessary to reduce the number of duplicate messages that appear in the message browser. You can reduce the amount of redundant information appearing in the message browser by changing the server configuration with the duplicate message suppression feature.
Select Actions→Server→Configure. Select duplicate message suppression from the window shown in Figure 13-23.
This configures the server to display and increment a counter for duplicate messages in the message browser. If there is information that should accompany a message in the form of a note, it is referred to as an annotation. You can either discard the duplicate messages or add them as annotations to the original message.
The Motif Graphical User Interface (GUI) has many customizable features. The file /opt/OV/lib/X11/app-defaults/C/Opc controls the X-Window display features for the OpenView Operations GUI. In the next two sections, we look at two of the Motif GUI configuration areas.
The Message Groups window dominates the screen anytime a new critical message arrives on the server. During the early phases of server configuration, you should control this window right away. The default X-Windows control for this window is called Opc.alertmsggroupPopup. The default setting is True. Change the setting to False to prevent this window from popping up to the front of your display for each new critical message. There are three ways to set this control.
First, if you change the setting in the Opc file from True to False, as described previously, you affect the entire server. All users who login via an X-server and launch he OpenView GUI will see the result of the global setting. The configuration will take affect during subsequent operator login session.
The second way to control this window is from the command line during the startup of the OpenView GUI with the command opc -xrm Opc.alertmsggroupPopup: False. This controls the window for the individual session.
The third method is creating a file in the users home directory called Xdefaults and place the line in the file Opc.alertmsggroupPopup: False.
The status color of the lines in the message browser can be displayed across the full width of the line. Edit the file /opt/Ov/lib/X11/app-defaults/C/OpC. Remove the comment symbol from the line Opc.browserColoredLines: True. Restart your session. You can activate this feature during login for one session with the following command:
opc –xrm Opc.browserColoredLines: True
The other choice is to add this line for an individual account to the users .Xdefaults file.
Many tasks that you will complete using the graphical user interface are also accomplished from the command line. This is important because you might prefer to automate some tasks and perhaps write your own scripts to perform them. For example, you may want to distribute the templates or components for several nodes and with the command opcragt, which is easily done. Chapter 14 contains a practical use example for command line distribution.
Documented problem-solving techniques and procedures for the operators are provided with Motif and Java graphical user environments. The tasks usually fall within the following categories:
Detect a problem
Investigate the problem
Solve the problem
Document the problem solution
In addition to problem-solving tasks, other resources and documentation are available online to help the operator become proficient with OVO as quickly as possible. Download the Java GUI configuration components at http://<management_server>:3443/ITO_OP/. Refer to Figure 13-24.
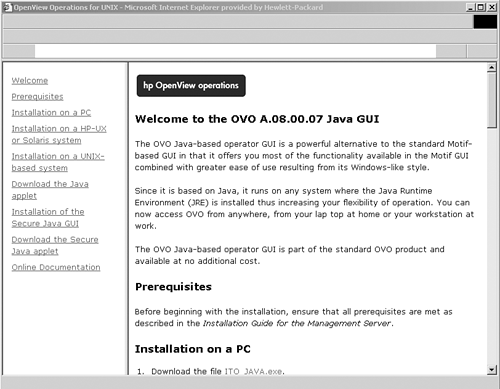
Figure 13-24. The OpenView Java GUI includes a link to a web-based view for online help and other information.
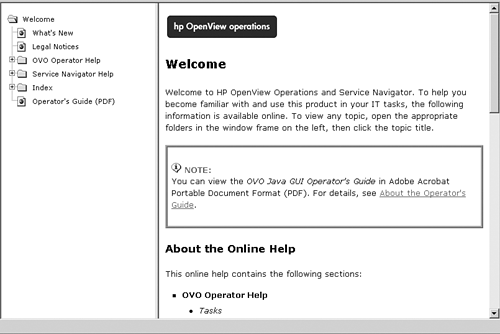
As another example, an operator working from the Java console can select the Help menu→Contents. The following web page, shown in Figure 13-25, contains links to information about “What's New,” Operator Help, OpenView Navigator Help, and the OV Java GUI Operations Guide.
http://<management_server>: 3443/ITO_OP/help/en/ovo/html/index.htm
One of the most challenging parts of learning about the OpenView platform is remembering what file is located in which directory. The tables in this section are quick references for the binaries, configuration, log, component, and queue files that are located on the server and managed nodes (for HTTPS-based agents and DCE-RPC-based agents). The server stores the platform specific agent configuration files. Reference the Administrators Reference, Volume 2, for the agent platform-specific file locations.
Table 13-6 is a quick reference for most of the OVO processes and associated queue files. During run time the processes use the queues and pipes for inter-process communications and temporary data storage. The information listed in the table is for reference only. Chapter 22 covers additional information about the queue files.
Table 13-6. Management Server Processes and Queue Files
Process Name | Queue/Pipe Files | Description |
|---|---|---|
opcactm Action request | Actreqq/p | Action manager |
Action response | ||
Configuration adapter (HTTPS based) | ||
Subprocess of message receiver, used for bulk transfers | ||
Certification Server Adapter | ||
Ctrlq/p Inform control manager of configuration changes | Control Manager | |
Dispq/p Display Manager to the GUI processes Mpicdmq/p Control display manager Sgmceq/p Display manager change events | Display manager | |
Distribution manager | ||
Forwmgrq/p | Message forward manager | |
Msgkeyq/p Manual acknowledgment Mpicmmq/p Control message manager | Message Manager | |
Message receiver (HTTPS based) | ||
Msgmgrq/p Messages and requests | Message receiver | |
Service engine | ||
Ttnsq/p, Ttnsarq/p | Trouble ticket, notification service man-ager | |
Rqsdbdf Buffer file for request sender Rqsq/p Request sender Input | Request sender | |
Transfer manager | ||
TCP socket server | ||
Administrator User Interface | ||
Operator User Interface | ||
Administrator Operator User Interface | ||
Java User Interface manager | ||
Communication broker (HTTPS based) | ||
Control daemon | ||
Configuration and Deploy | ||
The directories on the management server, shown in Figure 13-8, are used for storing the binary (/opt/OV), configuration (/etc/opt/OV), and run time (/var/opt/OV) files. Included for example, are the vendor or customer specific versions of the OVO agent software, actions, commands, and monitors. During distribution, the node-specific flag files are created in the interim distribution directory (/var/opt/OV/share/tmp/OpC/mgmt_sv/distrib) on the server. Prior to transferring the data the configuration is packaged for the appropriate managed node. Details about the OVO agent distribution process are covered in Chapter 14. The Smart Plug-In (add-on components) directories created for the SPI are not included in these tables.
Table 13-7. Management Server Directory Structure
The configuration files in Table 13-8 enable the management server environment to function properly. It is possible to achieve specific process behavior through further customization of the configuration files with the command ovconfchg.
Table 13-8. Server Configuration Files
File Name | Description |
|---|---|
Refer to Chapter 19 for more information. | |
/etc/opt/OV/conf/OpC/mgmt-sv/svreg | All registered server processes |
/etc/opt/OV/share/conf/OpC/mgmt_sv/svreg | Currently registered server processes |
/opt/Ov/lib/X11/appp-defaults/C/Opc | X-Window server display control file |
escmgr[*] | Message escalation on the management server |
msgforw[*] | Message forwarding on the management server |
outage [*] | |
[*] The file is not configured by default. | |
The following directories on the managed node are used for storing the binary (/opt/OV/bin/OpC), configuration (/var/opt/OV/bin/instrumentation), and run-time (/var/opt/OV) files.
Table 13-9. HP and Solaris Managed Node Directories
The files nodeinfo and opcinfo (used with prior releases of OVO) are combined into one data file (on HTTPS-based nodes) and the configuration changes to the file are made with either the command /opt/OV/bin/ovconfget locally or /opt/OV/bin/ovconfpar remotely from the OVO server. Refer to the man pages for details about the commands. The configuration file listed in Table 13-10 are shown for reference only. Please do not modify. This also applies to policies.
Table 13-10. Managed Node Configuration Files
File Name | Description |
|---|---|
/var/opt/OV/datafiles/policies /mgrconf.[*] | Agent message forwarding file |
/var/opt/OV/datafiles/policies /primmgr[*] | _Control switch and automatic action authorization file on the managed node |
[*] This file is configured as part of the manager-to-manager customization. Refer to Chapter 19 for more Information on message forwarding concepts. | |
The error and trace files used with the DCE-RPC and HTTPS agents are shown in Table 13-11. Refer to the HP OpenView Operations Tracing Concepts and User Guide for information on configuring tracing.
Refer to the man pages for the command ovconfchg and for more details on how to modify the configuration.
The files listed in Table 13-13 are general system resource files that are modified or created by OpenView during the initial installation of the server or managed node.
Table 13-13. System Resource Files Adapted by OpenView.
File Name | Description |
|---|---|
/etc/password | User password file |
/etc/group | Group file |
/sbin/init.d/opcagt | Agent startup and shutdown script |
/etc/rc.config.d/opcagt | Agent startup and shutdown configuration variable file |
/sbin/rc3.d/S#opcagt | Startup sequence number linked to the start/stop script |
/sbin/rc2.d/K#opcagt | Shutdown sequence number linked to the start/stop script |
/etc/services | Internet services, and ito-e-gui for opcuiwww (Java clients) (Server Only). |
/etc/inetd.conf | Service configuration for opcuiwww (Server Only). |
/var/adm/inetd.sec | Not configured by default install; used to limit access to the service ito-e-gui (Server Only). |
/etc/rc.log | Contains system, service and application startup information |
/var/adm/syslog/syslog.log | Operating system log file (HP). This file is not used by OVO by default, but may contain information for troubleshooting. |
/var/adm/sw/swagent.log |
The following documentation is available in PDF format (unless otherwise noted) after installation on the management server. The files are located in the directory /opt/OV/www/htdocs/ito_doc/C/manuals.
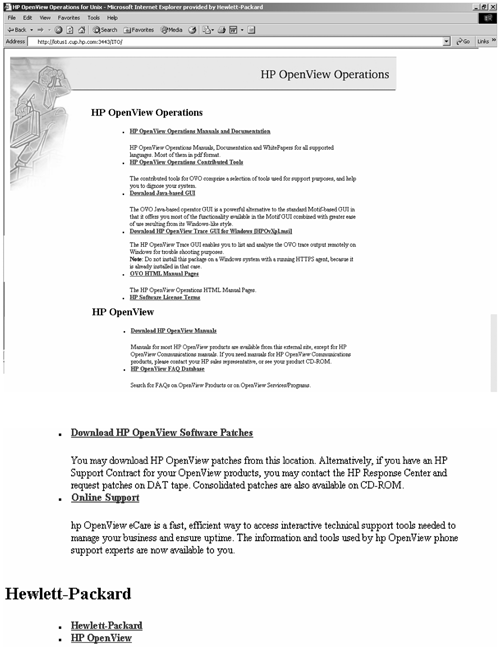
The management server is installed with a primary web page, http://<management _server>:3443/ITO/. This page contains links to many other resources as shown in Figure 13-26.
Table 13-14. Tools and Resources URL Guide
This section provides a list of the major steps that are accomplished by executing the ovoinstall program.
Query the user for information about number of concurrent users, and types of connections. This information is used to access if the available resources are adequate for the installation. If they are not you will get a warning message.
Check the system environment for the recommended patches.
Install OVO server software (including NNM).
Configure the OVO server. (Note: in prior releases of OVO the opcconfig program was used for this step).
Install OS SPIs (if selected by the user).
Install local OVO agent (if selected by the user).
Chapter 13 covered a lot of ground and should be a helpful reference for new and experienced OVO administrators. The chapter included key concepts and best practices for a new enterprise management implementation with OpenView, and touched upon some of the details of the configuration tasks. Finally, the chapter ends with lots of resources and references, which although available from other sources are consolidated here for quick reference. The next chapter continues with more details about the components and how to deploy the OVO configuration.
