
In this section, we will look into how to train your models for prediction using the Google Cloud platform. The focus is on how to use the Google Cloud platform to train models and the steps involved in that. The entire training code is taken from Google Cloud sample examples. Please refer to the following link (https://github.com/GoogleCloudPlatform/cloudml-samples/archive/master.zip) for the training code. You can also download the data from the Google Cloud public storage (gs://cloud-samples-data/ai-platform/census/data/*):
- You can create a data directory and use the gsutil copy command to copy data from the Google Cloud bucket to the local directory. This is required as you have to train and test the model locally first. The following code would do the same:
mkdir data
gsutil -m cp gs://cloud-samples-data/ai-platform/census/data/* data/
The data folder would have the structure shown in the following screenshot:

So, with the assumption that you have your training code, and training data, and all the relevant Python environments for the Google Cloud SDK are set up, we can now look into the steps for training the model using the Google Cloud AI Platform. You first start with local training jobs.
- The following code sets up the MODEL_DIR environment variable and then uses the Google Cloud AI Platform command to train models locally, as follows:
MODEL_DIR=output
rm -rf $MODEL_DIR/*
gcloud ai-platform local train
    --module-name trainer.task
    --package-path trainer/
    --job-dir $MODEL_DIR
    --
    --train-files $TRAIN_DATA
    --eval-files $EVAL_DATA
    --train-steps 1000
    --eval-steps 100
The output of the preceding code would look like that shown in the following screenshot:
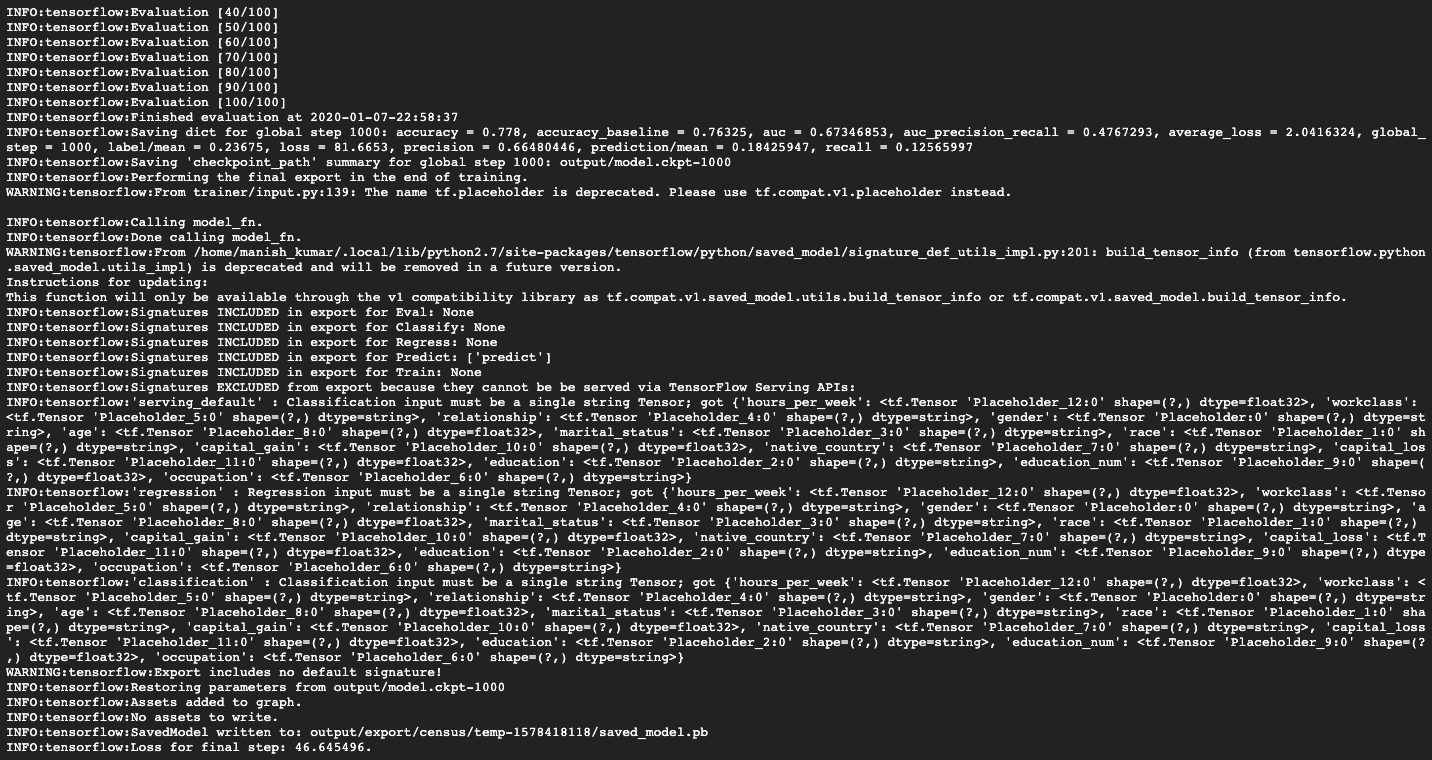
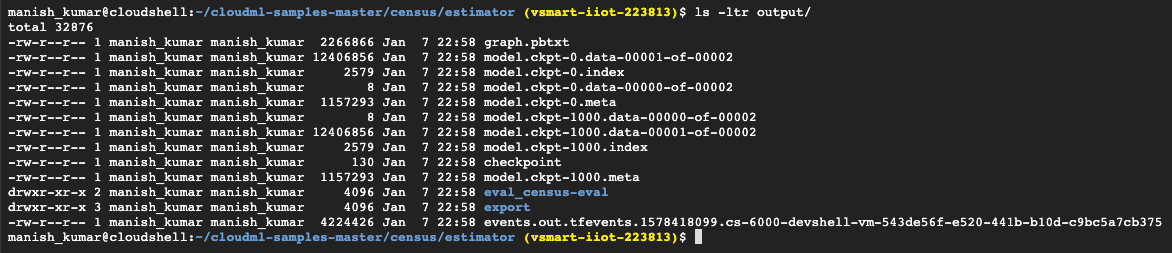
The output directory would have the following contents:
To show the results of the local model training test, you can use the TensorBoard visualization tool. With TensorBoard, you can view your TensorFlow map, compile quantitative data on how your model is run, and show additional data, such as pictures going through the chart. As part of the TensorFlow installation, the TensorBoard is available.
- Run the following command to start tensorboard:
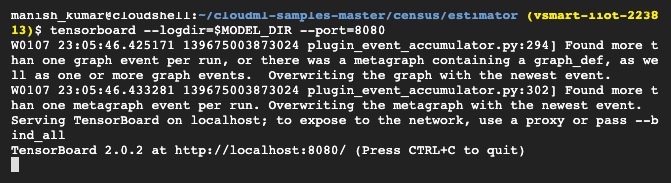
tensorboard --logdir=$MODEL_DIR --port=8080
The output of the preceding command would look like that in the following screenshot:
The following screenshot provides a glimpse of what a TensorBoard looks like:

As you can see in this screenshot, the model training goes through various stages, and TensorFlow creates the lineage with efficient logging. This lineage is easy to trace with the graphical user interface (GUI). It is possible to trace the input values as they process through the training stages and produce intermediate results. The model can be tuned based on the training graph by passing appropriate values to the runtime:

- Now, after local testing, you need to test the model training in distributed local mode to ensure that the model can be trained in distributed mode, which would be the case if the Google Cloud AI Platform were used to train the model. The following code can be used for the same:
MODEL_DIR=output-dist
rm -rf $MODEL_DIR/*
gcloud ai-platform local train
    --module-name trainer.task
    --package-path trainer/
    --job-dir $MODEL_DIR
    --distributed
    --
    --train-files $TRAIN_DATA
    --eval-files $EVAL_DATA
    --train-steps 1000
    --eval-steps 100
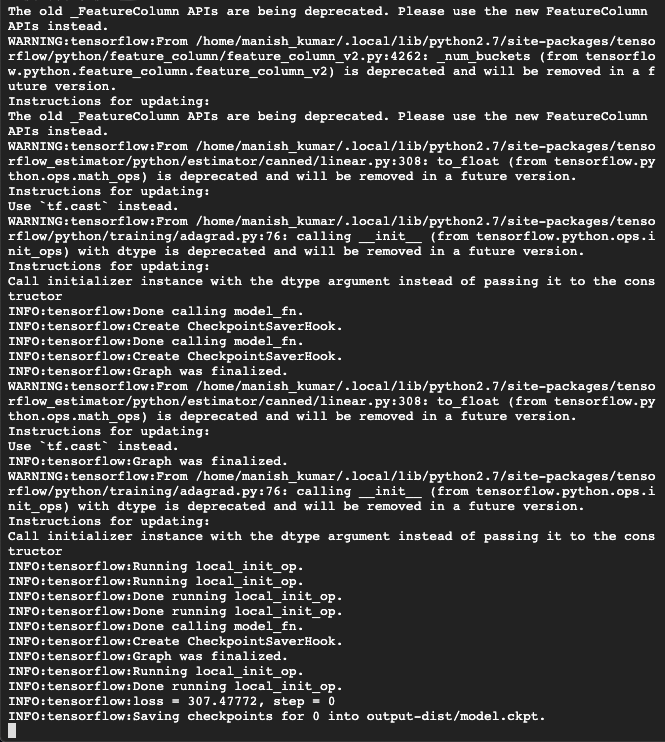
The output would look like that in the following screenshot:
The output model directory has the following contents. The checkpoint and log folders enable the graphical view on the TensorBoard, as shown in the following screenshot:

- The preceding steps are about running model training jobs for local testing. After this, for actual production-grade deployment, you need to run model training on the cloud. For that, you have to start by creating buckets (or you can use existing ones as well). The following code will create buckets for you:
BUCKET_NAME_PREFIX="ai_ml_book"
PROJECT_ID=$(gcloud config list project --format "value(core.project)")
BUCKET_NAME=${PROJECT_ID}-${BUCKET_NAME_PREFIX}
echo $BUCKET_NAME
REGION=us-central1
gsutil mb -l $REGION gs://$BUCKET_NAME
The output of the preceding code would look like the following:

- Once the bucket is created, you upload the artifacts to the bucket using the following code. This code also sets some variables to correct values so that the next set of commands can run:
gsutil cp -r data gs://$BUCKET_NAME/data
TRAIN_DATA=gs://$BUCKET_NAME/data/adult.data.csv
EVAL_DATA=gs://$BUCKET_NAME/data/adult.test.csv
gsutil cp ../test.json gs://$BUCKET_NAME/data/test.json
TEST_JSON=gs://$BUCKET_NAME/data/test.json
The output would look like the following:

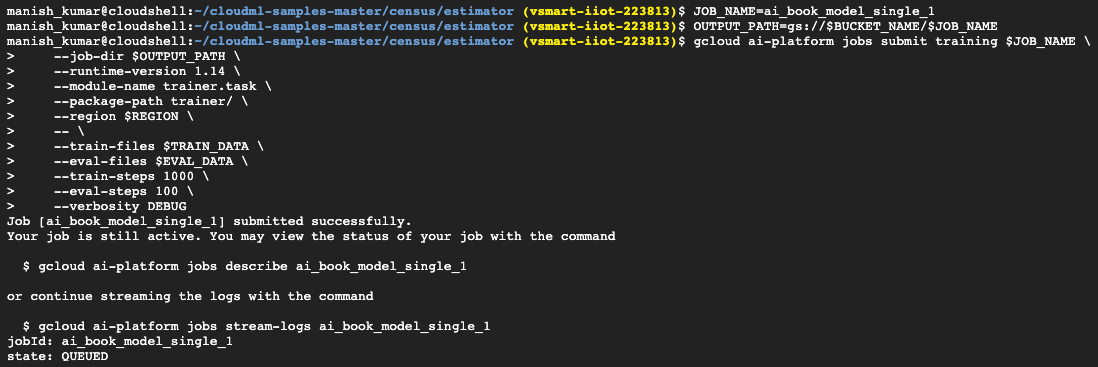
- You are now ready to work in the cloud with an approved exercise in both single and distributed mode. You will begin by applying for a one-instance training job. Use the default BASIC scale compute tier to perform a training job with a single instance. The initial job request can take a couple of minutes to start, but jobs will run faster afterward. It helps you to easily iterate when improving and validating your preparation. The following is the code for the same:
JOB_NAME=ai_book_model_single_1
OUTPUT_PATH=gs://$BUCKET_NAME/$JOB_NAME
gcloud ai-platform jobs submit training $JOB_NAME
    --job-dir $OUTPUT_PATH
    --runtime-version 1.14
    --module-name trainer.task
    --package-path trainer/
    --region $REGION
    --
    --train-files $TRAIN_DATA
    --eval-files $EVAL_DATA
    --train-steps 1000
    --eval-steps 100
    --verbosity DEBUG
The output of the preceding command would look like the following:
- Upon running the gcloud ai-platform jobs describe ai_book_model_single_1 command, the following output would be seen:

You can view the job status and logs from the Google Cloud console user interface as well. The following screenshot represents the same:
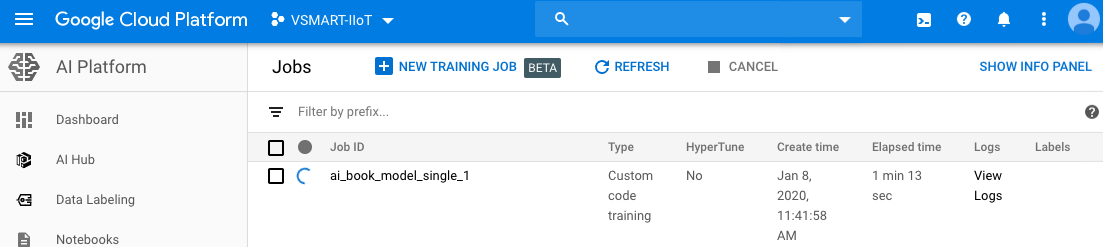
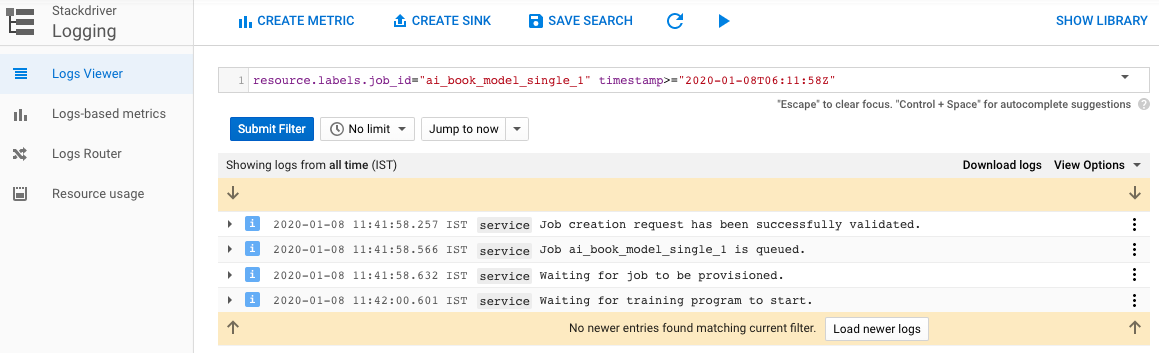
- While the model training is in progress, we see a progress bar in the model list user interface. The logs can be accessed in real time for understanding the model training progress as well as understanding the intermediate results. This level of logging is useful in model tuning, and can be seen in the following screenshot:
The output stored on the Google Cloud bucket would look like our locally trained output model only, as shown in the following screenshot:

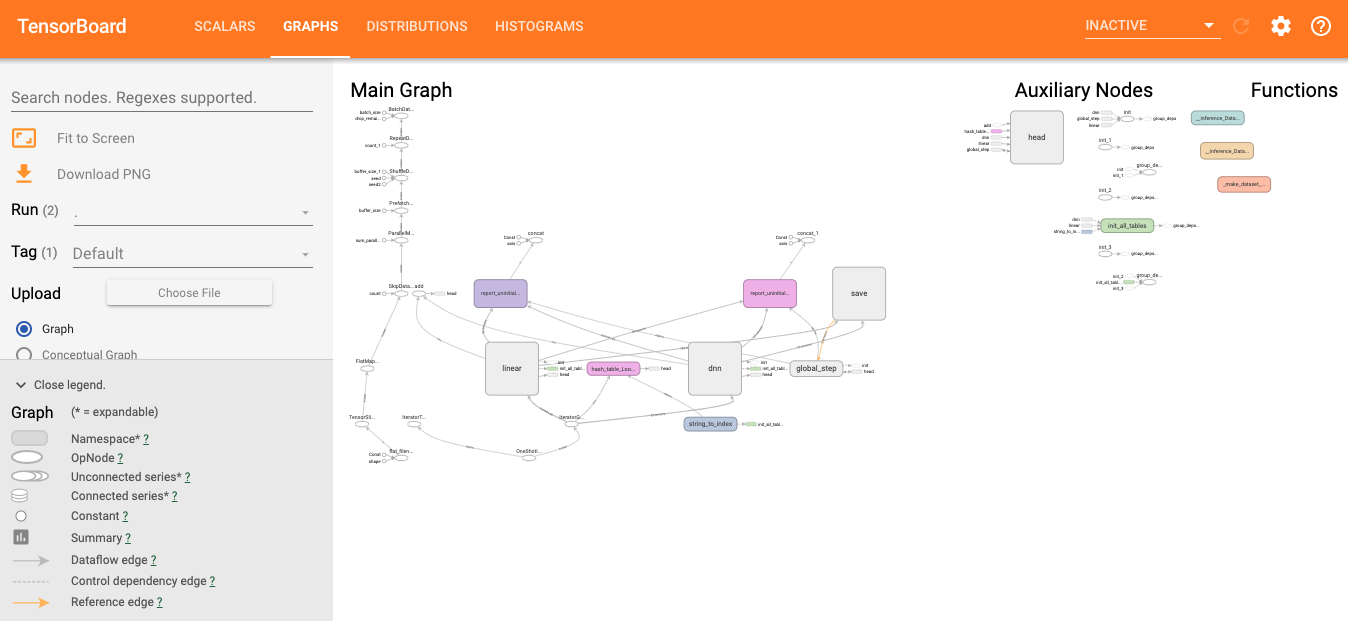
- By starting TensorBoard, the behavior of your training job can be inspected and point to summary logs produced during the workout—both during and after the workout. Since the summaries are written by the training programs to a cloud storage location, TensorBoard can read from them without having to copy event files manually. The following screenshot is for the same:
- You should configure your training job in distributed mode to take advantage of Google's flexible platform when carrying out training jobs. To run this model as a distributed process on the AI Platform, no code changes are required. Set --scale-tier to any tier above fundamental to perform a distributed job. The following is the example code for the same:
JOB_NAME=census_dist_1
OUTPUT_PATH=gs://$BUCKET_NAME/$JOB_NAME
gcloud ai-platform jobs submit training $JOB_NAME
    --job-dir $OUTPUT_PATH
    --runtime-version 1.14
    --module-name trainer.task
    --package-path trainer/
    --region $REGION
    --scale-tier STANDARD_1
    --
    --train-files $TRAIN_DATA
    --eval-files $EVAL_DATA
    --train-steps 1000
    --verbosity DEBUG
The output for the preceding code is shown in the following screenshot:

- You can stream logs using the gcloud ai-platform jobs stream-logs $JOB_NAME command. The following screenshot represents the output of the stream logs:

- The final step of model training is to deploy the models. The following code will deploy the model with a version:
MODEL_NAME=census
    gcloud ai-platform models create $MODEL_NAME --regions=$REGION
    OUTPUT_PATH=gs://$BUCKET_NAME/census_dist_1
    gsutil ls -r $OUTPUT_PATH/export
    MODEL_BINARIES=gs://$BUCKET_NAME/census_dist_1/export/census/1578466652
    gcloud ai-platform versions create v1
    --model $MODEL_NAME
    --origin $MODEL_BINARIES
    --runtime-version 1.14
The following is the output of the preceding command:

You can also view the deployed model version on the Google Cloud console user interface, shown in the following screenshot:

In the next section, we will take a look at how we can use the deployed census model for both online and batch prediction.