
Snapshot testing is a useful tool to test that there are no unwanted changes in your user interface. Jest generates snapshot files when the snapshot tests are executed. The next time the tests are executed, the new snapshot is compared to the previous one. If there are changes between the content of the files, the test case fails and an error message is shown in the Terminal.
To start snapshot testing, perform the following steps:
- Install the react-test-renderer package. The --save-dev parameter means that this dependency is saved to the package.json file's devDependencies part and it is only used for development purposes. If you type the npm install --production command in the installation phase, dependencies in the devDependencies part are not installed. So, all dependencies that are only required in the development phase should be installed using the --save-dev parameter:
npm install react-test-renderer --save-dev
- Your package.json file should appear as follows once the new devDependecies part has been added to the file:
{
  "name": "carfront",
  "version": "0.1.0",
  "private": true,
  "dependencies": {
    "@material-ui/core": "^3.9.3",
    "react": "^16.8.6",
    "react-csv": "^1.1.1",
    "react-dom": "^16.8.6",
    "react-scripts": "2.1.8",
    "react-table": "^6.9.2",
    "react-toastify": "^5.0.1"
  },
  "scripts": {
    "start": "react-scripts start",
    "build": "react-scripts build",
    "test": "react-scripts test",
    "eject": "react-scripts eject"
  },
  "eslintConfig": {
    "extends": "react-app"
  },
  "browserslist": [
    ">0.2%",
    "not dead",
    "not ie <= 11",
    "not op_mini all"
  ],
  "devDependencies": {
    "react-test-renderer": "^16.8.6"
  }
}
- Import TestRenderer to your test file:
import TestRenderer from 'react-test-renderer';
Let's now add a new snapshot test case to our App.test.js file. The test case will create a snapshot test of our AddCar component:
- Import the AddCar component to our test file:
import AddCar from './components/AddCar';
- Add the following test code after the first test case, which already exists in the file. The test case takes a snapshot from our App component and then compares whether the snapshot differs from the previous snapshot:
it('renders a snapshot', () => {
  const tree = TestRenderer.create(<AddCar/>).toJSON();
  expect(tree).toMatchSnapshot();
});
- Run the test cases again by typing the following command in your Terminal:
npm test
- Now, you can see the following message in the Terminal. The test suite tells us the number of test files, and the tests tell us the number of test cases:

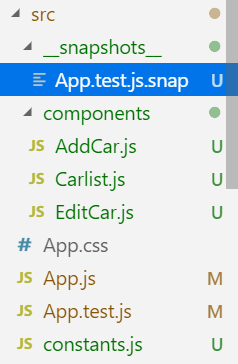
When the test is executed for the first time, a _snapshots_ folder is created. This folder contains all the snapshot files that are generated from the test cases. Now, you can see that there is one snapshot file generated, as shown in the following screenshot:
The snapshot file now contains the React tree of our AddCar component. You can see part of the snapshot file from the beginning in the following code block:
// Jest Snapshot v1, https://goo.gl/fbAQLP

exports[`renders a snapshot 1`] = `
<div>
  <button
    className="MuiButtonBase-root-252 MuiButton-root-226 MuiButton-outlined-234
        MuiButton-outlinedPrimary-235"
    disabled={false}
    onBlur={[Function]}
    onClick={[Function]}
    onContextMenu={[Function]}
    onFocus={[Function]}
    onKeyDown={[Function]}
    onKeyUp={[Function]}
    onMouseDown={[Function]}
    onMouseLeave={[Function]}
    onMouseUp={[Function]}
    onTouchEnd={[Function]}
    onTouchMove={[Function]}
    onTouchStart={[Function]}
    style={
      Object {
        "margin": 10,
      }
    }
    tabIndex="0"
    type="button"
  >
...continue
Now, let's look at how we can use Enzyme to test our React components.