


IBM Linear Tape File System Library Edition
IBM Linear Tape File System Library Edition (LTFS LE) extends the file manager capability of the IBM LTFS Single Drive Edition (LTFS SDE). LTFS LE is introduced with Version 2.0 of LTFS.
LTFS is the first file system that works with IBM System Storage tape technology to optimize ease of use and portability for open-systems tape storage. It manages the automation and provides operating system-level access to the contents of the library. LTFS LE is based on the LTFS format specification, enabling tape library cartridges to be interchangeable with cartridges that are written with the open source SDE version of LTFS. IBM LTFS LE supports most IBM tape libraries:
•TS2900 Tape Autoloader, TS3100 Tape Library, and TS3200 Tape Library
•TS3310 Tape Library
•TS3500 Tape Library
LTFS LE enables the reading, writing, searching, and indexing of user data on tape and access to user metadata. Metadata is the descriptive information about user data that is stored on a cartridge. Metadata enables searching and accessing of files through the graphical user interface (GUI) of the operating system. From LTFS V2R1.2, LTFS LE supports both Linux and Windows.
|
Did you know? IBM Linear Tape File System (LTFS) won a Pick Hit award at the National Association of Broadcasters (NAB) conference.
|
|
Ordering: LTFS LE is a Software License Product. LTFS LE has a Program PID number of 5639-LT1.
|
2.1 Introduction
LTFS LE is a file system that enables direct access to IBM Linear Tape-Option (LTO) generation 5, IBM LTO generation 6, and IBM TS1140 tape drives and tape libraries. LTFS LE eliminates the need for additional tape management software to access data. LTFS LE is based on the media partitioning feature that is introduced with the IBM Linear Tape-Option Ultrium 5 (LTO-5) and TS1140 tape drives.
LTFS is the first file system that works with LTO generation 5 tape technology to set a new standard for ease of use and portability for open systems tape storage. With LTFS, accessing data that is stored on an IBM tape cartridge becomes easy and intuitive. With LTFS and the operating system’s graphical file manager (Figure 2-1), reading data on a tape cartridge is as simple as dragging and dropping. In addition, it provides for caching tape indexes. It also provides for searching, querying, and displaying tape content within an IBM tape library without the requirement to mount tape cartridges.

Figure 2-1 IBM LTFS LE
Under LTFS, tape cartridge usage changes from being application-dependent to application independent. The tape cartridge is now a self-describing, independent storage object similar to a USB drive. Each LTFS cartridge contains the metadata to enable access to the user data on that cartridge. Tape cartridges are portable and robust, and far less prone to damage than a USB hard disk drive. They are also much smaller, lighter, and less expensive. Because nothing is ever overwritten on the tape cartridges, the tapes contain not only the current version of files, but also every previous version of every file that is written to the tape. And the metadata holds all of the necessary information to restore to previous “versions” of the tape.
LTFS LE provides the following product features:
•Direct access and management of data on tape libraries with LTO Ultrium 5 (LTO-5) tape drives, LTO Ultrium 6 (LTO-6) tape drives, and TS1140 tape drives
•Tagging of files with any text, allowing more intuitive searches of cartridge and library content
•Exploitation of the partitioning of the media in LTO-5 tape format standard
•One-to-one mapping of tape cartridges in tape libraries to file folders
•Capability to create a single file system mount point for a logical library that is managed by a single instance of LTFS and runs on a single computer system
•Capability to cache tape indexes and to search, query, and display tape content within an IBM tape library without having to mount tape cartridges
The following components are needed to operate the tape file system:
•Software in the form of LTFS LE
•Hardware, consisting of IBM LTO Ultrium 5 tape drive, IBM LTO Ultrium 6 tape drive, and media or IBM TS1140 Tape Drive and media
•On-tape data structures (created by LTFS)
Together, these components can handle a file system on LTO media as though it is a disk file system for accessing tape files, including the tape directory tree structures. After an LTFS tape is mounted and recognized by the LTFS software, its contents can be displayed quickly (that is, at the start of the tape) without a special backup or archive application. Data movement is application independent.
Because each LTFS formatted tape is self-describing, it holds all the needed information to determine the data contents on tape, including the instructions for data arrays, file elements and attributes, and the use of the metadata. An LTFS-formatted tape can be easily transported to other physical locations for reading and writing data.
The LTFS format is an ideal option for storing, on a long-term basis, large files that need to be shared with others, such as for the digital media and entertainment market. Most of these users use Linux or Macintosh systems and can see all the files on tape. With LTFS, users can recall any file from the tape without needing to read the entire tape.
The following sections provide a more detailed view of the design and implementation of the new tape file system:
•For index and data partition information, see 2.1.5, “Index and data partitions” on page 109.
•For Filesystem in User Space (FUSE), see 2.1.6, “Filesystem in Userspace (FUSE)” on page 111.
•For on-tape data structures that use an XML schema to record the contents of the tape, see 2.1.7, “XML schema” on page 112 and 2.1.8, “Recording the LTFS XML schemas” on page 120.
|
On-tape data structures: These structures are defined by the W3C Extensible Markup Language (XML) 1.0 standard.
|
2.1.1 LTO media partitioning
The new functionality of media partitioning is added to the LTO-5, LTO-6, and IBM TS1140 tape drives. Media partitioning is the logical and physical division of the tape into two segments to allow for faster data access and to update partitions independently.
In the LTO-5 implementation, two partition modes are supported:
•One partition on the full tape
•Two partitions with a variable size for each partition
Partitions on media all have the same beginning-of-tape (BOT) and end-of-tape (EOT) markers, as shown in Figure 2-2. The minimum partition size of the two partitions is equivalent to two wraps.

Figure 2-2 A logical view of media partitioning
The LTO-5 media default that is set at manufacturing is a single partition of 80 wraps. The host application or middleware can change the partition to one partition (partition 0, the default partition) or two partitions, where the second partition is called partition 1. Partitioning is done by using a reformat command that logically erases all data on a tape before it is partitioned.
Each LTO-5 partition (if there are two) has a bidirectional serpentine and must have an even number of wraps in size. This way, it begins and ends at Logical-Point 3 (LP3) (logical point to indicate the start of the user data region; see Figure 2-2). If there are two partitions, a guard band is between the two wraps, which is 2.5% of nominal LTO-5 cartridge capacity.
LTO-6 and TS1140 support the new partitioning scheme. By using the new scheme, LTFS can provide more space for data partitioning. Currently, LTFS V2R1.2 does not support the new scheme. The principle function of the media partitioning is to allow for faster data access by splitting the cartridge into up to four media partitions. Tape media can have a minimum of one and a maximum of four different partitions that are defined. Partitions on media all have the same BOT and EOT as shown in Figure 2-3. The minimum partition size of the multiple partitions is equivalent to two wraps.
Figure 2-3 Expanded Media Partitioning
Set capacity and partitioning are independent of each other. Partitioned media can be capacity scaled and capacity-scaled media can be partitioned. Each format media command causes a loss of data on media.
|
Important: The new partitioning scheme is applied when a cartridge is formatted. So, the user can read from and write to cartridges that are formatted by an older version of LTFS. LTFS V2R1.2 can read from and write to existing cartridges with the old partitioning scheme.
LTFSV2R1.2 does not provide the functionality to format with the “old” partitioning scheme. So, LTFS V2R1.2 can format with only the new partitioning scheme.
|
Encryption is supported by using one key for the entire cartridge in transparent encryption.
|
Write Once Read Many (WORM): Because WORM media is not partitionable, it is not supported in LTFS.
|
2.1.2 Interoperability
LTO Ultrium cartridges from earlier LTO generations (that is LTO-1 through LTO-4) are not partitionable. Those formats are not supported for partitioning. Figure 2-4 shows the interoperability matrix of media partitioning and LTO-5 cartridges.

Figure 2-4 Interoperability matrix for media partitioning
If LTO Ultrium 4 (LTO-4) cartridges are used in an LTO-5 drive to write data on, the LTO-4 cartridge is treated like an unpartitioned LTO-5 cartridge. Even if an application can work with partitions, it is not possible to partition the LTO-4 media that is mounted on an LTO Ultrium 5 drive.
2.1.3 Applications that use partitioning
To increase the usability of a tape drive system, a new tape file system interface acts similarly to any other storage disk and removable flash media, such as a USB disk drive. This file system, called the LTFS, is a self-describing tape format (SDTF) and open source file system software. Combined with LTO-5 partitioning technology, it brings functionality for easy handling of the tape cartridges.
To use the new tape file system, the file that is using the application can use middleware (such as LTFS) to handle the files. Alternatively, if the application is SDTF-capable, only the SCSI standard commands can be used (see Figure 2-5). Partitioning commands are already SCSI standard commands, but most tape applications that are written today do not use them.

Figure 2-5 Application that uses partitioning, SDTF, and LTFS
2.1.4 LTFS tape format specification
LTFS tape format compatibility for versions 2.1.1 is described. The LTFS tape format version is updated from 1.0 to 2.1.1. See the following LTFS format specification website for a PDF file of the latest version:
The older version of the LTFS SDE program (1.0.1.xx or older for Linux and Mac OS X, and 1.1.0 for Microsoft Windows) supports only LTFS format version 1.0. The latest version of LTFS SDE (1.2.0.xx or later) and LTFS LE supports LTFS format version 2.1.1. Table 2-1 shows a compatibility matrix for media versions 1.0 and 2.1.1.
Table 2-1 Media version compatibility
|
LTFS LE version
|
LTFS 1.0 medium
|
LTFS 2.1.1 medium
|
|
2.0 Linux only
|
N/A
|
Read/write
|
|
2.1.1 Linux only
|
N/A
|
Read/write
|
|
2.1.2 Linux and Windows
|
Read/writea
|
Read/write1
|
1 The user can create, delete, and move the symbolic link file except on Windows.
|
Important: For LTFS LE, the mkltfs and ltfsck functions are provided by the ltfsadmintool command. The ltfsck utility in LTFS SDE checks and recovers media. The mkltfs utility in LTFS SDE formats media.
The ltfsck command in the older LTFS package cannot be used to check and recover a medium that is formatted to version 2.1.1. A medium that is formatted to version 2.1.1 cannot be converted to a 1.0 version format. If you use the mkltfs command from a 1.0.x LTFS version, you reformat the medium to a 1.0 format.
|
In summary, media that is written by LTFS SDE (LTFS 2.1.1 format) can be read by LTFS LE and vice versa.
2.1.5 Index and data partitions
LTFS uses the capability of LTO Generation 5 technology to partition the LTO media into two segments. The first partition is used to store the self-describing LTFS format based on an XML schema that contains the client data in the second partition (see Figure 2-6 and Figure 2-7).

Figure 2-6 Logical view of LTFS volume
One partition (partition 0), which is called the index partition, is small and allocates two LTO-5 wraps with about 37.5 GB on native storage capacity. The remaining cartridge capacity is used by partition 1, which is called the data partition. The data partition consists of 76 LTO-5 wraps with about 1425 GB of native storage capacity. Both partitions are separated by the two guard wraps as shown in Figure 2-2 on page 106.

Figure 2-7 Index and data partitions on tape
After LTFS formats a tape media, the index and data partitions contain a VOL1 label and an LTFS label. The LTFS label is based on XML schema (see 2.1.7, “XML schema” on page 112) and contains information about the LTFS partition on which the structure is stored.
|
VOL1 label: The VOL1 label is created according to ANSI Standard X 3.27. It contains ASCII-encoded characters that are 80 bytes in length.
|
Figure 2-8 on page 110 shows the LTFS-formatted tape without any client data on it. The label construct in the index and data partitions consists of the VOL1 and LTFS labels.

Figure 2-8 LTFS tape format after initialization (FM=file mark)
An LTFS volume is defined as a pair of LTFS partitions (one index partition and one data partition) that contain a logical set of data files and directories. The pair of partitions in an LTFS volume must have the same Universally Unique Identifier (UUID).
Figure 2-9 shows the content of a simple LTFS volume. This volume contains three files: File A, File B, and File C.
File A consists of three extents. Files B and C have one extent. The file blocks are followed by a file mark only when an XML index immediately follows the files. Figure 2-9 also indicates that the LTFS volume is still mounted. After you unmount an LTFS volume, double file marks are written at the end of the index and data partitions.

Figure 2-9 A simple LTFS volume
TS1140 new partitioning scheme support
LTFS V2R1.1 already supports the TS1140 drive. Using LTFS V2R1.1 and TS1140 drives consumes 600 GB for the index partition.
LTFS V2R1.2 supports an enhanced partitioning scheme, which allows the user to use less space for indexes and more space for data partitions. By using the new scheme on TS1140 drives, LTFS V2R1.2 consumes only 300 GB for the index partition.
|
Update firmware: To use the new partitioning scheme, TS1140 firmware needs to be updated to PGA3 or later. If older firmware is installed, a cartridge with the new partitioning scheme cannot be mounted.
|
2.1.6 Filesystem in Userspace (FUSE)
LTFS is implemented on FUSE technology. The FUSE framework provides a file system infrastructure for UNIX technology-type systems and implements a set of standard file system interfaces to LTFS. The loadable kernel module and the userspace library offer an application programming interface (API) so that users can develop their own file systems, independently of the knowledge of kernel programming.
The system was initially implemented on Linux and Macintosh OS X. It is portable to any other UNIX technology-type systems that support FUSE. Figure 2-10 shows a simplified diagram of the Linux FUSE-based LTFS implementation.
When an LTFS volume is mounted, the directory information is read from the index partition by using XML (see 2.1.7, “XML schema” on page 112) and placed in the in-memory directory. See Figure 2-10. During I/O tape operations, the in-memory directory is updated to reflect the new data on tape. At various points, the contents of the in-memory directory are written back to the tape partitions.

Figure 2-10 LTFS and FUSE implementation architecture
FUSE also provides ease of maintenance to the kernel API and supports the use of userspace libraries and tools without having access to kernel data. (System root access is not required for the users.)
Within the Linux system, FUSE can be compiled and loaded similarly to any other daemons (for example, /bin/my_fs_daemon/mnt/fuse). The FUSE kernel module (Figure 2-10) is responsible for the routing requests that come from applications to the corresponding file system daemon. In addition, FUSE communicates with the file system daemon by using a special file descriptor that is obtained by opening the /dev/fuse directory.
Because tape is a sequential device, access times might differ depending on the location of the data to be accessed. Using the speed of LTO-5 with 140-MBps native does not cause a delay time that is longer than 50 seconds on average.
|
LTFS for Linux: With LTFS V2R1.2 for Linux, the user can share LTFS by use of the Network File System (NFS). LTFS for Linux is implemented with FUSE. FUSE provides functions for a user space program to be able to implement a fully functional file system.
File sharing by the use of NFS is provided by a new version of FUSE (Version 2.8). LTFS V2R1.2 for Linux relies on FUSE. The current version of FUSE has a limitation. See the readme.NFS file in the FUSE package and use the -o noforget option to support NFS.
|
2.1.7 XML schema
LTFS uses an XML schema to record information about the data files on the tape media. XML provides the following benefits, among others, to the LTFS format:
•Easy to document and to understand due to its human-readability
•Simple to port to different systems to produce interchangeable data
•Usable for standardization
•Easy data recovery in the event of a failure
When tape media is formatted for use by LTFS, an empty root directory structure is written to the index partition. For robustness and to provide compatibility with tape utilities that are not multiple partition aware, the same structure is also written to the data partition. In both cases, a single file mark is written before the schema. A double file mark is written after it, delimiting the index schema and indicating the end of data in the partition. See Figure 2-8 on page 110.
When an LTFS volume is mounted to write data on, the last file mark in the index partition is removed and is put back when the volume is unmounted. During mount time, if one file mark is found at the end of the index partition, the volume is not correctly unmounted. Then, LTFS uses the recovery procedures to find the latest recorded version of the XML schema to get the volume to a consistent status.
The XML schema contains a back pointer to the index that describes the previous generation (Gen-1) of the file system, which contains a back pointer to Gen-2, and so on. This pattern continues until the earliest generation of the index is reached. Although initially designed as a recovery mechanism, this feature makes LTFS a convenient versioned file system. Data files are never overwritten or erased from the tape until the tape is reformatted.
The following examples specify the XML schema. Attributes with square brackets are optional, and attributes that end in an ellipsis (...) are optionally repeatable. Attribute values in braces indicate that one of a series of values must be chosen, with the default value underlined.
LTFS label
The LTFS label is an XML data structure that describes information about the LTFS volume
and the LTFS partition on which the LTFS label is recorded. See Example 2-1.
and the LTFS partition on which the LTFS label is recorded. See Example 2-1.
Example 2-1 LTFS label structure
<?xml version="1.0" encoding="UTF-8"?>
<ltfslabel version="2.0.0">
<creator>IBM LTFS 1.2.0 - Linux - mkltfs</creator>
<formattime>2010-02-01T18:35:47.866846222Z</formattime>
<volumeuuid>30a91a08-daae-48d1-ae75-69804e61d2ea</volumeuuid>
<location>
<partition>b</partition>
</location>
<partitions>
<index>a</index>
<data>b</data>
</partitions>
<blocksize>524288</blocksize>
<compression>true</compression>
</ltfslabel
Index
An index is an XML data structure that describes all data files, directory information, and associated metadata for files that are recorded on the LTFS volume. See Example 2-2 and Example 2-3.
Example 2-2 LTFS index structure
<?xml version="1.0" encoding="UTF-8"?>
<ltfsindex version="2.0.0">
<creator>IBM LTFS 1.2.0 - Linux - ltfs</creator>
<volumeuuid>30a91a08-daae-48d1-ae75-69804e61d2ea</volumeuuid>
<generationnumber>3</generationnumber>
<comment>A sample LTFS Index</comment>
<updatetime>2010-01-28T19:39:57.245954278Z</updatetime>
<location>
<partition>a</partition>
<startblock>6</startblock>
</location>
<previousgenerationlocation>
<partition>b</partition>
<startblock>20</startblock>
</previousgenerationlocation>
<allowpolicyupdate>true</allowpolicyupdate>
<dataplacementpolicy>
<indexpartitioncriteria>
<size>1048576</size>
<name>*.txt</name>
</indexpartitioncriteria>
</dataplacementpolicy>
<higestfileuid>4</higestfileuid>
<directory>
...
</directory>
</ltfsindex>
Example 2-3 shows an index.
Example 2-3 LTFS index
<?xml version="1.0" encoding="UTF-8"?>
<ltfsindex version="2.0.0">
...
<directory>
<fileuid>1</fileuid>
<name>LTFS Volume Name</name>
<creationtime>2010-01-28T19:39:50.715656751Z</creationtime>
<changetime>2010-01-28T19:39:55.231540960Z</changetime>
<modifytime>2010-01-28T19:39:55.231540960Z</modifytime>
<accesstime>2010-01-28T19:39:50.715656751Z</accesstime>
<backuptime>2010-01-28T19:39:50.715656751Z</backuptime>
<contents>
<directory>
<fileuid>2</fileuid>
<name>directory1</name>
<creationtime>2010-01-28T19:39:50.740812831Z</creationtime>
<changetime>2010-01-28T19:39:56.238128620Z</changetime>
<modifytime>2010-01-28T19:39:54.228983707Z</modifytime>
<accesstime>2010-01-28T19:39:50.740812831Z</accesstime>
<backuptime>2010-01-28T19:39:50.740812831Z</backuptime>
<readonly>false</readonly>
<contents>
<directory>
<fileuid>3</fileuid>
<name>subdir1</name>
<readonly>false</readonly>
<creationtime>2010-01-28T19:39:54.228983707Z</creationtime>
<changetime>2010-01-28T19:39:54.228983707Z</changetime>
<modifytime>2010-01-28T19:39:54.228983707Z</modifytime>
<accesstime>2010-01-28T19:39:54.228983707Z</accesstime>
<backuptime>2010-01-28T19:39:54.228983707Z</backuptime>
</directory>
</contents>
</directory>
<file>
<fileuid>4</fileuid>
<name>testfile.txt</name>
<length>5</length>
<creationtime>2010-01-28T19:39:51.744583047Z</creationtime>
<changetime>2010-01-28T19:39:57.245291730Z</changetime>
<modifytime>2010-01-28T19:39:57.245291730Z</modifytime>
<accesstime>2010-01-28T19:39:57.240774456Z</accesstime>
<backuptime>2010-01-29T20:21:45.424385077Z</backuptime>
<readonly>true</readonly>
<extendedattributes>
</extendedattributes>
<extentinfo>
<extent>
<partition>a</partition>
<startblock>4</startblock>
<byteoffset>0</byteoffset>
<bytecount>5</bytecount>
<fileoffset>0</fileoffset>
</extent>
</extentinfo>
</file>
</contents>
</directory>
</ltfsindex>
Extended attributes elements
All directory and file elements in an index can specify zero or more extended attributes (extendedattributes). These extended attributes are recorded as xattr elements in the extendedattributes element for the directory or file. See Example 2-4.
Example 2-4 Extendedattributes elements structure
...
<directory>
<fileuid>2</fileuid>
<name>directory1</name>
<creationtime>2010-01-28T19:39:50.740812831Z</creationtime>
<changetime>2010-01-28T19:39:56.238128620Z</changetime>
<modifytime>2010-01-28T19:39:54.228983707Z</modifytime>
<accesstime>2010-01-28T19:39:50.740812831Z</accesstime>
<backuptime>2010-01-28T19:39:50.740812831Z</backuptime>
<extendedattributes>
<xattr>
<key>binary_xattr</key>
<value type="base64">/42n2QaEWDSX+g==</value>
</xattr>
<xattr>
<key>empty_xattr</key>
<value/>
</xattr>
<xattr>
<key>document_name</key>
<value type="text">LTFS Format Specification</value>
</xattr>
</extendedattributes>
<contents>
</contents>
</directory>
...
Data placement policy
An index can specify a data placement policy. This policy defines when the data extents for a file can be placed on the index partition. A data placement policy specifies the conditions under which it is allowed to place data extents on the index partition. See Example 2-5.
Example 2-5 Data placement policy structure
<?xml version="1.0" encoding="UTF-8"?>
<ltfsindex version="2.0.0">
...
<allowpolicyupdate>true</allowpolicyupdate>
<dataplacementpolicy>
<indexpartitioncriteria>
<size>1048576</size>
<name>*.txt</name>
<name>*.bin</name>
</indexpartitioncriteria>
</dataplacementpolicy>
<directory>
...
</directory>
</ltfsindex>
LTFS label XML schema
See Example 2-6 to get details about the definition. See also Example 2-7 on page 117.
Example 2-6 XML schema structure
<?xml version="1.0" encoding="UTF-8"?>
<xs:schema xmlns:xs="http://www.w3.org/2001/XMLSchema">
<xs:element name="ltfslabel">
<xs:complexType>
<xs:all>
<xs:element name="creator" type="xs:string"/>
<xs:element name="formattime" type="datetime"/>
<xs:element name="volumeuuid" type="uuid"/>
<xs:element name="location">
<xs:complexType>
<xs:sequence>
<xs:element name="partition" type="partitionid"/>
</xs:sequence>
</xs:complexType>
</xs:element>
<xs:element name="partitions">
<xs:complexType>
<xs:all>
<xs:element name="index" type="partitionid"/>
<xs:element name="data" type="partitionid"/>
</xs:all>
</xs:complexType>
</xs:element>
<xs:element name="blocksize" type="blocksize"/>
<xs:element name="compression" type="xs:boolean"/>
</xs:all>
<xs:attribute name="version" use="required" type="version"/>
</xs:complexType>
</xs:element>
<xs:simpleType name="blocksize">
<xs :restriction base="xs:integer">
<xs:minInclusive value="4096"/>
</xs:restriction>
</xs:simpleType>
<xs:simpleType name="version">
<xs:restriction base="xs:string">
<xs:pattern value="[0-9]+.[0-9]+.[0-9]+"/>
<xs:enumeration value="2.0.0"/>
</xs:restriction>
</xs:simpleType>
<xs:simpleType name="datetime">
<xs:restriction base="xs:string">
<xs:pattern
value="[0-9]{4}-[0-9]{2}-[0-9]{2}T[0-9]{2}:[0-9]{2}:[0-9]
{2}.[0-9]{9}Z"/>
</xs:restriction>
</xs:simpleType>
<xs:simpleType name="partitionid">
<xs:restriction base="xs:string">
<xs:pattern value="[a-z]"/>
</xs:restriction>
</xs:simpleType>
<xs:simpleType name="uuid">
<xs:restriction base="xs:string">
<xs:pattern
value="[a-fA-F0-9]{8}-[a-fA-F0-9]{4}-[a-fA-F0-9]{4}-
[a-fA-F0-9]{4}-[a-fA-F0-9]{12}"/>
</xs:restriction>
</xs:simpleType>
</xs:schema>
LTFS index XML schema
Example 2-7shows the LTFS index XML schema.
Example 2-7 LTFS index XML schema
<?xml version="1.0" encoding="UTF-8"?>
<xs:schema xmlns:xs="http://www.w3.org/2001/XMLSchema">
<xs:element name="ltfsindex">
<xs:complexType>
<xs:all>
<xs:element name="creator" type="xs:string"/>
<xs:element name="comment" type="xs:string" minOccurs="0"/>
<xs:element name="volumeuuid" type="uuid"/>
<xs:element name="generationnumber" type="xs:nonNegativeInteger"/>
<xs:element name="updatetime" type="datetime"/>
<xs:element name="location" type="tapeposition"/>
<xs:element name="previousgenerationlocation" type="tapeposition" minOccurs="0"/>
<xs:element name="allowpolicyupdate" type="xs:boolean"/>
<xs:element name="dataplacementpolicy" type="policy" minOccurs="0"/>
<xs:element name="highestfileuid" type="xs:nonNegativeInteger"/>
<xs:element ref="directory"/>
</xs:all>
<xs:attribute name="version" use="required" type="version"/>
</xs:complexType>
</xs:element>
<xs:element name="directory">
<xs:complexType>
<xs:all>
<xs:element name="fileuid" type="xs:nonNegativeInteger"/>
<xs:element name="name" type="xs:string"/>
<xs:element name="creationtime" type="datetime"/>
<xs:element name="changetime" type="datetime"/>
<xs:element name="modifytime" type="datetime"/>
<xs:element name="accesstime" type="datetime"/>
<xs:element name="backuptime" type="datetime"/>
<xs:element name="readonly" type="xs:boolean"/>
<xs:element ref="extendedattributes" minOccurs="0"/>
<xs:element name="contents">
<xs:complexType>
<xs:choice minOccurs="0" maxOccurs="unbounded">
<xs:element ref="directory"/>
<xs:element ref="file"/>
</xs:choice>
</xs:complexType>
</xs:element>
</xs:all>
</xs:complexType>
</xs:element>
<xs:element name="file">
<xs:complexType>
<xs:all>
<xs:element name="fileuid" type="xs:nonNegativeInteger"/>
<xs:element name="name" type="xs:string"/>
<xs:element name="length" type="xs:nonNegativeInteger"/>
<xs:element name="length" type="xs:nonNegativeInteger"/>
<xs:element name="creationtime" type="datetime"/>
<xs:element name="changetime" type="datetime"/>
<xs:element name="modifytime" type="datetime"/>
<xs:element name="accesstime" type="datetime"/>
<xs:element name="backuptime" type="datetime"/>
<xs:element name="readonly" type="xs:boolean"/>
<xs:element ref="extendedattributes" minOccurs="0"/>
<xs:element name="extentinfo" minOccurs="0">
<xs:complexType>
<xs:sequence minOccurs="0" maxOccurs="unbounded">
<xs:element name="extent">
<xs:complexType>
<xs:all>
<xs:element name="partition" type="partitionid"/>
<xs:element name="startblock" type="xs:nonNegativeInteger"/>
<xs:element name="byteoffset" type="xs:nonNegativeInteger"/>
<xs:element name="bytecount" type="xs:positiveInteger"/>
<xs:element name="fileoffset" type="xs:nonNegativeInteger"/>
</xs:all>
</xs:complexType>
</xs:element>
</xs:sequence>
</xs:complexType>
</xs:element>
</xs:all>
</xs:complexType>
</xs:element>
<xs:element name="extendedattributes">
<xs:complexType>
<xs:sequence minOccurs="0" maxOccurs="unbounded">
<xs:element name="xattr">
<xs:complexType>
<xs:all>
<xs:element name="key" type="xs:string"/>
<xs:element name="value">
<xs:complexType mixed="true">
<xs:attribute name="type">
<xs:simpleType>
<xs:restriction base="xs:token">
<xs:enumeration value="base64"/>
<xs:enumeration value="text"/>
</xs:restriction>
</xs:simpleType >
</xs:attribute>
</xs:complexType>
</xs:element>
</xs:all>
</xs:complexType>
</xs:element>
</xs:sequence>
</xs:complexType>
</xs:element>
</xs:element>
<xs:complexType name="policy">
<xs:sequence>
<xs:element name="indexpartitioncriteria">
<xs:complexType>
<xs:sequence>
<xs:element name="name" type="xs:string" minOccurs="0" maxOccurs="unbounded"/>
<xs:element name="size" type="xs:nonNegativeInteger"/>
<xs:element name="name" type="xs:string" minOccurs="0" maxOccurs="unbounded"/>
</xs:sequence>
</xs:complexType>
</xs:element>
</xs:sequence>
</xs:complexType>
<xs:complexType name="tapeposition">
<xs:all>
<xs:element name="partition" type="partitionid"/>
<xs:element name="startblock" type="xs:nonNegativeInteger"/>
</xs:all>
</xs:complexType>
<xs:simpleType name="version">
<xs:restriction base="xs:string">
<xs:pattern value="[0-9]+.[0-9]+.[0-9]+"/>
<xs:enumeration value="2.0.0"/>
</xs:restriction>
</xs:simpleType>
<xs:simpleType name="datetime">
<xs:restriction base="xs:string">
<xs:pattern
value="[0-9]{4}-[0-9]{2}-[0-9]{2}T[0-9]{2}:[0-9]{2}:
[0-9]{2}.[0-9]{9}Z"/>
</xs:restriction>
</xs:simpleType>
<xs:simpleType name="partitionid">
<xs:restriction base="xs:string">
<xs:pattern value="[a-z]"/>
</xs:restriction>
</xs:simpleType>
<xs:simpleType name="uuid">
<xs:restriction base="xs:string">
<xs:pattern
value="[a-fA-F0-9]{8}-[a-fA-F0-9]{4}-[a-fA-F0-9]{4}-
[a-fA-F0-9]{4}-[a-fA-F0-9]{12}"/>
</xs:restriction>
</xs:simpleType>
</xs:schema>
2.1.8 Recording the LTFS XML schemas
The following steps are taken by LTFS when files are written to the partitions. The following illustrations show how the XML schemas are recorded during the partition changes when a policy exists to have small files written to the index partition. They also show how multiple generations of indexes are stored on tape. In this scenario, the tape is already formatted as shown in Figure 2-8 on page 110.
The recording of the LTFS XML schemas follows these steps:
1. An LTFS formatted tape is mounted in read/write mode. Then, the following changes to the partitions are performed (see Figure 2-11):
– The last file mark in the index partition is erased.
This action indicates that a new session is started. Any file changes on the data partition are not recorded.
– New files F1 and F2 are added to the data partition.
The second file mark from the data partition is overwritten by file F1 to erase the end-of-data (EOD) indicator.

Figure 2-11 Files F1 and F2 added to the data partition
2. A small file that is called f3 is written to the index partition. Assume that LTFS is configured to cache a maximum of one file. The file is written as soon as it is closed by the application that writes it.
Before LTFS switches partitions, a new XML schema (which is aware of F1 and F2) is written to the end of the data partition (Figure 2-12). The new Index #1 contains a back pointer to the previous valid Index #0. It is enclosed by two file marks to indicate the boundaries of the XML schema and to ensure that its data is written to tape.

Figure 2-12 New index with a back pointer to the previous index
3. LTFS switches the partitions and writes the cached file f3 to the index partition (Figure 2-13). The file marks that are used to delimit the previous XML schema (Index #0 at the index partition) are overwritten by the f3 file.

Figure 2-13 Small file f3 that is written to the index partition
4. The LTFS volume becomes unmounted. Figure 2-14 shows the partition changes:
– The new XML schema that is called Index #2 is aware of the f3 file. Index #2 is written to the end of the index partition.
– Index #2 points back to the previous generation Index #1, which is stored in the data partition. A double file mark is appended to the index partition to indicate the EOD.

Figure 2-14 LTFS volume gets unmounted
5. The data partition XML schema is updated (Figure 2-15).
By adding the f3 file to the index partition, Index #1 at the end of the data partition is now out-of-date. Index #2 is now copied back to the data partition to ensure that both partitions provide a consistent view of the file system. Adding the f3 file also provides the ability to roll back to previous generations of the files on the tape.
Figure 2-15 Final partition view after tape unmount
6. The LTFS tape is unmounted and can be physically removed.
2.1.9 Reserved extended attribute definitions
In an LTFS index, all extended attribute names that start with the prefix “ltfs” with any capitalization are reserved for use by the LTFS format. (That is, any names that start with a not case-sensitive match for the letters “ltfs” are reserved.)
Any writer of an LTFS volume can use reserved extended attribute names to store extended attribute values only in conformance with the following tables.
The defined, reserved extended attributes are described in Table 2-2, Table 2-3, Table 2-4 on page 124, and Table 2-5 on page 127. Support for each of these defined, reserved extended attributes is optional for implementations that are in compliance with the LTFS format specification.
Software metadata
Table 2-2 lists the names of the defined, reserved extended attributes for the software metadata.
Table 2-2 Software metadata
|
Name
|
Accessibility
|
Availability
|
Description
|
|
ltfs.softwareVendor
|
Read only
|
Files and directories
|
This name is the software vendor name of this LTFS program. The LTFS program returns IBM.
|
|
ltfs.softwareProduct
|
Read only
|
Files and directories
|
This name is the product name of the LTFS program.
The LTFS program returns LTFS SDE.
|
|
ltfs.softwareVersion
|
Read only
|
Files and directories
|
This name is the version number of this LTFS program.
|
|
ltfs.softwareFormatSpec
|
Read only
|
Files and directories
|
This name is the format specification version that is supported by this LTFS program.
|
Object metadata
Table 2-3 lists the names for the defined, reserved extended attributes of the object metadata.
Table 2-3 Object metadata
|
Name
|
Accessibility
|
Availability
|
Description
|
LTFS format version 1.0
|
|
ltfs.accessTime
|
read/write
|
Files and directories
|
This value is the date and time of the last access to the object.
|
N/A
|
|
ltfs.backupTime
|
read/write
|
Files and directories
|
This value is the date and time of the last archive or backup of the object.
|
N/A
|
|
ltfs.changeTime
|
read/write
|
Files and directories
|
This value is the date and time of the last status change to the object.
|
N/A
|
|
ltfs.createTime
|
read/write
|
Files and directories
|
This value is the date and time that the object was created.
|
ltfs.creationtime
|
|
ltfs.fileUID1
|
Read-only
|
Files and directories
|
This value is the integer identifier for objects in the file system. This value is guaranteed to be unique within the LTFS volume.
|
N/A
|
|
ltfs.modifyTime
|
read/write
|
Files and directories
|
This value is the date and time of the last object modification.
|
N/A
|
|
ltfs.partition
|
Read-only
|
Non-empty file objects only
|
This value is the partition on which the first extent of the file is stored.
|
ltfs.partition
|
|
ltfs.startblock
|
Read-only
|
Non-empty file objects only
|
This value is the block address where the first extent of the file is stored.
|
ltfs.startblock
|
1 Unique identifiers (UIDs) for each file/directory are permanently stored on a version 2.0.0 formatted medium. When a version 1.0 formatted medium is mounted, this attribute returns UIDs for each file/directory, but the values are not permanently stored. The UIDs are stored only while the medium is mounted. When the medium is remounted, different UIDs can be assigned.
Volume metadata
Table 2-4 lists the defined, reserved extended attributes for the volume metadata.
Table 2-4 Volume metadata
|
Name
|
Accessibility
|
Availability
|
Description
|
LTFS format version 1.0
|
|
ltfs.commitMessage
|
read/write
|
Root directory only
|
This message is meant to be saved in the tape index on the subsequent synchronization of LTFS to the medium. If the commit message is not changed afterward, all indexes that are written to the medium have that same message in the XML <comment> field.
|
ltfs.commit_message
|
|
ltfs.indexCreator
|
Read only
|
Root directory only
|
This string is the creator string for the index. This string provides a human-readable identifier for the product that generated the index.
|
N/A
|
|
ltfs.indexGeneration
|
Read only
|
Root directory only
|
This number is the last index generation number that is written to the tape.
|
ltfs.index_generation
|
|
ltfs.indexLocation
|
Read only
|
Root directory only
|
This value is the location of the last index on the medium in the form p:1, where p is an alphabetic character value that indicates the internal LTFS partition identifier, and 1 is the logical block number within the partition. For example, the value a:1000 indicates that the last index starts on partition “a” at logical block 1000.
|
N/A
|
|
ltfs.indexPrevious
|
Read only
|
Root directory only
|
Location of the previous index on the medium in the form p:1, where p is an alphabetic character value that indicates the internal LTFS partition identifier, and 1 is the logical block number within the partition. For example, the value b:55 indicates that the previous index starts on partition “b” at logical block 55.
|
N/A
|
|
ltfs.indexTime
|
Read only
|
Root directory only
|
This value is the date and time when the last LTFS index is written to the medium.
|
ltfs.index_time
|
|
ltfs.labelCreator
|
Read only
|
Root directory only
|
This value is the creator string for the LTFS label. This string provides a human-readable identifier for the product that generated the LTFS label.
|
N/A
|
|
ltfs.partitionMap
|
Read only
|
Root directory only
|
This value is the only medium partition layout for the LTFS volume. The form of the value is W:x,Y:z where W and Y have the value I, indicating an index partition, or D, indicating a data partition. The alphabetic character values x and y indicate the internal LTFS partition identifier. For example, the value I:a,D:b indicates that LTFS partition “a” is used as the index partition, and LTFS partition “b” is used as the data partition.
|
N/A
|
|
ltfs.policyAllowUpdate
|
Read only
|
Root directory only
|
This value indicates whether the data placement policy for the volume can
be updated. |
ltfs.policy_allowupdate
|
|
ltfs.policyExists
|
Read only
|
Root directory only
|
This value indicates whether the policy that allows certain files to be written to the index partition is enabled. The policy is set at the time of formatting.
|
ltfs.policy_is_set
|
|
ltfs.policyMaxFileSize
|
Read only
|
Root directory only
|
This value is the maximum file size for files that match the data placement policy for the volume.
|
ltfs.policy_maxfilesize
|
|
ltfs.sync
|
Write only
|
Root directory only
|
Writing any value to this extended attribute initiates
a file system sync on any implementation that supports this extended attribute. |
N/A
|
|
ltfs.volumeBlocksize
|
Read only
|
Root directory only
|
This block size is used on read/write operations as specified at the time of formatting.
|
ltfs.volume_blocksize
|
|
ltfs.volumeCompression
|
Read only
|
Root directory only
|
This value is the compression setting for the volume.
|
N/A
|
|
ltfs.volumeFormatTime
|
Read only
|
Root directory only
|
This value is the date and time when the volume was formatted.
|
ltfs.volume_format_time
|
|
ltfs.volumeName
|
Read
|
Files and directories
|
This name is the tape volume name as set at the time of formatting.
|
ltfs.volume_name
|
|
Write
|
Root directory only
|
|||
|
ltfs.volumeSerial
|
Read only
|
Root directory only
|
This value is the tape serial number as specified at the time of formatting.
|
ltfs.tape_serial
|
|
ltfs.volumeUUID
|
Read only
|
Files and directories
|
This value is the Universally Unique Identifier that is assigned to the tape medium.
|
ltfs.volume_uuid
|
Media metadata
Table 2-5 lists the defined, reserved extended attributes for the media metadata.
Table 2-5 Media metadata
|
Name
|
Accessibility
|
Availability
|
Description
|
|
ltfs.mediaBeginningMediumPasses
|
Read only
|
Root directory only
|
This value is the total number of times the beginning of a medium position is passed. If the storage hardware cannot report this data, the value is -1.
|
|
ltfs.mediaDatasetsRead
|
Read only
|
Root directory only
|
This value is the total number of data sets read from the medium over its lifetime. If the storage hardware cannot report this data, the value
is -1. |
|
ltfs.mediaDataPartitionAvailableSpace
|
Read only
|
Root directory only
|
This value is the total available space in the data partition on the medium. The value is an integer count that is measured in units of 1048576 bytes.
|
|
ltfs.mediaDataPartitionTotalCapacity
|
Read only
|
Root directory only
|
This value is the total capacity of the data partition on the medium. The value is an integer count that is measured in units of 1048576 bytes.
|
|
ltfs.mediaDatasetsWritten
|
Read only
|
Root directory only
|
This value is the total number of data sets written to the medium over its lifetime. If the storage hardware cannot report this data, the value
is -1. |
|
ltfs.mediaEfficiency
|
Read only
|
Root directory only
|
This value is the overall measure of the condition of the loaded medium. The value 0x00 indicates that the condition is unknown. The range of known values is from 0x01 (best condition) to 0xFF (worst condition). If the storage hardware cannot report this data, the value is -1.
|
|
ltfs.mediaIndexPartitionAvailableSpace
|
Read only
|
Root directory only
|
This value is the total available space in the index partition on the medium. The value is an integer count that is measured in units of 1048576 bytes.
|
|
ltfs.mediaIndexPartitionTotalCapacity
|
Read only
|
Root directory only
|
This value is the total capacity of the index partition on the medium. The value is an integer count that is measured in units of 1048576 bytes.
|
|
ltfs.mediaLoads
|
Read only
|
Root directory only
|
This value is the number of times that the medium is loaded in a drive. For example, with tape media, this value is the tread count. If the storage hardware cannot report this data, the value is -1.
|
|
ltfs.mediaMBRead
|
Read only
|
Root directory only
|
This value is the total number of megabytes of logical object data that is read from the medium after compression over its lifetime. The value is rounded up to the next whole megabyte. The value that is reported includes bytes read as part of reading file marks from the medium. If the storage hardware cannot report this data, the value
is -1. |
|
ltfs.mediaMBWritten
|
Read only
|
Root directory only
|
This value is the total number of megabytes of logical object data that is written to the medium after compression over its lifetime. The value is rounded up to the next whole megabyte. The value that is reported includes bytes written as part of writing file marks to the medium. If the storage hardware cannot report this data, the value
is -1. |
|
ltfs.mediaMiddleMediumPasses
|
Read only
|
Root directory only
|
This value is the total number of times that the physical middle position of the user data region of a medium is passed. If the storage hardware cannot report this data, the value is -1.
|
|
ltfs.mediaPermanentReadErrors
|
Read only
|
Root directory only
|
This value is the total number of unrecovered data read errors over the lifetime of the medium. This value is the total number of times that a read-type command terminated with a sense key of MEDIUM ERROR, HARDWARE ERROR, or equivalent over its lifetime. If the storage hardware cannot report this data, the value
is -1. |
|
ltfs.mediaPermanentWriteErrors
|
Read only
|
Root directory only
|
This value is the total number of unrecovered data write errors over the lifetime of the medium. This value is the total number of times that a write-type command terminated with a sense key of MEDIUM ERROR, HARDWARE ERROR, or equivalent over the lifetime of the medium. If the storage hardware cannot report this data, the value is -1.
|
|
ltfs.mediaPreviousPermanentReadErrors
|
Read only
|
Root directory only
|
This value is the total number of unrecovered read errors that occurred during the previous load of the medium. This value is the total number of times that a read-type command terminated with a sense key of MEDIUM ERROR, HARDWARE ERROR, or equivalent during the previous load session. If the storage hardware cannot report this data, the value is -1.
|
|
ltfs.mediaPreviousPermanentWriteErrors
|
Read only
|
Root directory only
|
This value is the total number of unrecovered write errors that occurred during the previous load of the medium. This value is the total number of times that a write-type command terminated with a sense key of MEDIUM ERROR, HARDWARE ERROR, or equivalent during the previous load session. If the storage hardware cannot report this data, the value is -1.
|
|
ltfs.mediaRecoveredReadErrors
|
Read only
|
Root directory only
|
This value is the total number of recovered read errors over the lifetime of the medium. If the storage hardware cannot report this data, the value is -1.
|
|
ltfs.mediaRecoveredWriteErrors
|
Read only
|
Root directory only
|
This value is the total number of recovered data write correction errors over the lifetime of the medium. If the storage hardware cannot report this data, the value is -1.
|
|
ltfs.mediaStorageAlert
|
read/write
|
Root directory only
|
This value is a 64-bit value that contains alert flags for the storage system. For data tape media, this value is equal to the standard tape alert flags. If the storage hardware cannot report this data, the value is the string “UNKNOWN.” By writing a value of 1, the corresponding bit is cleared. By writing a value of 0, the current value is retained.
|
2.2 Installation
The system hardware and storage requirements are listed. The required steps to install the LTFS LE on a Linux system and also on a Windows system are described.
2.2.1 Hardware and software requirements
The system hardware and software requirements that relate to LTFS LE are listed. The current information for LTFS LE supported hardware and software configurations and notices or limitations is in the readme file of the software package.
Supported tape drives and media
The following tape drives and tape media are currently supported by the LTFS (Table 2-6).
Table 2-6 Supported tape drives and media
|
Tape drive
|
Tape media1
|
Native/compressed capacity2
|
Firmware level3
|
|
IBM System Storage TS1140 Tape Drive4
|
Advanced data (JC)
|
4000/12000 GB (E07 Format)
|
69E (D3I3_69E) or later
|
|
Extended data (JB)
|
1600/4800 GB (E07 Format)
|
||
|
Economy data (JK)
|
500/1500 GB (E07 Format)
|
||
|
IBM System Storage LTO Ultrium 5 Tape Drive
|
LTO-5
|
1500/3000 GB
|
C7R2 or later (full-height tape drive)
C7R3 or later (half-height tape drive)
|
|
IBM System Storage LTO Ultrium 6 Tape Drive
|
LTO-6
|
2500/6250 GB
|
C7S4 or later (full-height tape drive)
C7S5 or later (half-height tape drive)
|
1 WORM media is not supported.
2 1 GB = 1,000,000,000 bytes
3 This tape drive firmware level is required to fully use LTFS functions.
4 The TS1140 tape drive supports enhanced partitioning for cartridges. Enhanced partitioning allows more space for the data partition by using only 300 GB for the index partition on the IBM System Storage TS1140 Tape Drive. This partitioning scheme is applied when a cartridge is formatted for LTFS. To use enhanced partitioning, any TS1140 tape drives must be at firmware level D3I3_694 or later. If older firmware is installed on a tape drive, a cartridge with the enhanced partitioning scheme cannot be mounted. Beginning with version 2.1.2, the LTFS LE checks the firmware versions of all TS1140 tape drives in the library. If there is a TS1140 tape drive with older firmware, LTFS is unable to start. In this case, LTFS shows an error message that indicates that the drive firmware for all TS1140 tape drives in the library needs to be updated.
To learn more about fixes and updates for your system software, hardware, and operating system, see the Fix Central website:
System requirements
The system requirements are described for the LTFS. LTFS LE supports both Linux and Windows operating systems and hardware platforms. See Table 2-7 for Linux requirements. See Table 2-8 on page 132 for Windows requirements.
Linux system requirements
Table 2-7 Linux system requirements
|
Linux computers
|
|
|
Supported operating systems (x86 and x86_64 only)
|
Red Hat Enterprise Linux Server 5.5, 5.6, 5.7, 5.8, 6.1, and 6.2
|
|
Novell SUSE Linux Enterprise Server 11 Service Pack (SP) 1 and SP2
|
|
|
Supported hardware
|
TS3500 Tape Library with TS1140 tape drives:
• Library firmware level: latest
• Drive firmware level: 69E (D3I3_69E) or later
WORM media is not supported.
|
|
TS2900 (1U), TS3100 (2U), TS3200 (4U), TS3310, and TS3500 tape libraries with LTO-5 and later generation LTO drives:
•Library firmware level: latest
•Drive firmware level:
- LTO-5: C7R2 or later for full height; C7R3 or later for half height
- LTO-6: C7S4 or later for full height; C7S5 or later for half height
WORM media is not supported.
|
|
|
Server PC
|
x86 or x86_64 processor
|
|
1 GB (0.93 GiB) of available RAM for each 1,000,000 files that are stored on a tape (The on-disk metadata storage (dcache) utilizes the loop device on the file system. When using dcache, the maximum number of files and directories depends on the file system that is used and the dcache image size, which, in turn, affects the amount of additional RAM that is required. The following file
and directory limits exist for each file system: •ext3 file system: 130,000 files (and directories) per gibibyte (GiB)
•ext4 file system: 65,000 files (and directories) per gibibyte (GiB)
By default, LTFS reserves 5.37 GB (5 GiB) of disk space for the dcache image for each mount point. If the file system is ext4, LTFS can manage up to
325,000 files (65,000 x 5) under the mount point. Note: The ext3 file system is used on RHEL 5.5, 5.6, 5.7, and 5.8, and SUSE 11.1, by default. The ext4 file system is used on RHEL 6.1 and 6.2, by default.)
|
|
|
5.91 GB (5.5 GiB) of available disk space (if on-disk metadata storage is enabled)
|
|
|
Serial-attached Small Computer System Interface (SCSI) or Fibre Channel (FC) host bus adapter (HBA) is supported by IBM LTO-5 and later generation tape drives
|
|
|
FC HBA is supported by IBM TS1140 tape drives
|
|
|
TCP/IP based protocol network
|
|
Windows systems requirements
Table 2-8 Windows system requirements
|
Windows computers
|
|
|
Supported operating systems
|
Windows Server 2008 R2 (SP1)
|
|
Supported hardware
|
TS3500 Tape Library with TS1140 tape drives:
• Library firmware level: latest
• Drive firmware level: 69E (D3I3_69E) or later
WORM media is not supported.
|
|
TS2900 (1U), TS3100 (2U), TS3200 (4U), TS3310, and TS3500 tape libraries with LTO-5 and later generation LTO drives:
•Library firmware level: latest
•Drive firmware level:
- LTO-5: C7R2 or later for full height; C7R3 or later for half height
- LTO-6: C7S4 or later for full height; C7S5 or later for half height
WORM media is not supported.
|
|
|
Server PC
|
i386 or x86_64 processor
|
|
1 GB (0.93 GiB) of available RAM for each 1,000,000 files that are stored on a tape
|
|
|
Serial-attached Small Computer System Interface (SCSI) (SAS) or FC HBA supported by IBM LTO-5 and later generation tape drives
|
|
|
FC HBA supported by IBM TS1140 tape drives
|
|
|
Important:
•LTFS LE generates a volume for every cartridge in the library.
•LTO media can be loaded only to LTO-5 and LTO-6 drives that are installed in the library.
•The TS2900 Tape Autoloader supports the Half-High tape drive.
•LTFS LE supports only the random mode for TS2900 Tape Autoloader, TS3100 Tape Library, and TS3200 Tape Library.
•In a TS3500 Tape Library, you can have a mixture of LTO-5 and LTO-6 drives in one logical library. The limiting factor in this case is that all tapes must be LTO-5 media. The TS1140 and the LTO-5 and LTO-6 cannot be in the same logical library.
•LTFS LE supports Control Path Failover (CPF).
|
Required software
The software requirements are described for the LTFS. The LTFS LE requires that the following software is installed:
•Linux:
– openssl 0.9.8e or later
– FUSE 2.7.4 or later, but not higher than 2.8.3 (kernel and shared library modules are required). To identify the FUSE version, use one of the following commands:
• ls -l /lib64 |grep -i fuse
lrwxrwxrwx 1 root root 16 Sep 24 17:12 libfuse.so.2 → libfuse.so.2.7.4 -rwxr-xr-x 1 root root 136352 Mar 2 2011 libfuse.so.2.7.4
lrwxrwxrwx 1 root root 16 Sep 24 17:12 libfuse.so.2 → libfuse.so.2.7.4 -rwxr-xr-x 1 root root 136352 Mar 2 2011 libfuse.so.2.7.4
• ls -l /lib | grep -i fuse
• ls -l /usr/local/lib | grep -i fuse
• ls - /usr/local/lib64 | grep -i fuse
– The following packages are included in the service pack:
• libxml2-2.6.26 or later
• libuuid 1.39 or later, or equivalent Universally Unique Identifier (UUID) functions that conform to OSF DCE 1.1 (including the e2fsprogs package)
• libicu 3.6 or later
•IBM tape device driver for Linux (lin_tape) 1.73 or later
•Python 2.4 or later, but earlier than 3.0
•Windows:
– Microsoft Visual C++ 2010 Redistributable Package
– Microsoft .NET Framework 4
– IBM tape device driver for Windows version 6225 or later
– Python 2.7.2 or later, but earlier than 3.0
|
Python: The ltfsadmintool script does not run on Python version 3.0 or later.
|
To learn more about fixes and updates for your system software, hardware, and operating system, see the Fix Central website:
2.2.2 Unsupported Windows features, drivers, and commands
The Windows features, drivers, and commands that are not supported by the LTFS are listed.
New Technology File System (NTFS)
LTFS does not support the following NTFS features:
• Compression of files within a folder (LTFS uses the compression of the tape drive.)
•Encrypted files and directories
•Quota management
•Reparse points
•Defragmentation
•Change journals to monitor file activity
•Scanning of all files or directories that a security identifier owns (FSCTL_FIND_FILES_BY_SID)
•Access control lists. The Security tab is not displayed when the user views the file property by right-clicking, then selecting Properties.
•Alternate data streams. The Details tab is not available when the user views the file property by right-clicking, then selecting Properties.
•Shadow copies. The Previous Version tab is not displayed when the user views the file property by right-clicking, then selecting Properties.
•Opportunistic locks
•Recycle bins
•Short names
•Audit and alarm events (as specified in access control lists)
•Windows sparse files application interfaces
•Transactional NTFS (TxF)
•Symbolic and hard links
|
Symbolic links: It is possible to access symbolic links that are created in another platform (Linux or OS X); however, it is not possible create a symbolic link with Windows.
|
File system filter drivers
Although Windows has a mechanism to support file system filter drivers, LTFS Windows does not support their use. File system filter drivers cannot attach to LTFS by using formally documented mechanisms or application interfaces.
Native commands for a disk drive
LTFS does not support the following commands:
•chkdsk
•format
•defrag
•recover
•label
Symbolic links
The following limitations exist when you use symbolic links on a Windows system:
•The user cannot create a new symbolic link between another file system and LTFS.
•The user cannot create a new symbolic link in LTFS.
•The user cannot delete a symbolic link in LTFS.
•The user cannot rename a symbolic link in LTFS.
•Accessing the symbolic link is always forwarded to the target of the link.
•The target of the link is shown as a file, even if it is a directory.
•The target of the link is not shown.
2.2.3 Installation on Windows
The LTFS program installation on a Windows system is described.
Installing Microsoft Visual C++ 2010 Redistributable package (required software)
Follow this procedure:
1. Go to the Microsoft Visual C++ 2010 Redistributable package download site for the corresponding system type (x86 or x64). There are a couple of Visual C++ packages that are available for download. Be careful to download the correct x64 package. The LTFS LE supports only x64.
2. Download the package to your local folder.
3. Double-click the package in Windows Explorer to display the User Account Control window. See Figure 2-16.

Figure 2-16 Windows Explorer
4. Click Yes when the message “Do you want to allow the following program to make changes to this computer?” displays.

Figure 2-17 Microsoft Visual C++ 2010 Redistributable package
Installing Microsoft .NET Framework 4 (required software)
Follow this procedure:
1. Go to the Microsoft .NET Framework 4 (Stand-alone Installer) download site.
2. Download the file to your local folder.

Figure 2-18 Microsoft .NET Framework 4
4. Click Yes when the message “Do you want to allow the following program to make changes to this computer?” displays.
5. Follow the installer instructions until the installation is completed. See Figure 2-19 and Example 2-20 on page 161.

Figure 2-19 Microsoft .NET Framework 4 installer

Figure 2-20 Microsoft .NET Framework 4 installation complete
Installing the IBM tape driver for Windows (required software)
Follow these instructions before you begin the installation. Before you install the tape device driver, ensure that the following steps are completed:
1. The HBA and its device driver are installed automatically.
|
Emulex adapter: If the HBA that is attached to the tape library is an Emulex adapter, set the HBA configuration parameter "ExtTransferSize"=2 for Windows 2008 R2 by using the Emulex OneCommand Manager.
|
2. The tape drive and HBA are connected.
3. The tape drive is powered on.
4. The tape drives in the library are powered on.
5. The server is powered on.
Installation procedure
Complete the following steps to install the tape device driver:
1. Download the current version of the device driver from the IBM Fix Central portal:
a. Open the following URL in your web browser:
b. For Product Group, select System Storage.
c. For System Storage, select Tape systems.
d. For Tape systems, select Tape drivers and software.
e. For Tape drivers and software, select Tape device drivers.
f. For Platform, to download the latest version of atape, select the correct platform.
g. Click Continue.
h. Select the version that you want to download.
|
Installers: The IBM tape device driver has two installers: exclusive and non-exclusive. Use the exclusive installer with the LTFS LE.
|
i. Follow the instructions on the Fix Central download page to download the new version.
2. Download the PDF document, IBM Tape Device Drivers Installation and User’s Guide, GC27-2130-10, from the IBM Support portal:
a. Open the following URL in your web browser:
b. Enter the guide name in the Search support text box and then click the blue button.
c. Click IBM Tape Device Drivers Installation and User’s Guide.
d. Click Device_Driver_IUG. PDF to download the user’s guide.
e. Follow the procedures in the guide to install the tape device driver.
Installing Python for Windows (required software)
Complete the following steps in order to install Python:
1. Go to the Python Windows download website.
2. Download the file to your local folder.

Figure 2-21 Python
4. Follow the installer instructions until the installation is completed. See Figure 2-22 and Figure 2-23 on page 139.
Figure 2-22 Python installer
Figure 2-23 Python installation complete
Installing or upgrading LTFS LE Windows from an .exe file
Follow this procedure:
1. Complete the following steps to install or upgrade LTFS from an .exe file:
a. Open Windows Explorer and double-click the .exe file that you downloaded in advance from the IBM website. A dialog box displays with a drop-down menu from which you can select a language for the installation. See Figure 2-24, Figure 2-25, and Figure 2-26 on page 140.

Figure 2-24 Windows Explorer

Figure 2-25 LTFS LE installation wizard

Figure 2-26 LTFS LE installation wizard
b. Click OK to display a Software License Agreement window.
c. Select one of the following options to display the Destination Folder window:
• Read Non-IBM Terms (to open a non-IBM license agreement) and click Close.

Figure 2-27 LTFS LE installation wizard
|
Destination folder: With the Destination Folder wizard, you can change the folder to install the program. The default destination folder is set to C:Program FilesIBMLTFS. If you want to change the default folder, click Change. Otherwise, click Next to skip to step g.
|
d. If you click Change, the Change Current Destination Folder window displays the following options. Either choose a folder from the Look in menu (Figure 2-28) or set the folder name from the Folder name text box.
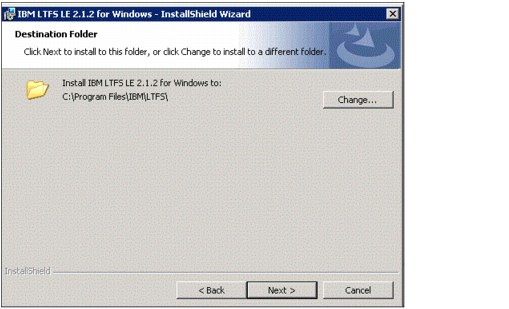
Figure 2-28 LTFS LE installation wizard
e. After you select an option, click OK to proceed to the next step.
f. Click Next in the Destination Folder window to display the Ready to Install the Program window (Figure 2-29).

Figure 2-29 LTFS LE installation wizard
|
Changes: If you want to change an installation parameter, click Back, and then follow the same steps that got you to step g.
|
g. Click Install to display the “Installing IBM Linear Tape File System Library Edition” window.
|
Progress: You can track the progress of the installation by viewing the status bar.
|
h. Click Yes when the User Account Control window displays the message “Do you want to allow the following program to make changes to this computer?” When the installation completes, the InstallShield Wizard Completed window displays (Figure 2-30).

Figure 2-30 User account control window
|
Administrator password: If you log on to the system as a user account, the User Account Control window displays. To proceed to the next step, type an administrator password and then click Yes.
|
i. Click Finish and then Yes when the “Installing IBM Linear Tape File System Library Edition Installer Information” window displays to restart the system to launch LTFS. See Figure 2-31 and Figure 2-32.

Figure 2-31 LTFS LE installation wizard

Figure 2-32 LTFS LE installation wizard
Figure 2-33 shows how the physical tapes are mapped to the Windows file system. Each physical tape cartridge volume serial numbers (VOLSER) is displayed as a directory on Windows Explorer.

Figure 2-33 Tape library tapes mapped to Windows
Uninstalling LTFS from a Windows system
Complete the following steps to uninstall LTFS:
1. From the desktop, click Start → All Programs → IBM → LTFS → Uninstall LTFS to open the Windows Installer program.
2. Click Yes when the message “Are you sure you want to uninstall this product?” displays.
3. Click Yes when the message “Do you want to allow the following program to make changes to this computer?” displays.
|
Administrator: If you log on to the system as a user account, the User Account Control window displays. You must type an administrator password to proceed to the next step and then click Yes.
|
4. If the message “All LTFS tape libraries must be unmounted before uninstalling LTFS program” displays, unmount all tape libraries from LTFS by using the ltfsunmount command, and then try again. If this message does not display, proceed to step 5.
5. Click OK when either of the following messages displays:
– “The following applications should be closed before continuing the uninstall.”
– “The setup was unable to automatically close all required applications.”
|
Progress: Use the status bar to track the progress of the uninstall.
|
6. Restart the system to completely remove the LTFS program from your operating system.
|
Alternative: You also can uninstall the LTFS program from the desktop by clicking Start → Control Panel → Uninstall a program under Programs. Then, restart your operating system.
|
2.2.4 Installation on Linux
Complete these required steps before you install LTFS LE.
Installing the prerequisite Linux software
LTFS LE requires the following prerequisite packages to be installed:
•openssl 0.9.8e or later
•FUSE 2.7.4 or later (including kernel and shared library modules)
•libxml2-2.6.26 or later
•libuuid 1.39 or later, or equivalent UUID functions that conform to OSF DCE 1.1 (included in the e2fsprogs package)
•libicu 3.6 or later
•Python 2.4 or later, but earlier than 3.0
|
Tip: The ltfsadmintool script does not run on Python version 3.0 or later.
|
Installing the HBA and HBA device driver
To install the HBA and its device driver for use with LTFS LE, see the documents that are provided by the HBA manufacturer. For a list of supported adapters, go to the following LTO page:
For information about connectivity and supported configurations, see the IBM System Storage Interoperation Center (SSIC) website:
|
Emulex adapter: If the HBA that is attached to the tape library is an Emulex adapter, add one of the following lines to the /etc/modprobe.conf file (for RHEL 5.5, 5.6, 5.7, or 5.8) or to the /etc/modprobe.d/lpfc.conf file (for RHEL 6.1, 6.2, and SLES 11). Then, restart the system for the changes to take effect.
For RHEL 5.5, 5.6, 5.7, or 5.8, add this line:
modprobe lpfc lpfc_sg_seg_cnt=256
For RHEL 6.1, 6.2, and SLES 11, add this line:
options lpfc lpfc_sg_seg_cnt=256
|
Installing the IBM tape device driver
Before you install the tape device driver for use with LTFS LE, complete the following tasks:
1. Install the HBA and its device driver:
a. Download the current version of the tape device driver from the IBM Fix Central portal (see 2.1.4, “LTFS tape format specification” on page 108):
b. Download the IBM Tape Device Drivers Installation and User’s Guide (a PDF document) from the IBM Support and Download site:
http://www.ibm.com/support/us/en/
c. Follow the procedures in the user’s guide to install the tape device driver or see 1.2.4, “Installation procedure” on page 16.
2. Connect the tape drive and HBA.
3. Power on the tape drive in the tape library.
4. Power on the server.
Enabling the system log
Error information for LTFS LE operations is displayed on the terminal console. The level of error reporting is based on the log trace level.
When the LTFS commands are used, error and trace information is recorded by using the system log mechanism. This mechanism is disabled by default. To enable the LTFS system log and locate additional information about LTFS logs, follow these steps:
1. Log on to the operating system as root.
2. Edit the system log configuration file on any available editor to enable the system log. Apply one of the following edits, depending on your base system. See Example 2-8.
Example 2-8 System log configuration file
For RHEL 5.5, 5.6, 5.7, or 5.8 add the following line to /etc/syslog.conf
user.* /var/log/userlog
For RHEL 6.1, 6.2, or SLES 11 add the following line to /etc/rsyslog.conf
:msg, contains, "LTFS" /var/log/ltfs.log
3. Enable the setting by restarting syslog (for RHEL 5.5, 5.6, 5.7, or 5.8) or ryslog (for RHEL 6.1, 6.2, or SLES 11). Issue the following command:
/etc/init.d/syslog restart
4. Open the /etc/logrotate.d/syslog file on any available editor (see Example 2-9). Add or edit the following lines.
Example 2-9 Add or edit syslog file
For RHEL 5.5, 5.6, 5.7, or 5.8:
/var/log/userlog {
size 1M
rotate 4
missingok
compress
sharedscripts
postrotate
/bin/kill -HUP `cat /var/run/syslogd.pid 2> /dev/null` 2> /dev/null || true
/bin/kill -HUP `cat /var/run/rsyslogd.pid 2> /dev/null` 2> /dev/null || true
endscript
}
For RHEL 6.1, 6.2, or SLES:
/var/log/ltfs.log {
size 1M
rotate 4
missingok
compress
sharedscripts
postrotate
/bin/kill -HUP `cat /var/run/syslogd.pid 2> /dev/null` 2> /dev/null || true
/bin/kill -HUP `cat /var/run/rsyslogd.pid 2> /dev/null` 2> /dev/null || true
endscript
}
LTFS records and displays the following types of logs:
Error A message that indicates an unrecoverable error occurred or an operation unexpectedly failed
Warning A message that indicates an unexpected condition occurred, but the operation can continue
Information A message that provides additional information about the current operation
Trace A message that provides information about debugging and troubleshooting
Table 2-9 describes the logging command options, types of results, and reasons to use the command options.
Table 2-9 Logging command options and results
|
Command option
|
Command
|
Results
|
Use
|
|
No option designated
|
Any
|
Error, warning, and information messages are logged and reported. This option is the default setting.
|
LTFS is designed to use this default setting to isolate any problem that occurs and to identify the appropriate action.
|
|
-o quiet
|
ltfs
|
Error and warning messages are logged and reported.
|
The quiet option can be used
to improve performance by reducing the level and number of messages logged and reported. |
|
-q or --quiet
|
ltfsadmintool -f --
ltfsadmintool -c --
|
||
|
-o trace
|
ltfs
|
Error, warning, information, and trace messages are logged and reported.
|
The trace option can be used if intermittent errors occur, or the default log information is insufficient to reproduce the problem in the IBM lab. The trace option is set under these special conditions to gather additional information to help re-create and solve the problem.
|
|
-t or --trace
|
ltfsadmintool -f --
|
||
|
-a or --trace
|
ltfsadmintool -c --
|
|
Logging command options: The ltfsadmintool does not support logging command options, but when the -f option or -c option is specified, the logging command options for mkltfs and ltfsck functions can be specified after the -- tag. See “Optional mkltfs parameters” on page 191 and “Optional ltfsck parameters” on page 194.
|
For more information about how to set the log trace level, see the LTFS LE information center and search for “setting log trace level”:
|
Latest information: Information in the readme and install files that are provided with the LTFS LE distribution package supersedes information that is presented and the information in the information center.
|
Extracting binary rpm files from an installation package
Extracting binary rpm files from an installation package for LTFS on a Linux system is described.
|
Installation package: The installation package name is ltfs-2.1.1-[revision].bin. It includes rpm files for the revision and supported platforms and architectures.
|
Ensure that the following steps are completed before you begin to create a binary rpm package:
1. Log on to the operating system as root.
2. Confirm the execution permission of ltfs-2.1.1-[revision].bin (Example 2-10) by issuing the following command:
# ls -l ltfs-2.1.1-[revision].bin
Example 2-10 LTFS confirm execution permission
[root@double ~]# ls -l ltfs-2.1.1-201109201.i386.bin
-rwxr-x--- 1 root root 68924904 Sep 29 16:23 ltfs-2.1.1-201109201.i386.bin
3. Set the execution permission, if it is not already set, by issuing the following command:
# chmod +x ltfs-2.1.1-[revision].bin
|
Create the rpm packages: If the software shipped as an rpm source file named “src.rpm”, issue the following command to create the rpm packages:
# rpmbuild --rebuild ltfs-2.1.1-[revision].src.rpm
|
After you verify the execution permission, complete the following steps to extract the binary rpm files:
1. Run the binary file on the system by following the steps that are shown in step 2 of the preceding list. You can launch it on a terminal by issuing the following command in the directory in which the file resides:
# ./ltfs-2.1.1-[revision].bin
The extracted rpm files are in the directory: /root/LTFSLE/rpm[revision]/[platform]/
2. Select the rpm files that correspond to your platform.
The following files in the rpm folder are extracted:
•ltfs-2.1.1-[revision]-[platform].rpm
•ltfs-license-2.1.0-[revision]-[platform].rpm
•ltfs-library-2.1.1-[revision]-[platform].rpm
•ltfs-admin-utils-2.1.1-[revision].noarch.rpm
The ltfs-admin-utils-2.1.1-[revision].noarch.rpm file is common to all platforms. Both ltfs and ltfs-library rpm file names include platform tags.
For example, if you want to install LTFS rpm files for revision 201109201, by using a Red Hat Linux distribution on a 64-bit architecture, the following files in the rpm folder are required:
•ltfs-2.1.1-201109021-RHEL61.i386.rpm
•ltfs-license-2.1.0-201109021-RHEL61.i386.rpm
•ltfs-library-2.1.1-2011009201-RHEL561.i386.rpm
•ltfs-admin-utils-2.1.1-201109201.noarch.rpm
The procedure to use the files is described.
Installing or upgrading from a binary rpm file
Follow these steps to install or upgrade the IBM LTFS LE program on a Linux system from a binary rpm file.
|
ltfsadmintool utility: LTFS LE does not support remote access by using the ltfsadmintool utility. Port 2112 must be blocked by a firewall program. If this port is set as a trusted port by using a firewall program, remove port 2112 as the trusted port before you install LTFS.
If port 2112 cannot be blocked because it is used by another program, specify another blocked port number with the -o admin_port option and the ltfs command.
|
|
Installing the binary rpm files: Install the binary rpm files by following the procedure in “Select the rpm files that correspond to your platform.” on page 149.
|
Complete the following steps from a Linux command prompt:
1. Log on to the operating system as a root user.
2. If LTFS is already installed and you want to upgrade it, unmount the LTFS file system by entering the following command:
umount /mnt/ltfs
To continue the upgrade, skip to step 5.
3. Run these commands in the following sequence to install the rpm packages:
# rpm -ihv ./ltfs-license-2.1.0-[platform].[architecture].rpm
# rpm -ihv ./ltfs-2.1.2-[revision]-[platform].[architecture].rpm
# rpm -ihv ./ltfs-library-2.1.2-[revision]-[platform].[architecture].rpm
# rpm -ihv./ltfs-admin-utils-2.1.2-[revision].noarch.rpm
|
Required: It is required to install the ltfs-license rpm file before you install the other packages. It is required to install the ltfs rpm file before you install the ltfs-library file. The commands are the same, whether you install for the first time or upgrade the rpm file. For example, if you install the ltfs-library rpm, revision 201111110, by using a Red Hat Linux distribution 6.1 on a 64-bit architecture, you issue the following command:
# rpm -ihv ./ltfs-library-2.1.2-201111110-RHEL61.x86_64.rpm
|
4. Optional: Run the following commands to verify the current version of LTFS LE:
# rpm -q ltfs-license
# rpm -q ltfs
# rpm -q ltfs-library
# rpm -q ltfs-admin-utils
5. Run these commands in the following sequence to upgrade the binary rpm package:
# rpm -Uhv ./ltfs-2.1.2-[revision]-[platform].[architecture].rpm
# rpm -Uhv ./ltfs-library-2.1.2-[revision]-[platform].[architecture].rpm
# rpm -Uhv ./ltfs-admin-utils-2.1.2-[revision].noarch.rpm
6. Optional: Run the following commands to verify the current version of LTFS LE:
# rpm -q ltfs-license
# rpm -q ltfs
# rpm -q ltfs-library
# rpm -q ltfs-admin-utils
Uninstalling from a Linux system
Follow these steps to uninstall LTFS from a Linux system:
1. Log on to the operating system as a root user.
2. If LTFS is mounted, unmount it by entering the following command:
# umount /mnt/ltfs
3. Run these commands in the following sequence to remove the installed packages:
# rpm -e ltfs-admin-utils-2.1.2-[revision]
# rpm -e ltfs-library-2.1.2-[revision]
# rpm -e ltfs-2.1.2-[revision]
4. Issue the following commands to check that the packages are uninstalled:
# rpm -q ltfs
# rpm -q ltfs-library
# rpm -q ltfs-admin-utils
|
Trials: If you uninstall to upgrade to a higher version, keep the license module installed. You cannot install an upgrade package without the license module. If you have a license module for a trial version and the license expires, LTFS works in read-only mode. To use all LTFS functions, uninstall the trial license module and install the license module for the product version.
|
|
Optional: The extracted rpm files for those operating systems other than your system can be deleted. Retain the rpm files that belong to LTFS LE for your operating system in case you need to reinstall.
|
2.3 Managing LTFS LE
Information is provided about the interfaces that are supported for use with LTFS. The operations to mount and unmount media in a tape library for LTFS LE are described.
2.3.1 Typical user scenario on a Windows system
Performing a series of typical administrative tasks in LTFS LE is described.
The following commands (Table 2-10) are used for common and basic tasks, such as mounting and unmounting a library, displaying available libraries, and managing LTFS.
Table 2-10 Basic LTFS LE administrative tasks
|
Command
|
Purpose
|
|
ltfs.exe
|
This command starts LTFS to mount a tape library. A drive letter must be specified.
|
|
ltfsunmount.exe
|
This command unmounts LTFS.
|
|
ltfsadmintool
|
This command is used to manage LTFS. It is used for operations, such as formatting a medium, checking a medium, and importing or exporting a medium. Python must be installed to use this tool.
|
Starting LTFS and mounting a library on a Windows system
Use these procedures to start LTFS and mount a library on a Windows system.
Follow this procedure:
1. Issue the ltfslsdev.exe command to view the available tape libraries as shown in the following example:
ltfslsdev.exe
2. Review the results that display the mapping between the address and serial number of the tape library as shown in the following example. The address is used to mount the library.
C:Program FilesIBMLTFS>ltfslsdev.exe
Assigned Address Serial
---------- ------------ ------------------------
---------- ------------ ------------------------
2.0.14.1 00L4U78C6339_LL1
Issue the ltfs.exe command with the address and a drive letter as shown in the following example to start LTFS:
ltfs.exe [options] DriveLetter
|
Drive letter: The ltfs.exe command on a Windows system requires a drive letter. There is no rule for the order of the options that are used with the ltfs.exe command. However, the drive letter must be after any options. The last argument for the ltfs.exe command must be the drive letter.
The %TEMP%ltfs directory is set as the default work_directory on a Windows system.
|
The following LTFS options are available:
-o changer_devname=<dev>
Changer device (For example, 1.2.3.4)
Changer device (For example, 1.2.3.4)
-o work_directory=<dir>
LTFS work directory
LTFS work directory
-o sync_type=<type> Specify sync type (default: time@5). <type> must be specified with one of the following values:
- time@min: LTFS attempts to write an index each 'min' minutes. min must be a decimal number 1 - 35791394. It is equivalent to "-o sync_type=unmount" when 0 is specified (default: min=5).
- close: LTFS attempts to write an index when a file is closed.
- unmount: LTFS attempts to write an index when the medium is unmounted.
-o device_list Show available tape devices
-o release_device Clear device reservation (must be specified with -o changer_devname)
-o run_inventory Run a full inventory to create the LTFS namespace
-o library_cache Set to use and create caches from the medium auxiliary memory (MAM), index, and labels (default)
-o nolibrary_cache Set to disable the use and creation of MAM, index, and label caches
-o volser_only_folder
Set to exclude volume name from top-level folder name
Set to exclude volume name from top-level folder name
-o novolser_only_folder
Set to include volume name in top-level folder name (default)
Set to include volume name in top-level folder name (default)
-o six_char_folder Display first six characters of directory name
-o strict_drive Mount only the corresponding generation of the medium with the tape drive. For example, an LTO-6 drive mounts an LTO-6 medium only.
-o nostrict_drive Mount any supported generation of the medium for the drive (default). For example, an LTO-6 drive mounts either an LTO-5 medium or an LTO-6 medium.
-o scsi_lbprotect=<on|off>
Enable logical block protection (default=off)
Enable logical block protection (default=off)
-o symlink_type=<type>
Specify symbolic link type (default: posix). <type> must be specified with one of the following values:
Specify symbolic link type (default: posix). <type> must be specified with one of the following values:
- posix: LTFS behavior is the same as standard symbolic link
- live: LTFS replaces mount point path by current mount point
-o quiet Disable informational messages
-o trace Enable diagnostic output
-o fulltrace Enable full call tracing
-a Advanced help
-h Display this help and exit
The following LTFS Admin Interface option is available:
-o admin_port=<num> TCP/IP port on which to listen for connections (default: 2112)
Example 2-11 ltfs -o changer_devname command
C:Program FilesIBMLTFS>ltfs -o changer_devname=2.0.14.1 L
LTFS61259I Sync type is "time", Sync time is 300 sec
LTFS61509I Set trace level in library (LTFS_INFO)
LTFS61206I LTFS starting. Drive:L, (Sep 20 2012 08:47:36) log level 2
LTFS17085I Plugin: Loading "scsilib" driver
LTFS17085I Plugin: Loading "unified" iosched
LTFS17085I Plugin: Loading "scsilib" changer
LTFS11593I LTFS starts with a product license version (20120712_1200)
LTFS62611I Opening a device through scsilib driver (af5fb0h)
LTFS62613I Changer serial is 00L4U78C6339_LL1
LTFS62160I Drive serial is 1068000264
LTFS17160I Maximum device block size is 1048576
LTFS62160I Drive serial is 1068000256
LTFS17160I Maximum device block size is 1048576
LTFS61509I Set trace level in library (LTFS_INFO)
LTFS11545I Rebuilding the cartridge inventory
LTFS11571I State of tape '001106L3' in slot 0 is changed from 'Not Initialized' to 'Non-supported'
LTFS11571I State of tape 'DG I69L3' in slot 0 is changed from 'Not Initialized' to 'Non-supported'
LTFS11571I State of tape '3TX070L3' in slot 0 is changed from 'Not Initialized' to 'Non-supported'
LTFS11571I State of tape '3DA491L3' in slot 0 is changed from 'Not Initialized' to 'Non-supported'
LTFS11571I State of tape '3DA493L3' in slot 0 is changed from 'Not Initialized' to 'Non-supported'
LTFS11571I State of tape '059AHDL4' in slot 0 is changed from 'Not Initialized' to 'Non-supported'
LTFS11571I State of tape '3SS081L4' in slot 0 is changed from 'Not Initialized' to 'Non-supported'
LTFS11571I State of tape 'DG I73L3' in slot 0 is changed from 'Not Initialized' to 'Non-supported'
LTFS11571I State of tape '3TX071L3' in slot 0 is changed from 'Not Initialized' to 'Non-supported'
LTFS14506I LTFS admin server is listening on port 2112
LTFS61280I Symbolic link type is (posix)
LTFS61237I Read-only directory mode is Windows
|
Important: To enable any of these options, specify them with the mount command.
|
Example 2-12 Setting sync_type option to close
C:Program FilesIBMLTFS>ltfs -o changer_devname=2.0.14.1 -o sync_type=close L
LTFS61260I Sync type is "close"
LTFS61509I Set trace level in library (LTFS_INFO)
LTFS61206I LTFS starting. Drive:L, (Sep 20 2012 08:47:36) log level 2
LTFS17085I Plugin: Loading "scsilib" driver
LTFS17085I Plugin: Loading "unified" iosched
LTFS17085I Plugin: Loading "scsilib" changer
LTFS11593I LTFS starts with a product license version (20120712_1200)
LTFS62611I Opening a device through scsilib driver (a091f0h)
LTFS62613I Changer serial is 00L4U78C6339_LL1
LTFS62160I Drive serial is 1068000264
LTFS17160I Maximum device block size is 1048576
LTFS62160I Drive serial is 1068000256
LTFS17160I Maximum device block size is 1048576
LTFS61509I Set trace level in library (LTFS_INFO)
LTFS11545I Rebuilding the cartridge inventory
LTFS11571I State of tape '001106L3' in slot 0 is changed from 'Not Initialized' to 'Non-supported'
LTFS11571I State of tape 'DG I69L3' in slot 0 is changed from 'Not Initialized' to 'Non-supported'
LTFS11571I State of tape '3TX070L3' in slot 0 is changed from 'Not Initialized' to 'Non-supported'
LTFS11571I State of tape '3DA491L3' in slot 0 is changed from 'Not Initialized' to 'Non-supported'
LTFS11571I State of tape '3DA493L3' in slot 0 is changed from 'Not Initialized' to 'Non-supported'
LTFS11571I State of tape '059AHDL4' in slot 0 is changed from 'Not Initialized' to 'Non-supported'
LTFS11571I State of tape '3SS081L4' in slot 0 is changed from 'Not Initialized' to 'Non-supported'
LTFS11571I State of tape 'DG I73L3' in slot 0 is changed from 'Not Initialized' to 'Non-supported'
LTFS11571I State of tape '3TX071L3' in slot 0 is changed from 'Not Initialized' to 'Non-supported'
LTFS14506I LTFS admin server is listening on port 2112
LTFS61280I Symbolic link type is (posix)
LTFS61237I Read-only directory mode is Windows

Figure 2-34 Windows Explorer
4. Double-click the LTFS icon to display the directories that correspond with the tape cartridges (Figure 2-34).
5. Right-click the LTFS icon to display the properties panel and view configuration information, such as the LTFS version, tape library ID, tape library serial number, and the tape library firmware version. The Properties panel (Figure 2-35 on page 156) also displays recent error or warning messages.

Figure 2-35 LTFS LE Properties panel
Unmounting LTFS
Before you proceed with this task, close all the files and directories on LTFS. If a user tries to shut down Windows without unmounting LTFS, a warning message displays to notify the user that LTFS is still running. The ltfsunmount.exe command requires a drive letter that is used by the ltfs.exe command.
Issue the ltfsunmount.exe command with the drive letter to unmount LTFS as shown in the following example:
ltfsunmount.exe DriveLetter
Example 2-13 ltfsunmount.exe command output
C:Program FilesIBMLTFS>ltfsunmount L
LTFS17189I Device is becoming ready (-20203)
LTFS62207I Logical block protection is disabled
LTFS17157I Changing the drive setting to append-only mode
LTFS62207I Logical block protection is disabled
LTFS11034I Volume unmounted successfully
LTFS11289I Ejecting cartridge
LTFS12022I Unloading medium
LTFS11291I Eject successful
LTFS17189I Device is becoming ready (-20203)
LTFS62207I Logical block protection is disabled
LTFS62207I Logical block protection is disabled
LTFS62160I Drive serial is 1068000264
LTFS62207I Logical block protection is disabled
LTFS62160I Drive serial is 1068000264
LTFS62207I Logical block protection is disabled
LTFS62160I Drive serial is 1068000264
LTFS62207I Logical block protection is disabled
LTFS62160I Drive serial is 1068000264
LTFS17157I Changing the drive setting to append-only mode
LTFS11538W Failed to verify library cache state for cartridge 'D00346L5'
LTFS11005I Mounting the volume
LTFS62207I Logical block protection is disabled
LTFS14540E Failed to remove tape volume from the library for checking cartridge
LTFSI9998E System error: Resource device (16)
LTFS11034I Volume unmounted successfully
LTFS11289I Ejecting cartridge
LTFS12022I Unloading medium
LTFS11291I Eject successful
LTFS17189I Device is becoming ready (-20203)
LTFS62207I Logical block protection is disabled
LTFS62207I Logical block protection is disabled
LTFS62160I Drive serial is 1068000264
LTFS17157I Changing the drive setting to append-only mode
LTFS11538W Failed to verify library cache state for cartridge 'D00346L5'
LTFS11005I Mounting the volume
LTFS62207I Logical block protection is disabled
LTFS62207I Logical block protection is disabled
LTFS14540E Failed to remove tape volume from the library for checking cartridge
LTFSI9998E System error: Resource device (16)
LTFS11034I Volume unmounted successfully
LTFS11289I Ejecting cartridge
LTFS12022I Unloading medium
LTFS11291I Eject successful
LTFS17189I Device is becoming ready (-20203)
LTFS62207I Logical block protection is disabled
LTFS62207I Logical block protection is disabled
LTFS62160I Drive serial is 1068000264
LTFS61656I Terminating FSD
LTFS62207I Logical block protection is disabled
LTFS62173E Error on tur: Medium Not Present (-20209) 1068000256
LTFS62173E Error on tur: Medium Not Present (-20209) 1068000256
LTFS62173E Error on tur: Medium Not Present (-20209) 1068000256
LTFS62207I Logical block protection is disabled
2.3.2 Typical user scenario on a Linux system
A typical user scenario on a Linux system is described.
Mounting a library on a Linux system
The ltfs command is used to mount a library to the directed mount point. In the following example, the library device name and the mount point are provided as parameters of the ltfs command. The library device name is /dev/IBMchanger0 and the mount point name is /mnt/ltfs:
$ ltfs -o changer_devname=/dev/IBMchanger0 /mnt/ltfs
|
Important: Before the library is mounted, a mount point, such as /mnt/ltfs, must be created. The user must be given write access permission. If you want to mount more than one library device, unique mount points must be created for each device. For example, you can create mount point /mnt/ltfs0 for library device /dev/IBMchanger0 and then create mount point /mnt/ltfs1 for library device /dev/IBMchanger1.
If multiple tape libraries are connected to the system, a library device name, such as /dev/IBMchanger0, can be changed after you disconnect the cable. To avoid this situation, see the information about persistent naming support in the IBM Tape Device Driver Installation and User’s Guide, GC27-2130.
|
To mount a tape library as a normal (nonroot) user, the following steps are required to be performed by a root user:
1. Open a terminal and become a superuser.
2. Create a mount point directory, such as /mnt/ltfs, and set the write permission to the directory.
|
Important: Unique mount points must be created for each library device.
|
3. Create a work directory, such as /tmp/ltfs (the default work directory) and set the write permission to the directory.
4. Set the write permission to a library device, such as /dev/IBMchanger0. This permission is reset to default on boot, so it is necessary to change permission to this device on every boot.
In Example 2-14, instead of setting permission to the library device on every boot as mentioned in step 4, set the permission to the tape library devices and the tape drives permanently to 666. Add the following lines in the /etc/udev/rules.d/98-lin_tape.rules file.
Example 2-14 Persistent set of permission
KERNEL=="IBMchanger*", NAME="%k", MODE="0666"
KERNEL=="IBMtape*[!n]", NAME="%k", MODE="0666"
KERNEL=="IBMtape*n", NAME="%k", MODE="0666"
Example 2-15 Read/Execute permission
su
Password:
mkdir /mnt/ltfs
chmod 666 /mnt/ltfs
mkdir /tmp/ltfs
chmod 666 /tmp/ltfs
chmod 666 /dev/IBMchanger0
chmod 666 /dev/IBMtape0
chmod +rx /bin/fusermount
6. Share the tape library. If you want to share the tape library with another user, add the user_allow_other option in the /etc/fuse.conf file.
7. Mount the tape library (Example 2-16). If you want to mount the tape library as a user other than a superuser and allow another user to access the file system, add the -o allow_other option:
ltfs /mnt/ltfs -o changer_devname=/dev/IBMchanger0 -o allow_other
Otherwise, edit the command line in the following manner:
ltfs /mnt/ltfs -o changer_devname=/dev/IBMchanger0
Example 2-16 LTFS LE mount command with -o option to allow another user
ltfs -o changer_devname=/dev/IBMchanger0 /mnt/ltfs
LTFS14000I LTFS starting, LTFS version 2.1.2.0 (2200), log level 2
LTFS14058I LTFS Format Specification version 2.1.0
LTFS14104I Launched by "ltfs -o changer_devname=/dev/IBMchanger0 /mnt/ltfs"
LTFS14105I This binary is built for Linux (x86_64)
LTFS14106I GCC version is 4.3.4 [gcc-4_3-branch revision 152973]
LTFS17087I Kernel version: Linux version 3.0.13-0.27-default (geeko@buildhost) (gcc version 4.3.4 [gcc-4_3-branch revision 152973] (SUSE Linux) ) #1 SMP Wed Feb 15 13:33:49 UTC 2012 (d73692b) x86_64
LTFS17089I Distribution: LSB_VERSION="core-2.0-noarch:core-3.2-noarch:core-4.0-noarch:core-2.0-x86_64:core-3.2-x86_64:core-4.0-x86_64"
LTFS17089I Distribution: SUSE Linux Enterprise Server 11 (x86_64)
LTFS14063I Sync type is "time", Sync time is 300 sec
LTFS17085I Plugin: Loading "ibmtape" driver
LTFS17085I Plugin: Loading "unified" iosched
LTFS17085I Plugin: Loading "ibmtape" changer
LTFS17085I Plugin: Loading "ondemand" dcache
LTFS11593I LTFS starts with a product license version (2011110430)
LTFS12165I lin_tape version is 1.74.0
LTFS12118I Changer identification is '3573-TL '
LTFS12162I Vendor ID is IBM
LTFS12159I Firmware revision is Bd50
LTFS12160I Changer serial is 00L4U78C6339_LL1
LTFS12196E IOCTL: INQUIRY PAGE -1056947426 failed -20501 (err 22) 00L4U78C6339_LL1
LTFS12165I lin_tape version is 1.74.0
LTFS12158I Opening a device through ibmtape driver (/dev/IBMtape0)
LTFS12118I Drive identification is 'ULT3580-HH6 '
LTFS12162I Vendor ID is IBM
LTFS12159I Firmware revision is C9C1
LTFS12160I Drive serial is 1068000264
LTFS17160I Maximum device block size is 1048576
LTFS12165I lin_tape version is 1.74.0
LTFS12158I Opening a device through ibmtape driver (/dev/IBMtape1)
LTFS12118I Drive identification is 'ULT3580-HH6 '
LTFS12162I Vendor ID is IBM
LTFS12159I Firmware revision is C6UN
LTFS12160I Drive serial is 1068000256
LTFS17160I Maximum device block size is 1048576
LTFS13500I On-demand dentry cache is initialized
LTFS11545I Rebuilding the cartridge inventory
LTFS11571I State of tape '001106L3' in slot 0 is changed from 'Not Initialized' to 'Non-supported'
LTFS11571I State of tape 'DG I69L3' in slot 0 is changed from 'Not Initialized' to 'Non-supported'
LTFS11571I State of tape '3TX070L3' in slot 0 is changed from 'Not Initialized' to 'Non-supported'
LTFS11571I State of tape '3DA491L3' in slot 0 is changed from 'Not Initialized' to 'Non-supported'
LTFS11571I State of tape '3DA493L3' in slot 0 is changed from 'Not Initialized' to 'Non-supported'
LTFS11571I State of tape '059AHDL4' in slot 0 is changed from 'Not Initialized' to 'Non-supported'
LTFS11571I State of tape '3SS081L4' in slot 0 is changed from 'Not Initialized' to 'Non-supported'
LTFS11571I State of tape 'DG I73L3' in slot 0 is changed from 'Not Initialized' to 'Non-supported'
LTFS11571I State of tape '3TX071L3' in slot 0 is changed from 'Not Initialized' to 'Non-supported'
LTFS14506I LTFS admin server is listening on port 2112
LTFS14111I Initial setup completed successfully
LTFS14112I Invoke 'mount' command to check the result of final setup
LTFS14113I Specified mount point is listed if succeeded
8. When the tape library is mounted, cartridges in the library can be accessed as subdirectories under the mount point /mnt/ltfs (Example 2-17).
In this example, three tape volumes are under the mount points D00200L5 and D00346L5.
Example 2-17 Cartridges that are loaded in the mount points
[root@double ~]# ls -l /mnt/ltfs
drwxrwxrwx 1 root root 0 Dec 31 1969 D00200L5
drwxrwxrwx 2 root root 0 Sep 24 17:44 D00346L5
[root@double ~]#
ls -l /mnt/ltfs/D00346L5
Example 2-18 Cartridge subdirectory
[root@double ~]# ls -l /mnt/ltfs/D00346L5
-rwxrwxrwx 1 root root 20897329 Sep 24 16:48 IBM_LTFS_LE.exe
-rwxrwxrwx 1 root root 40 Sep 25 09:50 test.txt
[root@double ~]#
Using the command-line interface
Using LTFS LE by using the command-line interface (CLI) commands from a terminal window is described.
The following examples show the mounted file systems, their contents, and how to use them to move, copy, delete, and touch files by using CLI commands. We defined two mount points for LTFS LE: /mnt/double and /mnt/lto5. Mount point /mnt/double relates to /dev/IBMchanger0. Mount point /mnt/lto5 relates to /dev/IBMchanger1.
We use the following command to mount /mnt/lto5:
ltfs /mnt/lto5 -o changer_devname=/dev/IBMchanger1
Follow these steps:
1. Example 2-19 shows the LTFS mount points before the /dev/IBMchanger1 library is mounted. The /mnt/double and /mnt/lto5 folders are empty.
Example 2-19 LTFS LE mount points before the library is mounted
[root@double ~]# ls -l /mnt/double
total 0
[root@double ~]# ls -l /mnt/lto5
total 0
2. Example 2-20 shows the contents of the LTFS mount points after the /dev/IBMchanger1 library is mounted. The content of the /mnt/double is zero (0). The /mnt/lto5 mount point contains three cartridges: 1FA554L5, 1FA563L5, and 1FA851L5.
Example 2-20 LTFS LE mount points after the library is mounted
[root@double ~]# ls -l /mnt/double
total 0
[root@double ~]# ls -l /mnt/lto5
total 3
drwxrwxrwx 3 root root 0 Sep 28 13:52 1FA554L5
drwxrwxrwx 2 root root 0 Sep 28 13:52 1FA563L5
drwxrwxrwx 2 root root 0 Sep 8 09:57 1FA851L5
3. Use the following command to check and load cartridge 1FA554L5. The cartridge is loaded to any available drive by the library accessor. Example 2-21 shows the cartridge 1FA554L5 is loaded to /dev/IBMtape2.
Example 2-21 Checking and loading cartridges
[root@double ~]# ltfsadmintool -s localhost:2112 -t 1FA554L5 -c
LTFS16000I Starting ltfsck, LTFS version 2.1.1 (201109201), log level 2
LTFS16088I Launched by "/opt/IBM/ltfs/bin/ltfsck /dev/IBMtape2"
LTFS16089I This binary is built for Linux (i386)
LTFS16090I GCC version is 4.4.5 20110214 (Red Hat 4.4.5-6)
LTFS17087I Kernel version: Linux version 2.6.32-71.el6.i686 ([email protected]) (gcc version 4.4.4 20100726 (Red Hat 4.4.4-13) (GCC) ) #1 SMP Wed Sep 1 01:26:34 EDT 2010 i386
LTFS17089I Distribution: Red Hat Enterprise Linux Server release 6.0 (Santiago)
LTFS17089I Distribution: Red Hat Enterprise Linux Server release 6.0 (Santiago)
LTFS17085I Plugin: Loading "ibmtape" driver
LTFS12165I lin_tape version is 1.60.0
LTFS12158I Opening a device through ibmtape driver (/dev/IBMtape2)
LTFS12118I Drive identification is 'ULTRIUM-TD5 '
LTFS12162I Vendor ID is IBM
LTFS12159I Firmware revision is B6W0
LTFS12160I Drive serial is 1013000451
LTFS17160I Maximum device block size is 1048576
LTFS16014I Checking LTFS file system on '/dev/IBMtape2'
LTFS16023I LTFS volume information:
LTFS16024I Volser (bar code) : 1FA554
LTFS16025I Volume UUID : 0f4feac6-e2cb-4c39-9ef2-2cb0cb0223c6
LTFS16026I Format time : 2011-09-01 14:12:43.532996720 MST
LTFS16027I Block size : 524288
LTFS16028I Compression : Enabled
LTFS16029I Index partition : ID = a, SCSI Partition = 0
LTFS16030I Data partition : ID = b, SCSI Partition = 1
LTFS11005I Mounting the volume
LTFS11026I Performing a full medium consistency check
LTFS11233I Updating MAM coherency data
LTFS11034I Volume unmounted successfully
LTFS16022I Volume is consistent
Consistency of tape 1FA554L5 successfully checked.
[root@double ~]#
4. After the 1FA554L5 cartridge is loaded, you can view the contents of the cartridge in the /mnt/lto5/1FA554L5 folder by using the following command:
ls -l /mnt/lto5/1FA554L5
Example 2-22 Cartridge contents after loading
[root@double ~]# ls -l /mnt/lto5/1FA554L5
total 0
[root@double ~]#
5. Copy the file that you want from a directory to the /mnt/lto5/1FA554L5 folder by using the following command:
cp Mauro_Tests /mnt/lto5/1FA554L5
Example 2-23 Copying a file to /mnt/lto5/1FA554L5
[root@double ~]# cp Mauro_Tests /mnt/lto5/1FA554L5
[root@double ~]#
6. After you copy the file from the root directory Mauro_LTFS_LE_Tests to the /mnt/lto5/1FA554L5 folder, you can view its contents by using the following command:
ls -l /mnt/lto5/1FA554L5
Example 2-24 Cartridge contents after the file is copied
[root@double Mauro_LTFS_LE_Tests]# ls -l /mnt/lto5/1FA554L5
total 1
-rwxrwxrwx 1 root root 74 Oct 7 08:44 Mauro_Tests
7. You can view the file and see its contents by using the following command:
vi Mauro_Tests
Example 2-25 View cartridge with vi command to view contents
[root@double ~]# cd /mnt/lto5/1FA554L5
[root@double 1FA554L5]# vi Mauro_Tests
----- The following is the VI result ------------------------------------------
This file has been created to perform LTFS LE tests for Redbooks publications purposes.
~
~
~
~
~
~
~
~
"Mauro_Tests" 1L, 74C
8. To touch the cartridge and create more files, use the following command:
touch Mauro_Test1 Mauro_Test2 Mauro_Test3
|
The touch command: The touch command is the easiest way to create new, empty files. You can also use it to change the time stamps (that is, the dates and times of the most recent access and modification) on existing files and directories.
|
Example 2-26 Touch 1FA554L5 cartridge to create three new files
[root@double 1FA554L5]# touch Mauro_Test1 Mauro_Test2 Mauro_Test3
--------- To see the cartridge contents after touch ---------------------------
[root@double 1FA554L5]# ls -l
total 4
-rwxrwxrwx 1 root root 0 Oct 7 09:35 Mauro_Test1
-rwxrwxrwx 1 root root 0 Oct 7 09:35 Mauro_Test2
-rwxrwxrwx 1 root root 0 Oct 7 09:35 Mauro_Test3
-rwxrwxrwx 1 root root 74 Oct 7 09:15 Mauro_Tests
[root@double 1FA554L5]#
9. Several touch command options are designed to allow users to change the time stamps for files. For example, the -a option changes only the access time. The -m option changes only the modification time. By using both of these options together, you can change both the access time and the modification time to the current time. Use the following command to change the access and modification time for the Mauro_Tests file.
touch -am Mauro_Tests
Example 2-27 Change access and modification times for file Mauro_Tests
[root@double 1FA554L5]# touch -am Mauro_Tests
----------- See access and modification time for file Mauro_Tests -------------
[root@double 1FA554L5]# ls -l
total 1
-rwxrwxrwx 1 root root 0 Oct 7 09:53 Mauro_Test1
-rwxrwxrwx 1 root root 0 Oct 7 09:35 Mauro_Test2
-rwxrwxrwx 1 root root 74 Oct 7 09:53 Mauro_Tests
[root@double 1FA554L5]#
10. To delete a file from the cartridge, use the following command:
rm Mauro_Test3
Example 2-28 Remove file from the cartridge
[root@double 1FA554L5]# rm Mauro_Test3
rm: remove regular empty file `Mauro_Test3'? y
----- To see cartridge content after removing a file --------------------------
[root@double 1FA554L5]# ls -l
total 1
-rwxrwxrwx 1 root root 0 Oct 7 09:35 Mauro_Test1
-rwxrwxrwx 1 root root 0 Oct 7 09:35 Mauro_Test2
-rwxrwxrwx 1 root root 74 Oct 7 09:15 Mauro_Tests
[root@double 1FA554L5]#
Remote access to LTFS LE
You can share the LTFS file system with other servers on your network. In our case, we successfully tested sharing a file system between Linux and Windows machines by using Samba (http://www.samba.org). The NFS protocol can be used when a file system needs to be shared between UNIX servers.
Configuring NFS and testing remote access to LTFS LE are explained. Basic knowledge of UNIX is assumed. Additional NFS security measures that are needed to be set up in a production environment are not described. Follow these steps:
1. On the server that runs LTFS LE, edit the /etc/exports file. Add an entry to give everyone read and write access to the LTFS file system (use a random fsid). See Example 2-29.
Example 2-29 Export the LTFS file system
[root@double Mauro_LTFS_LE_Tests]# vi /etc/exports
/mnt/lto5 *(rw,fsid=12345)
2. Start the NFS daemon:
start NFS
3. From a remote UNIX server, create a local mount point and then connect to the remote (NFS-mounted) LTFS file system and create a file. Remote file creation is shown in Example 2-30.
Example 2-30 Remote file creation on LTFS
[root@vegemite /]# mkdir /remote_LTFS
[root@vegemite /]# mount double.tucson.ibm.com:/mnt/lto5 /remote_LTFS
[root@vegemite /]# touch /remote_LTFS/1FA554L5/file_created_via_nfs
4. On the server that runs LTFS, you can now view the newly created file in the LTFS file system (Example 2-31).
Example 2-31 Confirmation that the new file exists
[root@double 1FA554L5]# ls -l
total 1
-rwxrwxrwx 1 root root 0 Oct 17 11:11 file_created_via_nfs
-rwxrwxrwx 1 root root 0 Oct 7 09:35 Mauro_Test1
-rwxrwxrwx 1 root root 0 Oct 7 09:35 Mauro_Test2
-rwxrwxrwx 1 root root 74 Oct 7 09:15 Mauro_Tests
[root@double 1FA554L5]#
Similarly, by installing and configuring Samba on the LTFS LE server, you can enable remote access to the LTFS file system from Windows servers. We tested enabling remote access to the LTFS file system by using Windows 7 Professional, but it also works with Windows 2008. Figure 2-36 shows a view of the LTFS LE file system running on a Linux Red Hat server using Windows Explorer on Windows 7 Professional.

Figure 2-36 Remote access to LTFS file system from Windows 7
Using LTFS LE with the Linux GUI
You can use the Linux GUI with LTFS. To use the Linux GUI, first mount the library by using the CLI commands from a terminal window. See “Mounting a library on a Linux system” on page 158. Next, the mounted file systems and their contents are shown. How to use them to move or copy files is shown. In the example, we defined two mount points for LTFS LE, /mnt/double and /mnt/lto5. Mount point /mnt/double relates to /dev/IBMchanger0. Mount point /mnt/lto5 relates to /dev/IBMchanger1.
We use the following command to mount /mnt/lto5:
ltfs /mnt/lto5 -o changer_devname=/dev/IBMchanger1

Figure 2-37 The lto5 mount point is empty before mount
After /dev/IBMchanger1 is mounted, three cartridges are visible in the /mnt/lto5 mount point: FA851L5, 1FA554L5, and 1FA563L5 (Figure 2-38).

Figure 2-38 The lto5 mount point after mount
If you click one of the three cartridges, you see that the cartridge loads into the drive by the library accessor. As an example, we clicked 1FA554L5 to load the cartridge into the drive (Figure 2-39).

Figure 2-39 The lto5 mount point loading a cartridge
After the cartridge is loaded, you can view its contents. You can drag and drop any type of file (backup files, text files, video files, and audio files) into the tape cartridge.
Figure 2-40 shows our example. In this example, we drag the text file Mauro_Tests from the Linux Desktop GUI and drop the file into the cartridge folder. After that, the text file is visible in the cartridge folder 1FA554L5.

Figure 2-40 The lto5 mount point cartridge mounted folder

Figure 2-41 The lto5 mount point cartridge mounted options
To unmount the library, use the CLI commands from a terminal window. There is no option that is available from the Linux GUI that permits you to unmount the library.
Unmounting a library
Unmounting a library on LTFS LE is described.
All files that are in use on cartridges in the tape library must be closed before a library can be unmounted. The library can be forcibly unmounted by using the force option (-f).
|
Caution: Using the force option (-f) can result in data loss.
|
Use one of the following commands to unmount a library from a mount point:
•umount /mnt/ltfs
•fusermount -u /mnt/ltfs
|
Administrator privileges: The unmount command (umount) requires administrator privileges. Users who do not have administrator privileges must issue the fusermount command with the -u option.
|
The unmount command (umount) flushes all buffered data to the cartridges in the tape library before it unloads the cartridge. After the flushing operation is complete, LTFS updates inventory information and unmounts the library from the mount point.
When the unmounting is completed, the subdirectories under the mount point are removed, along with information in the media library.
As shown in the following example, the success of the removal operation can be confirmed by issuing the ltfsadmintool command with the -i or --tape-inventory option:
ltfsadmintool -i
Failed to connect to the server.
Or, you can issue the ps command to check whether the process is terminated:
ps aux | grep ltfs
If a user other than the administrator attempts to access LTFS, the unmount command (umount) and the fusermount -u command cannot be issued to unmount the tape library from the file system. See Example 2-32.
Example 2-32 Unmount LTFS
[root@double ~]# umount /mnt/ltfs
# umount: /mnt/ltfs: device is busy
# umount: /mnt/ltfs: device is busy
[root@double ~]#
Example 2-33 Identify current user
/sbin/fuser -uv /mnt/ltfs
USER PID ACCESS COMMAND
/mnt/ltfs: user1 17399 ..c.. (erato)bash
To forcibly terminate LTFS, use the shutdown script as shown:
/etc/init.d/ltfs stop
|
Important: The (address:port) part of the command points to the library server. If this command is initiated on the library server by using the default setting, localhost:2112 must be specified.
|
2.3.3 Adding and removing tape drives
How to remove and add tape drives in a library that is mounted with LTFS LE is described. Use this procedure when a tape drive needs to be replaced or repaired. The following libraries are supported:
•TS2900 Tape Autoloader
•TS3100 Tape Library
•TS3200 Tape Library
•TS3310 Tape Library
•TS3500 Tape Library
TS2900 Tape Autoloader and TS3100, TS3200, and TS3310 tape libraries
How to remove and add tape drives for the TS2900 Tape Autoloader and the TS3100, TS3200, and TS3310 tape libraries is described.
When LTFS LE mounts the library, all tape drives are inventoried. After the library is mounted, the user must issue the ltfsadmintool command. This command allows the user to manage the library and correct a problem if one occurs. For more information, see 2.3.6, “Managing a library by using the ltfsadmintool command” on page 175.
Complete the following steps to remove a tape drive from the library and to add a tape drive:
1. Unmount the tape library on LTFS. For more information, see “Managing a library by using the ltfsadmintool command” on page 175.
2. Physically remove the tape drive from the tape library. For information about how to remove the drive, see the Setup, Operator, and Service Guide for your tape library at this website:
3. Observe the preferred practices by issuing the following commands to initialize the software stack of the device drivers. LTFS LE uses lpfc as an HBA driver:
– On Linux systems, issue the following commands to initialize the software stack of the device drivers:
i. lin_taped stop (Stop the tape device driver daemon)
ii. rmmod lin_tape (Remove the tape device driver)
iii. rmmod lpfc (Remove the HBA driver)
iv. modprobe lpfc (Reload the HBA driver)
v. modprobe lin_tape ( Load the tape device driver)
vi. lin_taped start (Load the tape device driver daemon)
– On Windows systems, perform the following steps:
i. Uninstall the Windows device driver.
ii. Reboot the Windows server.
iii. Reinstall the Windows device driver.
4. Mount the tape library on LTFS. For more information, see “Mounting a library on a Linux system” on page 158.
TS3500 Tape Library
How to remove and add a tape drive for the TS3500 Tape Library is described.
When LTFS LE mounts the library, all tape drives are inventoried to it. After the library is mounted, the user must issue the ltfsadmintool command. With this command, the user can manage the library and correct a problem if one occurs. For more information, see 2.3.6, “Managing a library by using the ltfsadmintool command” on page 175.
Complete the following steps to remove a tape drive from the library and to add a tape drive to the library:
1. On Linux systems, remove the tape drive from the LTFS inventory by specifying the -r or --remove option. A medium in the tape drive is automatically moved to the home slot (if a home slot exists) as shown in the following example:
$ ltfsadmintool -d (DRIVE SERIAL NUMBER) -r
2. Physically remove the tape drive from the tape library. For information about how to remove the drive, see the Setup, Operator, and Service Guide for your tape library.
|
Resource: You can download the Setup and Operator guides from the following website:
|
After you repair a tape drive, or when you replace or install a new tape drive, add the tape drive to the library.
On Linux systems, add the tape drive to the LTFS inventory by specifying the -a or --add option as shown in the following example:
$ ltfsadmintool -d (DRIVE SERIAL NUMBER) -a
On Windows systems, physically add the tape drive to the tape library and then perform the following steps:
1. Uninstall the Windows device driver.
2. Reboot the Windows server.
3. Reinstall the Windows device driver.
2.3.4 Turning on and off a tape drive while mounting LTFS
How to turn on a tape drive and off when you use LTFS is described.
Before you turn on or off tape drive power, you must first prepare the library. Determine which of the following scenarios applies to your environment. Check the interfaces between the server personal computer, tape library, and the target tape drive. Use Table 2-11 to determine which procedure you need to perform:
•Scenario one: The server personal computer connects to the target tape drive, and the target tape drive connects to the tape library. In this case, the target tape drive is used as a control path. No other tape drive is used as a control path. If another control path is established, the control path failover feature is disabled.
•Scenario two: The server personal computer connects to the target tape drive, and the target tape drive connects to the tape library. In addition, the server personal computer connects to another tape drive that also connects to the tape library. The target tape drive and the other tape drive establish multiple control paths and the control path failover feature is enabled.
•Scenario three: The target tape drive connects only to the tape library and does not establish a control path.
|
HBA: In addition to these interface and control path scenarios, the type of HBA affects how you perform the tape drive power-on or power-off procedure. For details, see Table 2-11 on page 173.
|
Table 2-11 Drive firmware upgrade procedure options
|
|
Target tape drive settings
|
||
|
HBA type
|
Scenario1
(CPF disabled)
|
Scenario 2
(CPF enabled)
|
Scenario 3
(no control path)
|
|
SAS
|
Option A
|
Option A
|
Option B
|
|
Fibre Channel
|
Option A
|
Option B-2
|
Option B
|
Procedure
Complete the appropriate steps based on the options that are presented in Table 2-11 on page 173 to successfully remove or restore power from or to a tape drive:
1. For option A, complete the following prerequisite and post-requisite steps:
a. Before you turn off the tape drive, you must first unmount the tape library from the mount point.
b. After you turn on the tape drive, you must mount the tape library to the mount point.
2. For option B, complete the following prerequisite and post-requisite steps:
a. Before you turn off the tape drive, you must remove the target tape drive from the library inventory by issuing the ltfsadmintool -r command with the -d or --drive option.
b. After you turn on the tape drive, you must add the tape drive to the library inventory by using the ltfsadmintool -a command with the -d or --drive option.
3. For option B-2, complete the following prerequisite and post-requisite steps. For this option, the control path automatically switches to another control path when the target drive control path is cut off.
a. Before you turn off the tape drive, you must remove the target tape drive from the library inventory by issuing the ltfsadmintool -r command with the -d or --drive option.
b. After you turn on the tape drive, you must add the tape drive to the library inventory by using the ltfsadmintool -a command with the -d or --drive option.
|
Important: Do not turn off both tape drives that establish the primary and alternate control paths simultaneously or the control path to the tape library is lost.
|
2.3.5 Adding and removing cartridges
Adding and removing cartridges on the LTFS LE file system are described.
An unformatted medium cannot be added to the LTFS file system. You need to format the medium before you add it by specifying the -f option with the ltfsadmintool command. See 2.4.2, “Formatting a medium by using the ltfsadmintool command” on page 191.
A new cartridge must be added to the LTFS file system to become usable. After it is added, the cartridge volume serial number (VOLSER) is recognized by the operating system as a subdirectory. The ltfsadmintool command with the -a or --add option adds a medium to the LTFS file system. In the following example, we show you the ltfsadmintool command that is used to add a medium (VOLSER 1FA563L5) to the local library server:
ltfsadmintool -t 1FA563L5 -a
When a medium is in use, the cartridge cannot be removed from the inventory. The ltfsadmintool command with the -r or --remove option removes a medium from the LTFS file system. The following example shows a command that is used to remove a medium (VOLSER 1FA563L5) from the library mount point /mnt/ltfs:
ltfsadmintool -s (address:port) -t 1FA563L5 -r
Using the I/O station
When a new medium is imported or a used medium is exported, the user moves the medium to or from the I/O station with the -m or --move-to option.
To import a new cartridge, the user inserts the cartridge into the I/O station and close it. The cartridge is added to the LTFS file system. The cartridge is then moved into the library by specifying the -a or --add option, as shown in the following example:
ltfsadmintool -t 1FA563L5 -a
|
Option: As this example shows, the use of the additional -m option is not required. If the target cartridge is in the I/O station, LTFS implicitly assigns the home slot in the storage slot and moves the medium to it.
|
To export a cartridge from the library, the user first move the cartridge from the storage slot to the I/O station. The user then opens the I/O station and removes the cartridge from the station. The cartridge can be removed from the LTFS file system and then exported from the library by specifying the -r or --remove option along with the -m or –move-to option. The following example shows a command that uses the -m option to export a cartridge:
ltfsadmintool -t 1FA563L5 -r -m ieslot
2.3.6 Managing a library by using the ltfsadmintool command
Managing the tape library and media by using the ltfsadmintool command and the options that can be specified with it is described.
The ltfsadmintool command is used on Linux and Windows systems to perform the following operations:
The ltfsadmintool command is used on Linux and Windows systems to perform the following operations:
•Listing the cartridge location and status
•Listing tape drives and drive status
•Adding a cartridge to the library
•Removing a cartridge from the library
•Formatting a cartridge in the library
•Checking and recovering or rolling back a cartridge in the library
The command can be used with a number of options.
|
Important: Beginning with version 2.1.1, it is no longer necessary to specify the -s or --server option to connect to the local library server. Instead, this option is now set by default and needs to be modified only if there is a need to access a remote library.
LTFS LE supports access only from localhost by using the ltfsadmintool command. Port 2112 by default, or a port number that is specified by using the ltfs command with the -o admin_port option, must be blocked by a firewall program. If this port is set as a trusted port by using a firewall program, remove it as a trusted port before you use LTFS. To access the ltfsadmintool command on the server from a remote client personal computer, log on to the server personal computer by using Secure Shell (SSH).
|
The ltfsadmintool command for Windows users has these characteristics:
•On a Windows system, the ltfsadmintool command must be preceded by python, as shown in our examples.
•On a Windows system, you can use PowerShell to run the ltfsadmintool command. When Windows PowerShell is used for the ltfsadmintool command, any option that starts with a dash (-) needs to be in double quotation marks as shown in the following example:
# python .ltfsadmintool "-t" 1FA563L5 "-f" "--" "--force"
Listing the cartridge location and status
The -i option is used to list the cartridge and its status in the LTFS inventory. In the following example, five cartridges are inventoried to the library. The first column shows the bar code label for each cartridge.
The first cartridge with bar code label YAM060L5 is in slot 17, which is in the import/export slot (I/O station). The next two cartridges, YAM061L5 and 068AGWL5, are in slots 256 and 257, which are in the data transfer element (tape drive). The remaining two cartridges, E2T101L2 and YL0001L5, are in slots 4096 and 4097, which are in the medium storage element (storage slot).
The status of the first cartridge is Unavailable. The status of the next two cartridges is Valid LTFS, and the data in the folder is accessible. The status of the next cartridge is Non-supported, and the cartridge is an older generation or a WORM cartridge. The status of the last cartridge is Unknown.
Linux
For Linux, use this command:
$ ltfsadmintool -i
Example 2-34 Output from the -i command
YAM060L5 -> Location: Import/Export slot, Address: 17, Capacity: 0GB, Remaining: 0GB, Status: Unavailable
YAM061L5 -> Location: Data transfer element, Address: 256, Capacity: 1327GB, Remaining: 1326GB, Status: Valid LTFS
068AGWL5 -> Location: Data transfer element, Address: 257, Capacity: 1327GB, Remaining:1326GB,Status: Valid LTFS
E2T101L2 -> Location: Medium storage element, Address: 4096, Capacity: 0GB, Remaining: 0GB,Status: Non-supported
YL0001L5 -> Location: Medium storage element, Address: 4097, Capacity: 0GB, Remaining: 0GB,Status: Unknown
Windows
For Windows, use this command:
# python ltfsadmintool -i
Example 2-35 Output from the -i command
YAM060L5 -> Location: Import/Export slot, Address: 17, Capacity: 0GB, Remaining: 0GB, Status: Unavailable
YAM061L5 -> Location: Data transfer element, Address: 256, Capacity:1327GB, Remaining: 1326GB, Status: Valid LTFS
068AGWL5 -> Location: Data transfer element, Address: 257, Capacity:1327GB, Remaining: 1326GB, Status: Valid LTFS
E2T101L2 -> Location: Medium storage element, Address: 4096, Capacity: 0GB, Remaining: 0GB, Status: Non-supported
YL0001L5 -> Location: Medium storage element, Address: 4097, Capacity: 0GB, Remaining: 0GB, Status: Unknown
The supported cartridge locations and medium status are shown in these tables. Table 2-12 lists the supported locations.
Table 2-12 Supported cartridge locations
|
Location
|
Description
|
|
Medium transport element
|
The cartridge is in a cartridge mover.
|
|
Medium storage element
|
The cartridge is in a storage slot.
|
|
Import/Export slot
|
The cartridge is in an I/O station.
|
|
Data transfer element
|
The cartridge is in a tape drive.
|
Table 2-13 Supported cartridge status
|
Cartridge status
|
File system access
|
Description
|
Limited operation
|
How to recover the cartridge
|
|
Valid LTFS
|
YES
|
The cartridge is valid. The index file is extracted to memory so that some file system requests, such as listing directory contents, can be processed without mounting a tape medium to a drive.
|
•Adding the cartridge by using the ltfsadmintool command with the -a option is not allowed for this cartridge because it is already added to the file system.
•Moving the cartridge to the I/O station by using the ltfsadmintool command with the -m ieslot option is not allowed. The cartridge must be removed from the file system by using the ltfsadmintool command with the -r option before you move it to the I/O station.
|
|
|
Unknown
|
Yes
|
The cartridge contents are unknown. The index file must be read on the tape medium before most file system requests can be processed.
|
•Adding the cartridge by using the ltfsadmintool command with the -a option is not allowed for this cartridge because it is already added to the file system.
•Moving the cartridge to I/O station by using the ltfsadmintool command with the -m ieslot option is not allowed. The cartridge must be removed from the file system by using the ltfsadmintool command with the -r option before you move it to the I/O station.
|
|
|
Write- protected
|
Read- only
|
The cartridge is physically (or logically) in a write-protected or read-only state because of an absence of capacity. This status is reported only when the cartridge is Valid.
If the cartridge is in any state other than Valid, the status is reported even though the cartridge is write- protected.
|
•Adding the cartridge by using the ltfsadmintool command using the -a option is not allowed for this cartridge because it is already added to the file system.
•Moving the cartridge to the I/O station by using the ltfsadmintool command with the -m ieslot option is not allowed. The cartridge must be removed from the file system by using the ltfsadmintool command using the -r option before you can move it to the I/O station.
•Formatting the cartridge is not allowed because the cartridge is read-only.
|
|
|
Warning
|
Yes
|
A medium error is detected while the medium is being read. The operations that can be performed by using this cartridge, however, are the same as for a Valid cartridge. This status is reported only when the cartridge is Valid. If the cartridge is any state other than Valid, the status is reported even though the cartridge reported a medium error.
|
•Adding the cartridge by using the ltfsadmintool command using the -a option is not allowed for this cartridge because it is already added to the file system.
•Moving the cartridge to the I/O station by using the ltfsadmintool command with the -m ieslot option is not allowed. The cartridge must be removed from the file system by using the ltfsadmintool command using the -r option before you can move it to the I/O station.
|
A medium error might have occurred. Check the system logs or terminal console outputs. The cartridge status returns to Valid by physically removing the medium from the library, then adding it to the library again.
|
|
Critical
|
Read- only
|
The index on memory is dirty. Data might not be able to be written to the tape medium due to the medium status. The volume is dropped to read-only and the drive is locked so that the cartridge cannot be removed. The drive scheduler excludes the drive from its scheduling to avoid an unexpected cartridge removal with an index write failure. The user can perform any backup operation in this state. After the backup is completed, the user can remove the cartridge from the drive by unlocking the drive by using the -r option. The cartridge status then changes to an “Error” state.
|
No operation that uses the ltfsadmintool command is allowed, except removing the cartridge from the file system by using the ltfsadmintool command with the -r option.
|
Back up the data on the cartridge to another tape medium or hard disk drive.
After the backup is complete, remove the cartridge from the file system with the -r option.
If the cartridge is not removed, file system performance is degraded because the tape drive with the cartridge is locked.
|
|
Unavailable
|
No
|
The cartridge has no problem, but is removed from LTFS. The -a option might change the cartridge status to “Valid”, “Unknown”, “Write Protected”, or “Warning”.
|
Removing the cartridge by using the ltfsadmintool command with the -r option is not allowed because the cartridge is not added to the file system.
|
|
|
Invalid LTFS
|
No
|
The cartridge is inconsistent with the LTFS format and must be checked by using the -c option.
|
Removing the cartridge by using the ltfsadmintool command with the -r option is not allowed because the cartridge is not added to the file system.
|
Check the cartridge. For more information, see 2.4.3, “Checking or recovering a medium by using the ltfsadmintool command” on page 192. If an error message returns, see the website:
|
|
Unformatted
|
No
|
The cartridge is not formatted and must be formatted by using the -f option.
|
Removing the cartridge by using the ltfsadmintool command with the -r option is not allowed because the cartridge is not added to the file system.
|
Format the cartridge before you use it. See 2.4.2, “Formatting a medium by using the ltfsadmintool command” on page 191.
|
|
Inaccessible
|
No
|
The cartridge is not allowed to move in the library, or might be stuck in the drive.
If the cartridge is stuck in the drive, the drive scheduler excludes this drive from its scheduling.
|
No operation that uses the ltfsadmintool command is allowed.
|
The cartridge might be stuck in the library or in one of the tape drives. The tape library or a tape drive must be repaired.
|
|
Error
|
No
|
The cartridge status is “Critical” and the cartridge is removed from the library. LTFS does not allow the cartridge to be added to the file system again.
|
No operation that uses the ltfsadmintool command is allowed, except to move the cartridge to another slot by using the -m option.
|
Check the system logs or terminal console outputs to locate the error message. The cartridge status returns to Valid by physically removing the medium from the library, then adding it to the library again.
|
|
Non-supported
|
No
|
The cartridge is an older generation or a WORM cartridge.
|
No operation that uses the ltfsadmintool command is allowed, except to move the cartridge to another slot by using the -m option.
|
LTFS supports the following tape cartridges:
•LTO-6
•LTO-5
•3592 Advanced data (JC)
•3592 Extended data (JB)
•3592 Economy data (JK)
Cleaning and WORM cartridges are not supported. Check to determine if the bar code label of the cartridge is properly set.
|
|
Duplicated
|
No
|
Two cartridges exist with
the same bar code. |
No operation that uses the ltfsadmintool command is allowed.
|
Export one of the cartridges with the same bar code label from the library.
|
|
Cleaning
|
No
|
The tape is being cleaned.
|
No operation that uses the ltfsadmintool command is allowed, except to move the cartridge to another slot by using the -m option.
|
|
Listing the tape drives and status in the LTFS inventory
The -I option is used to list the tape drives and their status in the LTFS inventory. The following example shows a valid tape drive /dev/IBMtape0 that is attached to the tape library 1168001144.
Linux
For Linux, use this command:
$ ltfsadmintool -I
1168001144 -> Device: /dev/IBMtape0 [ULT3580-TD5], Status: Available
$ ltfsadmintool -I <<<Code level 2.1.2>>>
1068000264 -> Device: /dev/IBMtape0 [ULT3580-HH6] , Library address: 256, Status: Available
1068000256 -> Device: /dev/IBMtape1 [ULT3580-HH6] , Library address: 257, Status: Available
Windows
For Windows, use this command:
# python ltfsadmintool -I
1168001144 -> Device: 6.0.0.1 [ULT3580-TD5], Status: Available
# python ltfsadmintool -I <<<Code level 2.1.2>>>
1068000264 -> Device: \.Tape0 [ULT3580-HH6] , Library address: 256, Status: Available
1068000256 -> Device: \.Tape1 [ULT3580-HH6] , Library address: 257, Status: Available
|
Examples:
•The drive serial numbers in these examples are 1168001144, 1068000264, and 1068000256.
•Beginning with code level 2.1.2, the drive type is also displayed.
|
Table 2-14 Supported tape drive types
|
Drive type
|
Description
|
|
|
[ULT3580-TD6]
|
LTO Ultrium 6 Tape Drive
|
|
|
[ULTRIUM-TD6]
|
||
|
[ULTRIUM-HH6]
|
LTO Ultrium 6 Tape Drive Half High
|
|
|
[ULT3580-HH6]
|
||
|
[HH LTO Gen 6]
|
||
|
[ULT3580-TD5]
|
LTO Ultrium 5 Tape Drive
|
|
|
[ULTRIUM-TD5]
|
||
|
[ULTRIUM-HH5]
|
LTO Ultrium 5 Tape Drive Half High
|
|
|
[ULT3580-HH5]
|
|
|
|
[HH LTO Gen 5]
|
|
|
|
[03592E07]
|
IBM System Storage TS1140 Tape Drive
|
|
Table 2-15 Supported drive status
|
Drive status
|
Description
|
How to recover the tape drive
|
|
Available
|
The drive is available.
|
No recovery is necessary.
|
|
Unavailable
|
The drive is removed from the library inventory by using the ltfsadmintool -r command.
|
The status changes to Available by adding the drive to the library inventory by using the ltfsadmintool -a command.
|
|
Error
|
The tape drive reports a hardware error.
|
Check the drive error messages on the library operator panel or tape library Specialist web interface. For instructions about how to use the operator panel or web interface, download the applicable guide. To do so, follow the procedure in the “Downloading operator guides for tape libraries and drives” at this website:
http://pic.dhe.ibm.com/infocenter/ltfsle/cust/topic/com.ibm.storage.hollywood.doc/ltfs_downloading_operator_guides.html. Also, for troubleshooting information, see the same guide and the tape drive operator guide.
|
|
Locked
|
The cartridge is in a critical condition. The tape drive for the cartridge is preserved for maintenance.
|
Back up the data on another medium. Then, remove the cartridge from the library inventory by using the ltfsadmintool -r command with the -t or --tape-id option to change the status to Available.
|
|
Not installed
|
If a tape drive is physically removed from the library, the tape drive disappears from the library inventory. But if the library reports an error condition when a drive is removed, the drive status changes to a “Not installed” status.
|
Check the tape library error messages on the library operator panel or tape library Specialist web interface. For instructions about how to use the operator panel or web interface, download the applicable guide. To do so, follow the procedure in the “Downloading operator guides for tape libraries and drives” topic at http://pic.dhe.ibm.com/infocenter/ltfsle/cust/topic/com.ibm.storage.hollywood.doc/ltfs_downloading_operator_guides.html. Also, for troubleshooting, see the same guide.
|
|
Important: The Tape Library Specialist web interface is not available for the TS2900 Tape Autoloader or the TS3100, TS3200, and TS3310 tape libraries.
|
Adding a cartridge to the library
How to add a cartridge to the library by using the LTFS commands is explained. The combination of the -a option and -t option is used to add a cartridge to the library.
The following command shows a cartridge that is added by using this combination of options:
•For Linux, use this command:
$ ltfsadmintool -t D00661L5 -a
•For Windows, use this command:
# python ltfsadmintool -t D00661L5 -a
The following command shows all cartridges that are added from the I/O station:
•For Linux, use this command:
$ ltfsadmintool -t @ieslot -a
•For Windows, use this command:
# python ltfsadmintool -t @ieslot -a
After a cartridge is added, the volume serial number (VOLSER) is recognized by the tape library as a subdirectory of the file system.
|
An unformatted medium: An unformatted medium cannot be added to the library. Format the medium before you add it by specifying the -f option.
|
Removing a cartridge
A combination of the -r option and -t option is used to remove a cartridge from the library.
The following example shows a cartridge that is removed by using this combination of options:
•For Linux, use this command:
$ ltfsadmintool -t D00661L5 -r
•For Windows, use this command:
# python ltfsadmintool -t D00661L5 -r
The following example shows a cartridge that is removed to the I/O station:
•For Linux, use this command:
$ ltfsadmintool -t D00661L5 -r -m ieslot
•For Windows, use this command:
# python ltfsadmintool -t D00661L5 -r -m ieslot
If the cartridge is successfully removed, the subdirectory that corresponds to the medium VOLSER disappears.
Formatting a cartridge in the library
The -f option can be specified when one or more cartridges in the LTFS inventory must be formatted. This operation is performed when the ltfsadmintool calls -f (mkltfs function). The mkltfs parameters are passed by adding the -- tag to the command line.
In the following example, the mkltfs parameter --rules=size=10M is added after the -- tag to specify the file placement policy that copies the matching files to the index partition. The ltfsadmintool passes the -rules=size=10M parameter to the -f option.
Use this command for Linux:
$ ltfsadmintool -t D00661L5,D00662L5 -f -- --rules=size=10M
The tape volume serial number (VOLSER) is set as a parameter of the -t option as shown:
$ ltfsadmintool -t AA0031 -f
In the second example, the -- tag after the -f option initiates setting a parameter for mkltfs. The -n ABC option then can be passed to mkltfs:
$ ltfsadmintool -t AA0031 -f -- -n ABC
When the mkltfs command is issued to format the medium, the medium folder for the cartridge is removed from the LTFS file system. When the format operation is complete, the cartridge is attached to the file system and a subdirectory displays with the VOLSER as the directory name. The name that is read from the bar code that is attached to the back of the tape cartridge is used to set the VOLSER name in the VOL1 label.
Multiple cartridges can be formatted by specifying VOLSERs after the -t option. The following example shows three cartridges that are formatted sequentially or simultaneously:
$ ltfsadmintool -t AA0031,AA0032,AA0033 -f
For Windows, use this command:
# python ltfsadmintool -t D00661L5,D00662L5 -f -- --rules=size=10M
If a number of drives are available, LTFS randomly uses one of the drives to format a medium. LTFS can use a single drive to sequentially format multiple cartridges or multiple drives to simultaneously format multiple cartridges. LTFS LE formats only one tape at a time by using one drive at a time per the ltfsadmintool command. However, you can use multiple drives to format multiple cartridges at one time by issuing more than one ltfsadmintool command.
|
Important: The formatting operation can fail if the medium is already formatted for LTFS. After the formatting is requested, LTFS attempts to mount the target medium to obtain the medium condition. The medium is formatted if the mount command finds any of the following conditions:
•The medium is not partitioned for LTFS.
•The medium has an invalid label.
•Labels in both partitions do not have the same value.
•The medium is not formatted for LTFS.
|
If none of these conditions are found, LTFS assumes that the medium is already formatted so it is not formatted by default. You can specify either the -f or --force option as an optional mkltfs parameter. The -f or --force option commands LTFS to format a medium forcibly regardless of the medium status.
For more information, see 2.4.2, “Formatting a medium by using the ltfsadmintool command” on page 191.
|
Logical block protection: To format a cartridge by using logical block protection (LBP), the -o scsi_lbprotect=on option must be specified with the ltfsadmintool command.
|
Checking and recovering or rolling back a cartridge in the library
The -c option can be specified to check the medium when one or more cartridges in the library are inconsistent and it is necessary to perform a check and recover operation. In this case, the ltfsadmintool command calls the ltfsck command. The user also has access to a list of other ltfsck options.
In the following example, both ltfsck options, --list-rollback-points and --full-index-info, are added after the -- tag to get a list of rollback points. The ltfsadmintool then passes those --list-rollback-points and --full-index-info options to the ltfsck command.
For Linux, use this command:
$ ltfsadmintool -t D00661L5,D00662L5 -c -- --list-rollback-points --full-index-info
In the following set of examples, the -- tag option after the -c option initiates setting a parameter for the ltfsck command. This option is passed to the ltfsck command, for example:
$ ltfsadmintool -t AA0031,AA0032,AA0033 -c
Or, use this command to pass parameters to the ltfsck command:
$ ltfsadmintool -t AA0031 -c -- (option for ltfsck)
No option is required to use the ltfsck command for normal check and recovery operations. In the second example, the -- tag that is followed by the -f option initiates a full system recovery:
$ ltfsadmintool -t AA0031 -c
or
$ ltfsadmintool -t AA0031 -c -- -f
Example 2-36 Specifying the -l option
$ ltfsadmintool -t AA0031 -c -- -l
Generation: Date Time Zone SelfPtr->BackPtr
(Part, Pos)->(Part, Pos)
1: 2011-03-31 14:50:08.800718541 JST (0, 5) <<Initial Index>>
2: 2011-03-31 14:55:53.988915408 JST (0, 9)->(0, 5)
3: 2011-03-31 14:57:38.755561251 JST (0, 13)->(0, 9)
4: 2011-03-31 14:59:24.992244674 JST (1, 5)->(0, 17)
4: 2011-03-31 14:59:24.992244674 JST (0, 17)->(0, 13)
2: 2011-03-31 14:55:53.988915408 JST (0, 9)->(0, 5)
3: 2011-03-31 14:57:38.755561251 JST (0, 13)->(0, 9)
4: 2011-03-31 14:59:24.992244674 JST (1, 5)->(0, 17)
4: 2011-03-31 14:59:24.992244674 JST (0, 17)->(0, 13)
In Example 2-36, to roll back a medium to generation 3 (timestamp 2011-03-31 14:57:38.755561251), the following command must be issued:
$ ltfsadmintool -t AA0031 -c -- -g 3 -r
Multiple cartridges can be checked or recovered by specifying VOLSERs that follow the -t option. The following example shows three cartridges that are checked or recovered sequentially or simultaneously:
$ ltfsadmintool -t AA0031,AA0032,AA0033 -c
For Windows, use this command:
# python ltfsadmintool -t D00661L5,D00662L5 -c -- --list-rollback-points --full-index-info
|
LBP: To check a cartridge by using LBP, the -o scsi_lbprotect=on option must be specified with the ltfsadmintool command.
If a number of drives are available, LTFS randomly uses one drive to check or recover a medium. LTFS can use a single drive to sequentially check or recover multiple cartridges, or multiple drives to simultaneously check or recover multiple cartridges.
|
Available command options for the ltfsadmintool command
The following options are available for the ltfsadmintool command:
-a, --add Add the tapes or drives that are identified by --tape-id or --drive-id to the library. The --drive-id option works only on the TS3500 Tape Library. To add a tape drive to other libraries, follow the instructions in “TS2900 Tape Autoloader and TS3100, TS3200, and TS3310 tape libraries” on page 172.
-c, --volume-check [options...]
Check the volumes that are specified by the --tape-id option in the library. Optional ltfsck parameters can be passed along in [options]. When no option is specified, the hyphen (-) is not required.
-d, --drive=<id>[,id...]
A comma-separated list of drive serial numbers.
-f, --volume-format [options...]
Format the volumes that are specified by the --tape-id option in the library. Optional mkltfs parameters can be passed along in [options]. When no option is specified, the hyphen (-) is not required.
-F, --force-inventory
With the -i or -I option, force the library to get the latest inventory.
-h, --help List all available options.
-i, --tape-inventory
Get an inventory of the tapes in the library.
-I, --drive-inventory
Get an inventory of the drives in the library.
-m, --move-to=<target>
Move the tapes that are specified by the --tape-id option to the specified target. The following targets are available:
homeslot: Cartridge’s home slot in the library
ieslot: Any available import or export slot
|
Target: If this option is specified without the -a or -r option, only the homeslot target is available.
If ieslot is specified as the target without the -a or the -r option, this option is ignored.
|
-o scsi_lbprotect=on
Enable LBP for all tape drives in the tape library.
-o scsi_lbprotect=off
Disable LBP for all tape drives in the tape library (default).
-p, --password=<password>
Authentication password.
-P -get-data-placement
Get the data placement policy of the tape or tapes that are identified by --tape-id.
-q, --quiet Operate in quiet mode.
-r, --remove Remove the tapes or drives that are identified by --tape-id or –drive-id from the LTFS inventory. The –drive-id option works only on the TS3500 Tape Library.
To remove a tape drive from other libraries, unmount the library from LTFS. See “TS2900 Tape Autoloader and TS3100, TS3200, and TS3310 tape libraries” on page 172.
-s, --server <hostname:port>
Server to connect to (mandatory option).
-t, --tape-id= <id>[,id...]
A comma-separated list of bar codes. A special identifier @ieslot also can be used to indicate that all tapes in the import or export slot have been added by the operator.
-v, --version Show version.
|
Warning: The ltfsadmintool might not work properly while the tape library or tape drive firmware is updating.
|
Enabling logical block protection
Logical block protection (LBP) and how to enable the feature for use with the LTFS are described. LBP is a feature that validates data and identifies corrupted data. Beginning with version 2.1.2, you can enable LBP between LTFS and the supported tape drives. When LBP is enabled (at the library level), all data that is read or written between all the tape drives and LTFS is checked. An error displays if data corruption occurs.
To enable LBP, the -o scsi_lbprotect=on option must be specified with the ltfs or ltfs.exe command. The -o scsi_lbprotect=off option is used to disable LBP. Optional mkltfs parameters and optional ltfsck parameters can be specified.
You can also enable LBP when you format a medium and when you check operations with the ltfsadmintool command.
|
LBP: If LTFS started with LBP enabled by using the -o scsi_lbprotect=on option with the ltfs or ltfs.exe command, you must add the -o scsi_lbprotect=on option to format or check a medium. Unless the -o scsi_lbprotect=on option is specified for format or check operations, the operations are performed with LBP disabled.
The default setting for LBP is disabled. Because LBP can affect read and write performance, use the default setting. When LBP is needed, enable the feature for each specific action, such as to start LTFS, check a medium, or format a medium. Then, disable the feature again.
|
Enabling symbolic links
Symbolic links and how to enable the feature for use with LTFS are explained. Beginning with version 2.1.2, LTFS supports symbolic links. A symbolic link (symlink) is used to create a reference to, or an alias for, another file. In addition, LTFS supports a feature called live link. Live link enables LTFS to follow the mount point and cartridge of the original target.
By default, standard symbolic links are enabled when LTFS starts. The command-line option is the -o symlink_type=posix option and is specified with the ltfs or ltfs.exe command. To enable live links, the -o symlink_type=live option is specified.
Certain limitations exist when you use symbolic links on a Windows system. LTFS fails to mount if it detects both <symlink> and <extents> elements in the <file> element as “inconsistent medium.” LTFS also fails to mount if a cartridge with symbolic link information is written on an older LTFS version that does not support symbolic links. If this situation occurs, it is necessary to recover the cartridge with the ltfsck command.
Enabling data-safe mode
Data-safe mode and how to enable the feature for use with LTFS are described.
Beginning with version 2.1.2, LTFS supports data-safe mode. Data-safe mode is a feature that protects user data by preventing data overwrite situations. When this feature is enabled, the tape drive issues an error after it receives a command to overwrite any data on the currently mounted volume. Data-safe mode is a drive-specific behavior and can be enabled each time that a tape is mounted. It can be disabled only when a tape is not mounted.
To enable or disable data-safe mode, the scsi_append_only_mode option must be specified with the ltfs or ltfs.exe command. The scsi_append_only_mode=on option enables the feature. The scsi_append_only_mode=on option is the default setting. The scsi_append_only_mode=off option disables the feature.
2.4 Command reference
The LTFS LE program is operated by LTFS commands. Detailed information about the ltfs and ltfsadmintool commands is provided.
|
Important: For LTFS LE, the mkltfs and ltfsck functions are provided by the ltfsadmintool utility. The ltfsck utility in LTFS SDE checks and recovers media. The mkltfs utility in LTFS SDE formats media. The ltfsck parameters are passed to the -c option of the ltfsadmintool command. The mkltfs parameters are passed to the -f option of the ltfsadmintool command.
|
2.4.1 Mounting a medium by using the ltfs command
How to mount tape media by using the ltfs command is explained. The options that you can specify with the ltfs command are also described. Enter the ltfs command from the command line to mount the library for use with LTFS LE.
|
Unique mount points: Unique mount points must be created for each library device. For more information, see “Mounting a library on a Linux system” on page 158.
|
The following example shows a command-line entry for ltfs:
ltfs /mnt/ltfs -o changer_devname=/dev/IBMchangerx, where x is the changer identifier (for example, changer0 or changer1)
The ltfs command includes the following options:
-a Advanced help, which includes the standard FUSE options.
-o eject Eject the cartridge after unmount (default).
-h, --help Displays help information and exit.
-o changer_devname=<dev>
Changer device.
-o device_list Show available tape devices.
-o sync_type=<type> Specify sync type (default: time@5); specify <type>:
time@min LTFS attempts to write down each min minutes; min is a decimal number 1 - 153722867280912930 (default: min=5).
close LTFS attempts to write an index when a file is closed.
unmount LTFS attempts to write an index when a file is unmounted.
-o trace Enable diagnostic output (same as verbose=3).
-o work_directory=<dir>
LTFS work directory (default: /tmp/ltfs). The work directory requires the user to have write access permission. For more information, see “Mounting a library on a Linux system” on page 158.
-V, --version Output version information and exit.
FUSE options
You can use the following FUSE options:
-o gid=N Set file group.
-o release_device Clear device reservation (specify with -o devname or -o changer_devname).
-o uid=N Set file owner.
--o umask=M Set file permissions (octal).
LTFS library options
You can use the following LTFS library options:
-o library_cache Set to use and create caches from the MAM, index, and labels (default).
-o run_inventory Run a full inventory to create the LTFS namespace. A length of time is required to complete this command.
-o volser_only_folder
Set to exclude volume name from the top-level folder name.
-o novolser_only_folder
Set to include volume name in the top-level folder name (default).
-o nolibrary_cache Set to disable the use and creation of the MAM, index, and labels’ caches.
-o six_char_folder Display the first six characters of the directory name.
-o strict_drive Mount only the corresponding generation of medium with the tape drive. For example, an LTO-6 drive mounts an LTO-6 medium only.
-o nostrict_drive Mount any supported generation of medium for the drive (default). For example, an LTO-6 drive mounts either an LTO-5 or LTO-6 medium.
LTFS administration interface option
You can use the following LTFS administration interface option:
-o admin_port=<num> TCP/IP port in which to listen for connections (default: 2112)
Mounting LTFS by a user other than root
To mount LTFS by a normal user, check for the following requirements:
•The user has write permission for the work directory (default: /tmp/ltfs).
•The user has write permission for the mount point.
•The file mode /usr/bin/fusermount is set to chmod 4755.
Mounting LTFS to have another user access the file system
Use the ltfs command to mount the tape library to the file system to allow a user other than the normal user access to it. For more information, see “Mounting a library on a Linux system” on page 158.
2.4.2 Formatting a medium by using the ltfsadmintool command
How to format a medium in the LTFS LE library is described.
|
Important: For LTFS LE, the mkltfs and ltfsck functions are provided by the ltfsadmintool utility. The ltfsck utility in LTFS SDE checks and recovers media. The mkltfs utility in LTFS SDE formats media. The ltfsck parameters are passed to the -c option of the ltfsadmintool command. The mkltfs parameters are passed to the -f option of the ltfsadmintool command.
|
Specifying the -f option with the ltfsadmintool command formats a cartridge for your use. The tape volume serial number (VOLSER) is set as a parameter of the -t option as shown in the following set of examples. Optional mkltfs parameters can be passed along by using the -f option. In the second example, the -- tag after the -f option initiates setting an mkltfs parameter:
ltfsadmintool -t 1FA563L5 -f
The -n ABC mkltfs parameter can be passed to the -f option:
ltfsadmintool -t 1FA563L5 -f -- -n ABC
When the ltfsadmintool command is issued to format the medium, the medium folder for the cartridge is removed from the LTFS. When the format operation is complete, the cartridge is attached to the file system and a subdirectory displays with the VOLSER as the directory name. The name that is read from the bar code that is attached to the back of the tape cartridge is used to set the VOLSER name in the VOL1 label.
Multiple cartridges can be formatted by specifying VOLSERs after the -t option. The following example shows three cartridges that are formatted sequentially or simultaneously:
ltfsadmintool -t 1FA554L5,1FA563L5,1FA851L5 -f
|
Multiple cartridges: If a number of drives are available, LTFS randomly uses one drive to format a medium. LTFS can use a single drive to sequentially format multiple cartridges or multiple drives to simultaneously format multiple cartridges.
|
Optional mkltfs parameters
Optional mkltfs parameters can be passed to the drive in the library by using the ltfsadmintool command with the -f option. The optional mkltfs parameters can be specified in the following manner:
ltfsadmintool -t (VOLSER) -f -- [optional mkltfs parameters]
The LTFS ltfsadmintool command formats tape media for use with LTFS. When the ltfsadmintool command with the -f option is run on a scratch medium, it performs the following actions:
•Destroys all data on the media
•Creates two partitions on the media
•Creates a UUID for the media
•Writes empty index data in the LTFS format
The following mkltfs parameters are also available for the ltfsadmintool command with the -f option:
-d, --device=<name> Tape device (required)
-f, --force Force to format medium
-s, --tape-serial=<id>
Tape serial number (six alphanumeric ASCII characters)
Tape serial number (six alphanumeric ASCII characters)
-n, --volume-name=<name>
Tape volume name (empty by default)
Tape volume name (empty by default)
-r, --rules=<rules> Rules for choosing files to write to the index partition. The syntax of the rule argument follows:
size=1M
size=1M/name=pattern
size=1M/name=pattern1:pattern2:pattern3
A file is written to the index partition if it is no larger than the specified size and matches at least one of the name patterns (if specified). The size argument accepts K, M, and G suffixes. Name patterns might contain the special characters '?' (match any single character) and '*' (match zero or more characters).
--no-override Disallow mount-time data placement policy changes
-w, --wipe Restore the LTFS medium to an unpartitioned medium (format to an existing scratch medium)
-q, --quiet Suppress progress information and general messages
-t, --trace Enable function call tracing
-h, --help Help
-p, --advanced-help Full help, including advanced options
The following examples show the usage:
mkltfs --device=/dev/IBMtape0 --rules="size=100K"
mkltfs --device=/dev/IBMtape0 --rules="size=1M/name=*.jpg"
mkltfs --device=/dev/IBMtape0 --rules="size=1M/name=*.jpg:*.png"
mkltfs --device=/dev/IBMtape0 --rules="size=1M/name=*.jpg"
mkltfs --device=/dev/IBMtape0 --rules="size=1M/name=*.jpg:*.png"
2.4.3 Checking or recovering a medium by using the ltfsadmintool command
You can check and recover or roll back a medium in the LTFS LE library. Specifying the -c option with the ltfsadmintool command checks a volume and recovers it from an inconsistent state. Additional ltfsck parameters can be passed to the -c option. In the following set of examples, the -- tag after the -c option initiates setting a ltfsck parameter.
This example shows the -c option without ltfsck parameters:
ltfsadmintool -t 1FA554L5,1FA563L5,1FA851L5 -c
The following example includes ltfsck parameters:
ltfsadmintool -t 1FA563L5 -c -- (ltfsck parameters)
Only the -c option is required for normal check and recovery operations, as shown in this example:
ltfsadmintool -t 1FA563L5 -c
In the following example, the -- tag followed by the -f option initiates a full system recovery:
ltfsadmintool -t 1FA563L5 -c -- -f
Example 2-37 List of rollback points
[root@double ~]# ltfsadmintool -t 1FA563L5 -c -- -l
Generation: Date Time Zone SelfPtr->BackPtr (Part, Pos)
(UTC Date UTC Time UTC)
Commit Message
-------------------------------------------------------------------------------
9: 2011-09-28 15:22:06.000096946 MST (0, 5)->(1, 43)
(2011-09-28 22:22:06.000096946 UTC)
No commit message
9: 2011-09-28 15:22:06.000096946 MST (1, 43)->(1, 39)
(2011-09-28 22:22:06.000096946 UTC)
No commit message
8: 2011-09-28 13:53:45.232972947 MST (1, 39)->(1, 36)
(2011-09-28 20:53:45.232972947 UTC)
No commit message
7: 2011-09-06 13:29:05.000140454 MST (1, 36)->(1, 32)
(2011-09-06 20:29:05.000140454 UTC)
No commit message
6: 2011-09-06 13:23:57.000132221 MST (1, 32)->(1, 25)
(2011-09-06 20:23:57.000132221 UTC)
No commit message
5: 2011-09-06 13:18:51.000133129 MST (1, 25)->(1, 18)
(2011-09-06 20:18:51.000133129 UTC)
No commit message
4: 2011-09-06 13:13:39.000158577 MST (1, 18)->(1, 15)
(2011-09-06 20:13:39.000158577 UTC)
No commit message
3: 2011-08-30 19:30:00.000138128 MST (1, 15)->(1, 8)
(2011-08-31 02:30:00.000138128 UTC)
No commit message
2: 2011-08-29 10:01:13.534597445 MST (1, 8)->(1, 5)
(2011-08-29 17:01:13.534597445 UTC)
No commit message
1: 2011-04-05 11:15:43.409951727 MST (1, 5) <<Initial Index>>
(2011-04-05 18:15:43.409951727 UTC)
No commit message
[root@double ~]#
To roll back a medium to generation 3 (time stamp 2011-08-30 19:30:00.000138128) in Example 2-37, you must issue the following command:
ltfsadmintool -t 1FA563L5 -c -- -g 3 -r
Multiple cartridges can be checked or recovered by specifying VOLSERs after the -t option. The following example shows three cartridges that are checked or recovered sequentially or simultaneously:
ltfsadmintool -t 1FA554L5,1FA563L5,1FA851L5 -c
|
Multiple cartridges: If a number of drives are available, LTFS randomly uses one drive to check or recover a medium. LTFS can use a single drive to sequentially check or recover multiple cartridges, or multiple drives to simultaneously check or recover multiple cartridges.
|
Optional ltfsck parameters
The LTFS ltfsadmintool command with the -c option verifies tape media consistency and, if necessary, recovers the media from an inconsistent state. When a tape is mounted, the tape is checked for consistency problems.
|
LTFS LE: For LTFS LE, the mkltfs and ltfsck functions are provided by the ltfsadmintool utility. The ltfsck utility in LTFS SDE checks and recovers media. The mkltfs utility in LTFS SDE formats media. The ltfsck parameters are passed to the -c option of the ltfsadmintool command. The mkltfs parameters are passed to the -f option of the ltfsadmintool command.
|
If a consistency problem is discovered and can be recovered without the loss of data, the recovery is performed automatically. If the recovery cannot be made without the loss of data, an automatic recovery is not performed. In these cases, the ltfsadmintool command with the -c option or the ltfsadmintool command with the -c option and the -f (ltfsck parameter) option locates the latest index and recovers a medium in an inconsistent state.
After the medium is recovered to a consistent state, you can use the -l ltfsck parameter to view a list of available rollback points. The ltfsadmintool command can then be initiated to recover the media to its last valid state. If the ltfsadmintool command with the -c option detects extra data after the final index in a partition, it deletes the data automatically. When the full recover option is specified, the ltfsadmintool command saves the data that might be lost and corrects block information in the _LTFS _lostandfound directory.
When the ltfsadmintool command with the -c option is run, it automatically removes invalid data from the end of the tape and recovers the tape to the last valid state. You can initiate more ltfsadmintool command options to save the invalid data or to list or recover consistency at a specific rollback point or date. Enter the ltfsadmintool command with the -c option from the command line to verify the consistency of the LTFS formatted media.
Optional ltfsck parameters can be passed to the drive in the library by using the ltfsadmintool command with the -c option. Optional ltfsck parameters can be specified in the following manner:
ltfsadmintool -t (VOLSER) -c -- [optional ltfsck parameters]
|
The ltfsadmintool command: The (address:port) part of the command points to the library server. If this command is initiated on the library server with the default setting, localhost:2112 must be specified. The (VOLSER) part of the command specifies the medium to format.
|
The following ltfsck parameters are available:
-a or --trace Enables function call tracing.
-f or --full-recovery
Recovers extra data blocks for which metadata is excluded from the index file. The recovered data is stored in the _ltfs _lostandfound directory. This directory is in the root directory on the tape media. When the tape media is mounted, it can be seen at the mount point.
-h or --help Displays program help information.
-g<generation> or --generation=<generation>
Specifies the index of the generation to roll back. Obtains the list of acceptable indexes by entering the -l parameter.
-j or --erase-history
Erases history at rollback. When this parameter is specified, the ltfsadmintool command with the -c option erases all index files and appended data up to the designated “rollback to” generation. Data newer than this generation cannot be recovered.
When this parameter is not specified, any existing generations can be recovered, even after a rollback operation.
-k or --keep-history
Keeps history at rollback (default).
Keeps history at rollback (default).
-l or --list-rollback-points
Lists the rollback-points (generations). When this parameter is selected, you see a result similar to the output that is shown in Example 2-38.
Lists the rollback-points (generations). When this parameter is selected, you see a result similar to the output that is shown in Example 2-38.
Example 2-38 Output of the -I or --list-rollback-points
[root@double ~]# ltfsadmintool -t 1FA563L5 -c -- -l
LTFS16000I Starting ltfsck, LTFS version 2.1.1 (201109201), log level 2
LTFS16088I Launched by "/opt/IBM/ltfs/bin/ltfsck -l /dev/IBMtape2"
LTFS16089I This binary is built for Linux (i386)
LTFS16090I GCC version is 4.4.5 20110214 (Red Hat 4.4.5-6)
LTFS17087I Kernel version: Linux version 2.6.32-71.el6.i686 ([email protected]) (gcc version 4.4.4 20100726 (Red Hat 4.4.4-13) (GCC) ) #1 SMP Wed Sep 1 01:26:34 EDT 2010 i386
LTFS17089I Distribution: Red Hat Enterprise Linux Server release 6.0 (Santiago)
LTFS17089I Distribution: Red Hat Enterprise Linux Server release 6.0 (Santiago)
LTFS16084I List indexes in backward direction strategy
LTFS17085I Plugin: Loading "ibmtape" driver
LTFS12165I lin_tape version is 1.60.0
LTFS12158I Opening a device through ibmtape driver (/dev/IBMtape2)
LTFS12118I Drive identification is 'ULTRIUM-TD5 '
LTFS12162I Vendor ID is IBM
LTFS12159I Firmware revision is B6W0
LTFS12160I Drive serial is 1013000451
LTFS17160I Maximum device block size is 1048576
LTFS16018I Listing LTFS file system rollback points on '/dev/IBMtape2'
LTFS16023I LTFS volume information:
LTFS16024I Volser (bar code) : 1FA563
LTFS16025I Volume UUID : e9510204-9c4a-4f2c-907f-fb3ba7655b65
LTFS16026I Format time : 2011-04-05 11:15:09.743517804 MST
LTFS16027I Block size : 524288
LTFS16028I Compression : Enabled
LTFS16029I Index partition : ID = a, SCSI Partition = 0
LTFS16030I Data partition : ID = b, SCSI Partition = 1
LTFS11005I Mounting the volume
Generation: Date Time Zone SelfPtr->BackPtr (Part, Pos)
(UTC Date UTC Time UTC)
Commit Message
-------------------------------------------------------------------------------
9: 2011-09-28 15:22:06.000096946 MST (0, 5)->(1, 43)
(2011-09-28 22:22:06.000096946 UTC)
No commit message
9: 2011-09-28 15:22:06.000096946 MST (1, 43)->(1, 39)
(2011-09-28 22:22:06.000096946 UTC)
No commit message
8: 2011-09-28 13:53:45.232972947 MST (1, 39)->(1, 36)
(2011-09-28 20:53:45.232972947 UTC)
No commit message
7: 2011-09-06 13:29:05.000140454 MST (1, 36)->(1, 32)
(2011-09-06 20:29:05.000140454 UTC)
No commit message
6: 2011-09-06 13:23:57.000132221 MST (1, 32)->(1, 25)
(2011-09-06 20:23:57.000132221 UTC)
No commit message
5: 2011-09-06 13:18:51.000133129 MST (1, 25)->(1, 18)
(2011-09-06 20:18:51.000133129 UTC)
No commit message
4: 2011-09-06 13:13:39.000158577 MST (1, 18)->(1, 15)
(2011-09-06 20:13:39.000158577 UTC)
No commit message
3: 2011-08-30 19:30:00.000138128 MST (1, 15)->(1, 8)
(2011-08-31 02:30:00.000138128 UTC)
No commit message
2: 2011-08-29 10:01:13.534597445 MST (1, 8)->(1, 5)
(2011-08-29 17:01:13.534597445 UTC)
No commit message
1: 2011-04-05 11:15:43.409951727 MST (1, 5) <<Initial Index>>
(2011-04-05 18:15:43.409951727 UTC)
No commit message
Consistency of tape 1FA563L5 successfully checked.
[root@double ~]#
To roll back generation 3 (time stamp 2011-08-30 19:30:00.000138128) in Example 2-38 on page 195, issue the following command:
ltfsadmintool -t 1FA563L5 -c -- -g 3 -r
|
Time to roll back option: The -t option, which specifies the time to roll back, is supported only for the LTFS SDE.
|
-m, --full-index-info
Displays full index information (effective only for the -l option).
-n or --no-rollback Does not roll back. Only verifies the point that is specified by the -g option. This setting is the default setting.
-q or --quiet Suppresses progress information and general messages.
-r or --rollback Rolls back to the point that is specified by the -g option.
-v, --traverse= <strategy>
Sets traverse mode for listing rollback points. Strategy must be forward or backward (default: backward).
-z or --deep-recovery
Recovers the cartridge missing the end-of-data mark. Specify this option when the medium cannot be recovered in any other way. Data on the medium that is written before the final unmount point still can be recovered. Blocks that are written to the medium when the drive power is lost, however, might not be recoverable.
The -z option retrieves index information from cartridge memory to recover as much data as possible. If data in the cartridge memory is broken due to media wear, however, the medium cannot be recovered. In this case, mount the medium with the ltfs command -o force_mount_no_eod. This command opens the volume as write-protected. Then, copy all data to another medium as soon as possible.
-p, --advanced-help
Full help, including advanced options.
Full help, including advanced options.
-i, --config=<file>
Use the specified configuration file (default: /etc/ltfs.conf).
Use the specified configuration file (default: /etc/ltfs.conf).
-e, --backend=<name>
Override the default tape device back end.
Override the default tape device back end.
--kmi-backend=<name>
Override the default key manager interface back end.
Override the default key manager interface back end.
-x, --fulltrace Enable full function call tracing (slow).
--capture-index Capture index information to the current directory (-g is effective for this option).
2.5 Hints and tips
Follow these useful hints and tips.
2.5.1 Sharing a mounted tape library among multiple users
The requirements are described for sharing a mounted tape library among multiple users of LTFS on a Linux system.
|
Linux only: This information does not apply to Windows users.
|
For a Linux user other than the user who mounted the tape library to access the mounted file system, add the following line to the /etc/fuse.conf file before you issue the ltfs command:
user_allow_other
To mount the library as a user other than a superuser, in addition to the previous setting, add the -o allow_other option to the ltfs command as shown:
$ ltfs -o changer_devname=/dev/IBMchanger0 -o allow_other /mnt/ltfs
To mount the library as a superuser, the -o allow_other option is not required, as shown in the following example:
# ltfs /mnt/ltfs -o changer_devname=/dev/IBMchanger0
|
On-disk metadata storage feature: The on-disk metadata storage feature is disabled by default. When this feature is enabled, the ability to mount tape libraries is restricted to the root user. To understand the on-disk metadata storage mechanism and to learn how to share a library that is mounted by the root user among multiple users, see Metadata storage at this website:
|
2.5.2 Performance considerations
Performance considerations when you use the LTFS are described. The LTFS tape drive is a sequential access device, and not a random access device. The LTFS tape drive can take some time to physically locate the position of data on a tape. Optimal performance is achieved after LTFS locates the position of the data to read or write.
Also, because the LTFS tape drive is a sequential access device, when a file on the medium is modified, the modified blocks of a file are appended to the bottom of the tape. To read the modified file, LTFS must read from different parts of the tape, which can slow down the access to the data.
To optimize performance, the following practices are suggested when you use LTFS:
•Certain application programs, such as editors, repeatedly overwrite a file. This process divides a file into a number of small blocks. When a file on the medium is opened by using an application program that modifies a file, copy the file to the hard disk. Modify the file on the hard disk before you copy it back to the LTFS volume.
•Set a data placement policy when you use files with a specific suffix.
•It can take some time to copy files to a different folder on the same medium because LTFS locates the source file and destination position for every block. To improve performance, copy the file to the hard disk and then back to the medium.
•If a file under the mount point subdirectory is moved to another subdirectory of the mount point, LTFS is using two tape drives. Until the move operation is complete, both drives are locked, and LTFS cannot perform another operation. This locked state causes library performance to drop. If the tape library has only two drives, LTFS does not work until the operation is completed. To avoid this situation, move the file to the hard disk, and then to the destination directory on another volume. If a tape library has only one drive, LTFS rejects the request to move the file to another subdirectory. Although a copy operation is still possible in this scenario, it is slow.
•If two files are simultaneously written to the mount point subdirectory, a block of each file is sequentially written to the medium. For example, if file A and file B are written, block 1 of file A (A1) is written, block 1 of file B (B1) is written, then A2, B2, A3, B3, and so on are written. When file A is read, LTFS goes to the A1 position and reads a block, then to the A2 position and reads a block, and so on. This sequential reading protocol can take some time to complete. Read performance can be improved by writing data separately. If, for example, higher performance is required for the read operation, (if possible) write file A first, then file B.
•If you attempt to simultaneously write or read data to or from more cartridges (or subdirectories under the root mount point) than the number of tape drives currently in the library, performance drops. This situation might occur, for example, if a user with two drives attempts to write a file on another subdirectory that is not on these two media to a third drive. LTFS uses a sequential protocol to write a block on a medium, then to unload the medium, to load another medium, then to copy a block to that medium, and so on. To improve performance in this example, the user must initiate the write operation after the copy operation is completed.
•If some components of the file system monitoring tool program are enabled, the program might periodically issue commands. This condition creates a short pause during the performance of the operation. To avoid this interruption, the user can disable these types of programs.
•The index cache mechanism can be disabled to ensure the index validity by specifying an option for modifying outside the file system. To optimize performance, however, the index cache must be enabled.
2.5.3 Accessing volumes from Windows by using CIFS
You can change the session timeout value to access volumes from Windows when you use the common Internet file system (CIFS).
A session timeout can occur when an LTFS volume is accessed from a client though network sharing. If this session timeout occurs, users might see a network error. If this kind of network error occurs frequently, change the session timeout value. The default timeout value is 45 seconds.
|
Attention: These instructions relate to editing the registry. If you make any error while you edit the registry, you can potentially cause Windows to fail or be unable to boot. Then, you are required to reinstall Windows. Edit the registry at your own risk. Always back up the registry according to the Microsoft website instructions before you change anything.
|
Procedure
Follow this procedure:
1. From the Start menu, select Run.
2. Type regedit in the Open field and click OK.
3. Expand and locate the registry subtree:
HKEY_LOCAL_MACHINE SYSTEM CurrentControlSet Services LanmanWorkstation Parameters
4. Add a REG_DWORD key with the name of SessTimeout.
5. Set the timeout value. Initially set the timeout value at 600 and then change the value according to the situation of your machine.
6. Reboot the client.
2.5.4 Data placement policy
How the LTFS uses the data placement policy is described. LTFS uses two partitions on the medium: the index partition and data partition. While the medium is unmounting, an index file is written to both partitions. The index file on the index partition is overwritten by the new index file. The index file on the data partition, however, is appended to the end of the data. Files on the index partition, including the index file, are readable the next time that the medium is mounted. If the file size and name match the data placement policy that is specified by the rules option for formatting the medium, some data files also can be written on the index partition for faster access.
The rules option for the formatting operation sets the following policies:
•File size: smaller than xxx bytes
•File name: *.jpg, *.txt, and so on
Sequence of data placement policy
The data placement policy writes in the following sequence:
1. When a file to write matches the rules as shown in the following example:
If the policy is set to a file size less than or equal to 1 MB and a file name of *.txt and *.jpg, the following files match the rules:
– File abc.txt with size 512 kB
– File xyz.jpg with size 1 MB
These files do not match the rules:
– File abc.csv with size 512 kB
– File xyz.jpg with size 1.2 MB
– File stu.png with size 2 MB
2. LTFS writes the file to the data partition and stores it in the memory buffer.
3. When the memory buffer is full or the medium is requested to unmount, LTFS performs the following actions:
a. Writes an index file at the end of the data partition
b. Writes the files in the memory buffer to the index partition
c. Builds an index file and writes it at the end of the index partition
At the next mount, the position of the tape head is near the files in the index partition so that they are quickly readable if those files are accessed immediately. After the files in the data partition are accessed, the access performance is equal to the performance of the other files in the data partition. If specific file suffixes are frequently accessed after the cartridge is mounted, set the data placement policy to include them to improve file access performance.
|
Index partition size: The size of index partition is much smaller than the data partition. If a large file size is specified for the data placement policy, the index partition might overflow.
|
2.5.5 Extended attributes
How the LTFS uses extended attributes is described.
LTFS supports valid characters in W3C Extensible Markup Language (XML) 1.0 standard, except for the forward slash (/) and colon (:), for extended attribute names. A file can have multiple extended attributes. The maximum size of an extended attribute is 4 KB. When the value of an extended attribute includes binary data, LTFS encodes the data in base64.
On Linux and Windows, all extended attribute names that start with the prefix "ltfs" with any capitalization are reserved for virtual extended attributes. See “Virtual extended attributes” on page 201.
Linux
Linux supports restrictive naming for extended attributes. Each extended attribute begins with one of the following names and ends with a period (.):
•system.
•security.
•trusted.
•user.
|
User.* extended attributes: For security purposes, only user.* extended attributes can be modified.
|
Windows
Windows supports restrictive naming for extended attributes. Windows allows only 8-bit ASCII characters that do not contain any of the following characters:
•ASCII values 0x0000 – 0x001F
• / : * ? " < > | , + = [ ] ;
|
Special characters: If any of these characters are used on Linux, and the medium is moved from that system to Windows, the attributes do not display.
|
Virtual extended attributes
LTFS defines a number of extended attributes that provide functionality other than a file system application programming interface (API). Virtual extended attributes provide more information about the internal operating status, file system, and directory of a tape medium. An application or operating system also can use the enhanced functionality by writing virtual extended attributes.
LTFS does not include virtual extended attributes in the list of responses for listxattr system calls. Therefore, virtual extended attributes are hidden from a query request. A user must first specify an attribute name to be able to access it. Some standard commands do not work for virtual extended attributes. On Linux, for example, the getfattr command works only for extended attributes. The following example shows how a user can access virtual extended attributes:
# attr -g ltfs.indexCreator /mnt/ltfsmz4/248AABL5-MOVIES_LTFS
Attribute "ltfs.indexCreator" had a 54 byte value for /mnt/ltfsmz4/248AABL5-MOVIES_LTFS:
IBM LTFS 2.1.0 (201105090) - Linux - ltfs.tape.library
Virtual extended attributes can be divided into four metadata categories. For details, see 2.1.9, “Reserved extended attribute definitions” on page 122.
2.5.6 Samba Network File Sharing
Follow the procedure to add a user to a Samba server:
1. Add the Linux/UNIX user by using the useradd or adduser command:
Use one of these examples:
# useradd <username>
# passwd <username>
or
# adduser <username>
|
The adduser command: The adduser command adds a user to the system according to the command-line options and the configuration information in the /etc/adduser.conf file. They are friendlier front ends to the low-level tools, such as useradd.
|
2. Add a user to Samba.
User <username> has an account on the Linux/UNIX system now. Use the smbpasswd command to specify that the username that follows the command needs to be added to the local smbpasswd file:
# smbpasswd -a <username>
3. Add a user to a Samba share.
By default, a user gets access to /home/<username> from the Windows system. To grant access for the user <username> to the /mnt/ltfs (ensure that the directory /mnt/ltfs exists) directory, open the /etc/samba/smb.conf file and add/modify the share that is called [accounts] (or add any other user-defined share):
[accounts]
comment = Accounts data directory
path = /mnt/ltfs
valid users = <username>
public = no
writable = yes
Or, add a user-defined share (username=mschaefr and directory to share /mnt/ltfs/redbooks)
[LTFS]
comment = Public Stuff
path = /mnt/ltfs/redbooks
public = yes
writable = yes
printable = no
write list = +staff
valid users = mschaefr
Save the file.
4. Restart Samba.
# service smb restart
or
# /etc/init.d/smb reload
Follow these steps to connect to the Samba share through Windows:

Figure 2-42 Map network drive

Figure 2-43 Map network drive

Figure 2-44 Login window

Figure 2-45 Samba Windows Explorer
..................Content has been hidden....................
You can't read the all page of ebook, please click here login for view all page.