
Chapter 15. Using Phoenix
While it’s great to use Elixir from the command line, sometimes you’ll want to expose your work to the Web as well. The Phoenix framework offers an Elixir-based toolkit, somewhat like Ruby on Rails, for building web applications. Phoenix is designed for robustness and scalability, building on macros, OTP, and Erlang’s Cowboy server. It wraps those powerful features, though, so you can get started building simple things without mastering those details.
Skeleton installation
Once you have Elixir itself installed, installing just Phoenix isn’t difficult. Installing everything that Phoenix might want, including PostgreSQL and Node.js is more than this introduction can cover, but you can do (at least sort of) useful things with only Phoenix.
To get started, install Phoenix from mix:
mix archive.install
https://github.com/phoenixframework/archives/raw/master/
phoenix_new.ez
Are you sure you want to install archive "https://github.com/phoenixframework/archives/raw/master/phoenix_new.ez"? [Yn] y
* creating .mix/archives/phoenix_new
Once you’ve installed Phoenix, you can have it build a minimalist application. The --no-brunch directive turns off Phoenix’s support for managing assets, which requires you to install Node. --no-ecto turns off the object relational mapping (ORM) that expects you to have installed PostgreSQL.
$ mix phoenix.new fall --no-brunch --no-ecto
* creating web/config/config.exs
* creating web/config/dev.exs
...
* creating web/web/views/layout_view.ex
* creating web/web/views/page_view.ex

Fetch and install dependencies? [Yn] y
* running mix deps.get

We are all set! Run your Phoenix application:
$ cd fall
$ mix phoenix.server

You can also run your app inside IEx as:

$ iex -S mix phoenix.server
The directory Phoenix created contains a lot of parts, as shown in Figure 15-1.
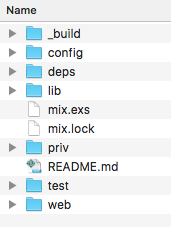
Figure 15-1. Files created by Phoenix.
For the rest of this chapter, you’ll be working in the web directory.
Take Phoenix’s advice: change to the fall directory, and then start Phoenix:
$ cd fall
$ iex -S mix phoenix.server
Note
Phoenix may ask to install a local copy of more software the first time you run it. My installation required Rebar, which it installed without a hitch.
The first time you run Phoenix, it will take a while to build before starting. After a lot of notices about files Phoenix is compiling, you’ll see:
Generated web app
[info] Running Web.Endpoint with Cowboy using http://localhost:4000
A basic site will now be running on port 4000 of your machine. When you visit http://localhost:4000, you’ll see the barely customized welcome page shown in Figure 15-2.
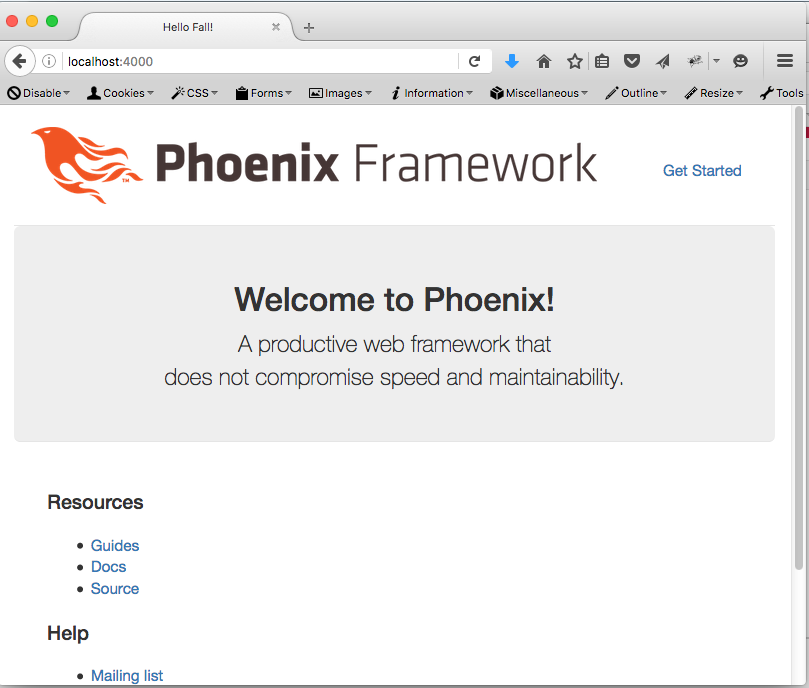
Figure 15-2. Phoenix’s welcome page.
You can tell it came from your app, because the title tab says “Hello Fall!” At the command line where you started Phoenix, you should see something like:
[info] GET /
[debug] Processing by Web.PageController.index/2
  Parameters: %{}
  Pipelines: [:browser]
[info] Sent 200 in 2ms
Structuring a Basic Phoenix Application
A minimal Phoenix application that does just one thing (beyond the welcome page!) requires you to work in four different places:
- Router
-
The router logic gives Phoenix basic direction on what to do when it receives a request for a given URL.
- Controller
-
The controller is the switchboard for information coming in and going out, the piece that will connect requests for calculations to the calculations.
- View
-
The view takes results from the controller and makes everything ready for final formatting in the template.
- Template
-
The template combines HTML formatting with variables that come to it from the controller using logic from the view.
For this basic application, we’re going to skip the M in MVC, the model that manages interactions with data. Phoenix typically uses Ecto to manage data, and Ecto expects PostgreSQL, which requires a potentially more complex installation than the basics of Phoenix.
Note
If you liked Mnesia, it is possible to use it with Phoenix, though it is far enough off the beaten path that you should probably get familiar with Phoenix first. For more, see https://www.amberbit.com/elixir-cocktails/elixir/using-mnesia-database-from-elisir/.
Presenting a Page
Getting a simple HTML page posted - that isn’t the installation default page - requires setting up all four of those components. While posting HTML may seem even duller than calculating the velocity of falling objects, establishing that foundation will give you a solid place on which to build more. Even stranger, chasing the errors you get from a not quite complete installation will teach you lessons you’ll need for future construction. When something goes wrong, it will be easier to see at which layer something isn’t right.
First, start Phoenix and then try visiting http://localhost:4000/welcome. You’ll see something like Figure 15-3.
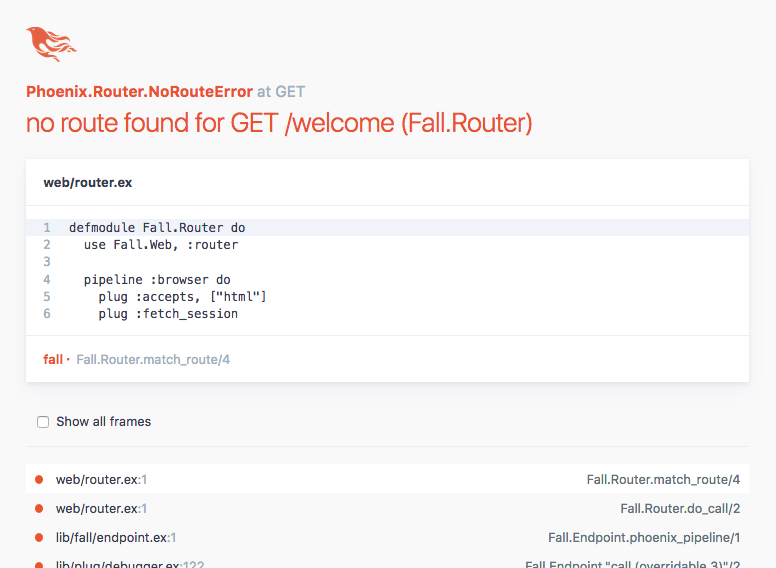
Figure 15-3. Phoenix needs a route.
Routing
Phoenix needs explicit instructions about where to send requests for particular URLs. It understood how to show the welcome page because the web/router.ex file that comes in a new Phoenix app provided that information:
defmodule Fall.Router do
  use Fall.Web, :router

  pipeline :browser do
    plug :accepts, ["html"]
    plug :fetch_session
    plug :fetch_flash
    plug :protect_from_forgery
    plug :put_secure_browser_headers
  end

  pipeline :api do
    plug :accepts, ["json"]
  end

  scope "/", Fall do
    pipe_through :browser # Use the default browser stack
    get "/", PageController, :index
  end

  # Other scopes may use custom stacks.
  # scope "/api", Fall do
  #   pipe_through :api
  # end
end
There’s a lot going in in that file. First, it makes clear that the application is called Fall. You’ll see Fall.Web a lot here, and one of the common perils of cutting and pasting code from another app is to forget to change all of those references. (Fall.Web gets defined in the web/web.ex file, but for now and probably for the most part you should leave that alone.)
The router also defines two pipelines. The first is meant for content to be displayed i a browser, typically HTML, and the second is for JSON-based API content. For now that’s all you need to know about those, but you can see the work Phoenix does for you, especially in the browser pipeline.
The place where you’ll tell Phoenix to support a new URL for an HTML interface is in the scope function. Phoenix knows to show the Phoenix default page because of get "/", PageController, :index, which kicks off a series of events that will show it. get tells Phoenix it will be handling an HTTP GET request. To create your own URL, you’ll add a line right above that line:
get "/welcome", FallController, :welcome
When the router gets a request for /welcome, it will pass the information from that call to the welcome function on the FallController. This means that you can advance to the next error, shown in Figure 15-4.
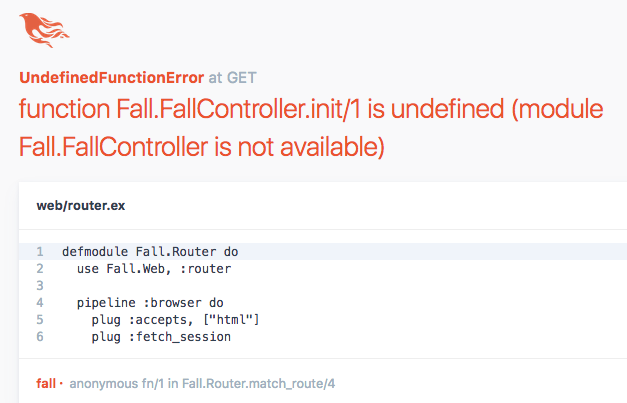
Figure 15-4. Phoenix wants a controller.
A Simple Controller
Phoenix expects to find controllers in the web/controllers directory. In the beginning, there’s only one file there, page_controller.ex, part of the welcome page. Its form provides a sense of what controllers should look like:
defmodule Fall.PageController do
  use Fall.Web, :controller

  def index(conn, _params) do
    render conn, "index.html"
  end
end
The controller file as a whole is a module, relying on the Web code for the whole application. The router does too, but the router referenced :router while the controller (unsurprisingly) references :controller.
Each function in the module should take a connection (conn) and parameters, and (perhaps after some processing) call render with that connection and the name of a file to send back.
To create the FallController specified in the earlier change to the routing file, make a fall_controll.ex file in web/controllers, and give it a welcome function:
defmodule Fall.FallController do
  use Fall.Web, :controller

def welcome(conn, params) do

 render conn, "welcome.html"

end

end
Then reload http://localhost:4000/welcome, and the next error will ask for a view, as shown in Figure 15-5.
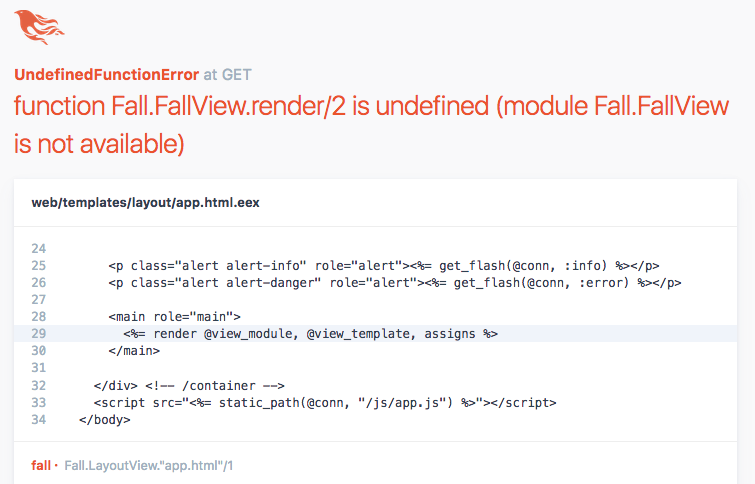
Figure 15-5. When a controller points to a nonexistent view.
A Simple View
Creating the view requires building two parts. The first, the view code in web/views/fall.ex, starts out as an extremely simple pass-through.
defmodule Fall.FallView do
  use Fall.Web, :view
end
You’re almost there, but the error message isn’t much more encouraging, as Figure 15-6 shows.
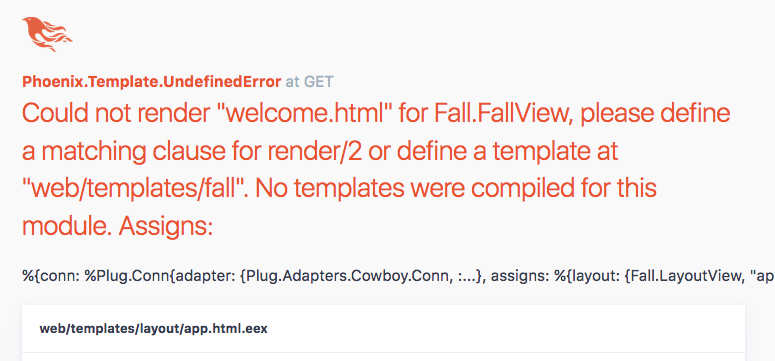
Figure 15-6. When a controller points to a nonexistent view.
The final piece you need is a template. The controller code said to render welcome.html, so you need to create a template for that in /web/templates/fall/welcome.html.eex. EEx, Embedded Elixir, is a part of Elixir that lets you create string templates that Elixir can process efficiently. In this case, Phoenix uses EEx to generate HTML, which will then go to the browser for display. Your templates don’t need to create a whole page: Phoenix already has templates that wrap your content, making it easy to keep applications looking consistent. That means your opening template can be as simple as:
<h1>Falling starts now!</h1>
Which - you might not even have to reload, as Phoenix in development mode retries failed code periodically - produces the welcome in Figure 15-7.

Figure 15-7. A complete set of parts finally produces a result.
You may not want the Phoenix Framework logo stamped on all of your work. To remove it, explore web/templates/layout/app.html.eex, and remove the header element.
Note
You can have Phoenix generate basic controller and view code with mix phoenix.gen.html, but it will also want to generate a model, which won’t work in this simple example.
Calculating
Now that you have a page, it’s time to do something with the data that it sends the server. This means learning to build a simple form, and dealing with the minor challenge that picking parameters out of an HTTP request is a bit trickier than receiving parameters in a function call.
Phoenix expects that long chain of files because it helps keep code organized as applications grow complex, but most of the changes you need to make to build a simple application are confined to the controller and the template, with an occasional visit to router.ex. Until you start building complex applications that need to reuse code across multiple interfaces, you shouldn’t need to make a lot of changes to the other files.
To get started, ask visitors some questions on that welcome page. This example uses the same fall velocity calculations as many previous examples, so you can focus on the form and the controller rather than the calculation. Phoenix supports a core set of functions that safely create HTML markup from data you provide.
To get started, put the following in /web/templates/fall/welcome.html.eex
<h1>Falling starts now!</h1>

<%= form_for @conn, fall_path(@conn, :faller), [as: :calculation],
fn f -> %>
  <%= select f, :planemo, @choices %>
  <%= text_input f, :distance %>
  <%= submit "Calculate" %>
<% end %>
The h1 stays the same - it’s just a headline - but form_for and its contents are all new. Elixir code surrounded by <%= and %> will produce results that turn up in the result HTML. (If it’s surrounded by <% and %>, without the =, the Elixir will run but won’t modify the HTML.) In this case, form_for is the core function, producing an HTML form element, and each of the lines in that function also produces some HTML, part of that form.
HTML forms need a few things to work. They need controls inside them to collect user input. In this case a selector and text input will tell our velocity calculator the information it needs. A submit button provides a way for the user to tell the form that the data is ready to be sent.
But where? How should that data be presented? In Phoenix, the form_for function handles all that. The first arguments about about where the request came from and where the form response should go. @conn is the connection information that led to the form being presented, passed along through the whole chain. For now, this form will send its data to another page, that doesn’t yet exist, connected to the :faller controller method. fall_path provides the information needed to send the data from the form in the browser back to your Phoenix server - and is the piece that will break when you load your page after making these changes.
The [as: calculation] piece is required because this form isn’t working with an underlying model. as: tells form_for how to present the collected information when it’s sent back, as you’ll see when the controller processes it. fn f creates a hook that the other pieces of the form use to access the information applying to the whole form.
Both the select and text_input functions take that f as their first argument. Their second argument is the name of the field that the controller will use to extract it when the form is submitted. select takes a third argument, @choices. (The @ makes it an assign, a variable that comes through from the controller.) That will provide the items in the select field, but it has to be provided by the controller, which doesn’t exist yet.
Right now, of course, the template fails before it gets to the missing @choices assign, as shown in Figure 15-8.
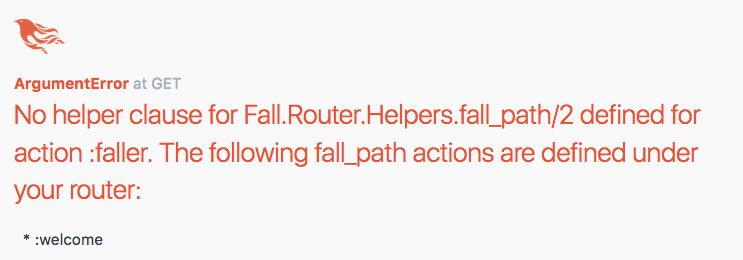
Figure 15-8. Broken again, pointing to a route that doesn’t exist yet to page that doesn’t exist yet.
Adding the new page will require adding a new entry to the routing file, as well as creating a new set of controller, view, and template files. Open up web/router.ex, and find the scope method. Add get "/fall", FallController, :faller just after the route for welcome:
scope "/", Fall do
    pipe_through :browser # Use the default browser stack

    get "/welcome", FallController, :welcome
    get "/fall", FallController, :faller
    get "/", PageController, :index
  end
That helps - now that it has the route, Phoenix fails on the missing assign, as Figure 15-9 shows.
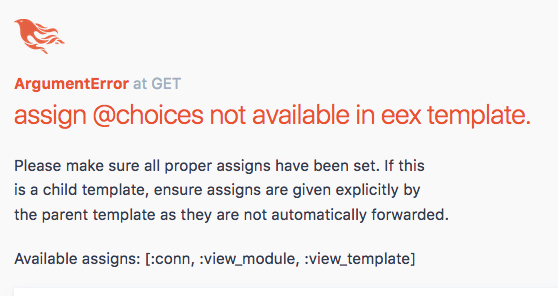
Figure 15-9. Just a missing variable now.
Adding @choices requires one new line of code and an addition to the render call:
def welcome(conn, params) do
 choices = ["Earth": 1, "Moon": 2, "Mars": 3]
 render conn, "welcome.html",  choices: choices
end
The choices probably look familar from earlier examples, and now Phoenix has all it needs to create the form in Figure 15-10.
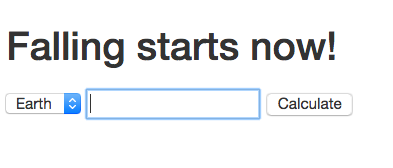
Figure 15-10. Form, presented.
Excellent! A quick look at the form Phoenix generated provides some sense of what form_for and its companions did.
<form accept-charset="UTF-8" action="/fall" method="post">
<input name="_csrf_token" type="hidden"
value="bnAhLkknegAwUXENPw48ByQ5FTYmJgAAZDjE0C+mY4+KNyuOOWwCHA==">
<input name="_utf8" type="hidden" value="✓">

<select id="calculation_planemo" name="calculation[planemo]">
  <option value="1">Earth</option>
  <option value="2">Moon</option>
  <option value="3">Mars</option>
 </select>

<input id="calculation_distance" name="calculation[distance]"
type="text">

<input type="submit" value="Calculate">
</form>
form_for created a lot by default and a little specific to your form. The action came from the routing addition. The information about UTF-8 charset (and the hidden field for it), the method (POST), and the extra hidden CRSF prevention token all came by default. The select is built out of content you provided, combining the name from the as: argument with the names of the forms. This will make it easier to pick out the form data later.
Now, pick a planemo, enter a distance, and hit calculate. Figure 15-11 shows the not so excellent result.
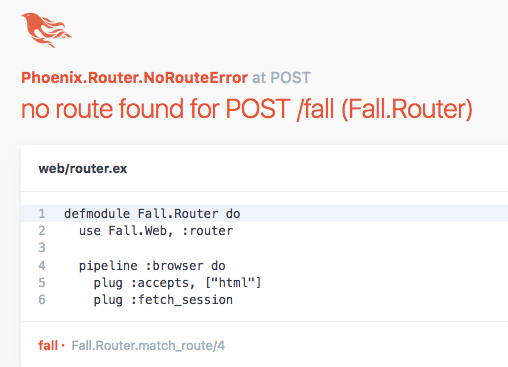
Figure 15-11. No place to go.
Because form_for defaulted to the HTTP POST method, and the route added only handled GET, Phoenix is confused. (Though you could say it created the situation.) Fix this by adding a post route to web/router.ex:
scope "/", Fall do
    pipe_through :browser # Use the default browser stack

  get "/welcome", FallController, :welcome
  get "/fall", FallController, :faller
  post "/fall", FallController, :faller
  get "/", PageController, :index
 end
Now the route works, but Figure 15-12 demonstrates that it’s time to build the path for the response.
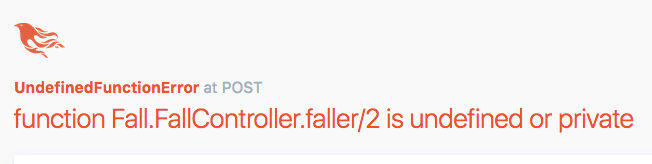
Figure 15-12. Needing a function to answer the request.
That’s the last error message you need to see for a while. Fortunately, creating a new set of pieces for the response will be easier, with most of the challenge in the controller. In the existing /web/controllers/fall_controller.ex file, add a new function:
def faller(conn, params) do
  choices = ["Earth": 1, "Moon": 2, "Mars": 3]
  speed = 0
  render conn, "faller.html", speed: speed, choices: choices
end
Yes, that simply throws away the form data, but it also lets you build a template and make sure that all the connections are working before diving into the details of parameter handling.
In /web/templates, create a new file called faller.html.eex. Make its contents look like welcome.html.eex, with a key change: an @speed reference in the headline.
<h1>Speed at impact was <%= @speed %> m/s.</h1>

<p>Fall again?</p>

<%= form_for @conn, fall_path(@conn, :faller), [as: :calculation],
fn f -> %>
  <%= select f, :planet, @choices %>
  <%= text_input f, :distance %>
  <%= submit "Calculate" %>
<% end %>
Technically you could skip the form for trying again if you wanted to, but Figure 15-13 shows what Phoenix created.
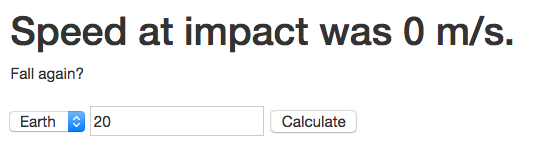
Figure 15-13. The speed may be zero, but data flowed from the right controller.
To move into calculating and returning a real speed, you need to extract the parameters received from the form. In the terminal window where you ran Phoenix, you’ll see something like:
[info] POST /fall
[debug] Processing by Fall.FallController.faller/2
  Parameters: %{"_csrf_token" => "bnAhLkknegAwUXENPw48ByQ5FTYmJgA
AZDjE0C+mY4+KNyuOOWwCHA==", "_utf8" => "✓", "calculation" =>
%{"distance" => "20", "planemo" => "1"}}
  Pipelines: [:browser]
[info] Sent 200 in 664µs
The distance and planemo parameters are there as maps, wrapped - as form_for said - in the calculation parameter. You have a few choices for how to get those parameters. Map.get can extract them for you. However, pattern matching seems more Elixir-like, and makes it easy to build controllers that smoothly handle things like requests that come without parameters. (Elixir lets things crash and doesn’t worry. Web users are a little more particular.)
To grab the parameters, open up /web/controllers/fall_controller.ex file. Add another faller function that pattern matches instead of just accepting params, and some familiar fall_velocity functions to handle the calculations:
def faller(conn, %{"calculation" => %{"planet" => planet, "distance" => distance}}) do
  {calc_planet, _null} = Integer.parse(planet)
  {calc_distance, _null} = Float.parse(distance)
  speed = fall_velocity(calc_planet, calc_distance)
  choices = ["Earth": 1, "Moon": 2, "Mars": 3]
  render conn, "faller.html", speed: speed, choices: choices
end

def fall_velocity(1, distance) do
 :math.sqrt(2 * 9.8 * distance)
end

def fall_velocity(2, distance) do
 :math.sqrt(2 * 1.6 * distance)
end

def fall_velocity(3, distance) do
 :math.sqrt(2 * 3.71 * distance)
end
The pattern match at the start that replaces the params mention, %{"calculation" => %{"planet" => planet, "distance" => distance}} matches the calculation map that should come from a normal form submission. It also breaks that down further, into planet and distance.
The next two lines deal with another challenge in handling parameters from web forms: everything arrives as a string. The parse functions of Float and Integer can help, but they return a map that also needs pattern matching. This code is a bit too trusting, especially on the distance, which people can type in. Eventually you may want to create your own validation, to prevent errors caused by non-numeric data, but this will get things started.
The calculations are familiar, and the results in Figure 15-15 should be too.
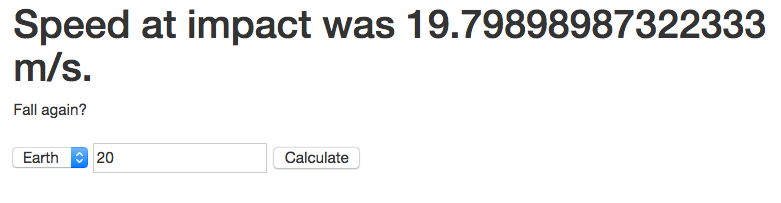
Figure 15-14. Reporting the correct speed.
Obviously, you’re going to want to do more. Generating JSON and working with data both go well beyond this work. However, if you can make these parts work, you’re ready to move further. The online documentation for Phoenix is generally good, and Programming Phoenix (Pragmatic Programmers) can take you deeper.