Appendix D
Introducing JShell

Beginning with JDK 9, Java has included a tool called JShell. It provides an interactive environment that enables you to quickly and easily experiment with Java code. JShell implements what is referred to as read-evaluate-print loop (REPL) execution. Using this mechanism, you are prompted to enter a fragment of code. This fragment is then read and evaluated. Next, JShell displays output related to the code, such as the output produced by a println( ) statement, the result of an expression, or the current value of a variable. JShell then prompts for the next piece of code, and the process continues (i.e., loops). In the language of JShell, each code sequence you enter is called a snippet.
A key point to understand about JShell is that you do not need to enter a complete Java program to use it. Each snippet you enter is simply evaluated as you enter it. This is possible because JShell handles many of the details associated with a Java program for you automatically. This lets you concentrate on a specific feature without having to write a complete program, which makes JShell especially helpful when you are first learning Java.
As you might expect, JShell can also be useful to experienced programmers. Because JShell stores state information, it is possible to enter multiline code sequences and run them inside JShell. This makes JShell quite useful when you need to prototype a concept because it lets you interactively experiment with your code without having to develop and compile a complete program.
This appendix introduces JShell and explores several of its key features, with the primary focus being on those features most useful to beginning Java programmers.
JShell Basics
JShell is a command-line tool. Thus, it runs in a command-prompt window. To start a JShell session, execute jshell from the command line. After doing so, you will see the JShell prompt:
jshell>
When this prompt is displayed, you can enter a code snippet or a JShell command.
In its simplest form, JShell lets you enter an individual statement and immediately see the result. To begin, think back to the first example Java program in this book. It is shown again here.
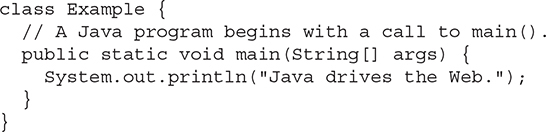
In this program, only the println( ) statement actually performs an action, which is displaying its message on the screen. The rest of the code simply provides the required class and method declarations. In JShell, it is not necessary to explicitly specify the class or method in order to execute the println( ) statement. JShell can execute it directly on its own. To see how, enter the following line at the JShell prompt:
System.out.println("Java drives the Web.");
Then, press ENTER. This output is displayed:
Java drives the Web.

jshell>
As you can see, the call to println( ) is evaluated and its string argument is output. Then, the prompt is redisplayed.
Before moving on it is useful to explain why JShell can execute a single statement, such as the call to println( ), when the Java compiler, javac, requires a complete program. JShell is able to evaluate a single statement because JShell automatically provides the necessary program framework for you, behind the scenes. This consists of a synthetic class and a synthetic method. Thus, in this case, the println( ) statement is embedded in a synthetic method that is part of a synthetic class. As a result, the preceding code is still part of a valid Java program even though you don’t see all of the details. This approach provides a very fast and convenient way to experiment with Java code.
Next, let’s look at how variables are supported. In JShell, you can declare a variable, assign the variable a value, and use it in any valid expressions. For example, enter the following line at the prompt:
int count;
After doing so you will see the following response:
count ==> 0
This indicates that count has been added to the synthetic class and initialized to zero. Furthermore, it has been added as a static variable of the synthetic class.
Next, give count the value 10 by entering this statement:
count = 10;
You will see this response:
count ==> 10
As you can see, count’s value is now 10. Because count is static, it can be used without reference to an object.
Now that count has been declared, it can be used in an expression. For example, enter this println( ) statement:
System.out.println("Reciprocal of count: " + 1.0 / count);
JShell responds with
Reciprocal of count: 0.1
Here, the result of the expression 1.0 / count is 0.1 because count was previously assigned the value 10.
In addition to demonstrating the use of a variable, the preceding example illustrates another important aspect of JShell: it maintains state information. In this case, count is assigned the value 10 in one statement, and then this value is used in the expression 1.0 / count in the subsequent call to println( ) in a second statement. Between these two statements, JShell stores count’s value. In general, JShell maintains the current state and effect of the code snippets that you enter. This lets you experiment with larger code fragments that span multiple lines.
Before moving on, let’s try one more example. In this case, we will create a for loop that uses the count variable. Begin by entering this line at the prompt:
for(count = 0; count < 5; count++)
At this point, JShell responds with the following prompt:
...>
This indicates that additional code is required to finish the statement. In this case, the target of the for loop must be provided. Enter the following:
System.out.println(count);
After entering this line, the for statement is complete and both lines are executed. You will see the following output:
0
1
2
3
4
In addition to statements and variable declarations, JShell lets you declare classes and methods and use import statements. Examples are shown in the following sections. One other point: Any code that is valid for JShell will also be valid for compilation by javac, assuming the necessary framework is provided to create a complete program. Thus, if a code fragment can be executed by JShell, then that fragment represents valid Java code. In other words, JShell code is Java code.
List, Edit, and Rerun Code
JShell supports a large number of commands that let you control the operation of JShell. At this point, three are of particular interest because they let you list the code that you have entered, edit a line of code, and rerun a code snippet. As the subsequent examples become longer, you will find these commands to be very helpful.
In JShell, all commands start with a / followed by the command. Perhaps the most commonly used command is /list, which lists the code that you have entered. Assuming that you have followed along with the examples shown in the preceding section, you can list your code by entering /list at this time. Your JShell session will respond with a numbered list of the snippets you entered. Pay special attention to the entry that shows the for loop. Although it consists of two lines, it constitutes one statement. Thus, only one snippet number is used. In the language of JShell, the snippet numbers are referred to as snippet IDs. In addition to the basic form of /list just shown, other forms are supported, including those that let you list specific snippets by name or number. For example, you can list the count declaration by using /list count.
You can edit a snippet by using the /edit command. This command causes an edit window to open in which you can modify your code. Here are three forms of the /edit command that you will find helpful at this time. First, if you specify /edit by itself, the edit window contains all of the lines you have entered and lets you edit any part of it. Second, you can specify a snippet to edit by using /edit n, where n specifies the snippet’s number. For example, to edit snippet 3, use /edit 3. Finally, you can specify a named element, such as a variable. For example, to change the value of count, use /edit count.
As you have seen, JShell executes code as you enter it. However, you can also rerun what you have entered. To rerun the last fragment that you entered, use /!. To rerun a specific snippet, specify its number using this form: /n, where n specifies the snippet to run. For example, to rerun the fourth snippet, enter /4. You can rerun a snippet by specifying its position relative to the current fragment by use of a negative offset. For example, to rerun a fragment that is three snippets before the current one, use /-3.
Before moving on, it is helpful to point out that several commands, including those just shown, allow you to specify a list of names or numbers. For example, to edit lines 2 and 4, you could use /edit 2 4. For recent versions of JShell, several commands allow you specify a range of snippets. These also include the /list, /edit, and /n commands just described. For example, to list snippets 4 through 6, you would use /list 4-6.
There is one other important command that you need to know about now: /exit. This terminates JShell.
Add a Method
You first learned about methods in Chapter 4. As you saw there, methods occur within classes. However, when using JShell, it is possible to experiment with a method without having to explicitly declare it within a class. As explained earlier, this is because JShell automatically wraps code fragments within a synthetic class. As a result, you can easily and quickly write a method without having to provide a class framework. You can also call the method without having to create an object. This feature of JShell is especially beneficial when learning the basics of methods in Java or when prototyping new code. To understand the process, we will work through an example.
To begin, start a new JShell session and enter the following method at the prompt:

This creates a method that returns the reciprocal of its argument. After you enter this, JShell responds with the following:
![]()
This indicates the method has been added to JShell’s synthetic class and is ready for use.
To call reciprocal( ), simply specify its name, without any object or class reference. For example, try this:
System.out.println(reciprocal(4.0));
JShell responds by displaying 0.25.
You might be wondering why you can call reciprocal( ) without using the dot operator and an object reference. Here is the answer. When you create a stand-alone method in JShell, such as reciprocal( ), JShell automatically makes that method a static member of the synthetic class. As you know from Chapter 5, static methods are called relative to their class, not on a specific object. So, no object is required. This is similar to the way that stand-alone variables become static variables of the synthetic class, as described earlier.
Another important aspect of JShell is its support for a forward reference inside a method. This feature lets one method call another method, even if the second method has not yet been defined. This enables you to enter a method that depends on another method without having to worry about which one you enter first. Here is a simple example. Enter this line in JShell:
![]()
JShell responds with the following:
![]()
As you can see, JShell knows that myMeth2( ) has not yet been declared, but it still lets you define myMeth( ). As you would expect, if you try to call myMeth( ) at this time, you will see an error message since myMeth2( ) is not yet defined, but you are still able to enter the code for myMeth( ).
Next, define myMeth2( ) like this:
![]()
Now that myMeth2( ) has been defined, you can call myMeth( ).
In addition to its use in a method, you can use a forward reference in a field initializer in a class.
Create a Class
Although JShell automatically supplies a synthetic class that wraps code snippets, you can also create your own class in JShell. Furthermore, you can instantiate objects of your class. This allows you to experiment with classes inside JShell’s interactive environment. The following example illustrates the process.
Start a new JShell session and enter the following class, line by line:
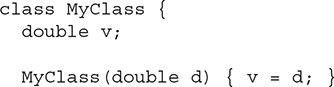

When you finish entering the code, JShell will respond with
| created class MyClass
Now that you have added MyClass, you can use it. For example, you can create a MyClass object with the following line:
MyClass ob = new MyClass(10.0);
JShell will respond by telling you that it added ob as a variable of type MyClass. Next, try the following line:
System.out.println(ob.reciprocal());
JShell responds by displaying the value 0.1.
As a point of interest, when you add a class to JShell, it becomes a static nested member of a synthetic class.
Use an Interface
Interfaces are supported by JShell in the same way as classes. Therefore, you can declare an interface and implement it by a class within JShell. Let’s work through a simple example. Before beginning, start a new JShell session.
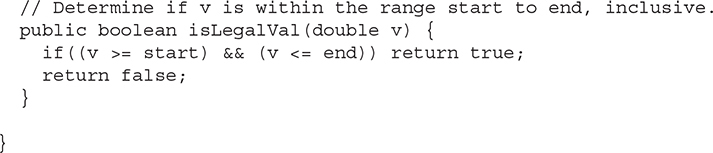
The interface that we will use declares a method called isLegalVal( ) that is used to determine if a value is valid for some purpose. It returns true if the value is legal and false otherwise. Of course, what constitutes a legal value will be determined by each class that implements the interface. Begin by entering the following interface into JShell:

JShell responds with
![]()
Next, enter the following class, which implements MyIF:
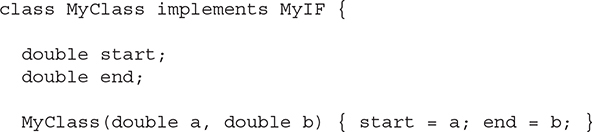
JShell responds with
![]()
Notice that MyClass implements isLegalVal( ) by determining if the value v is within the range (inclusive) of the values in the MyClass instance variables start and end.
Now that both MyIF and MyClass have been added, you can create a MyClass object and call isLegalVal( ) on it, as shown here:

In this case, the value true is displayed because 5 is within the range 0 through 10.
Because MyIF has been added to JShell, you can also create a reference to an object of type MyIF. For example, the following is also valid code:
![]()
In this case, the value of result will be true and will be reported as such by JShell.
One other point: Enumerations and annotations are supported in JShell in the same way as classes and interfaces.
Evaluate Expressions and Use Built-in Variables
JShell includes the ability to directly evaluate an expression without it needing to be part of a full Java statement. This is especially useful when you are experimenting with code and don’t need to execute the expression in a larger context. Here is a simple example. Using a new JShell session, enter the following at the prompt:
3.0 / 16.0
JShell responds with:
$1 ==> 0.1875
As you can see, the result of the expression is computed and displayed. However, note that this value is also assigned to a temporary variable called $1. In general, each time an expression is evaluated directly, its result is stored in a temporary variable of the proper type. Temporary variable names all begin with a $ followed by a number, which is increased each time a new temporary variable is needed. You can use these temporary variables like any other variable. For example, the following displays the value of $1, which is 0.1875 in this case.
System.out.println($1);
Here is another example:
double v = $1 * 2;
Here, the value $1 times 2 is assigned to v. Thus, v will contain 0.375.
You can change the value of a temporary variable. For example, this reverses the sign of $1:
$1 = -$1
JShell responds with
$1 ==> -0.1875
Expressions are not limited to numeric values. For example, here is one that concatenates a String with the value returned by Math.abs($1).
"The absolute value of $1 is " + Math.abs($1)
This results in a temporary variable that contains the string
The absolute value of $1 is 0.1875
Importing Packages
As described in Chapter 8, an import statement is used to bring members of a package into view. Furthermore, any time you use a package other than java.lang, you must import it. The situation is much the same in JShell except that by default, JShell imports several commonly used packages automatically. These include java.io and java.util, among several others. Since these packages are already imported, no explicit import statement is required to use them.
For example, because java.io is automatically imported, the following statement can be entered:
FileInputStream fin = new FileInputStream("myfile.txt");
Recall that FileInputStream is packaged in java.io. Since java.io is automatically imported, it can be used without having to include an explicit import statement. Assuming that you actually have a file called myfile.txt in the current directory, JShell will respond by adding the variable fin and opening the file. You can then read and display the file by entering these statements:
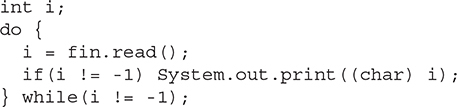
This is the same basic code that was discussed in Chapter 10, but no explicit import java.io statement is required.
Keep in mind that JShell automatically imports only a handful of packages. If you want to use a package not automatically imported by JShell, then you must explicitly import it as you do with a normal Java program. One other point: You can see a list of the current imports by using the /imports command.
Exceptions
In the I/O example shown in the preceding section on imports, the code snippets also illustrate another very important aspect of JShell. Notice that there are no try/catch blocks that handle I/O exceptions. If you look back at the similar code in Chapter 10, the code that opens the file catches a FileNotFoundException, and the code that reads the file watches for an IOException. The reason that you don’t need to catch these exceptions in the snippets shown earlier is because JShell automatically handles them for you. More generally, JShell will automatically handle checked exceptions in many cases.
Some More JShell Commands
In addition to the commands discussed earlier, JShell supports several others. One command that you will want to try immediately is /help. It displays a list of the commands. You can also use /? to obtain help. Several other commonly used commands are examined here.
You can reset JShell by using the /reset command. This is especially useful when you want to change to a new project. By use of /reset you avoid the need to exit and then restart JShell. Be aware, however, that /reset resets the entire JShell environment, so all state information is lost.
You can save a session by using /save. Its simplest form is shown here:
/save filename
Here, filename specifies the name of the file to save into. By default, /save saves your current source code, but it supports several options, of which two are of particular interest. By specifying -all you save all lines that you enter, including those that you entered incorrectly. You can use the -history option to save your session history (i.e., the list of the commands that you have entered).
You can load a saved session by using /open. Its form is shown next:
/open filename
Here, filename is the name of the file to load.
JShell provides several commands that let you list various elements of your work. They are shown here:
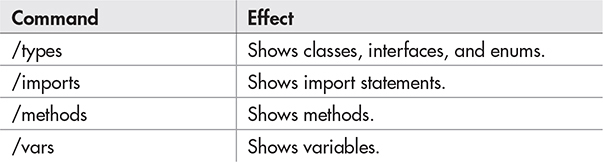
For example, if you entered the following lines:
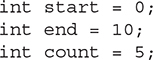
and then entered the /vars command, you would see
Another often useful command is /history. It lets you view the history of the current session. The history contains a list of what you have typed at the command prompt.
Exploring JShell Further
The best way to get proficient with JShell is to work with it. Try entering several different Java constructs and watching the way that JShell responds. As you experiment with JShell you will find the usage patterns that work best for you. This will enable you to find effective ways to integrate JShell into your learning or development process. Also, keep in mind that JShell is not just for beginners. It also excels when prototyping code. Thus, as you advance in your study of Java, you will still find JShell helpful whenever you need to explore new areas. Simply put: JShell is an important tool that further enhances the overall Java development experience.