Lesson 1
Installing Java
Welcome to the world of learning Java. In this first lesson, we will set up everything needed to write Java programs. We will then write our first program together called “Hello, World!”
It is important to know that, by itself, Java code doesn't do anything. It is just text. To make it useful, we need to install the Java Development Kit (JDK). The JDK contains the compiler and other tools needed to create executable Java programs. After the JDK is installed, we will check the configuration by creating, compiling, and running the obligatory “Hello, World!” program.
THE JAVA UNIVERSE
Before we get into downloading and installing the Java tools and writing our first program, let's first take a look at the bigger picture: the Java universe, if you will. A little history will help to make sense of where Java is today.
The development of the Java language was led by James Gosling at Sun Microsystems. The initial development started in the early 1990s, and the language was originally called Oak. The first official release of Java was in 1996. Now, in Internet time, 1996 seems like, I don't know, a million years ago. And it seems that Java has this reputation for being an old and creaky language because there are all these newer and cooler languages out there—you know, like Ruby and Python and JavaScript.
But wait—the first version of Ruby was also released in 1995 and the first version of Python was started in 1989, so they aren't really newer languages. JavaScript was called LiveScript when it came on to the scene in 1995. Maybe Java isn't an old language after all.
Java was originally a closed source project, meaning that developers had to purchase a license to use it, and the code that runs Java was accessible only to Sun Microsystems developers. In 2006, however, Sun decided to make the project open source under a newly defined General Public License (GPL). In short, Sun decided to let any developer use Java to write software programs for any purpose at no cost. In addition, the GPL allows developers to access the code that runs Java to tweak it for their own purposes.
In 2010, Oracle bought Sun Microsystems and took over stewardship of Java. Oracle continues to maintain, distribute, and support Java and its related tools, including the JDK and the JVM.
The Java Development Kit
The Java Development Kit is a software package that contains tools that allow developers, like you, to write new Java programs. These tools include things like the Java compiler, which converts the code you write into bytecode that the Java Virtual Machine can read, as well as the JVM itself and tools that allow you to package your creations to distribute to other users.
There are two basic versions of the JDK, both maintained and distributed by Oracle: OpenJDK and Oracle JDK. OpenJDK is the open source reference implementation of the JDK. This means that it is the standard from which all other JDK implementations are derived. OpenJDK is released under the GPL v2 license and is completely open to the community. It contains the core code that makes Java work.
The Oracle JDK is based on OpenJDK, but it is a commercial implementation released under the Oracle Binary Code License Agreement.
The two versions have nearly identical code, but the Oracle JDK has a few more classes (some closed source) and some additional bug fixes. Businesses generally use the Oracle JDK because it tends to be a bit more stable; however, most Oracle JDK versions are distributed under a relatively restricted license. You can download the software for free, but you are only allowed to use the free version for personal, noncommercial projects. The free Oracle JDK license excludes the ability to create software that you want to sell or distribute for others to use. Many businesses choose to pay for commercial-use licenses because Oracle Java JDK includes support features not included in the open source versions.
We include instructions in the following sections to install OpenJDK for use in this course. You are welcome to use Oracle JDK instead, if you prefer. We use the open source OpenJDK here because it is completely free for any purpose you want to use it for, including creating and selling your own software packages. While Oracle does allow developers to use its Java JDK at no cost for personal projects, the free license does not allow commercial use. Many businesses choose to purchase licenses for Oracle's Java JDK to take advantage of the additional support that Oracle provides with the commercial version. However, because the JDK is very much behind the scenes when developing software using Java, you are not likely to notice much difference between the two.
The Java Virtual Machine
One of the problems with writing software today is that we normally want our programs to be compatible with as many different types of computers as possible. What good is a killer app if it will run on only one brand of smartphone? What about a custom enterprise application that will run only on a Windows machine, even though many employees may use Apple computers? This is where Java has an advantage over other coding languages.
The Java Virtual Machine (JVM) is a software layer between the Java code and the machine running the software. A virtual machine (VM) is essentially a piece of software that acts like a computer, and it performs many of the same input/process/output operations that a physical computer does.
Essentially, the JVM (which is included in the JDK) acts as a translator between the compiled Java code and the machine's bytecode. This means that our program will run on any computer that the JVM recognizes, so we can write one app that will work on many different devices, rather than writing multiple versions of the same app for different platforms. The result is that we can write once and run anywhere, a process Sun Microsystems named WORA to promote the use of Java.
The Java Runtime Environment
As a Java developer, you may also hear about the Java Runtime Environment (JRE). Through Java version 8, anyone who wanted to run a Java application on their computer had to first install a compatible JRE, which included the JVM required to run compiled software but did not include the tools used to develop software.
Starting with Java 9, however, the JDK includes a packaging process that creates an executable package that does not require a separate JRE on the end user's computer. This streamlines the distribution process a bit, making it even easier to write once and run anywhere when we use Java.
Java 8 is still widely used in many enterprises, however, so it's not impossible that you will run across the need to have a JRE installed to run software written in Java.
INSTALLING OpenJDK
You will need to install the JDK for this book because it has the tools needed to develop Java applications. As mentioned, the JDK also contains the Java runtime, which is the component that allows us to run the Java programs that we (and others) write. You might have a Java runtime already installed on your system because Java is widely used to write software.
For this course, we will use OpenJDK, which you can also use for any project in the future. The following instruction sets can be used to check your current installed version of a JDK and to install OpenJDK if you do not already have it. The following sections cover
- Installing on Microsoft Windows
- Installing on macOS
We recommend installing the most recent long-term support (LTS) version of OpenJDK, which was version 11 at the time of this writing. While you will see newer versions (such as 14), you should choose an LTS version because it will be more stable than newer versions that are still in development. Each version is based on a previous version, however, so you don't want to choose a version that comes before 11—there may be newer features we use in this course that are not available in older versions.
Additionally, while we provide added guidance here for installing a JDK on Microsoft Windows and macOS, you can also install it on other operating systems including various versions of Linux and AIX. The installation would be similar to what is shown here, including starting at the same website.
Installing OpenJDK on Microsoft Windows
The following instructions walk you through checking for an existing copy of the JDK on Microsoft Windows 10. You'll then install and verify an installation of OpenJDK. If you are using macOS, skip ahead to the next section.
Checking for an Existing JDK on Windows
Start by checking to see whether you already have a JDK installed. This can be done by opening a command prompt window and using the command line.
You can open a command prompt window by clicking the Start menu, searching for cmd, and selecting Command Prompt in the search results. Figure 1.1 shows how to use the Windows Search box to find the command prompt window.
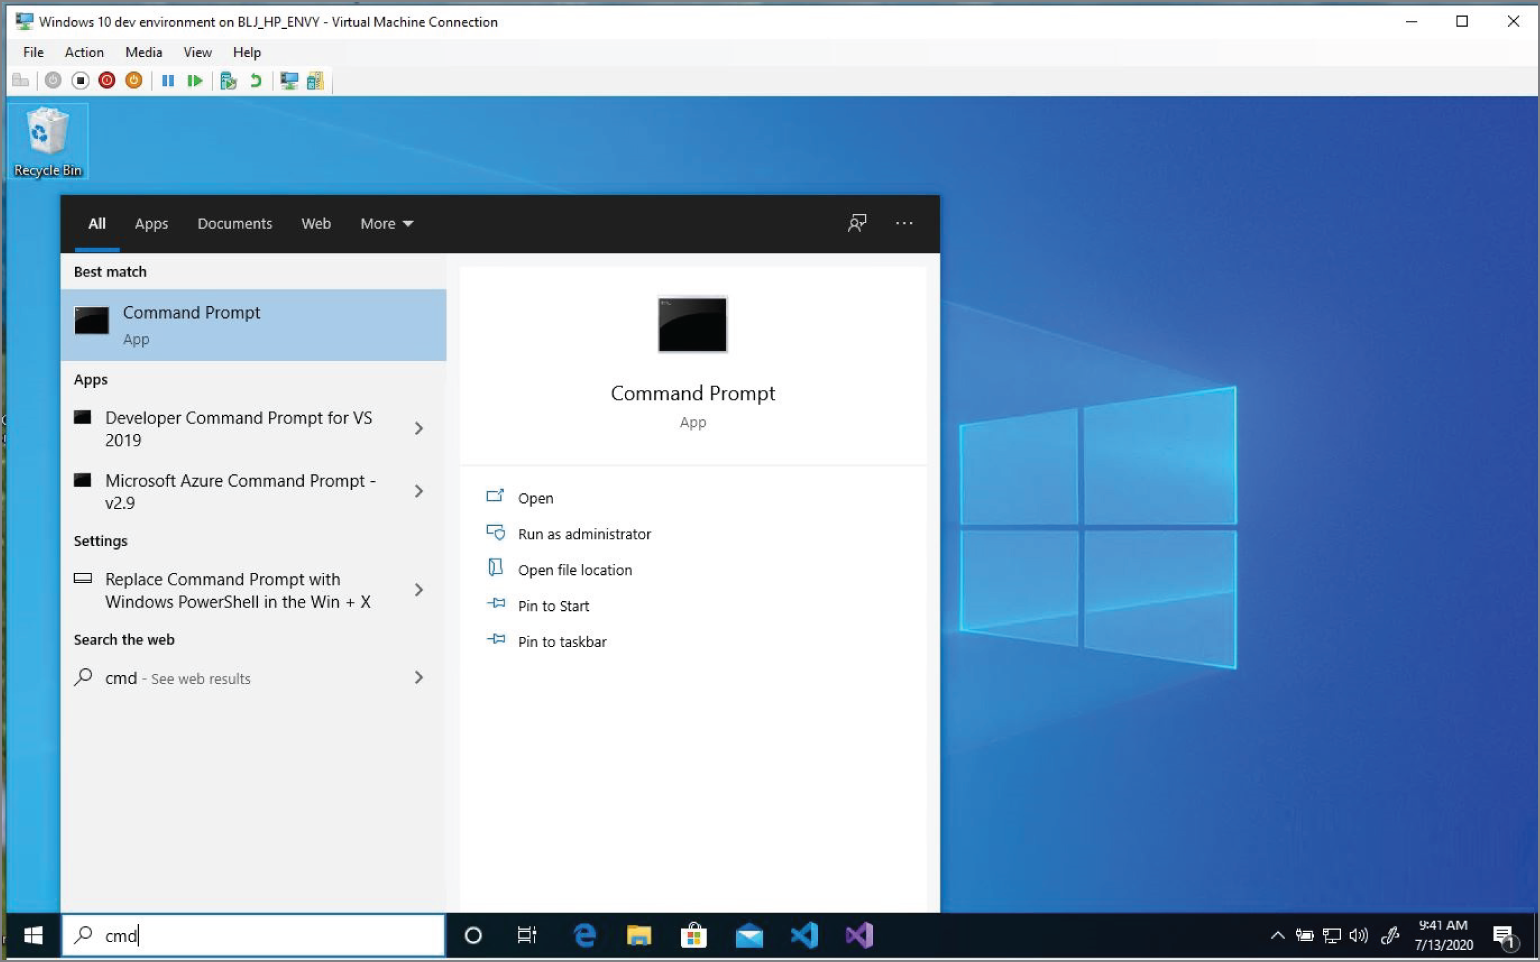
Figure 1.1 Running the command prompt window
In the command prompt window, key the following command as shown in Figure 1.2:
java -version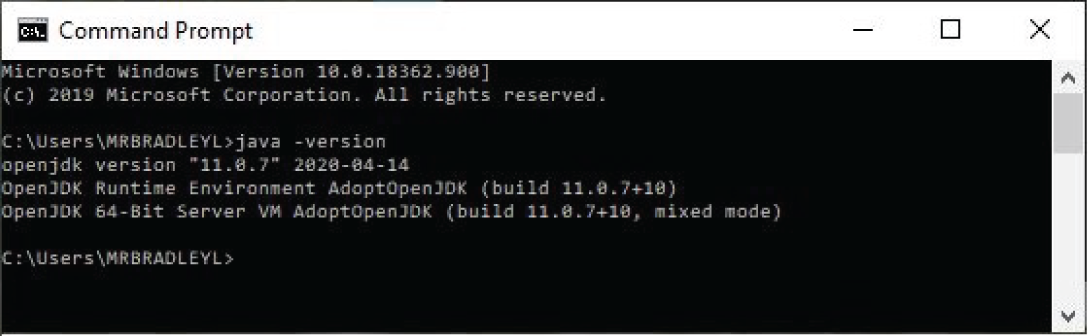
Figure 1.2 Checking the version in the Command Prompt
Windows will display the current version of Java installed on your computer. In this screenshot, the results are as follows:
openjdk version "11.0.7" 2020-04-14OpenJDK Runtime Environment AdoptOpenJDK (build 11.0.7+10)OpenJDK 64-Bit Server VM AdoptOpenJDK (build 11.0.7+10, mixed mode)
If your results are similar to those displayed in Figure 1.2 and you see openjdk with a version number that starts with 11, you already have the correct version of OpenJDK on your computer, and you can skip to “Creating Your Java First Program.”
In the rare case that Java is not installed, you might see a message such as this:
'java' is not recognized as an internal or external command,operable program or batch file.
If you get this message, simply continue to the next section for installing OpenJDK.
Installing OpenJDK
If you don't have the latest version—or any version—then you'll need to install the OpenJDK. Use your browser to navigate to AdoptOpenJDK.net, as shown in Figure 1.3.
Verify that the page has identified your computer platform (e.g., Windows, macOS, or Linux) correctly and select OpenJDK 11 with the Hotspot JVM. Click the Latest release button and save the file to a known location on your computer.

Figure 1.3 The AdoptOpenJDK site
Open or run the saved file. If prompted as shown in Figure 1.4, confirm that you want to launch the installer.
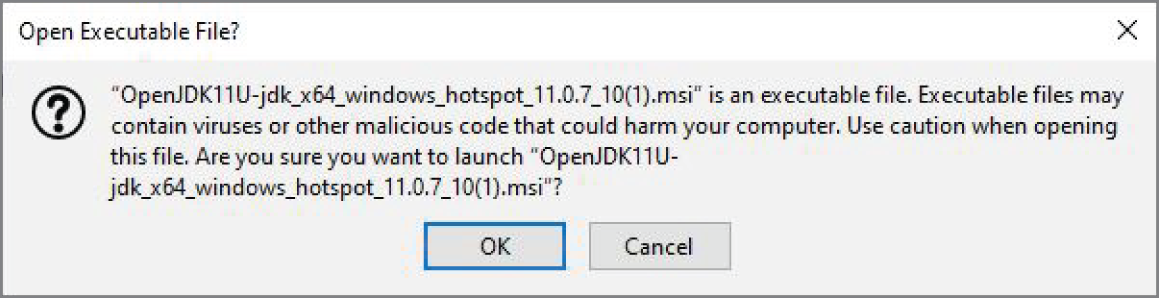
Figure 1.4 Prompt for running the launcher
The installer will launch the setup wizard to install the AdoptOpenJDK JDK, as shown in Figure 1.5.

Figure 1.5 The AdoptOpenJDK setup wizard
You should verify that it will install JDK 11 and click Next. This will show the end-user license agreement, as shown in Figure 1.6.

Figure 1.6 The end-user license agreement
The license on AdoptOpenJDK is a GNU General Public License, which means that it is open source, and anyone can use it in any way, as long as credit is given to the original developers. Accept the license agreement and click Next. This will display the Custom Setup settings, as shown in Figure 1.7.

Figure 1.7 The Custom Setup settings
Accept the default settings in the Custom Setup window. You should note the location where the JDK will be installed in this window. You will need it later.
Click Next to be taken to a window similar to Figure 1.8.
Click Install to begin the actual installation of the JDK. Windows will ask if you want to allow the app to make changes to your account (Figure 1.9). Click Yes.
The installation will start and run automatically (Figure 1.10). The installation will take several minutes to complete.
You will see a confirmation window when the installation is complete (Figure 1.11).
Verifying the Installation
Verify that you have Java 11 installed on your computer. Follow the same steps you did earlier to see what version you had installed. Open a command-line window by clicking the Start menu, searching for cmd, and selecting Command Prompt in the search results. This was shown in Figure 1.1.
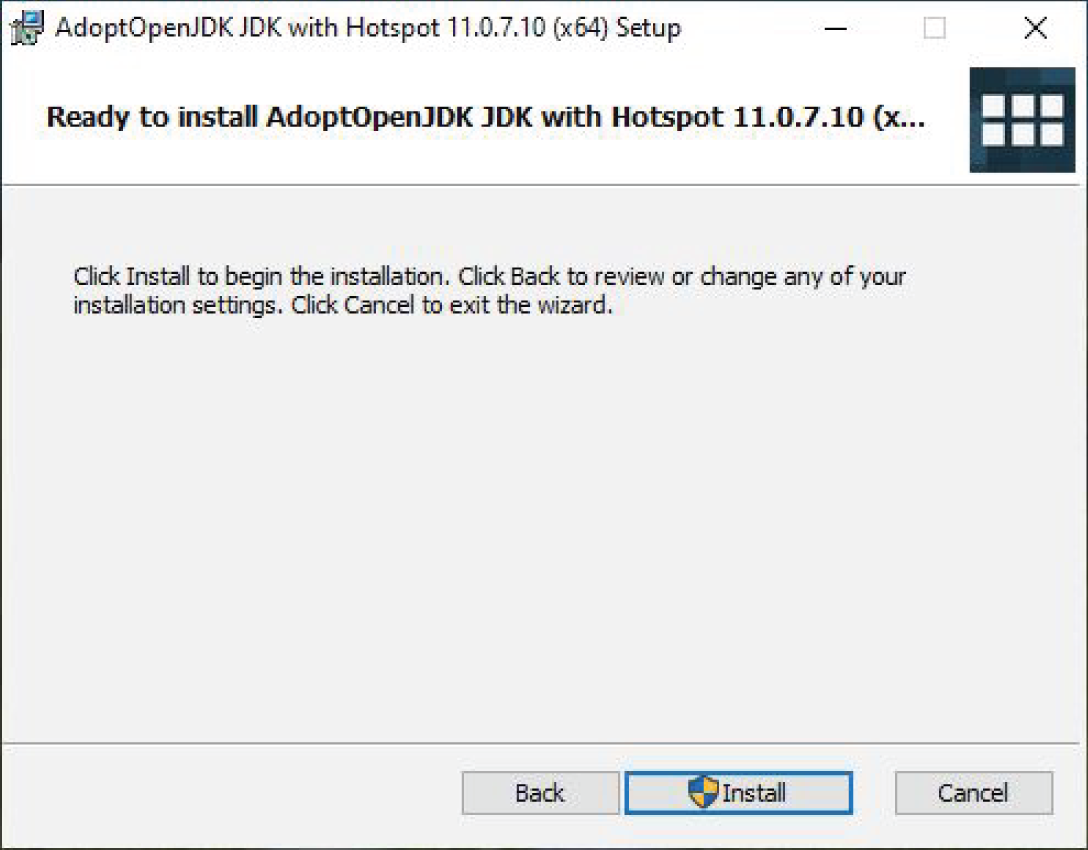
Figure 1.8 Ready to install

Figure 1.9 Windows permission to install
As shown in Figure 1.2, type the following command into the command prompt window:
java -versionWindows will confirm that Java is installed by returning the version number. We show this again in Figure 1.12. You should now see a version that starts with 11 as the first number in the version number. We are now ready start working with the Java and the JDK.

Figure 1.10 Installing the JDK
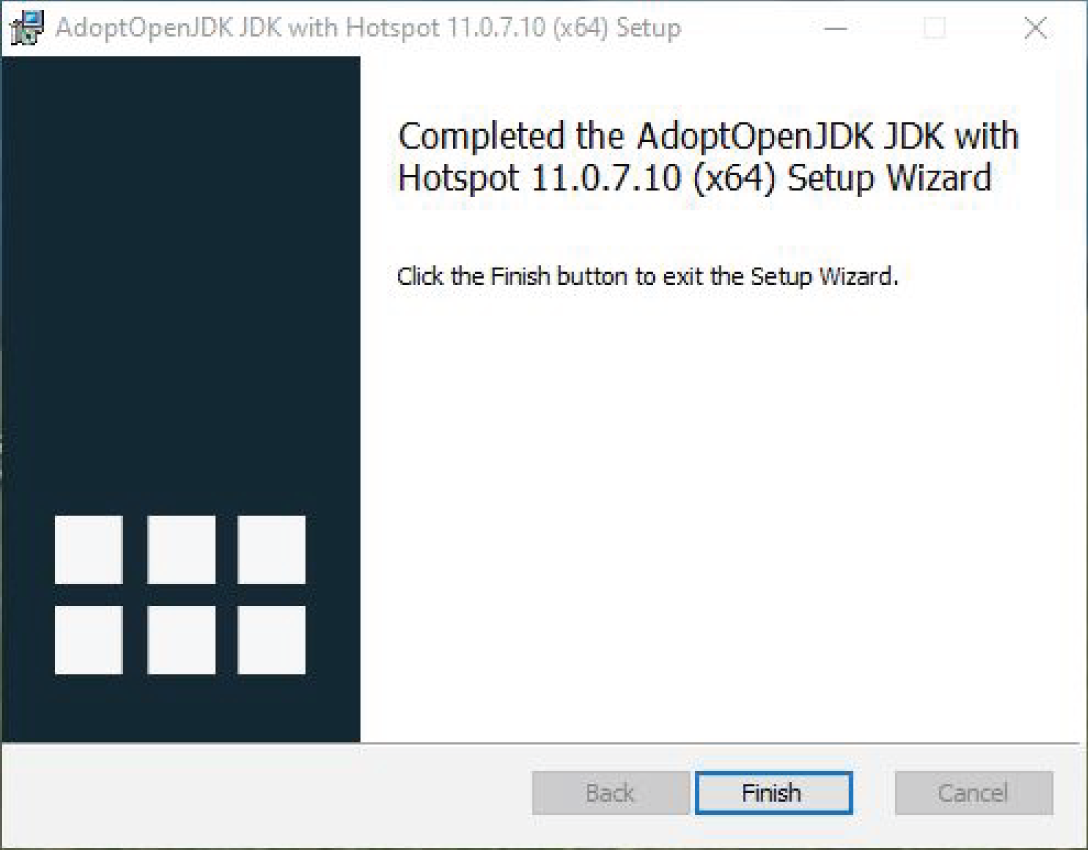
Figure 1.11 Installation completed message

Figure 1.12 Verifying the JDK was installed
Installing OpenJDK on macOS
The following instructions walk you through checking for an existing copy of the JDK on macOS. You'll then install and verify an installation of OpenJDK. If you are using Windows, skip ahead to the next section to see how to use the JDK with a Java program.
Checking for an Existing JDK on macOS
Check the version of Java installed on your computer by opening Terminal (using Spotlight Search, Siri, or Launch Pad) and entering the following command:
java -versionAs you can see in Figure 1.13, the results are as follows:
openjdk version "11.0.3" 2019-04-16OpenJDK Runtime Environment AdoptOpenJDK (build 11.0.3+7)OpenJDK 64-Bit Server VM AdoptOpenJDK (build 11.0.3+7, mixed mode)
If you see openjdk version 11 in the results, you do not need to install Java. You can skip to the next section to create your first program in Java.
Installing OpenJDK
Use your browser to navigate to AdoptOpenJDK.net. You should see a page similar to what is presented in Figure 1.14.
Verify that AdoptOpenJDK recognizes your operating system as macOS x64. Select OpenJDK 11 on the left and Hotspot on the right and then click Latest release. In Figure 1.14, the file is jdk-11.0.3+7, but you may see a slightly different version number. As long as the first number is 11, it's fine.

Figure 1.13 Checking the version number

Figure 1.14 The AdoptOpenJDK website
Your browser will download the file. Open the saved file after the download is complete to start the Installer. This should display a dialog similar to Figure 1.15.

Figure 1.15 Starting the AdoptOpenJDK install
Click Continue to start the installer. When prompted, you must accept the license agreement, as shown in Figure 1.16.
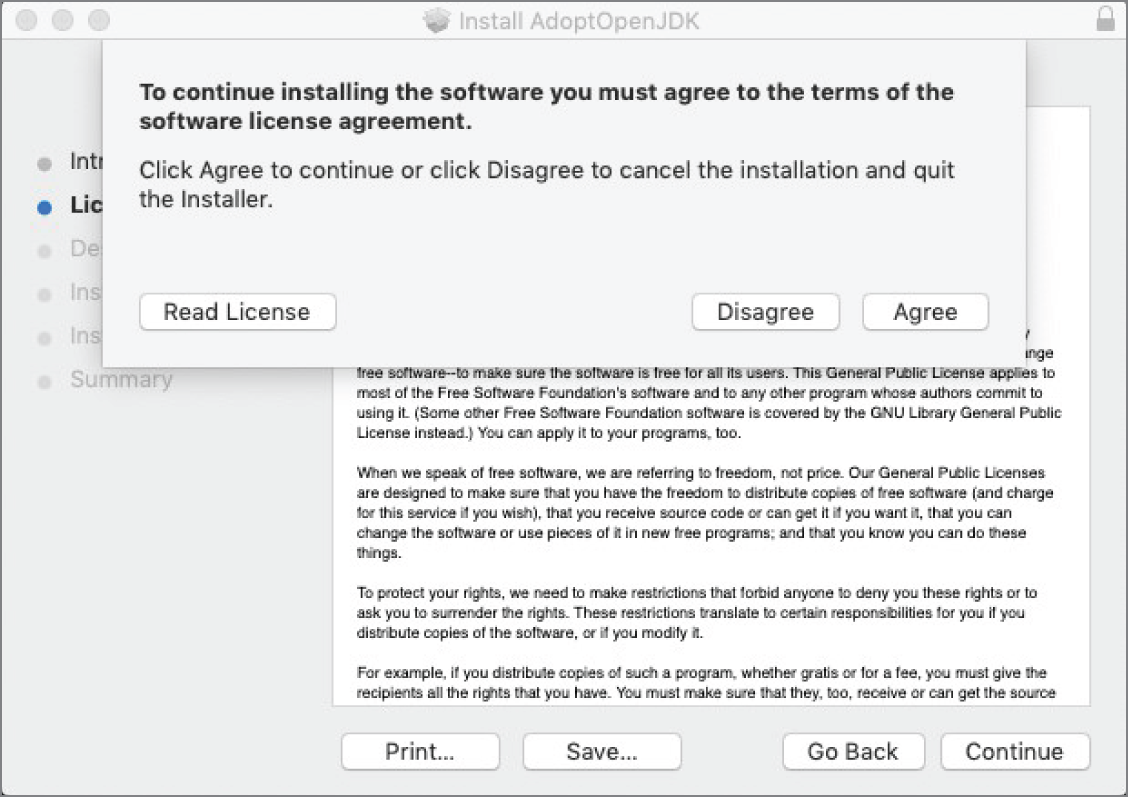
Figure 1.16 Accepting the licensing
Click Agree and then click Continue. You'll be taken to the dialog shown in Figure 1.17 that shows that, by default, the files will be installed on the computer's main disk.
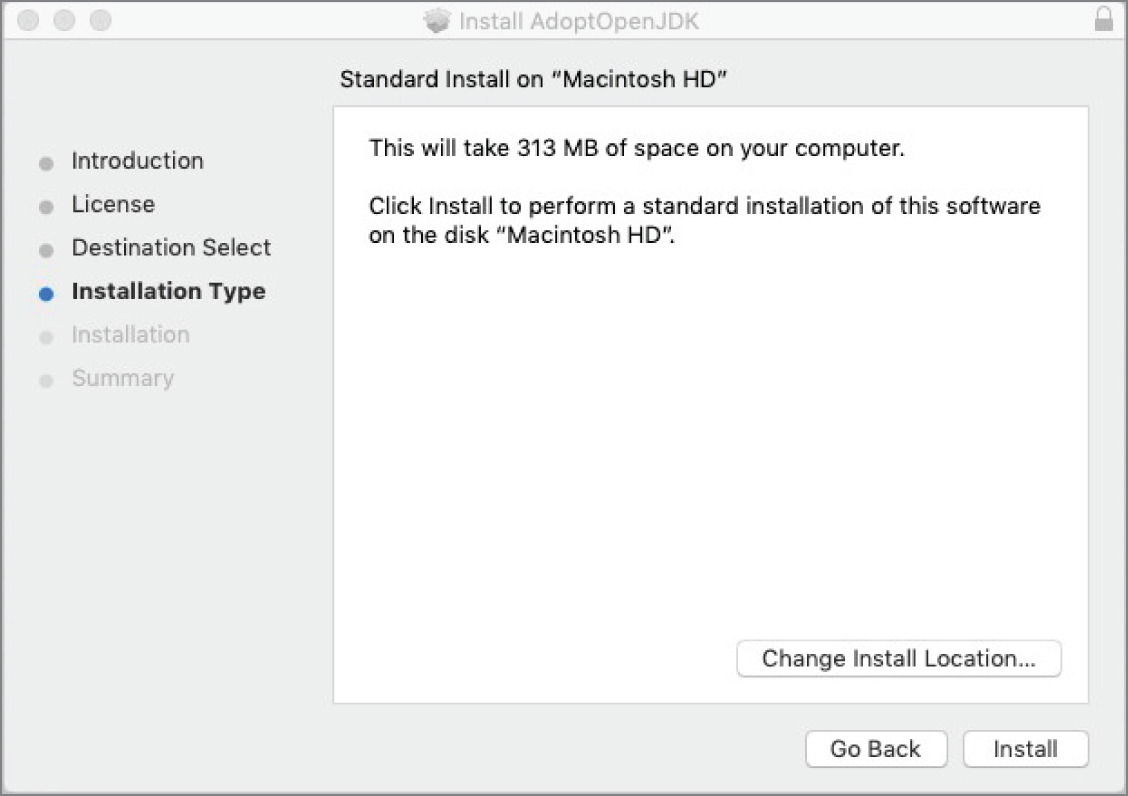
Figure 1.17 Location for the install
You can change the location if you want, but most users should use the default setting. Click Install to continue. This will start the installation. When the installation is completed, you will see a confirmation similar to Figure 1.18.
Click Close to complete the process.

Figure 1.18 Installation complete message
Verifying the Installation
Confirm the version of Java installed on your computer by opening Terminal (using Spotlight Search or Launch Pad) as you did before and entering the following command:
java -versionYou should see results similar to what are shown in Figure 1.19. The results are as follows:
openjdk version "11.0.3 " 2019-04-16OpenJDK Runtime Environment AdoptOpenJDK (build 11.0.3+7)OpenJDK 64-Bit Server VM AdoptOpenJDK (build 11.0.3+7, mixed mode)

Figure 1.19 Verifying that the installation was successful
If you see openjdk version 11 in the results, you are ready to go to the next step.
CREATING YOUR FIRST JAVA PROGRAM
Now that we have a JDK installed, we are ready to create our first Java program. We will use a text editor for this process and then walk through how your computer runs a program written in Java. You're not going to understand all of the words in the syntax here, which is fine. What we want to do at this point in time is get you writing your first program and running it!
Writing the Program
When learning a new language, it is customary that your first program simply print out “Hello, World!” to the screen. We'll do this following these steps:
- Open a text editor.
- Type in the Java code.
- Save the file as
Hello.java. - Compile the code with the Java compiler (javac).
- Run the program.
Open a text editor on your computer. For Windows, Notepad is a good choice; however, you can use any text editor you like. If you have a Mac, you can use the text editor. On Linux, there are editors such as Gedit, nano, or Vi. Create a new file if necessary and then type the code presented in Listing 1.1. Don't worry about what any of it means; we'll get to that soon enough.
LISTING 1.1
Hello.java: “Hello, World!”
public class Hello {public static void main (String[] args) {System.out.println("Hello, World!");}}
There are several things to notice about this file. First, you should note that the program creates something called a public class in the first line. A Java program is a class, which is a basic container for code in Java. This public class has the name Hello. It is important that when you enter this program into your editor and save it, you use this same name for the file. As such, you will need to save the program as Hello.java. If you are using a text editor in Windows, you'll want to make sure that .txt doesn't get added to the end of the name.
In addition to a Java program being a class, this class will also have a main method in it. A method is another container for Java code. A method must be placed inside a class. It is a named block of code that can be executed to accomplish some task. Here, it just prints “Hello, World!” You will learn more about classes and methods in future lessons.
The main method is a special method that is the entry (or starting) point for every Java program. The first line of the main method (public static void main (String[] args)) must be written exactly as in Listing 1.1, and it must be contained inside a class.
The curly braces, { }, denote the beginning and ending, respectively, of code blocks. You'll see that there are two sets of curly braces in our program. One is nested inside the other.
This leaves one more big line of code to mention:
System.out.println("Hello, World!"); This line is the magic code that sends things to the console. In this case, this code is going to write what is between the two quotes to the console. We'll learn much more about this later. For now, make sure you include the periods and the semicolon where they are shown in this line of code. You also need to make sure you capitalize the word System as shown. These small details are important for making sure the program works as expected.
Compiling and Running the Program
Now that you've written the Java program, you are ready to compile and run it.
To be able to run the program, we need to convert it into what is known as a class file. That class file contains what is known as bytecode. It is bytecode that the Java runtime environment, in particular the Java virtual machine, is able to interpret and run as our program. To do that, we can run the Java compiler.
To run the Java compiler, we type in javac. That's the name of the program. Javac is looking for one or more Java files to compile. In our case, we just want to pass in Hello.java. When we do this, the compiler will read Hello.java, and it will convert that into a class file called Hello.class.
Open your command-line interface and use the cd command to open the directory where you saved the Hello.java file. You saw how to open the command-line interface earlier to check the version of your JDK.
- In Windows, click Start and use cmd to open the command prompt.
- Enter cd Documents and hit Enter.
- Enter dir at the prompt and verify that you see
Hello.javain the results.
- In Mac (or Linux), open Terminal.
- Enter cd Documents and hit Enter.
- Enter ls at the prompt, hit Enter, and verify that you see
Hello.javain the results.
We will now compile our program by running the following command on the command line:
javac Hello.javaWhen you run this command, it will compile your code and create a Java program that can be executed. If you entered everything correctly, you won't see any feedback. If you entered something wrong, then any errors will be displayed. If an error is displayed, review the code in Listing 1.1 and make sure what you typed into your editor is identical, including semicolons and periods.
After our program is compiled, we can run it. We need to tell Java what program to execute. We'll run the Java program by using the java command on the command line followed by the name of the class we are running, in this case, Hello.
java HelloNote that we did not include any extension, but rather just use the name of the class we are running. When this command is executed, it will print “Hello, World!” to the screen, as shown in Figure 1.20.
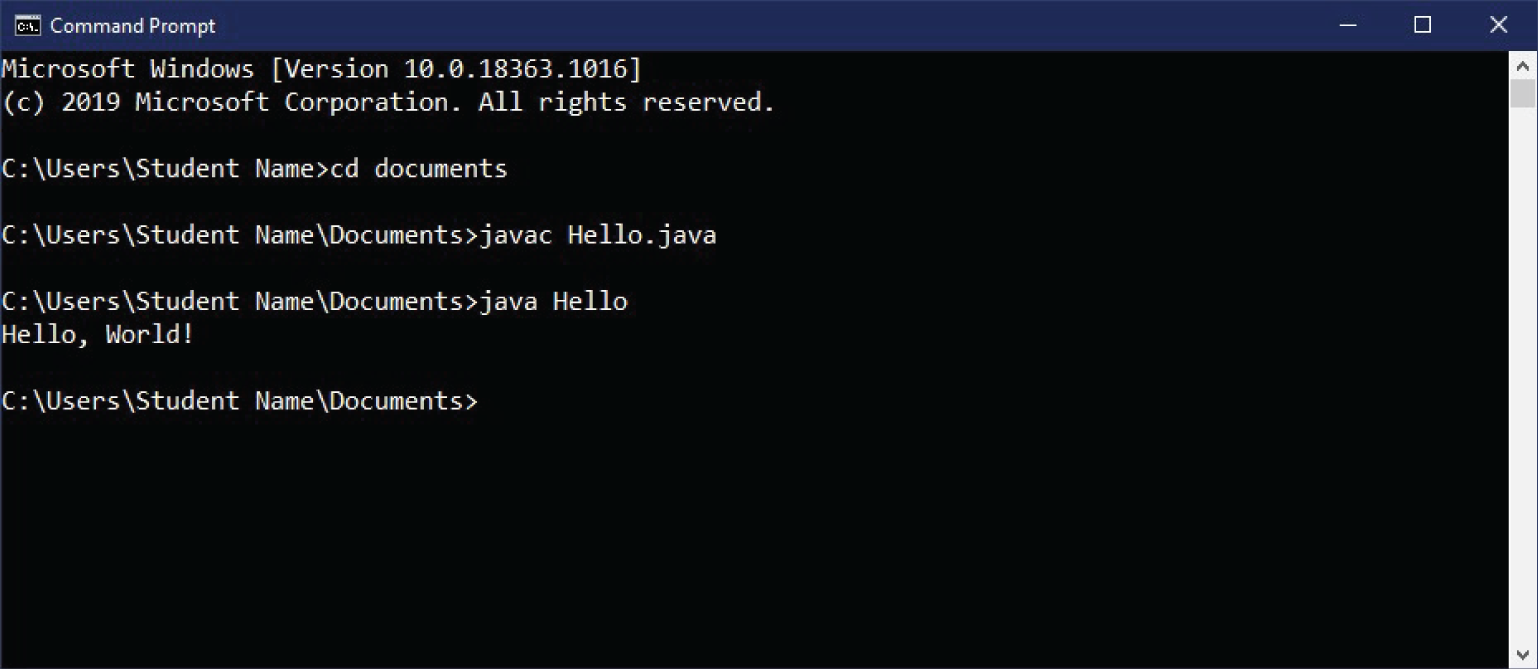
Figure 1.20 Hello.java output
Dealing with Syntax Errors
Syntax is the sequence of characters that make up well-formed statements in a programming language. You can think of syntax like the spelling, punctuation, and grammar rules of the programming language. The compiler is good at detecting syntax errors and will tell you when you type something that is not syntactically correct.
If you make a mistake in your program by leaving off a punctuation mark, capitalizing something that shouldn't be capitalized, or forgetting a bracket, it can cause a syntax error. If you entered Listing 1.1 perfectly, then it would have compiled without any issues. If, however, you made a mistake, then you might have gotten feedback.
Remove the semicolon from the end of the following line in Listing 1.1:
System.out.println("Hello, World!")If you compile the listing again, the following is the output you'll receive:
C:UsersJavaStudentjava>javac Hello.javaHello.java:3: error: ';' expectedSystem.out.println("Hello, World!")^1 error
As you can see, the Java compiler is providing you with information on your syntax error. This will help you determine what needs to be fixed.
USING THE COMPILER AND JAVA VIRTUAL MACHINE
The flow chart in Figure 1.21 represents the steps that happen behind the scenes when we compile and run our program.

Figure 1.21 Behind the scenes while compiling and running
- We created the
Hello.javafile using normal text and Java syntax. It includes a public class that defines what we want the computer to do when we run the program. - When we ran the command
javac Hello.javain the second step, it invoked the Java compiler. The compiler converts the text that we typed inHello.javainto bytecode. - Bytecode is a set of instructions for the JVM. When we ran the command
java Hello, we were running the bytecode version of the program that the JVM can read and interpret. - The JVM is basically a virtual computer that runs in a layer between the software and the operating system. Because all Java programs use the JVM to run, we can run the same program on any platform that supports Java, including Windows, macOS, and Linux.
- The JVM interprets the bytecode from your program and converts it into machine code that can run on the processor of your machine.
SUMMARY
In this lesson, we went over what a JDK is and why we need one as Java developers. We compared Oracle JDK with OpenJDK and then installed OpenJDK for use in this book.
We then created, compiled, and ran our first Java program called Hello.java. We learned the following:
- Java programs consist of a class that contains a
mainmethod. Themainmethod is the special starting point for every Java program. - Curly braces,
{}, mark the start and end of code blocks in Java. System.out.println("Hello, World!");is the magic code that sends text to the console to be displayed.
Finally, we learned about the Java Virtual Machine and the process that a Java file goes through from creation to execution.
While it is possible to write any Java program using a plaintext editor like we did in this lesson, larger programs are much more complicated than this one is and often include many individual files that must work together as a single project. In the next lesson, we'll install an integrated development environment (IDE), which includes tools that can identify syntax errors as we are coding before we say to compile the program, keep related files together in a single project, and compile the code when we want to test it.