
WHAT'S IN THIS CHAPTER?
A Joomla web page is made up of several elements, some of which you've met already. The articles are the pieces that contain the content for a given page. They can have pictures, video, audio, or just words. The menus provide the buttons to click to get to the content. In later chapters, you'll learn about modules and components, which provide other types of functionality to the Joomla web page. Templates are the icing on this big cake — they are anything that makes your web site look pretty.
This chapter covers Joomla's default templates, how to assign different templates to different pages, and how to install new templates from other sites.
Joomla comes with three templates by default. They're actually there as learning tools more than as templates you might use on a production web site.
If you choose Extensions
Note
To see a thumbnail image of a template, simply mouse over the template's name.
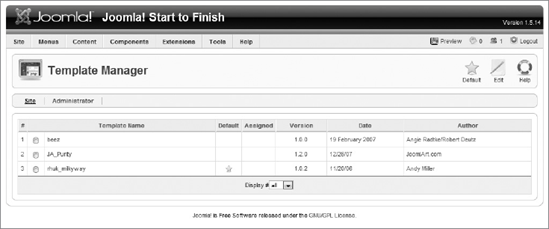
Note there are two tabs in the Template Manager: one for Site and one for Administrator. The Site tab refers to templates used on the front end of your site, whereas the Administrator tab refers to templates on the back end of the web site. Yes, it's possible to completely reengineer the way the back end of Joomla looks by changing its template! Only one administrator template comes with Joomla by default, called Khephri. There are a limited number of other Joomla administrator templates available for download at a variety of web sites. I recommend you stick with the Joomla default administrator template. It will make your support life easier as well. If you use different templates for different clients, you will have to remember which one they have installed. You'll also have to remember what the icons look like, where they're located, and how things look.
Let's go back to the Site tab. The default template is rhuk_milkyway (often just called Milkyway). If you click on the name of the template (or click the radio button next to its name and click the Edit button in the upper right), you can see some options for configuring this template, as shown in Figure 7-2. Milkyway is the template you've seen on the site all through this book.
Take a look at the template's Parameters on the right side of the screen. Color Variation is exactly what you would think it is — it changes the primary color scheme of the template. Change it to orange (or any other color) and click the Apply button (the big green check mark) in the upper right. Using Apply keeps you in this screen so that you can make more tweaks, but it applies your changes to the front end of the web site.
Now take a look at what happened by going to the front end of the web site and refreshing to see your changes. The titles and links are orange, but the background is blue.
That looks okay, but what if you could get the background to be orange, too? Fortunately, if you go back to the Template Manager Parameters screen, you can change the background color with the Background Variation drop-down menu. Click Apply, head back to the front end of the web site, and refresh. Getting better!
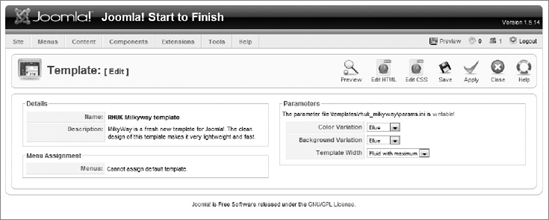
The Template Width drop-down menu of the Parameters area has to do with, intuitively, the width of the template. Small makes the template fit on an 800×600 monitor. Medium works with 1024×768 monitors. Fluid stretches the site to the full width of the browser window. Fluid with maximum makes the width fluid to a certain point, at which the site does not get any wider. Which is best? Of course, it depends. What monitor widths do your target audience use? Older computers have smaller monitors. If your target audience largely has newer computers, you could use one of the wider widths.
These parameters are unique to this template. They're created with some rather advanced template coding, and template developers have a lot of options for making these parameters. Some templates have several screens of parameters, whereas other templates might not have any parameters at all. The commercial templates might document which parameters do what, but the free templates seldom have any documentation.
Go back to the main Template Manager screen. If you're still in the Milkyway template's Parameters screen, click the Close button at the top right to return to the main Template Manager screen. If you're anywhere else on the site, choose Extensions
Note that the Milkyway template has a star in the column that says Default. This star indicates that when you create a new page and link it to the menu (which is how Joomla knows the page needs a template assigned), the Milkyway template is used on that page by default.
What if you want to assign a different template to a certain page or group of pages? You can assign templates to pages via the Template Manager.
For example, suppose you want to assign the Beez template to some of your pages. In the Template Manager, click on the Beez template name (or select the radio button and click the Edit button). The Beez template's Parameters screen appears, as shown in Figure 7-3.
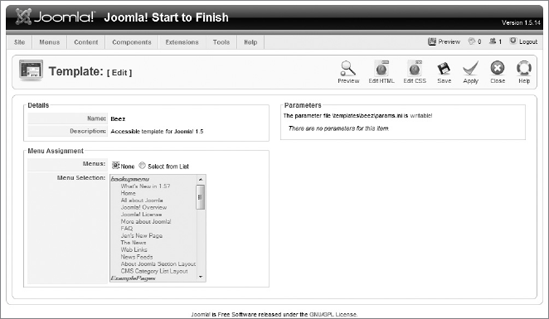
Note the Menu Assignment area in the bottom left, which currently is set to None. Change the radio button from None to Select from List, and then select Home from the Menu Selection box. Click the Apply button in the upper right, and go back to the web site home page on the front end and refresh it. It should look something like Figure 7-4.
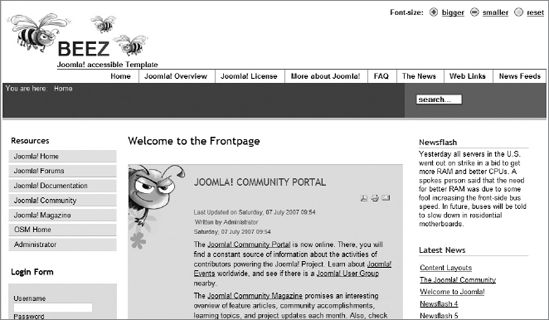
Pretty radical change! Now click on any link in the main menu — the page changes back to the Milkyway template.
I most assuredly would not encourage you to have such a radical template change on your web site! Some kind of visual continuity should exist among all pages on your site, and it is clearly lacking in this example. You run the risk that visitors will not even be sure that they are on the same site when they go from your Beez home page to a Milkyway inside page.
However, occasionally you might have a home page that has a radically different layout, yet is visually continuous, with the inside pages on your site. Assigning a different template to the home page, in that case, might be a good plan.
Having more than one template on your site does have its drawbacks, though. There are maintenance issues. You might need to make changes in more than one location, if a logo or some type of style changes. You must also train your users to remember to assign the right template to their page. This can only be done from the back end of the site, not the front end, and it's an extra step your client must remember to do. Packing all your pages into a single template is ideal. Chapter 13, "Custom Templates," gives you pointers for doing this.
One of Joomla's great strengths is its engaged and involved developer community, including its template developers. A Google search for "Joomla templates" pulls up dozens of links to sites where you can download templates for free or for fairly low cost.
Which is better — free or commercial? By now, you know the answer is, "It depends." If you are a beginning Joomla configuration specialist, you might do better with a commercial template with great support. Joomla Junkie, RocketTheme, Joomla Shack, and many others offer top-notch technical support with their templates.
Of course, for free, the price is right. Some of the aforementioned commercial developers also offer a few free templates that are well worth exploring. You can also download free templates from a number of other locations. However, when templates are free, sometimes they don't quite work right, or the styling is off, or they're incompatible in some browser or another. You'll want to have good technical chops to fix any problems that might arise with a free template — or you'll want to be able to walk away and pick a different template if the first one doesn't quite work for you.
Note
Templates are distributed as a zipped file. You don't want to unzip this file (unless the first zip contains documentation plus the template, and the template is bundled in there as its own zipped file). Keep it zipped, because this is how it installs on your site.
To install a template you've downloaded, do the following:
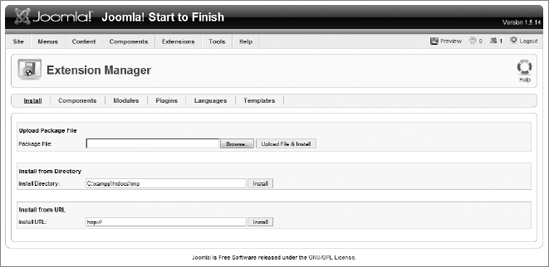
In the back end of Joomla, go to Extensions

You use this same screen for installing modules, components, plug-ins, templates, and languages. The installation process is the same for all of these items.
In the Upload Package File section, click the Browse button and browse for the zipped file on your computer. Select the file and click Open.
Click the Upload File & Install button to install the template to your site.
Choose Extensions
Alternatively, you can set it as the default template by choosing the radio button next to the template name and clicking the Default button in the upper right.
Once you've tried a bunch of templates on your web site, looking for the perfect match, you may decide you'd like to get rid of some of the templates that didn't work for you.
Getting rid of templates is very easy. Once again, go to Extensions
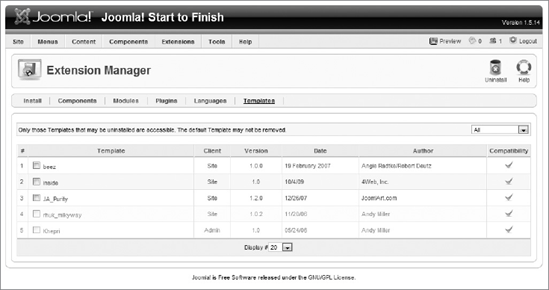
Place a checkmark after the template name you want to delete, and then click the Uninstall button at the top right.
Note that two templates are grayed out of the list. One is Milkyway, and the other is Khepri. These templates are the default templates for the front end and the back end of the site, respectively. You cannot delete the site's default templates.