
Now that you have painstakingly read your way through the basics of Ruby in Chapter 1, you can move on to a more exciting topic. In this chapter, you will create your first small Ruby on Rails project.
Environment (Development)
Development
Test
Production
In this chapter, you will be working only with the Development environment. Once you have gained a better feeling for Rails, you will start using tests, and then you will need the corresponding environment (where, for example, the test database is populated when you start a test and then cleared). Later, I will explain the various scenarios to show how you can roll out your Rails application from the Development environment to the Production environment.
The Development environment has everything you need for developing, besides an editor and a web browser. You do not need to install a special web server but can use the integrated Rails web server. It does not have extremely high performance, but you do not need that for developing. Later, you can switch to big web servers like Apache or Nginx. The same applies to the database.
SQLite3 Database
In terms of the database, the main focus in this chapter is once more not on optimum performance but on showing you a simple and quick way of getting started. That’s why Rails uses the SQLite3 database . You already have everything you need installed, and you don’t need to worry about anything. Later I will explain how you can use other databases (e.g., PostgreSQL).
Why Is It All in English?
If you are not a native English speaker, you should try to accept and even adopt Rails’ love for the English language. Much of it will then be much easier and more logical. Most of the code reads just like a normal English sentence. For example, many mechanisms “automagically” use plural or singular forms of normal English words. If you get used to naming database fields and tables with English terms (even if you are programming in a different language), then you can make use of the whole power of this magic. This mechanism is referred to as Inflector or inflections .
If you are programming in a language other than English, it still makes sense to use English names for variables, classes, and methods. You can write the comments in your own language, but if you take part in international projects, you should obviously write the comments in English as well.
Static Content (HTML and Graphics Files)
Let’s first create a new Rails project.
Create a Rails Project
Before you even get going, please check that you are using Rails 5.2.
That’s looking good. If you have an older version of Ruby or Rails installed, please install the 5.2 version before you read any further. The command gem install rails installs the current Rails version , and gem install rails --pre installs the beta of the next version.
Now you start by creating a new Rails project with the name testproject. Ruby on Rails is a framework, so you first need to set up the corresponding directory structure and basic configuration, including several scripts. It’s as easy as pie; just use the command rails new testproject to create everything you need.
Next, you cd into the new directory and run the first migration to create Active Storage tables.
![]() You don’t need to run rails db:migrate, which runs open database migrations at this time, but it is a good habit to make sure all database migrations are done.
You don’t need to run rails db:migrate, which runs open database migrations at this time, but it is a good habit to make sure all database migrations are done.
You can check whether the new Rails application is working by launching the integrated web server.
![]() Depending on the operating system (for example, macOS) and on your firewall settings, you may see a pop-up window when first starting a Rails application asking you if the firewall should permit the corresponding connection
.
Depending on the operating system (for example, macOS) and on your firewall settings, you may see a pop-up window when first starting a Rails application asking you if the firewall should permit the corresponding connection
.
Rails
Looks good. Rails works fine.
![]() You can stop the web server with the key combination Ctrl+C.
You can stop the web server with the key combination Ctrl+C.
Static Pages
There are certain static pages , images, and JavaScript files that are automatically delivered by Rails. Remember the following part of the output of the command rails new testproject?
The directory name public and the files it contains already look very much like static pages. Let’s create the file public/hello-world.html with the content shown in Listing 2-1.
public/hello-world.html
Now start the Rails web server with rails server.

Hello!
No output in the log means that this page was not handled by the Rails framework. It was delivered directly from the web server, which is Puma in this case.
![]() You can of course also use the URL http://localhost:3000/hello-world.html. But Rails regards HTML and therefore the file ending .html as standard output format, so you can omit the .html extension here.
You can of course also use the URL http://localhost:3000/hello-world.html. But Rails regards HTML and therefore the file ending .html as standard output format, so you can omit the .html extension here.
Now you know how you can integrate fully static pages in Rails. This is useful for pages that never change and that you want to work even if Rails is not currently working, for example because of an update. In a production environment, you would usually put a classic web server such as Apache or Nginx in front of the Rails server, which is capable of autonomously delivering static files from the public directory .
Creating HTML Dynamically with erb
The content of an erb file will probably seem familiar to you. It is a mixture of HTML and Ruby code (erb stands for “embedded Ruby”). erb pages are rendered as views. This is the first time for you to get in touch with the MVC model. You need a controller to use a view, and that can be created via the generator rails generate controller . Let’s take a look at the onboard help of this generator, shown here:
Nice! You are kindly provided with an example further down:
This doesn’t really fit the bill for this case, but I am feeling brave and suggest that you simply try rails generate controller Example test.
Phew...that’s a lot of stuff being created. Among others, the file app/views/example/test.html.erb is created. Let’s take a closer look at it; see Listing 2-2.
app/views/example/test.html.erb
It’s HTML, but for it to be a valid HTML page, something is “missing” at the top and bottom. The missing part can be found in the file app/views/layouts/application.html.erb. You are going to take a look into it later in the chapter.
Please launch the web server to test it.
Take a look at the web page in the browser at the URL http://localhost:3000/example/test.
In the log file log/development.log, you will find the following lines:
This is an HTTP GET request for the URI /example/test. This was then apparently rendered as HTML by the controller ExampleController using the method test.
Now you just need to find the controller. It’s a good thing you bought this book. All controllers are in the directory app/ controllers , and there you go, you indeed find the corresponding file app/controllers/example_controller.rb.
Please open the file app/controllers/example_controller.rb with your favorite editor, as shown in Listing 2-3.
app/controllers/example_controller.rb
That is very clear. The controller ExampleController is a descendant of the controller ApplicationController and contains currently just one method with the name test. This method has no program logic (it’s empty).
You will probably ask yourself how Rails knows that for the URL path /example/test it should process the controller ExampleController and the method test. This is not determined by some magical logic but by a routing configuration . All routings can be listed with the command rails routes.
These routes are configured in the file config/routes.rb, which has been autofilled by the controller generator with a route to example/test. The line that is important is the second one, as shown in Listing 2-4.
config/routes.rb
Later in the book you are going to dive more into routes.
![]() A static file in the directory public always has higher priority than a route in config/routes.rb! So, if you were to save a static file in public/example/test, that file would be delivered.
A static file in the directory public always has higher priority than a route in config/routes.rb! So, if you were to save a static file in public/example/test, that file would be delivered.
Programming in an erb File
erb pages can contain Ruby code. You can use erb to program and give these pages dynamic content.
Let’s start with something simple: adding 1 and 1. First try the following code in irb:
That was easy.
![]() If you want to output the result of Ruby code in erb, enclose the code within <%= ...%>.
If you want to output the result of Ruby code in erb, enclose the code within <%= ...%>.
Fill the erb file app/views/example/test.html.erb as shown in Listing 2-5.
app/views/example/test.html.erb
Then use rails server to launch the web server.
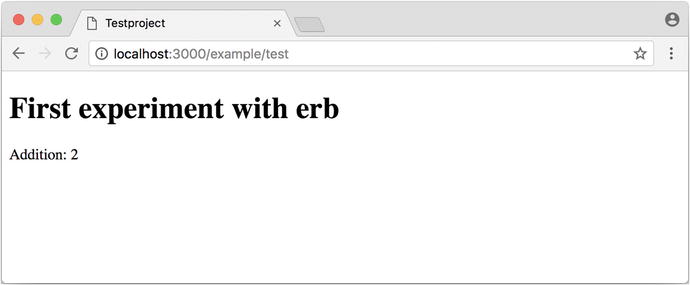
Experimenting with erb
You may ask yourself, how can the result of adding two Integers be displayed as a String? Let’s first look up in irb if it really is an Integer.
Yes, both the number 1 and the result of 1 + 1 is an Integer. What happened? Rails is intelligent enough to automatically call all objects in a view (that is, the file test.html.erb) that aren’t already strings via the method .to_s, which always converts the content of the object to a string. Let’s take a brief trip to irb.
You are now going to learn the finer points of erb step-by-step. Don’t worry, it’s neither magic nor rocket science.
<% ... %> vs. <%= ... %>
<% ... %>: Executes the Ruby code it contains but does not output anything (unless you explicitly use something like print or puts in special ways).
<%= ... %>: Executes the Ruby code it contains and outputs the result as a String. If it’s not a String, the method to_s will be called.
![]() The output of <%= ... %> is automatically escaped. So, you don’t need to worry about “dangerous” HTML.
The output of <%= ... %> is automatically escaped. So, you don’t need to worry about “dangerous” HTML.
Let’s use an example to make sure it all makes sense. You use each to iterate through the range (0..5). Edit app/views/example/test.html.erb as shown in Listing 2-6.
app/views/example/test.html.erb

Iterating through a range
Let’s now take a look at the HTML source code in the browser.
Now you understand how Ruby code is used in the view.
Q & A
- 1.
I don’t understand anything. I can’t cope with the Ruby code. Could you please explain it again?
Is it possible that you have not completely worked your way through Chapter 1? Please do take your time with it and have another thorough look. Otherwise, the rest won’t make any sense here.
- 2.
I can understand the Ruby code and the HTML output. But I don’t get why some HTML code was rendered around it if I didn’t even write that HTML code. Where does it come from, and can I influence it?
Excellent question! I will get to that in the next section.
Layouts
The erb file in the directory app/views/example/ only forms the core of the later HTML page. By default, an automatically generated app/views/layouts/application.html.erb is always rendered around it. Take a closer look at it in Listing 2-7.
app/views/layouts/application.html.erb
The interesting bit is the following line:
With <%= yield %>, the view file is included here. The lines with the stylesheets , the JavaScript, and csrf_meta_tags can stay as they are for now. You’ll take a look into that in the asset pipeline in Chapter 13. There’s no need to bother with that right now.
The file app/views/layouts/application.html.erb enables you to determine the basic layout for the entire Rails application. If you want to enter a <hr> for each page and above it some header text, then you can do this between <%= yield %> and the <body> tag, as shown in Listing 2-8.
app/views/layouts/application.html.erb
You can also create other layouts in the directory app/views/layouts/ and apply these layouts depending on the relevant situation. But let’s leave it for now. The important thing is that you understand the basic concept.
Passing Instance Variables from a Controller to a View
One of the cardinal sins in the MVC model is to put too much program logic into the view. That’s more or less what used to be done frequently in PHP programming. I’m guilty of having done it myself. But one of the aims of MVC is that any HTML designer can create a view without having to worry about the programming. Yeah, yeah...if only it were always that easy. But let’s just play it through in our minds. If I have a value in the controller that I want to display in the view, then I need a mechanism for this. This is referred to as an instance variable and always starts with @. If you are not 100 percent sure which variable has which scope, then please take another quick look at “Scope of Variables” in Chapter 1.
In the following example, you insert an instance variable for the current time that you get by Time.now in the controller and then insert it in the view. You’re taking programming intelligence from the view to the controller.
The controller file app/controllers/example_controller.rb looks like Listing 2-9.
app/controllers/example_controller.rb
In the view file app/views/example/test.html.erb, you can then access this instance variable, as shown in Listing 2-10.
app/views/example/test.html.erb
With the controller and the view, you now have a clear separation of programming logic and presentation logic. Now you can automatically adjust the time in the controller in accordance with the user’s time zone, without the designer of the page having to worry about it. As always, the method to_s is automatically applied in the view.
I am well aware that no one will now jump up from their chair and shout, “Thank you for enlightening me! From now on, I will only program neatly in accordance with MVC.” The previous example is just the first small step in the right direction and shows how you can easily get values from the controller to the view with instance variables.
Partials
Even with small web projects, there are often elements that appear repeatedly, for example, a footer on the page with contact info or a menu. Rails gives you the option of encapsulating this HTML code in the form of partials and then integrating it within a view. A partial is also stored in the directory structure under app/views/. But its file name must start with an underscore (_).
As an example, you now add a mini footer to your page in a separate partial. Copy the content shown in Listing 2-11 into the new file app/views/example/_footer.html.erb.
app/views/example/_footer.html.erb
![]() Yes, this is not the MVC way of doing it right. Date.today.year should be defined in the controller. I’m glad that you caught this mistake.
Yes, this is not the MVC way of doing it right. Date.today.year should be defined in the controller. I’m glad that you caught this mistake.
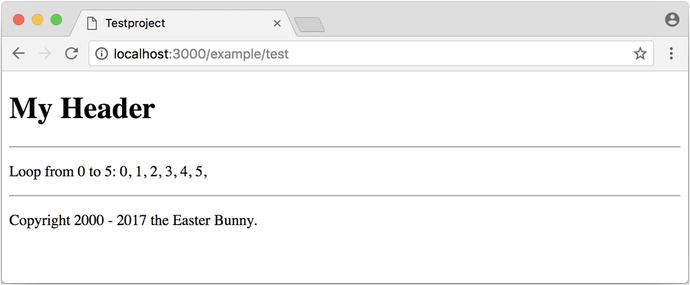
You can edit the file app/views/example/test.html.erb as shown in Listing 2-12 and insert the partial via the command render.
app/views/example/test.html.erb
So, now you have the following files in the directory app/views/example:

![]() The name of a partial in the code is always specified without the preceding underscore (_) and without the file extensions .erb and .html. But the actual file must have the underscore at the beginning of the file name and end with the file extensions .erb and .html.
The name of a partial in the code is always specified without the preceding underscore (_) and without the file extensions .erb and .html. But the actual file must have the underscore at the beginning of the file name and end with the file extensions .erb and .html.
Partials can also be integrated from other areas of the subdirectory app/views. For example, you can create a directory app/views/shared for recurring and shared content and create a file _footer.html.erb in this directory. You would then integrate this file into the erb code via the following line:
Passing Variables to a Partial
Partials are great in the sense of the Don’t Repeat Yourself (DRY) concept. But what makes them really useful is the option of passing variables. Let’s stick with the copyright example. If you want to pass the start year as a value, you can integrate this by adding the code in Listing 2-13 in the file app/views/example/_footer.html.erb.
app/views/example/_footer.html.erb
So, let’s change the file app/views/example/test.html.erb as shown in Listing 2-14.
app/views/example/test.html.erb
Sometimes you need a partial that uses a local variable and need the same partial but without the local variable somewhere else. You can take care of this in the partial with an if statement, as shown here:
![]() defined? can be used to check whether an expression has been defined.
defined? can be used to check whether an expression has been defined.
Now you can call this partial with <%= render partial: "footer", locals: {start_year: '2000'} %> and with <%= render 'footer' %>.
Further Documentation on Partials
You have really only barely scratched the surface here. Partials are powerful tools. You can find the official Ruby on Rails documentation on partials at http://guides.rubyonrails.org/layouts_and_rendering.html#using-partials .
The Rails Console
The console in Rails is nothing more than an irb session (see the section “irb” in Chapter 1) built around the Rails environment. The console is useful both for developing and for administration purposes because the whole Rails environment is represented and available.
I’ll show you how to work with it in this example application:
Start the Rails console with the command rails console.
You can use exit to get back out.
As mentioned in Chapter 1, I use the configuration file shown in Listing 2-15 to save some real estate in the console.
~/irbrc
In the console , you have access to all variables that are also available later in the proper application.
In Chapter 3, you are going to be working with the console a lot and will soon begin to appreciate the debugging possibilities it offers.
![]() One of my best buddies when developing Rails applications is the Tab key. Whenever you are looking for a method for a particular problem, re-create it in the Rails console and then press the Tab key twice to list all the available methods. The names of the methods are usually self-explanatory.
One of my best buddies when developing Rails applications is the Tab key. Whenever you are looking for a method for a particular problem, re-create it in the Rails console and then press the Tab key twice to list all the available methods. The names of the methods are usually self-explanatory.
app
app is useful if you want to analyze things having to do with routing.
What Is a Generator ?
You have already used the command rails generate controller. It starts the generator with the name controller. There are other generators as well. You can use the command rails generate to display a list of available generators.
What does a generator do? A generator makes a programmer’s job easier by doing some of the mindless tasks for you. It creates files and fills them with default code, depending on the parameters passed. You could do the same manually, without the generator. So, you do not have to use a generator. It is primarily intended to save you work and avoid potential errors that can easily arise from mindless repetitive tasks.
![]() Someday you might want to create your own generator. Take a look at
http://guides.rubyonrails.org/generators.html
to find a description of how to do that.
Someday you might want to create your own generator. Take a look at
http://guides.rubyonrails.org/generators.html
to find a description of how to do that.
Helper
A helper method takes care of recurring tasks in a view. For example, if you want to display stars (*) for rating a restaurant and not numbers from 1 to 5, you can define the helper shown in Listing 2-16 in the file app/helpers/application_helper.rb.
app/helpers/application_helper.rb
With this helper, you can then apply the following code in a view:
You can also try the helper in the console.
There are lots of predefined helpers in Rails, and you will use some of them in the next chapters. But you can also define your own custom helpers. Any of the helpers from the file app/helpers/application_helper.rb can be used in any view. Helpers that you want to be available only in certain views must be defined for each controller. When creating a controller, a file for helpers of that controller is automatically created in app/helpers. This gives you the option of defining helpers only for this controller or for the views of this controller.
All helpers are in the directory app/helpers/.
Debugging
Rails provides a couple of debug tools to make a developer’s live easier.
debug
In any view you can use the debug helper to render an object with the YAML format within a <pre> tag. To display the value of @foo, you can use the following line in your view:
Web Console
The web-console gem provides a way to render Rails console views. When you browse to a specific URL, at the end of that page you’ll get a console.
Let me show you this by example with this simple Rails application:
Rails 5.2 introduces a strict content security policy (CSP) that has to be configured to use the web console first. Please take a look at https://developer.mozilla.org/en-US/docs/Web/HTTP/Headers/Content-Security-Policy to understand the concept of a CSP . You find your CSP configuration in the file config/initializers/content_security_policy.rb. Please configure it according to your security needs. Listing 2-17 shows a quick-and-dirty hack to display the use of web console . Please do not use this in production.
config/initializers/content_security_policy.rb
In app/controllers/page_controller.rb, you’ll add the code shown in Listing 2-18.
app/controllers/page_controller.rb
In the view app/views/page/index.html.erb, you’ll add the console command shown in Listing 2-19.
app/views/page/index.html.erb

Web console
Other Debugging Tools
There are a couple of other built-in debugging tools that are out of the scope of this chapter. Please take a look at http://guides.rubyonrails.org/debugging_rails_applications.html to get an overview.
Rails Lingo
Here I’ll cover a couple of words that you’ll often find in the Ruby on Rails universe.
Don’t Repeat Yourself
Many Rails programmers are big fans of DRY . DRY means purely and simply that you should try to place repeated programming logic into separate methods.
Refactoring
You’ll often hear the word refactoring in the context of DRY. This involves functioning applications that are further improved. The application in itself remains unchanged in its interface. But its core is optimized through, among other principles, DRY.
Convention Over Configuration
Convention over configuration (also known as coding by convention ; see http://en.wikipedia.org/wiki/Convention_over_configuration ) is an important pillar of a Rails application. It states that the programmer does not need to decide in favor of certain features when starting a project and set these via configuration parameters. It specifies an underlying basic consensus, and this is set by default. But if you want to work outside of this conventional basic consensus, then you will need to change the corresponding parameters .
Model View Controller Architecture
You have already created a simple Rails application, and in the next chapter you will dive deeply into the topic of ActiveRecord. So, now is a good time to briefly introduce a few terms that often surface in the world of Rails.
According to Wikipedia ( http://en.wikipedia.org/wiki/Model-view-controller ), MVC is a design pattern that separates the representation of information from the user’s interaction with it.
MVC is a structure for software development. It was agreed that it makes sense to have one part of the software in one place and another part of the software in another place. Nothing more, nothing less.
This agreement has the enormous advantage that once you are used to this concept, you know exactly where you can find or need to integrate a certain functionality in a Rails project.
Model
Model in this case means data model. By default, Rails applications are an ActiveRecord data model (see Chapter 3).
All models can be found in the directory app/models/.
View
The view is responsible for the presentation of the application. It takes care of rendering the web page, an XML file, or a JSON file. A view could also render a PDF or an ASCII text. It depends entirely on your application.
You will find all the views in the directory app/views/.
Controller
Once a web page call has ended up in a route (see Chapter 5), it goes from there to the controller . The route specifies a certain method (action) as a target. This method can then fulfil the desired tasks (such as finding a specific set of data and saving it in an instance variable) and render the desired view.
All controllers can be found in the directory app/controllers/.
Abbreviations
rails console
Shorthand notation: rails c
rails server
Shorthand notation: rails s
rails generate scaffold
Shorthand notation: rails g scaffold