When designing applications in Microsoft Dynamics NAV, the Documents allow us to implement a functional workflow that resembles the traditional paper flow in a company. From a pure accounting and auditing perspective, we can run the application without Documents and have the same entries as a result in the database.
Documents act as containers of functionality for end users to be able to work with the application in a human way.
Let's add a Document in our example application and see how we can connect this to our journal during a posting process.
To implement a Document we must follow the following Diagram. Remember that the Document Type is optional.
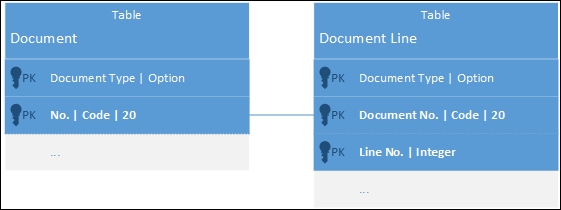
For our Example Document the table structures look as displayed in the following screenshot:

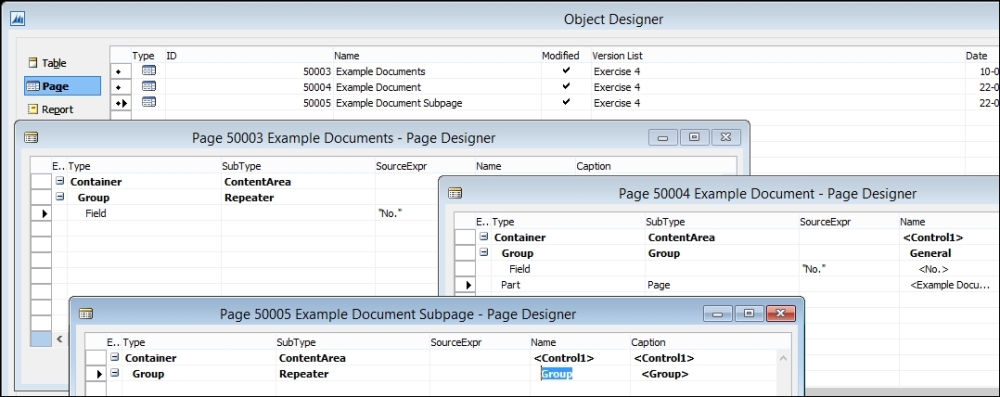
We also need a set of page objects. A list and a card page, as created for the Master Data, and a page for the lines as subpage for the card:
We now have the basic structure that we need to create a document, but in order to be able to implement the Example Journal as part of a posting process we also need to add references to our Master Data. We will reference our Example Person as part of the Document, and the Example Product as part of the Document Line. This way we can create an Example Journal Line for each Document Line when posting a Document.
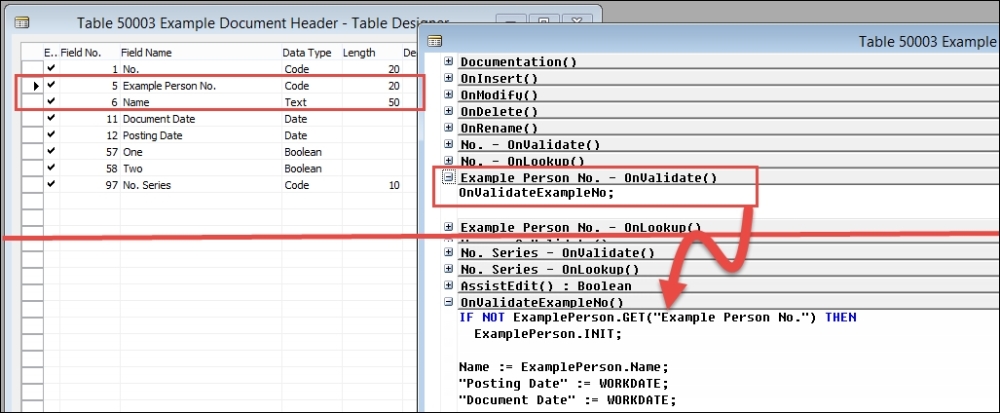
To implement these Master Data we need to implement fields with a reference to the primary key as well as inherit details that are required for our process.
The following image illustrates the Document table with the Master Data fields and Validation Code, as well as some additional fields:
When Documents have a limited life expectancy, we can implement a posting routine to remove the document and create the next document. An example of this process is posting a Sales Order into a Posted Sales Invoice. During these routines, we can create additional historical information, such as entries using the journal as a contract.
In our abstract example model we will create two of these history tables. We will call them Document History One and Document History Two. They are abstract names. Examples in NAV would be the Posted Purchase Invoice and Posted Purchase Receipt.

For our posting routine to be able to understand if it has to create a record in History One, History Two or both, we will implement the Select Pattern.
This Pattern allows us to parse extra parameters to a Codeunit using the OnRun trigger by adding fields to the table that act as placeholders.
The fields never appear on the user interface:

There are other Patterns that implement nicely with the Documents such as No. Series, Address Integration and Entity State. They are implemented in the Example Objects that can be downloaded as part of this book.
Let's have a look at the posting routine that we can create to move data from the Documents to the Document History while creating Example Entries:
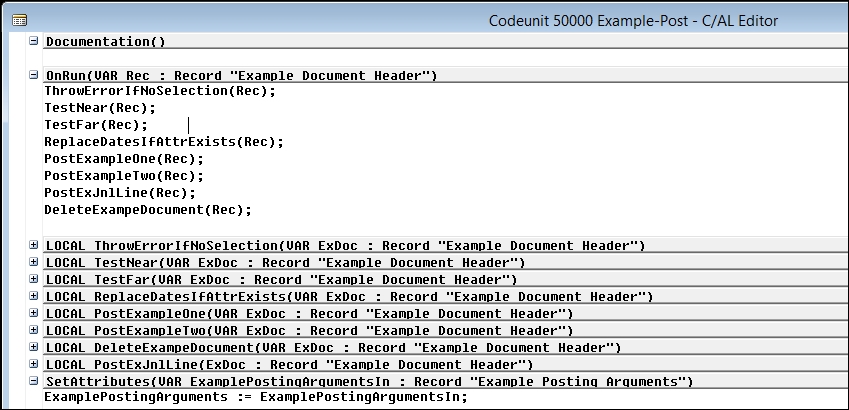
The Codeunit Example-Post 50000 is engineered with a concept called Natural Language Programming that we will discuss in the next chapter, Chapter 5, Coding Best Practices. The OnRun trigger does not contain any business logic code, it only explains in readable English what steps will be processed. Let's look at some of the steps.
When the Codeunit is called, we need to know which history document to create. This is done using the Select fields. If none are selected, we need to throw an error:
WITH ExDoc DO
  IF NOT (One OR Two) THEN
    ERROR(
      NoSelectionError,
FIELDCAPTION(One), FIELDCAPTION(Two));Before starting I/O to the SQL Server, we need to do some basic testing to see whether the Documents contain mandatory data. This is preferably done in the TestNear function:
WITH ExDoc DO BEGIN
  TESTFIELD("Example Person No.");
  TESTFIELD("Posting Date");
END;When the data in the Documents are valid, we need to check if the relevant setup is correct. This is done in the TestFar function:
IF GenJnlCheckLine.DateNotAllowed(ExDoc."Posting Date") THEN
ExDoc.FIELDERROR("Posting Date", DateNotAllowed);This is where we create the History Documents using TRANSFERFIELDS; the following is the code:
WITH ExampleHistoryOne DO BEGIN
  TRANSFERFIELDS(ExDoc);
  INSERT;
END;
WITH ExampleDocumentLine DO BEGIN
  SETRANGE("Document No.", ExDoc."No.");
  IF FINDSET THEN REPEAT
    ExampleHistoryOneLine.TRANSFERFIELDS(ExampleDocumentLine);
    ExampleHistoryOneLine.INSERT;
  UNTIL NEXT = 0;
END;This function creates the Entry based on the Master Data in the Document. This is done using the Journal line as a contract:
WITH ExDoc DO BEGIN
  ExampleDocumentLine.SETRANGE("Document No.", "No.");
  IF ExampleDocumentLine.FINDSET THEN
    REPEAT
      ExJnlLine.INIT;
      ExJnlLine."Posting Date" := "Posting Date";
      ExJnlLine."Document Date" := "Document Date";
      ExJnlLine."Example Person No." := "Example Person No.";
      ExJnlLine."Example Product No." :=
        ExampleDocumentLine."Example Product No.";
      ExJnlLine.Description := ExampleDocumentLine.Description;
      ExJnlLine.Quantity := 1;
      ExJnlPostLine.RunWithCheck(ExJnlLine);
    UNTIL ExampleDocumentLine.NEXT = 0;
END;