
|
CARBONATED CHEMICAL REACTIONS |

THERE ARE MANY SIMPLE CHEMICAL REACTIONS YOU CAN DO WITH INGREDIENTS YOU HAVE IN THE KITCHEN. IN FACT, EVERY TIME YOU MAKE COOKIES OR PANCAKES, YOU CREATE A CHEMICAL REACTION TO MAKE THEM RISE.
What’s a chemical reaction? It’s simpler than you might think.
Everything in our world is made of tiny pieces called atoms. Atoms are often connected to other atoms to form groups of linked atoms called molecules. A water molecule, for example, has two hydrogen atoms and one oxygen atom, bonded together.
A chemical reaction occurs when you mix two different kinds of molecules together to make one or more new kinds of molecules. In other words, it’s just mixing two things together to make something new. You can often tell chemical reactions are happening when you see bubbles, feel a temperature difference, notice an odor, or watch a color change.
This unit contains fun chemical reactions that let you mix things together to make carbon dioxide gas.
|
COLOR-CHANGING MAGIC POTION |

MAKE RED CABBAGE JUICE CHANGE COLOR AND FOAM OVER IN THIS BRILLIANT, BUBBLY EXPERIMENT.
MATERIALS
![]() Head of red cabbage
Head of red cabbage
![]() Knife
Knife
![]() Pot
Pot
![]() Blender (optional, see note)
Blender (optional, see note)
![]() Water
Water
![]() Heatproof spoon
Heatproof spoon
![]() Clear glasses, jars, or small bowls
Clear glasses, jars, or small bowls
![]() Colander
Colander
![]() White paper towels
White paper towels
![]() 1 heaping teaspoon (5 g) baking soda
1 heaping teaspoon (5 g) baking soda
![]() 3 tablespoons (45 ml) white vinegar
3 tablespoons (45 ml) white vinegar
SAFETY
TIPS & HINTS
An adult should boil the cabbage and strain the hot liquid.
This experiment may overflow, so have the paper towels ready.
PROTOCOL
STEP 1: Chop a head of red cabbage into small pieces and place it in a pot with enough water to cover it completely.
STEP 2: Boil the cabbage uncovered for about 15 minutes, stirring occasionally.
STEP 3: Remove from the heat, let the juice cool, and strain the purple juice into a jar or bowl. Pour about 1/4 cup (60 ml) of the cabbage juice, or “magic potion,” into each of two clear glasses, jars, or bowls and set them on a white paper towel.
STEP 4: Add the baking soda to one glass of cabbage juice and stir. Observe the color change. (Fig. 1)

Fig. 1: Add the baking soda to one glass of cabbage juice.
STEP 5: To the second glass, add the vinegar and see what color it turns. (Fig. 2)

Fig. 2: Add the vinegar to the other glass of cabbage juice.
STEP 6: Pour the glass of cabbage juice containing vinegar (pink) into the glass of cabbage juice containing the baking soda (blue/green). (Fig. 3)

Fig. 3: Pour the pink cabbage juice into the blue cabbage juice.
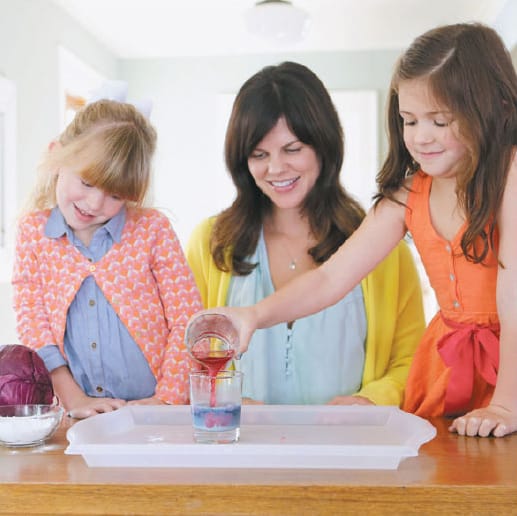
Fig. 4: Watch the chemical reaction.

Fig. 5: The bubbles contain carbon dioxide gas.
Note: To avoid needing to use the stove, chop half of a head of red cabbage and blend it in a blender with about 3 cups (710 ml) of water. Strain the liquid through a colander and then through a coffee filter in a plastic bag with one corner cut off. Blended cabbage juice makes longer-lasting bubbles and turns a slightly brighter shade of blue.
CREATIVE
ENRICHMENT
 Try adding some other liquids to your magic potion. Can you tell whether they’re acids or bases?
|
PAPER BAG VOLCANO |

MAKE A KITCHEN-TABLE KRAKATOA.

MATERIALS
![]() Paper lunch sack or small paper bag
Paper lunch sack or small paper bag
![]() Scissors (optional)
Scissors (optional)
![]() Tape
Tape
![]() Empty plastic water or soda bottle
Empty plastic water or soda bottle
![]() White vinegar
White vinegar
![]() Food coloring
Food coloring
![]() 1/4 cup (55 g) baking soda (plus more for step 9)
1/4 cup (55 g) baking soda (plus more for step 9)
SAFETY
TIPS & HINTS
Vinegar can sting your eyes.
Don’t worry about making your volcano perfect. It will get soaked!
PROTOCOL
STEP 1: Invert the brown paper bag and cut or tear a small triangle off one corner to form a hole. This will be the mouth of your volcano.
STEP 2: Tear, cut, fold, crumple, and tape the bag to form a cone shape that will sit over the bottle, with the mouth of the bottle sticking through the cut corner of the bag, but don’t tape the bag to the bottle. Decorate your volcano.
STEP 3: Remove the bottle from the bag and fill it halfway full of vinegar. (Fig. 1)

Fig. 1: Add vinegar to the bottle.
STEP 4: Add several drops of food coloring to your “lava.” (Fig. 2)
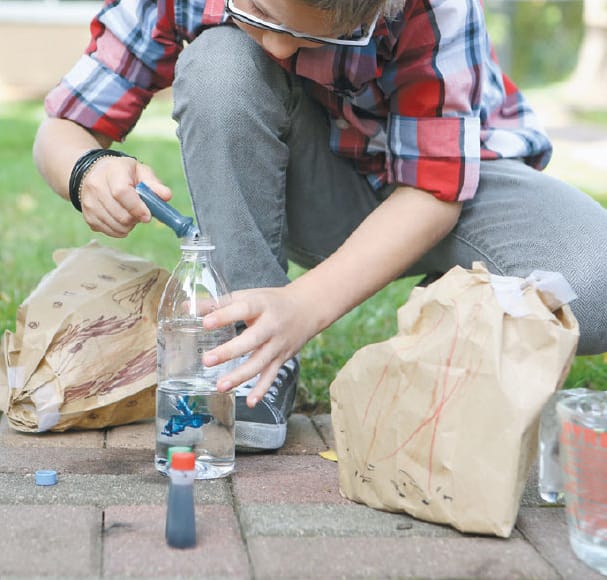
Fig. 2: Use food coloring to tint your lava.
STEP 5: Place the bag back over the bottle to hide the lava container.
STEP 6: Tape a piece of paper together to form a cone with a hole on one end that will fit inside the mouth of your volcano. You’ll use this as a funnel to add the baking soda.
STEP 7: Place the volcano on a tray or container to contain the overflow.
STEP 8: Start the eruption by quickly pouring 1/4 cup (55 g) of baking soda through the cone into the volcano. Remove the cone immediately. (Fig. 3, 4)

Fig. 3: Pour the baking soda into your volcano.

Fig. 4: Stand back!
STEP 9: When your volcano stops erupting, try adding more baking soda to see what happens.
CREATIVE
ENRICHMENT
How much baking soda do you have to add to one cup (235 ml) of vinegar until it stops foaming?
|
FIZZY BALLOONS |

WATCH A BUBBLY CHEMICAL REACTION INFLATE A BALLOON WITH INVISIBLE CARBON DIOXIDE GAS.

MATERIALS
![]() Medium-sized balloon
Medium-sized balloon
![]() An empty 16 oz soda or water bottle
An empty 16 oz soda or water bottle
![]() 1/3 cup (80 ml) vinegar
1/3 cup (80 ml) vinegar
![]() 3 teaspoons (14 g) baking soda
3 teaspoons (14 g) baking soda
![]() Spoon
Spoon
SAFETY
TIPS & HINTS
It’s a good idea to wear safety goggles or sunglasses to protect your eyes, since vinegar is a mild acid and can sting if the balloon accidentally shoots off the bottle.
PROTOCOL
STEP 1: Pour 1/3 cup (80 ml) vinegar into the soda bottle.
STEP 2: Hold the mouth of the balloon open and use a spoon to pour 3 teaspoon (14 g) or so of baking soda into the balloon. This takes two people, one to hold the balloon open and one to add the soda. (Fig. 1)

Fig. 1: Add baking soda to the balloon with a helper.
STEP 3: Shake the soda down into the “bulb” or the main part of the balloon. Carefully stretch the mouth of the balloon completely over the mouth of the bottle, keeping the main part of the balloon off to one side, so the baking soda isn’t dumped into the bottle until you’re ready. (Fig. 2)
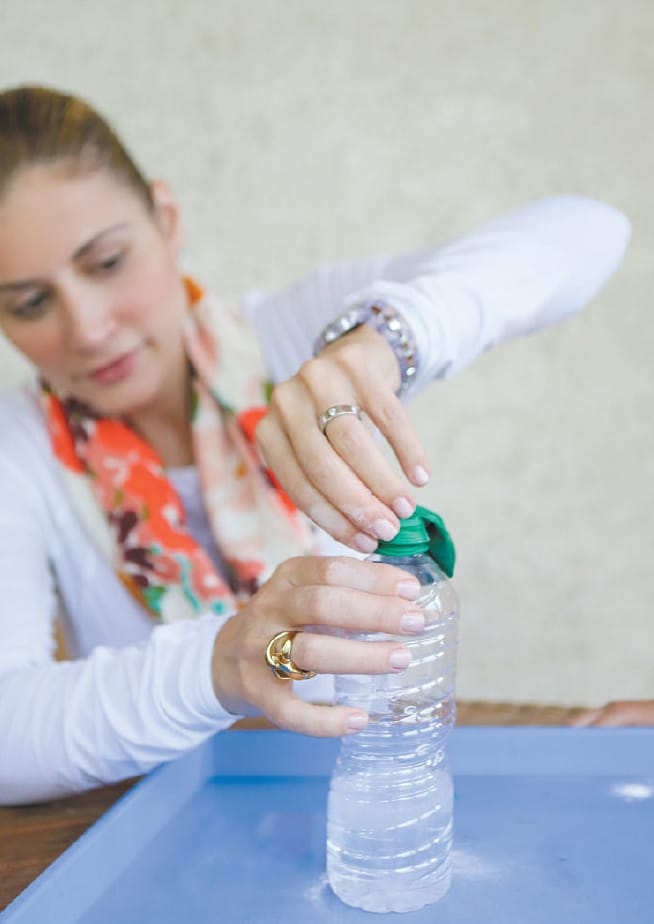
Fig. 2: Put the mouth of the balloon over the bottle’s mouth, but keep the baking soda off to one side.
STEP 4: Holding the mouth of the balloon on the bottle, shake the soda into the bottle, all at once. (Fig. 3)

Fig. 3: Shake the baking soda into the bottle quickly, all at once.
CREATIVE
ENRICHMENT
What happens if you use another method to generate carbon dioxide gas? Many living organisms, including humans, produce carbon dioxide gas when they break down nutrients. Could you do a similar experiment using baker’s yeast, sugar, and water to inflate the balloon? Do you think it would take longer?
For tips on growing yeast, see Lab 15, “Yeast Garden.”
|
FRANKENWORMS |

BRING GUMMY WORMS TO “LIFE” WITH A SIMPLE CHEMICAL REACTION.
MATERIALS
![]() Gummy worms candy
Gummy worms candy
![]() Scissors or kitchen shears
Scissors or kitchen shears
![]() 3 tablespoons (42 g) baking soda
3 tablespoons (42 g) baking soda
![]() 1 cup (235 ml) warm water
1 cup (235 ml) warm water
![]() Spoon
Spoon
![]() Jar or clear drinking glass
Jar or clear drinking glass
![]() White vinegar
White vinegar
![]() Fork
Fork
SAFETY
TIPS & HINTS
To avoid cuts and frustration, help young kids cut the gummy worms into long strips.
PROTOCOL
STEP 1: Using scissors or kitchen shears, make super-skinny gummy worms by cutting them into long strips. Cut each worm lengthwise at least four times. The skinnier you make your worms, the better they’ll work. (Fig. 1, 2)
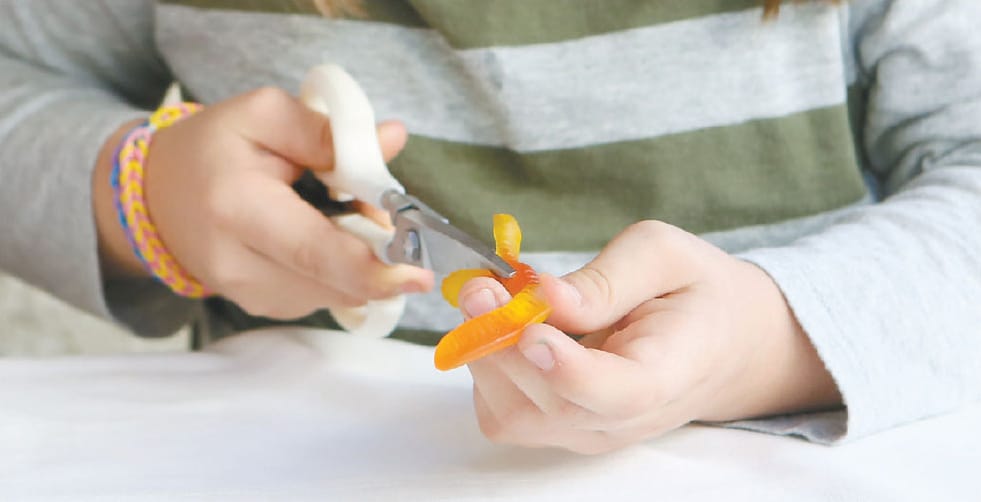
Fig. 1: Cut the gummy worms into very thin strips.

Fig. 2: The thinner they are, the better they’ll work.
STEP 2: Mix the baking soda with the warm water. Stir well. Drop your skinny gummy worms into the baking soda solution. Let them soak for 15 to 20 minutes. (Fig. 3)

Fig. 3: Soak your gummy worms in the baking soda solution.
STEP 3: While your worms are soaking, fill a clear glass or jar with vinegar.
STEP 4: When the 20 minutes are up, fish the gummy worms out of the baking soda solution with a fork and drop them into the glass of vinegar to bring them to “life.” (Fig. 4, 5)

Fig. 4: Drop the baking soda–soaked worms into the vinegar.

Fig. 5: Watch them wriggle and float.
CREATIVE
ENRICHMENT
Why don’t full-size gummy worms work well for this experiment? What else could you bring to “life” with this chemical reaction?
|
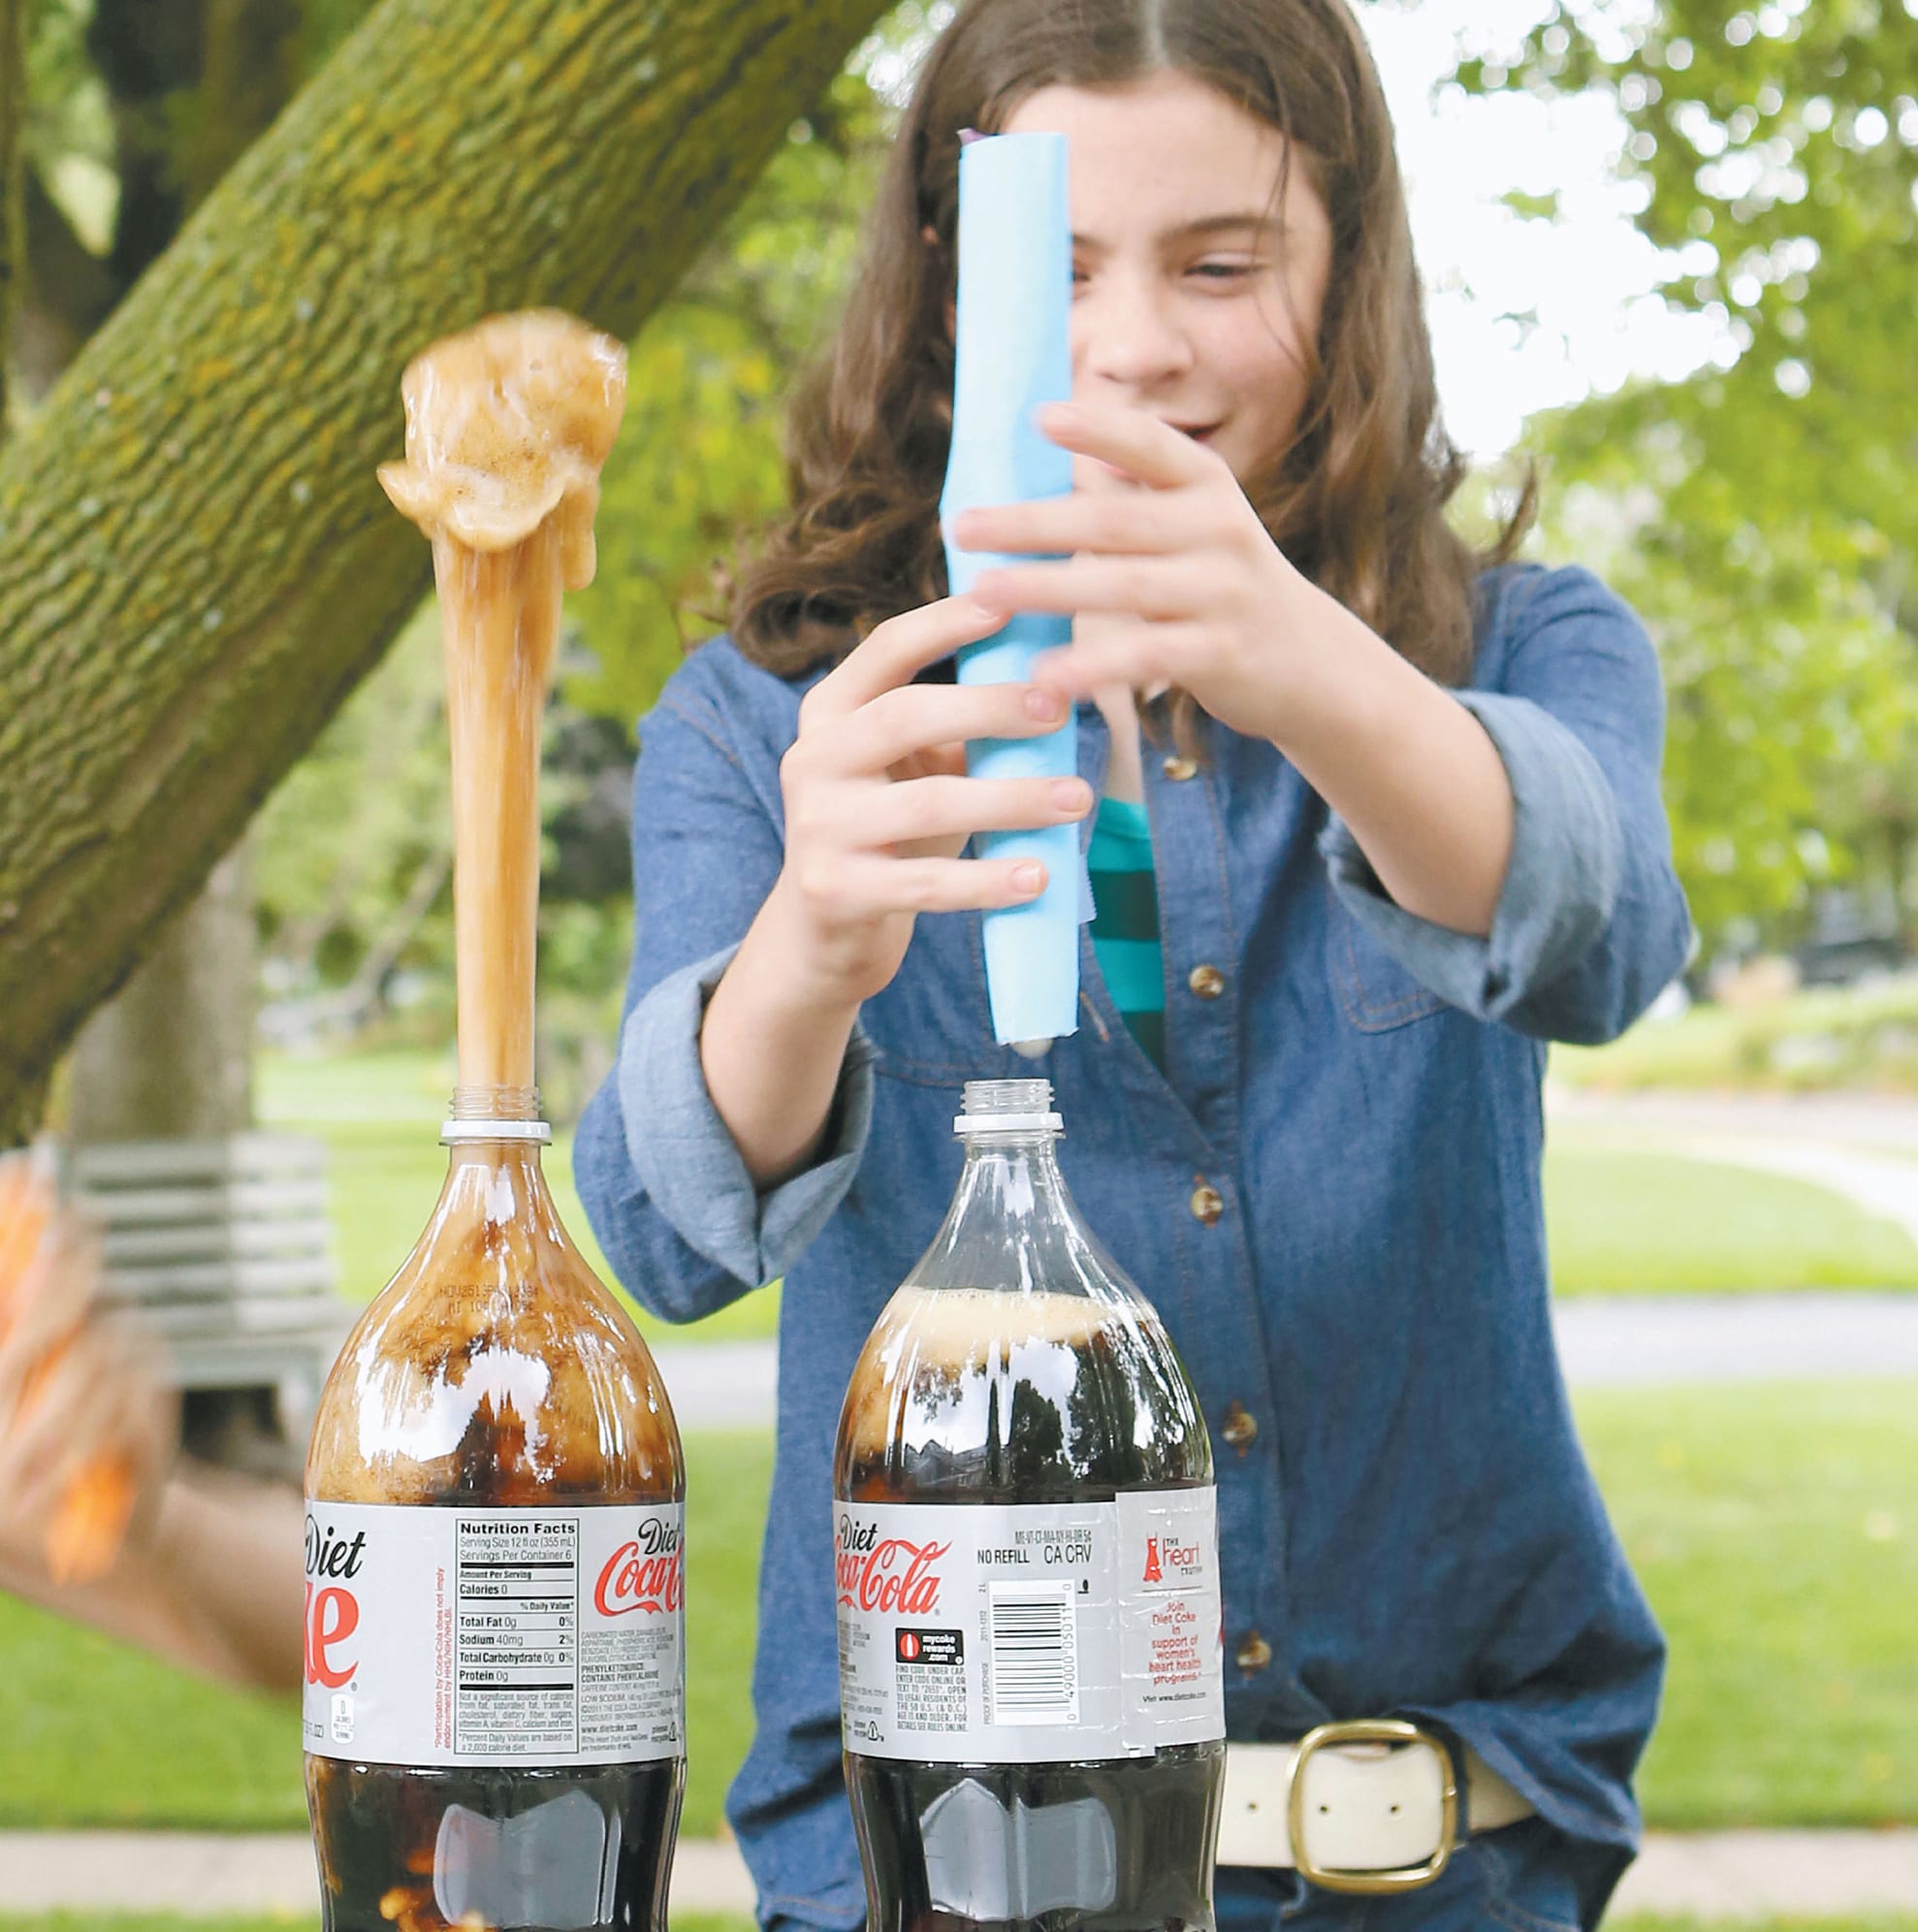
SODA GEYSER |

CREATE A FOUNTAIN OF FOAM WITH SODA AND MINTS.
MATERIALS
![]() 1 (2 L) bottle Diet Coke
1 (2 L) bottle Diet Coke
![]() Sheet of paper
Sheet of paper
![]() Roll of Mentos mints
Roll of Mentos mints
SAFETY
TIPS & HINTS
Wear glasses or safety goggles and stand back after adding the mints or you might get soaked. Do this experiment outdoors.
PROTOCOL
STEP 1: Remove the lid from the Diet Coke and set the bottle on a flat surface.
STEP 2: Roll the paper into a tube so it will just fit into the mouth of the bottle. The tube must be big enough to hold the mints. (Fig. 1)

Fig. 1: Make a paper tube for the mints.
STEP 3: Put your finger over the hole in the bottom of the tube and fill it with the mints. (Fig. 2)

Fig. 2: Fill the tube with mints.
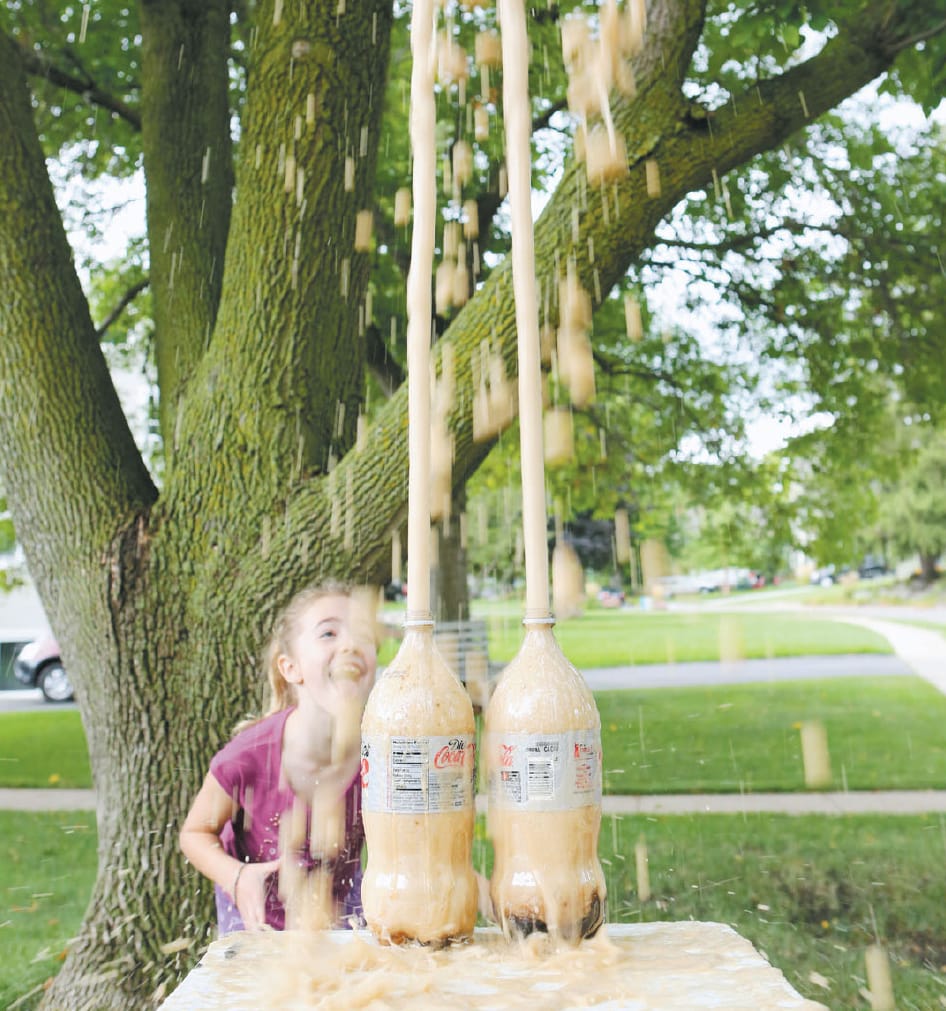
STEP 4: Quickly empty the mints, all at once, from the paper tube into the bottle and stand back! (Fig. 3, 4, 5)
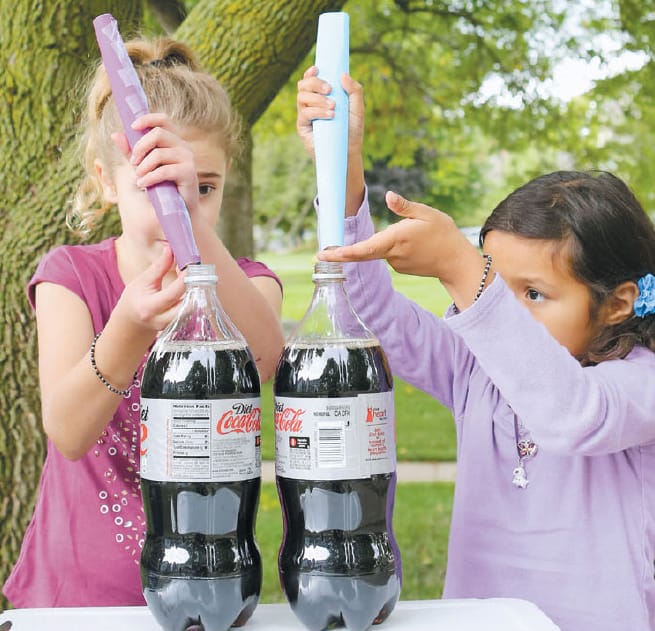
Fig. 3: Empty the mints from the tube into the bottle.
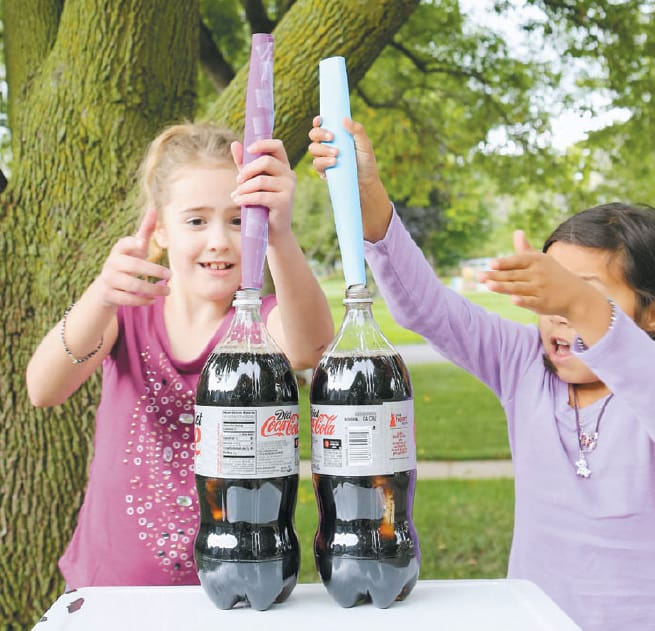
Fig. 4: The mints will react with the Diet Coke to make carbon dioxide gas.

Fig. 5: Stand back!
CREATIVE
ENRICHMENT
How well does this experiment work with different sodas or mints? Will it work with fruit Mentos?