Chapter 8. Multimedia
Since its introduction, the Macintosh has earned a reputation as a strong computing platform for multimedia applications. With the maturation of Mac OS X and its support for open source applications, coupled with Apple’s Digital Hub strategy, the Macintosh has become an even better choice for multimedia applications.
This chapter highlights a few multimedia applications that may be especially interesting to those Mac OS X users who have used similar (and in some cases, the same) applications in Linux and/or various flavors of Unix. We begin with a brief discussion on how to burn CDs in Mac OS X using both GUI and command-line tools. The chapter then moves on to discuss some familiar (to Linux/Unix users) open source and bundled applications for playing videos, image editing, and 3D modeling.
Burning CDs
There are several ways to burn CDs in Mac OS X. Which method of CD-burning you should use depends largely on what kind of data you are burning to the CD. Let’s consider an example in which we’ll use a CD-R to backup ~/Documents/tex-docs. The same procedure can be applied to other data. We’ll discuss how to accomplish this task with the GUI-based Disk Utility application located in /Applications/Utilities, with a burnable folder, and by using the command line in Terminal. In either case, you should make a disk image before burning your data to a CD-R.
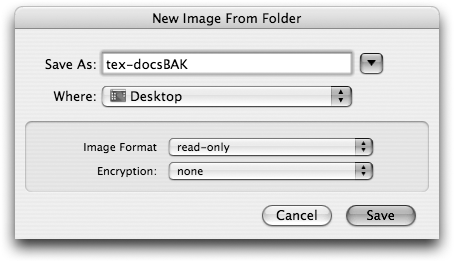
To make a disk image of ~/Documents/tex-docs using Disk Utility, select File → New → Disk Image From Folder and choose ~/Documents/tex-docs from the Open dialog that appears. A New Image From Folder pop-up window will prompt you to enter the name of the image you want to save, where you want to save the disk image and in what format, and whether you want to encrypt the disk image. This is illustrated in Figure 8-1, where we’ve chosen to save the disk image as tex-docsBAK to the Desktop in read-only format and without encryption (although you can’t see the file extension in that dialog, it’s automatically appended, giving you tex-docsBAK.dmg).
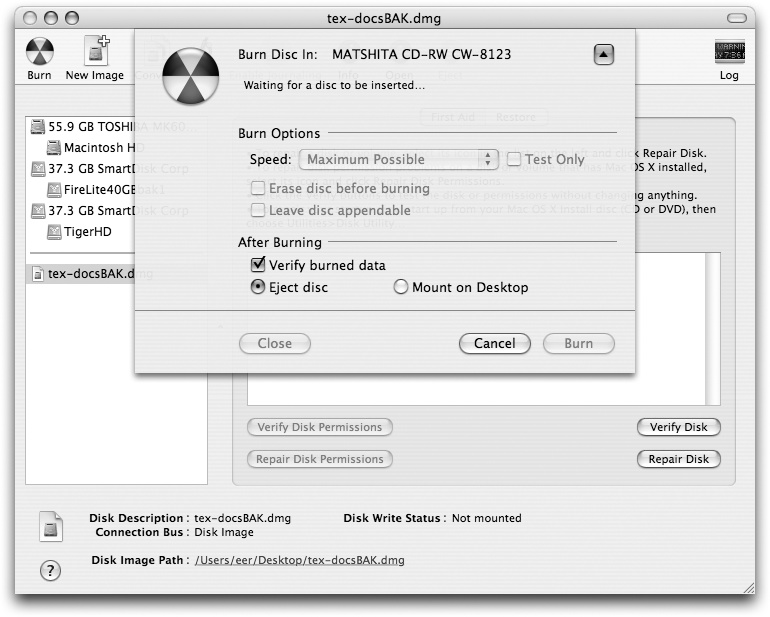
When the disk image has been created, it will appear in the list on the left side of the Disk Utility window. To burn this image to a CD-R, select the disk image in Disk Utility’s window and click the Burn icon in the toolbar. Disk Utility then prompts you to insert a blank disc and to select some options for burning the CD, as shown in Figure 8-2.
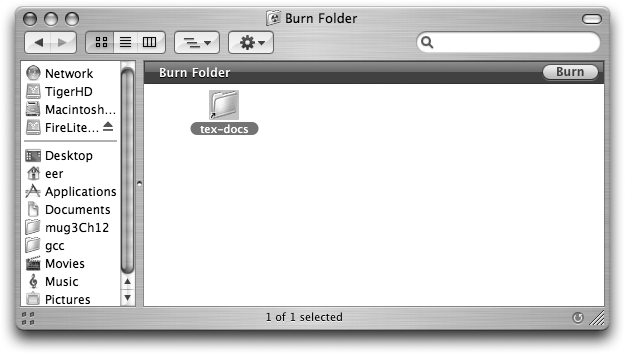
You can also do this using burnable folders , a feature introduced in Mac OS X Tiger to make it easier to copy files to a CD. To create a burnable folder, Control-click (or right-click) in the Finder and select New Burn Folder from the contextual menu. This creates a folder with a radioactive burn icon and named with a .fpbf extension. When you drag and drop a file into the Burn Folder, an alias for the file is placed inside the folder (see Appendix A for details on aliases). For example, if you drag and drop a folder named tex-docs into the burnable folder, an alias named tex-docs is created in the Burn Folder. This, along with a yellow bar containing a Burn button just under the titlebar, can be seen when you open the burnable folder, as shown in Figure 8-3.
When you click the burn button (or select File → Burn Disk from the menu bar), you are prompted to insert a blank disc (e.g., a CD-R or DVD-R). When you insert a disc, the actual file (in this example, the tex-docs folder) is written to disc. You can leave the Burn Folder and its alias on your system so you can reuse it for subsequent backups. When you initiate a burn in the burnable folder, the current contents of tex-docs are written to the disc.
You can create a disk image from the Terminal using hdiutil . For example, you can create an image of ~/Documents/tex-docs with this command:
$ hdiutil create -srcdir ~/Documents/tex-docs ~/Desktop/tex-docsBAK.dmgOnce this command has completed, enter the following command to burn the disk image to disc (you’ll be prompted to insert a disc):
    $ hdiutil burn ~/Desktop/tex-docsBAK.dmg
    Please insert a disc:
You can also create a disk image with a fixed size, copy files to it, and burn it:
$hdiutil create -size 200m ~/Desktop/tex-docsBAK.dmg -fs HFS+-volname tex-docs $open ~/Desktop/tex-docsBAK.dmg$cp -R ~/Documents/tex-docs/ /Volumes/tex-docs/$umount /Volumes/tex-docs/$hdiutil burn ~/Desktop/tex-docsBAK.dmg
Video
You can install any of several X11-based open source applications for viewing various formats of video by using the Fink package manager (see Chapter 13). These applications will run under Apple’s X11 environment. Also, some open source video applications have been ported to Mac OS X using Aqua, rather than relying on X11.
Open Source Video Players
MPlayer (http://www.mplayerhq.hu), a popular audio/video player among Linux/Unix users, runs under Mac OS X. In addition to being among many packages that are being ported to Mac OS X by the Fink Project, a Mac OS X binary distribution of MPlayer, MPlayer OS X, is available at http://mplayerosx.sourceforge.net/ and sports an Aqua GUI.
After you’ve downloaded and mounted the disk image, drag the MPlayer OS X application to your Applications folder, and then unmount and trash the disk image if you don’t plan to install it anywhere else.
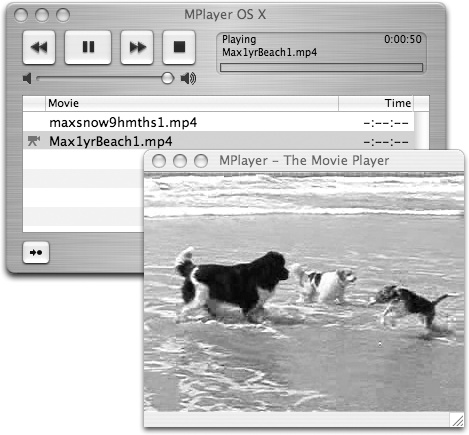
To play videos with MPlayer OS X (shown in Figure 8-4), you can drag and drop a video file on the MPlayer OS X icon in the Finder, or select a video from the MPlayer OS X menu bar by using File → Open.
Another popular open source, cross-platform multimedia player, VLC (shown in Figure 8-5), has been ported to Mac OS X and sports an Aqua-native GUI. VLC, distributed by the VideoLAN project (http://www.videolan.org), supports a wide variety of video and audio formats. To play a
video using VLC, choose either File → Open from the menu bar or drag and drop the video file onto the VLC icon in the Finder.
VideoLAN supports some formats that Apple’s QuickTime Player does not. If you find that QuickTime does not support a particular file, you may want to try it with VLC or MPlayer OS X.
Image Editing
The GIMP (http://www.gimp.org) is one of the best-known open source image manipulation programs. You can get GIMP for Mac OS X from Fink (see Chapter 13). With the GIMP, you can create drawings, touch up photographs, convert images, and do much more.
You can even use the GIMP as iPhoto ’s default image editor. To do this, use the Script Editor (found in /Applications/AppleScript) to create the following AppleScript, and save it as an Application named /Applications/LaunchGIMP (select File → Save As, and specify Application under File Format):
    on open all_images
      tell application "X11" to activate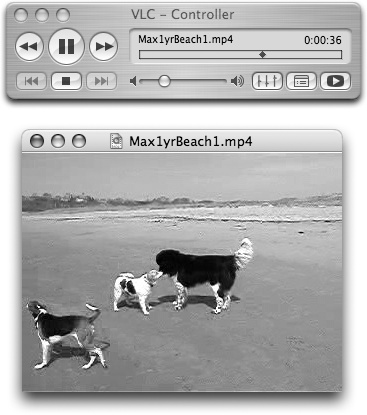
      repeat with image in all_images

        (* replace colons with slashes, prefix path with /Volumes *)
        do shell script "perl -e '$f=shift; $f =~ s/:/\//g;  " & ⌝
          "print "/Volumes/$f";' "" & image & """
        set image to the result

        (* set the X11 DISPLAY variable, and launch gimp-remote *)
        do shell script "DISPLAY=:0.0; export DISPLAY; " & ⌝
         "PATH=$PATH:/sw/bin; export PATH; " & ⌝
         "gimp-remote -n "" & image & """

      end repeat
    end open
Next, go to iPhoto’s Preferences window (iPhoto → Preferences, or ⌘-,) and follow these steps:
In the Double-Click section under General, click on the radio button next to “Opens photo in”. You’ll be prompted to select an application (if not, click the Select button).
Choose LaunchGIMP as the application.
Close the Preferences window (⌘-W).
Quit iPhoto (⌘-Q).
When you relaunch iPhoto, you are able to use the GIMP as your image editing tool the next time you select an image file for editing.
Tip
Another solution would be to use Gimp.app, a self-contained installation of GIMP for Mac OS X that does not rely on Fink. You can find it at http://gimp-app.sourceforge.net. With Gimp.app, you can simply specify Gimp as the helper application for iPhoto.
There is a modified version of the GIMP, CinePaint (http://cinepaint.sourceforge.net/) that is designed to meet the needs of film professionals. It has been used in the Harry Potter movies, Scooby Doo, and other movies. CinePaint was originally known as Film GIMP , and an earlier version was available through Fink at the time of this writing. Check out the CinePaint web site for the latest version.
3D Modeling
Blender (http://www.blender3d.org) is a popular cross-platform, open source, integrated 3D graphics package for modeling , animation , rendering , post-production , real-time interactive 3D , and game creation and playback . A complete list of features can be found on Blender’s web site. In addition to source code, binaries are available for a variety of platforms, including Mac OS X.
To install Blender on Mac OS X, download the appropriate disk image from Blender’s site and, after it has mounted, copy Blender to your Applications folder. To run Blender, double-click its icon.
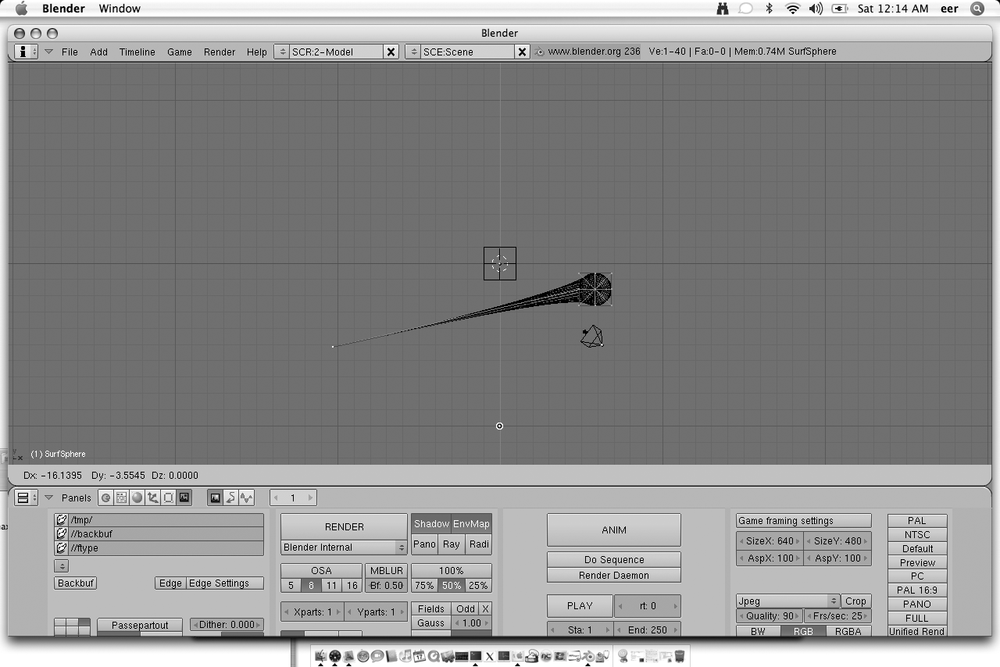
As you can see in Figure 8-6, the look and feel of Blender on Mac OS X is different from most standard Aqua applications. The reason is that OpenGL is used to draw Blender’s interface.
Since Blender makes extensive use of OpenGL, you’ll find that drawing images in large windows can be slow if your Mac’s graphics card does not have sufficient memory. In this case, you can switch to fewer screen colors in System Preferences → Displays, and then click on the Display button and choose the Thousands option as the number of colors to display onscreen.
Although Blender is designed for use with a three-button mouse, the standard single-button Apple mouse can also be used in combination with various keystrokes.
The left button of a three-button mouse is used to activate screen menus and buttons in the GUI, to resize subwindows, and to set the 3D cursor. The same effect can be achieved with the single button of a standard one-button Apple mouse.
The middle button of a three-button mouse is used to move, rotate, and zoom the 3D views. To access this functionality with a one-button mouse, simultaneously press the Shift-Control-Option keys with the mouse button.
The right button is used to select 3D objects. The right mouse button effect can be achieved by Command-clicking.
There are more Mac OS X-specific details to be aware of when using Blender. For example, on other platforms, the F12 key is used to render an image in Blender; however, on Mac OS X, you must press either Control-F12 or Option-F12 to render an image. This is because the F12 key is used on a Mac to activate Dashboard.