
Now that you have learned the basics of ActionScript, let’s look at some more advanced examples. The following 10 lessons show you some techniques that will be used in the games later in this book.
![]() Example file: Mcplayback.fla
Example file: Mcplayback.fla
Movie clips are like extra little Flash movies inside your main Flash movie. They contain a complete timeline with layers and most of the elements of your main Flash movie. You can control your main Flash movie with commands such as play() and stop(). You can also control a movie clip with these commands.
On the CD, in a file named Mcplayback.fla, you’ll see a movie clip named MyMovieClip in the library. This movie clip contains 10 frames labeled with some text so that you know which frame of the movie clip is being shown at which time.
By dragging that movie clip from the library to the Stage, you are creating an instance of that movie clip. You can and should name these instances. To do this, use the Property inspector. In Figure 3.1, you can see the Property inspector used to name the instance myMovieClip.

Tip

You might have noticed that the movie clip instance is named the same as the movie clip in the library. This is commonly done when you are creating exactly one instance of a movie clip and have no plans to create more. The name of the instance is easier to remember when it is the same as the library item.
The example movie also has five buttons in the library. These have been placed on the Stage just under the movie clip instance. You don’t need to name the button instances—in fact, you can’t. Unfortunately, buttons by themselves cannot be referenced by code in any way, so there is no need for a name.
After the movie clip and the five buttons are on the Stage, you should get something that looks like Figure 3.2. The buttons look like video tape recorder controls, and that’s exactly how they will be used.
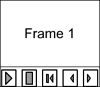
The five buttons have complete control over the movie clip. The play button starts the movie clip moving forward. The clip continues to move forward, looping around to the beginning when it reaches the end. The stop button halts the movie clip at its current frame. The rewind button takes the movie clip back to frame one and stops it. The previous and next buttons advance the movie clip one step and stop it there.
Before the movie turns over control of the movie clip to the user, it must tell the movie clip to stop moving. Movie clips naturally want to start going as soon as they appear on the Stage. To prevent this, the following frame script was placed on the first frame of the main timeline. It stops the movie clip from animating, and also tells the main movie to stop.
myMovieClip.stop();
stop();
By using the dot-syntax, the first line tells the movie clip instance named “myMovieClip” to obey the stop() command. The second line has no instance name before it, so the command is issued to the same place where the script is located—in this case, the main timeline.
The button scripts use the same dot-syntax to send their commands to the movie clip. Here is the play button’s script, which tells the movie clip to play():
on (press) {
    myMovieClip.play();
}
The stop button sends the stop() command to the movie clip.
on (press) {
    myMovieClip.stop();
}
The rewind button needs to tell the movie clip to return to the first frame and stop there. The gotoAndStop() command with the parameter 1 does just that.
on (press) {
    myMovieClip.gotoAndStop(1);
}
The previous and next buttons move the movie clip backward or forward one frame. The prevFrame() and nextFrame() commands can be used for this. Here are both scripts:
on (press) {
    myMovieClip.prevFrame();
}

on (press) {
    myMovieClip.nextFrame();
}
Although the purpose of this lesson is to teach you how to control the playback of movie clips, you can actually use the method in this example as a way to play back an animation or even a slideshow with Flash.
![]() Example file: Mcproperties.fla
Example file: Mcproperties.fla
In addition to controlling the insides of a movie clip, you can also control its external properties. For instance, you can control a movie clip’s position, its rotation, and its scale.
The example movie Mcproperties.fla contains a sample movie clip of a fox in the middle of the screen. Both the library fox and the movie clip instance are named “fox.”
In addition, there are eight buttons around the box. Each of these buttons sets a movie clip property of the fox. You can see how this screen appears in Figure 3.3. The first three are labeled “Left,” “Middle,” and “Right.”
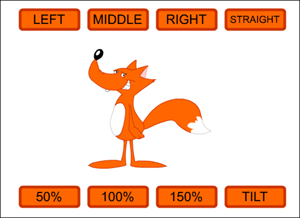
In “Lesson 6: Animating with ActionScript,” in Chapter 2, you saw that the _x property of a movie clip can be used to set its horizontal location on the Stage. This is what the “Left,” “Middle,” and “Right” buttons will use. They could also use the _y property to set the vertical location of the movie clip, but that isn’t needed in this example. Here is the code from the “Left” button. It sets the horizontal location of the fox to 200, which is slightly to the left of center, considering that the movie is 550 pixels wide. The “Middle” and “Right” buttons only differ in the value to which the _x property is set.
on (press) {
    fox._x = 200;
}
To scale a movie clip, you need to use the _xscale and _yscale properties. If these are set to the same value, they provide a way to uniformly scale a movie clip. A value of 100 stands for 100% scale.
Tip
You can also change only _xscale or _yscale individually, or set them to different values to make a movie clip thinner or flatter.
Here is the button script for the “50%” button. The other two scaling buttons use the same code, but with a different value.
on (press) {
    fox._xscale = 50;
    fox._yscale = 50;
}
To rotate a movie clip, you need to use the _rotation property. It takes a value in degrees, so 0 is the same as 360. You can go higher than 360 or lower than 0, but Flash just interprets that into a reading between 0 and 360.
Here is the script for the “Tilt” button. It rotates the movie clip 30° clockwise. The “Straight” button just sets the rotation back to 0.
on (press) {
    fox._rotation = 30;
}
By using these properties in more complex code to come later in this book, you’ll be able to move movie clips around the Stage to create all sorts of games.
An important part of many interfaces, whether they are games or applications, is the ability to drag elements around on the screen. This can be done several ways in Flash. Let’s look at three of them.
The startDrag command tells Flash to make a movie clip automatically follow the cursor. The example movie Dragsimple.fla demonstrates how to use this command in the most basic way.
A movie clip with a circle drawn in it has been placed on the Stage and named “circle.” As soon as the movie runs, the following command starts the circle following the cursor. It also tells the main timeline to stop animating so the movie doesn’t continue past this frame.
startDrag("circle",true);
stop();
The startDrag command is using two parameters in this case. The first is the name of the movie clip to drag. The second is the keyword true, which in this case tells startDrag to lock the object’s center to the cursor. If you used a false in this second parameter, the distance between the cursor and the center of the movie clip would remain the same as when the startDrag command was issued.
Note
The keywords true and false are called Boolean expressions. They can be used in cases in which an attribute is either on or off. They are also the results of comparisons, such as “a == b.”
The example movie Dragsimple.fla forces the movie clip “circle” to follow the cursor. However, a more typical use of dragging is to have the user click an item to start dragging it, and then release the mouse to drop it.
![]() Example file: Dragcomplex.fla
Example file: Dragcomplex.fla
The drag and release behavior can be done by making a movie clip that contains a button inside it. In Dragcomplex.fla, an invisible button has been placed in the same circle movie clip. The button was made invisible by placing content on only the “Hit” frame inside the button.
So, the “circle” movie clip contains the same graphic as in Dragsimple.fla, but also a button. The following script has been attached to this button. It executes the startDrag command when the user presses down, and a stopDrag when the user lifts up the mouse button.
on (press) {
    startDrag("",false);
}

on (release) {
    stopDrag();
}
The empty quotes inside the startDrag command tell Flash that you want the current movie clip to be dragged. Because the button is inside the “circle” movie clip, that particular clip can be dragged. The false as the second parameter means that the movie clip will not lock its center to the cursor, but instead maintain the original distance between the cursor and the movie clip center. This makes it appear as if the cursor has grabbed a part of the circle and is dragging the circle by that point.
The stopDrag command needs no parameters. Only one movie clip can be dragged at a time, so all it needs to do is stop the current dragging action, which will return the movie clip to its immobile state.
One of the problems with the startDrag command is that only one movie clip can be dragged at a time. In addition, the dragging is happening automatically, which makes it hard for you to monitor the movie clip’s progress as it is dragged. For these reasons, it is useful to know how to drag a movie clip without using the startDrag command.
![]() Example file: Dragbetter.fla
Example file: Dragbetter.fla
The example movie Dragbetter.fla contains some code that does this. The movie is set up the same way as Dragcomplex.fla, with a movie clip that has an invisible button inside it. The script attached to this button, however, is different. All it does is set a variable called “drag” to true when the user presses down on the button, and false when the mouse button is lifted.
on (press) {
    drag = true;
}

on (release) {
    drag = false;
}
The “drag” variable becomes a global variable, which is shared by all the code associated with the movie clip. Therefore, the script attached to the movie clip can tell the value of “drag” and use it to determine whether or not the movie clip should follow the cursor.
The script attached to the movie clip sets the _x and _y properties of the movie clip to the _xmouse and _ymouse properties of the main timeline. These last two properties give you the mouse location relative to the Stage.
onClipEvent (enterFrame) {
    if (drag) {
        this._x = _root._xmouse;
        this._y = _root._ymouse;
    }
}
The this keyword is used to indicate that the object being referred to is the current one. The script is attached to the “circle” movie clip, so this refers to that clip. In the next section, you’ll look at different ways of referring to movie clips at different levels.
The beginning ActionScript programmer might find it difficult to understand how movie clips and levels work. It helps to think of a movie clip as a Flash movie inside your main Flash movie. Although your main Flash movie has variables and properties, the movie clip inside it has its own world of variables and properties that are separate from the main Flash movie.
Whenever you place a movie clip on the Stage, you are creating a new world, also called an object. The main Flash movie is an object and the movie clip is an object inside that object.
Think of the Flash movie as a toy box full of toys. If you paint the toy box blue, it doesn’t make all the toys inside it blue. Each toy maintains its original color. On the other hand, if you move the toy box across the room, all the toys come with it. However, they maintain their own properties, such as color and position inside the toy box.
Assuming the toy box is closed and you have told someone in the room to get the toy truck, that person might have a difficult time if she hasn’t been told that the toy truck is inside the toy box. “Get the toy truck,” isn’t enough. You would have to say, “Get the toy truck that is inside the toy box.”
Movie clips work the same way. If you have a movie clip that is at the main level of the Flash movie, you can refer to it by name, such as “toyTruck.” However, if you have a movie clip “toyTruck” that is inside another movie clip called “toyBox,” then you’ll have to refer to it as “the toy truck inside the toy box,” or “toyBox.toyTruck.”
![]() Example file: Levels.fla
Example file: Levels.fla
Figure 3.4 shows a situation like this. The source for this movie can be found as the file Levels.fla on the CD.

There are two movie clips in Levels.fla. However, only the movie clip called “firstMC” is on the Stage. The movie clip “secondMC” is actually inside “firstMC.” A text box on the Stage and in each movie clip is linked to the variable “testVariable.” These text boxes show you, at any time, the value of “testVariable” on the Stage in “firstMC” and in “secondMC.”
The Stage and each movie clip contain a button that will increase the value of “testVariable.” Here is the code inside each of these buttons:
on (press) {
    testVariable++;
}
The button changes the value of the variable “testVariable” found at the level of the button. So the button on the Stage changes the variable “testVariable” at the main level. The button in “firstMC” changes the variable “testVariable” in “firstMC.” The button in “secondMC” changes the variable “testVariable” in “secondMC.”
It is important to realize that these three variables named “testVariable” are actually three different variables. Because they are at different levels, they have no relationship to each other.
If you run this movie, you can see that pressing one of these small buttons changes the value of “testVariable” at only the level where the button is located.
You can also change the value of variables at levels other than the level where the code is located. By using ActionScript dot-syntax, you can force Flash to modify variables at different levels. The three larger buttons at the bottom of the screen show some examples.
All three of these buttons are on the Stage, not inside any movie clip. The first button changes the value of “testVariable” without specifying a movie clip. This results in the “testVariable” on the Stage being changed.
The second button specifies the variable “testVariable” inside the movie clip “firstMC.” The code looks like this:
on (press) {
    firstMC.testVariable++;
}
The result is that the variable in the “firstMC” movie clip is changed. To change the variable inside “secondMC,” you need to remember that “secondMC” is inside “firstMC.” To get to this variable, tell Flash to look at the “secondMC” that is inside “firstMC.”
on (press) {
    firstMC.secondMC.testVariable++;
}
These three buttons are similar to saying, “paint the room blue,” then “paint the toy box blue,” and then “paint the toy truck inside the toy box blue.”
In all the previous examples, the name of the movie clip instance has been used directly in the code. There is another way that you can refer to movie clips. You can use the _root property of the Flash movie to refer to a movie clip like this:
_root["firstMC"].testVariable++;
This comes in handy if you have a space in the name of the movie clip instance, because you can’t use the other method with spaces in the name. This alternative method will also come in handy when you need to use more complex code to construct the name of a movie clip as a string, rather than having it hard-coded into the program. You’ll see one use of that in the next section.
Being able to manipulate movie clips is an important part of building games. However, you’ll also need to be able to create movie clips. Although this is easy enough to do in Flash, you might want your code to be able to create the movie clips after the movie has started running.
Think about a game in which enemy spaceships are attacking the player. One ship comes, and then another, and then another, and so on. Instead of having to create dozens or hundreds of movie clips ready for the game to use, you can have the code create them as necessary.
There are two ways to create movie clips. One is to duplicate a movie clip that already exists. Another is to create a movie clip from a symbol in the library.
To duplicate a movie clip, you need to use the duplicateMovieClip command. This command creates a carbon copy of an existing movie clip. Here is an example:
firstclip.duplicateMovieClip("newclip",0);The command duplicateMovieClip must be triggered by the movie clip to be duplicated. So it starts with the name of that movie clip, in this case “firstclip.” There are also two parameters. The first parameter is the name of the new movie clip instance. The second parameter is the level of this new movie clip.
This is where it can get a bit confusing. The duplicateMovieClip command uses the term “level” to describe the order in which movie clips are drawn. This is different than the use of the term “level” in the last section, when it was used to describe which movie clips were inside other movie clips.
If a movie clip is drawn at level 0, like in the previous one-line code example, then it is drawn under a movie clip at level 1. Level 1 is drawn under level 2, and so on.
You don’t have to worry about two movie clips being at the same level because they can’t be. Flash won’t let two movie clips be created at the same level. So with every use of duplicateMovieClip, you need to use a different level number.
![]() Example file: DuplicateMovieClip.fla
Example file: DuplicateMovieClip.fla
In DuplicateMovieClip.fla, the first and only frame of the main timeline contains the variable “level,” which is set to 0. On the Stage is a button labeled “New MC.” There is also a movie clip with the name “firstclip.” Each time the button is pressed, the following code is executed:
on (press) {
    // duplicate first clip
    firstclip.duplicateMovieClip("newclip"+level,level);

    // set a random position
    _root["newclip"+level]._x = int(Math.random()*550);
    _root["newclip"+level]._y = int(Math.random()*400);

    // increase level
    level++;
}
Note
Notice that for the first time, I’ve used comments in the ActionScript code. These comments start with two slashes. Everything else on a line after the two slashes is ignored by Flash and is there only to make it easier for you to understand what the code is doing. As the blocks of code in this book get longer and longer, you’ll see comments to help you read through them. You should also use comments in your code to make it easier to edit later, or for a co-worker to be able to understand it more easily.
The variable “level” is used in many ways in this handler. First, it is used to compose a name for the new movie clip. The first time the variable is used, the movie clip will be named “newclip0.” The variable is also used as the level for the movie clip.
At the end of the handler, “level” is incremented by one. So the next movie clip created will be “level1” at level number 1.
This handler also sets the horizontal and vertical location of this new movie clip to a random spot on the Stage. Notice that the _root[] syntax is used to indicate which movie clip is being referred to.
Another way to create new movie clips is to use the attachMovie command. This command does not require that the movie clip already be on the Stage. Instead, it just needs to be in the library. However, if a movie clip is in the library and not used on the Stage, Flash automatically won’t include it in the final .swf file. To force it to include this movie clip, you need to select it in the library and use the Options menu to set the Symbol Linkage Properties. You can see this dialog box in Figure 3.5.

The Symbol Linkage Properties needs to be set to Export This Symbol. Then, you have to come up with a name for the symbol that the code will use to refer to it. I usually use the symbol’s name as it appears in the library.
![]() Example file: AttachMovie.fla
Example file: AttachMovie.fla
The attachMovie command uses the name in the Symbol Linkage Properties dialog box as the first parameter. The second parameter is the name of the instance of the movie clip on the Stage, and the third parameter is its level. The code for this button, found in the movie AttachMovie.fla, is almost the same as the code for the DuplicateMovieClip.fla movie, with the exception of one line.
on (press) {

    // duplicate first clip
    attachMovie("myMovieClip","newclip"+level,level);

    // set a random position
    _root["newclip"+level]._x = int(Math.random()*550);
    _root["newclip"+level]._y = int(Math.random()*400);

    // increase level
    level++;
}![]() Example file: RemoveMovieClip.fla
Example file: RemoveMovieClip.fla
You can also remove movie clips from the Stage by using the removeMovieClip command. For instance, the following code, found in RemoveMovieClip.fla, removes the previous movie clip before creating a new one:
on (press) {
    // remove previous movie clip
    _root["newclip"+(level-1)].removeMovieClip();

    // duplicate first clip
    attachMovie("myMovieClip","newclip"+level,level);

    // set a random position
    _root["newclip"+level]._x = int(Math.random()*550);
    _root["newclip"+level]._y = int(Math.random()*400);

    // increase level
    level++;
}
These techniques mean that your games and applications can create their own movie clips, adding them and removing them from the Stage as necessary.
Now that you know how to create a bunch of movie clips with ActionScript, let’s look at how to control them. You know that you can control one movie clip with code attached to it, but what if you have several movie clips that need to be controlled? What if these movie clips all need to behave in the same way?
If you place those movie clips on the Stage, you can copy and paste code from one movie clip on to the others. This has several disadvantages. First, there’s the copying and pasting. Then, if you decide to change the code, you need to change it in all the instances of the movie clip.
One way to control several movie clips is to place code in one spot that controls all these clips. For instance, if you have 10 movie clips, you can place code on the first clip that controls all 10.
But rather than place the burden of control on one out of many clips, why not create a movie clip for the express purpose of controlling other clips? This common technique makes it easy to remember where you put your code. I call it the “actions movie clip.”
Start by using the text tool to create a small text box on the Stage and type the word “actions” in it. (This is just so it can be identified easily.) Then, with this text box selected, choose Insert, Convert To Symbol, and turn it into a movie clip named “actions.” Move it to the gray area off the Stage, so the word “actions” isn’t visible to the user.
This movie clip is used to attach a script that will control all sorts of things in the movie. For instance, suppose you want to have a movie that creates 10 movie clip instances from a library symbol, and then rotates them all a little each turn.
![]() Example file: actionsMC.fla
Example file: actionsMC.fla
First, create the symbol. Set its linkage properties in the symbol’s Properties dialog box to Export for ActionScript with a name “sample.” You can see this in the example movie ActionsMC.fla.
The only code needed will be attached to the movie clip “actions.” There will be two parts to this code, each inside an onClipEvent handler. The first such handler will react to a load event. The load event occurs when the movie clip first appears. The code in it will be executed once at this time. In this case, take the opportunity to create 10 new movie clips:
onClipEvent (load) {

    // create 10 movie clips
    for(i=0;i<10;i++) {
        _root.attachMovie("sample","sample"+i,i);

        // set the location
        _root["sample"+i]._x = i*50+50;
        _root["sample"+i]._y = 100;
    }
}
Not only are the movie clips created, but their locations are set. The vertical location is set to 100, but the horizontal location is set to different locations starting at 50 and continuing to 500. You can see what this looks like in Figure 3.6.
The second part of the code is inside an onClipEvent(enterFrame) handler. The code here executes every time the “actions” movie clip loops. If the movie is set to run at 12 frames per second, then the code should run 12 times a second.
onClipEvent (enterFrame) {

    // loop through and rotate each movie clip
    for(i=0;i<10;i++) {
        _root["sample"+i]._rotation += 5;
    }
}
This code loops through all the movie clips and rotates each one by 5°. The result is that there will be 10 movie clips on the Stage and all 10 will be rotating.
![]() Example file: Gears.fla
Example file: Gears.fla
I’ve also created a more advanced version of this movie that is set up in exactly the same way, except for the code. In Gears.fla, the movie clips are placed close together so that the cogs on the gears touch. To make them act like gears, each movie clip starts rotated 15° more than the previous one. Because the cogs are 30° apart, it makes the cogs of one gear interlock with the cogs of the previous one. Then, instead of each gear rotating in the same direction, each gear rotates in the opposite direction of the one before it. Here is this code:
onClipEvent (load) {
    initialRotation = 0;

    // create 10 movie clips
    for(i=0;i<10;i++) {

        // attach the movie clip
        _root.attachMovie("sample","sample"+i,i);

        // set its position
        _root["sample"+i]._x = i*37;
        _root["sample"+i]._y = 100;

        // set initial rotation so each new one is off by 15 degrees
        _root["sample"+i]._rotation = initialRotation;
        initialRotation += 15;
    }
}

onClipEvent (enterFrame) {
    // loop through every other movie clip
    for(i=0;i<10;i+=2) {

        // make this one rotate clockwise
        _root["sample"+i]._rotation += 5;

        // make next one rotate counterclockwise
        _root["sample"+(i+1)]._rotation -= 5;
    }
}
To further understand how this code works, open the Gears.fla movie and play around with it. This code, like more code to come in this book, can be explained only so far with text. You need to open Flash and poke around at the examples to gain a full understanding of how they work.
The only way to trap events such as “enterFrame” in Flash 5 was to use onClipEvent attached to a movie clip. However, in Flash MX there is an alternative. You can tell Flash to run a specific function when an event such as “enterFrame” occurs. Better still, you can do this in the main timeline, without creating an “Actions” movie clip.
Here is a simple example. This script, when placed in the main timeline, sends text to the Output window every frame.
_root.onEnterFrame = function() {
    trace("enterFrame Event");
}
Instead of the trace command, you can insert the same sort of commands used earlier in this lesson. You can also define a separate named function to handle the event. Here is another way of writing the previous example:
_root.onEnterFrame = myFunction;
function myFunction() {
    trace("enterFrame Event");
}
You can use this technique to get all sorts of events, such as onMouseUp, onKeyup, and onLoad. You can check out the documentation for a full list and descriptions of what triggers each event.
You can find this technique used in several games, starting with the Find the Picture game in Chapter 13.
In games, things collide, usually with disastrous results for one or both objects colliding. You need to be able to write code that detects whether two objects collide, or whether the cursor location collides with an object.
In Flash, the primary way to determine whether two objects collide, or an object is covering a certain point on the screen, is to use the hitTest function. You can feed the hitTest function either the location of a point or another movie clip.
Let’s start with testing for collision with a point. Suppose you have a movie clip on the screen and you want to determine whether the user’s cursor is over it. You can attach this code to the movie clip:
onClipEvent (enterFrame) {
    if (this.hitTest(_root._xmouse,_root._ymouse,true)) {
        this._x = int(Math.random()*550);
        this._y = int(Math.random()*400);
    }
}
By using this.hitTest(), you are asking for the function hitTest to be used on the current movie clip. The three parameters passed into it are the horizontal location of the mouse, the vertical location of the mouse, and a true. This last parameter determines whether Flash uses the bounding box around the movie clip as the area for collision detection, or whether only the exact shape of the object is used. This code uses the latter parameter option by indicating true.
![]() Example file: Runaway.fla
Example file: Runaway.fla
You can see this code in action in the sample movie Runaway.fla. When you move the cursor over the movie clip, it jumps to a random spot on the screen.
![]() Example file: Collision.fla
Example file: Collision.fla
To determine whether two movie clips intersect, you can instead use a single parameter—a pointer to the second movie clip—to see whether they both collide. In the movie Collision.fla, two movie clips are on the Stage. The larger is named “target” and the smaller is named “bullet.” There is also an “actions” movie clip just off the Stage. The following code is attached to it:
onClipEvent (enterFrame) {

    // see if the bullet hit the target
    if (_root["target"].hitTest(_root["bullet"])) {

        // collision, so target grows
        _root["target"]._xscale += 5;
        _root["target"]._yscale += 5;

        // bullet resets
        _root["bullet"]._x = 350;

    } else {
        // no collision, continue to move bullet
        _root["bullet"]._x -= 5;
    }
}
This code moves the bullet to the left 5 pixels at a time. When the two movie clips collide, the target grows slightly by having its scale increased by 5%. The bullet’s horizontal position is reset so it can begin its approach again.
So far, you have learned how to scale a movie clip and change its position. Next, you’ll learn how to change a movie clip’s appearance in a more drastic way.
Unfortunately, in Flash you can’t swap one movie clip for another on the Stage. One way to make up for this is to remove one movie clip and create another in its place. But when you have a single movie clip that needs to change its image often, you need a quicker way to do it.
Another method is to create a movie clip that contains all the different states of that object. For instance, if the object is a spaceship, I might have frames in that movie that represent the spaceship without any engines on, the spaceship with the main engine on, the spaceship with the left engine on, the spaceship with the right engine on, and a series of frames that make up an animation of the spaceship exploding.
![]() Example file: Changingimages.fla
Example file: Changingimages.fla
In Changingimages.fla, there are buttons on the left that allow you to select which part of the “ship” movie clip will be shown. Figure 3.7 shows you what this movie looks like.

Each of the buttons in Changingimages.fla takes the movie clip to a different frame. For instance, this is the script on the up button:
on (press) {
    ship.gotoAndStop("up");
}
The code on the Explode button is different from all the rest because it uses gotoAndPlay so that the movie clip jumps to the “explode” frame and continues to animate.
on (press) {
    ship.gotoAndPlay("explode");
}
The movie clip contains an eight-frame sequence starting with “explode” that shows the explosion. The last frame of this sequence has a stop() command placed on it so that when the explosion is done, the movie clip waits on that last frame, which is blank, instead of looping back around to the first frame of the movie clip.
Check out Changingimages.fla from the CD and pay special attention to the timeline inside the “ship” movie clip. This is where the frames are labeled so that the code can use frame names rather than numbers.
The previous example used five buttons to allow you to test the five different portions of the movie clip. Although buttons are a primary source of input into Flash movies, in the world of games, you’ll eventually want to accept input directly from the keyboard.
There are two ways to get keyboard input from the user. The first involves a special way to use buttons. The second method uses only code to test whether keys are pressed at any given time.
To use the button method, create a normal Flash button. It doesn’t have to be anything special because you’ll be hiding it off the Stage. The following sample code can be attached to that button to have it accept the “r” key and use it to move a movie clip:
on (keyPress "r") {
    circle._x++;
}
Tip
Note that keyPress actions attached to buttons are case sensitive. This means that if you are looking for the “r” key to be pressed, the button will not respond to Shift+R.
![]() Example file: Keyboardbutton.fla
Example file: Keyboardbutton.fla
For movement, it is often better to look for the arrow keys to be pressed rather than letters. To do this, you can use some special syntax. Here is a longer script that enables the user to move the movie clip in all four directions. You can find this script in the Keyboardbutton.fla movie on the CD.
on (keyPress "<Right>") {
    circle._x++;
}

on (keyPress "<Left>") {
    circle._x--;
}

on (keyPress "<Up>") {
    circle._y--;
}

on (keyPress "<Down>") {
    circle._y++;
}
Although using buttons allows ActionScript to capture individual keypresses, it does not work well in situations where you want fast and fluid movement. In these situations, the Key code object allows you to test the state of any key to see whether it is currently being pressed.
Tip
If you use a button to detect keypresses, you’ll notice that the user can hold a key down and the action takes place repeatedly. Most computers are set to repeat keys if the user holds down the key. The delay between the first and second time the key is activated, and the delay between each successive key, is determined by the user’s system keyboard settings. You should not rely on this keyboard functionality for games in which you want the user to be able to hold down a key to repeat an action. Instead, use the Key.isDown() function described in this section.
The Key.isDown() function allows you to test a key. For instance, if you want to see whether the “r” key is pressed, you can do this:
if (Key.isDown("r")) {
    circle._x++;
}![]() Example file: Keyisdown.fla
Example file: Keyisdown.fla
This code does not have to be and should not be attached to a button. Instead, it should be attached to an “action” movie clip, as is the case in the movie Keyisdown.fla. The code is inside an onClipEvent(enterFrame) handler so that the keyboard is checked every frame. The code looks for the arrow keys again, which are signified by special constants, such as Key.RIGHT.
onClipEvent(enterFrame) {
    if (Key.isDown(Key.RIGHT)) {
        _root.circle._x++;
    }

    if (Key.isDown(Key.LEFT)) {
        _root.circle._x--;
    }

    if (Key.isDown(Key.UP)) {
        _root.circle._y--;
    }

    if (Key.isDown(Key.DOWN)) {
        _root.circle._y++;
    }
}
If you run this example movie, you’ll see that the circle behaves in a much more fluid way. The frame rate of the movie has been increased to 120fps to take advantage of as many frames per second as the computer can handle.
So when is it a good idea to use a button to accept keystrokes and when is it a good idea to use the Key object? If you are looking for a single keypress to trigger an event, then use a button. This reacts to the keypress 100% of the time. The Key.isDown() function sees the key pressed only if the key happens to be down when the function is called. So if the user presses down and then lifts up quickly, the keypress could be missed. This can easily happen on slow computers.
The Key.isDown() function, on the other hand, is good for when you want the player to control movement. In this case, you want fluid movement that will continue at a constant rate as long as the player holds down the key. By using Key.isDown(), you can also test for more than one key being pressed at a time, whereas a button reacts to a single keystroke only.
To conclude the ActionScript tutorial part of this book, you’ll see how to use sounds. Flash has the capability to play sounds by placing them in the timeline of the movie, or placing them in a movie clip in the timeline. However, you can also trigger sounds by using ActionScript commands.
Unfortunately, triggering a sound from the library is not as simple as one command. First, you have to make sure that the sound is included in the final .swf file. Do this by setting its Symbol Linkage Properties. The “Lesson 20: Creating an ‘Actions’ Movie Clip” section showed you how to do this. For this example, let’s assume that the sound is linked with the name “beep.”
You still have to use several lines of code to get the sound to play. First, you need to create a variable that is of type Sound. Next, you have to tell this variable that “beep” is the sound to play. Then, you have to trigger that sound. Here’s how the code looks inside a button script:
on (press) {
    mySound = new Sound();
    mySound.attachSound("beep");
    mySound.start();
}
Note
The start command for sounds can also use two parameters. The first is the number of seconds into the sound before it should start. So if you want to skip the first 3 seconds, use a 3. For normal playback, use 0. The second argument is the number of times the sound is to loop. So to get 10 “beeps” in a row, use 10.
You can also do many tricks with sound. The most useful is setting the volume of the sound. This way, if you have a sound that is too loud, you can adjust the volume in your ActionScript rather than having to remake the sound.
To adjust the volume, use the setVolume command. This takes a value from 0 to 100. Here’s the same code, but with the volume cut in half:
on (press) {
    mySound = new Sound();
    mySound.attachSound("beep");
    mySound.setVolume(50);
    mySound.start();
}
Another trick worth noting is the setPan command. This takes a value of –100 to 100. For stereo sounds, it works like a balance control with –100 being all left speaker and 100 being all right speaker. For monaural sounds, it forces the sound more from one speaker than the other. Here’s a script that plays the sound from only the left speaker:
on (press) {
    mySound = new Sound();
    mySound.attachSound("beep");
    mySound.setPan(-100);
    mySound.setVolume(100);
    mySound.start();
}
One very frustrating thing about sounds is that when you set the volume or pan, it remains set, even when you want to play a completely different sound later. So if you use setPan or setVolume just once, get into the habit of setting them every single time. Otherwise, the previous setting is used for the new sound.
![]() Example file: Sound.fla
Example file: Sound.fla
The example movie Sound.fla has four buttons. The large middle one plays the sound normally. The large buttons to the left and right play the sound only from the left or right speaker. The smaller button in the middle plays the sound at 50% volume.
You can learn even more about sounds in Chapter 6, “Toys and Gadgets,” in the section called “Jukebox.” You can also learn more in Chapter 7, “Construction Toys,” in the section called “Music Mixer.”
This concludes the two-chapter tutorial that takes you through your first steps in ActionScript. In the next chapter, you’ll learn about programming techniques such as planning, debugging, and testing. Then, beginning with Chapter 5, “ActionScript Design Effects,” you’ll begin to work through larger examples of programs.