
Photography by Jason Verlinde
Downhill Makers
Garage ski builders are outdoing the pros.
SOME MODES OF TRANSPORTATION WERE destined for garage builders. Think of the thousands of wooden canoes, dune buggies, and steel-framed road bikes that hobbyists have created over the years. Modern, high-performance downhill skis, on the other hand, seem to be an entirely different beast, the kind of state-of-the-art product that only a big factory production process could churn out. Who else has the ability to fuse together all those exotic materials into a sturdy package that will safely get you down icy slopes, powder runs, and even the occasional cliff huck?
Well, it turns out that virtually anyone with basic woodworking skills can make a pair of skis. And the three friends behind the skibuilders.com site — Kelvin Wu and cousins Kam K. Leang (“Big Kam”) and Kam S. Leang (“Little Kam”) — are hoping to inspire other snow fanatics to build their own rides. “The vision of SkiBuilders.com is to demystify the design and engineering of skis,” Big Kam says. “It’s a web-based information clearinghouse for people who love to ski and build things.”
THE BUILD
In Wu’s Seattle garage, he and Big Kam walked me through the ski building steps. To start, you need some common power tools. A sander, a router, and a table saw are all essential. You’ll also need to fabricate two important items: a core profiler and a ski press. The core profiler allows you to trim and taper the laminated wood guts of the ski, something that would be impossible to do consistently by hand.
And the ski press — either pneumatic or vacuum — compresses and heats the skis into their finished form. (Plans for all of the above, and links for part suppliers, are available at skibuilders.com.)
First, you use your profiler and a router as a guide to shape your wooden core. Poplar, maple, and birch are all popular woods to make skis from, but you can be creative in the wood selection and in how you layer each type — the finished laminate looks like a thin kitchen cutting board in the shape of a flattened ski.
Basically, you make a snow-ski lasagna, with fiberglass layers acting as your noodles.
Next, you cut your ski base material to the desired ski shape, and bend edge material around the contours of the ski; at this point, a thin strip of rubber is often added to the top of the edges for vibration dampening. Now we get to the fun, and messy, part: epoxying layers of fiberglass sheets to the wood core, base, and edges. Basically, you make a snow-ski lasagna, with fiberglass layers acting as your noodles. You can also go wild with your graphics (the sample pair shown on the next page features a cut sheet of fabric and some printed paper logos) and place them under a clear topsheet (often made of clear P-Tex, the same plastic used for the bases).
The ski press that Wu built for his garage is pneumatic: two ski-length sections of 5-inch fire hose are clamped off and filled with compressed air to force pressure onto the skis (a method taken from skateboard deck manufacturing).
Here, pushed against a heated ski mold for an hour or two, the pair will cure into their desired shape and camber. Some garage builders have simpler setups: single ski presses made out of wood and car bottle jacks. Basically, you just want to safely get the skis to stick together long enough for the epoxy and fiberglass to become solid.
When the skis come out of the press, they are often attached to each other by the now-dried fiberglass and epoxy hanging off the edges. Using the skis’ edges as a guide, you use a jigsaw to cut off the excess material, and then use a router to shape the sidewalls and do some final touch-up work with a file. From there on, it’s the same as with store-bought skis: bindings have to be mounted and a base grind and tuneup will be needed to get them performing at their peak. The entire process (minus the binding mounting and tuneup) can be done in a long day.
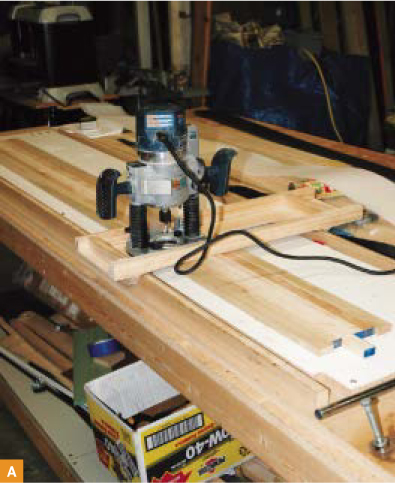
Fig. A: A router shapes the wooden core.
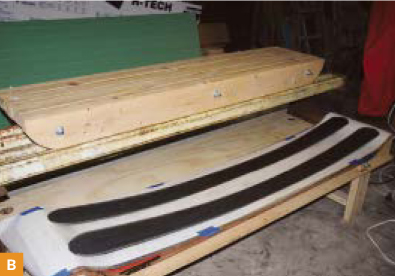
Fig. B: A thin strip of rubber on top dampens vibration.
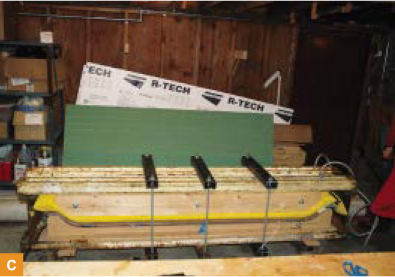
Fig. C: Wu’s pneumatic ski press.
As complicated as it all sounds, by your second pair of skis, you may already be saving money compared to buying high-performance skis off a rack.
“Costs to get this setup can vary dramatically, but depending on your scavenging skills and ingenuity, a setup can be as little as a few hundred dollars,” Big Kam says. “We highly recommend that first-time builders try to scrounge up as much material (free or discounted) as possible to lessen costs. For the tooling, which includes pneumatic press, core profilers, sanders, routers, et cetera, I would estimate the total cost to be near $600. The material to build one pair of skis can be as low as $50.”
To date, the guys behind skibuilders.com have added about one pair of skis a month to their site’s ski gallery. They’re now up to almost 30 pairs. There are reverse cut and reverse camber creations, traditional-shaped skis, twin tips, and swallowtails.
Most are either based on existing, off-the-shelf skis, or are exotic, flight-of-fancy creations. Making them quickly and testing them is, at least for now, more important than long-term durability. In fact, each member of the site has a good delamination story.
“Getting things to bond well is a tricky process,” Little Kam says. “Last season I was skiing on a pair of skis on which I tried a new method of using fabric paint for the graphic. After a few icy landings in the park the topsheet completely ripped off ... the paint separated. I decided to ski with the topsheet flapping around for the rest of the day, much to the confusion of Southern Californian snowboarders.”
Wu admits that the group still has a lot to learn about the building process. “There are a lot of material treatment and bonding issues that we need to figure out, and how best to do it in a garage shop,” he says. “I think most of our delamination could be eliminated with proper treatment and cleaning. Also, there isn’t a lot of empirical data on how the flex, sidecut, length, and other aspects of ski design work together and how they affect the ski’s performance. We also still need to figure out how best to control the camber of the skis in a heated press. It seems that the heat and the differences in thermal expansion of the materials make it really hard to predict how the ski will turn out once everything cools down.”
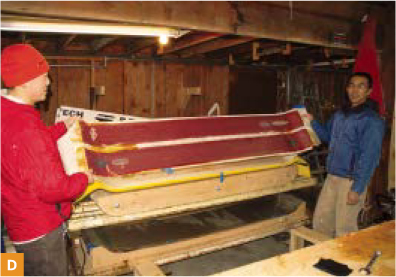
Fig. D: When they come off the press, the skis are attached to each other by the fiberglass sheet.
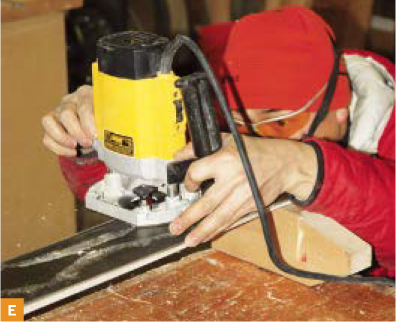
Fig. E: Using a router to shape the sidewalls.
THE TEST
After spending a day on a pair of garage-built skis, I was hooked. I can honestly confess that they performed as well as the all-mountain, high-end K2s I’ve used for the last two seasons. The garage skis garnered a lot of strange looks from the lift attendants but they were an absolute blast on the runs. Granted, I was worried the whole time that they might delaminate in the middle of a steep run, but they never did. And, even if they do break, I now know how to make more!
Seattle-based Jason Verlinde usually writes about guitar, not ski, builders for his magazine the Fretboard Journal (fretboardjournal.com).