123 Jumbo Hand-Launcher for Folding Wing Glider
Written by Rick Schertle ![]() Illustrations by Julie West
Illustrations by Julie West
SINCE THE ROCKET GLIDER PROJECT WAS RELEASED IN MAKE VOLUME 31 (makezine.com/go/rocketglider), it’s been wildly popular. But one struggle that younger builders have is getting the glider pulled back on the handheld catapult. With this portable and inexpensive launcher, even the youngest kids can achieve impressive flights.
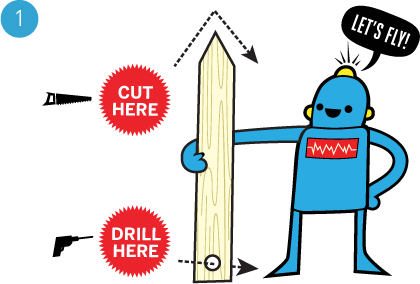
1. Cut a stake and drill a hole
Make 2 angled cuts in the pine board to form a point on one end, then drill a ¼" hole centered on the opposite end.
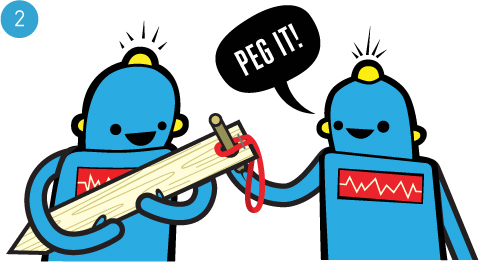
2. Secure the rubber band
Feed the dowel through the hole so that one side is flush with the stake and the other protrudes. Next, put the rubber band around the dowel, then staple the rubber band to the wood to keep it in place.

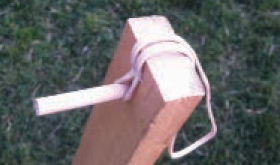
3. Pound stake into the ground
Place the stake dowel-side up with a slight angle. Use a piece of scrap wood to protect the top when you hammer it into place. Hang the loose end of the rubber band over the top of the stake.
Use It
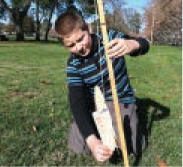
Hook the notch on the bottom of the glider onto the rubber band, pull the plane down along the length of the stake, make sure your face is clearly out of the way, and let it rip! Be sure to launch along the stake, not toward it, or you may break the plane. If wind is a factor, make sure you're launching on the downwind side. With this much stretch, the rubber bands tend to wear out quickly. Keep a supply on hand for quick replacement. ![]()
Watch the launcher in action at makezine. com/projects/jumbo-hand-launcher Share it: #jumbohandlauncher
RICK SCHERTLE
([email protected]) teaches middle school in San Jose, Calif., and designed the Compressed Air Rockets for MAKE Volume 15 and the Rocket Glider for MAKE Volume 31. With his wife and kids, he loves all things that fly.

You will need:
» Pine board, 1"×2"x4'
» Small piece of wood dowel or pencil
» Rubber band, #117, ⅛"×7"
» Rocket Glider Maker Shed #MKRS2, or other catapult-launched flying object
» Saw
» Drill
» Drill bit, ¼"
» Hammer or mallet
» Stapler