
In the last ten years or so, 3D printers have gone from being large pieces of industrial equipment to hobbyist novelties, to classroom staples. This chapter reviews the range of technologies that all fall into the broad category of 3D printing. There are many different 3D printers, but fundamentally they all create an object by building up one layer at a time on some sort of platform. As we discuss in Chapter 1, the basic idea of 3D printing (or additive manufacturing, if you prefer) is that you create objects by building them up one layer at a time.
The commonest type of 3D printer works with spools of plastic (called filament), which it melts and lays down to create objects. Others use lasers or projectors to harden light-sensitive resin. Still others either sinter powder or lay down binders to form objects from powder. The sheer number of technologies can be overwhelming. There is a lot of experimentation going on in the field at the moment, and hundreds of companies are developing new printers on what seems like a daily basis. The materials available have proliferated too.
In this chapter, we survey the field and give you a basic idea of what each of the technologies is and what it can do. We explain some basic vocabulary so that you can understand what we will be talking about later in the book. Later chapters focus more on the how-to aspects: the software of 3D printing (Chapters 3 and 7), things to consider when buying a printer (Chapter 4), and how to fit a printer into your space and daily routines (Chapter 5).
The 3D printing world uses metric measurements, and you will need to get comfortable with them if you are not already. The commonest measures you will encounter are millimeters (mm) and degrees Celsius. If you are used to Imperial units, 25.4 mm is an inch. To convert temperature in degrees Celsius to Fahrenheit, multiply the temperature in Celsius by 9/5, and then add 32 degrees. So, an extruder temperature of 210 C is the same as 410 F.
Filament Printers
By far the commonest consumer-level 3D printing technology is fused filament deposition manufacturing , sometimes called FDM (which technically applies to just one manufacturer) or more generically FFF for fused filament fabrication . In this book, we just refer to these printers as filament 3D printers. These printers pull plastic filament off a spool, melt it, and lay down the melted plastic in a fine line, typically around 0.2 mm high and a few times as wide.
Figure 2-1 shows a typical filament printer, which would have a spool of filament next to it if it were running. We have also labeled the common convention for naming the axes of a printer. The x axis here is left to right, the y axis is toward and away from you, and the z axis is vertical.

A typical consumer 3D printer

The Artemis deltabot (courtesy of SeeMeCNC)
There are philosophical debates about whether Cartesians or deltas are “better” for any purpose, somewhat along the lines of debates about the virtues of Windows vs. Mac personal computers. In the end, the quality of manufacture and the features you need should drive your choice.
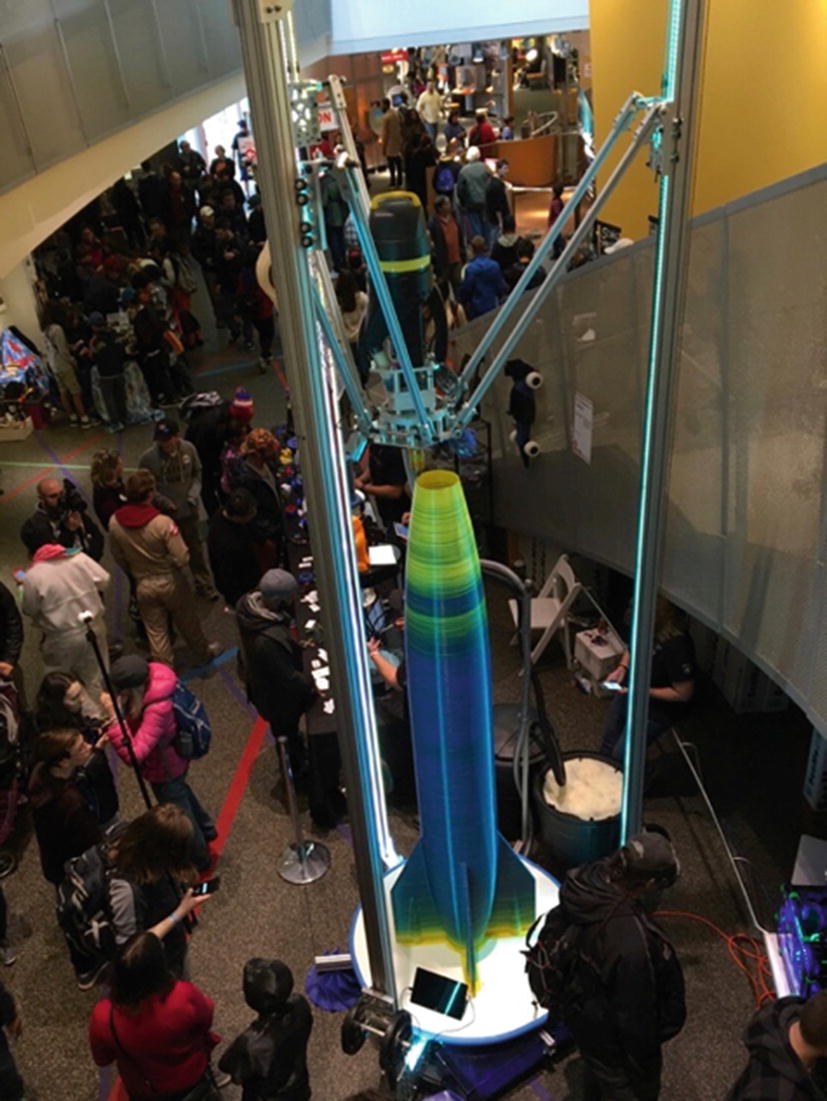
The Part Daddy demonstrator
Parts of a Filament Printer
A filament printer is pretty simple—a common analogy is to call it a computerized hot glue gun. However, there are several critical parts that affect reliability, print quality, and what kinds of materials you can use.
Stepper Motors
Consumer 3D printers usually have four or more stepper motors , commonly called steppers. As the name implies, these are precise motors that move their shafts in predefined angular steps. The availability of very reliable, precise, yet cheap steppers like those in Figure 2-4 has been an enabler for many consumer goods.

A stepper motor
Control
3D printers are controlled by microcontrollers. Many of these use a processor that is an adaptation or descendant of the Arduino open source microcontroller standard. Surprisingly, many printers run on very little computing horsepower. As of 2019, many consumer printers still use open-loop control , meaning that they do not have sensors checking that the printer is running as planned, except for sensors monitoring temperatures of the print bed and extruder. Deltas take more processing power than Cartesians, generally speaking, and you may want a more powerful controller on a delta to keep up.
Most printers do not need to be tethered to a computer. If they are, it is to feed the commands to create a model, not to directly control the motors and temperatures.
A printer runs some sort of firmware on its controller to do that low-level control. Firmware is just software that is used to control a machine. Many printers that are descendants of the RepRap project described in Chapter 1 run a variation of the open source Marlin firmware. Older MakerBots and their distant cousins and clones tend to run a version of the Sailfish firmware.
The most common type of 3D printer controller is based on the ATmega2560, an 8-bit microcontroller that runs at 16 Mhz. The first 3D printer controller to use this processor was the RAMPS board (short for RepRap Arduino Mega Pololu Shield). This was a shield, or daughterboard, designed to be used with the Arduino Mega development board that was designed to carry several small stepper driver boards in a form factor originally designed by electronics manufacturer Pololu. Most modern versions have the ATmega2560 chip onboard rather than using a separate circuit board, but many are still designed to use replaceable stepper drivers in the Pololu form factor. More advanced stepper drivers are now available in pin-compatible formats that allow you to upgrade your printer or replace a damaged driver.
There are several different projects developing open source firmware to run on these 8-bit microcontrollers. The most common of these is the Marlin firmware. Some newer controllers use 32-bit ARM microcontrollers running at 48–120 Mhz. Most of these are divided between those designed to run the Duet firmware and those designed for Smoothieware, and not compatible with one another. Marlin 2.0 (in development as of this writing) adds support for 32-bit controllers, including many of the existing boards designed for other platforms.
Build Platform
Prints are created on a flat platform, interchangeably referred to as the print bed or print platform . Most are equipped with a heater, which allows you to use more materials, as we discuss in detail in Chapter 4. Depending on the printer design, the print bed may move in one or two directions, or not at all.
Extruder
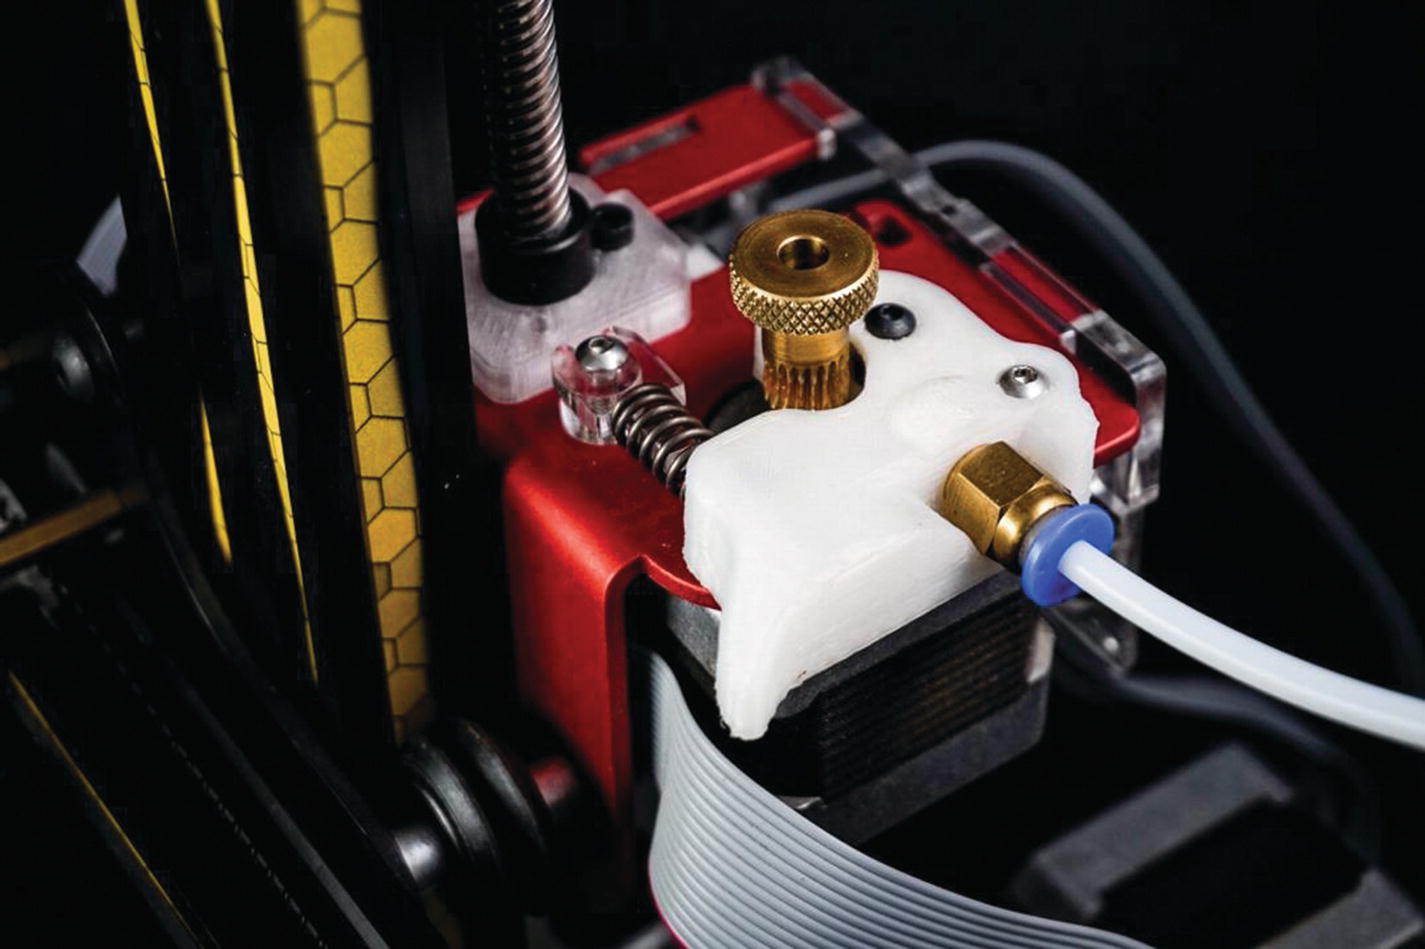
The extruder is the part of the printer that melts and moves the filament. It is made up of several parts. We have already mentioned the extruder drive gear and its motor, which push the filament into the hot end. The hot end in turn is comprised of a heater, a nozzle, and a sensor (called a thermistor) to sense how hot the nozzle is.
The nozzles are very precise. They typically measure 0.35–0.50 mm in diameter and can be made entirely of metal, or they may be lined with a material called polytetrafluoroethylene (PTFE) to minimize jamming. All-metal hot ends are required for printing many materials.
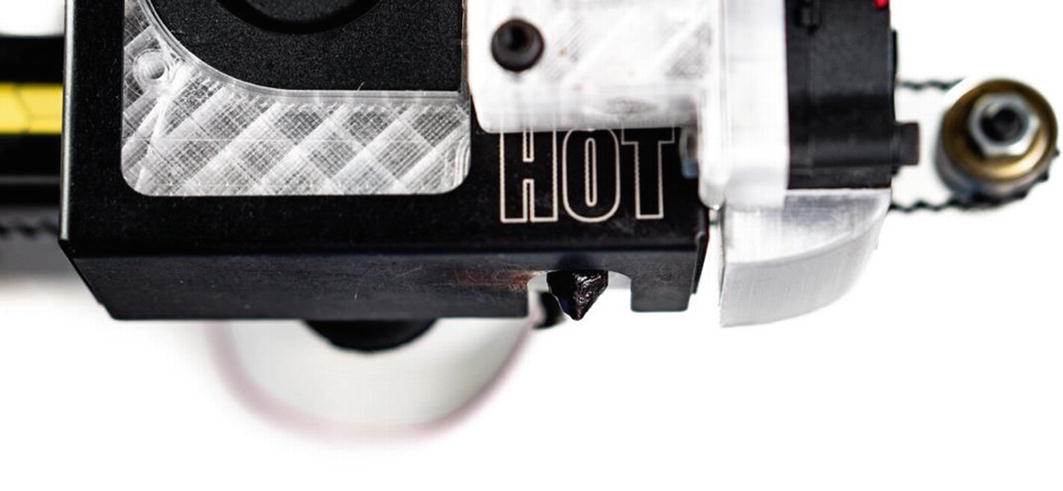
A nozzle
How Printing Works
First, filament has to be pulled from the spool into the printer, usually with a gear driven by a stepper motor. There are a variety of geometries for this. Sometimes a gear is right next to where the plastic will be melted (the hot end), and sometimes it is separated by a flexible tube, called a Bowden tube .
Extruder gear on a printer with a Bowden tube
Some manufacturers like direct-drive extruders; many have moved now to some form of Bowden extruder. The main advantage of having the gear right at the extruder is simplicity, though it also means that the motor is being carried around with the hot end. This can in turn mean slower printing and other issues.
A print starts with a 3D CAD, which is turned into a series of commands for the stepper motor and the temperature controls. This process is discussed in detail in Chapters 3 and 7. Once those commands are loaded onto the printer, via cable, SD card, or wireless connection, the printer will first heat up the nozzle and the platform (if it has a heater). Once everything is up to temperature and the printer performs whatever self-checks it is capable of, printing begins.
The first layer of the print has to stick well to the platform. There are various techniques for ensuring this. Some involve software settings (Chapter 3), and others are related to using the correct platform surface for the material you are printing (Chapter 4). Assuming that the print sticks, as a layer builds up, there are areas that do and do not have plastic within one layer. This means that the nozzle will be extruding during some parts of the layer, and not during others.
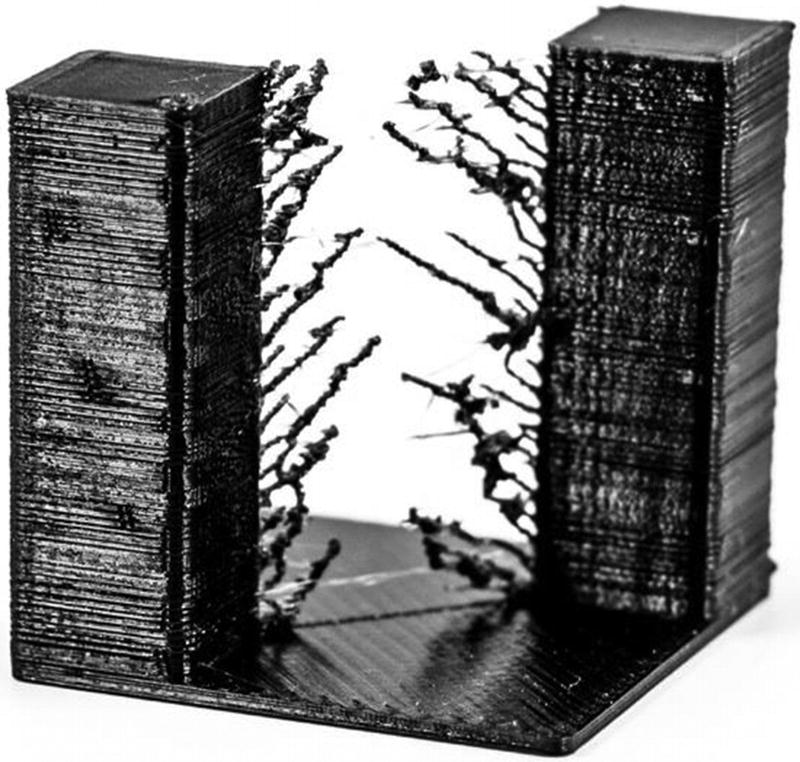
A print with poor retraction settings

A failed print
Suppose that you were printing something that had a part sticking out, like someone reaching out an arm. As you built up your print layer by layer, you would eventually reach the first layer of the bottom of the arm. But as you laid out plastic to form the first layer, it would just fall down since there was nothing to support it. To address problems like that, we use support material. Support is extra material that is added to the model to allow it to print a layer at a time. Figure 2-9 shows a print with support. The process of creating support is discussed in Chapter 3.
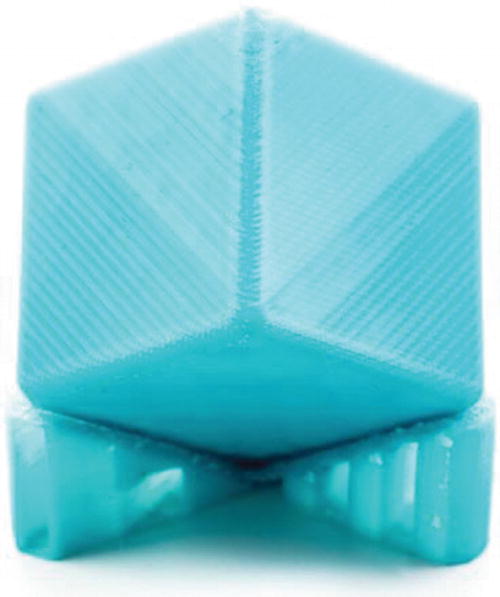
A print with support
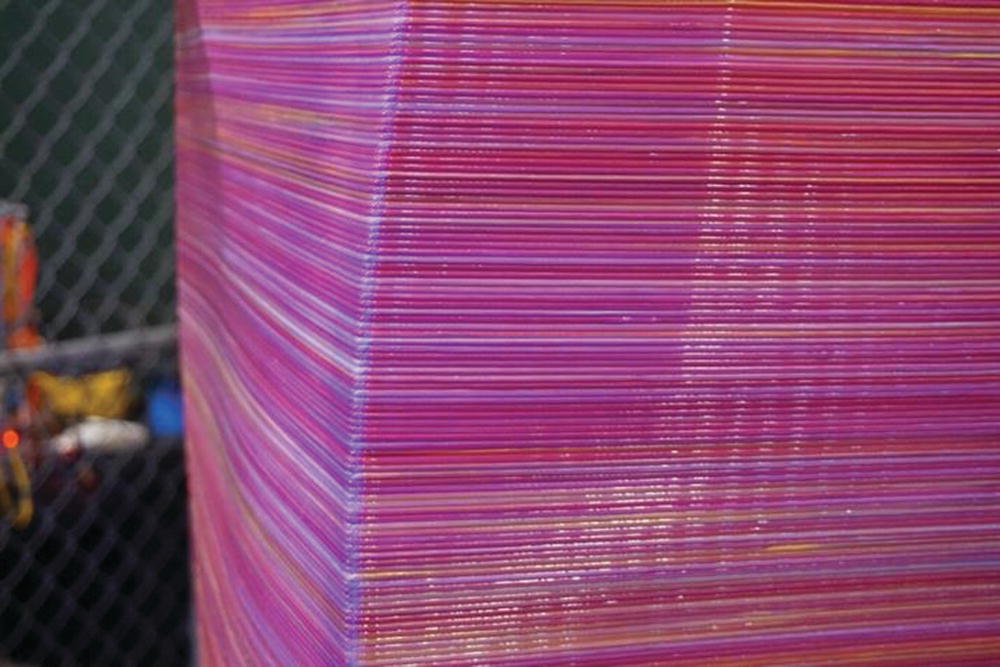
A close-up of layers
Filament Choices
There are many choices for 3D printer filament. Your printer, however, will likely only be able to handle a subset of them, and will either use 3 mm or 1.75 mm diameter filament. The quality of your 3D printing filament will make the difference between endless frustration and a good experience, so let us go over what “filament quality” means first.
Consumer 3D printers, as we have just seen, are really not all that sophisticated. They have, in a way, outsourced their complexity to their filament. Consistency and quality is better now than it was a few years ago, but can still be uneven.

Checking filament diameter with a pair of calipers
If your printer stops extruding mid-print, your first suspect should be a bulge in the filament, which will jam the extruder. The extruder gear will also usually chew into the filament and therefore have a lot of ground filament in it. Brush the ground filament out gently and measure the filament. If it is significantly wider than you expected, break off a few meters and measure again.
The other filament problem that can cause this symptom is filament impurity or poor color mixing. Again, try breaking off some and printing again. If your printer has a restart function, it probably will not work in this case, because you do not know how long the filament has been grinding. You will probably have to restart from the beginning.
There are a lot of different filaments available. We discuss some of the commonest ones, and what 3D printer hardware and software you need to use them.
Filaments come labeled with a range of appropriate temperatures for the extruder and the platform. Often the temperature range is really large, so it is not that helpful. There may be a label on the spool or on the website where you ordered it. If in doubt, start in the middle of the range. See the discussions of settings in Chapter 3 to see whether you should move up or down if you do not like the results.
Filaments need to be kept in a cool, dry place. Do not open a spool of filament out of its shrink wrap until you are ready to use it, because keeping it sealed will keep moisture out of it. After a while, you will have a bunch of partial spools on the go. We keep ours in airtight plastic boxes—a 5-gallon paint bucket with a good lid works well; Joan is partial to 22-liter stacking plastic boxes with good seals. Resist the urge to use your spools as a colorful wall display, since that is asking for both dust and moisture contamination of your filament.
Nylon is particularly sensitive to humid conditions. If nylon gets damp, the water will pop and sizzle out as it heats up, leaving pits and gaps in the print. If you live someplace with routinely high humidity, you may want to explore reviews of the various filament-drying systems out there, or DIY equivalents.
Dust is an issue, too. Keep the filament clean; in Chapter 5 we have some suggestions on how to do that. Do not try to do 3D printing and other fabrication that creates dust (ceramics, woodworking, machining) in close proximity.
Many low-cost printers have no temperature limiters in their software or hardware and will be perfectly happy trying to heat the nozzle to the point where it will burn, or the heated bed to beyond its design temperature. Check your manufacturer’s limitations before trying a filament that your printer was not designed to use.
PLA
By far the commonest filament material is PLA, polylactic acid. It is a biodegradable, corn-based (sometimes sugarcane-based) plastic. It melts at a relatively low temperature and will stick to a variety of platform surfaces. PLA usually requires an extruder temperature of around 210 degrees C.
One of the reasons it is so popular is that PLA does not require a heated platform. Low-cost printers usually suggest that you put blue painter’s tape (1.88-inch wide 3M ScotchBlue 2090 works well) and use that as your surface. If you do have a heated platform, follow your manufacturer’s suggestions for what to put on the bed. Often it will be plain glass, or you might smear on some glue stick first. The adhesive found on painter’s tape is not suitable for use on platforms heated much beyond room temperature.
The downside of PLA is that, well, it melts at a low temperature. A PLA print on a hot car dashboard will warp and creep. (Creeping is a tendency to flow slowly under pressure—for example, a PLA print might develop a dent if something is pressing against it in a warm room.) If that is not an issue, PLA is a very good material for quick prototypes, student projects, and the like.
There are specialty filled PLA mixes that contain stone, wood, metal, or glow-in-the-dark fine particles. Objects made with this can look surprisingly like they are made of the respective substance, with a bit of polishing. However, these mixes are hard on nozzles and tend to abrade them; hardened or ruby nozzles can get around this problem. There are also formulations of PLA that have a nice sheen without any post-processing. Experiment a little (many filament sellers have sample packs) to see what you might like to work with.

Vase printed in silk PLA
PLA sign after time in the California sun
PET
PET (polyethylene terephthalate) is a very common plastic in the non-3D printing world, used for water bottles and many other things. PETG is a type of PET that is often used in 3D printing; some varieties are translucent. You can in principle print PETG on blue tape, although people use heated beds if they have one. It needs an extruder temperature higher than PLA—around 230–260 C. PET filaments are typically a little more expensive than PLA, sometimes as much as twice the price. But they can look really good, particularly if you want something transparent, and they are not as vulnerable to warm temperatures as PLA is.
ABS

An ABS part that pulled up from the heated bed
Although we recommend ventilation with any 3D printer, ABS fumes in particular are an issue. However, blowing a fan directly on the print will tend to make it fail. Arrange your ventilation if possible to be pulling air off the print rather than blowing on it.
ABS can be smoothed and post-processed in a variety of ways. We talk about some of those in Chapter 6, where we focus on what happens after the print comes off the printer.
Nylon
Nylon is a strong printing material, which also requires a high temperature of around 240–270 C. Be sure your nozzle is all-metal before trying to print with nylon, because nozzles lined with plastic cannot handle that high a temperature.
The biggest challenge with nylon, other than the high extruder temperature, is that it does not want to stick to anything. The best platform material we have found for nylon is a cold platform made of Garolite LE, a type of composite. Failing that, we have heard that glue stick on a platform heated to about 75 degrees C will work. As noted earlier, nylon also needs to be kept very dry, or pitting can result. Nylon can be dyed after printing with dyes appropriate for it.
Challenging Filaments
Some materials are difficult to print well. Filaments that are very strong tend to require correspondingly higher temperatures and often want to peel up from the print bed. Some printers can handle materials like polycarbonate, which typically requires higher nozzle and bed temperatures than consumer machines can achieve safely.
There are also filaments that are flexible which can create parts that also can flex. However, they tend to jam in the extruder, particularly for printers using 1.75 mm filament and Bowden tubes.
Dissolvable Support
Some printers have more than one extruder. One reason for buying such a machine is to allow the use of support material that can be dissolved away, either with water or other chemicals.
The commonest water-soluble support, PVA (used ambiguously for the closely related water-soluble polymers polyvinyl alcohol and polyvinyl acetate), is basically Elmer’s glue. As you might imagine, it has a tendency to clog nozzles, and it has to be extruded fairly cold. Check your local rules about disposal—you should not put water full of dissolved glue into your plumbing. PVA has to be kept extremely dry, for obvious reasons. It also tends not to stick well to the other materials you are using to make your print.
Other materials like HIPS (high-impact polystyrene) dissolve in limonene (a solvent made from oranges), but this leaves you with a rather smelly mess to deal with.
In other words, this is not a particularly easy route to go. You will need to talk to your local waste-disposal person to see how best to handle your waste stream. In the end, you may decide to stick with support you can pull off with pliers. We talk more about support in Chapter 3’s discussion of software settings.
Multimaterials vs. Multiple Extruders
The other reason you might buy a printer with multiple extruders is to print objects in more than one color at a time. With only one extruder, 3D printers print with just one color of filament for the entire print. In essence, you develop two interleaved computer models, one for each color, and the printer alternates extruders in each layer. Because the extruders would interfere if they tried to print at the same time, typically dual-extruder prints take longer than single-extruder ones do because one extruder prints, then wipes itself off (so it does not dribble on the layer once it is done), and so on, back and forth.
Alternatively, some machines now come with a device that can take filament from multiple spools and splice a mixed filament to mimic what multiple heads would have done, but with one nozzle. This is an interesting development to watch; there are some aftermarket devices available as add-ons to existing printers.
Aftermarket Upgrades
If you want to be able to print some materials that will not stick to your original print bed material, there are now a variety of aftermarket materials you can stick on to your platform. A commonly used one is BuildTak (www.buildtak.com), which can be glued on to your existing platform. The only issue is that some materials stick too well to BuildTak , and getting the prints off it is challenging. You will need to recalibrate your printer if you add a clip-on or stick-on platform on top of your original. See “Calibrating Your Printer” in Chapter 5.
Similarly, there are replacement third-party nozzles. Here, however, the replacement process is more sophisticated. If you are not a tinkerer who is comfortable with building a printer from a kit, you probably should not go that route.
Advanced Filament Printers
As the consumer and higher-end “prosumer” markets expand, some specialty printers have emerged. Some are very large, having a build volume of a cubic meter or more. Some have up to five extruders, or one of the multimaterial extruders we mentioned earlier.
Another niche is occupied by Markforged (www.markforged.com). This company has a printer that lays down nylon in parallel with another head that lays down one of several continuous fibers. Thus, they are 3D printing carbon fiber or other composite parts; Markforged has stated in webinars that its early adopters often use their printers to make tooling. Some Markforged printers use a filament with chopped carbon fiber filler, which increases the stiffness of the base nylon. This evolution of materials with custom printers is probably a niche that will grow as specialty applications emerge; novel materials are now driving a lot of the 3D printing universe as the printers become more commoditized.
Markforged is also one of several companies developing printers that are designed to print with filament (or, in some cases, rods) with a high percentage of metal filler. Metal-filled filament is available for many printers, but while most of these filaments can only give the appearance of metal, these machines are designed to create real metal parts by allowing you to put the printed parts into some combination of a chemical bath and furnace that will remove out the plastic matrix material and sinter the metal particles together. Chapter 11 has more detail about 3D printing with metal.
3D printing “pens” (Figure 2-15) heat up 3D printing filament (usually 1.75 mm) and allow you to freehand draw with the melted plastic. They are useful for welding together broken prints, since you can use a thin line of the same material as you are using for your 3D print. In other words, they are more or less hot glue guns that use 3D printer filament.
The pens can also be used to do 3D freehand drawing. However, unless you have really steady hands, it is not as easy as it looks. Cover a piece of cardboard with the same blue painter’s tape you would use on a cold 3D printer platform and use it as your work area.
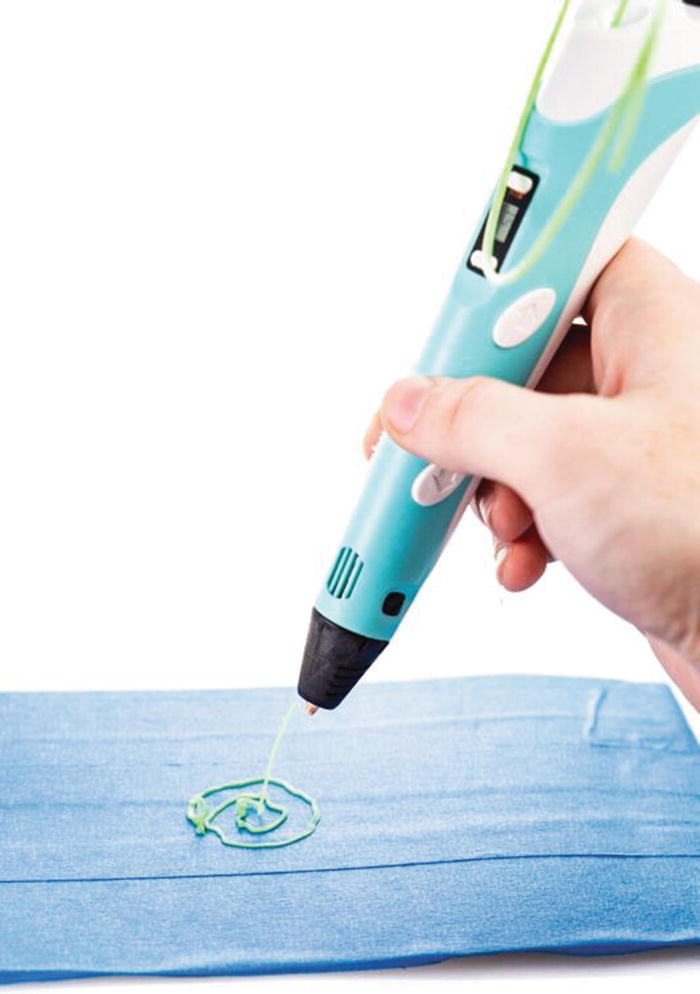
A 3D printing pen
Some pens can use both PLA and ABS, with an ability to set temperatures appropriate for both, and most have a speed control to manage how much plastic you are using at a time. Using one of these pens can be a good exercise in building your intuition about what a 3D printer is doing, as you will most likely make a stringy mess the first time you use a pen.
Concerns about ventilating an area where you are melting plastic, ABS in particular, still apply with a pen. And of course the pen tip gets very hot, just like the extruder on a 3D printer. If you are using PLA, you will need to have some sort of airflow anyway to cool the material as it hardens out of the pen if you want to build in 3D.
There are stencils and such things too; search online for “3D art pen” for examples and videos. Eiffel Tower models are the aspirational thing to build, but you obviously should not start there. No computer modeling is required to use a 3D pen, but manual dexterity and a bit of artistic ability help. Pens with good temperature control and ability to use multiple materials cost about $50–$100.
Resin Printers: SLA, DLP, and LCD
The consumer resin printer market has been coming into its own recently with a great deal of experimentation. There are three types of resin printer on the market right now: stereolithography (SLA), Digital Light Processing (DLP), and a variation of DLP that uses a liquid-crystal mask (LCD) with an LED illumination source. Technically, all are SLA, but the terminology is used somewhat ambiguously. Laser SLA printers use optics to move around an ultraviolet laser spot to cure UV-curable resin within one layer at a time. This layer is peeled off the bottom of a tank (or dropped down into the tank, in the older but now less-common top-down orientation), and then the next layer is cured, and so on. Figure 2-16 shows a Formlabs Form 2, one of the higher-end consumer SLA machines.
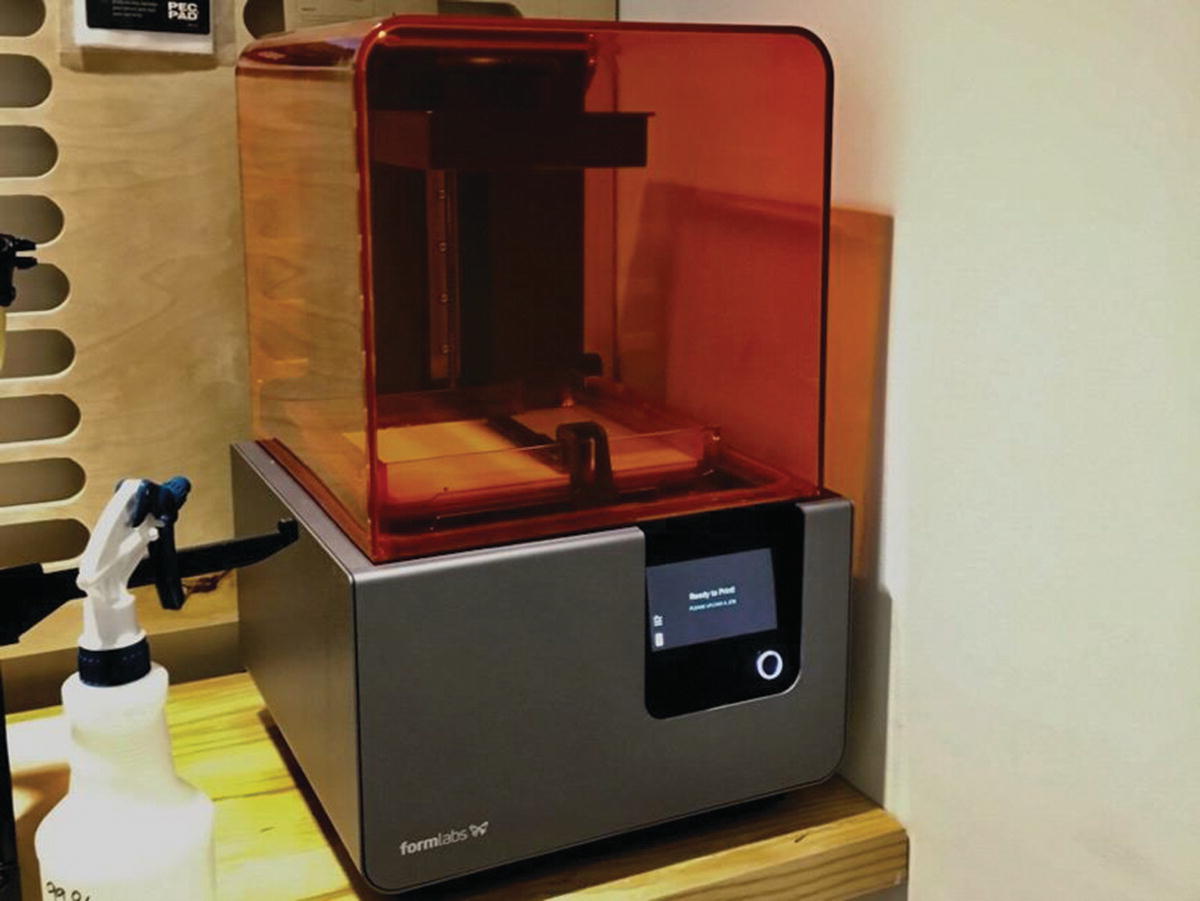
A Formlabs Form 2 SLA resin printer
Printing Process
Resin 3D printers have an ability to create far finer detail than filament-based printers. A resin printer is limited by its laser spot size (SLA) or the pixel size (DLP and LCD). This means that resin prints can have very smooth surfaces relative to those created by a printer using filament.
Resin printers still need to create support, but the nature of the support is a little different. Typical printers are “bottom-up” and build a layer at a time, which is peeled off the bottom of a tray. To survive the peeling process with every layer, support is required. However, the object prints upside-down and support primarily withstands the forces associated with peeling off the bottom at the end of each layer. Figure 2-17 shows a print building upside-down on a Form 2. The greenish glow is the laser.
Printers that use a laser to cure resin use a series of coordinates that the laser spot moves through, philosophically similar to the commands that control a filament-based printer. They can generally move the laser spot much faster than a printer can move a heated nozzle, though. Although most have proprietary software, some of them have adapted software developed for filament printing.

A resin print in progress
Post-processing
Post-processing is required on SLA prints, and typically involves washing off the print with isopropyl alcohol to remove uncured resin and exposing the print to UV light to ensure that the resin is fully cured. This can be a challenge in environments that are not set up for disposing of chemicals.
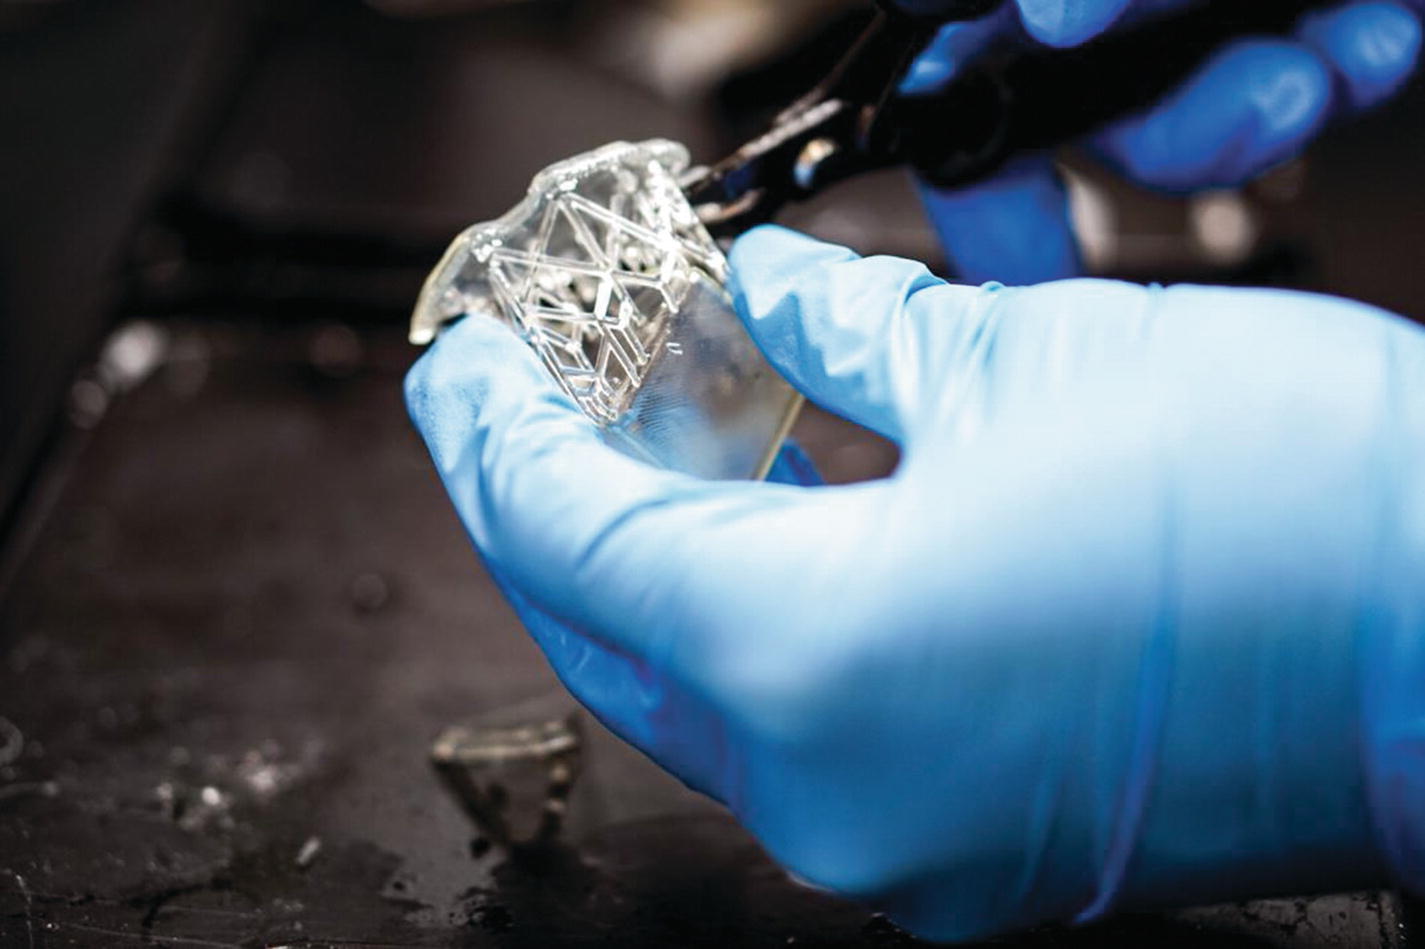
Washing off a resin print
Notice that this process requires wearing nitrile gloves to keep the resin off your skin. We talk a little more about resin printers in Chapter 4.
Materials
Resin printers use a variety of light-cured resins. Most of them are sensitive to UV light so that you do not have to use them in a dark room, since visible light does not harden them. But because by definition you cannot see UV light, you might be surprised if you do not control the environment around the printer. For example, having a resin printer in direct sunlight can destroy the printer (or at least its resin tank) by hardening a brick of resin into it.
Much of the development in resin 3D printing at the moment is in proprietary resins with special properties. Formlabs, for example, has a high-temperature resin that it says can be used for injection molds. Biocompatible resins for dental work have been an active area of study as well. Because the materials are so crucial, many manufacturers have closed systems with materials cartridges and proprietary software. These may have great properties, but they will be correspondingly expensive.
High-temperature for injection molds
Biocompatible resins for dental work
Castable resins for jewelry
Resins that cure into a flexible material
Formlabs (www.formlabs.com) has been an innovator in the materials space. If you want to know more, you can read up on its proprietary materials on the website, which includes case studies.
Other Technologies
The overall field of 3D printing has been expanding in many different directions. There are a few other major categories of printer that are unlikely to come into the classroom in the near term, but given the rate of progress, one never knows!
There are some just-for-fun technologies, like a printer that makes pancakes (www.pancakebot.com) and ones that print in chocolate or other foodstuffs. But the industrial market has been moving onward too. In this section, we talk about some of the categories of industrially oriented printers.
SLS
One of the oldest technologies in this space is selective laser sintering (SLS). Typically, a very fine powder is spread on a build platform, and a laser is used to sinter the powder together. More and more powder is added as the print grows. SLS can be used to make very fine, detailed prints. SLS prints do not need support, because the unfused powder acts as a support. However, the powder is very fine and hard to deal with, and SLS has been an expensive technology. Some “desktop” SLS machines are beginning to come on the market, and this may be an area to watch.
Many machines that print metal use a process called direct metal laser sintering (DMLS), which is the SLS process used for metals. Metal powder has to be worked in an inert atmosphere to prevent fires, so DMLS machines are very expensive since they need to be completely enclosed and filled with an inert gas. Other processes like selective laser melting (SLM) and electron beam melting (EBM) use even higher power to more fully fuse metal powder. We discuss metal printing more in Chapter 11.
Binder Jetting and Material Jetting
There are also processes that use a powder bed that do not require a laser (or other highly directed heat source). These processes typically use an inkjet head similar to what you would find in a desktop photo printer. Instead of heating the powder to fuse it, they deposit glue or other binding agents onto the powder. Binder jetting machines typically use gypsum powder and can deposit ink along with the binding agent to create full-color prints.
Binder jetting can also be done with metal, but that requires a second step in which the loosely bound particles are infused with a lower-temperature metal, or a wash and sinter stage to remove the binder. Some machines even sinter nylon powder by using inkjet heads to deposit sensitizing and/or inhibiting agents to the powder before heating it with a more diffuse heat source.
Other processes do away with the powder entirely and use inkjet heads to deposit liquid resin. These printers deposit tiny droplets of UV-sensitive resin and then quickly expose it to UV light to solidify it. This process requires that multiple materials be used—a build and support material at least—and can be used to produce prints with gradients of color and even of material properties like flexibility.
Bioprinting
Printing with biological materials has become fairly mainstream now in lab environments. In some cases, the printer is using some sort of paste to create an object for a biology lab. In others, the printer is very precisely squirting a liquid. The lower-cost “bioprinters” are basically a robotic pipette that can move in three dimensions; there are several competitors in this space already, and there will probably be more. Search for “bioprinter” to see the huge range of capabilities and price ranges.
Organovo (www.organovo.com) has been printing human tissue, as have other researchers. Right now, most people are looking at projects like skin or ear repairs, but there is long-term interest in building entire human organs.
Summary and Questions for Review
This chapter reviewed the different types of 3D printer technology available in the consumer market, with a particular focus on printers that use plastic filament. We also gave a brief introduction to other technologies, particularly printers that use liquid resin. 3D printer evolution is being driven now by inventions of new materials, too, and we discussed some of the wide variety of materials you might want to explore.
- 1.
What are the relative merits of 3D printers that use filament vs. ones that use liquid resin?
- 2.
What are two commonly used filament materials, and when might you use each?
- 3.
Name three critical components of a filament printer and what they do.
- 4.
How are SLA and DLP resin printers different from each other?
- 5.
What is SLS printing, and what type of material does it use to print?