Chapter 6: Interactive Motion Graphics for the Web
In the previous chapter, we explored content creation using the various tools within Animate and focused on animating that content through the use of both Shape Tweens and Classic Tweens.
In this chapter, we are going to design animated content for publication to the native web using the HTML5 Canvas target platform. As we build out a digital advertisement, we will include externally created content such as photographic bitmap images, design text objects within the project using Adobe Fonts, and animate both by focusing on the third tweening type available to us in Animate, the Motion Tween. We'll close out the chapter by examining various properties unique to Motion Tweens and then explore a few ways of writing code to make our project interactive.
After reading this chapter, you'll be able to perform the following functions in Animate:
- Import photographic content to combine with additional object types such as text and shape within Animate.
- Create and animate symbol instances using Motion Tweens, Motion Guides, and the Motion Editor.
- Effectively animate with Motion Tweens and modify associated tweening properties.
- Develop interactive elements for use on the web through the use of the Actions panel and the Actions Wizard.
Technical Requirements
You will need the following software and hardware to complete this chapter:
- Adobe Animate 2021 (version 21.0 or above)
- Refer to the Animate System Requirements page for hardware specifications: https://helpx.adobe.com/animate/system-requirements.html. The CiA video for this chapter can be found at: https://bit.ly/3iSDvuQ.
Designing a Document for the Native Web
While we spoke in some detail about different document types and publishing platforms in Chapter 2, Exploring Platform-Specific Considerations, and Chapter 4, Publishing and Exporting Creative Content, we haven't really focused on any particular platform when creating and animating content. This chapter changes that as we will be entirely focused on the native web in everything we do.
The first step in designing content for the web such as digital advertisements or interactive infographics is to create a document that targets these technologies and get our assets together.
Creating a New Document for Digital Advertising
We'll first create a new document that targets native web technologies from the various presets available to us in Adobe Animate. The New Document dialog includes a series of categories containing focused sets of presets to be used. You can access this dialog by choosing File | New or through the Create New button on the welcome screen.
Whichever method you choose, the New Document dialog will appear:
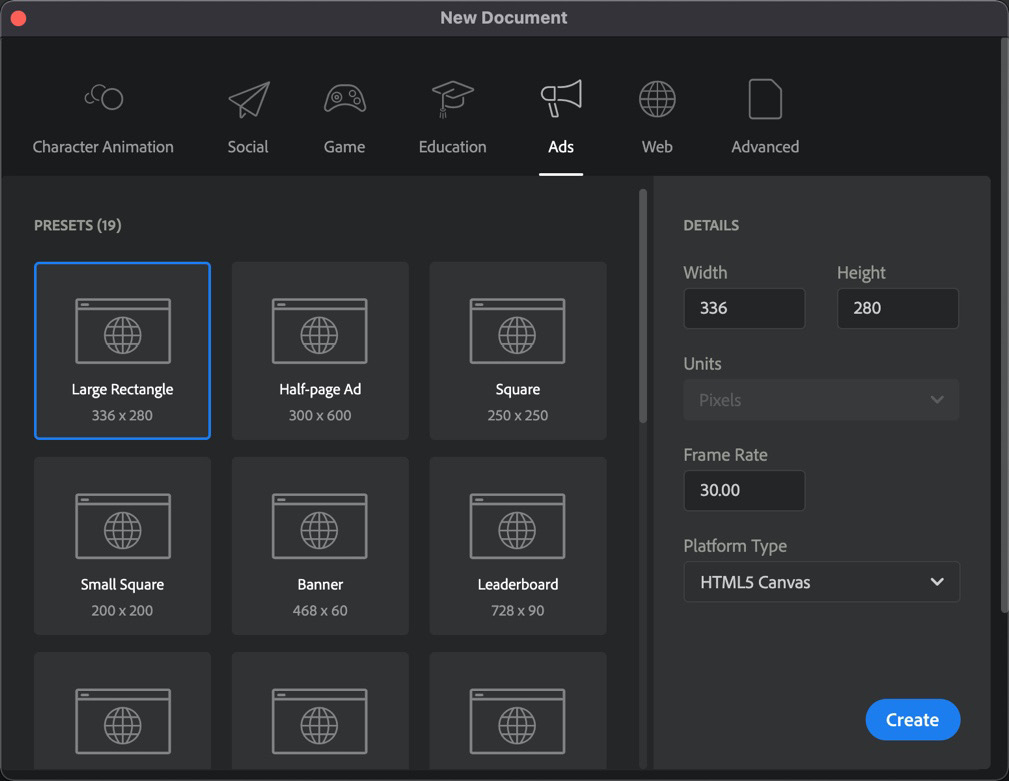
Figure 6.1 – New Document Ads Category Presets
With the New Document dialog open, we are ready to choose a preset. Along the top, you'll find six categories: Character Animation, Social, Game, Education, Ads, Web, and Advanced. We've already had a look at the Advanced category earlier in this book and will now turn our attention to the others.
We are designing a motion advertisement that will be supported on the web:
- Choose the Ads category and view the many ad presets that are present there. These presets are useful for both mobile displays and web browsers and are all built to conform to commonly accepted ad sizes.
- Locate the preset named Large Rectangle and select it. It will then appear highlighted with a blue border.
- The sidebar will change to display the details of our chosen preset. You'll note the size of our document will be 336x280 with an FPS value of 30. It's fine to adjust the Frame Rate if you find the playback requires a smoother frame rate or that you have too many frames for your needs, but since we are targeting commonly accepted ad sizes through these presets, there is no need to make any adjustments to the width and height.
- Look below the Frame Rate and notice that there is a Platform Type selection box. If you interact with this control, you will see two choices: the default of HTML5 Canvas and ActionScript 3.0. Again, since we are targeting the native web, we want to be sure that HTML5 Canvas is the one selected.
- When you are ready to create your document, click the Create button and a new document will open up within Animate.
- Be sure to save your new document as a .fla file by choosing File | Save from the application menu before moving on.
Our new document is configured, saved, and ready to be worked on.
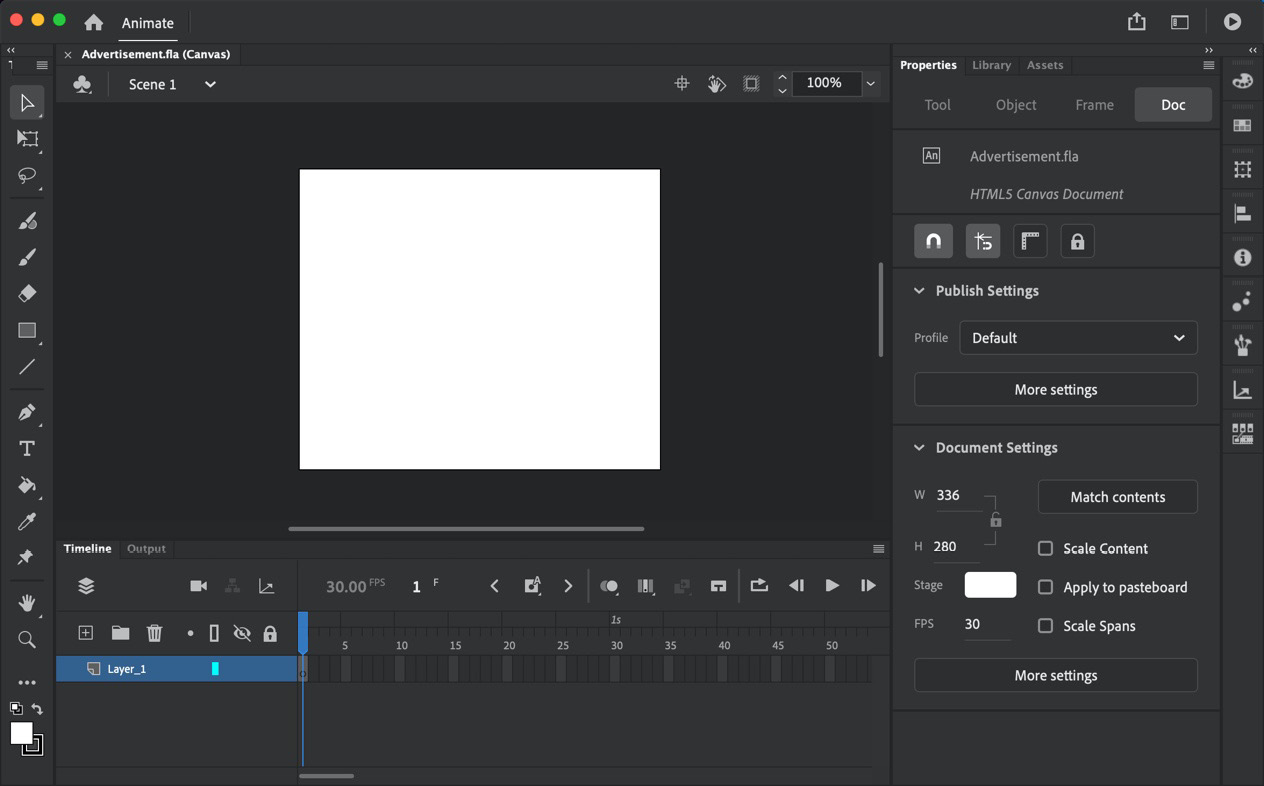
Figure 6.2 – Our newly created document
- A quick look at the Properties panel should confirm that all of the choices made in regard to width, height, FPS, and the target platform have been preserved.
Before moving on, we should note a couple of important things about digital advertising on the web and the standard presets we have based our new document upon. If you are new to the field of digital advertising, you may not know there actually are a set of common ad sizes that almost all ad delivery networks accept.
These range from elongated banners to tall skyscrapers, and a set of sizes that are squarer in aspect. They can be seen in the following figure:

Figure 6.3 – Common display ad sizes
Some of these sizes should be instantly recognizable by shape alone, as they appear all over the internet; on news websites, social networks, personal blogs – everywhere. The presets within the Ads category in Animate are all based upon these standard sizes.
Tip
An extensive list of digital advertising sizes is maintained by Google and can be found at https://support.google.com/google-ads/answer/7031480.
With our new document created and saved, we will now turn our attention to the content to be included in our advertisement.
Importing External Content
Up to this point, we've only worked with assets created within Animate itself and haven't used anything external to the software. Many advertisements contain bitmap images such as .jpg and .png files for a photorealistic approach. Animate has no problem using bitmap images within any project, but you must first import the files to be used into the project library.
We've prepared a set of photographic images that have been prepared using Adobe Photoshop that will be used in different ways within this project. Our example advertisement is going to be for a unique brand of coffee that can only be purchased online.
Note
You can find the images we use here, within the exercise files at https://github.com/PacktPublishing/Mastering-Adobe-Animate-2021.
Let's go ahead and import some bitmap images into our document:
- Using the application menu, choose File | Import | Import to Library… to summon a file browse dialog:

Figure 6.4 – Choose Import to Library…
- Navigate to the location of your bitmap image files. If your Bean.png and CoffeeBeans.jpg files are not visible, within the browse dialog, be sure and choose All Files (*.*) from the Enable drop-down menu:
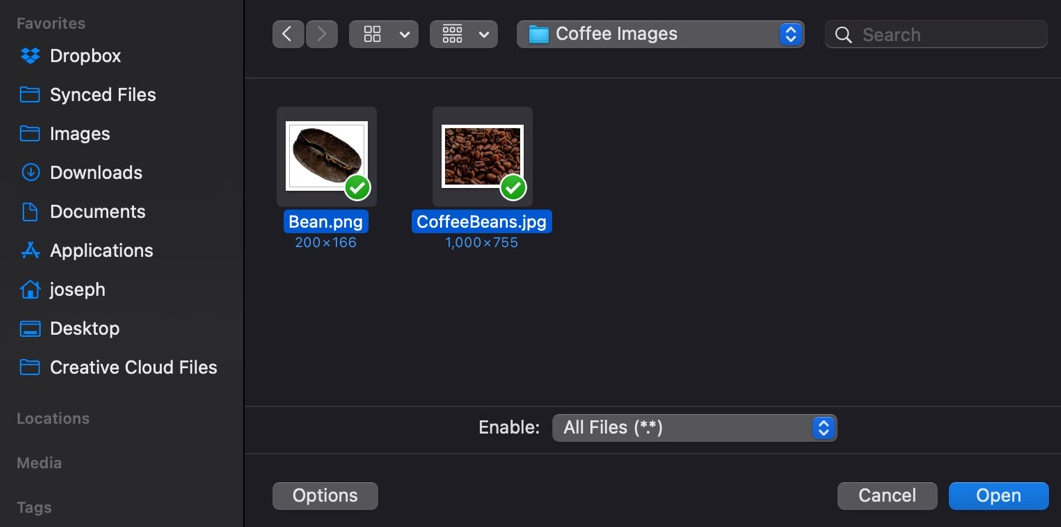
Fig. 6.5 – Import image files dialog
- Select the two files and click the Open button.
- The files will be imported into your project library. You can verify this by opening the Library panel. The images will be the only items within, and you will be able to preview them from here as well:

Fig. 6.6 – Imported bitmaps are stored in the library
We could have alternatively chosen to import our images directly onto the stage. When choosing Import to Stage… from the Import menu, your files will be imported to the project library just as we've done here but instances of these bitmaps will also be placed upon the stage. We are going to handle that part ourselves.
We only want to bring an instance of CoffeeBeans.jpg onto the stage at this point, so we can ignore Bean.png for now:
- Be sure your Library panel is open and that the stage is in view within the interface as well. Select CoffeeBeans.jpg and drag it onto the stage:
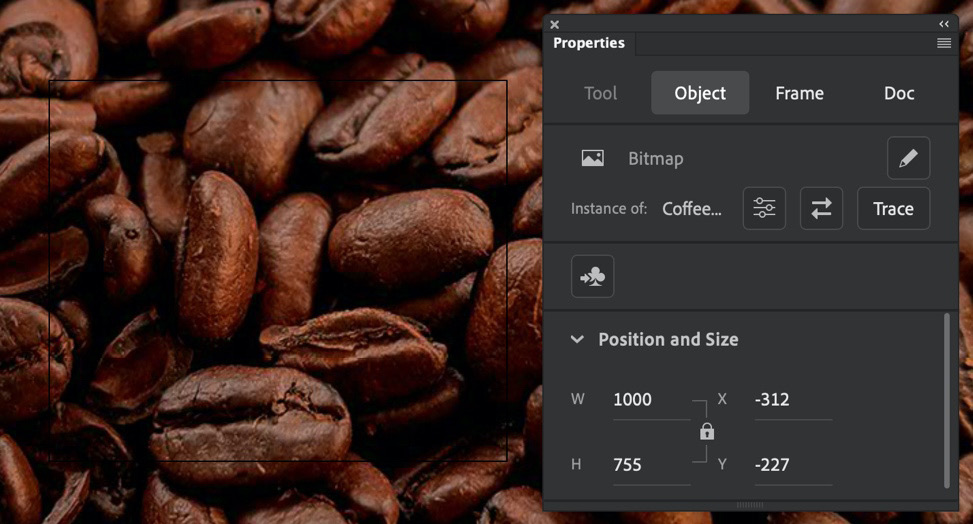
Fig. 6.7 – The image is huge
The image is much too large for the stage at its native size of 1,000 pixels in width!
- Look at the Object tab in the Properties panel and ensure the small lock icon between the width and height boxes is active. This will retain the native aspect ratio when the image is resized. Set the image width value to 425:

Fig. 6.8 – Set image width
- Open the Align panel if not already open by choosing Window | Align from the application menu. Ensure the Align to stage checkbox is active and choose both Align horizontal center and Align vertical center:
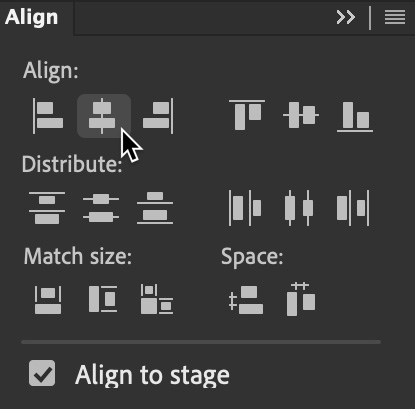
Fig. 6.9 – Align to stage vertical and horizontal center
This will center the bitmap instance across the stage. The image will overlap the stage onto the pasteboard a bit on all sides as well, but that is what we want.
- We should always aim to be as organized as possible within our projects. Rename Layer_1 to CoffeeBeans before moving on.
- If desired, you can hide the parts of the bitmap image that overlay the pasteboard by clicking the Clip content outside the stage button right next to the zoom percentage above the stage:
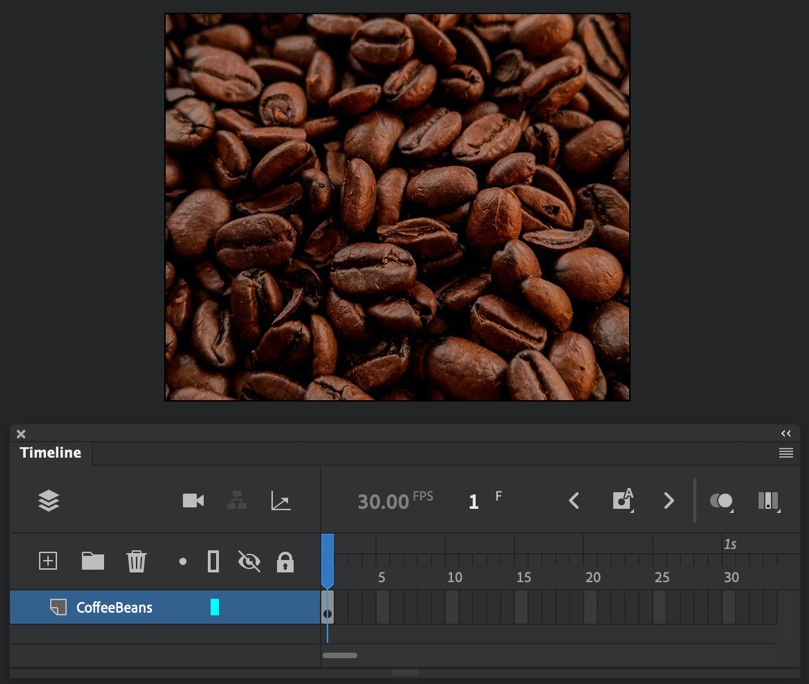
Fig. 6.10 – Our background and timeline are ready
We now have an instance of the CoffeeBeans.jpg bitmap file on the stage, resized to allow just a bit to bleed over onto the pasteboard. All of this is contained in a single layer named CoffeeBeans, which consists of a single frame.
Next, we'll go ahead and create more objects that will make up the rest of our digital advertisement.
Creating Text Objects
This chapter marks our first time using imported bitmap files in a project, but that won't be the only first. We need some text to include within the coffee advertisement as well and for that, we will put the Text tool to work.
Once the text is in place, we will add additional elements to complete the layout portion of this project:
- We want to keep our text in a different layer from the background image so that we'll be able to animate each separately. Click the New Layer button above the layer stack to add a new layer:

Fig. 6.11 – Adding a new layer
- With a new layer added above the CoffeeBeans layer, rename the newly added layer to TextMsg. It is always important to name your layers using terms that make sense to the overall project.
- Select the Text tool from the Tools panel. Remember, if a tool is not initially present, you can always edit the Tools panel to include it:

Fig. 6.12 – Text tool
- With the Text tool selected, look at the Tool tab or the Properties panel. This allows us to set some properties of our text before even creating it:

Fig. 6.13 – Text tool properties
We will want to use Static Text for this task so be sure the text Instance Behavior dropdown is set to this. Static Text is rendered to shape data upon publishing, ensuring that even viewers who do not have a specific font installed can see the text using the intended font. We'll look at Dynamic Text as part of Chapter 10, Developing Web-Based Games.
I've selected an Adobe Font for this project called Neue Haas Grotesk Display Pro and this can be used by anyone with an Adobe Creative Cloud subscription – just visit https://fonts.adobe.com and search for it!
I'm going to use a 48pt value for Size and #FF9900 for my Fill color.
To add text to the stage, you can click and begin typing to create an expanding width Point Text object or click and drag a textbox with a specific width to create Paragraph Text. We want to control the width of our text objects so will create Paragraph Text:
- At the top of the stage, click and drag from one side to the other to create a textbox measuring the width of the stage and type DARK ROAST using the previously chosen size and fill values.
- Modify the Text tool properties to use a 15pt value for Size and #FFD495 for the Fill color before adding a secondary piece of text.
- Once again, click and drag from one side of the stage to the other to create a textbox the width of the stage and type THE ULTIMATE COFFEE EXPERIENCE directly beneath the original text object.
- Using the Selection tool, click on the first text block and look at the Object tab of the Properties panel. The object width should be 336 with an x position of 0 and a y position of 5. Look to the Paragraph section and choose to Center align the text.
- Click the secondary text and look at its properties. The width should be 336 and the y position should be 63. The x position remains aligned to the left at 0 just like the previous text object. You should be sure and Center align this text as well:

Fig. 6.14 – Text added to our advertisement
The advertisement layout is beginning to take shape! One of the biggest concerns right now is the legibility of the text across the background image. We can increase the readability of the text message by adding a shape between the text and background.
- Choose the Rectangle tool, set its fill color to pure black (#000000), and disable the stroke. Enable Object Drawing Mode so that the resulting shape is easier to handle:

Fig. 6.15 – Object Drawing Mode activated
- Adjust the Fill opacity to a value of 80% and draw a rectangle at the top of the stage so that it covers the text completely. Your shape should have a width of 336, a height of 90, and be positioned at an x and y of 0.
- The last step is to send the shape behind your text, as it is obscuring it right now. Select the shape and choose Modify | Arrange | Send to Back from the application menu. The shape will be sent to the back of the stacking order within this specific layer. If you did not activate Object Drawing Mode in the last step, you will not need to do this as simple shapes will appear beneath text objects:

Fig. 6.16 – Shape added for clarity
That looks pretty good! The initial layout for our advertisement is now complete.
With our text objects and the background bitmap image on their own layers, this gives us a good starting point to create some animation.
In this section, we assembled imported external bitmap images and created text objects within a new document targeting the native web. Next, we'll begin animating this content through the use of a tween type called the Motion Tween – a tween we haven't encountered yet in this book.
Animating with Motion Tweens
We'll now add motion to the various components of our advertisement. In the previous chapter, we used both Shape Tweens and Classic Tweens to create motion, depending upon whether our object was a shape or a more complex symbol instance. In this project, we have a bitmap image instance to animate along with a group of text and shape objects.
We could convert these various objects to symbols and employ a classic tween – that would work just fine! However, this is the perfect opportunity to introduce the third type of tween that you can use within Animate – the Motion Tween.
Motion Tweens work very similarly to Classic Tweens in that they are both used to animate symbol instances and not shapes. A lot differs between the two as well – both in how they are created and the various properties available to us.
Note
Classic Tweens actually used to be called Motion Tweens before Motion Tweens were introduced to Flash Professional. When that happened, they were given the "classic" moniker and are now known as Classic Tweens.
We'll have a look at all of this, but the first task in preparation to use a Motion Tween is to ensure anything we want to animate is encapsulated within a symbol.
Building Symbols for use in Motion Tweens
Before animating with Motion Tweens, we will transform the contents of both our existing layers into symbols in order to tween their instances:
- Using the Selection tool, select the instance of our CoffeeBeans.jpg bitmap file within the CoffeeBeans layer.
- Choose Modify | Convert to Symbol… from the application menu or choose the Convert to Symbol button within Object properties. The Convert to Symbol dialog appears. We must convert any bitmap image to a symbol in order to animate it with a tween as bitmap instances cannot be tweened.
- Name the new symbol CoffeeBeans and choose the symbol type of Movie Clip. This symbol type will give us a good amount of flexibility when animating the background and we can also add interactivity to it if the need arises. Click OK:
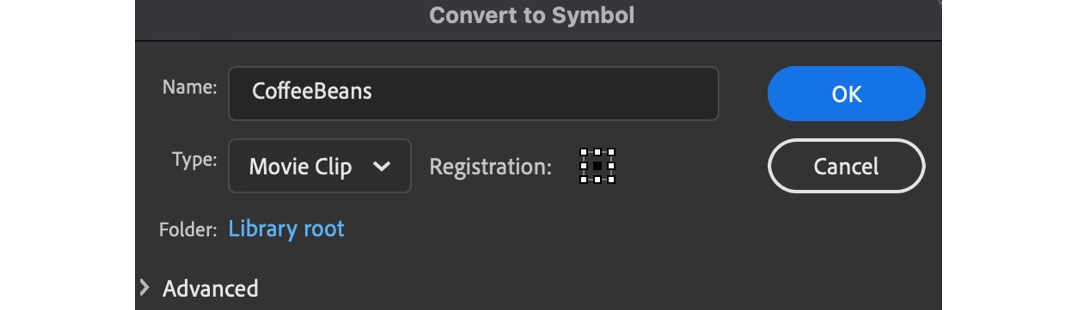
Fig. 6.17 – Create the CoffeeBeans Movie Clip symbol
Have a look in the Library panel and note that the newly created symbol appears there – right alongside the images that have been imported. Both imported files and symbols created in Animate will become part of the project library and you can use as many instances of each as you like.
- Now, we will focus our attention on the TextMsg layer. Clicking the keyframe at frame 1 of this layer will select both text objects along with the underlying shape object as they all exist on this single layer. We are going to convert all three to a single symbol in order to animate them as one object.
- In the Properties panel, the Frame tab is currently selected since we clicked upon a keyframe. Click the Object tab and notice the object type reads as Mixed, indicating that objects of multiple types have been selected:

Fig. 6.18 – Object Properties showing a mixed selection
- With this information verified, click Convert to Symbol to summon the Convert to Symbol dialog.
- Name the new symbol TextMessage and choose the symbol type of Movie Clip just as before. Click OK:
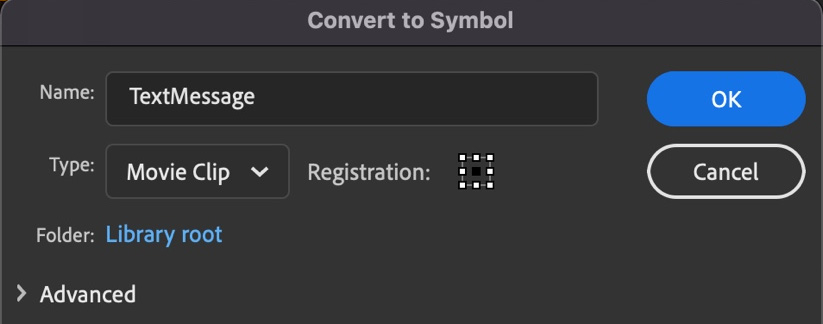
Fig. 6.19 – Create the TextMessage Movie Clip symbol
We now have a single Movie Clip symbol instance within each of our layers and they can each be effectively tweened in this state. The CoffeeBeans symbol contains a single bitmap image and the TextMessage symbol contains multiple objects within it, but we can manipulate them all together since they are now part of a single Movie Clip symbol.
We will now create a Motion Tween within each layer in order to add animation across both symbol instances:
- Select the keyframe at frame 1 of the CoffeeBeans layer and choose Create Motion Tween from the Insert Tweens button above the timeline:

Fig. 6.20 – Create Motion Tween creates a Motion layer
The Create Motion Tween command establishes a Motion Tween with only a single manual keyframe created. This is very different from Shape Tweens and Classic Tweens, which both require at least two keyframes to create a tween. This action converts the chosen layer into a special Motion Layer and 1 second worth of frames is added.
- Do likewise in regard to the TextMsg layer so that both become Motion Layers with active Motion Tweens. Once the conversions are complete, we can begin animating the contents of each layer.
- Select frame 30 in the CoffeeBeans layer. Right-click and choose Insert Keyframe | All from the menu that appears. This will insert a keyframe that holds data values for the Position, Scale, Skew, Rotation, Color, and Filter properties:

Fig. 6.21 – Manual keyframe insertion for Motion Tweens
Note that these keyframes in Motion Tweens appear as small diamonds and not the circular keyframes we are used to:

Fig. 6.22 – A diamond-shaped keyframe is inserted
In addition, you do not even have to set a keyframe manually as we have done here. All that is needed is to change any of the supported properties with the playhead at a specific frame and a keyframe representing the change in data will appear automatically. Again, quite different from other tween types.
- The only property we'll be adjusting is the scale of the background image. Move the playhead to frame 1 and use the Free Transform tool to scale down the image so that it is closer to the height of our stage:

Fig. 6.23 – Scaling the symbol instance
The original scale is preserved in the previously inserted keyframe at frame 30.
- We'll now move on to the TextMsg layer. Insert a new keyframe with all properties as before at frame 25 and frame 15. All three keyframes hold the same values at this point:
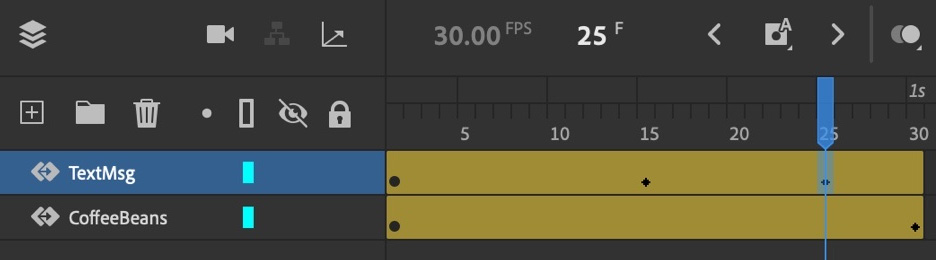
Fig. 6.24 – Keyframes inserted along the motion layer
- At both frame 1 and frame 15, shift the symbol instance upwards, off the stage so that the y position value is -55. You will notice a Motion Guide appears automatically, which displays the path of motion for our object. The instance will animate in from the top of the stage between frame 15 and frame 25:
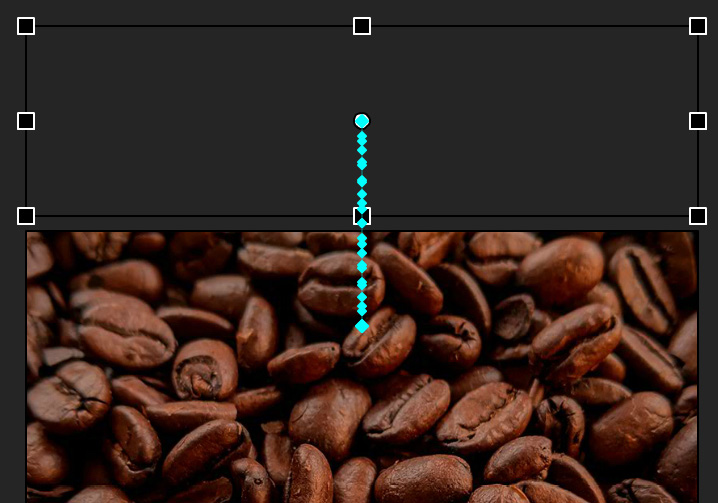
Fig. 6.25 – Instance shifted off the stage
- Our initial animation is rough but complete. Perform a Test Movie to view it in the web browser.
Notice the animation loops endlessly and there is no pause at the beginning or end. We will remedy these aspects of our animation before closing out the project.
With the animation of two pieces of content in place, we have seen that changing position when using a Motion Tween results in a Motion Guide on the stage. We'll next give this a better look and put it into play with another animated object.
Including Additional Library Items
To include additional library items, follow these steps:
- To complete the layout of our advertisement, we'll also bring in an instance of the Bean.png bitmap we imported to the Library earlier and animate that as well.
- The first thing to do is create a new layer to hold our single coffee bean image. This image is a PNG file with a transparent background, so all you see is the coffee bean. Name the layer Bean once you create it.
- Drag an instance of the Bean.png bitmap image onto the stage. Place it toward the bottom left. Feel free to use the Free Transform tool to scale and rotate the image instance as appropriate:

Fig 6.26 – Scaling the Bean.png bitmap instance
- We will now convert this image instance into a symbol. With the image selected, choose Modify | Convert to Symbol from the application menu. Give the Movie Clip symbol the name Bean and click OK:
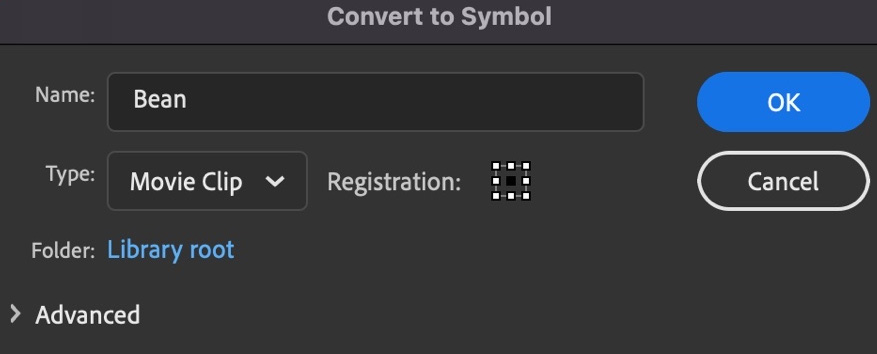
Fig. 6.27 – Create the Bean Movie Clip symbol
- Now, create a new Motion Tween within the Bean layer just as we have done with the previous two. The Bean layer becomes a Motion Layer with an active Motion Tween stretching to frame 30 at the 1-second marker.
- Click upon the initial circular keyframe at frame 1 to select it. We are going to shift this over a bit.
- Hover to the left of the keyframe at frame 1 with your mouse cursor and a small double-headed arrow cursor appears, indicating you can move the beginning keyframe along the timeline by dragging it:
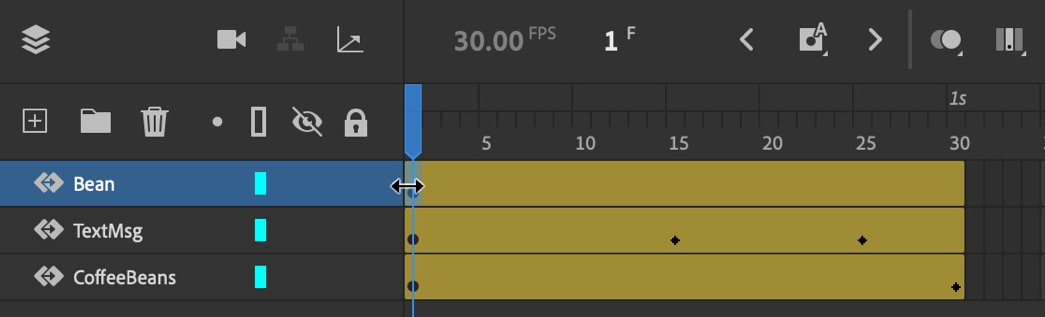
Fig. 6.28 – A double-headed arrow appears
- Go ahead and drag the selected keyframe to frame 30. When the mouse is released, the initial keyframe is relocated and now begins at frame 30. The frame span before frame 30 contains only empty frames.
With the new asset in place on its own layer, we'll next make some adjustments to the previously included animated content.
Adjusting the Timeline
At this point, we are going to want to adjust the previous animations a bit to allow some padding both before and after the animations. A common practice in character animation, it's always a good idea to include a bit of anticipation this way, even with motion graphics in advertising.
Okay, let's fill out our timeline a bit more and perform some additional keyframe arrangements:
- Insert frames for all layers up to and including the 2-second mark at frame 60 using either the Insert Frame button above the timeline or Insert | Timeline | Frame from the application menu.
- Let's ensure that the background scaling animation also extends to the entire 2 seconds. Click the diamond keyframe at frame 30 on the CoffeeBeans layer so that it becomes selected and highlighted in blue.
- If you now hover over this selected keyframe, you will see the cursor change to include a white box with a dashed line around it next to the cursor. This indicates you can now click and drag the keyframe to relocate it. Drag the keyframe to frame 60 and release the mouse to relocate it:
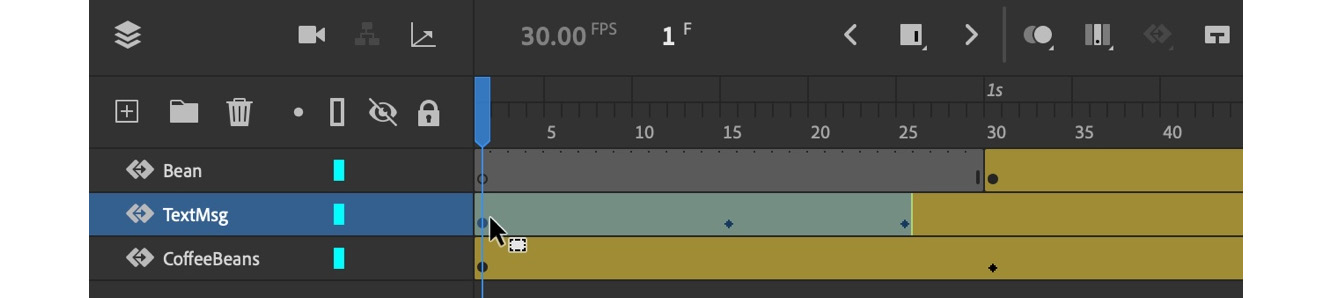
Fig. 6.30 – Dragging the keyframe to relocate
The previous scaling animation is preserved but takes up double the time now.
- We will now shift our keyframes in the TextMsg layer a bit so that the animation we created previously has a bit more room to breathe at the beginning. Select the block of frames that make up the entire set of keyframes in the TextMsg layer:
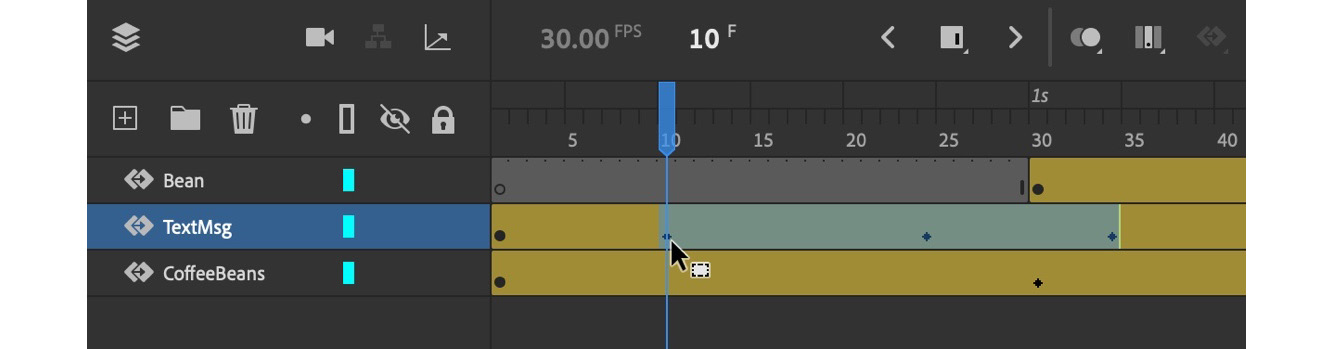
Fig. 6.31 – Block of frames selected
- Just as before, if we hover over the selection and then drag it across the timeline, we can relocate the entire set of frames. To include a pause at the start of the timeline, drag the keyframe at frame 1 over to frame 10:
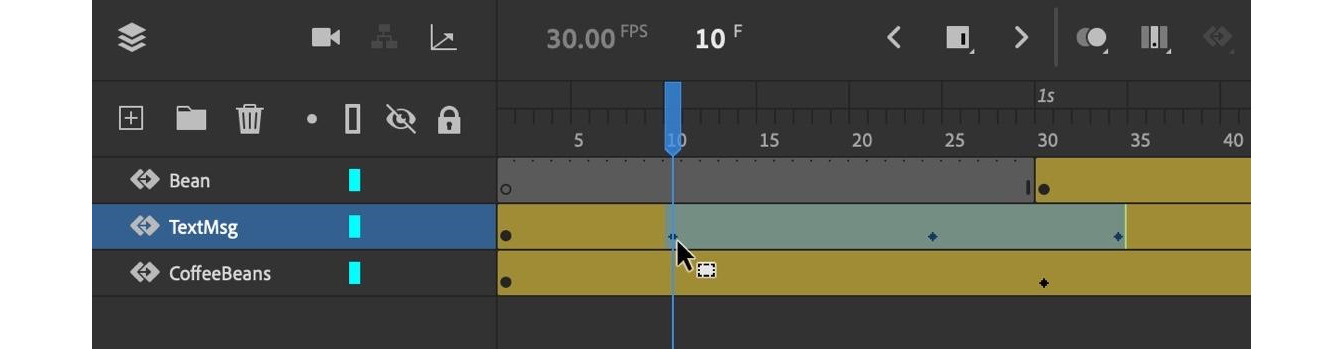
Fig. 6.32 – Block of frames shifted to frame 10
Play the animation using the controls above the timeline to view the effect of anticipation.
With these adjustments in place, we can better animate the Bean symbol instance in the proper context.
Animating with Motion Guides
Time to add motion to the Bean symbol instance! Right now, it exists at frame 30 and just sits there. We will have the bean drop in from the upper right and settle to its present location in the lower left:
- Select the frame at frame 50 of the Bean layer and right-click on the selection to open the menu. Choose Insert keyframe | All from the menu that appears. This duplicates the keyframe information from the previous keyframe.
- Move the playhead back to the initial keyframe at frame 30 and reposition the Bean symbol instance to the upper right – completely off the stage. This is where the instance will animate in from:

Fig. 6.33 – Motion Guide created
Notice that, since the position of our object differs between the two keyframes, a Motion Guide automatically appears between the two positions. This is very different than working with Classic Motion Guides since we don't have to do anything special to make it appear.
- Using the Selection tool, we can make all sorts of adjustments to the curve and ease the motion by hovering over the Motion Guide until a small arc appears next to the cursor. Pull this down and to the right to give the motion a slight curve and to space the frames in a more variable way.

Fig. 6.34 – The curved motion guide
- Each frame in our tween is represented by a small dot along the Motion Guide path. This is a great way to visualize easing for position in our Motion Tweens.
- Go ahead and click the Play button above the timeline to preview the animation.
Certain aspects of a Motion Tween are very different from the two other tween types in Animate, but in execution perform mostly the same function.
We'll next examine the properties associated with a Motion Tween.
Exploring Motion Tween properties
Just as with Shape Tweens and Classic Tweens, Motion Tween properties can be accessed through the Tweening section of the Properties panel:
- Go ahead and click on any Motion Tween frame and look at the Frame tab of the Properties panel to access this section and the properties within:

Fig 6.35 – Motion Tween properties
There isn't a lot here by comparison. That is due to the fact that additional properties are located elsewhere. We'll look into that next, but first, the obvious properties:
- Ease – Accepts a value between -100 and 100 with a default of 0, adjusting the intensity of either an ease-in or an ease-out.
- Orient to path – This option will preserve the orientation of your object as it moves along the Motion Guide by adjusting its rotation.
- Rotate – You can choose between None, Auto, Clockwise, and Counter-clockwise as well as the number of rotations between keyframes and a specific angle.
- Sync symbols – Will force the internal timeline of the symbol to sync frames with the main timeline.
- Remove Tween – Choosing this button will remove the tween entirely.
You may have noticed from our initial exploration of Motion Tween properties that there are no Ease Effect presets like there are in Shape Tween and Classic Tween properties. With a Motion Tween, you access similar functionality through the Motion Editor.
- To access the Motion Editor, simply double-click on any existing Motion Tween:
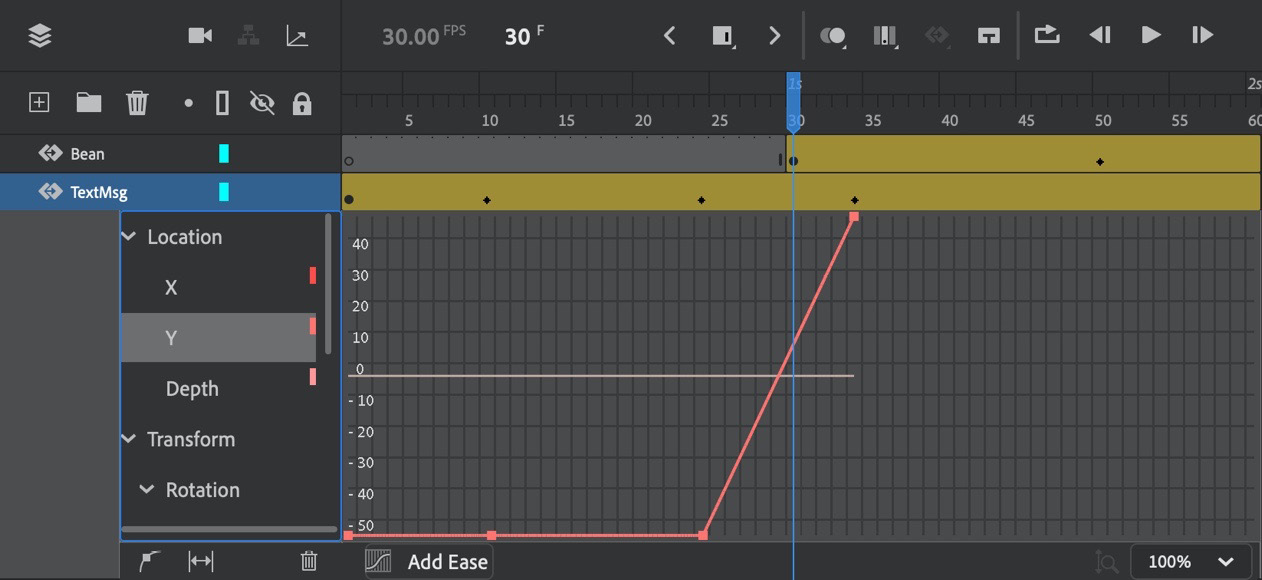
Fig. 6.36 – The Motion Editor
- The Motion Editor will appear as part of the timeline. On the left side, you will see a list of the various properties that can be tweened. Note that each property of a Motion Tween can be tweened individually in this way!
- You'll also see a graph displayed to the right of this, within the timeline proper. Each property has a path here with a set of anchor points and handles that can be manipulated in much the same way as when you edit any path when designing visual content with the Pen tool or Subselection tool.
- Below this is the location of the ease presets that were missing from the Tweening section we previously examined. If you don't want to manipulate each easing curve by hand, clicking the Add Ease button will allow you to choose from a list of presets.
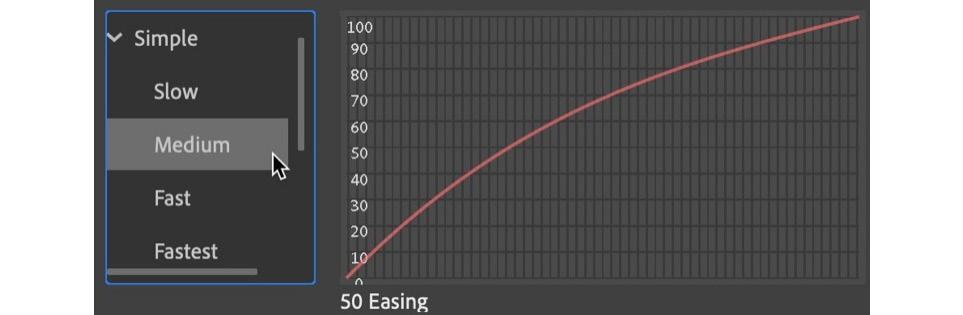
Fig. 6.37 – Motion Ease presets
The Motion Tween ease presets are somewhat similar to what can be found in other tween types, but they differ in some ways as well. Double-click on a preset to apply it to any selected property. In addition, certain presets also have the ability to have the intensity value adjusted.
Once you apply an ease preset, the apparent ease will be reflected in the easing graph by way of a dashed easing curve right alongside the original curve.
To hide the Motion Editor, simply double-click on the associated Motion Tween in the same way that you opened it.
As we saw in our examination of Shape Tween and Classic Tween properties, Motion Tweens have their own set to be aware of. In the next section, we'll see how to make our advertisement interactive using JavaScript code.
Adding Interactivity with JavaScript
Generally, a digital advertisement like the one we've designed here will need to be interactive as well. Most ads of this kind will respond to user interaction by opening a web page where the user can get more information about, or even purchase, the advertised product or service.
Since we are publishing to the native web using an HTML5 Canvas document type, we will be coding our interactions with the JavaScript language.
Writing code with the Actions panel
Animate is a unique piece of software in that it allows both design and development within the same application. This hybrid approach has always been a strong part of the tool and continues to be so, no matter which platform you might be targeting.
Let's go ahead and add some code to our motion advertisement:
- By convention, and for the purpose of organization, we should keep our code completely separate from any visible assets. Go ahead and create a new layer and name it Actions. All code will go in this layer to keep things clean.
- All of our code will be on the final frame of the animation, so we must insert a new keyframe at frame 60 in the Actions layer. Go ahead and perform these actions.
- To stop the playhead at the end of our animation, we must use a stop() action. Select frame 60 and open the Actions panel from the application menu by choosing Window | Actions. The Actions panel appears with the Script Editor visible.
- On line 1 of the Script Editor, write this.stop(); to stop the playhead once it hits frame 60. This will ensure that the animation will not loop:
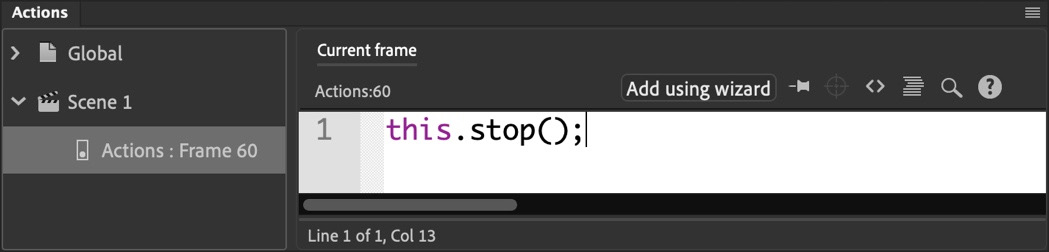
Fig. 6.38 – Stop action at frame 60 via the Script Editor
If you know what code to write, you can just start writing directly into the Script Editor here. If you need a more guided approach, we'll tackle that momentarily.
We want the user to be able to click on our little coffee bean symbol instance to be taken to a website. To make a Movie Clip symbol instance interactive, it must be given an Instance Name so the code can identify and address it.
- Using the Selection tool, click on the Bean symbol instance to select it and look to the Object tab or the Properties panel.
- There is an input field ready and waiting for an instance name to be given. Type coffeebean in the Instance Name field. Once this has been done, the instance is exposed to code:

Fig. 6.39 – Instance name added to the bean instance
- Open the Actions panel at frame 60 once again if it has been closed. Instead of editing code in the Script Editor, we will now make use of the Actions Wizard to take us step-by-step through constructing the code. Click the Add using wizard button above the Script Editor to open it.
- The editor disappears and is replaced by the wizard. Step 1 asks you to Select an action from a long list of possible actions. Locate the action named Go to Web Page and click to select it.
- You'll notice a preview of the code you are building is added to the tiny code editor at the top of the panel. Replace the highlighted URL with one of your own and then click the Next button to move on to Step 2.
- Step 2 asks you to Select a triggering event from a list of events. Choose On Mouse Click for your event and Step 3 will activate.
- In Step 3, you are asked to Select an object for the triggering event. Notice the given Instance Name of coffeebean appears as part of this list! Choose this object and click the Finish and add button to complete the steps and build the final code:
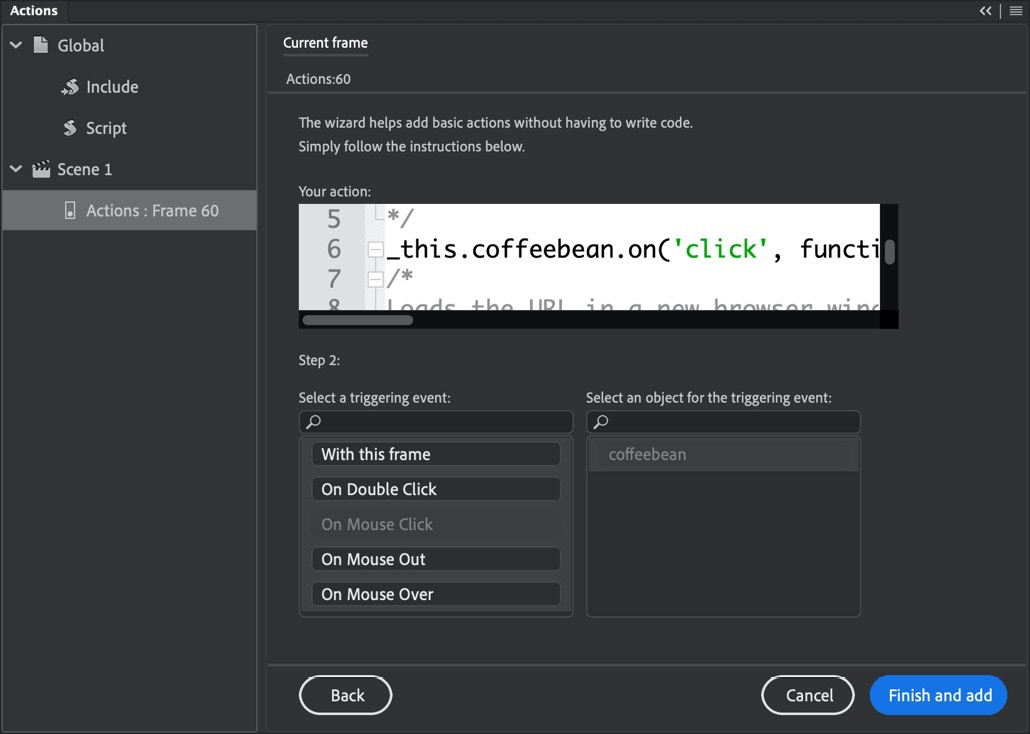
Fig. 6.40 – Click trigger added via the Actions Wizard
- You can close the Actions panel and perform a Test Movie to view the animated advertisement and interact with it by clicking the little bean at the end.
The resulting JavaScript code created by the Actions Wizard is included here:
var _this = this;
_this.coffeebean.on('click', function(){
window.open('https://josephlabrecque.com', '_blank');
});
It is basically defining a variable, this, to preserve scope, followed by the registration of an event listener on our coffeebean object. If a click event is detected, the function to open a URL in the web browser is executed. Passing in the '_blank' argument opens the URL in a new window or tab. Pretty simple stuff!
In this snippet of code, all comments have been removed for clarity.
Note
We will be looking at a lot more JavaScript in Chapter 10, Developing Web-Based Games, and Chapter 11, Producing Virtual Reality Content for WebGL.
In this section, we had a look at features of the Actions panel and used both the Script Editor and the Actions Wizard to add interactivwity to our digital advertisement.
Summary
In this chapter, we focused on creating a web-based digital advertisement using the HTML5 Canvas document type and introduced a number of new topics while doing so. We saw how to import bitmap images, create text objects, convert both object types to symbols, and animate those symbol instances through the use of Motion Tweens. Building on that, we also had our first look at the Actions panel and making our content interactive.
In the next chapter, we will have a deep look at an even newer way of animating content in Animate through the use of layer parenting.