
Now that our web application is ready, let's take a look at how it is written. Before going further, we can save our work with Git.
If you don't know anything about Git, I recommend the two following tutorials:
- https://try.github.io, which is a good step-by-step interactive tutorial to learn the basic Git commands
- http://pcottle.github.io/learnGitBranching, which is an excellent interactive visualization of the Git tree-like structure that will show you basic, as well as very advanced, Git capabilities
Tip
Installing Git
On windows, install Git bash, which can be found at https://msysgit.github.io. On Mac, if you use homebrew you should already have Git. Otherwise, use the command brew install git. When in doubt, check out the documentation at https://git-scm.com/book/en/v2/Getting-Started-Installing-Git.
To version our work with Git, type the following commands in a console:
$ cd app
$ git init
With IntelliJ, ignore the generated files: .idea and *.iml. With eclipse you should commit the .classpath and .settings folder. In any case you should ignore the .gradle folder and the build folder.
Create a .gitignore file containing the following text:
# IntelliJ project files
.idea
*.iml

# gradle
.gradle
build
Now, we can add all the other files to Git:
$ git add .
$ git commit -m "Generated with curl start.Spring.io"
[master (root-commit) eded363] Generated with curl start.Spring.io
4 files changed, 75 insertions(+)
create mode 100644 build.Gradle
create mode 100644 src/main/Java/com/geowarin/AppApplication.Java
create mode 100644 src/main/resources/application.properties
create mode 100644 src/test/Java/com/geowarin/AppApplicationTests.Java
If you are unfamiliar with Gradle, think of it as Maven's successor, a modern build tool. Like Maven, it uses conventions such as how to structure a Java application. Our sources will still be found in src/main/java, our webapp in src/main/webapp, and so on. Not unlike Maven, you can use Gradle plugins to deal with various build tasks. However, Gradle really shines because it allows you to write your own build tasks using the Groovy DSL. The default library makes it easy to manipulate files, declare dependencies between tasks, and execute jobs incrementally.
Tip
Installing Gradle
If you're on OS X, you can install Gradle with brew by using brew install gradle command. On any *NIX system (Mac included), you can install it with gvm (http://gvmtool.net/). Alternatively, you can grab the binary distribution at https://Gradle.org/downloads.
The first good practice when creating an application with Gradle is to generate a Gradle wrapper. The Gradle wrapper is a small script that you will share along with your code to ensure that the build will use the same version of Gradle that you used to build the application.
The command to generate the wrapper is Gradle wrapper:
$ gradle wrapper
:wrapper

BUILD SUCCESSFUL

Total time: 6.699 secs
If we look at the new files created, we can see two scripts and two directories:
$ git status -s
?? .gradle/
?? gradle/
?? gradlew
?? gradlew.bat
The .gradle directory contains the Gradle binaries; you wouldn't want to commit those to your version control.
We previously ignored this file along with the build directory so that you could safely git add everything else:
$ git add .
$ git commit -m "Added Gradle wrapper"
The Gradle directory contains information on how to get the binaries. The two other files are scripts: a batch script for windows (Gradlew.bat) and a shell script for other systems.
We can also run our application with Gradle instead of executing the application from the IDE:
$ ./gradlew bootrun
Issuing this command will run an embedded tomcat server with our application in it!
The log tells us that the server is running on port 8080. Let's check it out:
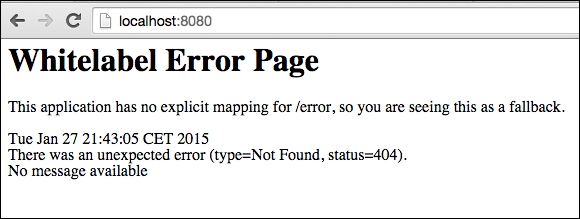
I can imagine your disappointment. Our application is not ready for the grand public just yet.
That being said, the work accomplished by the two files our project is made of is rather impressive. Let's review them.
The first one is the Gradle build file, build.Gradle:
buildscript {
    ext {
        springBootVersion = '1.2.5.RELEASE'
    }
    repositories {
        mavenCentral()
    }
    dependencies {
        classpath("org.springframework.boot:spring-boot-gradle-plugin:${springBootVersion}")
        classpath("io.spring.gradle:dependency-management-plugin:0.5.1.RELEASE")
    }
}

apply plugin: 'java'
apply plugin: 'eclipse'
apply plugin: 'idea'
apply plugin: 'spring-boot'
apply plugin: 'io.spring.dependency-management'

jar {
    baseName = 'masterSpringMvc'
    version = '0.0.1-SNAPSHOT'
}
sourceCompatibility = 1.8
targetCompatibility = 1.8

repositories {
    mavenCentral()
}


dependencies {
    compile("org.springframework.boot:spring-boot-starter-web")
    testCompile("org.springframework.boot:spring-boot-starter-test")
}


eclipse {
    classpath {
         containers.remove('org.eclipse.jdt.launching.JRE_CONTAINER')
         containers 'org.eclipse.jdt.launching.JRE_CONTAINER/org.eclipse.jdt.internal.debug.ui.launcher.StandardVMType/JavaSE-1.8'
    }
}

task wrapper(type: Wrapper) {
    gradleVersion = '2.3'
}
What do we see here?
- A dependency on the Spring Boot plugin distributed on Maven central.
- Our project is a Java project. IDE project files can be generated by Gradle for IntelliJ or Eclipse.
- The application will generate a JAR file.
- Our project dependencies are hosted on maven central.
- Our classpath includes
spring-boot-starter-webin production andspring-boot-starter-testfor testing. - Some additional configuration for eclipse.
- The version of the Gradle wrapper is 2.3.
The Spring Boot Plugin will generate a fat jar that contains all the dependencies of the project. To build it, type:
./gradlew build
You will find the JAR in the directory build/libs. This directory will contain two files, the fat jar called masterSpringMvc-0.0.1-SNAPSHOT.jar and the classic JAR file that does not include any dependencies, masterSpringMvc-0.0.1-SNAPSHOT.jar.original.
Tip
Runnable jar
One of the main advantages of Spring Boot is embedding everything the application needs in one easily redistributable JAR file, including the web server. If you run java jar masterSpringMvc-0.0.1-SNAPSHOT.jar, tomcat will start on port 8080, just like it did when you developed it. This is extremely handy for deploying in production or in the cloud.
Our main dependency here is spring-boot-starter-web. Spring Boot provides a good number of starters that will automatically configure some aspects of the application for us by providing typical dependencies and Spring configuration.
For instance, spring-starter-web will include dependencies of tomcat-embedded and Spring MVC. It will also run the most commonly used Spring MVC configuration and provide a dispatcher listening on the "/" root path, error handling such as the 404 page we saw earlier, and a classical view resolver configuration.
We'll see more on this later. First, let's take a look at the next section.
Here is all the code that is needed to run the application. Everything is in a classic main function, which is a huge advantage because you can run your application in your IDE like you would for any other program. You can debug it and also benefit from some class reloading out of the box without a plugin.
This reloading will be available in the debug mode when saving your file in eclipse, or clicking on Make Project in IntelliJ. This will be possible only if the JVM is able to switch the new compile version of the class file with the new one; modifying the static variable or touching configuration files will force you to reload the application.
Our main class looks as follows:
package masterSpringMvc;

import org.Springframework.boot.SpringApplication;
import org.Springframework.boot.autoconfigure.SpringBootApplication;

@SpringBootApplication
public class AppApplication {

    public static void main(String[] args) {
        SpringApplication.run(AppApplication.class, args);
    }
}
Note the @SpringBootApplication annotation. If you look at the code of this annotation you will see that it actually combines three other annotations: @Configuration, @EnableAutoConfiguration, and @ComponentScan:
@Target(ElementType.TYPE)
@Retention(RetentionPolicy.RUNTIME)
@Documented
@Inherited
@Configuration
@EnableAutoConfiguration
@ComponentScan
public @interface SpringBootApplication {

  /**
  * Exclude specific auto-configuration classes such that they will never be applied.
  */
  Class<?>[] exclude() default {};
}
The @Configuration class should be familiar to you if you've already configured a Spring application with Java code earlier. It indicates that our class will handle classical aspects of a Spring configuration: declaring beans, for instance.
The @ComponentScan class is also a classic. It will tell Spring where to look to find our Spring components (services, controllers, and so on). By default, this annotation will scan every current package and everything under it.
The novelty here is @EnableAutoConfiguration, which will instruct Spring Boot to do its magic. If you remove it, you will no longer benefit from Spring Boot's autoconfiguration.
The first step when writing an MVC application with Spring Boot is usually to add a controller to our code. Add the controller in the controller subpackage so that it is picked up by the @ComponentScan annotation:
package masterSpringMvc.controller;

import org.springframework.stereotype.Controller;
import org.springframework.web.bind.annotation.RequestMapping;
import org.springframework.web.bind.annotation.ResponseBody;

@Controller
public class HelloController {

    @RequestMapping("/")
    @ResponseBody
    public String hello() {
        return "Hello, world!";
    }
}
This time, if you open your browser and visit http://localhost:8080 you will see this lovely Hello, world! output:
