
3 CREATIVE PHOTOGRAPHY WITH THE X100T AND X100S
I think the X100 series cameras are best suited for photographing people, events, landscapes, urban architecture, street life, and evening scenes. The characteristics of these cameras make them particularly suited for situations when it is undesirable to carry heavy equipment. Another reason the X100T has become my daily companion is that it fits in nearly any jacket pocket. In chapter 4, “Accessories,” I’ll talk more about portability and discuss what to include in the perfect gear bag.
In science, the simple act of taking a measurement may influence the results of an experiment. In photography, a similar phenomenon can happen when potential subjects realize you’re pointing a camera in their direction—they either turn away or deliberately smile at the camera, and the photographic moment evaporates. Photographing models or people who gladly ham it up for the camera results in a different type of image. Capturing an authentic moment with genuine feeling and atmosphere requires subtle, inconspicuous, and quiet work. This is where the Fujifilm X100T and X100S shine. Because the cameras are small and inconspicuous, I can engage with subjects more thoroughly and often elicit a genuine questioning nod or a warm, friendly smile. The dialog is primarily between two people, and the camera becomes less of a threat. Because the operation of the camera is so intuitive and is reduced to the most essential functions, I can focus on when to release the shutter instead of battling with excessive technology. For all these reasons, the Fujifilm X100 series has earned a cultlike following among street photographers. My friend sums up the delightful process of working with this camera series: “The camera is effectively an extension of my right eye.”
What follows are concrete examples that tease out the strengths of the Fujifilm X100T and X100S, along with explanations about how I approach specific shooting scenarios.
SCENARIO 1: STEALTH OPS (SILENT SHOOTING)
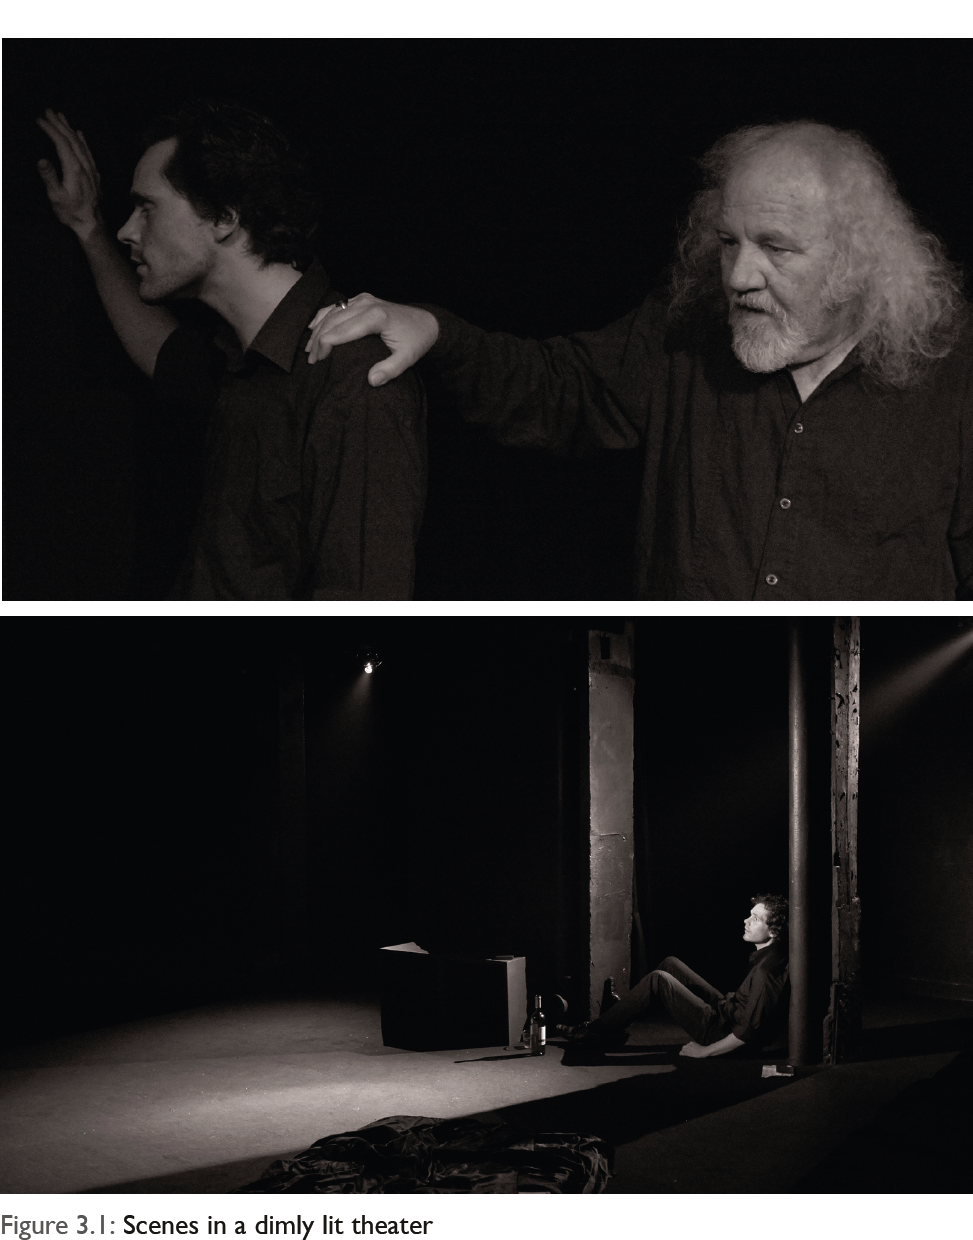
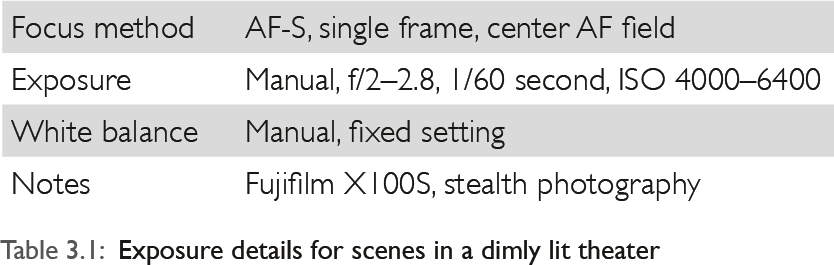
A client hired me to shoot a series of photos in a small Parisian theater and asked me to expressively document the actors, the ambience, and the play itself, as well as an outdoor portrait of the playwright. The theater was cramped and dark, and the first row of spectators was positioned near the stage. The lighting was minimal and primarily illuminated the stage actors. For my first attempt, I wanted to photograph during an actual performance of the play to avoid images that felt contrived. The shutter noise of my Fujifilm X-Pro1 would have been much too loud and distracting, but the nearly silent shutter of the X100S allowed me to photograph during the play without disturbing the spectators or the actors. The lighting conditions required that I shoot with ISO sensitivities between 5000 and 6400, so the camera’s low-noise performance at higher ISO values and fast lens worked in my favor. To avoid motion blur while I shot the actors on stage, I set the shutter speed to 1/60 second and I left the aperture at f/2 or f/2.8 because of the dim light. I decided to underexpose my images by 1 to 1 2/3 stops so I could capture the atmosphere of the scene; the exposure compensation dial allowed me to change this setting while I kept the camera to my eye. Auto ISO ensured that my exposures were balanced and even.
NOTE
Working with a tripod would have been too distracting, so I chose a tool that I recommend in all my workshops: a string tripod. It is nothing more than a piece of common string or twine attached to a tripod plate at one end. I stand on the loose end of the string and steady the camera by pulling the string tight. The camera can still be moved laterally, but slight vertical shifts are mostly eliminated. If you don’t need to adjust your camera vertically, this makeshift tool may be a better solution than a monopod.
I fixed the white balance and set the exposure meter to average with the goal of producing a balanced, color-neutral exposure.
SCENARIO 2: STREET PHOTOGRAPHY
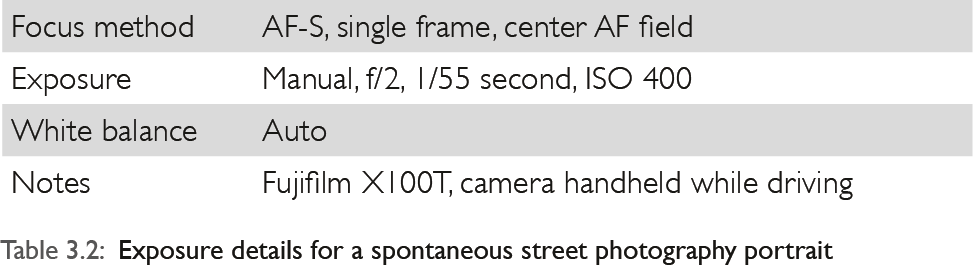
Street photography involves capturing life on the street spontaneously and organically. The best street photographs are as authentic as possible and are void of artificial intervention or contrivance. If you fiddle with your camera too long, you’ll miss the moment, especially when people are key elements of your composition. You need to react and focus quickly. I use a broad range of ISO values for this type of photography (e.g., ISO 200–1600 during the day and ISO 200–4000 at night), which allows me to handle a variety of lighting conditions. I also use a fairly fast shutter speed (e.g., 1/250 second) so I can freeze movement in my images even when I’m on the go. The key challenge is focusing. Depending on your speed or the speed of the subject, continuous autofocus (AF-C) with the Multi AF or Area mode is often a good choice. In AF-C mode, the camera constantly updates and refines the focus as long as the shutter button is pressed. The Multi AF mode, which is often called automatic tracking, will adjust the active AF field to follow the main subject as long as it retains enough contrast for the camera to detect it. These tools allow you to keep the image frame constant even while the subject changes position. Alternatively, you can use the Area AF mode to choose a specific AF field, establish focus on the main subject, then track the subject manually with the shutter button pressed halfway down. In both cases, the camera continuously updates the focus. With continuous shooting, or burst mode, you can capture either three or six frames per second (with the Low or High setting) while the focus keeps adjusting—a truly powerful feature. Make sure you have a fast memory card in your camera so the images can be saved quickly. I set up one of the seven shooting profiles on my camera for spontaneous street photography (Red 3.3).
NOTE
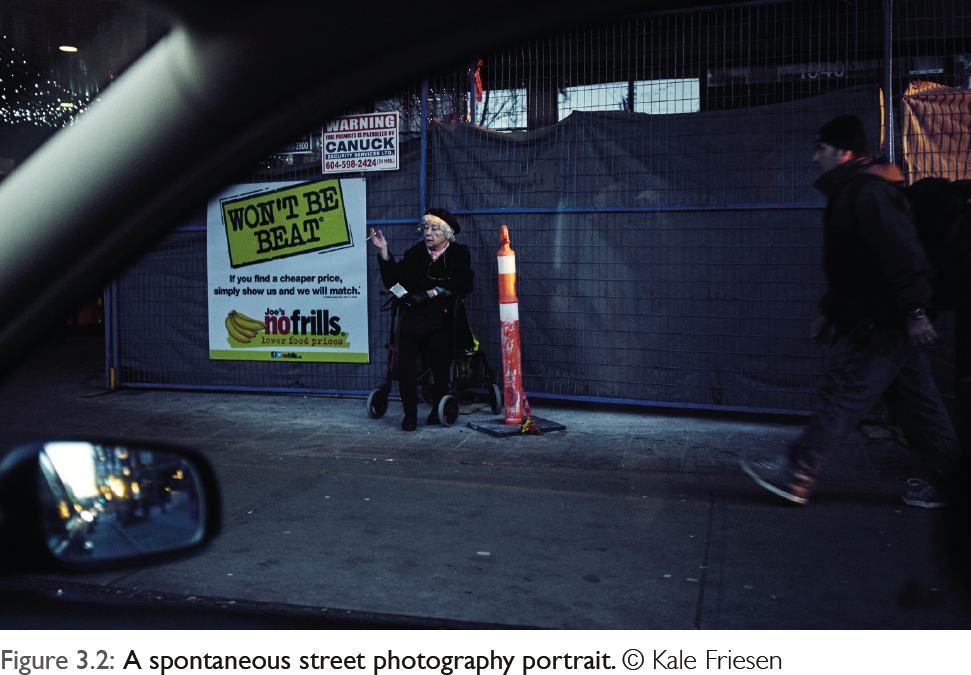
Different places around the world have various laws and customs regarding photography of people in public places, such as on a regular city street. In Germany, for instance, a modification of a privacy law went into effect on January 27, 2015. Photographers may face criminal charges even for pressing the shutter button halfway in some circumstances. The relevant legislation was inconspicuously included in a law to prevent child pornography. The law makes it punishable to photograph “helpless people” in public. The rationale is that it will prevent violent perpetrators from photographing their victims with cell phones and publishing the images online. The law states that a prison sentence of up to two years or a fine will be imposed on anyone who captures, broadcasts, or transfers an image that depicts the helplessness of another person without authorization, thereby violating the privacy rights of the person depicted. If you encounter a homeless person sitting in front of a bank who is being ignored by people on the street as they rush past, you may have found a compelling image, but think twice about taking the shot. If you can prove that the photo is a part of a photo essay or project, or if you have a press pass, certain exceptions can be granted. Always use common sense when you weigh the pros and cons of shooting in these types of circumstances.
SCENARIO 3: CITYSCAPES
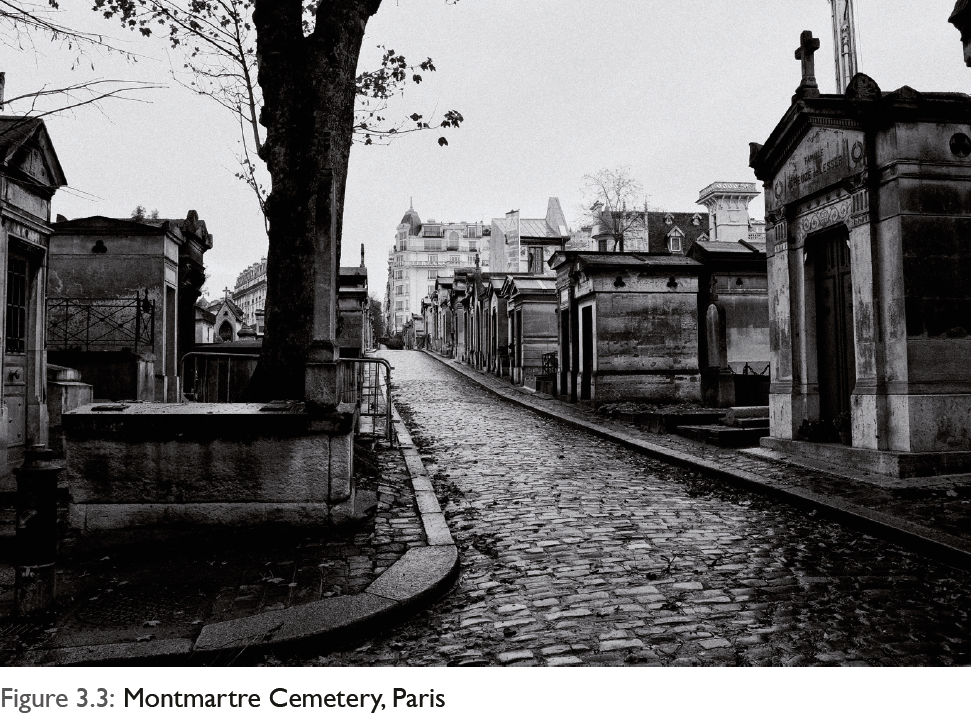
During a stopover in Paris, the Montmartre Cemetery presented countless photographic opportunities, all of which were easily within the technical capabilities of the Fujifilm X100T. The large cemetery is latticed with narrow paths and alleys. I wanted to spontaneously react to scenes as I saw them, so I didn’t bother with my tripod. The overcast sky after a rain and the bright building facades in the background made a perfect optical counterweight to the dark and expressive tombs on either side of the cobblestones. I used the optical viewfinder to get the exact exposure I wanted; it’s the ideal window for directly assessing your shooting environment. To prevent the highlights from clipping while I retained a good level of detail in the shadows, I slightly boosted the contrast range to DR 200%. The cobblestone path in the foreground that runs from the left of the frame toward the horizon was key to my composition, so I used my 28mm wide-angle conversion lens. Focus peaking made it easy to establish my desired depth of field because its colorful highlights identified the areas of the scene that were in focus. In addition to precisely choosing a focal plane, the ability to examine the depth of field in a scene is one of the main advantages of using manual focus.

SCENARIO 4: SPONTANEOUS PORTRAIT
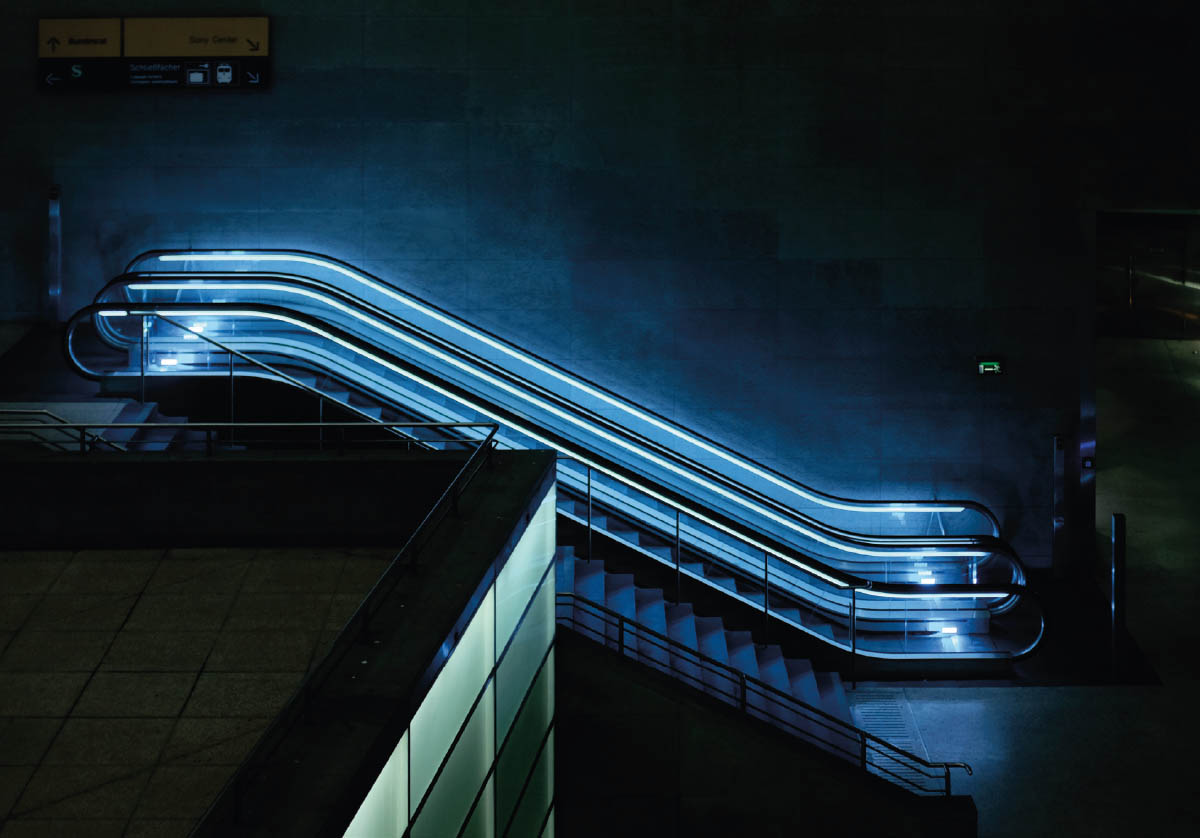
This picture was taken during a workshop. The idea for the portrait, which was taken on an escalator, was sparked by the way the neon lights along the handrail illuminated the woman’s face. Thanks to a high ISO value and the wide aperture, a fast shutter speed of 1/250 second was possible, which froze all motion in the scene. Pictures like this rely mostly on the natural appearance of the subject—the position of her head and her natural smile. In situations like these, the intuitive operation of the Fujifilm X100 series cameras is a true advantage.
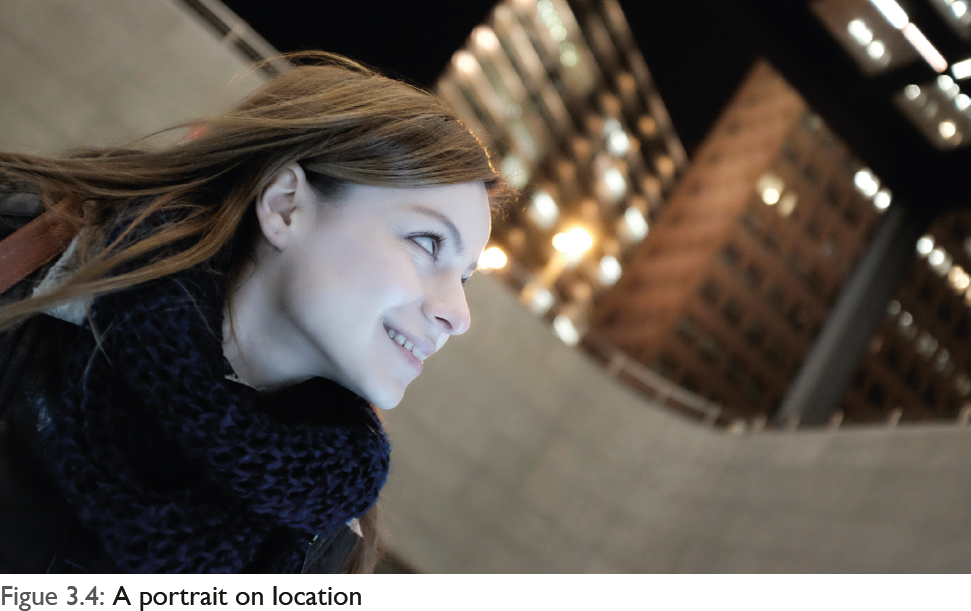
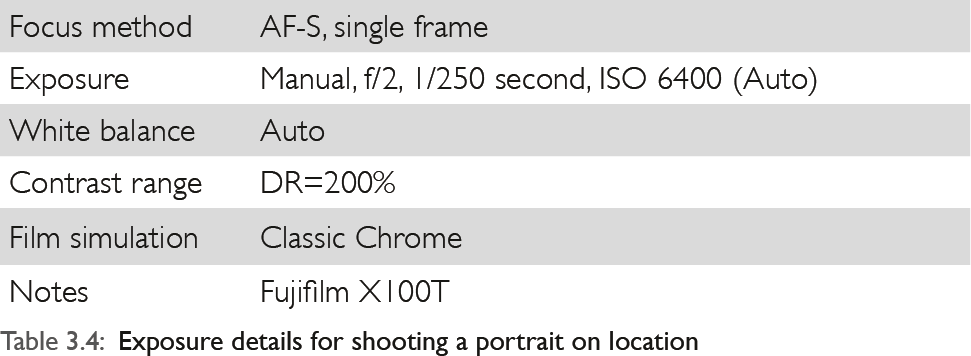
It was quick and easy to set up the camera for this shot. In a single motion, I opened the aperture and set the shutter speed as I brought the camera to my eye and instantly composed the frame. The whole process took less than a second, thanks in part to having basic settings already programmed, including Auto ISO with a range of 200 to 6400, a minimum shutter speed of 1/60 second, autofocus enabled, and my desired film simulation. When you’re prepared for a critical moment, you will have a greater opportunity to get the shot you want.
SCENARIO 5: SEARCHING FOR A LOCATION
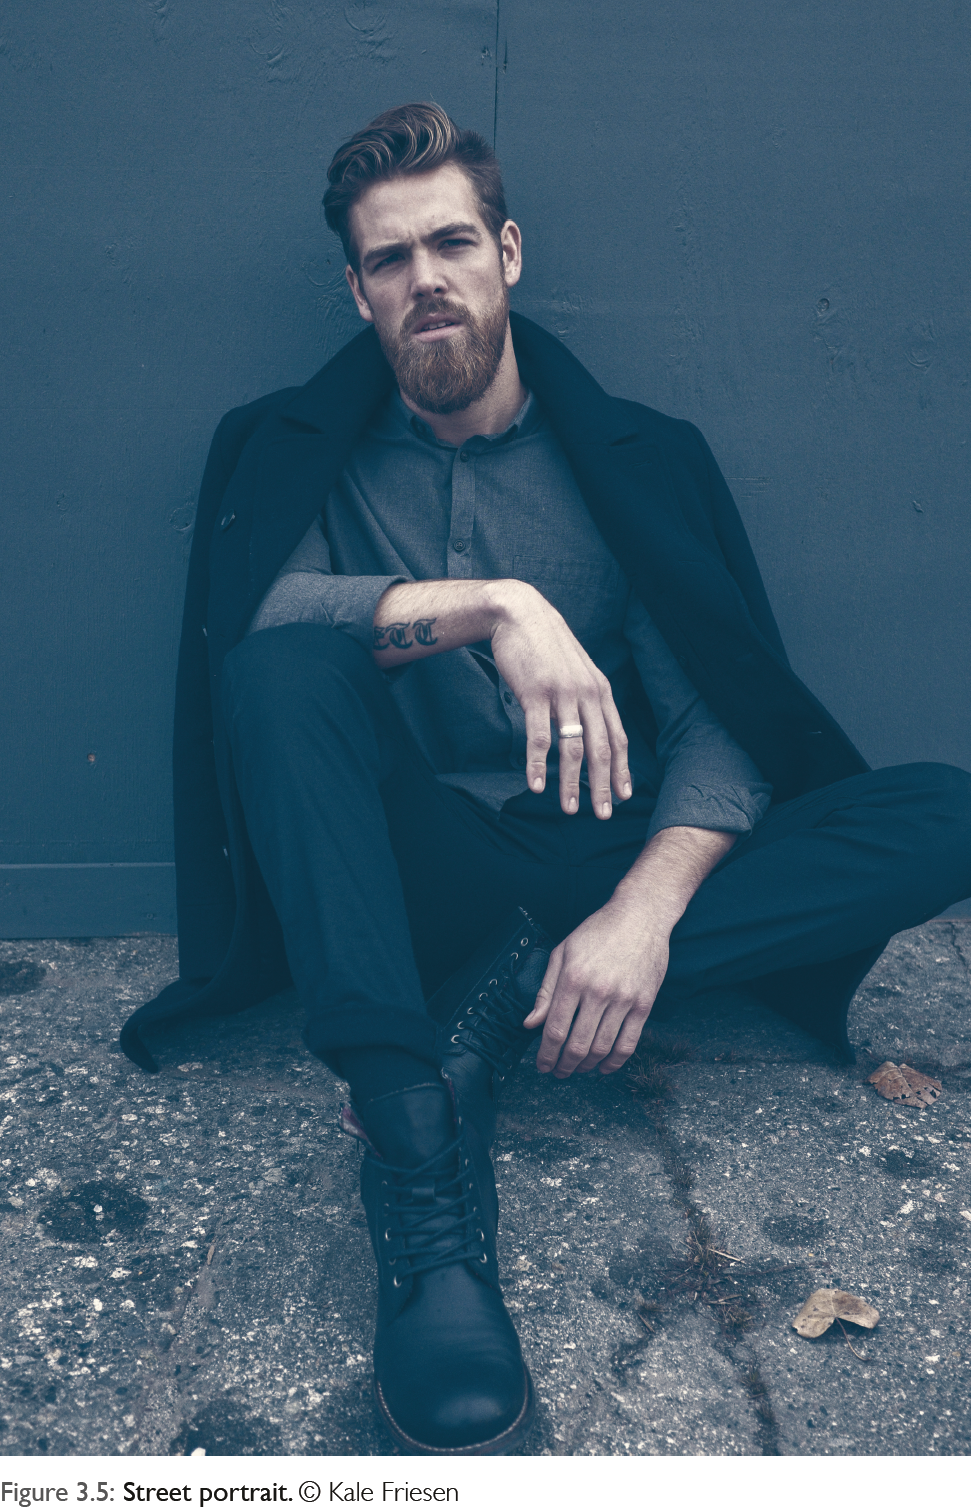
The search for an ideal photo shoot location is a key part of a photographer’s prep work. This is especially true in the fashion industry, where clients put lots of emphasis on the overall effect of an image. A stylish model is not enough. This picture was taken while the photographer, Kale Friesen, was taking test pictures in an industrial area of Vancouver, Canada. The monochromatic feel is the result of an overcast sky, the gray tones in the model’s clothes, and the color of the wall behind him. The color saturation and white balance were adjusted during RAW conversion using Capture One Pro 8. The preset film simulations don’t always match the client’s or the photographer’s vision, which is why having a RAW file as a starting point is so powerful for letting your creativity run wild.
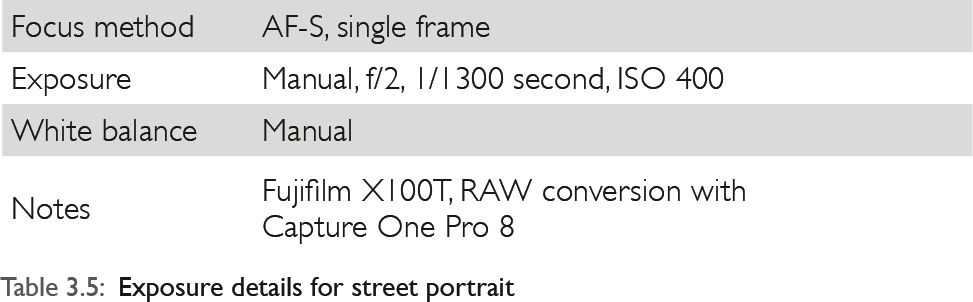
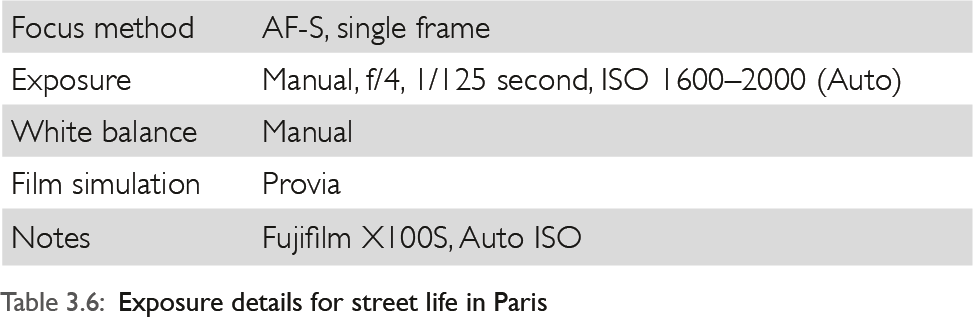
SCENARIO 6: PARIS STREETS
The capital city of France is unquestionably a dream location for street photographers. Elliott Erwitt, an advertising and documentary photographer born in Paris, said: “For me, photography is the art of observation. It’s about discovering something interesting in a conventional location.” Being encumbered by a heavy equipment bag and a weighty camera hinders your ability to stay alert for the right moment. For me, the main thrill is scanning my environment—either through the viewfinder or simply with my eyes—as I search for subjects. Often, when I photograph in these situations, I set up my camera before I head out, then I wait until the end of the day or when I’m back at my hotel to view my work. Constantly looking at your camera monitor will prevent you from spotting fleeting moments. Set the ISO to Auto (e.g., ISO 200–3200) and the minimum shutter speed to 1/125 second to ensure that your images will be properly exposed.
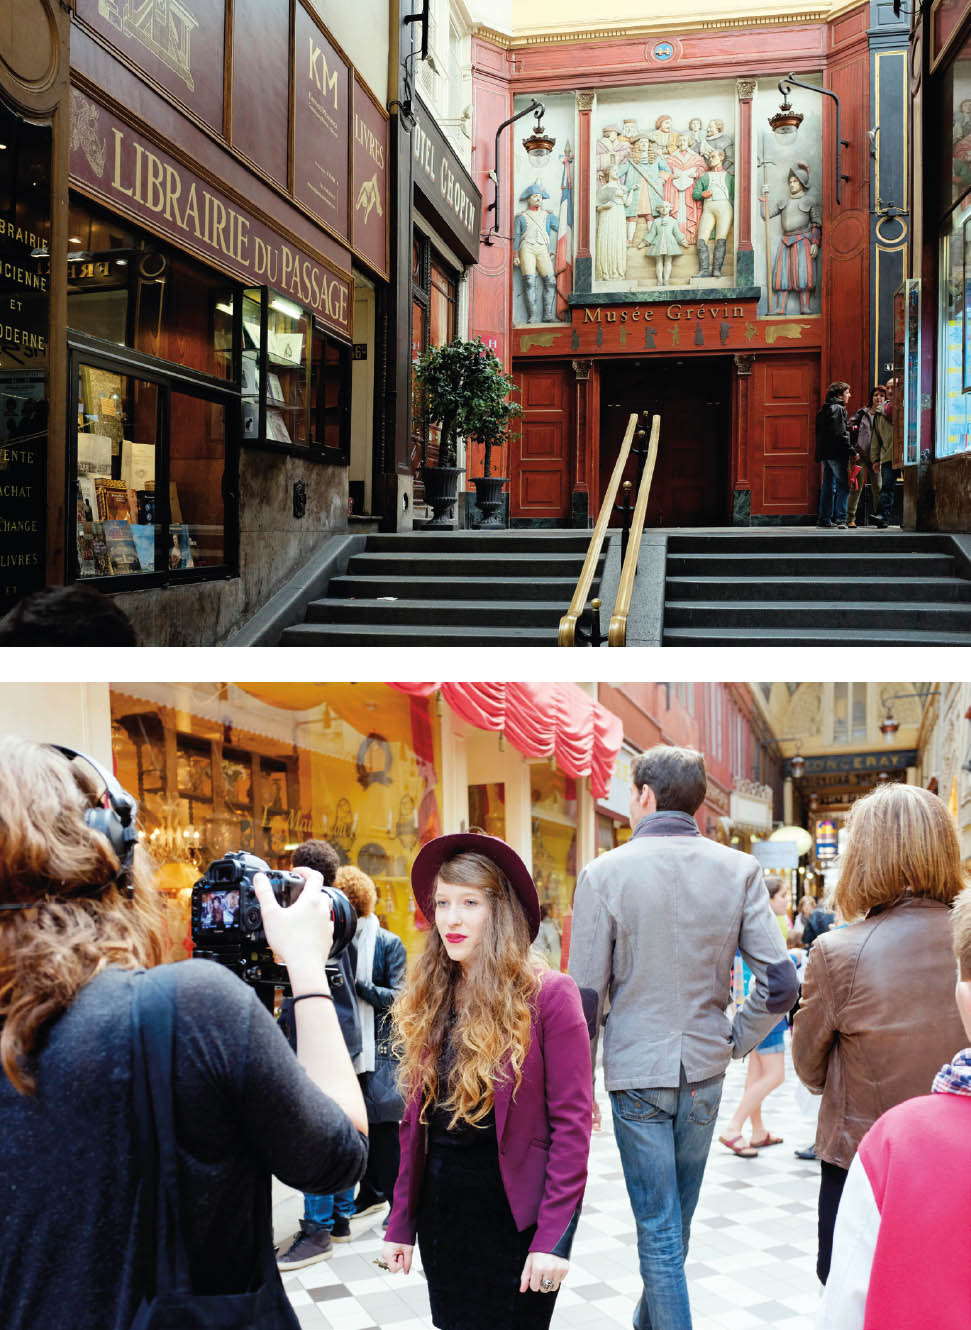
Some photographs turn out best when they’re shot blind, which is how I shot the picture of the café. Instead of looking through the viewfinder, I held the camera at stomach level and pointed it in the right direction. In less than a second I had captured the image I wanted as I passed by. To protect my camera from danger amid the masses and to keep it securely on my body, I use a hand strap that will prevent it from slipping from my hands. It also thwarts pickpockets.
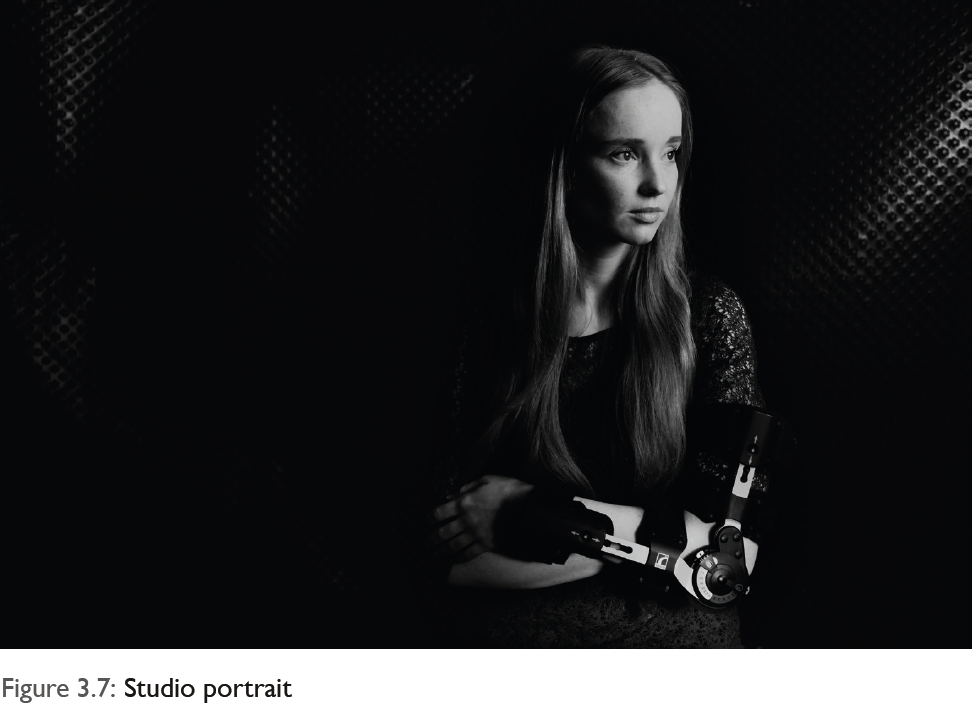
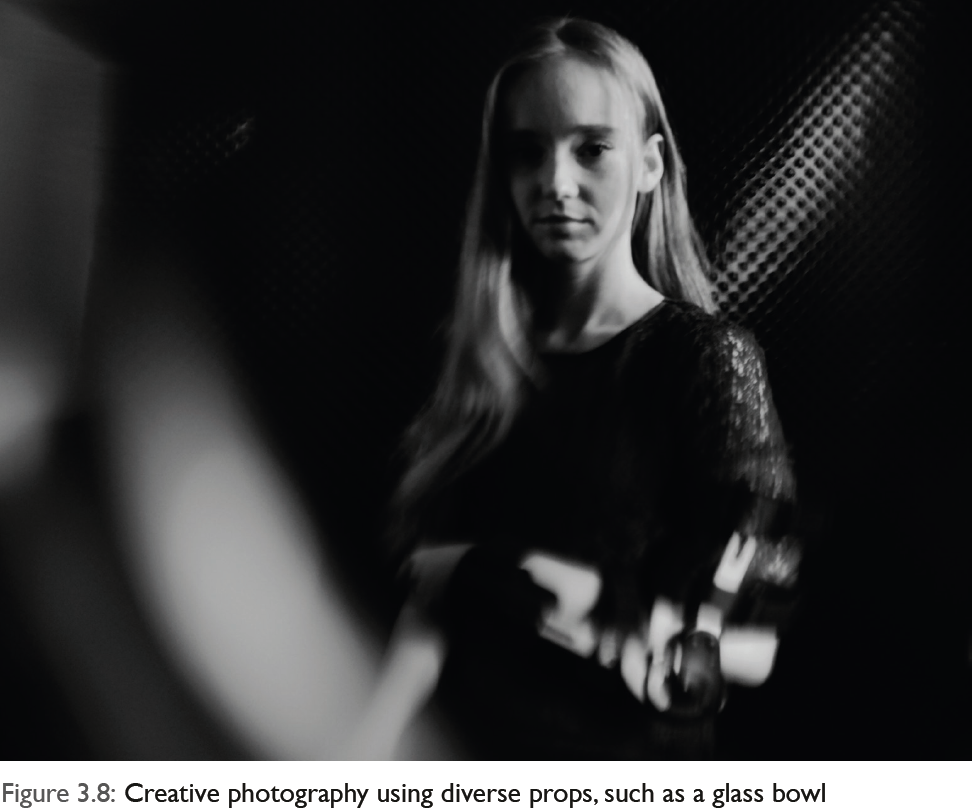
SCENARIO 7: CYBORG GIRL STUDIO PORTRAIT
People often ask me if the small Fujifilm cameras can be used in a studio with an artificial lighting system. The answer, not surprisingly, is a definite yes. As in so many other situations, the Fujifilm X100 series cameras excel in part because of their modest appearance. Studio photo shoots are full of equipment—tripods, lights, accessories galore—and extra personnel, including assistants, makeup artists, and others. Amid the chaos, the person being photographed tends to get tense. One of the photographer’s most important jobs is to put the subject at ease and create a laid-back atmosphere that is conducive to relaxed poses. Using a small camera is helpful because it facilitates more eye contact between the photographer and the subject. To produce a detail-rich image with a perfectly lit backdrop, I planned in advance to shoot this portrait in black-and-white with manually defined settings for the aperture, shutter speed, and ISO. The lighting setup consisted of two lights: one main light with a small softbox (16 x 24 inches) pointed at the model, and one light fitted with a snoot to direct light at the subject’s arm. A quick series of test shots helped me decide how to regulate the flash power settings. I used a tripod with an Arca-Swiss ball head mount. The Fujifilm MHG-X100 handgrip has tripod threads, so an additional tripod plate is not necessary.
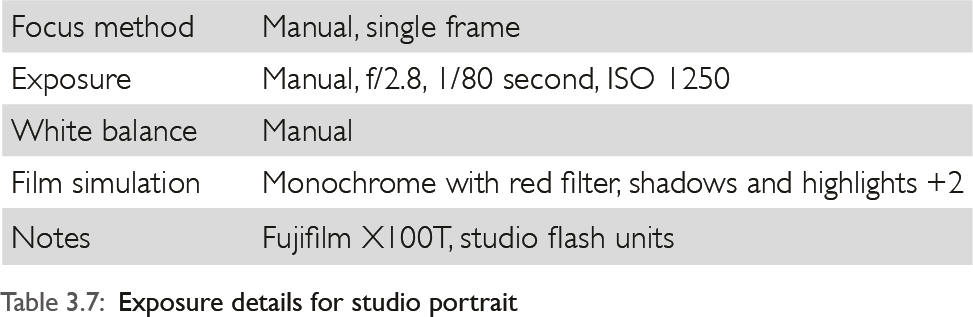
Because the physical dimensions of the Fujifilm X100 series cameras are so small, you can carry out experiments that you otherwise wouldn’t be able to do, such as placing the camera in a rounded glass bowl. The photograph in figure 3.8 was created with this approach. The camera and the bowl were moved until the desired effect was achieved.
Unmounted lenses, eyeglasses, magnifying glasses, and so forth lend themselves to experiments like this. You can find them for little to no money in secondhand stores and at flea markets.
SCENARIO 8: ARCHITECTURAL PHOTOGRAPHY
Meticulously composing an image to bring out the best in your subject can be very satisfying, and the Fujifilm X100T has a big, bright viewfinder that makes it all the more enjoyable. Even though architectural photographers place a premium on framing images with certain proportions, such as the golden ratio (in which a distance is divided into two unequal parts, and the smaller part relates to the larger part at the same ratio as the larger part relates to the full distance), sometimes a clean geometric division of the image area and its key elements produces a satisfying and solid composition.
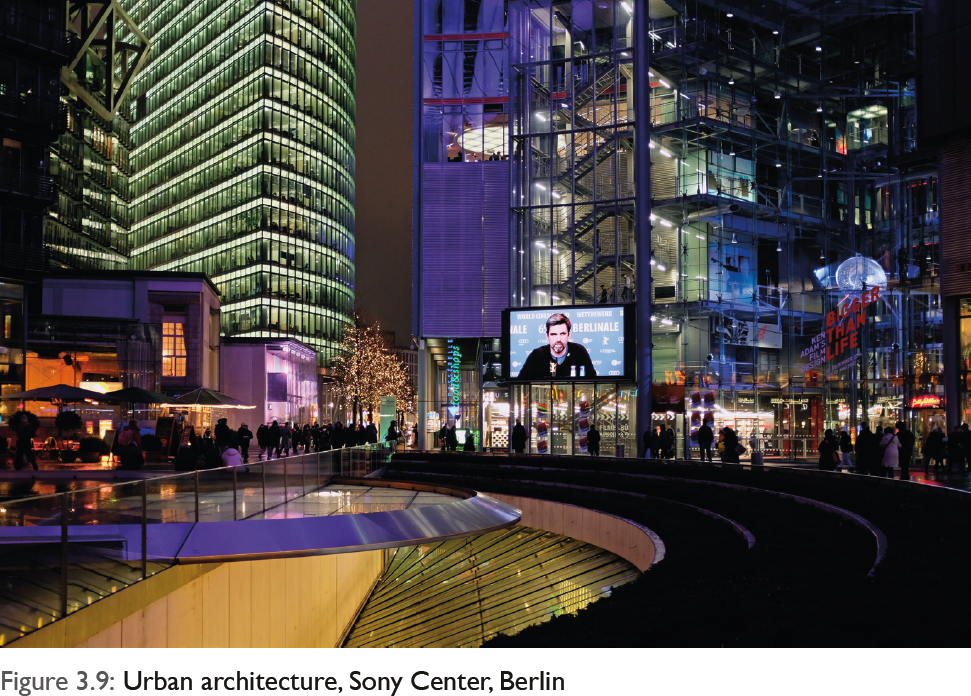
The image in figure 3.9 was taken with the X100T’s 23mm (35mm equivalent) focal length lens. Even with a wide-angle lens it is nearly impossible to capture the entire structure of the distinctive dome, let alone the other buildings that make up the complex. When you look at the scene without a camera, you have to turn your head from one side to the other, so framing the image for a photograph is a real challenge. The task here was to find a partial view of the scene that conveys a sense of the whole, which is why the wide-angle conversion lens was not used. In the following paragraph I discuss the composition of the image with the help of green guiding lines and other marks in red and yellow. The image is divided vertically into thirds and horizontally into fourths, with an additional optical center axis.

The green lines produce four small squares in the center of the image. In the lower-left quadrant, all the key lines of the image converge (marked in red). This point of convergence, in combination with the giant video screen in the lower-right square, form the center of the photograph. The curved lines in the lower portion of the image (marked in red) exit the image area at the intersections of the dividing lines. The brighter and darker quadrants are diagonally opposite from each other. Finding the perfect vantage point was relatively easy using the Framing Guideline for the viewfinder (Blue 2.3.10). There are several framing grids available: Grid 9, Grid 24, and HD Framing. Grid 9 follows the rule of thirds and superimposes a nine-box grid over the image area; Grid 24 superimposes a symmetrical 6 x 4 grid; and HD Framing provides guidelines for composing an image in HD format.
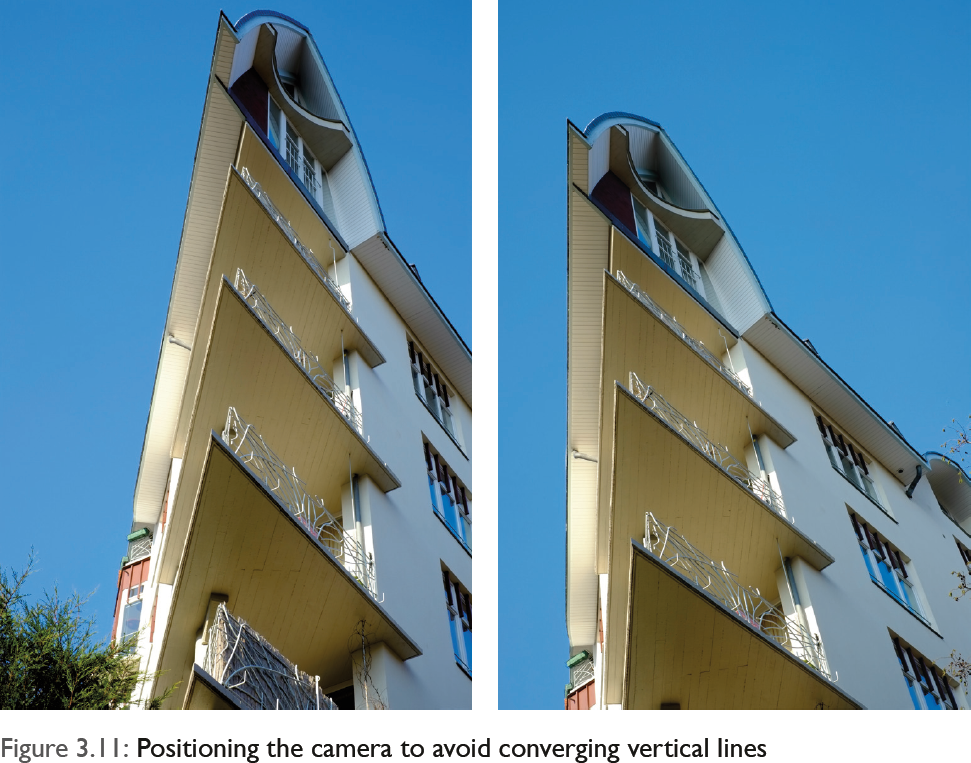
Deliberately tilting the camera is one way to avoid converging vertical lines. You can use the vertical lines in a framing grid to tilt the camera and align vertical lines in the scene. This approach helps make architectural images feel more relaxed, but it is a stopgap measure, not a definitive solution.
Before I conclude this section on creative photography, I want to mention a special technique that addresses the desire for even higher image resolution. If Fujifilm were to release a new camera with upwards of 60 megapixels, it would be a dream come true for landscape and architectural photographers. But what if you already own a camera with that capability? The goal here is “super-resolution,” and the process starts with using your camera’s burst mode and shooting 10 to 20 images of the same subject while handholding the camera so that each image is slightly different due to subtle shifts in camera position. A tiny detail in the scene would be captured by neighboring pixels from frame to frame. In contrast to a single exposure, which requires the interpolation of red, green, and blue pixels to reproduce the actual color, you now have multiple exposures with pixels that recorded the identical detail in red, green, and blue.
After you shoot the pictures, follow this process: Stack the 20 images in Photoshop, then magnify the image by 200% (Resample Method: Nearest Neighbor). Automatically align the images, then set the opacity for the images from bottom to top at the following levels, with the fade blending mode set to Normal:
100%, 50%, 33%, 25%, 20%, 17%, 14%, 12%, 11%, 10%, 9%, 8%, 8%, 7%, 7%, 6%, 6%, 6%, 5%, 5%.
The next step is to sharpen the image with the following settings: Filter > Smart Sharpen, Amount = 300%, Radius = 2 pixels, Reduce Noise = 0%. The final step is to reduce everything to one layer and save it in your desired file format.
Be aware that this process takes a lot of computer processing power, and it can take up to an hour even with a fast computer. It’s not practical to use this process for moving subjects because it’s impossible to overlay multiple images without ghosting or artifacts. You’ll find a much more exhaustive description of the process, including several examples, on Ian Norman’s website (see the Photon Collective link in chapter 5).
3.1 Which Camera Model Is Right for Me?
Much like giving advice about what kind of car to buy, it’s hard to say which camera model is right for you. It just depends. The good news, however, is that regardless of whether you buy the X100T or X100S, you’ll have a great camera. Both cameras have the same lens, the same X-Trans sensor and image processor, and produce the same high-quality pictures. And that means you can’t argue the pros and cons of each model for the most important consideration: making great images. The cameras are also nearly identical in dimension, weight, and handling. As is always the case, though, better is the enemy of good.
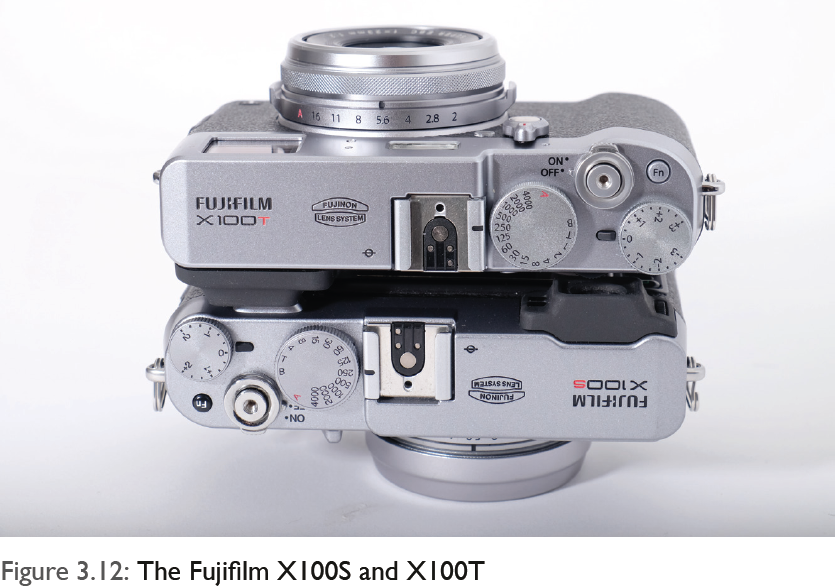
In addition to the publicized improvements and developments of the X100T—including the electronic rangefinder and the electronic shutter with speeds up to 1/32,000 second—the arrangement and functionality of the buttons and dials were also updated, and the Q menu is more customizable.
You operate the buttons and dials mostly with your left and right thumbs. In my opinion, the new arrangement of the control keys on the X100T and the decision to replace what was a somewhat fiddly dial with four selector keys significantly improves the operation of the X100T.
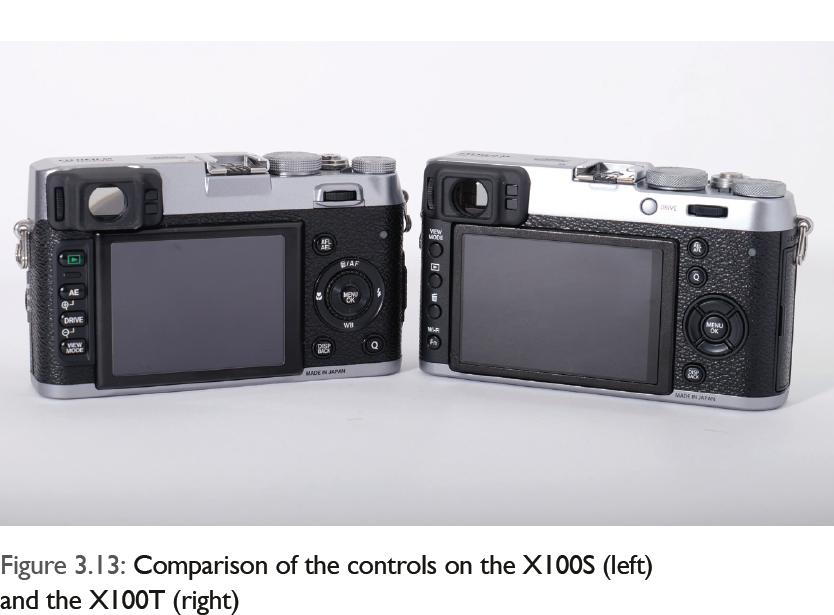
On the X100T, a full dial has replaced the push-pull toggle switch, and the Drive button has been moved to the left of the command dial. The Q button that launches the Q menu is now logically positioned directly below the AEL/AFL button, which is in the same location along with the Display/Back button. The left side of the back is noticeably sleeker, with the following buttons arranged from top to bottom: View Mode to cycle through options for the viewfinder, LCD monitor, and eye sensor; the Playback button; the Delete button; and the Wi-Fi button. When the camera is in shooting mode, the bottom two buttons are programmable. In total, the X100T has seven programmable function buttons (the X100S has one programmable function key next to the shutter button on top of the camera). This wealth of function buttons, combined with the fully programmable Q menu, makes customization a key emphasis of the X100T. I would like to see a firmware update that allows photographers to save all settings on an SD card so they can transfer them from one camera to another. Users could even create a database for different shooting circumstances.
The differences between the Fujifilm X100T and X100S are probably not large enough to warrant upgrading from one to the other, but if you’re new to these delightful cameras, it makes sense to start with the most recent version. Anyone who is familiar with Fujifilm and the frequency of their firmware updates knows that older models are never forgotten. In most cases, you need only to have a bit of patience to work with the new Classic Chrome film simulation on the X100S. But if patience isn’t your thing, try the following tip:
X100S
If you have the Fujifilm X100S, you can edit the EXIF data for your images (essentially altering the metadata to match the X100T) to unlock the Classic Chrome simulation in a RAW converter.