Every organization has goals. A salesperson might need to generate $30,000 of revenue in a quarter. A service technician might be required to close 15 service cases every week. In CRM, you can create and track goals for employees in your organization.
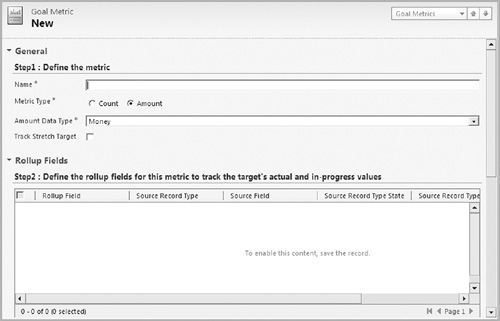
For a monetary goal, you would use an “amount” goal metric. You might, for example, want a salesperson to generate a certain amount of revenue in closed opportunities within a specified period. Before you can create a goal for this salesperson, you would need to create a revenue goal metric.
Outlook 2010/Internet Explorer:
In the Navigation Pane, click Service and then Goal Metrics.
On the Goal Metrics tab, in the Records group of the ribbon, click the New button.
Give your metric a name, and then, in the Metric Type field, select the Amount option.
Click the Save & Close button.
Outlook 2003/2007:
In the Navigation Pane, click Service and then Goal Metrics.
On the Goal Metrics menu click the New button.
Give your metric a name, and then, in the Metric Type field, select the Amount option.
Click the Save & Close button.
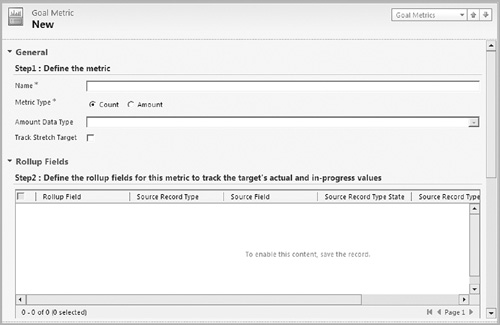
With “count” goal metrics, you can track progress by a record count. A service technician, for example, might need to close a certain number of service cases in a week. Before you create a goal like this for a service technician, you would need to create a goal metric that tracks by count.
Outlook 2010/Internet Explorer:
In the Navigation Pane, click Service and then Goal Metrics.
On the Goal Metrics tab, in the Records group of the ribbon, click the New button.
Give your metric a name, and then, in the Metric Type field, select the Count option.
Click the Save & Close button.
Outlook 2003/2007:
In the Navigation Pane, click Service and then Goal Metrics.
On the Goal Metrics menu, click the New button.
Give your metric a name, and then, in the Metric Type field, select the Count option.
Click the Save & Close button.
The rollup query defines the subset of records that will be used for counting progress toward your goals. For example, you might create a rollup query that defines just high-priority opportunities. Once you have that query in place, then you can create a goal for closing × number of high-priority opportunities.
Outlook 2010/Internet Explorer:
In the Navigation Pane, click Sales and then Rollup Queries.
On the Rollup Queries tab, in the Records group, click the New button.
Give your rollup query a name and entity type.
Once you select an entity type, a query edit window will appear, where you can configure your query logic.
Click the Save & Close button when you are done.
Outlook 2003/2007:
In the Navigation Pane, click Sales and then Rollup Queries.
On the Rollup Queries menu, click the New button.
Give your rollup query a name and entity type.
Once you select an entity type, a query edit window will appear, where you can configure your query logic.
Click the Save & Close button when you are done.

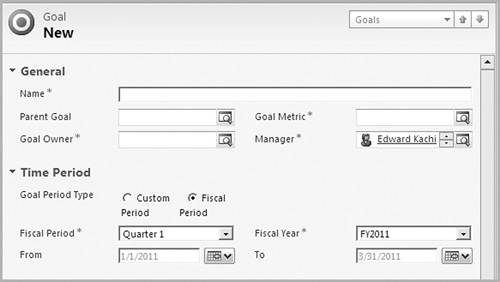
Once you have defined your goal metrics and your rollup queries, you’re now ready to put actual goals into the system. As a manager, you can create goals for your employees or you can create personal goals for yourself.
Outlook 2010/Internet Explorer:
In the Navigation Pane, click Sales and then Goals.
On the Goals tab, in the Records group of the ribbon, click the New button.
Give your goal a name, goal metric, and owner.
Define the time period for this goal.
Define your target, which will be either an integer or monetary amount, depending on your goal metric.
Define your criteria for the goal, including your rollup query.
Click the Save & Close button.
Outlook 2003/2007:
In the Navigation Pane, click Sales and then Goals.
On the Goals menu, click the New button.
Give your goal a name, goal metric, and owner.
Define the time period for this goal.
Define your target, which will be either an integer or monetary amount, depending on your goal metric.
Define your criteria for the goal, including your rollup query.
Click the Save & Close button.
Opportunities are potential sales. Whether you are selling widgets, services, buildings, pizzas, or just about anything else, you can customize the opportunity feature in Microsoft Dynamics CRM to track the sales opportunities for your company.
Adding a new opportunity to Microsoft Dynamics CRM is the first step in managing your prospective sales. You can create a new opportunity from the New Record drop-down on the File tab of the ribbon in Internet Explorer, or you can follow the procedure below.
Outlook 2010/Internet Explorer:
In the Navigation Pane, click on Sales and then Opportunities.
On the Opportunities tab in the Records group of the ribbon, click the New button.
Enter information about your opportunity.
Click the Save & Close button.
Outlook 2003/2007:
In the Navigation Pane, click on Sales and then Opportunities.
On the Opportunities menu, click the New button.
Enter information about your opportunity.
Click the Save & Close button.
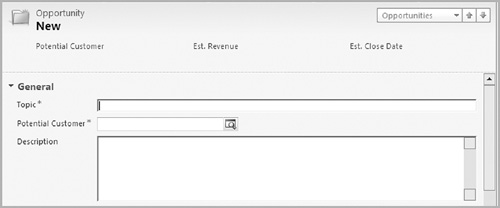
Microsoft Dynamics CRM stores a central list of products. When you enter an opportunity, it’s a good idea to link products to the opportunity. Doing so makes it easy to calculate the estimated revenue and create quotes, orders, and invoices for the opportunity. It also makes it easy to create product-based reports.
Outlook 2003/2007/2010/Internet Explorer:
Create a new opportunity or open an existing opportunity.
If you are creating a new opportunity, click the Save button after entering the required fields.
On the left, click on the Line Items form Section.
Specify a price list.
Choose a product and unit, and quantity. (The amount will be automatically calculated when you save.)
Click the Save & Close button.
The product will be added to the opportunity. Note that this also changes the estimated revenue field for the opportunity.
Click the Save & Close button.

From the Opportunity list view, you can double-click any opportunity to edit the properties of the opportunity. Of course, you’ll need to have sufficient permissions to edit the opportunity.
Outlook 2003/2007/2010/Internet Explorer:
In the Navigation Pane, click Sales and then Opportunities.
This will bring up your default list of your opportunities.
Locate the opportunity you’d like to edit. Use the Search for Records field at the top of the Opportunities list to find a specific opportunity.
Double-click the opportunity you’d like to edit.
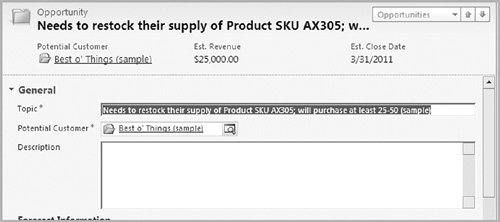
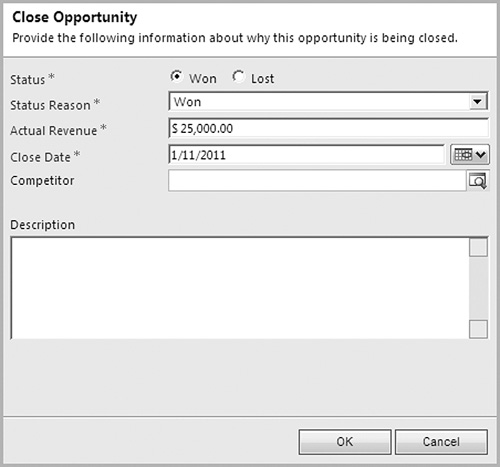
Once an opportunity has been won or lost, you can close the opportunity in Microsoft Dynamics CRM. It’s a good idea to close your opportunities when they’re no longer active because this removes them from your active list of opportunities in the Opportunity list view.
Outlook 2003/2007/2010/Internet Explorer:
Go to your Opportunities list.
Double-click an opportunity to open it for editing.
In the Actions group of the ribbon, click the Close as Won or Close as Lost button.
Choose a status for the opportunity to show whether the opportunity was won or lost.
Select a reason for the end of the opportunity.
Add an actual revenue, close date, competitor, and description.
Click OK.
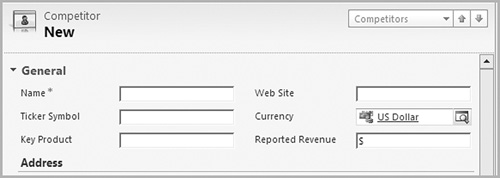
Gaining an understanding of your competition is critical to understanding whether your sales and marketing efforts are working. By creating a central list of competitors in Microsoft Dynamics CRM, you can track your win/loss rate with specific opportunities and products.
The first step in tracking your competitors in Microsoft Dynamics CRM is to create a list of competitors. Once your list of competitors has been defined, you can link those competitors to opportunities or products.
Outlook 2010/Internet Explorer:
In the Navigation Pane, click Sales and then Competitors.
On the ribbon in the Records group, click the New button.
Type the name of your competitor in the Name field.
Enter any other information about your competitor into the other fields on the screen.
Click the Save & Close button.
Outlook 2003/2007:
In the Navigation Pane, click Sales and then Competitors.
On the Competitors menu, click the New button.
Type the name of your competitor in the Name field.
Enter any other information about your competitor into the other fields on the screen.
Click the Save & Close button.
After adding an opportunity to Microsoft Dynamics CRM, you may find out that you’re competing against a specific competitor. When you learn this, associate the opportunity with the competitor.
Outlook 2003/2007/2010/Internet Explorer:
Create a new opportunity or open an existing opportunity.
If you are creating a new opportunity, click the Save button after entering the required fields.
On the left, click the Competitors option.
On the ribbon in the Records group, click the Add Existing Competitor button.
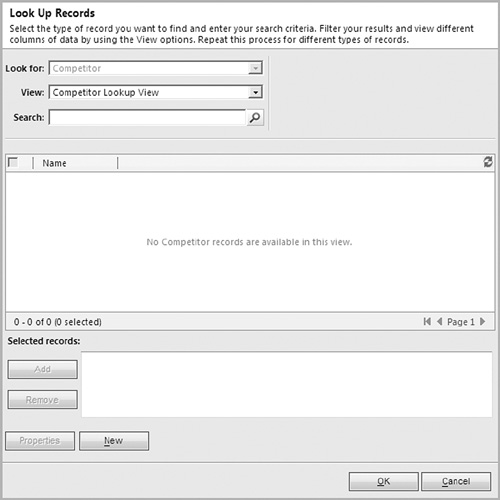
In the look up dialog, add any existing competitors to the opportunity.
Click OK.
Click the Save & Close button.
Sales slicks, pricing spreadsheets, product descriptions, technical documents, news bulletins, manuals, marketing collateral, and any other sales literature can all be added to the sales literature library in Microsoft Dynamics CRM.
After adding sales literature to the library in Microsoft Dynamics CRM, you can associate the literature with products or competitors. Then, the next time you are up against a specific competitor, you’ll have literature specific to the competitor at your fingertips. If you’re selling a product, the price lists, news, or marketing collateral is linked to the product and is easily accessible.
Outlook 2010/Internet Explorer:
In the Navigation Pane, click Sales and then Sales Literature.
On the Sales Literature tab, in the Records group of the ribbon, click the New button.
Give your sales literature item a title and subject. Fill in any other fields.
Click the Save button.
On the left, click the Sales Attachments option.
On the Actions toolbar, click the New Sales Attachment button.
Add a title, author, keywords, and abstract (description). Click the Browse button to attach a file.
Click the Save & Close button.
Outlook 2003/2007:
In the Navigation Pane, click Sales and then Sales Literature.
On the Sales Literature menu, click the New button.
Give your sales literature item a title and subject. Fill in any other fields.
Click the Save button.
On the left, click the Sales Attachments option.
On the Actions toolbar, click the New Sales Attachment button.
Add a title, author, keywords, and abstract (description). Click the Browse button to attach a file.
Click the Save & Close button.

Sales literature that is linked with products or competitors can be viewed in the Sales Literature section for the product or opportunity. If you’d like to view all sales literature, check out the Sales Literature view.
Outlook 2003/2007/2010/Internet Explorer:
In the Navigation Pane, click Sales and then Sales Literature. That will bring up the master list of all sales literature.
When viewing the details for a product, click the Sales Literature option on the left to bring up sales literature associated with the product.
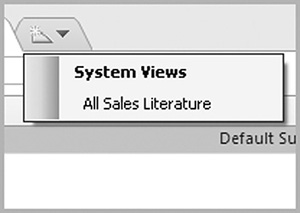
At the top of the Sales Literature list, click the View drop-down to select a category of literature to display.
At the end of the day, opportunity reports will really drive your sales system. Reports will show your most important competitors, your best-selling products, and your most productive salespeople.
Many people overlook Excel as a reporting tool. It can, however, be a really powerful tool. If you don’t know anything about pivot charts and pivot tables in Excel, run a Windows Live Search or reference your favorite Excel book. Using pivot tables, you can easily create breakdowns of your sales data. Want to know how many sales you have broken down by state and then salesperson? That report takes about ten seconds to produce as a pivot table.
Outlook 2010/Internet Explorer:
In the Navigation Pane, click Sales and then Opportunities.
Choose a view from the View drop-down.
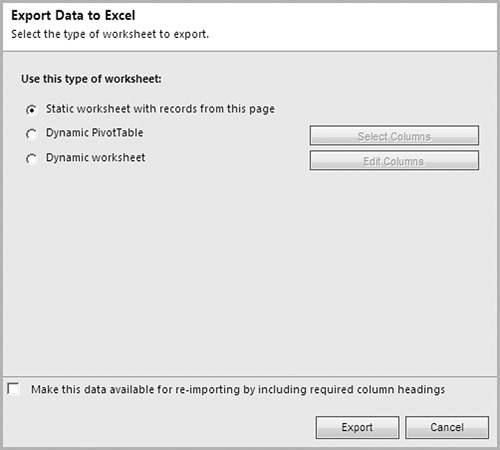
In the Data group of the ribbon, click the Export to Excel button.
Select the type of export to perform. You can export a static worksheet, or you can create a dynamic pivot table or worksheet.
Click the Export button.
Outlook 2003/2007:
In the Navigation Pane, click Sales and then Opportunities.
Choose a view from the View drop-down.
On the Opportunities menu, click the Export to Excel button.
Select the type of export to perform. You can export a static worksheet, or you can create a dynamic pivot table or worksheet.
Click the Export button.
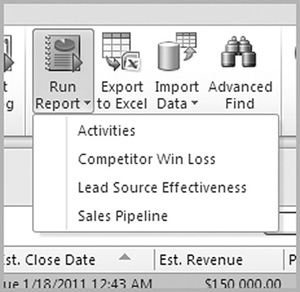
Without any customization, you can create activity, competitor, lead source effectiveness, and pipeline reports in Microsoft Dynamics CRM. Using the Report Wizard, you can create new reports that show data specific to your business process.
Outlook 2010/Internet Explorer:
In the Navigation Pane, click Sales and then Opportunities.
Select the opportunities that should be included in your report. (This step is optional.)
On the Opportunities tab, in the Data group of the ribbon, click the Run Report drop-down.
Select the report you’d like to run.
Choose the range of records that should be included in the report. Your options are: All applicable records, The selected records, and All records on all pages in the current view.
Click the Run Report button.
Outlook 2003/2007:
In the Navigation Pane, click Sales and then Opportunities.
Select the opportunities that should be included in your report. (This step is optional.)
On the toolbar, click the Run Report drop-down.
Select the report you’d like to run.
Choose the range of records that should be included in the report. Your options are: All applicable records, The selected records, and All records on all pages in the current view.
Click the Run Report button.
