
Chapter 3. Dropwizard for Microservices
Dropwizard was created well before either Spring Boot or WildFly Swarm (the other two microservices frameworks we’re looking at in this book). Its first release, v0.1.0, came out December 2011. At the time of this writing, v0.9.2 is the latest, and 1.0 is just around the corner. Dropwizard was created by Coda Hale at Yammer to power the company’s distributed-systems architectures (now called microservices!), heavily leveraging the JVM. It started out as a set of glue code to combine some powerful libraries for writing REST web services and has evolved since then, although it still maintains its identity as a minimalist, production-ready, easy-to-use web framework.
Dropwizard is an opinionated framework like Spring Boot; however, it’s a little more prescriptive than Spring Boot. There are some components that are just part of the framework and cannot be easily changed. The sweet-spot use case is writing REST-based web applications/microservices without too many fancy frills. For example, Dropwizard has chosen the Servlet container (Jetty), REST library (Jersey), and serialization and deserialization (Jackson) formats for you. Changing them out if you want to switch (i.e., changing the servlet container to Undertow) isn’t very straightforward.
Dropwizard also doesn’t come with a dependency-injection container (like Spring or CDI). You can add one, but Dropwizard favors keeping development of microservices simple, with no magic. Spring Boot hides a lot of the underlying complexity from you, since Spring under the covers is pretty complex (i.e., spinning up all the beans actually needed to make Spring run is not trivial) and hides a lot of bean wiring with Java Annotations. Although annotations can be handy and save a lot of boilerplate in some areas, when debugging production applications, the more magic there is, the more difficult it is. Dropwizard prefers to keep everything out in the open and very explicit about what’s wired up and how things fit together. If you need to drop into a debugger, line numbers and stack traces should match up very nicely with the source code.
Just like Spring Boot, Dropwizard prefers to bundle your entire project into one, executable uber JAR. This way, developers don’t worry about which application server it needs to run in and how to deploy and configure the app server. Applications are not built as WARs and subject to complicated class loaders. The class loader in a Dropwizard application is flat, which is a stark difference from trying to run your application in an application server where there may be many hierarchies or graphs of class loaders. Figuring out class load ordering, which can vary between servers, often leads to a complex deployment environment with dependency collisions and runtime issues (e.g., NoSuchMethodError). Running your microservices in their own process gives isolation between applications so you can tune each JVM individually as needed and monitor them using operating system tools very familiar to operations folks. Gone are the GC or OutOfMemoryExceptions which allow one application to take down an entire set of applications just because they share the same process space.
The Dropwizard Stack
Dropwizard provides some very intuitive abstractions on top of these powerful libraries to make it very easy to write production-ready microservices:
-
Jetty for the servlet container
-
Jersey for the REST/JAX-RS implementation
-
Jackson for JSON serialization/deserialization
-
Hibernate Validator
-
Guava
-
Metrics
-
Logback + SLF4J
-
JDBI for dealing with databases
Dropwizard is very opinionated in favor of “just get to writing code.” The trade-off is if you want to tinker with the underlying stack, it’s not very easy. On the other hand, getting up and running quickly so you can delivery business value is much easier than configuring the pieces yourself. Jetty, Jersey, and Jackson are well-known, production-grade libraries for writing REST-based services. Google’s Guava library is around to provide utilities and immutable programming. The Dropwizard Metrics library is a very powerful metrics library that exposes more than enough insight to manage your services in production. In fact, the Metrics library is so powerful and popular it was spun out into its own project and can be used with Spring Boot or WildFly Swarm.
Dropwizard exposes the following abstractions with which a developer should be familiar. If you can understand these simple abstractions, you can be very productive with Dropwizard:
- Application
-
Contains our
public void main() - Environment
-
Where we put our servlets, resources, filters, health checks, tasks, commands, etc.
- Configuration
-
How we inject environment- and application-specific configuration
- Commands
-
Tells Dropwizard what action to take when starting our microservice (e.g., start a
server) - Resources
-
REST/JAX-RS resources
- Tasks
-
Admin tasks to be performed when managing the application (like change the log level or pause database connections)
When you run your Dropwizard application out of the box, one Jetty server
gets created with two handlers: one for your application (8080 by
default) and one for the administration interface (8081 by default).
Dropwizard does this so you can expose your microservice without
exposing administration details over the same port (i.e., can keep 8081 behind a firewall so it’s inaccessible). Things like metrics and health
checks get exposed over the admin port, so take care to secure it
properly.
Getting Started
Dropwizard doesn’t have any fancy project-initialization helpers or Maven plug-ins. Getting started with Dropwizard follows a similar pattern to any plain-old Java project: use a Maven archetype, or add it to an existing application with whatever tools you currently use. You could also use JBoss Forge, which is a technology-agnostic Java project coordination and management tool that allows you to quickly create projects, add dependencies, add classes, etc. For this section, we’ll just use Maven archetypes.
Choose a directory where you want to create your new Dropwizard project. Also verify you have Maven installed. You can run the following command from your operating system’s command prompt, or you can use the following information in the following command to populate a dialog box or wizard for your favorite IDE:
$mvn -B archetype:generate-DarchetypeGroupId=io.dropwizard.archetypes-DarchetypeArtifactId=java-simple -DarchetypeVersion=0.9.2-DgroupId=com.redhat.examples.dropwizard -DartifactId=hola-dropwizard -Dversion=1.0 -Dname=HolaDropwizard
Navigate to the directory that the Maven archetype generator created for
us in hola-dropwizard and run the following command to build our
project:
$ mvn clean installYou should have a successful build!
This uses the Dropwizard archetype java-simple to create our microservice. If you go into the hola-dropwizard directory, you should see this structure:
./src/main/java/com/redhat/examples/dropwizard/api
./src/main/java/com/redhat/examples/dropwizard/cli
./src/main/java/com/redhat/examples/dropwizard/client
./src/main/java/com/redhat/examples/dropwizard/core
./src/main/java/com/redhat/examples/dropwizard/db
./src/main/java/com/redhat/examples/dropwizard/health
./src/main/java/com/redhat/examples/dropwizard
    /HolaDropwizardApplication.java
./src/main/java/com/redhat/examples/dropwizard
    /HolaDropwizardConfiguration.java
./src/main/java/com/redhat/examples/dropwizard/resources
./src/main/resources
./src/main/resources/assets
./src/main/resources/banner.txt
./pom.xml
Note that Dropwizard creates a package structure for you that follows their convention:
api-
POJOs that define the objects used in your REST resources (some people call these objects domain objects or DTOs).
cli-
This is where your Dropwizard commands go (additional commands you wish to add to startup of your application).
client-
Client helper classes go here.
db-
Any DB related code or configuration goes here.
health-
Microservice-specific health checking that can be exposed at runtime in the admin interface goes here.
resources-
Our REST resource classes go here.
We also have the files HolaDropwizardApplication.java and
HolaDropwizardConfiguration.java, which is where our
configuration and bootstrapping code goes. Take a look at the
HolaDropwizardApplication class in Example 3-1, for example.
Example 3-1. src/main/java/com/redhat/examples/dropwizard/HolaDropwizardApplication.java
publicclassHolaDropwizardApplicationextendsApplication<HolaDropwizardConfiguration>{publicstaticvoidmain(finalString[]args)throwsException{newHolaDropwizardApplication().run(args);}@OverridepublicStringgetName(){return"HolaDropwizard";}@Overridepublicvoidinitialize(Bootstrap<HolaDropwizardConfiguration>bootstrap){// TODO: application initialization}@Overridepublicvoidrun(HolaDropwizardConfigurationconfiguration,finalEnvironmentenvironment){// TODO: implement application}}
This class contains our public static void main() method, which doesn’t do too much except call our microservice’s run() method. It also has a getName() method, which is shown at startup. The initialize() and run() methods are the key places where we can bootstrap our application as we’ll show in the next section.
The configuration class that was generated,
HolaDropwizardConfiguration, is empty for now (Example 3-2).
Example 3-2. src/main/java/com/redhat/examples/dropwizard/HolaDropwizardConfiguration.java
publicclassHolaDropwizardConfigurationextendsConfiguration{// TODO: implement service configuration}
Although Dropwizard doesn’t have any special Maven plug-ins on its own,
take a look at the pom.xml that was generated. We see that the
Dropwizard dependencies are on the classpath and that we’ll be using the
maven-shade-plugin to package up our JAR as an uber JAR. This means
all of our project’s dependencies will be unpacked (i.e., all dependency
JARs unpacked) and combined into a single JAR that our build will
create. For that JAR, we use the maven-jar-plugin to make it
executable.
One plug-in we do want to add is the exec-maven-plugin. With Spring Boot we were able to just run our microservice with
mvn spring-boot:run. We want to be able to do the same thing with our
Dropwizard application, so let’s add the following plug-in within the
<build> section of the pom.xml, shown in Example 3-3.
Example 3-3. pom.xml
<plugin><groupId>org.codehaus.mojo</groupId><artifactId>exec-maven-plugin</artifactId><configuration><mainClass>com.redhat.examples.dropwizard.HolaDropwizardApplication</mainClass><arguments><argument>server</argument></arguments></configuration></plugin>
Now we can execute our application from the command line like this:
$mvnexec:java
We should see something like what’s in Example 3-4.
Example 3-4. HolaDropwizard
====================================================================HolaDropwizard====================================================================INFO[2016-03-27 21:54:22,279]io.dropwizard.server.DefaultServer... : Registering jersey handler with root path prefix: / INFO[2016-03-27 21:54:22,291]io.dropwizard.server.DefaultServer... : Registering admin handler with root path prefix: / INFO[2016-03-27 21:54:22,326]org.eclipse.jetty.setuid.SetUIDL... : Opened application@5dee571c{HTTP/1.1}{0.0.0.0:8080}INFO[2016-03-27 21:54:22,327]org.eclipse.jetty.setuid.SetUIDL... : Opened admin@f8bd099{HTTP/1.1}{0.0.0.0:8081}INFO[2016-03-27 21:54:22,329]org.eclipse.jetty.server.Server : jetty-9.2.13.v20150730 INFO[2016-03-27 21:54:22]io.dropwizard.jersey.DropwizardResou... : The following paths were foundforthe configured resources: NONE INFO[2016-03-27 21:54]org.eclipse.jetty.server.handler.Context... : Started i.d.j.MutableServletContextHandler@1dfb9685{/,null,AVAI... INFO[2016-03-27 21:54:22]io.dropwizard.setup.AdminEnvironment:... POST /tasks/log-level(dropwizard.servlets.tasks.LogConfigurat... POST /tasks/gc(io.dropwizard.servlets.tasks.GarbageCollection... WARN[2016-03-27 21:54:22,695]io.dropwizard.setup.AdminEnvironm... !!!!!!!!!!!!!!!!!!!!!!!!!!!!!!!!!!!!!!!!!!!!!!!!!!!!!!!!!!!!!!!!!!!! !!!!!!!!!!!!!!!!!!!!!!!!!!!!!!!!!!!!!!!!!!!!!!!!!!!!!!!!!!!!!!!!!!!! !THIS APPLICATION HAS NO HEALTHCHECKS. THIS MEANS YOU WILL NEVER... ! IF IT DIES IN PRODUCTION, WHICH MEANS YOU WILL NEVER KNOW IF... !LETTING YOUR USERS DOWN. YOU SHOULD ADD A HEALTHCHECK FOR EACH... ! APPLICATION'S DEPENDENCIES WHICH FULLY(BUT LIGHTLY)TESTS... !!!!!!!!!!!!!!!!!!!!!!!!!!!!!!!!!!!!!!!!!!!!!!!!!!!!!!!!!!!!!!!!!!!! !!!!!!!!!!!!!!!!!!!!!!!!!!!!!!!!!!!!!!!!!!!!!!!!!!!!!!!!!!!!!!!!!!!! INFO[2016-03-27 21:54]org.eclipse.jetty.server.handler.ContextH... : Started i.d.j.MutableServletContextHandler@4969dc6{/,null,AVA... INFO[2016-03-27 21:54:22,704]org.eclipse.jetty.server.ServerCo... : Started application@5dee571c{HTTP/1.1}{0.0.0.0:8080}INFO[2016-03-27 21:54:22,705]org.eclipse.jetty.server.ServerCo... : Started admin@f8bd099{HTTP/1.1}{0.0.0.0:8081}INFO[2016-03-27 21:54:22,705]org.eclipse.jetty.server.Server : Started @2914ms
If you see the application start up, you can try to navigate in your browser to the default location for RESTful endpoints: http://localhost:8080. You probably won’t see too much:
{"code":404,"message":"HTTP 404 Not Found"}
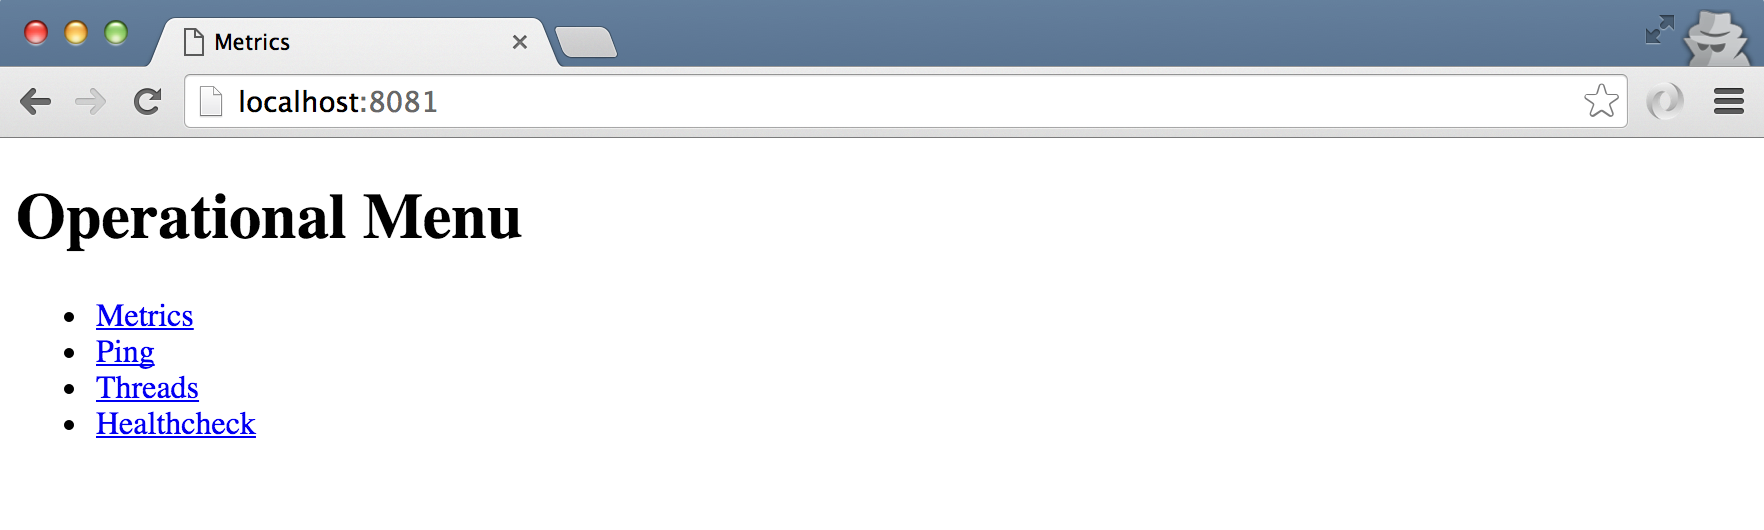
If you try going to the admin endpoint http://localhost:8081, you should see a simple page with a few links. Try clicking around to see what kind of value is already provided out of the box for managing your microservice!
Hello World
Now that we have our Dropwizard microservice template ready to go, let’s add a REST endpoint. We want to expose an HTTP/REST endpoint at
/api/hola that will return “Hola Dropwizard from X” where X is the IP
address where the service is running. To do this, navigate to
src/main/java/com/redhat/examples/dropwizard/resources (remember, this is the convention that Dropwizard follows for where to put REST
resources) and create a new Java class called HolaRestResource. We’ll
add a method named hola() that returns a string along with the IP
address of where the service is running, as shown in Example 3-5.
Example 3-5. src/main/java/com/redhat/examples/dropwizard/resources/HolaRestResource.java
publicclassHolaRestResource{publicStringhola()throwsUnknownHostException{Stringhostname=null;try{hostname=InetAddress.getLocalHost().getHostAddress();}catch(UnknownHostExceptione){hostname="unknown";}return"Hola Dropwizard de "+hostname;}}
Add the HTTP Endpoints
If this is familiar to what we did with Spring Boot, it’s for a reason. We want to be able to create REST endpoints and services with POJO code where possible, and a Hello World application is the perfect place to do that. To expose this as a REST service, we’re going to leverage good old JAX-RS annotations (see Example 3-6):
@Path-
Tell JAX-RS what the context path for this service should be.
@GET-
Add a GET HTTP service.
Example 3-6. src/main/java/com/redhat/examples/dropwizard/HolaRestResource.java
@Path("/api")publicclassHolaRestResource{@Path("/hola")@GETpublicStringhola()throwsUnknownHostException{Stringhostname=null;try{hostname=InetAddress.getLocalHost().getHostAddress();}catch(UnknownHostExceptione){hostname="unknown";}return"Hola Dropwizard de "+hostname;}}
Now, in our HolaDropwizardApplication class, let’s give the run()
method an implementation to add our new REST resource to our
microservice (Example 3-7).
Example 3-7. src/main/java/com/redhat/examples/dropwizard/HolaDropwizardApplication.java
@Overridepublicvoidrun(HolaDropwizardConfigurationconfiguration,Environmentenvironment){environment.jersey().register(newHolaRestResource());}
Now we should be able to build and run our Dropwizard microservice:
$mvn clean packageexec:java
When we go to the endpoint at http://localhost:8080/api/hola we should see the following:

Externalize Configuration
Dropwizard has many options for configuring the built-in components
(like the servlet engine or data sources for databases) as well as
creating entirely new commands that you can run and configure with a
configurations file. We can also inject environment variables and system
properties for those types of configurations that expect to change based
on the environment in which they’re running. Just like with Spring Boot,
we can bind entire classes of properties to specific objects. In this
example, let’s bind all of the helloapp.* properties to our
HolaRestResource class. With Spring Boot we had the options to write
our configs in property files with key-value tuples. We could have also
used YAML. With Dropwizard, we only have the YAML option.
So let’s create a file in the root of our project called conf/application.yml (note, you’ll need to create the conf directory if it doesn’t exist). We put our configuration files in the conf folder to help us organize our project’s different configuration files (the naming of the directory is not significant (i.e., it does not have any conventional meaning to Dropwizard). Let’s add some configuration to our conf/application.yml file:
# configurations for our sayingFactory
helloapp:

  saying: Hola Dropwizard de
In this case, we’re setting the property to a specific value. What if we
wanted to be able to override it based on some environment conditions?
We could override it by passing in a Java system variable like this
-Ddw.helloapp.saying=Guten Tag. Note that the dw.* part of the system
property name is significant; it tells Dropwizard to apply the value
to one of the configuration settings of our application. What if we
wanted to override the property based on the value of an OS environment
variable? That would look like Example 3-8.
Example 3-8. conf/application.yml
# configurations for our sayingFactoryhelloapp:saying:${HELLOAPP_SAYING:-Guten Tag aus}
The pattern for the value of the property is to first look at an
environment variable if it exists. If the environment variable is unset,
then use the default value provided. We also need to tell our
application specifically that we want to use environment-variable
substitution. In the HolaDropwizardApplication class, edit the
initialize() method to look like Example 3-9.
Example 3-9. src/main/java/com/redhat/examples/dropwizard/HolaDropwizardApplication.java
@Overridepublicvoidinitialize(Bootstrap<HolaDropwizardConfiguration>bootstrap){// Enable variable substitution with environment variablesbootstrap.setConfigurationSourceProvider(newSubstitutingSourceProvider(bootstrap.getConfigurationSourceProvider(),newEnvironmentVariableSubstitutor(false)));}
Now we’ve set up our configuration, let’s build the backing object for
it. We purposefully created a subconfiguration named helloapp which
allows us to namespace our configs to organize them. We could have left
it as a top-level configuration item, but since we didn’t, let’s see how we bind our application.yml file to our Dropwizard configuration
objects.
Let’s create a new class called HelloSayingFactory in
src/main/java/com/redhat/examples/dropwizard/resources directory. Fill
it out like this:
publicclassHelloSayingFactory{@NotEmptyprivateStringsaying;@JsonPropertypublicStringgetSaying(){returnsaying;}@JsonPropertypublicvoidsetSaying(Stringsaying){this.saying=saying;}}
This is a simple Java Bean with some validation (@NotEmpty, from the
hibernate validators library) and Jackson (@JsonProperty) annotations. This class wraps whatever configurations are under our helloapp configuration in our YAML file; at the moment, we only have “saying.” When we first created our application, a HolaDropwizardConfiguration class was created. Let’s open that class and add our new HelloSayingFactory, as shown in Example 3-10.
Example 3-10. src/main/java/com/redhat/examples/dropwizard/HolaDropwizardConfiguration.java
publicclassHolaDropwizardConfigurationextendsConfiguration{privateHelloSayingFactorysayingFactory;@JsonProperty("helloapp")publicHelloSayingFactorygetSayingFactory(){returnsayingFactory;}@JsonProperty("helloapp")publicvoidsetSayingFactory(HelloSayingFactorysayingFactory){this.sayingFactory=sayingFactory;}}
Lastly, we need to inject the configuration into our HolaRestResource (Example 3-11).
Example 3-11. src/main/java/com/redhat/examples/dropwizard/resources/HolaRestResource.java
@Path("/api")publicclassHolaRestResource{privateStringsaying;publicHolaRestResource(finalStringsaying){this.saying=saying;}@Path("/hola")@GETpublicStringhola()throwsUnknownHostException{Stringhostname=null;try{hostname=InetAddress.getLocalHost().getHostAddress();}catch(UnknownHostExceptione){hostname="unknown";}returnsaying+" "+hostname;}}
Since there is no magic dependency injection framework that you’re
forced to use, you’ll need to update our HolaDropwizardApplication to
inject the configurations to our REST Resource (Example 3-12).
Example 3-12. src/main/java/com/redhat/examples/dropwizard/HolaDropwizardApplication.java
@Overridepublicvoidrun(HolaDropwizardConfigurationconfiguration,Environmentenvironment){environment.jersey().register(newHolaRestResource(configuration.getSayingFactory().getSaying()));}
Now we should have a fairly sophisticated configuration injection-capability available to us. In this example, we purposefully made it slightly more complicated to cover what you’d probably do in a real-world use case. Also note, although the mechanics of hooking all of this up is more boilerplate, there’s a very clear pattern here: bind our Java objects to a YAML configuration file and keep everything very simple and intuitive without leveraging complex frameworks.
Let’s run our application. To do this, let’s update our pom.xml to pass our new conf/application.yml file, as shown in Example 3-13.
Example 3-13. pom.xml
<plugin><groupId>org.codehaus.mojo</groupId><artifactId>exec-maven-plugin</artifactId><configuration><mainClass>com.redhat.examples.dropwizard.HolaDropwizardApplication</mainClass><arguments><argument>server</argument><argument>conf/application.yml</argument></arguments></configuration></plugin>
From the command line, we can now run:
$mvn clean packageexec:java
When you navigate to http://localhost:8080/api/hola, we should see one of the sayings:

If we stop the microservice, and export an environment variable, we should see a new saying:
$exportHELLOAPP_SAYING='Hello Dropwizard from'$mvn clean packageexec:java

Expose Application Metrics and Information
The great thing about Dropwizard is metrics are first-class citizens,
not an afterthought, and are already there! Metrics are enabled by
default on the admin port (8081, by default) but how does Dropwizard
know anything specific about our application? Let’s sprinkle a couple
declarative annotations on our HolaRestResource (Example 3-14).
Example 3-14. src/main/java/com/redhat/examples/dropwizard/resources/HolaRestResource.java
@Path("/hola")@GET@TimedpublicStringhola()throwsUnknownHostException{Stringhostname=null;try{hostname=InetAddress.getLocalHost().getHostAddress();}catch(UnknownHostExceptione){hostname="unknown";}returnsaying+" "+hostname;}
We’ve added the @Timed annotation which tracks how long invocations to
our service take. Other annotations for gathering metrics include:
@Metered-
The rate at which the service is called
@ExceptionMetered-
The rate at which exceptions are thrown
Build and restart your microservice and try hitting your service at http://localhost:8080/api/hola a couple times. Then if you navigate to http://localhost:8081/metrics?pretty=true and scroll toward the bottom (may be different for yours), you should see the metrics for our service:
com.redhat.examples.dropwizard.resources.HolaRestResource.hola{count:3,max:0.0060773830000000004,mean:0.002282724632345539,min:0.000085167,p50:0.0007421190000000001,p75:0.0060773830000000004,p95:0.0060773830000000004,p98:0.0060773830000000004,p99:0.0060773830000000004,p999:0.0060773830000000004,stddev:0.002676717391830948,m15_rate:0,m1_rate:0,m5_rate:0,mean_rate:0.12945390398989548,duration_units:"seconds",rate_units:"calls/second"}
How to Run This Outside of Maven?
Dropwizard packages our microservice as a single executable uber JAR. All we have to do is build our application and run it like this:
$mvn clean package$java -jar target/hola-dropwizard-1.0.jarserver conf/application.yml
Calling Another Service
In a microservice environment, each service is responsible for providing the functionality or service to other collaborators. If we wish to extend the “hello world” microservice, we will need to create a service to which we can call using Dropwizard’s REST client functionality. Just like we did for the Spring Boot microservice, we’ll leverage the backend service from the source code that accompanies the book. The interaction will look similar to this:

If you look in this book’s source code, we’ll see a Maven module called backend which contains a very simple HTTP servlet that can be invoked with a GET request and query parameters. The code for this backend is very simple, and does not use any of the microservice frameworks (Spring Boot, Dropwizard, or WildFly Swarm).
To start up the backend service on port 8080, navigate to the
backend directory and run the following:
$ mvn clean install jetty:runThis service is exposed at /api/backend and takes a query parameter
greeting. For example, when we call this service with this path
/api/backend?greeting=Hello, then the backend service will respond with a JSON object like this:
$curl -X GET http://localhost:8080/api/backend?greeting=Hello
Before we get started, let’s add the dropwizard-client dependency to
our pom.xml:
<dependency><groupId>io.dropwizard</groupId><artifactId>dropwizard-client</artifactId></dependency>
We will create a new HTTP endpoint, /api/greeting in our Dropwizard
hola-dropwizard example and use Jersey to call this backend! Let’s start off by creating two new classes in the src/main/java/com/redhat/examples/dropwizard/resources folder of our
hola-dropwizard project named GreeterRestResource and
GreeterSayingFactory. The GreeterRestResource will implement our
JAX-RS REST endpoints, and the GreeterSayingFactory class will
encapsulate the configuration options we wish to use for our Greeter
service.
The GreeterRestResource class is shown in Example 3-15.
Example 3-15. src/main/java/com/redhat/examples/dropwizard/resources/GreeterRestResource.java
@Path("/api")publicclassGreeterRestResource{privateStringsaying;privateStringbackendServiceHost;privateintbackendServicePort;privateClientclient;publicGreeterRestResource(finalStringsaying,Stringhost,intport,Clientclient){this.saying=saying;this.backendServiceHost=host;this.backendServicePort=port;this.client=client;}@Path("/greeting")@GET@TimedpublicStringgreeting(){StringbackendServiceUrl=String.format("http://%s:%d",backendServiceHost,backendServicePort);System.out.println("Sending to: "+backendServiceUrl);returnbackendServiceUrl;}}
The GreeterSayingFactory class encapsulates configuration options
we’ll need, like the service host and service port, which could change in different environments (see Example 3-16). It also declares a JerseyClientConfiguration, which provides us a nice DSL for building up our Jersey client. Let’s add this as a section to our HolaDropwizardConfiguration class, as shown in Example 3-17.
Example 3-16. src/main/java/com/redhat/examples/dropwizard/resources/GreeterSayingFactory.java
publicclassGreeterSayingFactory{@NotEmptyprivateStringsaying;@NotEmptyprivateStringhost;@NotEmptyprivateintport;privateJerseyClientConfigurationjerseyClientConfig=newJerseyClientConfiguration();@JsonProperty("jerseyClient")publicJerseyClientConfigurationgetJerseyClientConfig(){returnjerseyClientConfig;}publicStringgetSaying(){returnsaying;}publicvoidsetSaying(Stringsaying){this.saying=saying;}publicStringgetHost(){returnhost;}publicvoidsetHost(Stringhost){this.host=host;}publicintgetPort(){returnport;}publicvoidsetPort(intport){this.port=port;}}
Example 3-17. src/main/java/com/redhat/examples/dropwizard/HolaDropwizardConfiguration.java
publicclassHolaDropwizardConfigurationextendsConfiguration{privateHelloSayingFactorysayingFactory;privateGreeterSayingFactorygreeterSayingFactory;@JsonProperty("helloapp")publicHelloSayingFactorygetSayingFactory(){returnsayingFactory;}@JsonProperty("helloapp")publicvoidsetSayingFactory(HelloSayingFactorysayingFactory){this.sayingFactory=sayingFactory;}@JsonProperty("greeter")publicGreeterSayingFactorygetGreeterSayingFactory(){returngreeterSayingFactory;}@JsonProperty("greeter")publicvoidsetGreeterSayingFactory(GreeterSayingFactorygreeterSayingFactory){this.greeterSayingFactory=greeterSayingFactory;}}
We can also update our conf/application.yml file to add these values in:
greeter:saying:${GREETER_SAYING:-Guten Tag Dropwizard}host:${GREETER_BACKEND_HOST:-localhost}port:${GREETER_BACKEND_PORT:-8080}
Note we specify defaults for the various configuration options if they’re not provided by OS environment variables.
Now let’s wire up the client and the greeter resource inside our
HolaDropwizardApplication class, which is where all of our services and resources are wired into the Environment object (Example 3-18).
Example 3-18. src/main/java/com/redhat/examples/dropwizard/HolaDropwizardApplication.java
@Overridepublicvoidrun(HolaDropwizardConfigurationconfiguration,Environmentenvironment){environment.jersey().register(newHolaRestResource(configuration.getSayingFactory().getSaying()));// greeter serviceGreeterSayingFactorygreeterSayingFactory=configuration.getGreeterSayingFactory();ClientgreeterClient=newJerseyClientBuilder(environment).using(greeterSayingFactory.getJerseyClientConfig()).build("greeterClient");environment.jersey().register(newGreeterRestResource(greeterSayingFactory.getSaying(),greeterSayingFactory.getHost(),greeterSayingFactory.getPort(),greeterClient));}
Lastly, let’s implement the client that will make the call to the backend service with all of the appropriate host and port information injected, see Example 3-19.
Example 3-19. src/main/java/com/redhat/examples/dropwizard/resources/GreeterRestResource.java
@Path("/greeting")@GET@TimedpublicStringgreeting(){StringbackendServiceUrl=String.format("http://%s:%d",backendServiceHost,backendServicePort);System.out.println("Sending to: "+backendServiceUrl);BackendDTObackendDTO=client.target(backendServiceUrl).path("api").path("backend").queryParam("greeting",saying).request().accept("application/json").get(BackendDTO.class);returnbackendDTO.getGreeting()+" at host: "+backendDTO.getIp();}
Dropwizard offers two convenience wrappers for making REST calls: the HttpComponents library directly (if you need low-level HTTP access) or the Jersey/JAX-RS REST client libraries, which have a nice higher-level DSL for making HTTP calls. In the previous example, we’re using the Jersey client to make the call.
Now let’s build the microservice and verify that we can call this new
greeting endpoint and that it properly calls the backend. First, let’s
start the backend if it’s not already running. Navigate to the backend directory of the source code that comes with this application and run it:
$ mvn clean install jetty:runNext let’s build and run our Dropwizard microservice. Let’s also
configure this service to run on a different port than its default port (8080) so that it doesn’t collide with the backend service which is already running on port 8080. Later on in the book we can see how
running these microservices in their own container removes the
restriction of port swizzling at runtime.
First let’s make explicit which port we want to use as default. Open the conf/application.yml file and add the server port information:
server:applicationConnectors:-type:httpport:8080
Now start the microservice by overriding the default port:
$mvn clean installexec:java-Ddw.server.applicationConnectors[0].port=9090
Now, let’s navigate our browser to http://localhost:9090/api/greeting to see if our microservice properly calls the backend and displays what we’re expecting:

Where to Look Next
In this chapter we learned about Dropwizard, saw some differences and similarities with Spring Boot and how to expose REST endpoints, configuration, and metrics, and make calls to external services. This was meant as a quick introduction to Dropwizard and is by no means a comprehensive guide. Check out the following links for more information: