
Chapter 11: Understanding the Microsoft 365 Security & Compliance Center
This chapter focuses on the many different features and functions of the Microsoft 365 Security & Compliance Center as it relates to Office 365 apps and services. From audit log activities and working with Secure Score to configuring advanced threat protection features, we'll cover the essentials that every admin should know.
This chapter includes the following recipes:
- Viewing a report on all users who have accessed a specific SharePoint file
- Using Content Search to find content containing certain keywords
- Creating a retention policy based on the discovery of certain keywords
- Accessing the standard Microsoft BAA
- Accessing and reviewing an organization's secure score
- Complying with Secure Score security configuration recommendations
- Assigning permissions for non-IT users to the Security & Compliance admin center
- Using Communication Compliance to identify potential policy violations in messages
Technical requirements
In this chapter, it would be best to be registered as a Global Admin. If you are not, then many recipes in this chapter will still be accessible to you as a Security Admin. Check each recipe's Getting ready section for its specific requirements.
Viewing a report on all users who have accessed a specific SharePoint file
Sometimes, you will need to know who has accessed specific files and when, whether to verify receipt, investigate a potential data-loss risk, or for another reason. This can be accomplished via the Microsoft 365 Security & Compliance Center. In this recipe, we'll go through the steps of pulling the access report for a file named FirstDraft.docx.
Getting ready
You should be a global administrator to complete this recipe. You will also need audit logging turned on for your organization. You can do this from the Office 365 Security & Compliance Center (https://protection.office.com) by clicking Turn on auditing on the Audit log search page in the Security & Compliance Center. If you don't have that option, then auditing has already been turned on.
How to do it…
- Go to the Office 365 Security & Compliance Center at https://protection.office.com.
- Click Search | Audit log search in the left navigation pane.
- Expand the Activities dropdown and select Accessed file:

Figure 11.1 – Accessed file option under File and page activities
- Add the earliest and latest dates of the activities to be included, the specific users to look for, and/or a file, folder, or site name or URL:

- Click Search.
- You can then filter or search the results to find activities of interest. In this example, I searched to find which users were using anonymous links:

Figure 11.3 – Search results filtered based on the User field
How it works…
In this recipe, you used the audit log in the Office 365 Security & Compliance Center to find out who had accessed a specific file in SharePoint over the last few months. From here, you can save or download results or set an alert based on specific criteria.
There's more...
To set an alert for certain results, select New alert policy on the left:

Figure 11.4 – New alert policy button to the left of the search results
See also
- You can learn more about utilizing the audit log at https://docs.microsoft.com/en-us/microsoft-365/compliance/search-the-audit-log-in-security-and-compliance.
Using Content Search to find content containing certain keywords
It can be difficult to track where people copy and save content, or where they're discussing critically sensitive things, such as confidential projects. In this recipe, we'll perform a content search to look through our entire tenant for content containing DocID-7846. This would be helpful in ensuring the compliance and confidentiality of specific content.
Getting ready
You should be a global administrator to complete this recipe.
How to do it…
- Go to the Office 365 Security & Compliance Center at https://protection.office.com.
- Click Search | Content search from the left navigation menu:

Figure 11.5 – Content search link on the left-hand navigation menu of the Office 365 Security & Compliance Center
- Click New search.
- Enter the keyword(s) to search for. In our example, we're entering DocID-7846:
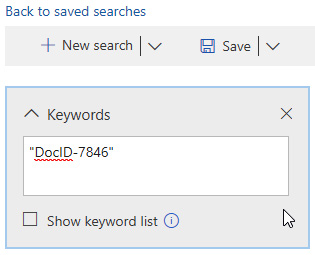
Figure 11.6 – Keyword search terms entry
- Select All locations.
- Click Save & run.
- Name and describe your search so you can return to its results later, then click Save.
- Wait for it to complete, or close and return to it later (follow steps 1 to 2 to find it again).
How it works…
You've just performed a content search. This may take some time, as it searches all content in all locations. To find your specific search statistics, you can go to the Content search page and select the search you want data for, then choose Open query then Individual results | Search statistics. Here, you'll be able to view a summary, queries, and top locations.
If there are results matching your query, they'll appear on the same page. You can leave and come back to Content search at any time to view its status.
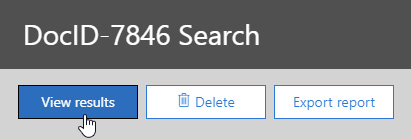
Figure 11.7 – View results button for the saved search
See also
- Content search is a large topic and has much more to consider across scenarios. You can check out more details about it at https://docs.microsoft.com/en-us/microsoft-365/compliance/content-search.
Creating a retention policy based on the discovery of certain keywords
Retention policies can be created that are automatically applied to items containing specific keywords when found in the search index. In this recipe, we'll create a retention policy that applies to items that are found containing the word Contoso.
Getting ready
You should be a global administrator to complete this recipe.
How to do it…
- Go to the Office 365 Security & Compliance Center at https://protection.office.com.
- Click Information governance | Retention from the left navigation menu:

Figure 11.8 – Retention link in the left-hand navigation menu of the Office 365 Security & Compliance Center
- Click Create.
- Name and describe your retention policy:

Figure 11.9 – Name and description fields for the new policy
- Under Need more options?, select Use advanced retention settings and leave Detect content that contains specific words or phrases selected. Click Next:
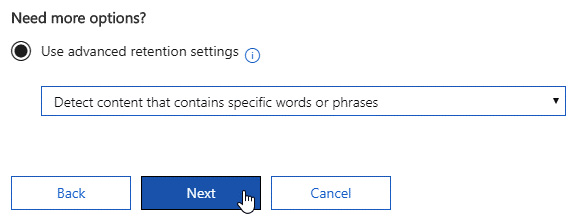
Figure 11.10 – Advanced retention settings available by dropdown
- Enter Contoso in the keyword query editor.
- Under Retention actions, choose to retain matching content for 1 year, but don't automatically delete it, and base the date on last modified, as shown in the following figure:

Figure 11.11 – Retention actions to take
- Click Next.
- Leave All locations selected and click Next.
- Review the policy for accuracy, then click Create this policy:
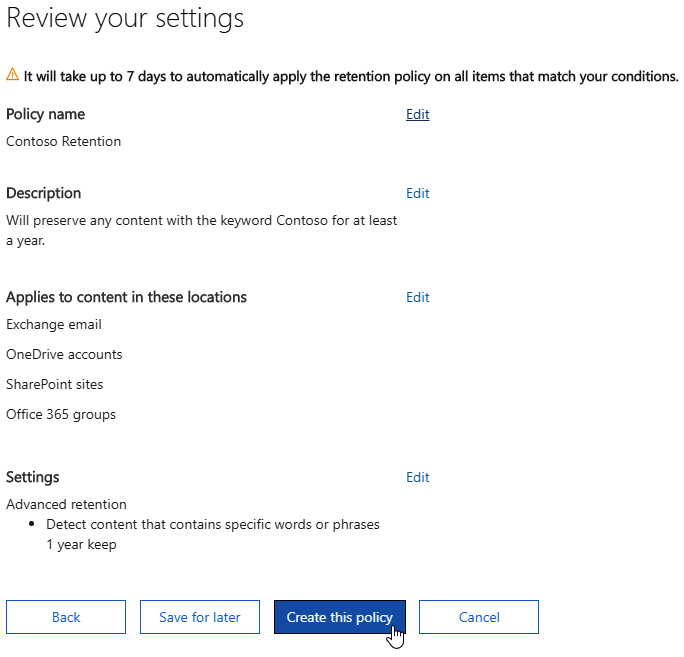
Figure 11.12 – The review screen of the new policy with the option to create or save for later
How it works…
You've just created a retention policy that will look for the word Contoso in content found throughout Office 365. When it finds matches, it will make sure that the content is kept for at least a year. At that point, nothing will happen, but users will be able to delete it if they wish since it has passed its required retention period.
Note the warning that appears when creating this policy that says that it could take up to a week for this to apply.
See also
- Learn more about retention policies on items containing keywords at https://docs.microsoft.com/en-us/microsoft-365/compliance/retention-policies?view=o365-worldwide#retain-content-that-contains-specific-keywords.
Accessing the standard Microsoft BAA
Your subscription agreement included Microsoft's HIPAA Business Associate Agreement (BAA), but finding it later for your compliance and audit needs can be tricky. In this recipe, you'll locate the BAA.
Getting ready
Most users can access the BAA. There are no prerequisites.
How to do it…
- Go to https://portal.office.com/commerce/supplements.aspx.
- Click Online Services Terms:

Figure 11.13 – Online Service Terms in the blurb about supplements
- You can find a lot of valuable documentation and information on this screen. Spend some time checking out all that's available. Then scroll down to Hot topics and select HIPAA-BAA:

Figure 11.14 – HIPAA-BAA link under Hot topics at the bottom of the page
- Scroll down to find the available BAA documents. Note the dates for each one:

Figure 11.15 – Available HIPAA documents listed in a table
Before you complete step 3, you may also notice other useful documents, such as the following:
- Licensing for virtual environments
- Downgrade rights
- Product activation and keys
- Product lists, terms, and licensing FAQs
- Online services terms
- Service-level agreements (SLA)
How it works…
While not straightforward, you found the Microsoft HIPAA-BAA in this recipe. Be sure to save it somewhere for future reference.
There's more...
As long as the URL is active, you can go directly to http://aka.ms/BAA as well.
Accessing and reviewing an organization's secure score
Your secure score gives you an idea of how well protected your organization is based on your administrative setting configurations, policies, and activities. In this recipe, you'll learn how to find and analyze your organization's secure score.
Getting ready
You should be a global, security, Exchange, SharePoint, or account administrator to access Secure Score.
How to do it…
- Go directly to your secure score overview at https://securescore.microsoft.com/. You can also go to the Microsoft 365 Security Center (https://security.microsoft.com/) and click Secure Score from the left navigation menu.
- Check your secure score breakdown in the leftmost column of the Overview tab. You'll notice the categories for each of the following making up your score:
--Identity: Accounts and roles in Azure AD
--Data: Microsoft Information Protection
--Device: Microsoft Defender Advanced Threat Protection (ATP)
--Apps: Email and cloud apps (includes Office 365 and Cloud App Security)
--Infrastructure: Azure Security Center score:

Figure 11.16 – Example of a secure score broken down by category
- Check the actions to review in the middle column (or scroll down if the screen resolution is small). Click To address, or any specific Top improvement action, to dive deeper into the suggested actions to improve your score. On this screen, you can also see the percentage by which resolving the action would increase your score:

Figure 11.17 – A list of actions to review for improving your secure score
- Once an improvement action for you to address has been selected, you can add notes or a plan to resolve it, as well as see the step-by-step instructions needed to resolve it:
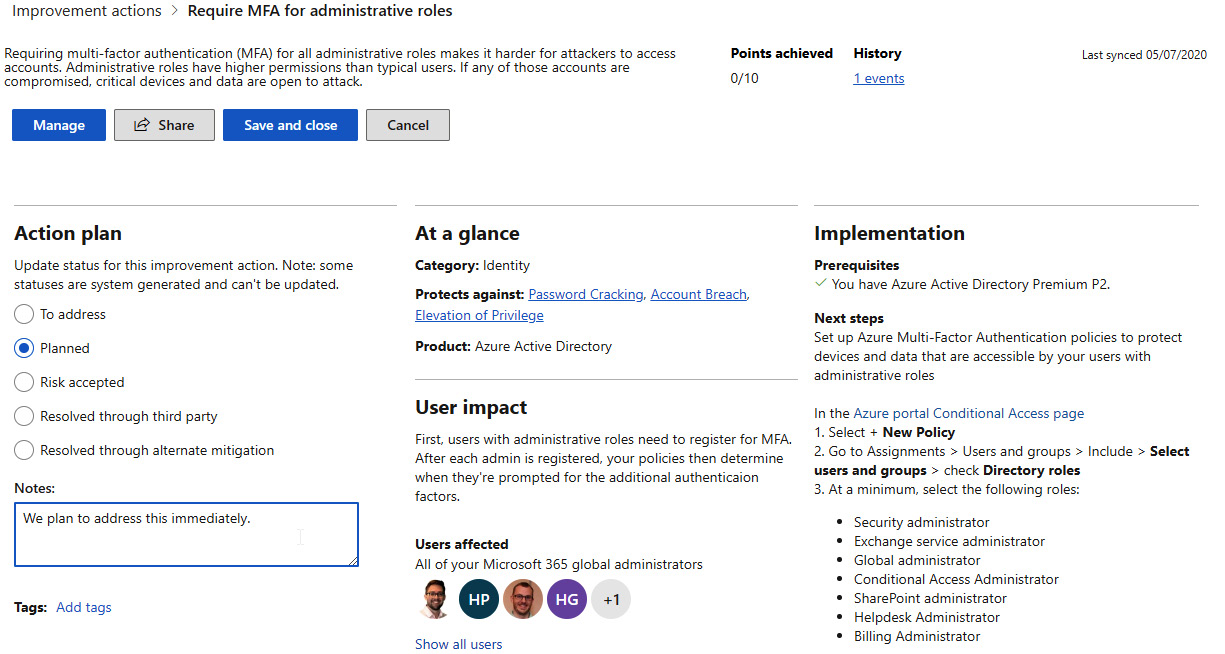
Figure 11.18 – A selected action for review showing all of the details
- Back on the Secure Score dashboard (Overview), you can view your score comparison to see how your organization compares to similar organizations:
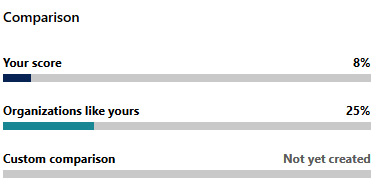
Figure 11.19 – Comparison listing for seeing how your organization compares to similar organizations
- Under Metrics & trends, you can view changes over time in your score:
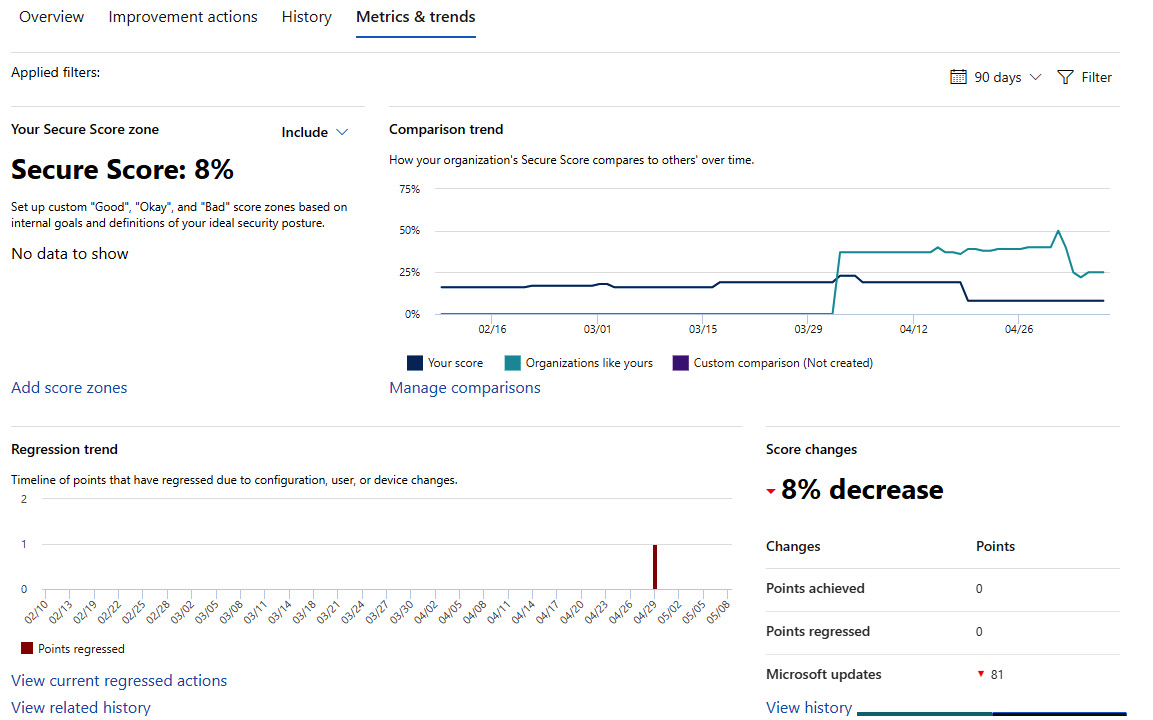
Figure 11.20 – Metrics & trends dashboard with score-over-time visuals
How it works…
In this recipe, you explored the various sections of Secure Score to familiarize yourself with its functions and learn how it can help you enhance your organization's security one action at a time.
See also
- You can find out more about Secure Score at https://docs.microsoft.com/en-us/microsoft-365/security/mtp/microsoft-secure-score-new.
Complying with Secure Score security configuration recommendations
In the previous recipe, you accessed and toured Secure Score. In this recipe, we'll dive deeper into improvement actions and resolve one, complying with a recommendation that will boost our secure score.
Getting ready
You should be a global, security, Exchange, SharePoint, or account administrator to access Secure Score.
How to do it…
- Go directly to your Secure Score overview at https://securescore.microsoft.com/. You can also go to the Microsoft 365 Security Center (https://security.microsoft.com/) and click Secure Score in the left navigation menu.
- Click Improvement actions:

Figure 11.21 – Improvement actions link on the Microsoft Secure Score page
- Choose an improvement action to complete. For this recipe, we'll click Enable self-service password reset:
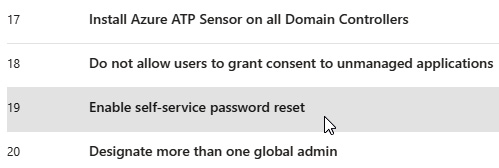
Figure 11.22 – An improvement action being selected
- See the recipe titled Enabling self-service password reset in Chapter 10, Configuring and Managing Users in Azure Active Directory (Azure AD) for the steps on how we'll resolve this. Whichever action you choose to resolve, follow the instructions on the right-hand side after selecting it to complete the action. In most cases, the Manage button will take you directly to where you need to go to resolve the action:
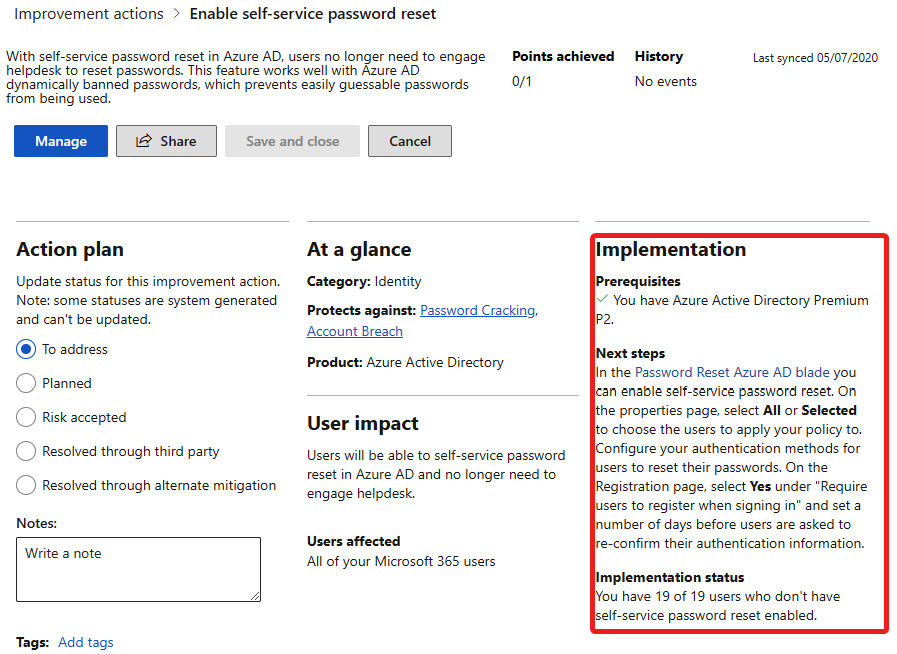
Figure 11.23 – Details for the selected improvement action
- After you've made changes, click Save and close. Once the change has been made, you can wait 24 hours for it to update the score and then go ahead and mark the improvement action as Planned with a note on the actions you took:
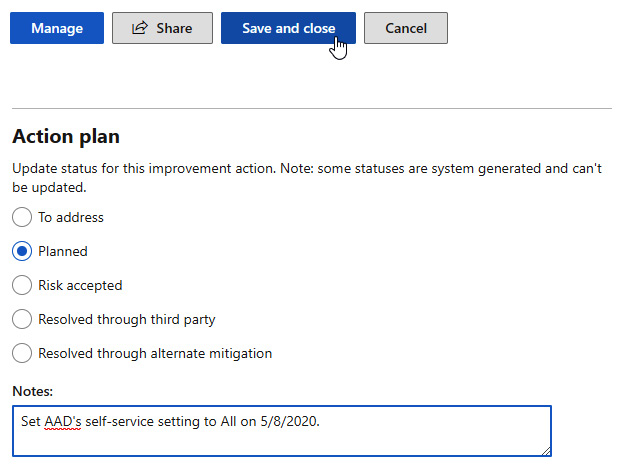
Figure 11.24 – Action plan status and note being saved to the improvement action
How it works…
In this recipe, we looked at an improvement action recommended in our secure score and resolved it by following the provided instructions. Secure Score makes it easy to identify risks in our environment and resolve them.
See also
- You can find out more about Secure Score at https://docs.microsoft.com/en-us/microsoft-365/security/mtp/microsoft-secure-score-new.
Assigning permissions for non-IT users to the Security & Compliance admin center
Sometimes, you'll want additional eyes on the Security & Compliance admin center, but they won't usually belong to a global admin. In this recipe, we'll set a non-IT user's role to Security Reader so that they can access, but not administer, the Office 365 Security & Compliance admin center.
Getting ready
You should be a global administrator to complete this recipe (and whenever assigning admin roles).
How to do it…
- Go to the Office 365 Security & Compliance Center at https://protection.office.com.
- Select Permissions from the left navigation menu:
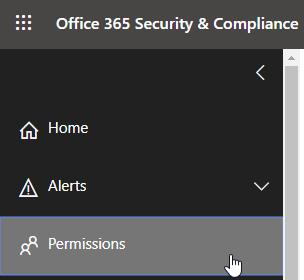
Figure 11.25 – Permissions link in the left-hand navigation menu of the Office 365 Security & Compliance Center
- Select the role that you're assigning, then click Edit in the Members section:

Figure 11.26 – Edit button in the Members section for the selected security role
- Select Choose members.
- Click Add.
- Select those that you're adding to this role group, then click Add:

Figure 11.27 – A selected user to be added to the role group
- Confirm your changes, then click Done:
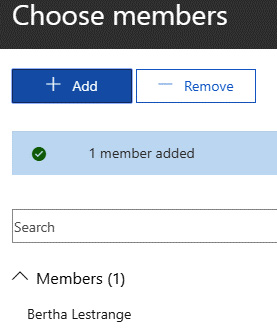
Figure 11.28 – Member(s) added confirmation
- Click Save.
- Click Close.
How it works…
In this recipe, we gave someone permissions for the Office 365 Security & Compliance Center as part of the Security Reader role group. In this group, users have read-only access to much of the Security & Compliance Center, but can't complete tasks or make configuration changes.
See also
- You can learn more about all the roles you could assign users to give a user access to the Security & Compliance admin center at https://docs.microsoft.com/en-us/microsoft-365/security/office-365-security/permissions-in-the-security-and-compliance-center.
Using Communication Compliance to identify potential policy violations in messages
With so many different avenues for communication in Office 365, it can be difficult to monitor inappropriate messages or those that could potentially be in violation of organization policies. Communication Compliance allows you to monitor, capture, and alert assigned reviewers of messages in email, Teams, Yammer, and more for predefined or specified risky content.
In this recipe, we'll add the predefined policy from Microsoft that monitors messages for offensive language.
Getting ready
You should be assigned the Supervisory Review Administrator, Case Management, and Review roles from the Office 365 Security & Compliance admin center to access and utilize the Communication Compliance solution. You can do this by creating a new role group from the Permissions pane of the Office 365 Security & Compliance admin center with these three roles included.
How to do it…
- Go to the Microsoft 365 Compliance Center at https://compliance.microsoft.com.
- Click Show all in the left navigation menu.
- Select Communication compliance:

Figure 11.29 – Communication compliance in the left-hand navigation menu of the Microsoft 365 Compliance Center
- Under Monitor for offensive language, click Get started:

Figure 11.30 – Get started button for the Monitor for offensive language policy
- Name the policy and choose which groups of users to monitor and who should review any violations:
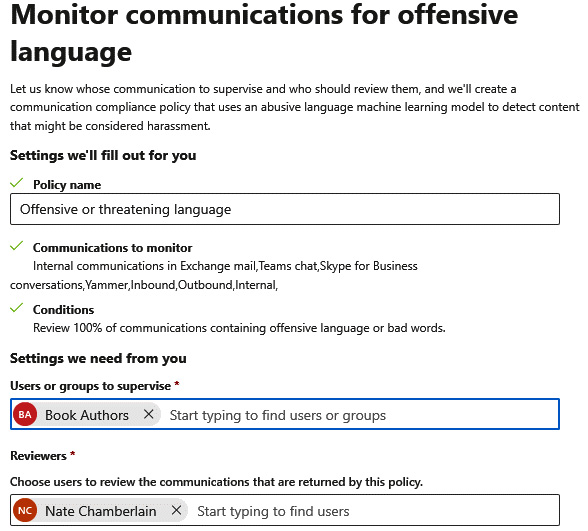
Figure 11.31 – Policy name and associated people and groups
- Click Create policy.
How it works…
You've just created the offensive language policy in your tenant via the Communication Compliance solution from the Microsoft 365 Compliance Center. Within an hour it will be active, and it could take up to 24 hours before violating communications are captured and reported as alerts to the assigned reviewer(s).
See also
- Check out the video at https://youtu.be/z33ji7a7Zho/ on detecting workplace harassment using Communication Compliance.
- You can learn more about Communication Compliance at https://docs.microsoft.com/en-us/microsoft-365/compliance/communication-compliance.