
In this chapter, we will delve further into the concept of sharing modules. Before you can share a module or package, you need to test it to ensure that it is working properly. You also need to prepare your code and know how to deploy it. To learn these things, we will cover the following topics:
- See how unit tests can be used to ensure that your module or package is working properly
- Learn how to prepare a module or package for publication
- Find out how GitHub can be used to share your code with others
- Examine the steps involved in submitting your code to the Python Package Index
- Discover how to use pip to install and use packages written by other people
Testing is a normal part of programming: you test your code to verify that it works and identify any bugs or other problems, which you can then fix. Then, you test some more, until you are happy that your code is working correctly.
All too often, however, programmers just do
ad hoc testing: they fire up the Python interactive interpreter, import their module or package, and make various calls to see what happens. In the previous chapter, we looked at a form of ad hoc testing using the importlib.reload() function to support RAD development of your code.
Ad hoc testing is useful, but it isn't the only form of testing. If you are sharing your modules and packages with others, you will want your code to be bug-free, and ad-hoc testing can't guarantee this. A much better and more systematic approach is to create a series of unit tests for your module or package. Unit tests are snippets of Python code which test various aspects of your code. Because the testing is done by a Python program, you can simply run the program whenever you want to test your code, and you can be sure that everything is being tested each time you run the test. Unit tests are a great way of making sure bugs don't creep into your code as you make changes, and you can run them whenever you want to share your code to make sure it's working as you expect.
Note
Unit tests aren't the only sort of programmatic testing you can do. Integration tests combine various modules and systems to make sure they work together correctly, and GUI tests are used to ensure that a program's user interface is working as it should.Unit tests are, however, the most useful for testing modules and packages, and this is the type of testing we will focus on in this chapter.
The following is a very simple example of a unit test:
import math
assert math.floor(2.6197) == 2
The assert statement checks the expression that follows it. If this expression does not evaluate to True, then an AssertionError will be raised. This makes it easy for you to check that a given function is returning the results you expect; in this example, we are checking that the math.floor() function is correctly returning the largest integer less than or equal to the given floating-point number.
Because a module or package is ultimately just a collection of Python functions (or methods, which are just functions grouped into classes), it is quite possible to write a series of assert statements that call your functions and check that the returned values are what you would expect.
Of course, this is a simplification: often the results of calling one function will affect the output of another function, and your functions can sometimes perform quite complex actions such as communicating with a remote API or storing data into a file on disk. In many cases, though, you can still use a series of assert statements to verify that your modules and packages are working the way you would expect.
While you could put your assert statements into a Python script and run them, a better approach is to use the unittest module from the Python Standard Library. This module allows you to group your unit tests into
test cases, run additional code before and after the tests are run, and access a whole raft of different types of assert statements to make your testing easier.
Let's see how we can use the unittest module to implement a series of unit tests for the quantities package we implemented in Chapter 6, Creating Reusable Modules. Place a copy of this package into a convenient directory and create a new Python source file named test_quantities.py in the same directory. Then, add the following code to this file:
import unittest
import quantities

class TestQuantities(unittest.TestCase):
    def setUp(self):
        quantities.init("us")

    def test_new(self):
        q = quantities.new(12, "km")
        self.assertEqual(quantities.value(q), 12)
        self.assertEqual(quantities.units(q), "kilometer")

    def test_convert(self):
        q1 = quantities.new(12, "km")
        q2 = quantities.convert(q1, "m")
        self.assertEqual(quantities.value(q2), 12000)
        self.assertEqual(quantities.units(q2), "meter")

if __name__ == "__main__":
unittest.main()Let's take a closer look at what this code does. First off, the TestQuantities class is used to hold a number of related unit tests. You would normally define a separate unittest.TestCase subclass for each of the major groups of unit tests that you need to perform. Within our TestQuantities class, we define a setUp() method which contains code that needs to be executed before our tests are run. If we wanted to, we could also define a tearDown() method that would be executed after the tests have been completed.
We then define two unit tests, which we have called test_new() and test_convert(). These test the quantities.new() and quantities.convert() functions, respectively. You would typically have a separate unit test for each piece of functionality that you need to test. You can call your unit tests anything you like, so long as the method name starts with test.
Within our test_new() unit test, we create a new quantity and then call the self.assertEqual() method to ensure that the expected quantity was created. As you can see, we're not just limited to using the built-in assert statement; there are dozens of different assertXXX() methods that you can call to test your code in various ways. All of these will raise an AssertionError if the assertion fails.
The last part of our testing script calls unittest.main() when the script is executed. This function looks for any unittest.TestCase sub-classes that you have defined and runs each test case in turn. For each test case, the setUp() method is called if it exists, followed by the various testXXX() methods that you have defined, and finally, the teardown() method is called if it exists.
Let's try running our unit test. Open up a terminal or command-line window, use the cd command to set the current directory to the directory holding your test_quantities.py script, and try typing the following:
python test_quantities.py
All going well, you should see the following output:
..
---------------------------------------------------------------
Ran 2 tests in 0.000s

OK
By default, the unittest module doesn't show you much about the tests that have been run, other than that it ran your unit tests without any problems. If you want more detail, you can increase the verbosity of your tests, for example by adding a parameter to the unittest.main() statement in your test script:
unittest.main(verbosity=2)
Alternatively, you can use the -v command-line option to achieve the same result:
python test_quantities.py -v
The aim of unit testing is to check that your code is working. A good rule of thumb is to have a separate test case for each publicly accessible module within your package and a separate unit test for each feature provided by that module. The unit test code should aim to test at least the usual operation of the feature to make sure it works. If you wish, you can also choose to write additional testing code within your unit tests, or even additional unit tests, to check for particular edge cases in your code.
To use a concrete example, in the test_convert() method we wrote in the previous section, you might want to add code to check that a suitable exception is raised if the user tries to convert a distance into a weight. For example:
q = quantities.new(12, "km")
with self.assertRaises(ValueError):
    quantities.convert(q, "kg")
The question is: how many edge cases should you test for? There are potentially hundreds of different ways in which someone can use your module incorrectly. Should you write unit tests for each of these?
In general, no. It isn't worth your while trying to test every possible edge case. Certainly, you may wish to test a few of the main possibilities, just to make sure your module is able to handle the most obvious errors, but beyond this, writing additional tests probably isn't worth the effort.
Coverage is a measure of how much of your code is being tested by your unit tests. To understand how this works, consider the following Python function:
[1] def calc_score(x, y):
[2]     if x == 1:
[3]         score = y * 10
[4]     elif x == 2:
[5]         score = 25 + y
[6]     else:
[7]         score = y
[8]
[9]     return score
Now, imagine that we create the following unit test code for our calc_score() function:
assert calc_score(1, 5) == 50
assert calc_score(2, 10) == 35
How much of the calc_score() function has our unit test covered? Our first assert statement is calling calc_score() with x as 1 and y as 5. If you follow the line numbers, you'll see that calling this function with this set of parameters will cause lines 1, 2, 3, and 9 to be executed. Similarly, the second assert statement calls calc_score() with x as 2 and y as 10, causing lines 1, 4, 5, and 9 to be executed.
In total, these two assert statements caused lines 1, 2, 3, 4, 5, and 9 to be executed. Ignoring the blank line, our test did not include lines 6 and 7. Thus, our unit test has covered six of the eight lines in our function, giving us a code coverage value of 6/8 = 75%.
Obviously, you won't calculate code coverage by hand. There are some excellent tools that will calculate code coverage for your Python testing code. Take a look, for example, at the coverage package (https://pypi.python.org/pypi/coverage).
The basic concept of code coverage is that you want your tests to cover all your code. Whether or not you use a tool such as coverage to measure code coverage, it's a good idea to write your unit tests to include as close to 100% of your code as possible.
While we are looking at the idea of testing Python code, it is worth mentioning the concept of test-driven development. Using test-driven development, you first choose what you want your module or package to do, and then you write unit tests to ensure that the module or package works the way you want it to—before you write it. In this way, the unit tests act as a kind of specification for the module or package; they tell you what your code should do, and your task is then to write the code so that it passes all the tests.
Test-driven development can be a useful way of implementing your modules and packages. Whether or not you use it, of course, is up to you—but if you have the discipline to write the unit tests first, test-driven development can be a great way of making sure you've implemented your code correctly, and your modules continue to do what you expect them to as your code grows and changes over time.
If your module or package calls an external API or performs some other complex, expensive, or time-consuming operation, you may want to investigate the unittest.mock package in the Python Standard Library. Mocking is the process of replacing some functionality in your program with a dummy function that immediately returns suitable data for testing.
Mocking is a complicated process, and it can take some doing to get it right, but the technique is absolutely worthwhile if you want to run unit tests over code that would otherwise be too slow, cost money each time you ran it, or depends on external systems to operate.
Now that we have been introduced to the concept of unit testing, taken a look at how the unittest standard library module works, and looked at some of the more complicated but important aspects of writing unit tests, let's now see how unit tests can be used to assist with the development and testing of your modules and packages.
First off, you should aim to write unit tests for at least the main functions defined by your module or package. Start by testing the most important functions, and add tests for the more obvious error conditions to make sure errors are being handled correctly. You can always add extra tests for the more obscure parts of your code later.
If you are writing unit tests for a single module, you should place your test code in a separate Python script, named, for example, tests.py, and place this in the same directory as your module. The following image shows a good way of organizing your code when writing a single module:
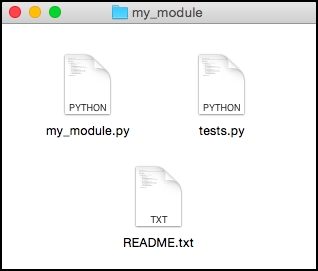
If you have multiple modules in the same directory, you can either combine the unit tests for all the modules into the tests.py script, or else rename it to something like test_my_module.py to make it clear which module is being tested.
For a package, make sure you place the tests.py script in the directory that contains the package, not inside the package itself:

If you place the test.py script inside the package directory, you are likely to encounter problems when your unit tests attempt to import the package.
Your tests.py script should define a unittest.TestCase object for each publicly accessible module in your package, and each of these objects should have a testXXX() method for each function or major piece of functionality defined within the module.
Doing this allows you to test your module or package simply by executing the following command:
python test.py
You should run your unit tests whenever you want to check that your module is working, and in particular before uploading or sharing your module or package with other people.