
Overview
In this chapter, we will examine exactly how to load backups, samples, and test databases into a target MongoDB instance, and just as importantly, you will learn how to export an existing dataset for backup and restoration at a later date. By the end of this chapter, you will be able to backup, export, import, and restore MongoDB data into an existing server. This allows you to recover data from disasters as well as quickly load known information into a system for testing.
Introduction
In the previous chapters, we have relied primarily on the sample data preloaded into a MongoDB Atlas instance. Unless you are working on a new project, this is generally the way a database will first appear to you. However, when you are hired or moved to a different project with a MongoDB database, it will contain all the data that was created before you started there.
Now, what if you require a local copy of this data to test your applications or queries? It is often not safe or feasible to run queries directly against production databases, so the process of duplicating datasets onto a testing environment is quite common. Similarly, when creating a new project, you may wish to load some sample data or test data into the database. In this chapter, we will examine the procedures for migrating, importing or exporting for an existing MongoDB server and setting up a new database with existing data.
Note
Throughout this chapter, the exercises and activities included are iterations on a single scenario. The data and examples are based on the MongoDB Atlas sample database titled sample_mflix.
For the duration of this chapter, we will follow a set of exercises based on a theoretical scenario. This is an expansion of the scenario covered in Chapter 7, Data Aggregation and Chapter 8, Coding JavaScript in MongoDB. As you may recall, a cinema chain asked you to create queries and programs that would analyze their database to produce a list of movies to screen during their promotional season.
Over the course of these chapters, you built up some aggregations whose output was a new collection containing summary data. You also created an application that enabled users to update movies programmatically. The company has been so delighted with your work that they have decided to migrate the entire system to more significant, better hardware. Although the system administrators feel they are confident in migrating the existing MongoDB instance to the new hardware, you have decided it would be best if you manually test the procedure to ensure you can assist if required.
The MongoDB Utilities
The mongo shell does not include functions for exporting, importing, backup or restore. However, MongoDB has created methods for accomplishing this, so that no scripting work or complex GUIs are needed. For this, several utility scripts are provided that can be used to get data in or out of the database in bulk. These utility scripts are:
- mongoimport
- mongoexport
- mongodump
- mongorestore
We will cover each of these utilities in detail in the upcoming sections. As their names suggest, these four utilities correspond to importing documents, exporting documents, backing up a database and restoring a database. We will start with the topic of exporting data.
Exporting MongoDB Data
When it comes to moving data in and out of MongoDB in bulk, the most common and generally useful utility is mongoexport. This command is useful because it is one of the primary ways to extract large amounts of data from MongoDB in a usable format. Getting your MongoDB data out into a JSON file allows you to ingest it with other applications or databases and share data with stakeholders outside of MongoDB.
It is important to note that mongoexport must run on a single specified database and collection. You cannot run mongoexport on an entire database or multiple collections. We will see how to accomplish larger scope backups like these later in the chapter. The following snippet is an example of mongoexport in action:
mongoexport --uri=mongodb+srv://USERNAME:[email protected]/sample_mflix –quiet --limit=10 --sort="{theaterId:1}" --collection=theaters --out=output.json
This example is a more complex command, which includes some optional parameters and explicitly sets others. In practice though, your export commands may be much more straightforward. The structure and parameters used here are explained in detail in the following section.
Using mongoexport
The best way to learn the mongoexport syntax is to build up a command parameter by parameter. So let's do that, beginning with the simplest possible version of an export:
mongoexport –-collection=theaters
As you can see, in its simplest form, the command only requires a single parameter: –-collection. This parameter is the collection for which we wish to export our documents.
If you execute this command, you may encounter some puzzling results, as follows:
2020-03-07-T13:16:09.152+1100 error connecting to db server: no reachable servers
We get this result because we have not specified a database or URI. In such cases, where these details are not specified, mongoexport defaults to using a local MongoDB on port 27017 and the default database. Since we have been running our MongoDB server on Atlas in previous chapter examples and exercises, let's update our command to specify these parameters.
Note
You cannot specify both database and URI; this is because the database is a part of the URI. In this chapter, we will use URI for our exports.
The updated command would look as follows:
mongoexport --uri=mongodb+srv://USERNAME:[email protected]/sample_mflix --collection=theaters
Now that you have a valid command, run it against the MongoDB Atlas database. You will see the following output:
2020-08-17T11:07:23.302+1000 connected to: mongodb+srv://[**REDACTED**]@performancetuning.98afc.gcp.mongodb.net/sample_mflix
{"_id":{"$oid":"59a47286cfa9a3a73e51e72c"},"theaterId":1000,"location": {"address":{"street1":"340 W Market","city":"Bloomington","state":"MN","zipcode":"55425"},"geo": {"type":"Point","coordinates":[-93.24565,44.85466]}}}
{"_id":{"$oid":"59a47286cfa9a3a73e51e72d"},"theaterId":1003,"location": {"address":{"street1":"45235 Worth Ave.","city":"California","state":"MD","zipcode":"20619"},"geo": {"type":"Point","coordinates":[-76.512016,38.29697]}}}
{"_id":{"$oid":"59a47286cfa9a3a73e51e72e"},"theaterId":1008,"location": {"address":{"street1":"1621 E Monte Vista Ave","city":"Vacaville","state":"CA","zipcode":"95688"},"geo": {"type":"Point","coordinates":[-121.96328,38.367649]}}}
{"_id":{"$oid":"59a47286cfa9a3a73e51e72f"},"theaterId":1004,"location": {"address":{"street1":"5072 Pinnacle Sq","city":"Birmingham","state":"AL","zipcode":"35235"},"geo": {"type":"Point","coordinates":[-86.642662,33.605438]}}}
At the end of the output, you should see the number of exported records:
{"_id":{"$oid":"59a47287cfa9a3a73e51ed46"},"theaterId":952,"location": {"address":{"street1":"4620 Garth Rd","city":"Baytown","state":"TX","zipcode":"77521"},"geo": {"type":"Point","coordinates":[-94.97554,29.774206]}}}
{"_id":{"$oid":"59a47287cfa9a3a73e51ed47"},"theaterId":953,"location": {"address":{"street1":"10 McKenna Rd","city":"Arden","state":"NC","zipcode":"28704"},"geo": {"type":"Point","coordinates":[-82.536293,35.442486]}}}
2020-08-17T11:07:24.992+1000 [########################] sample_mflix.theaters 1564/1564 (100.0%)
2020-08-17T11:07:24.992+1000 exported 1564 records
With your URI specified, the export operation worked, and you can see all the documents from the theatres collection. However, it's not very useful having all these documents flooding your output. You could use some shell commands to pipe or append this output into a file, but the mongoexport command provides another parameter in its syntax for outputting to a file automatically. You can see this parameter (--out) in the following command:
mongoexport --uri=mongodb+srv://USERNAME:[email protected]/sample_mflix --collection=theaters --out=output.json
After running this command, you will see the following output:
2020-08-17T11:11:44.499+1000 connected to: mongodb+srv://[**REDACTED**]@performancetuning.98afc.gcp.mongodb.net/sample_mflix
2020-08-17T11:11:45.634+1000 [........................] sample_mflix.theaters 0/1564 (0.0%)
2020-08-17T11:11:45.694+1000 [########################] sample_mflix.theaters 1564/1564 (100.0%)
2020-08-17T11:11:45.694+1000 exported 1564 records
Now, there is a new file created in that directory called output.json. If you look inside this file, you can see our documents exported from the theatres collection.
The parameters uri, collection, and out enable the majority of use cases for exporting. Once you have your data in a file on the disk, it is easy to integrate it with other applications or scripts.
mongoexport Options
We now know about the three most important options for a mongoexport. However, there are several other useful options that are helpful for exporting data from MongoDB. Here are some of these options and their effects:
- --quiet: This option reduces the amount of output sent to the command line during export.
- --type: This will affect how the documents are printed in the console and defaults to JSON. For example, you can export the data in Comma-Separated Value (CSV) format by specifying CSV.
- --pretty: This outputs the documents in a nicely formatted manner.
- --fields: This specifies a comma-separated list of keys in your documents to be exported, similar to an export level projection.
- --skip: This works similar to a query level skip, skipping documents in the export.
- --sort: This works similar to a query level sort, sorting documents by some keys.
- --limit: This works similar to a query level limit, limiting the number of documents outputted.
Here is an example with some of these options used, in this case outputting ten theatre documents, sorted by id, into a file called output.json. Additionally, the --quiet parameter has also been used:
mongoexport --uri=mongodb+srv://USERNAME:[email protected]/sample_mflix --quiet --limit=10 --sort="{theaterId:1}" --collection=theaters --out=output.json
Since we have used the --quiet option, we will not see any output at all.
> mongoexport --uri=mongodb+srv://testUser:testPassword@performancet uning.98afc.gcp.mongodb.net/sample_mflix --quiet --limit=10 --sort="{theaterId:1}" --collection=theaters --out=output.json
>
However, if we look inside the output.json file, we can see the ten documents sorted by ID:
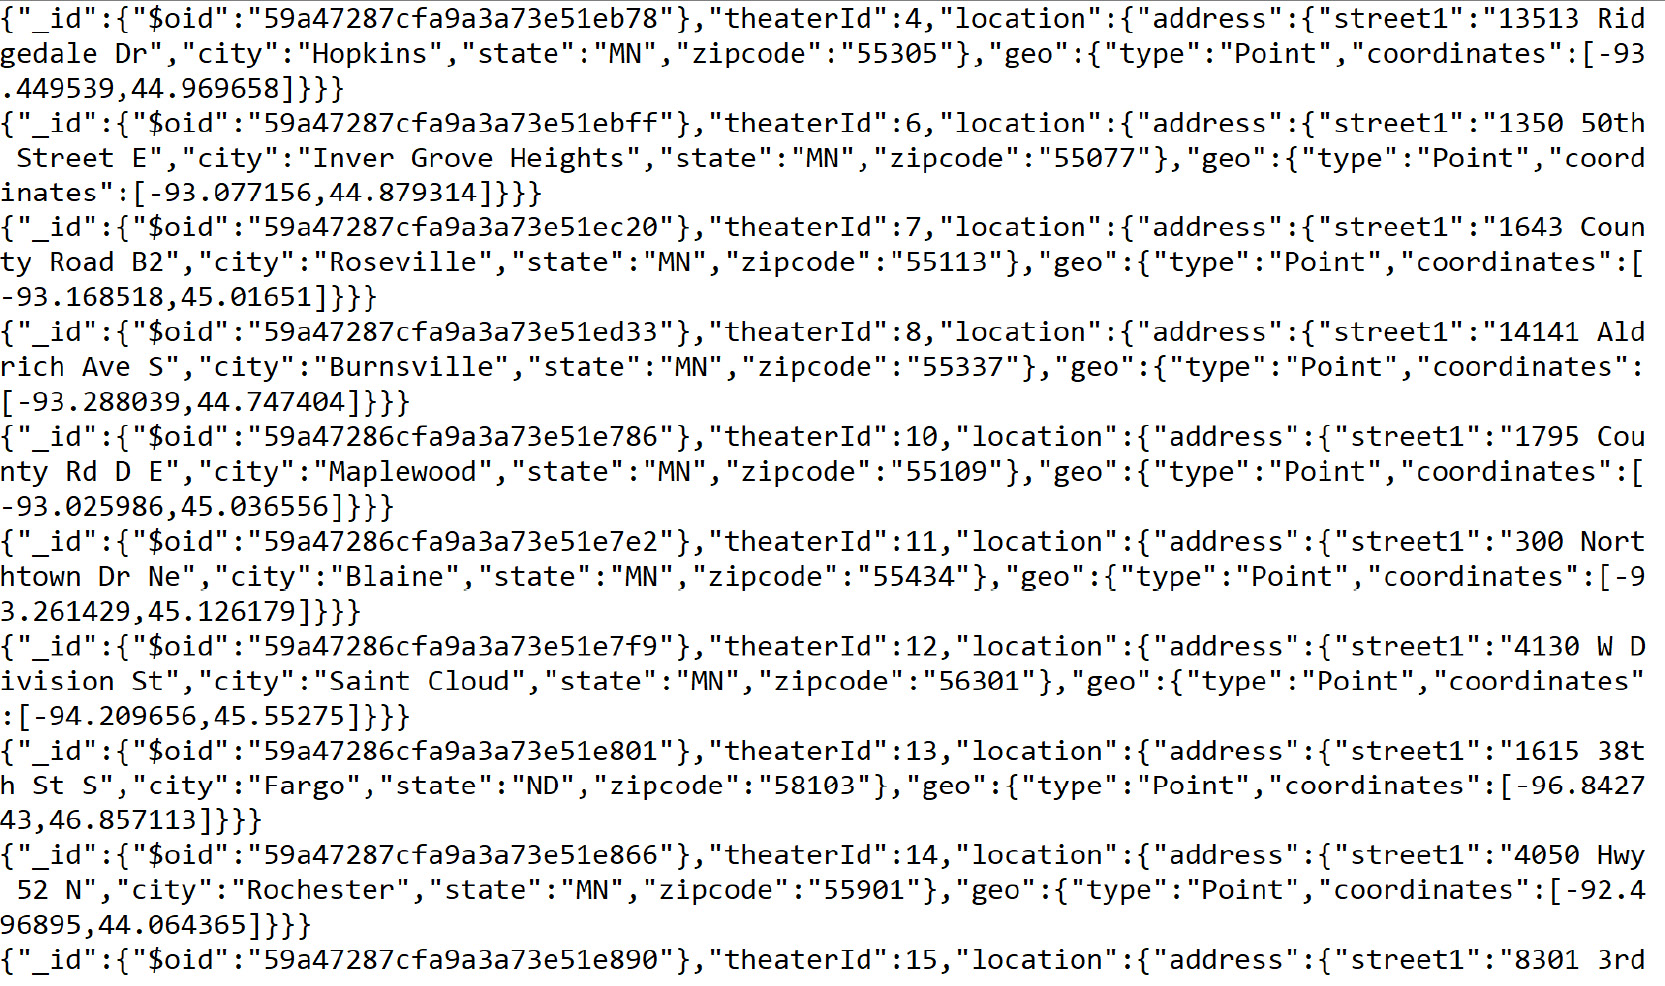
Figure 11.1: Contents of output.json file (truncated)
There is another option that can be used for more advanced exports, and that is the query option. The query option allows you to specify a query, using the same format as your standard MongoDB queries. Only documents matching this query will be exported. Using this option in combination with other options like --fields, --skip, and --limit allows you to define a complete query with formatted output and then export that into a file.
The following is an export that uses the query option to return a specific subset of documents. In this case, we are getting all cinemas with a theaterId of 4.
mongoexport --uri=mongodb+srv://USERNAME:[email protected]/sample_mflix --query="{theaterId: 4}" --collection=theaters
Note
On MacOS you may need to wrap the theaterId in quotation marks, for example: --query="{"theaterId": 4}"
We will now see the document we're looking for as follows:
2020-08-17T11:22:48.559+1000 connected to: mongodb+srv://[**REDACTED**]@performancetuning.98afc.gcp.mongodb.net/sample_mflix
{"_id":{"$oid":"59a47287cfa9a3a73e51eb78"},"theaterId":4,"location": {"address":{"street1":"13513 Ridgedale Dr","city":"Hopkins","state":"MN","zipcode":"55305"},"geo": {"type":"Point","coordinates":[-93.449539,44.969658]}}}
2020-08-17T11:22:48.893+1000 exported 1 record
Let us use these options in the next Exercise.
Exercise 11.01: Exporting MongoDB Data
Before you begin this exercise, let's revisit the movie company from the scenario outlined in the Introduction section. Say your client (the cinema company) is going to migrate their existing data, and you're worried about any loss of valuable information. One of the first things you decide to do is export the documents from the database as JSON files, which can be stored in inexpensive cloud storage in case of a disaster. Additionally, you are going to create a different export for each film category.
Note
To demonstrate knowledge of mongoexport, we will not create an export for each category, but just for a single category. You will also only export the top three documents.
In this exercise, you will use mongoexport to create a file called action_movies.json, which contains three action movies, sorted by release year. The following steps will help you accomplish the task:
- Fine-tune your export and save it for later. Create a new file called Exercise11.01.txt to store your export command.
- Next, type the standard mongoexport syntax with just the URI and movies collection:
mongoexport --uri=mongodb+srv://USERNAME:[email protected]/sample_mflix --collection=movies
- Add extra parameters to satisfy your conditions. First, output your export into a file called action_movies.json. Use the --out parameter as follows:
mongoexport --uri=mongodb+srv://USERNAME:[email protected]/sample_mflix --collection=movies --out=action_movies.json
- Next, add your sort condition to sort the movies by release year as per the specifications of this exercise. You can accomplish this using --sort:
mongoexport --uri=mongodb+srv://USERNAME:[email protected]/sample_mflix --collection=movies --out=action_movies.json --sort='{released: 1}'
- If you were to run this command at its current intermediary stage, you would encounter the following error:
2020-08-17T11:25:51.911+1000 connected to: mongodb+srv://[**REDACTED**]@performancetuning.98afc.gcp.mongodb.net/sample_mflix
2020-08-17T11:25:52.581+1000 Failed: (OperationFailed) Executor error during find command :: caused by :: Sort operation used more than the maximum 33554432 bytes of RAM. Add an index, or specify a smaller limit.
This is because there are a large number of documents that the MongoDB server is trying to sort for us. To improve the performance of your exports and imports, you can limit the number of documents you retrieve, so MongoDB doesn't have to sort so many for you.
- Add a --limit parameter to reduce the number of documents being sorted and satisfy the three-document condition:
mongoexport --uri=mongodb+srv://USERNAME:[email protected]/sample_mflix --collection=movies --out=action_movies.json --sort='{released: 1}' --limit=3
Finally, you need to add your query parameter to filter out any documents not in the movie genre.
Note
Depending on your operating system and shell, you may have to modify the single and double quotes to ensure the quoted values do not interfere with your shell. For example when using a query against a string, you may have to use double quotes around the filter document and single quotes around the values. For command prompt users, try escaping the double quotes with the backslash character, for example, query="{"genres": "Action"}"
The query is as follows:
mongoexport --uri=mongodb+srv://USERNAME:[email protected]/sample_mflix --collection=movies --out=action_movies.json --sort='{released : 1}' --limit=3 --query="{'genres': 'Action'}"
Note
On MacOS and Linux, you may need to change the quotation marks around strings within parameters, for example in the preceding query you will need to use: --query='{"genres": "Action"}'
- With your command complete, copy it from your Exercise11.01.txt file into your terminal or command prompt to run it:
2020-08-18T12:35:42.514+1000 connected to: mongodb+srv://[**REDACTED**]@performancetuning.98afc.gcp.mongodb.net/sample_mflix
2020-08-18T12:35:42.906+1000 exported 3 records
The output looks good so far, but you need to check your output file to ensure the correct documents have been exported. In the directory in which you just executed your command, you should see the new file action_movies.json. Open this file and view the contents inside.
Note
The plot field is removed to improve the clarity of the output.
You should see the following documents:

Figure 11.2: Contents of the action_movies.json file (truncated for brevity)
This exercise illustrated the fundamentals required to export your documents from MongoDB in a robust and flexible way. Combining the parameters learned here, most basic exports will now be easy. To master data exports in MongoDB, it is helpful to keep experimenting and learning.
Importing Data into MongoDB
You now know how to get your collection data out of MongoDB and into an easy-to-use format on disk. But say that you have this file on disk, and you want to share it with someone with their own MongoDB database? This situation is where mongoimport comes in handy. As you may have guessed from the name, this command is essentially the reverse of mongoexport, and it is designed to take the output of mongoexport as an input into mongoimport.
However, it is not only data exported from MongoDB that you can use with mongoimport. The command supports JSON, CSV and TSV formats, meaning data extracted from other applications or manually created can still be easily added to the database using mongoimport. By supporting these widespread file formats, the command becomes an all-purpose way to load bulk data into MongoDB.
As with mongoexport, mongoimport operates on a single target collection within the specified database. This means that if you wish to import data into multiple collections, you must separate the data into individual files.
Following is an example a complex mongoimport. We'll go through the syntax in detail during the next section.
mongoimport --uri=mongodb+srv://USERNAME:[email protected]/imports --collection=oldData --file=old.csv --type=CSV --headerline --ignoreBlanks --drop
Using mongoimport
The following is a mongoimport command with the fewest possible parameters. This is significantly simpler than preceding command.
mongoimport --db=imports --collection=contacts --file=contacts.json
This example should also look very similar to some of the snippets we saw in the previous section. It is almost identical to our mongoexport syntax, except, instead of providing a location to create a new file using --out, we're entering a --file parameter which specifies the data we wish to load in. Our database and collection parameters are provided with the same syntax as in the mongoexport examples.
As you may have guessed, another similarity that mongoimport shares with mongoexport is that, by default, it would run against a MongoDB database running on your local machine. We use the same --uri parameter to specify that we are loading data into a remote MongoDB server—in this case, on MongoDB Atlas.
Note
As with mongoexport, the db and uri parameters are mutually exclusive as the database is defined in the uri itself.
The mongoimport command, when using the --uri parameter, will look as follows:
mongoimport --uri=mongodb+srv://USERNAME:[email protected]/imports --collection=contacts --file=contacts.json
Before you can execute this command against your MongoDB database and import, you require a file containing valid data. Let's create one now. One of the simplest ways to create importable data is to run a mongoexport. However, to improve your knowledge of importing files, we'll create one from scratch.
You would begin by creating a file called contacts.json. Open the file in a text editor and create some very simple documents. When importing JSON files, each line within the file must contain exactly one document.
The contacts.json file should look as follows:
//contacts.json
{"name": "Aragorn","location": "New Zealand","job": "Park Ranger"}
{"name": "Frodo","location": "New Zealand","job": "Unemployed"}
{"name": "Ned Kelly","location": "Australia","job": "Outlaw"}
Execute the following import:
mongoimport --uri=mongodb+srv://USERNAME:[email protected]/imports --collection=contacts --file=contacts.json
This will result in the following output:
2020-08-17T20:10:38.892+1000 connected to: mongodb+srv://[**REDACTED**]@performancetuning.98afc.g
cp.mongodb.net/imports
2020-08-17T20:10:39.150+1000 3 document(s) imported successfully. 0 document(s) failed to import.
You can also use a JSON array format for your file, meaning your import file contains an array of many different JSON documents. In that case, you must specify the --jsonArray option in your command. This JSON array structure should be very familiar to you by now, as it matches both the mongoexport output as well as the results you receive from MongoDB queries. For example, if your file contains an array as follows:
[
{
"name": "Aragorn",
"location": "New Zealand",
"job": "Park Ranger"
},
{
"name": "Frodo",
"location": "New Zealand",
"job": "Unemployed"
},
{
"name": "Ned Kelly",
"location": "Australia",
"job": "Outlaw"
}
]
You could still import the file using the mongoimport command with the --jsonArray option as follows:
mongoimport --uri=mongodb+srv://USERNAME:[email protected]/imports --collection=contacts --file=contacts.json --jsonArray
This will result in the following output:
2020-08-17T20:10:38.892+1000 connected to: mongodb+srv://[**REDACTED**]@performancetuning.98afc.g
cp.mongodb.net/imports
2020-08-17T20:10:39.150+1000 3 document(s) imported successfully. 0 document(s) failed to import.
Note
In the preceding example, you will notice that you can provide _id values for documents in the import. If no _id is provided, one will be generated for the document. You must ensure that the _id you provide is not already used; otherwise, the mongoimport command will throw an error.
These two imports have shown us simple ways to get data into our MongoDB database, but let's have a look at what happens when things go wrong. Let's modify our file to specify the _id for a few of our documents.
[
{
"_id": 1,
"name": "Aragorn",
"location": "New Zealand",
"job": "Park Ranger"
},
{
"name": "Frodo",
"location": "New Zealand",
"job": "Unemployed"
},
{
"_id": 2,
"name": "Ned Kelly",
"location": "Australia",
"job": "Outlaw"
}
]
Execute this once, and you should get an output without error.
mongoimport --uri=mongodb+srv://USERNAME:[email protected]/imports --collection=contacts --file=contacts.json --jsonArray
You will see the following output:
2020-08-17T20:12:12.164+1000 connected to: mongodb+srv://[**REDACTED**]@performancetuning.98afc.g
cp.mongodb.net/imports
2020-08-17T20:12:12.404+1000 3 document(s) imported successfully. 0 document(s) failed to import.
Now, if you rerun the same command, you see an error because that _id value already exists in your collection.
2020-08-17T20:12:29.742+1000 connected to: mongodb+srv://[**REDACTED**]@performancetuning.98afc.g
cp.mongodb.net/imports
2020-08-17T20:12:29.979+1000 continuing through error: E11000 duplicate key error collection: imp
orts.contacts index: _id_ dup key: { _id: 1 }
2020-08-17T20:12:29.979+1000 continuing through error: E11000 duplicate key error collection: imp
orts.contacts index: _id_ dup key: { _id: 2 }
2020-08-17T20:12:29.979+1000 1 document(s) imported successfully. 2 document(s) failed to import.
You can see the error in your output. Another thing you may notice is that the documents without problems are still imported successfully. mongoimport will not fail on a single document if you're importing a ten-thousand document file.
Say you did want to update this document without changing its _id. You couldn't use this mongoimport command because you would receive a duplicate key error every time.
You can log into MongoDB using the mongo shell and manually remove this document before importing, but this would be a slow way to do it. With mongoimport, we can use the --drop option to drop the collection before the import takes place. This is a great way to ensure that what exists in your file exists in the collection.
For example, consider that you have the following documents in our collection before our import:
MongoDB Enterprise PerformanceTuning-shard-0:PRIMARY> db.contacts.find({})
{ "_id" : ObjectId("5e0c1db3fa8335898940129ca8"), "name": "John Smith"}
{ "_id" : ObjectId("5e0c1db3fa8335898940129ca8"), "name": "Jane Doe"}
{ "_id" : ObjectId("5e0c1db3fa8335898940129ca8"), "name": "May Sue"}
Now, run the following mongoimport command with --drop:
mongoimport --uri=mongodb+srv://USERNAME:[email protected]/imports --collection=contacts –-file=contacts.json --jsonArray --drop
2020-08-17T20:16:08.280+1000 connected to: mongodb+srv://[**REDACTED**]@performancetuning.98afc.g
cp.mongodb.net/imports
2020-08-17T20:16:08.394+1000 dropping: imports.contacts
2020-08-17T20:16:08.670+1000 3 document(s) imported successfully. 0 document(s) failed to import.
You will see that the collection has the following documents once the command is executed, view these documents using the find command.
db.contacts.find({})
You should see the following output:
{ "_id" : ObjectId("5f3a58e8fd0803fc3dec8cbf"), "name" : "Frodo", "location" : "New Zealand", "job" : "Unemployed" }
{ "_id" : 1, "name" : "Aragorn", "location" : "New Zealand", "job" : "Park Ranger" }
{ "_id" : 2, "name" : "Ned Kelly", "location" : "Australia", "job" : "Outlaw" }
In the next section, we will look at the options we can use with mongoimport.
mongoimport Options
We now know about the fundamental options you need to use mongoimport with the --uri, --collection, and --file parameters. But, just as with mongoexport in our last section, there are several additional options you may wish to use when running the command. Many of these options are the same as from mongoexport. The following list describes some of the options and their effects.
- --quiet: This reduces the amount of output messaging from the import.
- --drop: This drops the collection before beginning import.
- --jsonArray: A JSON type only, this specifies if the file is in a JSON array format.
- --type: This can be either JSON, CSV, or TSV to specify what type of file will be imported, but the default type is JSON.
- --ignoreBlanks TSV and CSV only, this will ignore empty fields in your import file.
- --headerline : TSV and CSV only, this will assume the first line of your import file is a list of field names.
- --fields: TSV and CSV only, this will specify a comma-separated list of keys in your documents for CSV and TSV formats. This is only needed if you do not have a header line.
- --stopOnError: If specified, the import will stop on the first error it encounters.
Here is an example with some more of these options used—specifically, a CSV import with a header line. We will also have to ignore blanks so that a document is not given a blank _id value.
Here is our .csv file, called contacts.csv:
_id,name,location,job
1,Aragorn,New Zealand,Park Ranger
,Frodo,New Zealand,Unemployed
2,Ned Kelly,Australia,Outlaw
We will use the following command to import the CSV:
mongoimport --uri=mongodb+srv://USERNAME:[email protected]/imports --collection=contacts --file=contacts.csv --drop --type=CSV --headerline --ignoreBlanks
2020-08-17T20:22:39.750+1000 connected to: mongodb+srv://[**REDACTED**]@performancetuning.98afc.gcp.mongodb.net/imports
2020-08-17T20:22:39.863+1000 dropping: imports.contacts
2020-08-17T20:22:40.132+1000 3 document(s) imported successfully. 0 document(s) failed to import.
The preceding command results in the following documents in our collection:
MongoDB Enterprise atlas-nb3biv-shard-0:PRIMARY> db.contacts.find({})
{ "_id" : 2, "name" : "Ned Kelly", "location" : "Australia", "job" : "Outlaw" }
{ "_id" : 1, "name" : "Aragorn", "location" : "New Zealand", "job" : "Park Ranger" }
{ "_id" : ObjectId("5f3a5a6fc67ba81a6d4bcf69"), "name" : "Frodo", "location" : "New Zealand", "job" : "Unemployed" }
Of course, these are only some of the more common options you may encounter. There is a full list available in the documentation. It is useful to familiarize yourself with these in case you need to run a more advanced import to a differently configured MongoDB server.
Exercise 11.02: Loading Data into MongoDB
In this scenario, you have successfully created an export of the clients' data on your local machine. You have set up a new server on a different version and would like to make sure the data imports correctly into the new configuration. Additionally, you have been given some data files from another, older database in CSV format that will be migrated to the new MongoDB server. You want to ensure this different format also imports correctly. With that in mind, your goal is to import two files (shown as follows) into your Atlas database and test that the documents exist in the correct collections.
In this exercise, you will use mongoimport to import two files (old.csv and new.json) into two separate collections (oldData and newData) and use drop to ensure no leftover documents exist.
This aim can be accomplished by executing the following steps:
- Fine-tune your import and save it for later. Create a new file called Exercise11.02.txt to store your export command.
- Create your old.csv and new.json files that contain the data to be imported. Either download the files from GitHub at https://packt.live/2LsgKS3 or copy the following into identical files in your current directory.
The old.csv file should look as follows:
_id,title,year,genre
54234,The King of The Bracelets,1999,Fantasy
6521,Knife Runner,1977,Science Fiction
124124,Kingzilla,1543,Horror
64532,Casabianca,1942,Drama
23214,Skyhog Day,1882,Comedy
The new.json file should look as follows:
[
{"_id": 54234,"title": "The King of The Bracelets","year": 1999,"genre": "Fantasy"},
{"_id": 6521, "title": "Knife Runner","year": 1977,"genre": "Science Fiction"},
{"_id": 124124,"title": "Kingzilla","year": 1543,"genre": "Horror"},
{"_id": 64532,"title": "Casabianca","year": 1942,"genre": "Drama"},
{"_id": 23214,"title": "Skyhog Day","year": 1882,"genre": "Comedy"}
]
- Enter the standard mongoimport syntax into your Exercise11.02.txt file, with just the URI, collection, and file location. Import your data into the "imports" database, importing the old data first:
mongoimport --uri=mongodb+srv://USERNAME:[email protected]/imports --collection=oldData --file=old.csv
- Now, start adding your extra parameters to satisfy the conditions for your CSV file. Specify type=CSV:
mongoimport --uri=mongodb+srv://USERNAME:[email protected]/ imports --collection=oldData --file=old.csv --type=CSV
- Next, because you have a header row in your old data, use the headerline parameter.
mongoimport --uri=mongodb+srv://USERNAME:[email protected]/imports --collection=oldData --file=old.csv --type=CSV --headerline
- When you saw a CSV import in some of the examples earlier in the chapter, the --ignoreBlanks parameter was used to ensure empty fields were not imported. This is a good practice, so add it here too.
mongoimport --uri=mongodb+srv://USERNAME:[email protected]/imports --collection=oldData --file=old.csv --type=CSV --headerline --ignoreBlanks
- Finally, for this exercise, you need to make sure you don't import on top of the existing data, as this may cause conflicts. To ensure your data is imported cleanly, use the --drop parameter as follows:
mongoimport --uri=mongodb+srv://USERNAME:[email protected]/imports --collection=oldData --file=old.csv --type=CSV --headerline --ignoreBlanks --drop
- That should be everything you need for your CSV import. Start writing your JSON import by copying your existing command on to a new line and then removing the CSV specific parameters.
mongoimport --uri=mongodb+srv://USERNAME:[email protected]/imports --collection=oldData --file=old.csv --drop
- Now, change the file and collection parameters by importing your new.json file into a newData collection as follows:
mongoimport --uri=mongodb+srv://USERNAME:[email protected]/imports --drop --collection=newData --file=new.json
- You can see that the data in your new.json file is in a JSON array format, so add the matching parameter, as follows:
mongoimport --uri=mongodb+srv://USERNAME:[email protected]/imports --collection=newData --file=new.json --drop --jsonArray
- You should now have the following two commands in your Exercise11.02.txt file.
mongoimport --uri=mongodb+srv://USERNAME:[email protected]/imports --collection=newData --file=new.json --drop --jsonArray
mongoimport --uri=mongodb+srv://USERNAME:[email protected]/imports --collection=oldData --file=old.csv --type=CSV --headerline --ignoreBlanks --drop
- Run your newData import using the following command:
mongoimport --uri=mongodb+srv://USERNAME:[email protected]/imports --collection=newData --file=new.json --drop --jsonArray
The output is as follows:
2020-08-17T20:25:21.622+1000 connected to: mongodb+srv://[**REDACTED**]@performancetuning.98afc.gcp.mongodb.net/imports
2020-08-17T20:25:21.734+1000 dropping: imports.newData
2020-08-17T20:25:22.019+1000 5 document(s) imported successfully. 0 document(s) failed to import.
- Now, execute the oldData import as follows:
mongoimport --uri=mongodb+srv://USERNAME:[email protected]/imports --collection=oldData --file=old.csv --type=CSV --headerline --ignoreBlanks --drop
The output is as follows:
2020-08-17T20:26:09.588+1000 connected to: mongodb+srv://[**REDACTED**]@performancetuning.98afc.gcp.mongodb.net/imports
2020-08-17T20:26:09.699+1000 dropping: imports.oldData
2020-08-17T20:26:09.958+1000 5 document(s) imported successfully. 0 document(s) failed to import.
- Check the two new collections in MongoDB by running the following command:
show collections
The output is as follows:
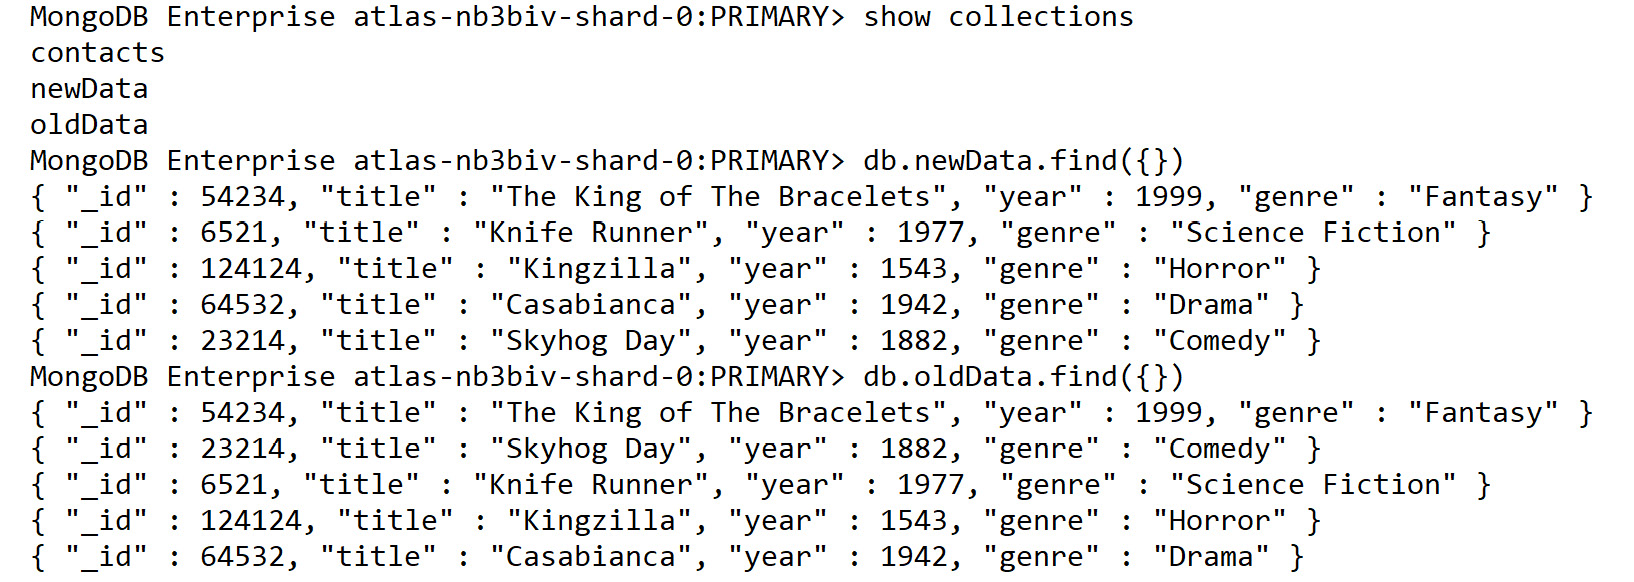
Figure 11.3: Displaying the new collections
First, we learned how to export our data from our MongoDB server. Now we are able to take that external data and enter it back into MongoDB using the import command. By combining these two simple commands, we can also shift data between instances of MongoDB or create data using external tools before importing them into MongoDB.
Backing up an Entire Database
Using mongoexport, we could theoretically take an entire MongoDB server and extract all the data in each database and collection. However, we would have to do this with one collection at a time, ensuring that the files correctly mapped to the original database and collection. Doing this manually is possible but difficult. A script could accomplish this reliably for an entire MongoDB server even with hundreds of collections
Fortunately, along with mongoimport and mongoexport, the MongoDB tools package also provides a tool for exporting the entire contents of a database. This utility is called mongodump. This command creates a backup of the entire MongoDB instance. All you need to provide is the URI (or host and port numbers), and the mongodump command does the rest. This export creates a binary file that can be restored using mongorestore (a command covered in the next section). By combining mongodump and mongorestore, you have a reliable way of backing up, restoring, and migrating your MongoDB databases across different hardware and software configurations.
Using mongodump
The following is a mongodump command in its simplest possible form:
mongodump
Interestingly enough, you can run mongodump without a single parameter. This is because the only piece of information the command needs to use is the location of your MongoDB server. If no URI or host is specified, it will attempt to create a backup of a MongoDB server running on your local system.
We can specify a URI using the --uri parameter to specify the location of our MongoDB server.
Note
As with mongoexport, the --db/--host and --uri parameters are mutually exclusive.
If we did have a local MongoDB server running, however, this is the sort of output we may receive:
2020-08-18T12:38:43.091+1000 writing imports.newData to
2020-08-18T12:38:43.091+1000 writing imports.contacts to
2020-08-18T12:38:43.091+1000 writing imports.oldData to
2020-08-18T12:38:43.310+1000 done dumping imports.newData (5 documents)
2020-08-18T12:38:44.120+1000 done dumping imports.contacts (3 documents)
2020-08-18T12:38:44.120+1000 done dumping imports.oldData (5 documents)
At the end of this command, we can see there is a new folder in our directory containing the dump of our database. By default, mongodump exports everything in our MongoDB server. However, we can be more selective with our exports, and we see an example of this in the next section.
mongodump Options
The mongodump command requires very minimal options to function; in most cases, you may only be using the –-uri parameter. However, there are several options we can use to get the most out of this utility command. Following is a list of some of the most useful options.
- --quiet: This reduces the amount of output messaging from the dump.
- --out: This allows you to specify a different location for the export to be written to disk, by default it will create a directory called "dump" in the same directory the command is run.
- --db: This allows you to specify a single database for the command to backup, by default it will back up all databases.
- --collection: This allows you to specify a single collection to backup, by default it will back up all collections.
- --excludeCollection: This allows you to specify a collection to exclude from the backup.
- --query: This allows you to specify a query document which will limit the documents being backed up to only those matching the query.
- --gzip: If enabled, the output of the export will be a compressed file in .gz format instead of a directory.
We'll look at creating a dump of a single database, with users and roles, to a specific location on disk. Because we are doing a single database dump, we can use --uri with the database we want to use.
mongodump --uri=mongodb+srv://USERNAME:[email protected]/imports --out="./backups"
2020-08-18T12:39:51.457+1000 writing imports.newData to
2020-08-18T12:39:51.457+1000 writing imports.contacts to
2020-08-18T12:39:51.457+1000 writing imports.oldData to
2020-08-18T12:39:51.697+1000 done dumping imports.newData (5 documents)
2020-08-18T12:39:52.472+1000 done dumping imports.contacts (3 documents)
2020-08-18T12:39:52.493+1000 done dumping imports.oldData (5 documents)
As you can see in the preceding screenshot, only the collections existing in our specified database were exported. You can even see this if you have a look at the folder containing our exports:
╭─ ~/backups
╰─ ls
imports/
╭─ ~/backups
╰─ ls imports
contacts.bson contacts.metadata.json newData.bson
newData.metadata.json oldData.bson oldData.metadata.json
You can see in the imports directory that two files are created for each collection in the dump, a .bson file containing our data and a .metadata.json file for the collection metadata. All mongodump results will match this format.
Next, use your --query parameter to dump only specific documents in a collection. You can specify your collection using a standard query document. For example, consider the following command on Windows:
mongodump --uri=mongodb+srv://USERNAME:[email protected]/sample_mflix --collection="movies" --out="./backups" --query="{genres: 'Action'}"
On MacOS/Linux, you will have to modify the quotation marks to the following:
mongodump --uri=mongodb+srv://USERNAME:[email protected]/sample_mflix --collection="movies" --out="./backups" --query='{"genres": "Action"}'
The output is as follows:
2020-08-18T12:57:06.533+1000 writing sample_mflix.movies to
2020-08-18T12:57:07.258+1000 sample_mflix.movies 101
2020-08-18T12:57:09.109+1000 sample_mflix.movies 2539
2020-08-18T12:57:09.110+1000 done dumping sample_mflix.movies (2539 documents)
The movies collection has over 20,000 documents in it, but we have exported only the 2539 matching documents.
Now, execute this same export without the --query parameter:
mongodump --uri=mongodb+srv://USERNAME:[email protected]/sample_mflix --collection="movies" --out="./backups"
The output is as follows:
2020-08-18T12:57:45.263+1000 writing sample_mflix.movies to
2020-08-18T12:57:45.900+1000 [........................] sample_mflix.movies 101/23531 (0.4%)
2020-08-18T12:57:48.891+1000 [........................] sample_mflix.movies 101/23531 (0.4%)
2020-08-18T12:57:51.894+1000 [##########..............] sample_mflix.movies 10564/23531 (44.9%
)
2020-08-18T12:57:54.895+1000 [##########..............] sample_mflix.movies 10564/23531 (44.9%)
2020-08-18T12:57:57.550+1000 [########################] sample_mflix.movies 23531/23531 (100.0%)
2020-08-18T12:57:57.550+1000 done dumping sample_mflix.movies (23531 documents)
We can see in the preceding output that the number of documents dumped is significantly higher without the --query parameter, meaning we have reduced the number of documents exported from our collection to only those matching the query.
As with the commands we learned earlier, these options only represent a small subset of the parameters you can provide to mongodump. By combining and experimenting with these options, you will be able to create a robust backup and snapshot solution for your MongoDB server.
By using mongoimport and mongoexport, you have been able to get specific collections in and out of a database easily. However, as part of the backup strategy for your MongoDB server, you may want to back up the entire state of your MongoDB database. In the next exercise, we will create a dump of only the sample_mflix database, rather than creating a larger dump of the many different databases we may have within our MongoDB server.
Exercise 11.03: Backing up MongoDB
In this exercise, you will use mongodump to create a backup of the sample_mflix database. Export the data to a .gz file in a folder called movies_backup.
Perform the following steps to complete this exercise:
- To fine-tune your import and save it for later, create a new file called Exercise11.03.txt to store your mongodump command.
- Next, type the standard mongodump syntax with just the --uri parameter set. Remember, the --uri includes the target database within it.
mongodump --uri=mongodb+srv://USERNAME:[email protected]/sample_mflix
- Next, add the parameter which specifies the location your dump should be saved to. In this case, that is a folder called movies_backup:
mongodump --uri=mongodb+srv://USERNAME:[email protected]/sample_mflix --out=movies_backup
- Finally, to automatically place your dump file in a .gz file, use the --gzip parameter and run the command.
mongodump --uri=mongodb+srv://USERNAME:[email protected]/sample_mflix --out=movies_backup --gzip
Note
Because this command will dump the entire sample_mflix database, it may take a little bit of time depending on your internet connection.
Once the command executes, you should see output similar to the following screenshot:
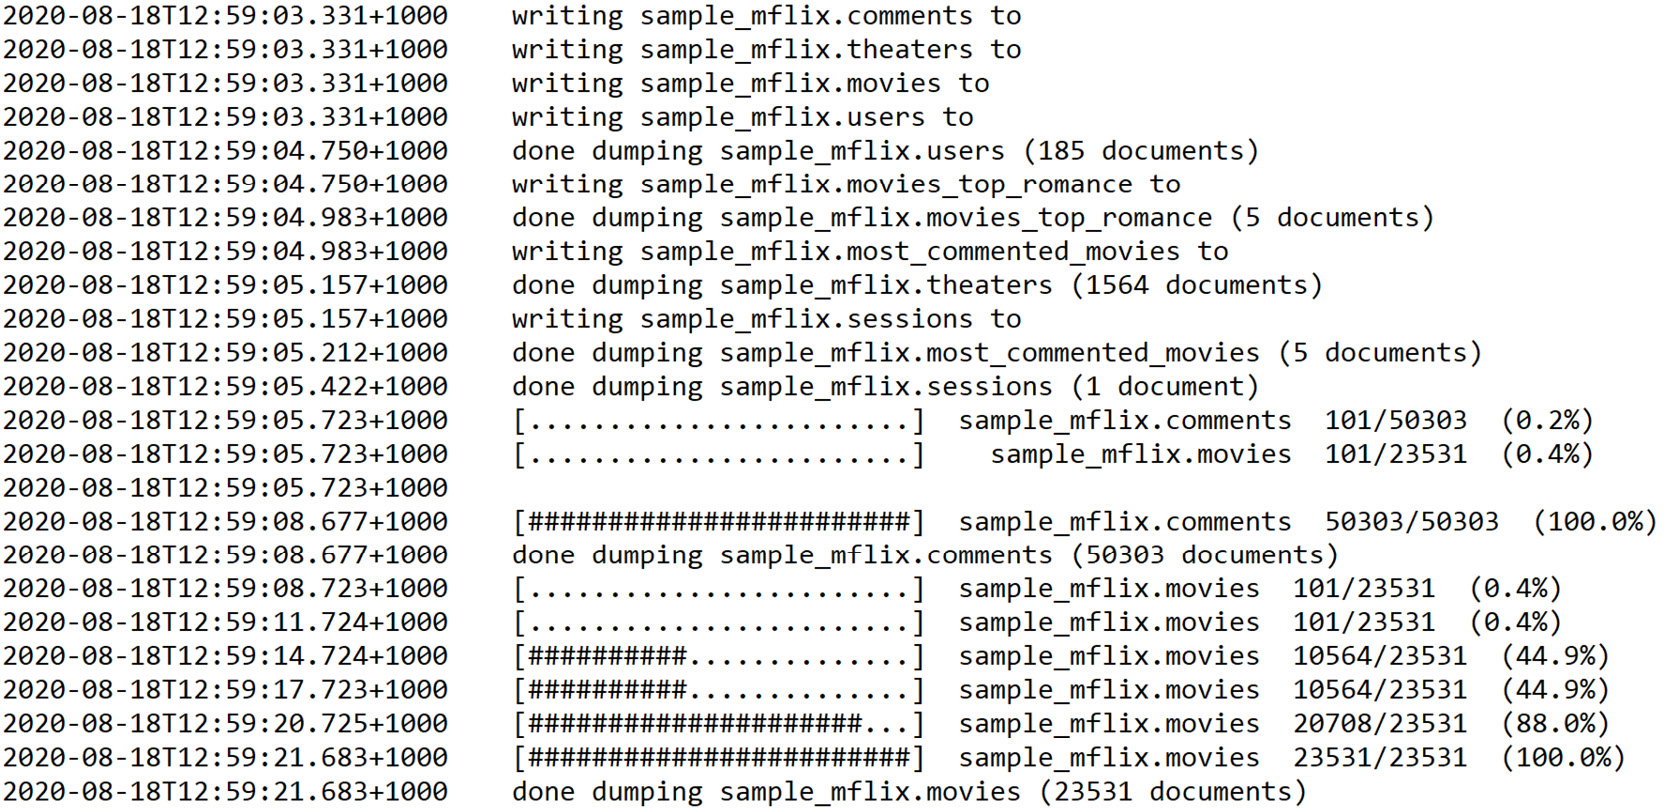
Figure 11.4: Output after the mongodump command is executed
- Check your dump directory. You can see all the mongodump data has been written into the correct directory.
╰─ ls movies_backup
sample_mflix/
╰─ ls movies_backup/sample_mflix
comments.bson.gz comments.metadata.json.gz
most_commented_movies.bson.gz most_commented_movies.metadata.json.gz
movies.bson.gz movies.metadata.json.gz
movies_top_romance.bson.gz movies_top_romance.metadata.json.gz
sessions.bson.gz sessions.metadata.json.gz
theaters.bson.gz theaters.metadata.json.gz
users.bson.gz users.metadata.json.gz
Over the course of this exercise, you have learned how to write a mongodump command that will correctly create a compressed backup of your database. You will now be able to integrate this technique as part of a database migration or backup strategy.
Restoring a MongoDB Database
In the previous section, we learned how to create a backup of an entire MongoDB database using mongodump. However, these exports would not be beneficial in our backup strategy unless we possess a method for loading them back into a MongoDB server. The command that complements mongodump by putting our export back into the Database is mongorestore.
Unlike mongoimport which allows us to import commonly used formats into MongoDB, mongorestore is only used to importing mongodump results. This means it is most commonly used for restoring most or all of a database to a specific state. The mongorestore command is ideal for restoring a dump after a disaster or for migrating an entire MongoDB instance to a new configuration.
When put in combination with our other commands, it should be clear that mongorestore completes the import and export lifecycle. With the three commands (mongoimport, mongoexport, and mongodump), we have learned we can export collection-level data, import collection-level data, export at the server level, and now finally, with mongorestore, we can import server-level information.
Using mongorestore
As with the other commands, let's have a look at a simple implementation of the mongorestore command.
mongorestore .dump
Or on MacOS/Linux, you can enter the following:
mongorestore ./dump/
The only required parameter we need to pass in is the location of the dump we are restoring. However, as you may have guessed from our other commands, by default mongorestore attempts to restore the backup to the local system.
Note
The dump location does not require a --parameter format and, instead, can be passed in as the last value of the command.
Here again, we can specify a URI using the --uri parameter to specify the location of our MongoDB server.
As an example, let's say that we did have a local MongoDB server running. To complete a restore we would need a previously created dump . Here is the dump command based off Exercise 11.03, Backing up MongoDB:
mongodump --uri=mongodb+srv://USERNAME:[email protected]/imports --out=./dump
If we now run mongorestore against this dump using the --drop option, you might see an output similar to the following:

Figure 11.5: Output after mongorestore is run using the –drop option
As you would expect, this output should be most similar to the output from mongoimport, telling us exactly how many documents and indexes were restored from the dump file. If your use case is to restore as part of a backup strategy, this simple command with minimal parameters is all you need.
By default, mongorestore restores every database, collection and document in the targeted dump. If you wish to be more specific with your restore, there are several handy options which allow you to restore only specific collections or even rename collections during the restore. Examples of these options are provided in the next section.
The mongorestore Options
Like mongodump, the mongorestore command can satisfy most use cases with just its fundamental parameters such as --uri and the location of the dump file. If you wish to accomplish a more specific type of restore, you can use some of the following options:
- --quiet: This reduces the amount of output messaging from the dump.
- --drop: Similar to mongoimport, the --drop option will drop the collections to be restored before restoring them, allowing you to ensure no old data remains after the command has run.
- --dryRun: This allows you to see the output of running a mongorestore without actually changing the information in the database, this is an excellent way to test your command before executing potentially dangerous operations.
- --stopOnError: If enabled, the process stops as soon as a single error occurs.
- --nsInclude: Instead of providing a database and collection specifically, this option allows you to define which namespaces (databases and collections) should be imported from the dump file. We will see an example of this later in the chapter.
- --nsExclude: This is the complimentary option for nsInclude, allowing you to provide a namespace pattern that is not imported when running the restore. There is an example of this in the next section.
- --nsFrom: Using the same namespace pattern as in nsInclude and nsExclude, this parameter can be used with --nsTo to provide a mapping of namespaces in the export to new namespaces in the restored backup. This allows you to change the names of collections during your restore.
Now, let us look at some examples of these options being used. Note that for these examples, we are using the dump file created in the previous section. As a reminder, this is the command required to create this dump file:
mongodump --uri=mongodb+srv://USERNAME:[email protected]/sample_mflix --out=dump
Firstly, assume you have a full mongodump created from the sample_mflix database. The following is an example of the command required to restore just a subset of our collections. You may notice the parameter is in the format of {database}.{collection}, but you can use the wild-star (*) operator to match all values. In the following example, we are including any collections that match the namespace "sample_mflix.movies" (only the movies collection of the sample_mflix database).
mongorestore --uri=mongodb+srv://USERNAME:[email protected] --drop --nsInclude="sample_mflix.movies" dump
Once this command finishes running, you should see an output similar to the following:
2020-08-18T13:12:28.204+1000 [###################.....] sample_mflix.movies 7.53MB/9.06MB (83.2%)
2020-08-18T13:12:31.203+1000 [#######################.] sample_mflix.movies 9.04MB/9.06MB (99.7%)
2020-08-18T13:12:33.896+1000 [########################] sample_mflix.movies 9.06MB/9.06MB (100.0%)
2020-08-18T13:12:33.896+1000 no indexes to restore
2020-08-18T13:12:33.902+1000 finished restoring sample_mflix.movies (6017 documents, 0 failures)
2020-08-18T13:12:33.902+1000 6017 document(s) restored successfully. 0 document(s) failed to restore.
In the output, you can see that only the matching namespaces are restored. Now let's examine how the nsFrom and nsTo parameters can be used to rename collections, using the same format as in the preceding example. We will rename collections in the sample_mflix database to the same collection name but in a new database called backup:
mongorestore --uri=mongodb+srv://USERNAME:[email protected] --drop --nsFrom="sample_mflix.*" --nsTo="backup.*" dump
Once execution of this command is complete, the final few lines should look similar to the following:
2020-08-18T13:13:54.152+1000 [################........] backup.movies 6.16MB/9.06MB (68.0%)
2020-08-18T13:13:54.152+1000
2020-08-18T13:13:56.916+1000 [########################] backup.comments 4.35MB/4.35MB (100.0%)
2020-08-18T13:13:56.916+1000 no indexes to restore
2020-08-18T13:13:56.916+1000 finished restoring backup.comments (16017 documents, 0 failures)
2020-08-18T13:13:57.153+1000 [###################.....] backup.movies 7.53MB/9.06MB (83.1%)
2020-08-18T13:14:00.152+1000 [#######################.] backup.movies 9.04MB/9.06MB (99.7%)
2020-08-18T13:14:02.929+1000 [########################] backup.movies 9.06MB/9.06MB (100.0%)
2020-08-18T13:14:02.929+1000 no indexes to restore
2020-08-18T13:14:02.929+1000 finished restoring backup.movies (6017 documents, 0 failures)
2020-08-18T13:14:02.929+1000 23807 document(s) restored successfully. 0 document(s) failed to restore.
Now, if we observe the collections in our MongoDB database, we will see that the sample_mflix collections exist in a database called backup as well, for example:
MongoDB Enterprise atlas-nb3biv-shard-0:PRIMARY> use backup
switched to db backup
MongoDB Enterprise atlas-nb3biv-shard-0:PRIMARY> show collections
comments
most_commented_movies
movies
movies_top_romance
sessions
theaters
users
Finally, let's have a quick look at how the dryRun parameter works. Take a look at the following command:
mongorestore --uri=mongodb+srv://USERNAME:[email protected] --drop --nsFrom="imports.*" --nsTo="backup.*" --dryRun .dump
You will notice an output about the command preparing the restore. However, it will not load any data. None of the underlying data in MongoDB has changed. This serves as an excellent way to make sure your command will run without error before executing it.
The mongorestore command completes our four commands, that is, mongoimport, mongoexport, mongodump, and mongorestore. Although it is straightforward to use mongorestore, if your backup strategy has a more complicated setup, you may need to use multiple options and to refer the documentation.
Exercise 11.04: Restoring MongoDB Data
In the previous exercise, you used mongodump to create a backup of the sample_mflix database. As part of the backup strategy for your MongoDB server, you now need to place this data back into the database. In this exercise, pretend that the database you exported from and imported to are different databases. So, to prove to the client that the backup strategy works, you will use mongorestore to import that dump back into a different namespace.
Note
You need to create a dump from Exercise 11.03, Backing up MongoDB, before completing this exercise.
In this exercise, you will use mongorestore to restore the sample_mflix database from the movies_backup dump created in the previous exercise, changing the namespace of each collection to backup_mflix.
- Fine-tune your import and save it for later. Create a new file called Exercise11.04.txt to store your restore command.
- Make sure the movies_backup dump from Exercise 11.03, Backing up MongoDB, is in your current directory as well. Otherwise, you can create a new backup using the following command:
mongodump --uri=mongodb+srv://USERNAME:[email protected]/sample_mflix --out=./movies_backup --gzip
- Next, type the standard mongorestore syntax with just the URI and location of the dump file being provided. Remember, the URI includes the target database within it:
mongorestore --uri=mongodb+srv://USERNAME:[email protected] ./movies_backup
- Since the dump file is in gzip format, you also need to add the --gzip parameter to your restore command so that it can decompress the data.
mongorestore --uri=mongodb+srv://USERNAME:[email protected] --gzip ./movies_backup
- To ensure the restore ends up with a clean result, use your --drop parameter to drop the relevant collections before you try and restore them:
mongorestore --uri=mongodb+srv://USERNAME:[email protected] --gzip --drop ./movies_backup
- Now, add the parameters that modify your namespace. Because you are restoring a dump of the sample_mflix database, "sample_mflix" will be the value of your nsFrom parameter:
mongorestore --uri=mongodb+srv://USERNAME:[email protected] --nsFrom="sample_mflix.*" --gzip --drop ./movies_backup
- This use case dictates that these collections will be restored in a database named backup_mflix. Provide this new namespace with the nsTo parameter as follows.
mongorestore --uri=mongodb+srv://USERNAME:[email protected] --nsFrom="sample_mflix.*" --nsTo="backup_mflix.*" --gzip --drop ./movies_backup
- Your command is now complete. Copy and paste this code into your Terminal or Command Prompt and run it. There will be a lot of output to show you the progress of the restore, but at the end, you should see an output like the following:
2020-08-18T13:18:08.862+1000 [####################....] backup_mflix.movies 10.2MB/11.7MB (86.7%)
2020-08-18T13:18:11.862+1000 [#####################...] backup_mflix.movies 10.7MB/11.7MB (90.8%)
2020-08-18T13:18:14.865+1000 [######################..] backup_mflix.movies 11.1MB/11.7MB (94.9%)
2020-08-18T13:18:17.866+1000 [#######################.] backup_mflix.movies 11.6MB/11.7MB (98.5%)
2020-08-18T13:18:20.217+1000 [########################] backup_mflix.movies 11.7MB/11.7MB (100.0%)
2020-08-18T13:18:20.217+1000 restoring indexes for collection backup_mflix.movies from metadata
2020-08-18T13:18:26.389+1000 finished restoring backup_mflix.movies (23531 documents, 0 failures)
2020-08-18T13:18:26.389+1000 75594 document(s) restored successfully. 0 document(s) failed to restore.
From reading the output, you can see that the restoration completed, restoring each existing collection into a new database titled backup_mflix. The output will even tell you exactly how many documents were written as part of the restore. For example, 23541 documents were restored into the movies collection.
Now if you log into your server with the mongo shell, you should be able to see your newly restored backup_mflix database and relevant collections as follows:
MongoDB Enterprise atlas-nb3biv-shard-0:PRIMARY> use backup_mflix
switched to db backup_mflix
MongoDB Enterprise atlas-nb3biv-shard-0:PRIMARY> show collections
comments
most_commented_movies
movies
movies_top_romance
sessions
theaters
users
And that's it. You have successfully restored your backup into the MongoDB server. With your working knowledge of mongorestore, you will now be able to backup, and migrate entire MongoDB databases or servers efficiently. As noted earlier in this chapter, you might have been able to manage this same task with mongoimport, but being able to use mongodump and mongorestore will make your task significantly simpler.
With the four key commands you've learned about in this chapter (mongoexport, mongoimport, mongodump and monogrestore), you should now be able to accomplish the majority of backup, migration and restoration tasks that you will encounter when working with MongoDB.
Activity 11.01: Backup and Restore in MongoDB
Your client (the cinema company) already has several scripts that run nightly to export, import, backup, and restore data. They run both backups and exports to ensure there are redundant copies of the data. However, due to their lack of experience with MongoDB, these commands are not functioning correctly. To resolve this, they have asked you to assist them with fine-tuning their backup strategy. Follow these steps to complete this activity:
Note
The four commands in this activity must be run in the correct order, as the import and restore commands depend on the output from the export and dump commands.
- Export: Export all theater data, with location and theaterId fields, sorted by theaterId, into a CSV file called theaters.csv:
mongoexport --uri=mongodb+srv://USERNAME:[email protected]/sample_mflix --db=sample_mflix --collection=theaters --out="theaters.csv" --type=csv --sort='{theaterId: 1}'
- Import: Import the theaters.csv file into a new collection called theaters_import:
mongoimport --uri=mongodb+srv://USERNAME:[email protected]/imports --collection=theaters_import --file=theaters.csv
- Dump: Dump every collection except the theaters collection into a folder called backups in gzip format:
mongodump --uri=mongodb+srv://USERNAME:[email protected]/sample_mflix --out=./backups –gz --nsExclude=theaters
- Restore: Restore the dump in the backups folder. Each collection should be restored into a database called sample_mflix_backup:
mongorestore --uri=mongodb+srv://USERNAME:[email protected] --from="sample_mflix" --to="backup_mflix_backup" --drop ./backups
Your goal is to take the provided scripts from the client, determine what is wrong with these scripts, and fix these problems. You can test that these scripts are running correctly on your own MongoDB server.
You can complete this objective in several ways, but remember what we have learned throughout the chapter and attempt to create simple, easy to use code. The following steps will help you to complete this task:
- The target database is specified twice, try removing the redundant parameter.
- Rerun the export command. We are missing an option specific to the CSV format. Add this parameter to ensure we export the theaterId and location fields.
Now looking at the import command, you should immediately notice there are some missing parameters required for CSV imports.
- Firstly for the dump command, one of the options is not correct; run the command for the hint.
- Secondly, the nsInclude option is not available for the dump command, as this is a mongorestore option. Replace it with the appropriate option for mongodump.
- In the restore command, there are some options with incorrect names. Fix these names.
- Also in the restore command, restore a gzip format dump from the preceding command. Add an option to your restore command to support this format.
- Finally, in the restore command, look at values of the nsFrom and nsTo options and check whether they are in the correct namespace format.
To test your results, run the four resulting commands in order (export, import, dump, restore.)
The output from the mongoexport command would look as follows:
2020-08-18T13:21:29.778+1000 connected to: mongodb+srv://[**REDACTED**]@performancetuning.98afc.gcp.mongodb.net/sample_mflix
2020-08-18T13:21:30.891+1000 exported 1564 records
The output from the mongoimport command will look as follows:
2020-08-18T13:22:20.720+1000 connected to: mongodb+srv://[**REDACTED**]@performancetuning.98afc.g
cp.mongodb.net/imports
2020-08-18T13:22:22.817+1000 1564 document(s) imported successfully. 0 document(s) failed to import.
The output from the mongodump command will look as follows:

Figure 11.6 Output from the mongodump command
The start of the output from the mongorestore command will look as follows:
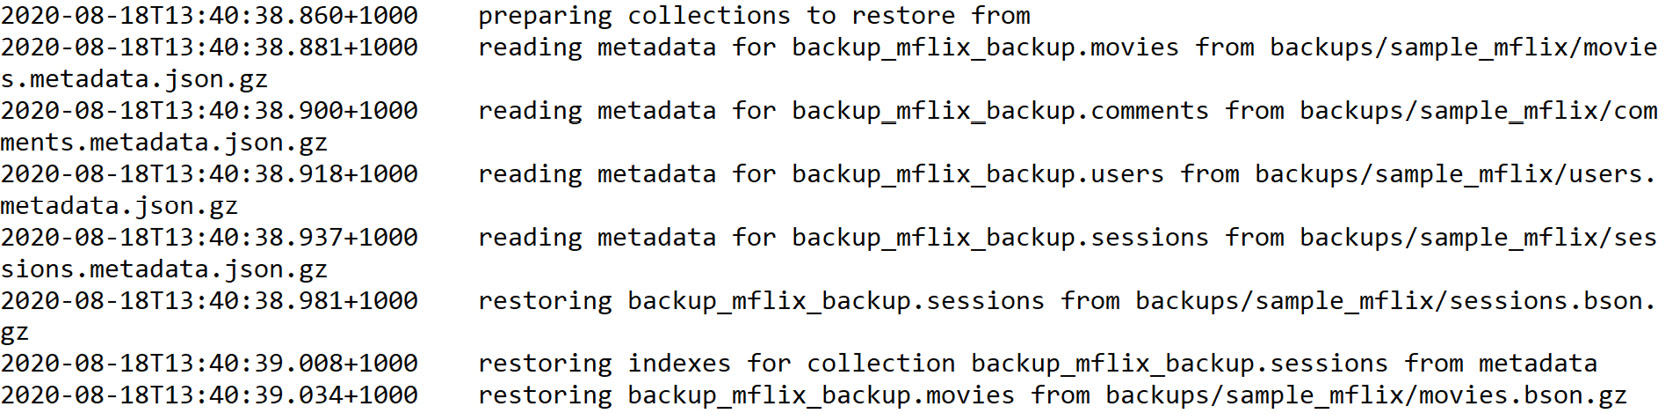
Figure 11.7: Start of the output from the mongorestore command
The end of the output from the mongorestore command will look as follows:

Figure 11.8: End of the output from the mongorestore command
Note
The solution for this activity can be found via this link.
Summary
In this chapter, we have covered four separate commands. However, these four commands all serve as elements in a complete backup and restore lifecycle for MongoDB. By using these fundamental commands in combination with their advanced options, you should now be able to ensure that any MongoDB server you are responsible for can be appropriately snapshotted, backed up, exported, and restored in case of data corruption, loss, or disaster.
You may not be responsible for backing up your MongoDB data, but these commands can also be used for a vast array of utilities. For example, being able to export the data into a CSV format will be very handy when trying to explore the information as a spreadsheet visually or even to present it to colleagues who are unfamiliar with the document model. By using mongoimport, you can also reduce the amount of manual work required to import data that is not provided in MongoDB format as well as import MongoDB data from other servers in bulk.
The next chapter covers data visualization, an incredibly important concept for transforming MongoDB information into easily understood results that can provide insight and clarity for business problems as well as integrating them into presentations to persuade or convince stakeholders of hard to explain trends in the data.