
5. Managing Contacts and Appointments
In this chapter, you’ll learn how to use your MacBook to manage your contacts, calendars, and appointments, including:
• Adding contacts to Address Book
• Organizing contacts into groups
• Connecting to enterprise contact servers
• Creating calendars in iCal
• Adding appointments to calendars
• Inviting contacts to meetings
• Connecting to network calendar servers
Introduction
Part of the pleasure of owning a MacBook is that you don’t need to sit at a desk to get work done. In a portable workspace, however, you still need to interact with coworkers and manage meetings, appointments, and deadlines.
Lion gives you the tools to organize contacts and tie into enterprise personnel directory systems. It also works with your company’s scheduling system to track calendars, meeting invitations, and even to-do items. In this chapter, you learn about Address Book and iCal—your MacBook’s personal information management utilities.
Managing Contacts in Address Book
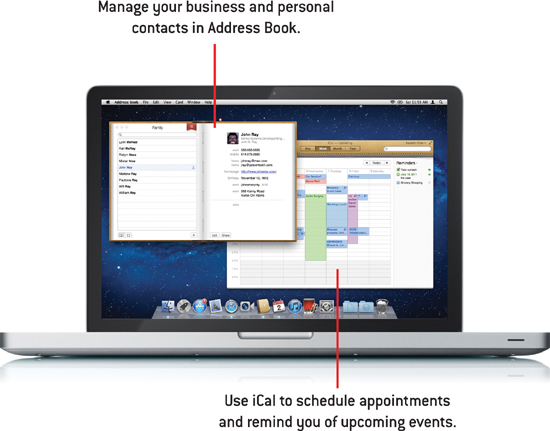
Many of the applications you use on your MacBook send information to, or receive information from, other people. Lion offers a central contact database that you can access in Mail, iCal, iChat, FaceTime, and other programs. Appropriately enough, you manage this database through an application called Address Book (found in the Applications folder).
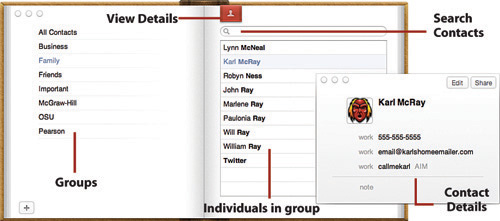
Address Book acts as a digital rolodex, pulling together personal and business contacts. With it you can connect to enterprise directory servers for accessing centralized company personnel listings. The Address Book application is similar to many other Lion applications, providing a drill-down view from a group list, to a contact list, and, finally, to contact details.
Adding Groups
When you first start Address Book, there is a single pseudo-group available: All Contacts. The group displays any contact available in Address Book. To make the most efficient use of Address Book, you should add groups for the different types of contacts you use—businesses, coworkers, family, friends, doctors, and so on. Like Mail, Address Book can use rules to create Smart Groups.
Creating a Group
To create a new group, decide what you’d like it to be called, then follow these steps:
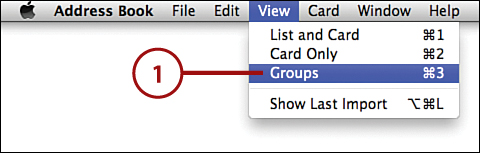
1. Navigate to the Group page by clicking the bookmark with the silhouette of two people, or by choosing View, Groups from the menu bar.
2. Click the + button below the group list.
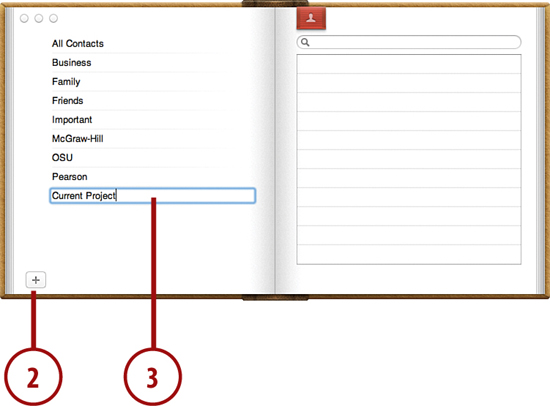
3. A new “untitled group” is added. Type to change the name of the group.
Creating a Smart Group
If you’d like to use search criteria to define your address book groups, you’re in luck! Address Book supports Smart Groups, capable of pulling contacts together from multiple different groups, and even network accounts:
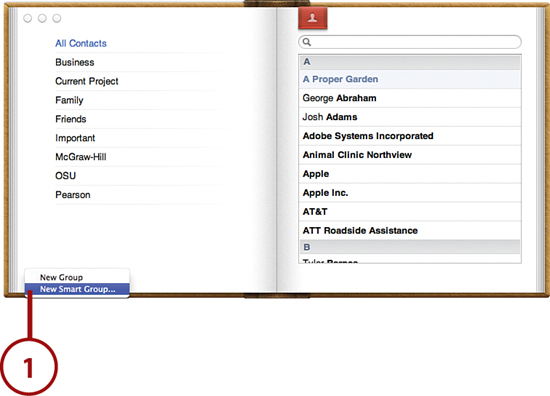
1. Click and hold the + button below the group list. Choose New Smart Group from the pop-up menu that appears.
2. Enter a name for the new Smart Group.
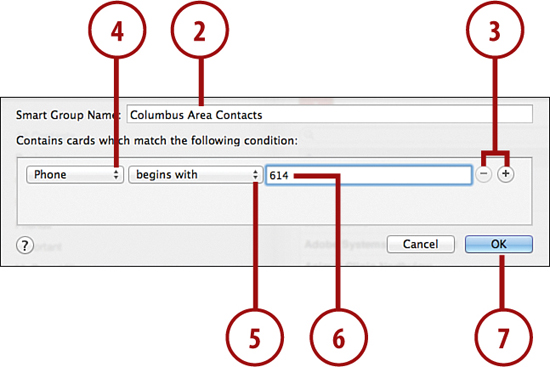
3. Use the + and – buttons to add or remove selection criteria.
4. Use the first pop-up menu from the selection lines to choose a contact attribute.
5. Use the second pop-up menu to set a comparison.
6. Enter the value to use in the comparison in the text field at the end of the selection line.
7. Click OK when you’re satisfied with your group definition.
Adding Contacts
The bulk of what you’ll do with Address Book is entering contacts. When it comes to people, one size contact does not fit all. For your family, you might want to store email addresses, instant messaging screen names, and birthdays. But for business contacts, you might only be interested in an address and a phone number. Address Book adapts to the information that you want to store.
Creating a New Contact
To create a new contact, gather all the information you have available for the person, then do the following:
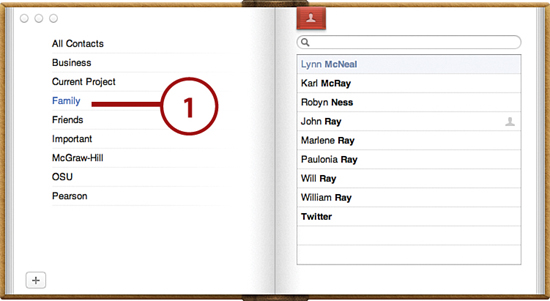
1. From the Group page of the address book, double-click the group name that the contact should be added to.
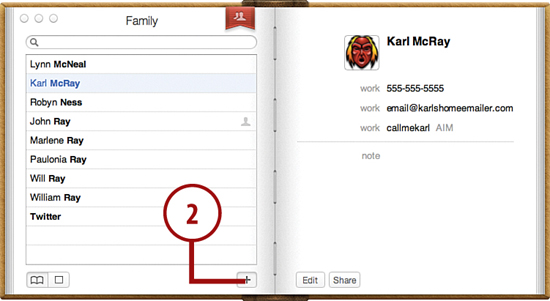
2. The group opens to show members and details. Click the + button below the member names column.
3. A new No Name contact is added, and the empty contact details display.
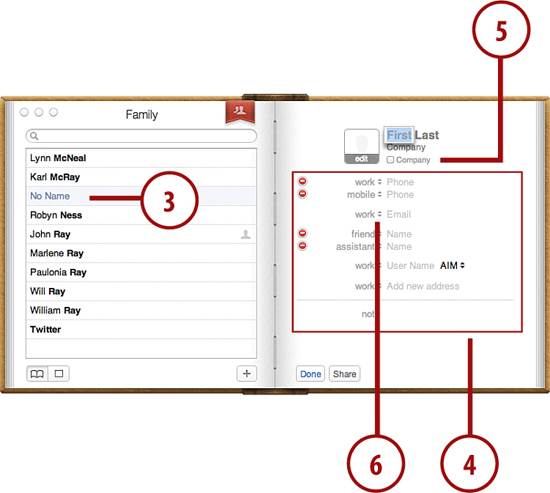
4. Use the fields in the detail view to enter information for the contact.
5. Click Company to classify the entry as a business rather than a personal contact.
6. Set the context for the card’s fields (for example, choose home, work, or cell for a phone number) using the pop-up menu in front of each field.
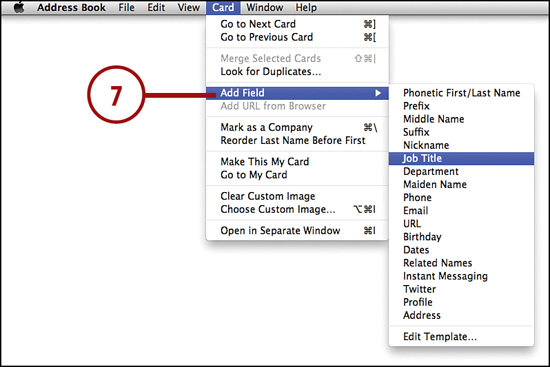
7. If you’d like to store additional information for the contact, choose Card, Add Field from the menu.
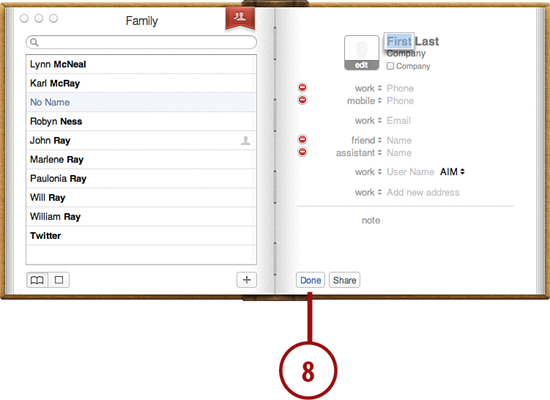
8. Click the Done button at the bottom of the contact details to finish editing the contact.
Setting a Contact Image
Contact images can help you visually identify individuals in your address book and are even displayed in Mail or shown on your iPhone if you sync your phone with Address Book. To set an image for a contact, complete these steps:
1. Find and select the contact that you want to associate with an image.
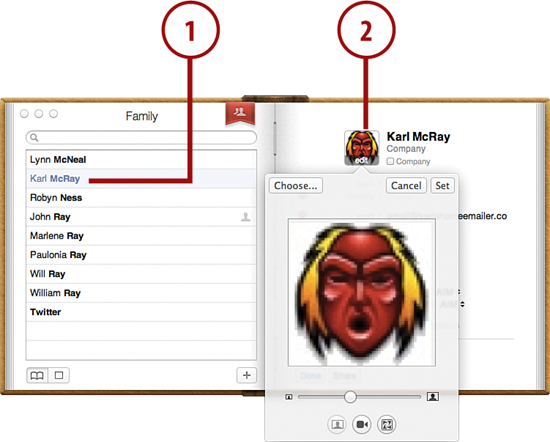
2. Select Card, Choose Custom Image from the menu bar, or double-click the picture within the card details.
3. Click the Camera icon to take a new picture.
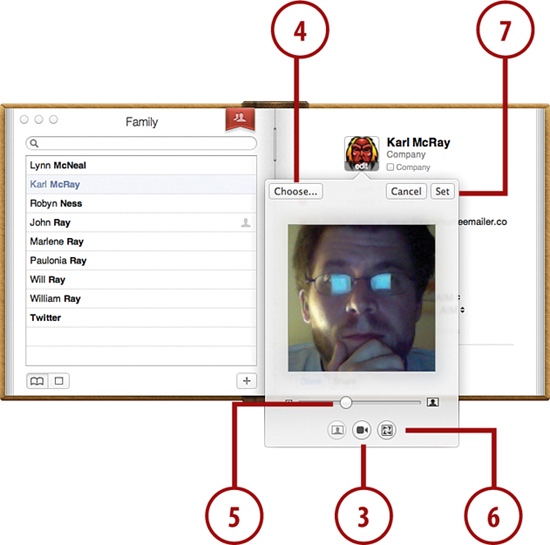
4. Alternatively, click Choose to choose a picture from your computer.
5. Set cropping and size for the picture by dragging it within the image window and adjusting the zoom slider.
6. Apply effects, if desired, using the Effects button.
7. Click Set to finalize the contact’s custom image.
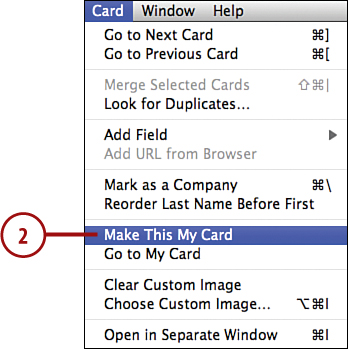
Creating “My” Card
Many system applications and utilities need to identify information about you. To tell Address Book who you are, enter a new contact for yourself, and then follow these steps:
1. Find and select your name in the Address Book

2. Choose Card, Make This My Card from the menu bar.
Editing the Contact Template
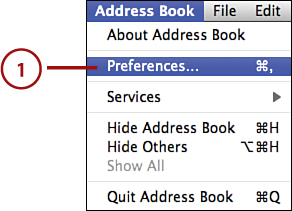
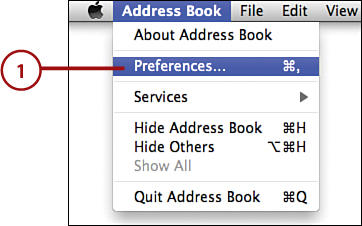
If you find that you constantly need to add new fields to contacts, you might want to consider modifying the default contact template. Changing the default gives you a starting place for all future contacts.
1. Choose Address Book, Preferences from the menu bar.
2. Click the Template icon in the Preferences toolbar.
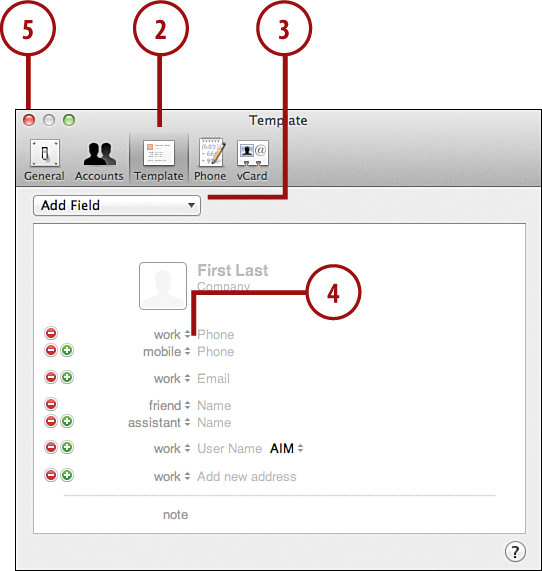
3. Use the Add Field drop-down menu to add additional fields to the contact template.
4. Click the double arrows to open the pop-up menus in the front of each field to set the context for fields displayed in the template.
5. Close the Address Book preference window when you’re finished.
Searching Contacts
When you aren’t sure of an exact name, or where you filed a contact, you can quickly search across all of your groups and contact data.
1. Navigate to the Groups page of the address book and highlight the address group to search.
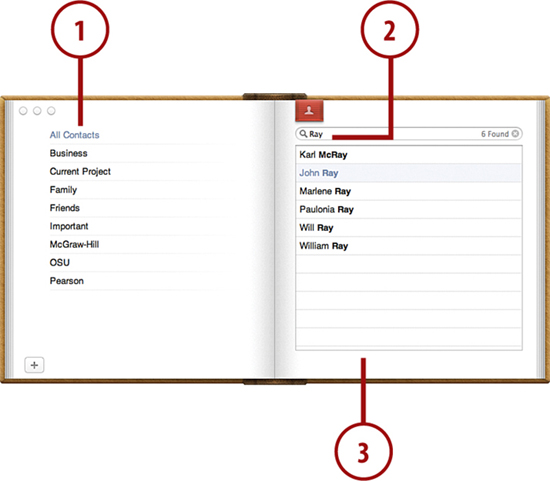
2. Type into the search field in the upper-right corner.
3. As you type, the contact list is filtered to show only matching contacts.
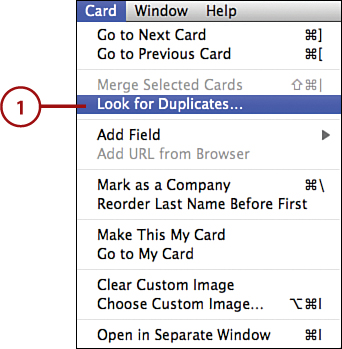
Detecting and Merging Duplicates
Over time you might find that you’ve created several Address Book entries for a single person. To identify and merge duplicate cards, follow these steps:
1. Choose Card, Look for Duplicates from the menu bar.
2. Address Book analyzes your contacts and presents you with the option to merge identified duplicates.
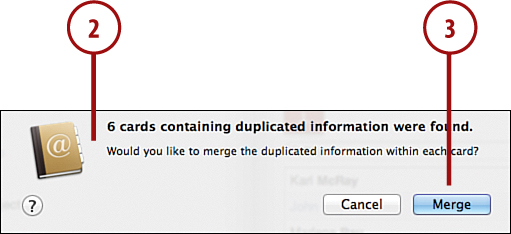
3. Click Merge to fix the duplicates.
Using Network Contacts
Address Book isn’t just limited to keeping information on your MacBook; it can also synchronize with Google, Yahoo contacts and connect to enterprise directory servers, such as Exchange, standard LDAP servers, as well as Apple’s iCloud service.
Synchronizing with Google and Yahoo! Contacts
If you have a Google Mail or Yahoo! Account and would like to transfer your contacts to or from these systems, you can easily configure Address Book to automate the process.
1. Choose Address Book, Preferences from the menu bar.
2. Click the Accounts icon in the preference window.
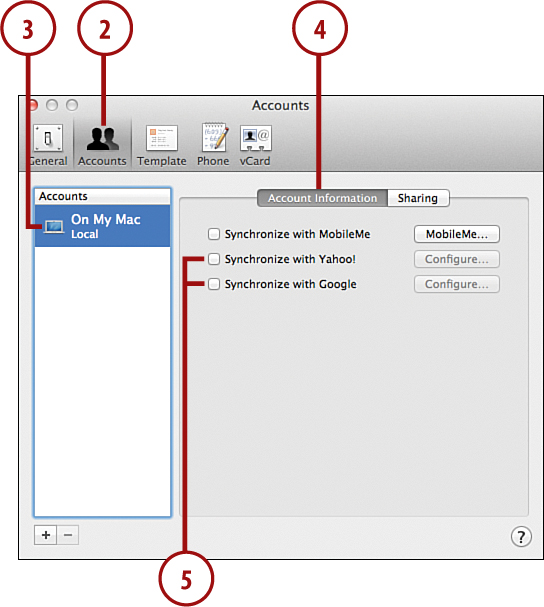
3. Click On My Mac.
4. Choose the Account Information button in the details pane to the right.
5. Click the checkboxes in front of Synchronize with Yahoo!, Synchronize with Google, or both.
6. Enter your Google or Yahoo! Account information, when prompted.
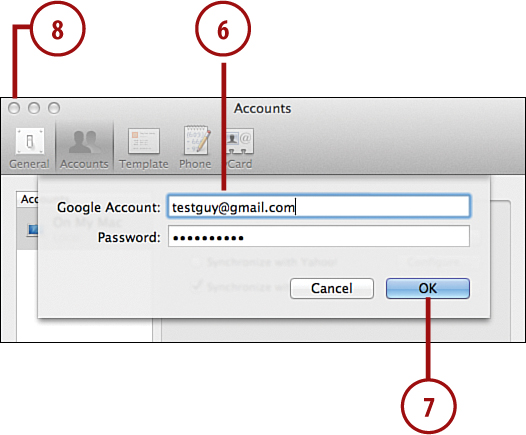
7. Click OK.
8. Close the Address Book preferences window.
Connecting to Exchange, CardDAV, LDAP, and iCloud Servers
Many organizations provide central enterprise contact directories that you can access via Address Book. Address Book supports several enterprise standards in addition to the Google and Yahoo! Syncing options. Using a central server means that changes and updates are available immediately for everyone who is connected. Like Mail and iChat, you’ll want to configure these options through the Mail, Contacts, and Calendars system preference panel:
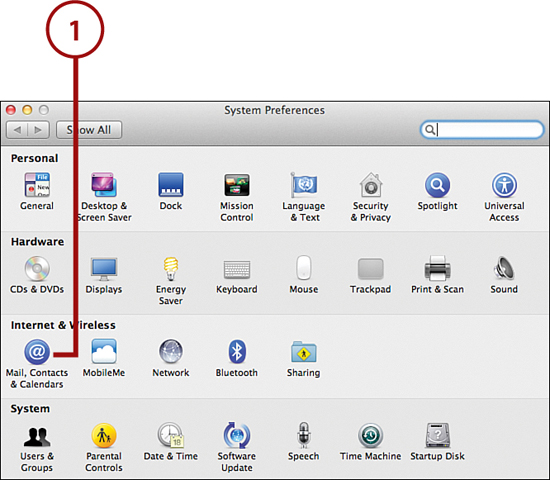
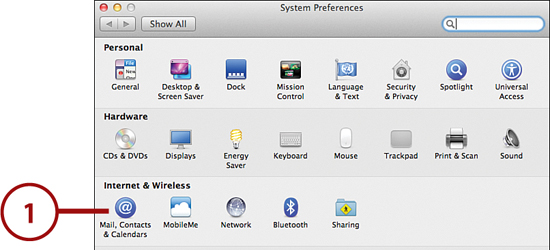
1. Open the Mail, Contacts, and Calendars panel.
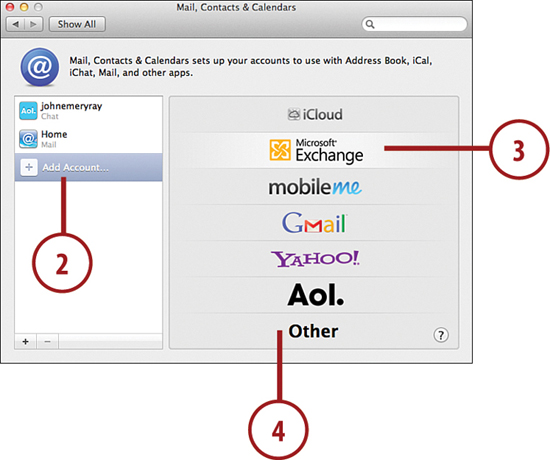
2. Click to highlight Add Account on the left.
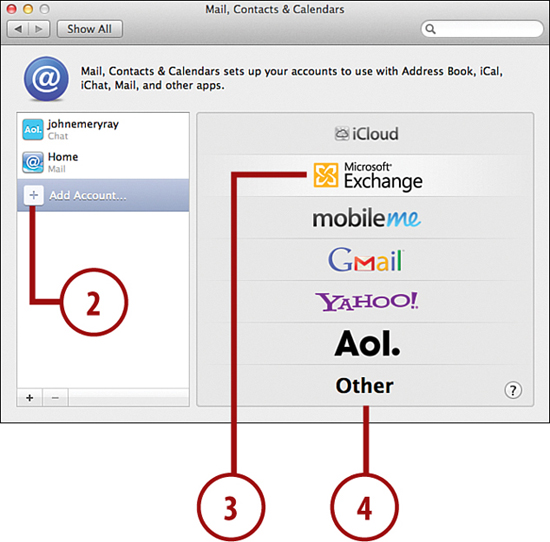
3. Choose the service providing contact information from the list on the right.
4. Alternatively, click Other to add LDAP, CardDAV, or Mac OS X Server accounts.
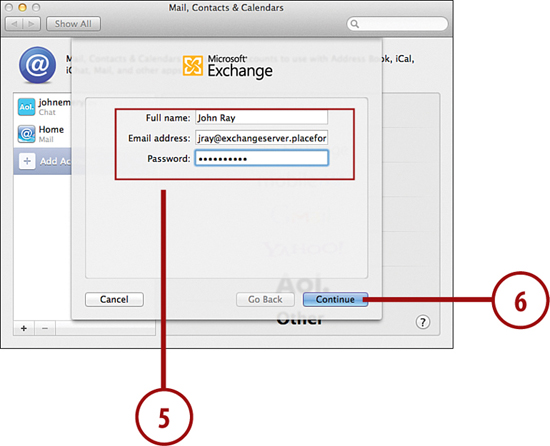
5. The account creation window appears. Use the fields in the window to configure your account information.
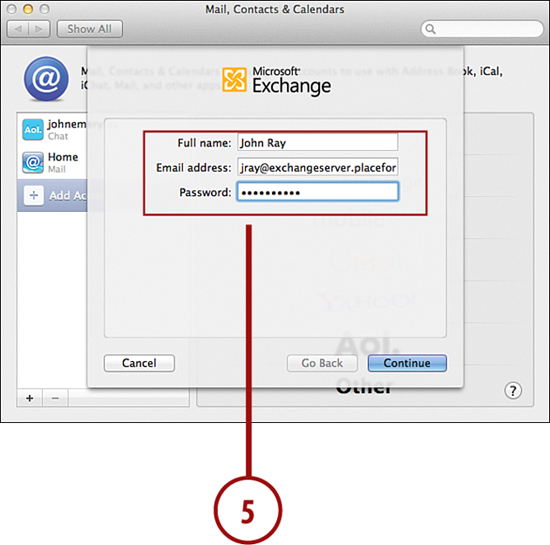
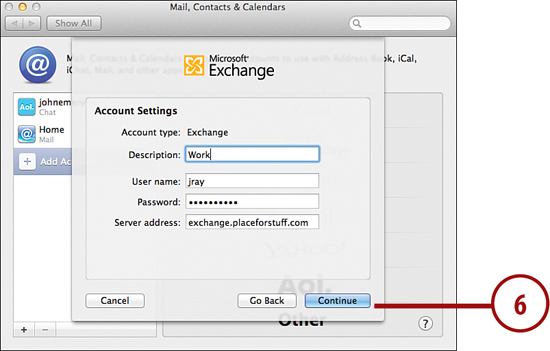
6. Click Continue to walk through the account setup wizard.
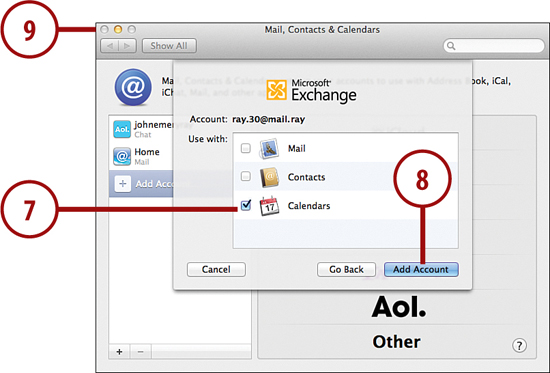
7. If you’re setting up a service that provides more than just contacts (such as Exchange), you are prompted to automatically set up corresponding email accounts and iCal calendars.
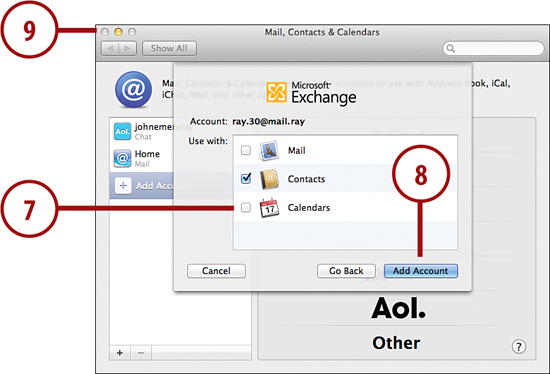
8. Click Add Account to provision the server.
9. Close the System Preferences.
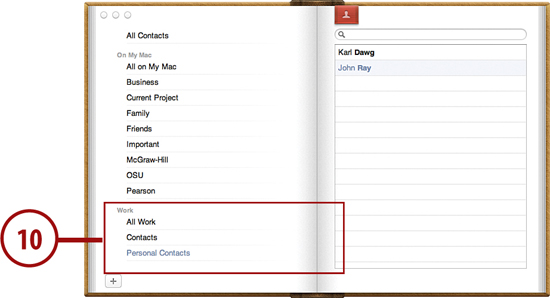
10. The new server appears in the Address Book group list. You can click to select it and search the group.
Exporting vCards from Address Book
vCards are small files that store all the Address Book entries for one or more individuals or organizations. Exporting the vCard enables you to share your contacts with others by sending them as an email attachment to someone else.
To export vCards from Address Book, follow these steps:
1. Highlight one or more entries in the Address Book.
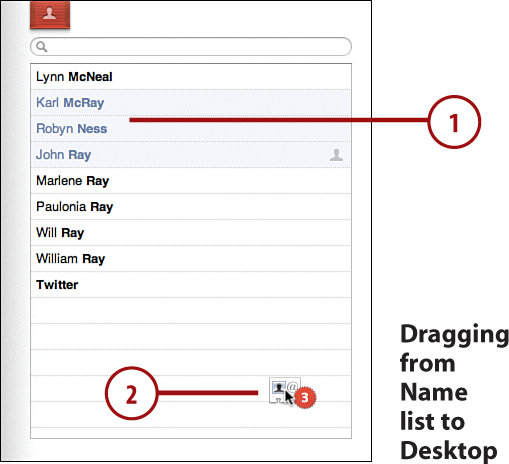
2. Drag from one of the contact names to your desktop.
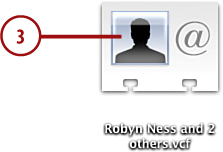
3. A vCard file is created with all of the exported contacts.
Printing Addresses
For those times when you need to use actual paper for your communications, Address Book provides several useful print options for printing your contacts onto envelopes or labels.
1. Select individual contacts or contact groups to print.
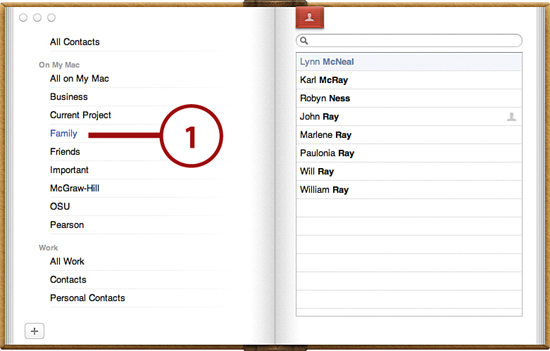
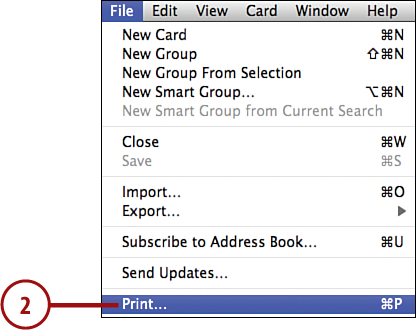
2. Choose File, Print from the menu bar.
3. Click the Hide/Show Details button so the full print dialog window appears.
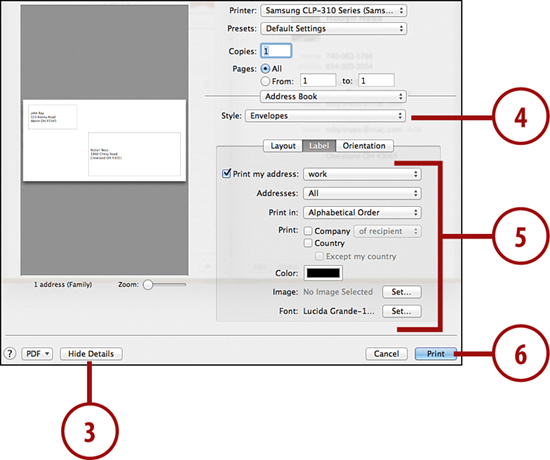
4. Use the Style pop-up menu to select an output format (Mailing Labels, Envelopes, and so on).
5. Set any of the additional configuration options for the style you’ve chosen.
6. Click Print to output the contact information in the selected style.
Working with Schedules in iCal
Much of our lives, like it or not, revolve around adhering to a schedule. Calendars, in whatever form we use them, keep us informed of upcoming appointments, holidays, birthdays, and anniversaries. Your MacBook can serve as your scheduling work center. Lion’s iCal application (found in the Applications folder) is a fast and well-connected way to keep your life in order.
Unlike applications such as Microsoft Outlook, iCal is an unimposing piece of software that shows you everything you need within a single window.
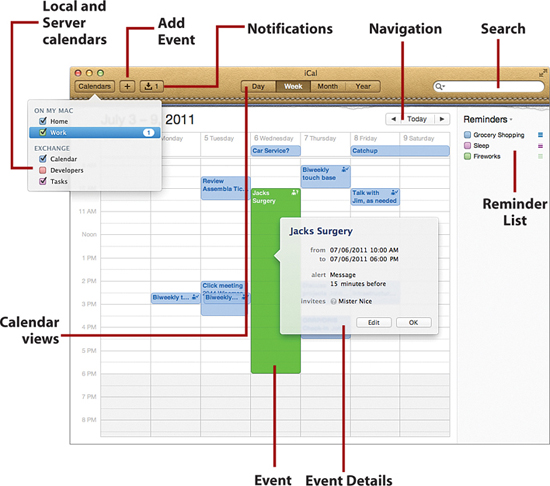
iCal’s general operation is similar to other Lion applications you’ve used. Clicking the Calendar button displays a list of calendars you have access to. Selecting a calendar in the calendar list displays the content of the calendar to the right. Double-clicking a calendar entry shows the details of the entry. The four buttons at the top (Day, Week, Month, Year) coupled with the View menu control the appearance of the calendars.
Despite its simple styling, iCal works just as well for managing calendars located on your MacBook as it can interacting with Exchange, iCloud, Google, and other standards-based enterprise calendaring systems.
Adding Calendars
The first step in using iCal is to establish the calendars that you use to store your events. iCal comes with two local calendars already created: Home and Work. Use these default calendars or create new calendars depending on how you want to categorize your events.
Creating Local Calendars
Local calendars store their information directly on your MacBook and cannot be viewed from anywhere else:
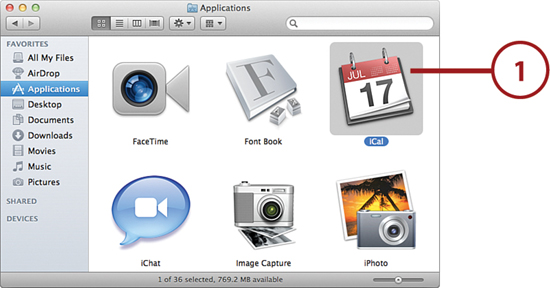
1. Open the iCal application from the Applications folder.
2. Click the Calendar button to view the list of calendars on your MacBook.

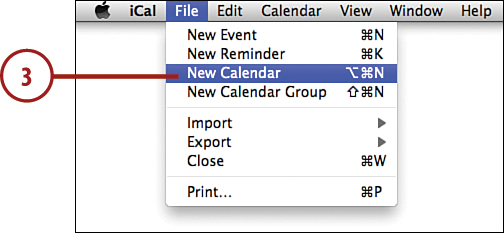
3. Pick File, New Calendar from the main menu bar. You can also right-click (or Control-click) on the list and choose New Calendar from the contextual menu that appears.
4. A new Untitled calendar is added at the bottom of the calendar list. Type to replace Untitled with whatever name you’d like.
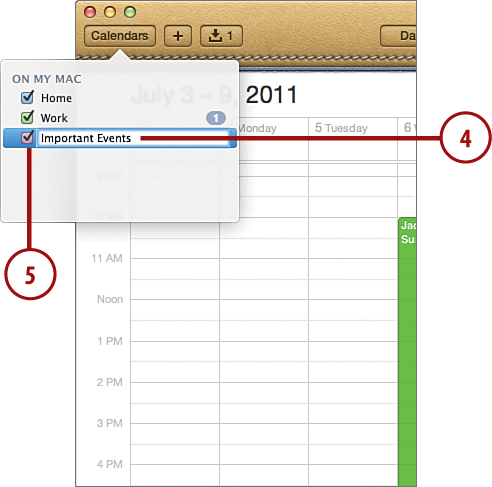
5. Verify that the checkbox next to the calendar is selected so that the calendar entries are visible.
Nesting Local Calendars in Groups
To help organize calendars, you can create groups—similar to folders—that hold local calendars. Groups make it simple to turn several calendars on and off.
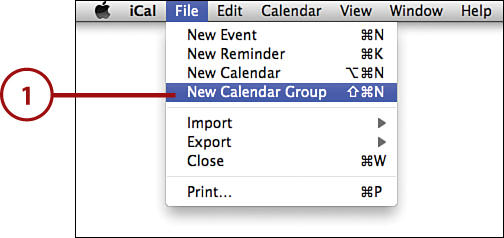
1. In iCal, choose File, New Calendar Group, from the menu bar.
2. The calendar list is displayed and a new Group item appears; type to replace the name with the label you’d like.
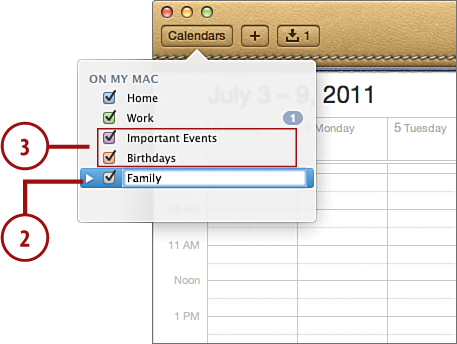
3. Click and drag one or more existing calendars onto the group name.
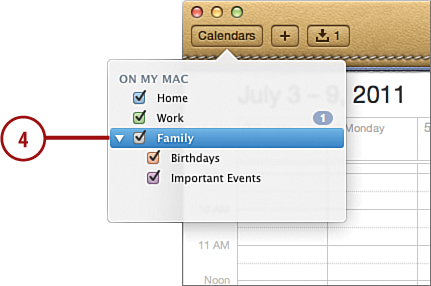
4. Use the arrow in front of the group to expand or collapse the group as needed.
Connecting to Server-based Calendars
Unlike a local calendar, server-based calendars are stored on a central network location rather than on your MacBook. Network calendars can be accessed and modified in iCal on multiple computers. Many businesses use Exchange Server, for example, to provide shared calendars and scheduling. Apple’s iCloud service provides free shared calendaring that can be used across your Mac and iOS devices. Another option, Google Calendar, is also free and can be used on virtually any desktop or mobile device.
Things You Need
Most server-hosted calendars are associated, in some way, with an email account. To configure a server-based calendar, you probably only need an email account and password. If you know, however, that your calendar is hosted somewhere else, you should collect the server name in addition to your username and password before proceeding. As you’d expect, calendar services are configured through the Mail, Contacts, and Calendars panel, as you’ve become accustomed:
1. Open the Mail, Contacts, and Calendars panel.
2. Click to highlight Add Account on the left side.
3. Choose the service providing calendar information from the list on the right.
4. Alternatively, click Other to manually add a CalDAV account.
5. The account creation window appears. Use the fields in the window to configure your account information.
6. Click Continue to step through the account setup wizard.
7. If you’re setting up a service that provides more than just calendars (such as Exchange, iCloud, or Gmail), you are prompted to automatically set up corresponding email accounts and contact servers.
8. Click Add Account.
9. Close the System Preferences when finished.
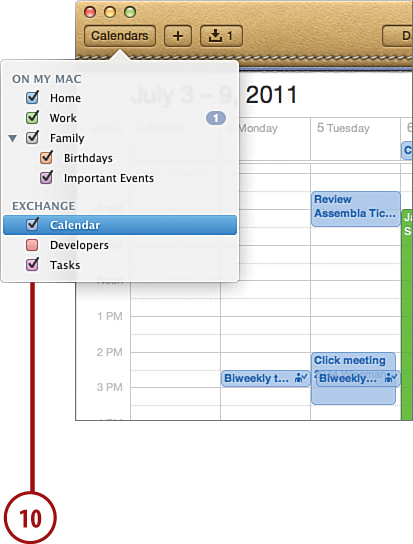
10. The iCal calendar list displays a new section with any calendars that are located on the server.
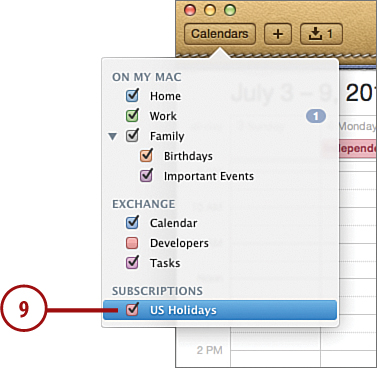
Subscribing to a Public Shared Calendar
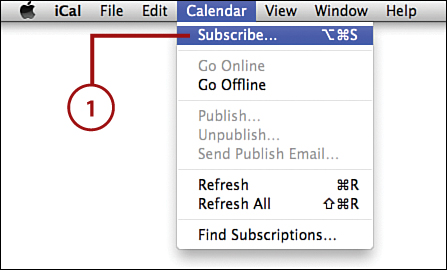
Another iCal calendar type is a shared calendar. These read-only Internet-published calendars are available for TV show schedules, holidays, sports team game dates, and other useful information. To subscribe to a shared calendar, copy the URL for the calendar and then follow these steps:
1. Choose Calendar, Subscribe from the iCal menu bar.
2. Enter the URL for the calendar you are subscribing to.
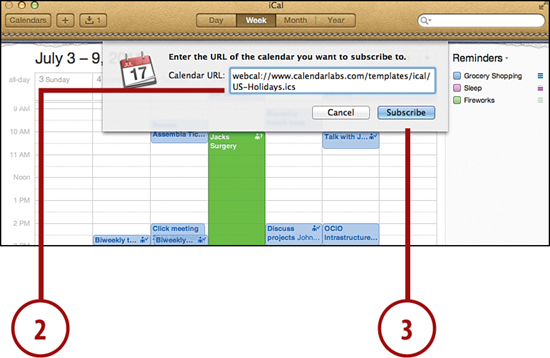
3. Click Subscribe.
4. If prompted, enter a login name and password to access the calendar and click OK.
5. Set a name, color, and storage location for the calendar.
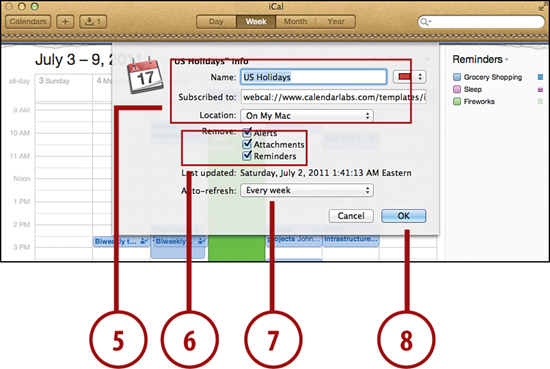
6. If there are any embedded Alerts, Attachments, or Reminders in the calendar (this depends entirely on the person making the calendar available), you may want to strip them out. Click the Remove checkboxes to make sure you get only calendar data and no surprises!
7. To enable the calendar to automatically update, choose an auto-refresh time.
8. Click OK.
9. The subscribed calendar appears in a new section within the calendar list.
Viewing Calendars and Calendar Groups
After you’ve set up one or more calendars in iCal, you can view their contents. To view a calendar or calendar group in the calendar list, follow these steps.
1. In iCal, click the checkbox in front of the calendar you wish to view.
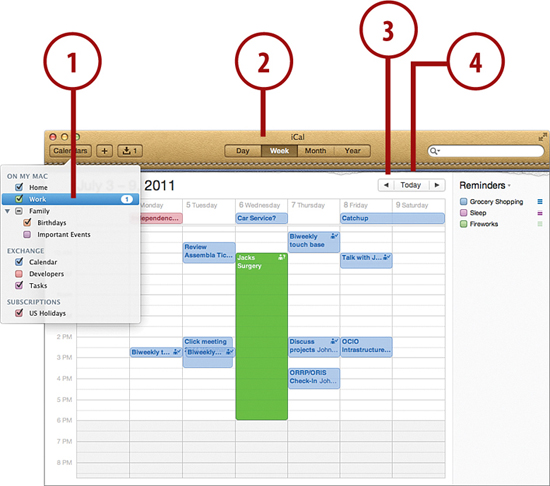
2. Use the Day, Week, Month, and Year buttons to narrow or expand your calendar view.
3. Use the arrows to move forward or backward by day, week, month, or year depending on the current view.
4. Click Today to jump to today’s date.
Working with Events
What good is a calendar if you don’t have the ability to add events? In iCal, events can be anything you’d like—birthdays, outings, reminders, anything—as long as they are associated with a date. If you’d like to include other people in the event, you can even send out invitations that are compatible with other calendaring systems, such as Exchange.
Creating a New Event
Events can hold a large number of attributes that describe what the events are, when they are, where they are located, and so on. All you need to know to create an event, though, is the date and a name for the event:
1. Navigate to the day on which the event takes place.
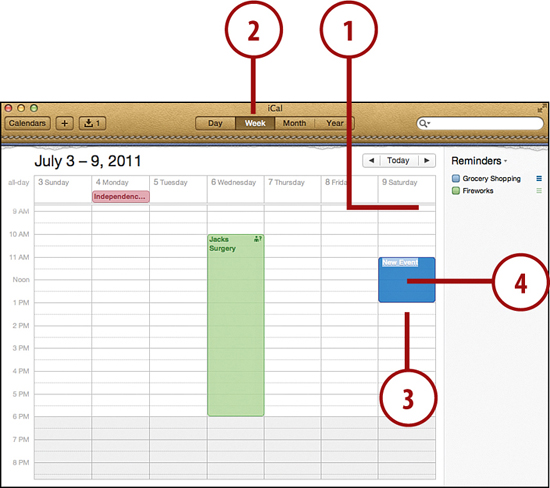
2. Switch to day or week view.
3. Click and drag from the start time to the end time to create the event. The default event name, New Event, is highlighted automatically.
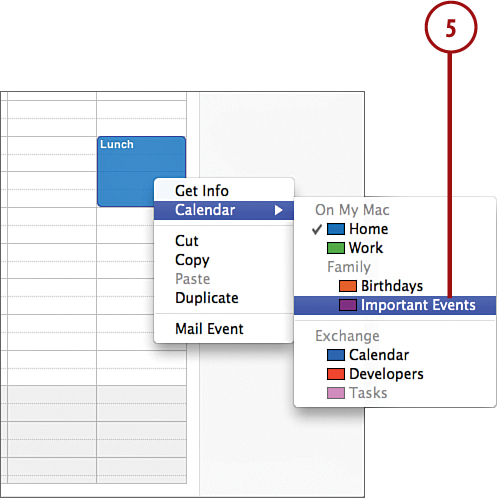
4. Type a name for the event, and then click off of the event to save it.
5. Right-click the event box, and choose the calendar that the event should be added to.
Using the Quick Event Feature
Lion’s iCal application also supports a simple way of creating events without any calendar navigation at all. Quick Event provides simple, plain-text entry of new events directly from the iCal toolbar. To use this feature, follow these steps:
1. Click and hold the + icon in the iCal toolbar.
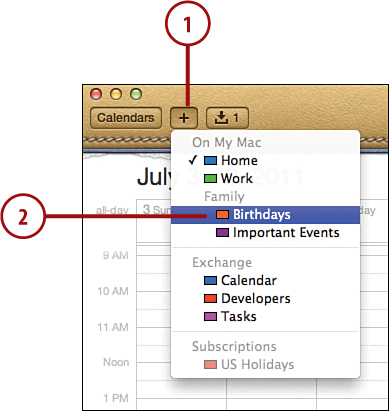
2. Choose the calendar that should hold the new event.
3. In the Quick Event field that appears, type a description of the event, such as “Dinner on November 12th at 6 pm.”
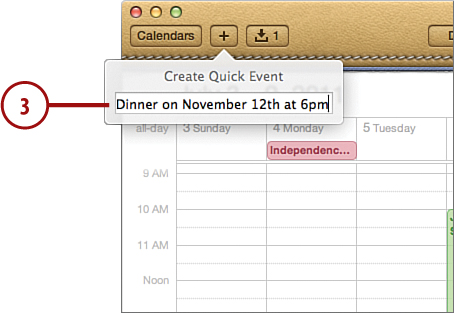
4. A new event is added and opened for additional editing.
Editing Event Information
To edit the information for an event that you’ve created, first find the event on the calendar where you added it and then follow these steps.
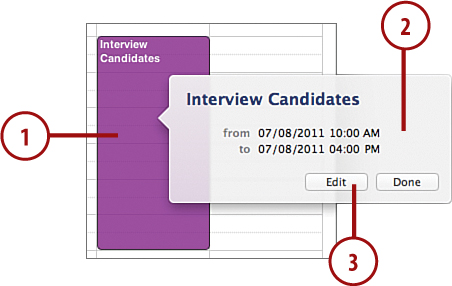
1. Find and double-click the event you want to edit.
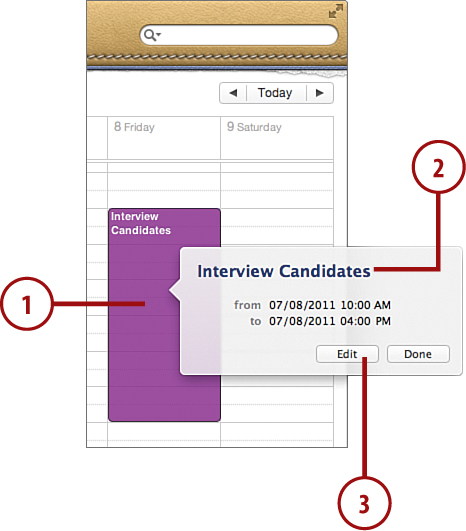
2. Unless you’ve just added the event, an event summary window appears.
3. Click Edit.
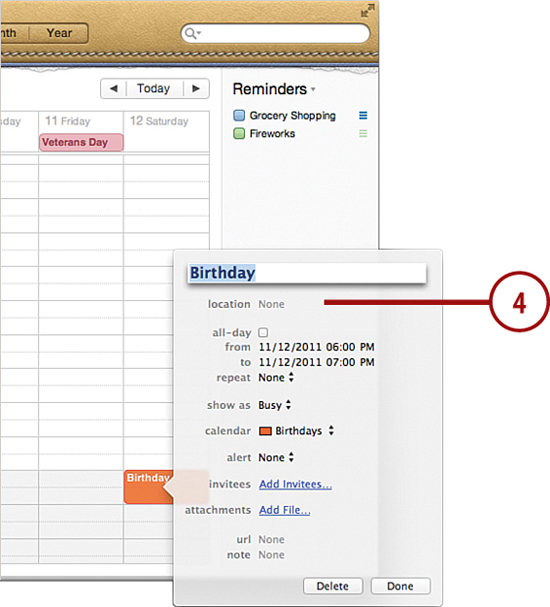
4. The event information window appears.
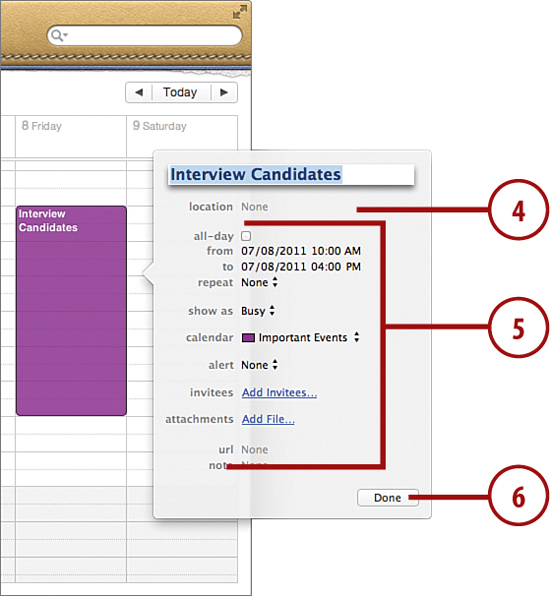
5. Click any of the available fields to change values such as start or end times, location, alarms (notifications), and so on.
6. Click Done when you are finished editing the event.
Sending Event Invitations
iCal can work directly with Mail to send invitations to your events. When the invitees respond, their attendance status is updated directly in iCal. Use these steps to send invitations to an event.
1. Find and double-click the event you wish to send invitations for.
2. Unless you’ve just added the event, an event summary window appears.
3. Click Edit.
4. The event information window appears.
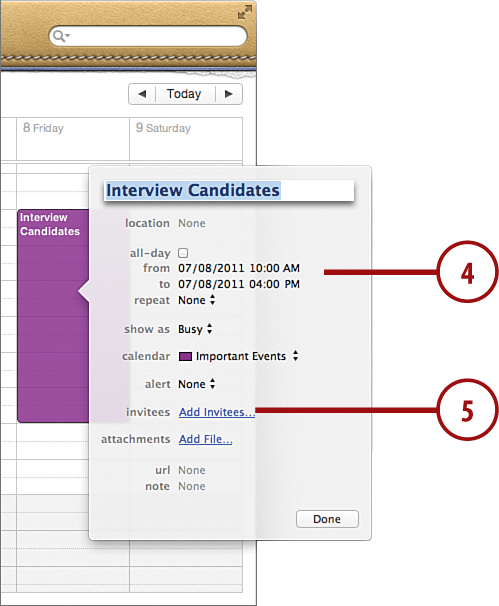
5. Click the Add Invitees link.
6. Enter email addresses in the field that appears, just as you would in Mail.
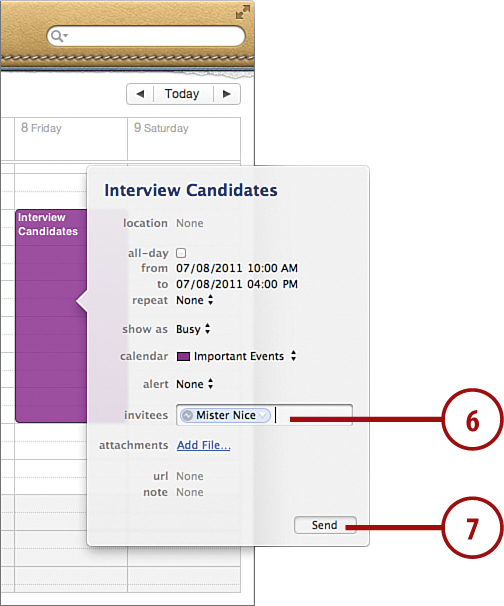
7. Click Send to send the invitations.
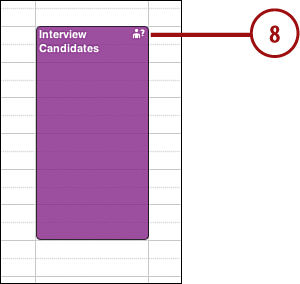
8. An icon appears in the upper-right corner of the event to show that invitations have been sent. A question mark indicates that responses haven’t been received from all invitees.
Accepting Invitations
You can easily add to your calendar invitations that you receive. Even though invitations are sent through email, Lion’s Mail program works with iCal to automatically transfer the invitations to the iCal Notifications area where you can act on them.
1. When a new invitation arrives, the iCal application icon updates to show the count of invitations in the Dock.

2. The event is shown with a dotted outline in iCal.
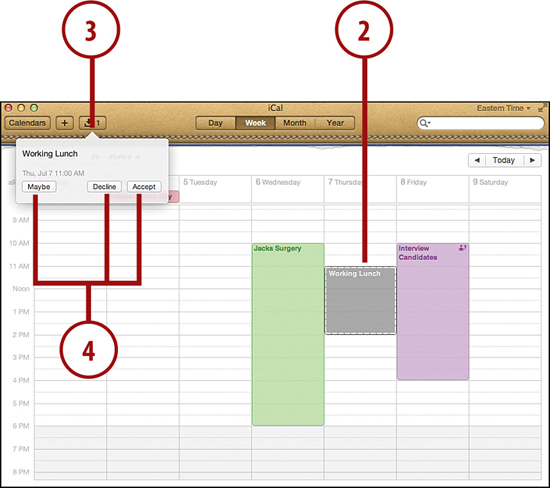
3. Click the notification button to show the notification panel in iCal.
4. Use the Maybe, Decline, and Accept buttons to respond to the invitation.
5. Declined invitations are removed from your calendar, accepted and tentative invitations are added.
Searching Events
If you’re a heavy scheduler, or have dozens of enterprise calendars to manage, sometimes it’s useful to be able to quickly search for events, which is a breeze in iCal.
1. Make sure the checkboxes are selected for the calendars and calendar groups you want to search.
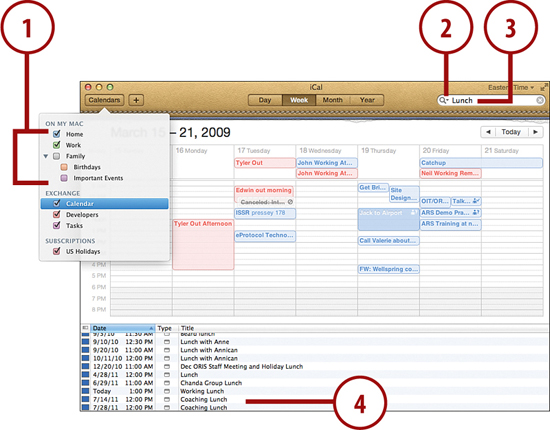
2. Choose which fields to include in the search using the drop-down menu in the Search field.
3. Enter your search terms in the Search field.
4. The results of the search are displayed in a pane at the bottom of the iCal window. Click an entry to jump to that event.
Working with Reminders
In addition to events, iCal offers a simple to do list called Reminders. Combined with events, reminders provide a means of managing projects and other task-oriented or time-sensitive happenings.
Displaying the Reminder List
Your default iCal view does not include Reminder items. To see them, you need to follow these steps:
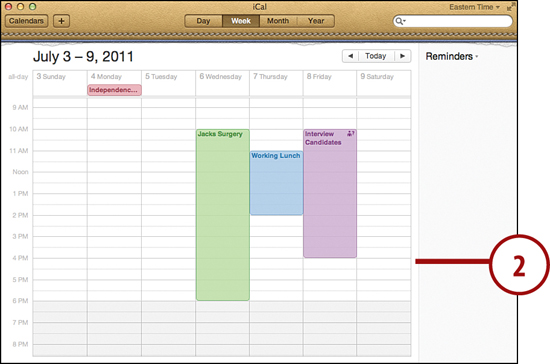
1. Choose View, Show Reminders from the menu bar.

2. The Reminder list appears.
Adding a Reminder Item
Reminders are added in a way that’s similar to how you add calendar events. With the Reminders visible, complete these steps.
1. Double-click the empty space inside the Reminder list.
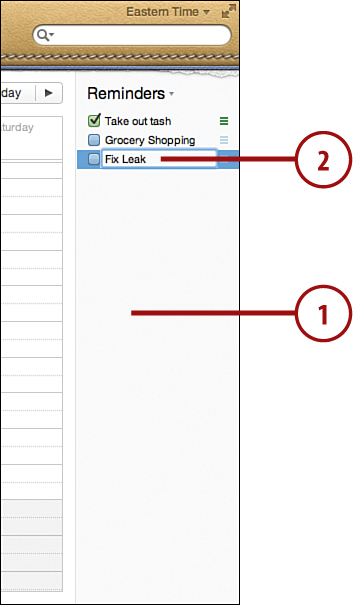
2. A Reminder is created and the name is highlighted. Type to enter a new name.
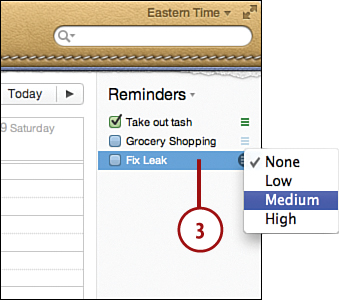
3. Use the drop-down menu to the right of the item to set a priority.
Editing Reminder Details
After creating a new Reminder, you might want to fine-tune the details. Editing the Reminder’s details gives you the ability to set an associated calendar, due date, priority, and more.
1. Double-click the name of the Reminder.
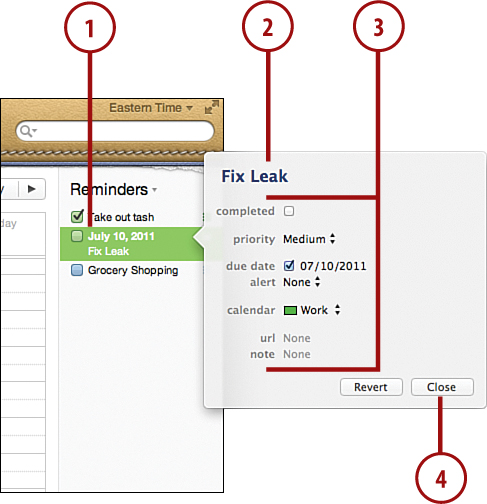
2. The Reminder detail window displays.
3. Use the available fields to set alarms, associate the item with a specific calendar, or set a due date.
4. Click the Close button.
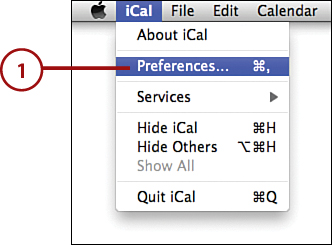
Removing Reminder Items
After you’ve completed a Reminder, chances are that you don’t want to have to think about it any more. To automatically delete or hide Reminders after they’ve been checked as complete, follow these steps:
1. Choose iCal, Preferences from the menu bar.
2. Click the Advanced icon in the toolbar.
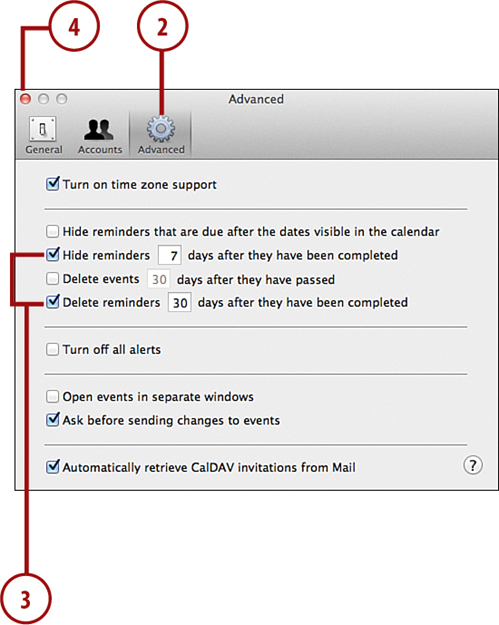
3. Check the boxes beside Hide Reminders or Delete Reminders and provide the number of days before these rules take effect.
4. Close the iCal preferences.
Printing Calendars
Despite our best efforts, sometimes we can’t take our MacBooks (or even our iPads and iPhones) everywhere. When you need your calendar information in paper form, iCal does an amazing job of printing calendar and itinerary views.
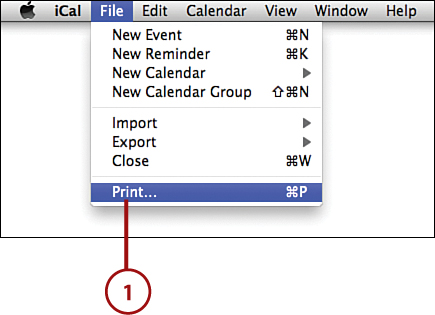
1. Choose File, Print from the iCal menu bar.
2. Set the view you want to print.
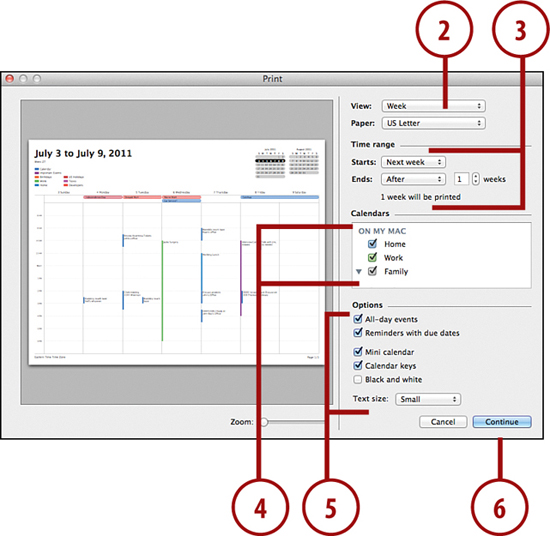
3. Set a time range for the calendar being printed.
4. Click the checkboxes beside each calendar to print.
5. Select which options should be added to the printed page.
6. Click Continue to start the typical Lion printing process.