
One of the challenges of backup and recovery is manifested when faced with the task of recovering a database or set of databases to a specific point before a critical event occurs. More specifically, the data is considered valid prior to a specific event that caused inconsistencies or data loss. For example, the event could be the result of operator error, a software defect, or hardware/connectivity issues.
When this happens, systems administrators (or database administrators) must restore the data with the last known good backup. However, if the backup were set up to occur in the middle of the night and the data-altering event occurs during the middle of the day, there could be hours of data changes lost and must be recreated in some manner.
Fortunately, there is a feature in MySQL that you can use to protect yourself against such recovery events. It is named point-in-time recovery (PITR) and is a combination of replication technologies and backup strategies.
In this chapter, we will learn about PITR in the OCI MySQL Database Service (MDS) on a DB System beginning with a brief overview of how PITR works on-prem. This will give you the opportunity to understand PITR in MDS and how to leverage it to your advantage for data recovery.
Overview
Those who have their on-prem MySQL servers have at their disposal a feature in MySQL called binary logs, which record the changes to your data in a special binary format that can be replayed if data recovery is needed. Like physical backups, binary logs are not human readable but unlike physical backups, they must be processed one event (data change) at a time making them cumbersome for use as a recovery mechanism.
Interestingly, binary logs are one of the key components in enabling the high availability features in MySQL. We will explore the high availability features in MDS in Chapter 8.
See https://dev.mysql.com/doc/refman/8.0/en/binary-log.html for more information about the MySQL binary log.
Once binary logging is turned on, your MySQL server is recording each event as it is processed and writes it in the log. The logs are designed so that they can be rotated manually or automatically to reduce file sizes.
When combined with regular backups, you can set up your backup routines to rotate the binary logs immediately before a snapshot of the data. This enables you to begin recording which binary logs have been created since the last backup.
Should an event occur where you need to restore to a time period between the automated backups, you can restore that latest backup and then apply the logs to the point of the event by replaying (executing or applying) the binary logs that were created since the last backup. For those using this mechanism on their on-prem servers, you can use binary logging tools to help locate a precise location to restore your data.
This mechanism, PITR, is available in MDS for DB Systems and is fully automated. You need not worry about binary logs, which backup to restore, or any such details – all of it is handled by the MDS automation mechanisms. In fact, it is so easy to use you merely turn it on and forget about it (until you need to recover your data).
However, automation of complex tasks always results in some level of restriction in order to make it consistent and dependable. The limitation imposed by OCI for MDS PITR is the recovery window. Currently, you can recover your data on your DB System with PITR enabled to any 5-minute time period. Thus, at most you may have to recover manually is 5 minutes of data, which is a small price to pay for automatic recovery of data between backups.
Now that we know a little more about PITR, let’s see how to setup our DB Systems.
Setup
You can set up PITR at any time for a DB System by enabling it on the DB System details page. You can also enable PITR when you create a DB System. The feature requires activation of automatic backups so if your DB System has that feature turned off, you will need to enable PITR.

A screenshot of the backup section has automatic backup, backup window, retention days, and point-in-time restore details. The point-in-time restore is highlighted.
Backup Settings – Disabled (DB System Details Page)

A screenshot of the edit backup plan with 3 checklist buttons selected. The backup retention period sets as 10, and the save changes button is highlighted at the bottom.
Edit Backup Plan Dialog
If you have a DB System running MySQL 8.0.28, you will need to update to MySQL 8.0.29 at a minimum to use PITR. You can upgrade your DB System on the details page by clicking on the Edit link next to the MySQL version and choose the version you want to upgrade to from the list.

A backup menu lists the automatic backup, backup window, retention days, and point-in-time restore. Automatic backup and point-in-time restore are enabled and highlighted with a rectangular box.
Backup Settings – Enabled (DB System Details Page)
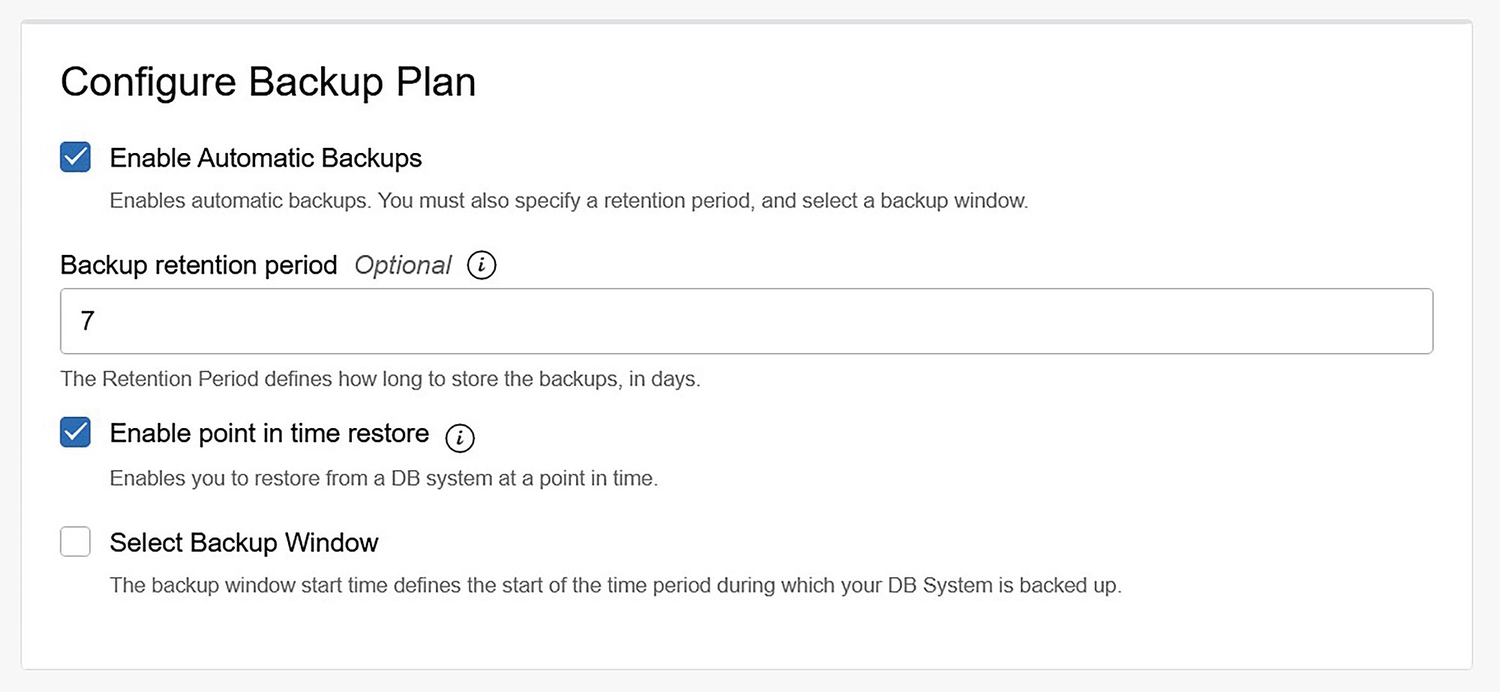
A dialog box of configure backup plan with enable automatic backup and enable point-in-time restore checkbox selected. The backup retention time is 7.
Backup Settings (Create DB System)

A window page displays the backup list with the details on top, and the table to list the backups is at the bottom.
List of Backups (DB System Detail Page)
Now that we know how to set up PITR, we can see a small demonstration on how to recover a DB System using PITR.
Recovery
Recovery of a DB System using PITR is very similar to recovery using any normal backup. The difference is in how you select the backup. If you choose to recover using a PITR entry, you will need to select the last backup from the list
To make this demonstration feasible, we will need to introduce an event from which we want to recover. A simple DROP DATABASE or similar SQL statement will suffice. In this case, I issued a DROP DATABASE sakila; command.

A window page displays the backup list with the details on top and the table with 4 rows and 7 columns to list backups. In the view details, select and change restore to the new D B system.
Launching Restore to New DB System (Backups List on DB System Details Page)

A dialog box to configure the source highlights restores from the D B system at any point, select a specific point in time and time.
Restore DB System from Backup (PITR)
This is the area where you can specify that you want to restore to a specific point-in-time. Begin by clicking on the Restore from DB System at a point in time. Notice this allows you to choose the latest PITR period or a specific period. For this demonstration, we tick the Select a specific point in time radio button. Finally, you can enter a time period that occurs prior to your event. In this case, the last entry available is 21:03 UTC. Simply reduce the time shown by 5 minutes segments to reach your desired time period.
Once you click Restore button and the DB System is ready, we can log in and see that the sakila database is indeed present and the unwanted data change event has been recovered. Recall, there is much going on under the hood. MDS is restoring from the last known good backup and once restored, is applying the binary logs recorded since the backup. All this occurs without any intervention from the user. How cool is that?

A menu of endpoints displays private IP addresses, internet F Q D N, My SQL part, and My SQL X Protocol port. Private IP address highlights with a rectangular box.
Private IP Address (Restored DB System via PITR)
Testing the Data (Restored DB System)
That’s it! We now know how to restore a DB System to a specific 5-minute time period using point-in-time recovery.
Summary
Point-in-time recovery is one of those features, like automated backups, which can increase your ability to recover from data disasters and reduce your risk of data loss. PITR in MDS is automated and easy to set up. Recovery using PITR for your DB System is also easy to accomplish and works without any need to record complex system parameters or process binary log files. Once you’ve had a chance to use the feature and in the unlikely event you rely upon it to restore your systems to operation, you will appreciate the work Oracle has done to make a complex task simple in execution for DB Systems owners.
In the next chapter, we will learn about the options available to import and export your data to or from your MDS DB Systems.