
In the previous chapter, we learned about Django and Flask development in VS Code. In this chapter we will be talking about containers and MS Azure.
VS Code has great support for Remote Development, which is a popular feature these days. It allows you to connect to another machine via Secure Shell Protocol (SSH) and operate with code and various language services there remotely. It is also possible to connect to Microsoft Azure and manage your development environment in containers. The last two are the main focus of this chapter.
Integrating Azure for Your Python Projects

Microsoft Azure
It also acts as a provider of software as a service (SaaS), a platform as a service (PaaS), and infrastructure as a service (IaaS) and carries out many different programming languages, tools, and frameworks, Microsoft-based as well as third-party-specified software and systems.
In this section, we’ll review some of the more import services Azure offers and then use VS Code to create a Python function that responds to HTTP requests. We’ll end by deploying Docker containers to Azure App Service.
Key Azure Services
Azure utilizes large-scale virtualization at Microsoft data centers worldwide, and it supplies more than 600 services.
Computer Services
Virtual machines or infrastructure as a service (IaaS) providers allow users to create general-purpose Microsoft Windows and Linux virtual machines, as well as preconfigured machine items for in-demand software sets. Most users run Linux on Azure due to beneficial Linux distributions offered and Microsoft’s own Linux-based Azure Sphere. In addition, many app services or platform as a service (PaaS) providers use Azure as an environment to let developers easily publish and administer web sites. Moreover, Azure web sites encourage developers to build sites using ASP.NET, PHP, Node.js, or Python, and deploy Team Foundation Server or uploading through the user portal. Azure customers can create web sites in PHP, ASP.NET, Node.js, or Python, or select from several open-source applications. This comprises one aspect of the platform as a service (PaaS) offerings for the Microsoft Azure Platform. Those applications that can be deployed to an App Service environment to implement background processing can be invoked on a schedule, on-demand, or run nonstop.
Identity
Azure Active Directory is used to synchronize on-premises directories and enable single sign-on.
Azure Active Directory B2C enables access to consumer identity and access management in the cloud.
Azure Active Directory Domain Services is activated when joining Azure virtual machines to a domain without domain controllers.
Azure information protection is utilized to protect sensitive information.
Azure Mobile Services
Mobile Engagement collects real-time data that highlight users’ analytics. It also enables push notifications to mobile devices.
HockeyApp can be installed to build, distribute, and run various beta tests on mobile apps.
Storage Services
Table Service lets programs store structured text in sectioned collections of items that are accessed by partition or primary keys. Azure Table Service is activated in the same manner as any other NoSQL nonrelational database.
Blob Service offers programs a place to store unstructured text and binary data that can be accessed simply by an HTTP(S) path. Blob service also has built-in security mechanisms to limit and calculate access to data.
Queue Service provides programs with a platform to communicate asynchronously by message using queues.
File Service allows storing and access of data on the cloud using popular REST APIs and SMB protocols .
Data Management
Azure Data Explorer is well-suited for big data analytics and data-exploration.
Azure Search is great for text search and structured data filtering.
Cosmos DB is a NoSQL database service that enacts a subset of the SQL SELECT statement on JSON documents.
Azure Cache for Redis is a managed implementation system for Redis.
StorSimple is great to distribute storage tasks between different devices and cloud storage.
Azure SQL Database works to produce, scale, and place applications into the cloud using Microsoft SQL Server technology. It also integrates well with Active Directory and Microsoft System Center.
Azure Synapse Analytics is an independently managed cloud data warehouse.
Azure Data Factory is a data integration service that enables the creation of data-driven work processes in the cloud for automating data sets and data transformation.
Azure Data Lake is another data storage and analytic service platform for big data analytics and massive parallel queries.
Azure HDInsight is a data-relevant service that supports the creation of different clusters using Linux with Ubuntu.
Azure Stream Analytics is a Serverless event processing tool that enables users to combine and run real-time analytics on multiple sets of data from sources such as devices, sensors, web sites, and even social media.
Messaging Products
Event Hubs, that provide event and telemetry functions to the cloud with low latency and high reliability. For instance, an event hub can be applied to track data from cell phones such as a GPS real-time location.
Queues, which allow one-directional communication via service bus queue. Even though there can be multiple readers for the queue, only one can process a single message.
Topics also provide one-directional communication but via subscriber pattern. It is similar to a queue, yet each subscriber can get a copy of the message sent to a Topic. Moreover, the subscriber can filter out messages based on various criteria set by the subscriber.
Relays, on the other hand, provide bi-directional communication. Unlike queues and topics, a relay does not store in-flight messages in its own memory but passes data on to the destination application.
CDN
A global content delivery network (CDN) is of great use for audio, video, applications, images, and other static media files. It can be used to cache static assets of web sites geographically closer to users to advance performance. The network can be easily managed by HTTP API. As of April 2020,1 Azure has 94 points of presence locations worldwide (also known as Edge locations).
Management
Azure Automation management tool provides a way for users to automate the manual, long-running, error-prone, and repeated tasks that are frequently performed in a cloud or virtual environment. This tool not only saves time and increases the reliability of usual administrative tasks, but also schedules them to be automatically completed at regular time periods. Moreover, you can automate processes using runbooks or automate configuration tasks using Desired State Configuration.
Azure AI
Microsoft Azure Machine Learning stands for a set of ultra-modern tools and frameworks for developers to design their own machine learning and artificial intelligence (AI) services.
Microsoft Azure Cognitive Services is another product that offers customizable services for developers to make their applications more intelligent, user-friendly, and popular. Both platforms include perceptual and cognitive intelligence covering speech recognition, speaker recognition, neural speech synthesis, face recognition, computer vision, natural language processing, and machine translation, as well as business decision services. Most AI features that are applied in Microsoft’s own products and services such as Office, Teams, and Xbox are also powered by Azure Cognitive Services.
Azure Blockchain Workbench
Through Azure Blockchain Workbench, Microsoft is promoting infrastructure to set up a consortium network of multiple blockchain mechanisms. The company is also eager to provide integration from Azure Blockchain platform to other Microsoft services to share the development of distributed applications. Furthermore, Microsoft supports many general-purpose blockchains like Ethereum or Hyperledger Fabric, as well as other purpose-built blockchains like Corda.
Azure is currently available in 54 regions around the world, and is considered to be one of the first hyper-scale cloud provider that has committed to building facilities in regions located in South Africa. As of now, Azure geography has multiple Azure Regions, such as North Europe (Dublin, Ireland) and West Europe (Amsterdam, Netherlands).
Creating a Function in Azure with Python Using Visual Studio Code
In this section, we are going to use VS Code to create a Python function that responds to HTTP requests. After testing the code locally, we will try to deploy it to the serverless environment of Azure Functions.
You can build Python web apps in the cloud-managed application platform optimized especially for Python. It is also possible to connect your apps to data using Azure services for popular relational and nonrelational (SQL and NoSQL) databases.
You can quickly and easily build, test, and host models from any Python environment with Azure services for data science and machine learning purposes. Azure can also bring in prebuilt AI solutions to provide the smoothest experiences to your Python apps.
With Azure, you can build and debug your Python apps with VS Code. Moreover, Azure and VS Code also integrate seamlessly with GitHub, letting you run a full DevOps lifecycle for your Python apps.
Azure lets you focus on your application’s code, rather than on infrastructure. Meaning you can run Django and Flask apps on Azure platform with Azure Web Apps while Azure will manage the underlying app’s infrastructure.
Azure offers both relational and nonrelational databases as managed services. Most popular are MySQL, Redis, and Azure Cosmos DB (compatible with MongoDB).
Before getting started, configure your environment and make sure you have the following requirements in place: an Azure account with an active subscription and Azure Functions Core Tools version 3.x downloaded.
In order to create your local Azure Functions project in Python project using VS Code, choose the Azure icon in the Activity bar, then go to the Azure: Functions area and select the Create new project. Next, choose a directory location for your project workspace and choose Select. Be sure to sign in to Azure using your Outlook or Microsoft ID.
- 1.
Select a language for your function project: go with Python.
- 2.
Select a Python integration to create a virtual environment: pick a location of your Python interpreter. If the location is not displayed, script the full path to your Python binary.
- 3.
Select a template for your project’s first function: select HTTP trigger.
- 4.
Provide a function name: type HttpExample.
- 5.
When it comes to authorization level: opt for Anonymous, which enables everyone to call your function endpoint.
- 6.
Set how you would like to open your project: choose to Add to the workspace.
Using this data, VS Code generates an Azure Functions project with an HTTP trigger so you can view the local project files in the Explorer.
VS Code will then integrate with Azure Functions Core tools to let you run this project on your local development computer before you publish it to Azure. To activate your function, press F5 and start the function app project. Output from Core Tools is located in the Terminal panel, and that is where your app starts. There you can also see the URL endpoint of your HTTP-triggered function operating locally.
If you have issues occurring while running on Windows, check that the default terminal for VS Code is not set to Windows Subsystem for Linux (WSL) Bash. You can also do it manually by going to the Azure: Functions area and under Functions, expand Local Project ➤ Functions. Right-click (Windows) or Ctrl-click (macOS) the HttpExample function and select Execute Function Now.
In Enter request body you should be able to see the request message body value of { “name”: “Azure” }. Press Enter to send this request message to your function or manually send an HTTP GET request to the http://localhost:7070/api/HttpExample address in a web browser. When the function is activated locally and returns a response, a notification is displayed in VS Code. Press Ctrl + C to stop Core Tools and disconnect the debugger.
After you have confirmed that the function runs properly on your local computer, you can now access VS Code to publish the project directly to Azure. However, before you can publish your app, you should sign in to Azure. If you are not already signed in, look for the Azure icon in the Activity bar, then in the Azure: Functions area, and click on Sign in to Azure. If you do not already have an Azure account, you can create a free account. If you are a student, you are eligible to create a free Azure account for Students. Once you have successfully signed in, you can close the new browser window. The subscriptions that were activated by you would be displayed in the Sidebar.
In order to publish the project to Azure, you are expected to make a function app and related resources in your Azure subscription and then deploy your code. Normally, publishing to an existing function app overwrites the content of that app in Azure. To start, choose the Azure icon in the Activity bar, then in the Azure: Functions area click on the Deploy to function app button.
- 1.
Select folder: Locate a folder from your workspace or browse to one that has your function app. You will not be able to see this if you already have a valid function app running.
- 2.
Select subscription: Choose the subscription to apply. You will not be able to see this if you only have one subscription.
- 3.
Select Function App in Azure: Choose + Create a new Function App.
- 4.
Create a globally unique name for the function app: It has to be a name that is valid in a URL path and is unique in Azure Functions at the same time.
- 5.
Select a runtime: Choose the version of Python you have already activated to run locally. It is recommended to use the python --version command to check your version.
- 6.
Select a location for new resources: It is always better to choose a region closer to you.
A resource group, which is also a logical container for related resources.
A standard Azure Storage account, which has all the information about your projects.
A consumption plan, which determines the host for your serverless function app.
A function app, which defines the environment for executing your function code and lets your group functions as a logical unit for easier management and sharing of resources within the same hosting plan.
An Application Insights are used to record the routine of your serverless function.
A notification will be displayed after your function app is created. By default, the Azure resources are set based on the function app name you provide in the same new resource group with the function app. If you need to change the names of these resources or reuse them, you would need to publish the project applying advanced create options.
Look for View Output in the notification to review the deployment results, and if you miss the notification, you can select the bell icon in the lower right corner for it to reappear again.
Back in the Azure: Functions area in the sidebar, expand your subscription, your new function app, and Functions. Right-click (Windows) or Ctrl-click (macOS) the HttpExample function and select Execute Function Now. In Enter request body you should be able to see the request message body value of { “name”: “Azure” }. Press Enter to send this request message to your function so that when the function is activated in Azure and returns a response, a notification is displayed in VS Code.
- 1.
In VS Code, press F1 to activate the command palette. In the command palette, look for Azure Functions: Open in the portal. Choose your function app, and press Enter to see the function app page open in the Azure portal.
- 2.
In the Overview tab, look for the named link next to the Resource group. Choose the resource group to delete from the function app page. Proceed to the Resource group page to review the list of included resources, and click on the ones you need to delete. Keep in mind that deletion might take some time (no more than a couple of minutes). Once completed, a notification appears for a few seconds. You can also click on the bell icon at the top of the page to view the notification again.
Azure Functions lets you get access to Azure services without having to write your own integration code. These bindings, which are represented by input and output, are declared within the function definition. Data from bindings are mostly presented as parameters. A trigger here is a special type of input binding, and even if a function has only one trigger, it can have multiple input and output bindings.
You can use VS Code to connect Azure Storage to the function. The output binding that you insert to this function imports data from the HTTP request to a message in an Azure Queue storage queue.
Most bindings function via stored connection strings that Functions use to access the bound service. To put it simply, you use the Storage account that you created with your function app. The connection to this account is already stored in an app setting named AzureWebJobsStorage.
However, before you start to work with storage, you should install the Azure Storage Extension for VS Code and install Azure Storage Explorer. Storage Explorer is a great instrument to look into queue messages produced by your output binding. Conveniently, Storage Explorer is supported on macOS, Windows, and Linux-based operating systems. To connect to your Storage account when running the function locally, you should download app settings to the local.settings.json file.
Next, press the F1 key to open the command palette, then look for and activate the command Azure Functions: Download Remote Settings. Select Yes to all to overwrite the existing local settings. The local.settings.json file is not published and therefore excluded from source control. Copy the value AzureWebJobsStorage, which is the key for the Storage account connection string value, and use this connection to confirm that the output binding works as needed.
With it you can add the storage output binding to your project. Once you cover that, it is time to learn how to add an output binding. Each type of binding has a direction, type, and a unique name to be included in the function.json file. The way you define these attributes depends on the language of your function app. Binding attributes are defined directly in the function.json file and depending on the binding type, additional modifications may be needed. The queue output configuration defines the fields required for an Azure Storage queue binding.
Binding characteristics
Prompt | Value | Description |
|---|---|---|
Select binding direction | Out | The binding is an output binding. |
Select binding with direction... | Azure Queue Storage | The binding is an Azure Storage queue binding. |
The name used to identify this binding in your code | Msg | Name that identifies the binding parameter referenced in your code. |
The queue to which the message will be sent | Outqueue | The name of the queue that the binding writes to. When the queueName doesn't exist, the binding creates it on first use. |
Select setting from "local.setting.json" | AzureWebJobsStorage | The name of an application setting that contains the connection string for the Storage account. The AzureWebJobsStorage setting contains the connection string for the Storage account you created with the function app. |
Once the binding is defined, you can now use the name of the binding to access it as an attribute signature. With an output binding, there is no need to use the Azure Storage SDK code for authentication or queue reference, or scripting data. The Functions runtime and queue output binding will be completing these tasks for you.
In order to run the function locally, press F5 to start the function app and Core Tools. With Core Tools running, look for the Azure: Functions area. Under Functions, expand Local Project ➤ Functions then right-click (Ctrl-click on Mac) the HttpExample function and choose Execute Function Now. Once completed, you should be able to see the request message body value of { “name”: “Azure” }. Press Enter to send this request message to your function, and when a response is returned, do not forget to press Ctrl + C to stop Core Tools.
Since you are using the storage connection string, your function will automatically connect to the Azure storage account when running locally. A new queue named outqueue will be made in your storage account by the Functions runtime when the output binding is first activated. The Storage Explorer will then be used to demonstrate that the queue was created along with the new message.
In order to connect Storage Explorer to your account, it is necessary to run the Azure Storage Explorer tool. Select the connect icon on the left, and click on Add an account. In the Connect dialog, choose Add an Azure account, choose your Azure environment, and select Sign in. After you successfully sign in to your account, you will be able to see all of the Azure subscriptions attached to your account.
To examine the output queue in VS Code, press the F1 key to open the command palette, then search for and run the command Azure Storage: Open in Storage Explorer and look for your Storage account name. Your storage account opens in Azure Storage Explorer.
You should then expand the Queues node and select the queue named outqueue. The queue carries the message that the queue output binding created when you ran the HTTP-triggered function. If you activated the function with the default name value of Azure, the queue message is Name passed to the function: Azure. Try running the function again, send another request, and you will be able to see a new message appear in the queue. With it, it is now time to redeploy and verify the updated app.
Go to VS Code, press F1 to open the command palette in which you should search for, and select Azure Functions: Deploy to function app. Choose the function app that you created in the first article and deploy it to dismiss the warning about overwriting files.
Once the deployment completes, you can again employ the Execute Function Now feature to trigger the function in Azure and view the message in the storage queue to verify that the output binding creates a new message in the queue.
In Azure, resources refer to function apps, functions, and storage accounts. They are grouped into resource groups, and you can remove everything in a group simply by deleting the whole group.
Press F1 in VS Code to open the command palette. In the command palette, look for and select Azure Functions: Open in the portal. Choose your function app and press Enter. The function app page will then open in the Azure portal. In the Overview tab, select the named link next to the Resource group. Here, select the resource group to delete from the function app page and verify that they are the ones you want to delete. Select Delete resource group, and simply follow the instructions. Deletion may take a couple of minutes, and when it is completed, a notification will show up for just a few seconds.
In the next section, we will discuss how to deploy Docker containers to App Services in Azure.
Deploying Docker Containers to Azure App Service
Once you have installed the Azure extension, go to the Azure explorer and select Sign in to Azure to follow with the prompts. After signing in, confirm that Azure: Signed In statement appears in the Status Bar and your subscription is displayed in the Azure explorer as well.
For Windows:
set HTTPS_PROXY=https://username:password@proxy:8080set HTTP_PROXY=http://username:password@proxy:8080For macOS and Linux:
export HTTPS_PROXY=https://username:password@proxy:8080export HTTP_PROXY=http://username:password@proxy:8080
With a container image in a registry, you can apply the Docker extension in VS Code to set up an Azure App Service operating the container. In the Docker explorer, expand Registries, expand the node for your registry, then expand the node for your image name until you see the image with the :latest tag.
You can locate an image in the Docker explorer by right-clicking the image and selecting Deploy Image to Azure App Service. Select the Deploy Image to Azure App Service menu item. Afterward, follow the prompts to select an Azure subscription, select or specify a resource group, specify a region, configure an App Service Plan, and set a name for the site.
The name of the App Service should be unique across all of Azure, so it is standard to use a company or personal name. For production sites, you can configure the App Service with a separately registered domain name. Setting the app service as such takes not more than just a few minutes, and you can see progress in VS Code’s Output panel.
Once over, you should also add a setting named WEBSITES_PORT to the App Service to specify the port on which the container is located. It is typical to use an image from the Create a Python container in VS Code tutorial with the port of 5000 for Flask and 8000 for Django. To set WEBSITES_PORT of your own, switch to the Azure: App Service explorer, expand the node for your new App Service, and right-click Application Settings to select Add New Setting. In the beginning, be sure to enter WEBSITES_PORT as the key and the port number as the value.
The App Service restarts automatically when you change settings. You can also right-click the App Service and select Restart at any time. After the service has restarted, browse the site at HTTP://<name>.azurewebsites.net. You can use Ctrl+ click (Cmd + click on macOS) on the URL in the Output panel, or right-click the App Service in the Azure: App Service explorer and select Browse Website.
Because you are going to make changes to your app at some point for sure, you end up rebuilding your container many times. Fortunately, the process consists of only a few steps. First, rebuild the Docker image. If you change only the app code, the build should take only a few seconds. Then, push your image to the registry. Similarly, if you modify only the but app code, only that small layer needs to be pushed, and the process will be completed within seconds.
After that, in the Azure: App Service explorer, right-click the suitable App Service and select Restart. Restarting an app service will automatically deliver the latest container image from the registry. After about 15–20 seconds, try visiting the App Service URL again to check the updates.
You can also use this procedure to stream logs from an Azure App Service for a container to VS Code. From within VS Code, you can view logs from the running site on Azure App Service, that detains any output to the console and directs them to the VS Code Output panel. In order to open VS Code Output panel with a connection to the log stream, find the app in the Azure: App Service explorer, right-click the app, and choose Start Streaming Logs. Be sure to answer Yes when asked to enable logging and restart the app.
It is possible that Azure resources you established for your project might incur ongoing costs. To prevent overspending, delete the resource group that hosts all those resources. You can delete the resource group through the Azure portal or the Azure CLI: In the Azure portal. Select Resource groups from the left-side navigation pane, select the resource group that you want to be erased, and then use the Delete function.
Cosmos DB
Azure Functions
Azure CLI Tools
Azure Resource Manager Tools
Using Containers in VS Code
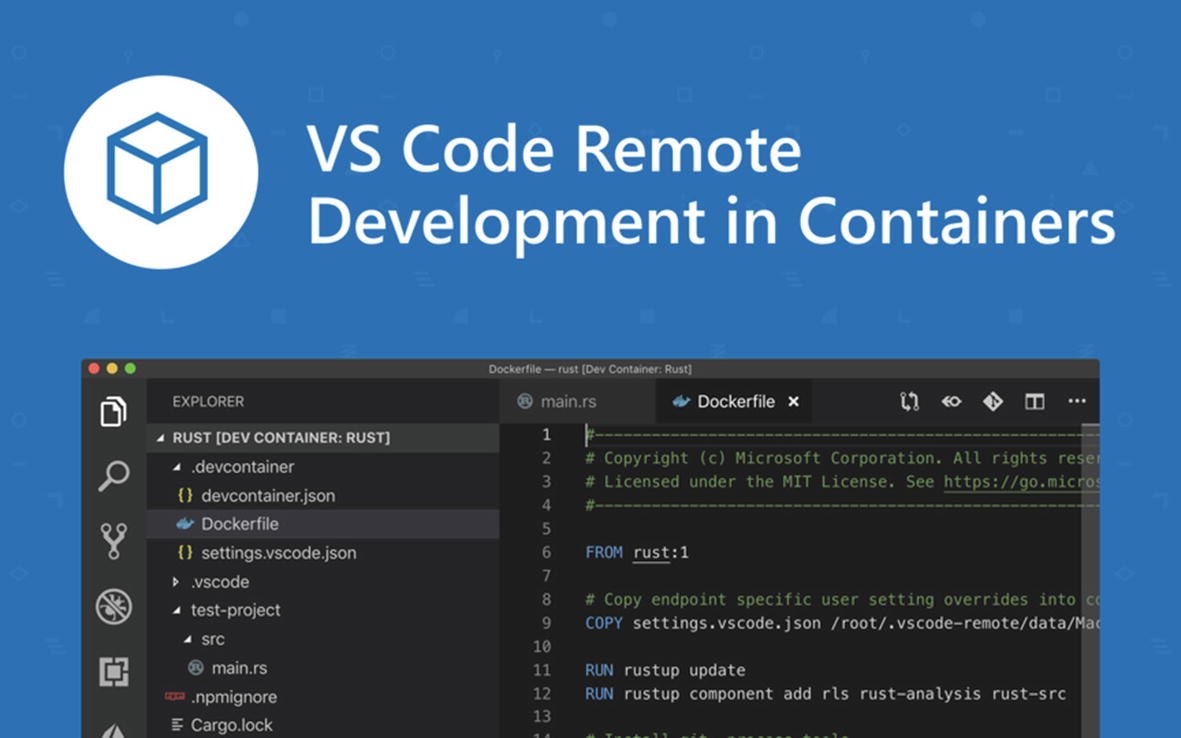
Remote containers in VS Code
Workspace files are installed from the local file system or shared or copied into the container. Extensions are activated inside the container, where they have full access to the tools, platform, and another file system. This gives you a chance to seamlessly switch your entire development environment by linking to a different container. This lets VS Code run a smooth local-quality development experience—including full IntelliSense capacity, code navigation, and debugging—regardless of where your code is located.
Windows: You are expected to have Docker Desktop 2.0+ on Windows 10 Pro/Enterprise. Windows 10 Home (2004+) requires Docker Desktop 2.3+ and the WSL 2 back-end.
macOS: Be sure to set Docker Desktop 2.0+.
Linux: Docker CE/EE 18.06+ and Docker Compose 1.21+.
To get started, first install and configure Docker for your operating system. If you are using WSL 2 on Windows, to enable the Windows WSL 2 back-end: Right-click on the Docker taskbar item and select Settings. Check Use the WSL 2 based engine and verify your distribution is enabled under Resources ➤ WSL Integration. Then right-click on the Docker taskbar item, select Settings, and update Resources ➤ File Sharing with any locations your source code is located.
If you are using Linux, follow the official install instructions for Docker CE/EE for your distribution and add your user to the docker group by using a terminal to run: sudo usermod -aG docker $USER. Then sign out and back in again to set your changes before you install the VS Code and Remote Development extension pack.
If you are working with Git, there are two points to consider: if you are working with the same repository both locally in Windows and inside a container, see that you set up stable line endings. If you copy using a Git credential manager, it is important that your container has a full access to your credentials.
Operating with Containers
The Remote containers extension administers in two primary operating models: you can use a container as your full-time development environment, or attach it to another running container to examine it. The easiest way to get started is to try one of the sample development containers from the Docker and the Remote-Containers extension where you can select a sample from the extensive list.
On the other hand, you can open an existing folder in a container for any project to use as your full-time development environment by applying active source code on your filesystem. Start VS Code, run the Remote-Containers: Open Folder in Container command from the Command Palette (F1), and click on the project folder for which you need to set up the container. At the same time, if you want to modify the container’s contents or settings before opening the folder, you can activate Remote-Containers: Add Development Container Configuration Files instead. Next, pick a starting point for your dev container. You can opt for a base dev container definition from a filterable list, or use an existing Dockerfile or Docker Compose file. Please pay attention when using Alpine Linux containers, as some extensions may not be available due to glibc dependencies in native code inside the extension.
The filterable list will be automatically organized based on the contents of the folder you have. The dev container definitions typically come from the vscode-dev-containers repository. You can easily look through the containers folder of that repository to check the contents of each definition. After selecting the starting point for your container, VS Code will include the dev container configuration files in your project (.devcontainer/devcontainer.JSON).
The VS Code window will then restart and build the dev container. You only have to build a dev container the first time you access it; opening the folder after the first successful build will be much faster. A progress notification will be there to display status updates. After the build is over, VS Code will automatically connect to the container. You can then interact with your project in VS Code just as you could when accessing the project locally: when you open the project folder, VS Code will pick up and reuse your dev container configuration by default. While using this approach to link-local filesystem into a container is convenient, it does have some minor performance overhead on Windows and macOS.
If you are using Windows Subsystem for Linux v2 (WSL 2) and have activated Docker Desktop’s WSL 2 back-end, you can work with source code stored inside WSL.
Once the WSL 2 engine is enabled, you can either use the Remote-Containers: Reopen Folder in Container command from a folder that is already opened or select Remote-Containers: Open Folder in Container from the Command Palette (F1) and choose a WSL folder using the local \wsl$ share (from the Windows side).
You can also open an existing workspace in a container following a similar process to open a VS Code multiroot workspace in a single container if the workspace only references relative paths to subfolders. In this case, you can apply the Remote-Containers: Open Workspace in Container command or simply use File ➤ Open Workspace once you have opened a folder that contains a .code-workspace file in a container. Once connected, you should add the .devcontainer folder to the workspace so you can edit its contents with ease, if it is not already visible. Remember that while it is not possible to use multiple containers for the same workspace in the same VS Code window, it is possible to use multiple Docker Compose operated containers at once from separate windows.
Creating a Devcontainer.json File
VS Code’s container configuration is located in a devcontainer.json file. This file is optional, but it is recommended that you create it because it makes handling debugging configuration easier.
Activating the Remote-Containers: Add Development Container Configuration Files command from the Command Palette (F1) will deliver the needed files to your project as a starting point, which you can further edit to match your needs. The command also allows you to pick a prescribed container configuration from a list based on your folder’s contents, reuse an existing Dockerfile, or reuse an existing Docker Compose file.
At times you might have an occasion where you are using a Docker named volume that you need to review or make changes in. You can activate VS Code to work with these contents without creating or editing devcontainer.json file but by selecting the Remote-Containers: Explore a Volume in a Development Container from the Command Palette (F1).
In addition, it is also possible to inspect your volumes in the Remote Explorer. First, select Containers in the dropdown, where you can find a Dev Volumes section. Right-click on a volume to check its creation information, such as when the volume was made and what files were cloned into it. If you have the Docker extension installed, you can right-click on a volume in the Volumes section of the Docker Explorer and select Explore in a Development Container to explore and navigate through the whole Docker context menu.
Managing Extensions
VS Code manages and stores extensions in one of two places: locally on the UI/client side, or in the container. While extensions that directly impact the VS Code UI, such as themes and snippets, are uploaded locally, most extensions will be placed inside a particular container. This feature lets you install only the extensions you need for a specific task in a container and effortlessly turn the whole tool-chain on by linking to a new container.
When you install an extension from the Extensions view, it will automatically be placed in the correct location. You can guess where an extension is installed by looking at the category grouping. There will be a Local - Installed category and also one for your container. Local extensions that actually need to operate remotely will appear Disabled in the Local - Installed category. In order to install an extension on your remote host, select Install. You can also install all locally installed extensions inside the Dev Container by accessing the Extensions view and clicking Install Local Extensions in Dev Container: [Name], pressing the cloud button at the right of the Local - Installed title bar. This will present a dropdown from which you can choose what locally installed extensions to add to your container.
Some extensions may depend upon you installing additional software in the container. Even though you can edit your devcontainer.json file by hand to add a list of extension IDs, you can also right-click on any extension in the Extensions view and click Add to devcontainer.json.
Forcing an Extension to Operate Locally or Remotely
A value of “ui” instead of “workspace” is the one that will force the extension to operate on the local UI/client-side instead. Normally, this should only be applied for testing unless otherwise guided by the extension’s documentation, since it can cause errors in extensions.
Forwarding or Publishing a Port
Containers are naturally unrelated environments, so if you need to access a server, service, or another source inside your container, you will have to forward or publish the port to your host. You can potentially configure your container to always keep these ports open, or forward them for the time being.
You can also settle a list of ports you want to forward at all times when attaching or accessing a folder in a container by using the forwardPorts function in devcontainer.json, similar to “forwardPorts”: [3000, 3001]. After that, you are requested to reload and reopen the window for all the settings to be applied once VS Code connects to the container again.
Temporarily Forwarding a Port
If you need to access a port that was not included in devcontainer.json, or if you need to publish it in your Docker Compose file, you can forward a new port for the duration of the session by activating the Forward a Port command from the Command Palette (F1). After choosing a port, a notification will inform you about the localhost port you should use to access the port in the container. For example, when you forward an HTTP server listening on port 3000, the notification will tell you that it is mapped to port 3000 on localhost. You can then create a link to this remote HTTP server using http://localhost:3000.
If you would like VS Code to recollect any ports you have previously forwarded, check Remote: Restore Forwarded Ports in the Settings editor (Ctrl+,) or set “remote.restoreForwardedPorts”: true in settings.json.
Docker also has the ability to publish ports when the container is created. Published ports have very much the same pattern as ports that you make available to your local network. If your application only accepts calls from localhost, it will dismiss connections from published ports just as your local machine would for network calls. Forwarded ports, on the other hand, actually look like localhost to the application. Each can be beneficial in different instances.
To publish a port, you can utilize the appPort item. For example, when you reference an image or Dockerfile in devcontainer.json, you can use the appPort property to publish ports to the host: “appPort”: [ 3000, “8921:5000” ].
In any case, you would have to rebuild your container for the setting to have any impact. You can achieve this by starting off the Remote-Containers: Rebuild Container command in the Command Palette (F1) when you are linked to the container.
Opening a terminal in a container from VS Code is also quite simple. When you create a folder in a container, any terminal window you open in VS Code (via Terminal ➤ New Terminal) will automatically operate in the container rather than locally. You can also use the same code command line from this same terminal window to take a number of different operations, such as opening a new file or folder in the container.
Once you have opened a folder in a container, you can switch the VS Code’s debugger on in the same way you would when performing the application locally. For instance, if you choose to launch configuration in launch.json and start debugging (F5), the application will turn on the remote host and add the debugger to it.
VS Code’s local user settings are also reapplied when you are linked to a dev container. Even though this keeps your user experience stable, you might want to vary some of these settings between your local project and the container. When you have connected to a container, you can also calibrate container-specific settings by running the Preferences: Open Remote Settings command from the Command Palette (F1) or by switching to the Remote tab in the Settings editor. These will overrule any local settings you currently activate every time you connect to the container.
By default, the Remote-Containers extension automatically kicks off the containers attached to the devcontainer.json when you open the folder. When you close VS Code, the extension automatically turns off the containers you have connected to. However, you can correct this behavior by adding “shutdownAction”: “none” to devcontainer.json.
While you can utilize the command line to administer over your containers, you can also do it with the Remote Explorer. To stop a container, choose Containers from the dropdown list and right-click on a running container, then select Stop Container. You can also kick off exited containers, remove containers, and remove recent folders. Through the Details view, you can forward ports and open already forwarded items in the browser. When you need to clean out images or mass-delete containers, look for Cleaning out unused containers and images for various available options.
Personalizing with Dotfile Repositories
Dotfiles stand for files whose filename starts with a dot (.) and generally have configuration information for different applications. Because development containers can make up for a wide range of application types, it could be convenient to place these files somewhere so that you can easily duplicate them into a container once it is on and operating. A practical way to do this would be to locate these dotfiles in a GitHub repository and then apply a utility to take a copy and employ them. The Remote-Containers extension has built-in assistance for using these with your own containers. If you are a newbie in this area, start by taking a look at the different dotfiles bootstrap repositories that are available.
Docker Toolbox on Windows is not supported.
Windows container images are not yet supported.
Using a remote Docker Host is realizable, but requires extra setup actions.
All roots and folders in a multiroot workspace will be accessed in the same container, regardless of whether there are available configuration documents at lower levels or not.
The unofficial Ubuntu Docker snap set for Linux is not supported.
If you copy a Git repository with SSH and your SSH key has a passcode, VS Code’s pull and sync features may break off when running remotely. Either use an SSH key without a passphrase, copy using HTTPS, or run git push from the command line to operate around the matter.
Local proxy settings are not reapplied inside the container, which can obstruct extensions from working unless the correct proxy data is configured (for example, global HTTP_PROXY or HTTPS_PROXY environment items with the accurate proxy data).
Additionally, the first-time installation of Docker Desktop for Windows without the WSL 2 engine might require an additional sharing action to provide your container with access to local source code. This step may not work with certain email-based identities, and you may get errors if you sign in to Docker with your email address instead of your Docker ID. This is a known problem and can be resolved by signing in with your Docker ID instead.
Summary
In this chapter we unraveled the mighty world of MS Azure services, and how it can be used for building and deploying terrific Python apps.