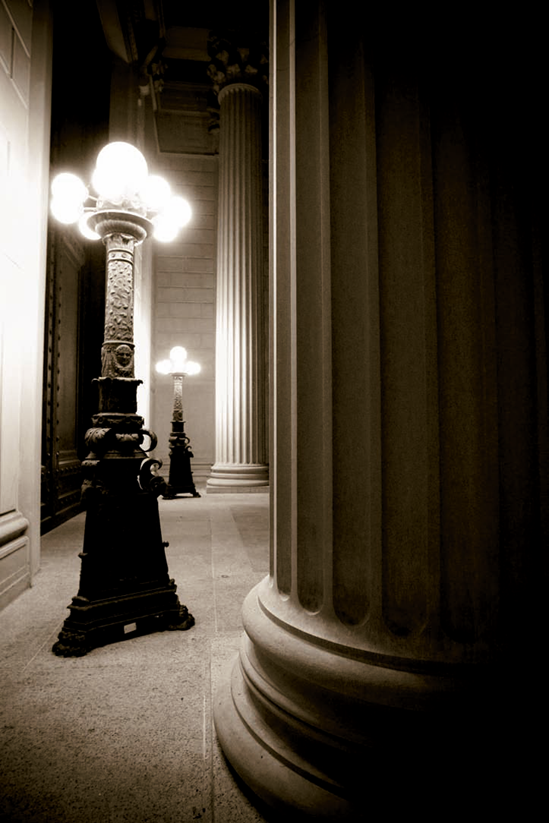
The south entrance to the National Archives. Taken at ISO 100, f/8, 1/250 second with a 19mm lens.
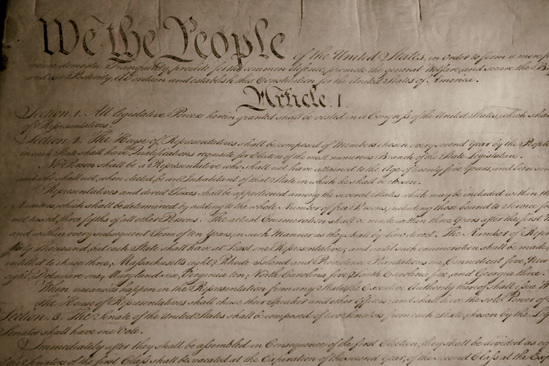
At the National Archives, you can see the documents that defined the United States and the freedoms that its citizens enjoy. Together, the Declaration of Independence, the Constitution of the United States, and the Bill of Rights make up the Charters of Freedom.
A visit to the National Archives offers a rare chance to see all these documents together. In addition to the rotunda, the National Archives building and statues that adorn it symbolize the importance of these documents as well as the historical records kept by the nation's archivists. Together, they tell the story of America.
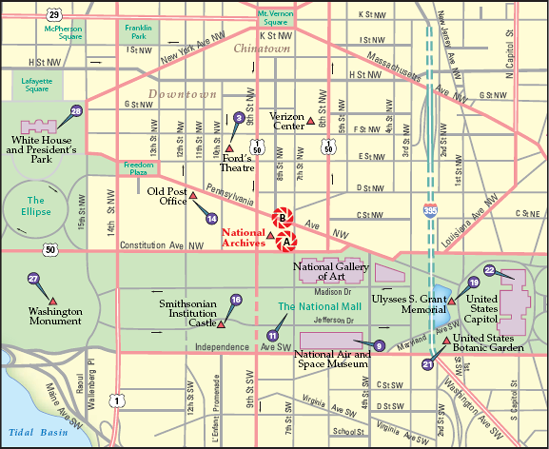
Figure 10.1. The best locations from which to photograph the National Archives: (A) the Rotunda for the Charters of Freedom and (B) the building's north entrance. Nearby photo ops: (3) Ford's Theatre, (9) National Air and Space Museum, (11) National Mall, (14) Old Post Office, (16) Smithsonian Institution Castle, (19) Ulysses S. Grant Memorial, (21) United States Botanic Garden, (22) United States Capitol, and (28) White House and President's Park.
There are two very different areas to photograph here: inside the dark, cavernous rotunda, and outside in what will often be the bright outdoor light.
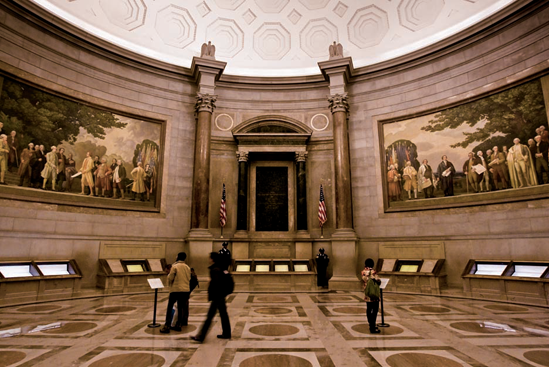
Besides photographing the documents that make up the Charters of Freedom, the Rotunda where these documents are stored is a spectacle unto itself (see Figure 10.1). Two murals painted by Barry Faulkner depict fictional scenes of the presentation of the Declaration of Independence and the Constitution, and below these are some of the most important documents to the free world (see Figure 10.2). You can photograph the documents here if you like, but it is also possible to download high-resolution images of them from the National Archives Web site, www.archives.gov.
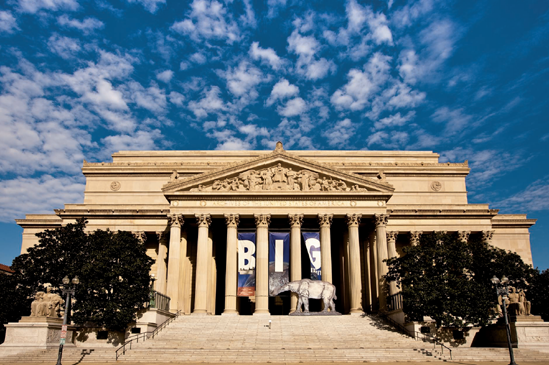
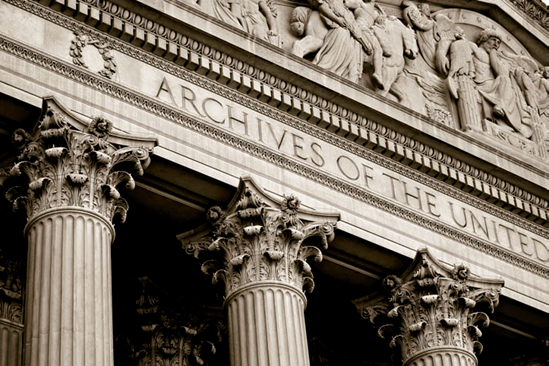
The north side of the National Archives building is a little easier to photograph than the south because there is a good amount of space from which to photograph both its pediment (see Figure 10.3) and its two main sculptures by Robert Aitken, The Past and The Future. But you may want to choose whichever side has the better light — the south side has less room, and you'll likely have to view it from across Constitution Avenue.
The pediment on this side was sculpted by Adolph A. Weinman, and is called Destiny. Here figures representing The Arts of War and The Arts of Peace stand next to a Zeus-like figure. Surrounding them are figures representing The Romance of History and The Song of Achievement.
Many people realize when their camera's flash goes off, but not so for their autofocus light. When some cameras sense there is not enough light or contrast to perform an autofocus, they will emit a light to find a focus point. With some cameras, you can turn this light off and still use the autofocus (although it will be slower or may not work at all), but with other cameras the only way to do so is to switch the autofocus off. Therefore, you want to figure out how to manually focus your camera.
Tip
Turn your flash off! In order to help preserve the documents within the rotunda, flashes are not allowed.
Within the National Archives, more modern cameras with higher ISOs fare much better, because it is quite dark (see Figure 10.4).
Within the Rotunda, you want to use a wide lens of about 20mm for a horizontal shot that spans most of the two paintings. If you don't have such a wide lens, you can also choose to photograph a horizontal image of the center of the Rotunda, which can be taken with a 35mm lens.
If you choose to photograph the documents, you want to use a standard lens of about 50mm. Outside, longer lenses work well to separate the subjects from their backgrounds, as well as simply to see high enough to the details of the pediment. Lenses between 100–200mm work well here.

Figure 10.5. A detail of the floor in the Rotunda; figures here symbolize Legislation, Justice, History, War and Defense (see A on the map). Taken at ISO 3200, f/3.5, 1/15 second with a 50mm lens.
If you choose to photograph the doors on the south entrance, you'll need a wide lens of 20–24mm (a slightly longer focal-length lens may work as well).
When photographing an overall shot of the Rotunda, you may have to use a very slow shutter speed to expose it enough. Figure 10.1 was shot at 1/10 second, which means you have to have a very steady hand and depress the shutter carefully. You can also use your camera's timer to automatically shoot the picture. In this way, you only hold the camera still, and the camera will snap the photo without you moving any fingers. This can help you to hold the camera still. Otherwise, shoot a few pictures in a row by either holding down the shutter button (this will keep your hand more steady) or lightly depressing the shutter consecutively several times — often one of the photos within that group will be tack sharp.
You may want to choose to use Aperture Priority mode so that your camera doesn't inadvertently set a very low aperture value such as f/2.8. With a wide-angle lens, it's easier to keep things in focus, but sometimes the combination of a very low aperture value and a focus point that isn't perfect (such as too far away or too close) will mean an out-of-focus picture. By setting a higher aperture value, such as f/4, that has a little more depth and carefully focusing with a steady hand, you should be able to make a good photo.
Before you enter the National Archives building, you should understand two things: how to turn off your flash, and how to also turn off any autofocus lights that your camera may emit. Flash photography, and any extraneous lighting in general, is prohibited within the Rotunda. It is especially important to make sure your camera doesn't emit any sources of light next to the Charters of Freedom.
Indoors at the National Archives, the best times to go are first thing in the morning or very late in the day, when the crowds will be minimized. During the day, there are often hundreds of people surrounding all the documents, as well as a line forming on the left side to walk though them all (although it's really not necessary to wait in it, because people come and go to different parts of the exhibit).
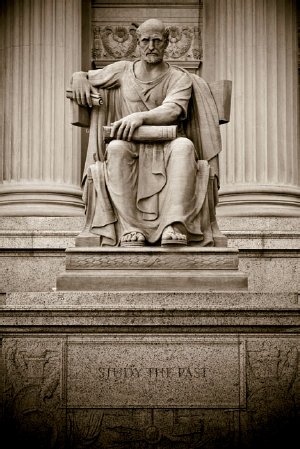
Figure 10.6. The Past, by Robert Aitken, on the National Archives Building's north side (see B on the map). Taken at ISO 200, f/5, 1/250 second with a 165mm lens.
Outside, you can work on the side that has the best sun exposure when you are there, but Figure 10.5 was shot when the building's north side was in shade, which works well anyway.
Outdoors, use the weather to your advantage. If there are big clouds and blue sky, incorporate them into your composition. On a cloudy day, use the soft light to make nice portraits of the different sculptures and artwork that cover the building.
Night can be an interesting time to photograph here. There are a variety of lighting types on the building which each produce a different color of light. Be sure to explore the south entrance doors — those are the largest bronze doors in the world, and they don't look half bad photographed at night (see Figure 10.6).