
![]()
Performance is one of the attributes of software quality. An application with performance levels meeting or exceeding the expectations of its end users can be called performant. Often the term performance is used synonymously with scalability, which is another software quality attribute.
Performance, an indication of the responsiveness of an application, can be measured in terms of latency or throughput. Latency is the time taken by an application to respond to an event, for example the number of seconds taken by a screen to show some search result, in response to a user clicking a search button. Throughput is the number of events that take place in a specified duration of time, for example number of orders processed by an order processing system in a minute.
Scalability is the ability of an application to handle increased usage load without any (or appreciable) degradation of the performance. Scalability also refers to the ability of an application to show improved performance in proportion to the addition of resources such as memory, CPU power, and so on. A performant application need not be scalable, and vice versa, but ideally your application should be both performant and scalable.
The topics of performance and scalability are vast, and when it comes to ASP.NET Web API, these topics typically cut across multiple technologies. For example, if your ASP.NET Web API uses SQL Server as the persistence store and Entity framework for object-relational mapping, and you host it in IIS (web hosting), you need to be performant on all the following areas: the .NET framework in general, ASP.NET, IIS, EF, SQL server and of course ASP.NET Web API. It is not possible to cover all these topics in a single book, let alone a single chapter. Hence, in this chapter I cover only a few important and must-know areas in ASP.NET Web API.
12.1 Creating Asynchronous Action Methods
In this exercise, you will create asynchronous action methods. The objective behind creating an asynchronous method is to handle more requests with the same number of threads in the thread pool. On the IIS server, the .NET framework maintains a thread pool. The threads from this pool are used to service the requests. The number of threads in a thread pool is finite. The number of threads can be increased to the physical limits, but additional threads do add overhead. The better approach will be to serve the requests with fewer threads, in an efficient manner.
When a request comes in, a thread from the thread pool is assigned to process the request. This thread busily works as the request is processed; and on completion of the request, the thread is returned to the pool to service some other request. This is similar to the operation of a post office or bank, 1 where you wait in line and are processed by an available teller. The teller is with you all the time during the transaction, irrespective of whether she is capable of handling someone else while she waits on some external entity to complete your request. Likewise, as the thread allocated from the thread pool services your request, there are times when a thread must wait for an external entity such as a result from a web service call becoming available. During this time, the thread does nothing but is still allocated to your request because the service call is a blocking call. For this reason, the thread cannot return to the pool. As the number of incoming requests exceeds the number of threads that are free in the pool, requests start queuing up, as is the case when you visit your bank during the lunch break. If you somehow return the thread to the pool and take the same or another thread when the result from the web service is available to resume processing, you will be able to process more requests with the same number of threads. In a restaurant, by contrast, a waiter takes the order, puts it in for the chef to work on, and goes to some other table to take orders. Eventually, when the food is available, the waiter appears to serve you the food, but she does not stand there staring at you, while you eat! The waiter just works on some other table, until the time you are in need of something. In the case of ASP.NET Web API, a processing mechanism similar to the restaurant model is possible with the use of asynchronous controllers.
Asynchronous action methods allow you to start a long-running operation, return your thread to the pool, and then wake up on a different thread or the same thread depending on the availability of threads in the pool at that time, when the operation is complete, to resume the processing. The async and await keywords of C# 5.0 makes writing asynchronous methods easy.
However, asynchronous methods are not suitable for operations that are CPU-intensive, generally called CPU-bound. Using asynchronous action methods on such CPU-bound operations provides no benefits and actually results in overhead from switching the threads. Using asynchronous methods for the operations that are network-bound or I/O-bound, as in the case of calling an external service or reading or writing a large chunk of data from the hard disk, is typically beneficial. This basically means that we should start with normal synchronous methods and switch to asynchronous methods on a case-by-case basis.
- Run Visual Studio and create a new ASP.NET MVC 4 Web Application. Give the project a name of Performant and click OK.
- Select the Web API template and click OK. You can leave the Create A Unit Test Project checkbox unchecked and the Razor option selected in the View Engine dropdown.
- Modify the ValuesController class generated by Visual Studio, as shown in Listing 12-1. Change the <
Path
> placeholder in the code to a valid path in your file system. Note the following about this code:
- a. The ReadFile method just reads a text file and returns the content to the action method, which returns it as the response content.
- b. I have added a delay of 500 milliseconds just for simulating a big file read.
Listing 12-1. The ValuesController Class
using System.IO;
using System.Threading;
using System.Web.Http;

public class ValuesController : ApiController
{
    public string Get(int id)
    {
        return ReadFile();
    }

    private string ReadFile()
    {
        using (StreamReader reader = File.OpenText(@"C: < Path >SomeFile.txt"))
        {
            Thread.Sleep(500);
            return reader.ReadToEnd();
        }
    }
} - Rebuild the solution and make a GET to http://localhost:35535/api/values/1 using Fiddler. Remember to replace port 35535 with the actual port that your application runs on. Web API returns the text, as expected.
- Now, let us simulate some load. For this purpose I use ApacheBench (http://httpd.apache.org/docs/2.2/programs/ab.html), the same tool used by Steve Sanderson in Tech Days 2012 in the talk I noted previously. ApacheBench is just a command-line tool.
- Download and install Apache HTTP Server and you will find ApacheBench (ab.exe) in the bin folder. One of the popular options for downloading Apache for Windows is Apache Haus (http://www.apachehaus.com/cgi-bin/download.plx). You can download the zip of Apache server and take ab.exe from the zip under the bin folder. We need only the executable ab.exe and nothing else.
- Run the following command in a command box: ab -n 60 -c 60 http://localhost:35535/api/values/1. Basically, we ask ApacheBench to make 60 GET requests with a concurrency of 60 to our URI. The output is as follows (some parts removed for brevity).
C:>ab -n 60 -c 60 http://localhost:35535/api/values/1
This is ApacheBench, Version 2.0.41-dev <$Revision: 1.121.2.12 $> apache-2.0
Copyright (c) 1996 Adam Twiss, Zeus Technology Ltd, http://www.zeustech.net/
Copyright (c) 2006 The Apache Software Foundation, http://www.apache.org/

Benchmarking localhost (be patient).....done

Server Software:        Microsoft-IIS/8.0
Server Hostname:        localhost

Document Path:          /api/values/1
Document Length:        771 bytes

Concurrency Level:      60
Time taken for tests:   7.154410 seconds
Requests per second:    8.39 [#/sec] (mean)
Time per request:       7154.410 [ms] (mean)
Time per request:       119.240 [ms] (mean, across all concurrent requests)
Transfer rate:          9.36 [Kbytes/sec] received

Percentage of the requests served within a certain time (ms)
  50%   3576
  66%   4593
  75%   5560
  80%   5628
  90%   6614
  95%   7079
  98%   7121
  99%   7134
100% 7134 (longest request) - You can run ab few more times to get a good handle on the response times as well as the throughput (requests per second).
- Now, modify the ValuesController class, as shown in Listing 12-2. Change the <Path> placeholder in the code to the valid path in your file system.
Listing 12-2. The ValuesController Class Converted to Async
using System.IO;
using System.Threading.Tasks;
using System.Web.Http;

public class ValuesController : ApiController
{
    public async Task<string> Get(int id)
    {
        return await ReadFileAsync();
    }

    private async Task<string> ReadFileAsync()
    {
        using (StreamReader reader = File.OpenText(@"C: <Path>SomeFile.txt"))
        {
            await Task.Delay(500);
            return await reader.ReadToEndAsync();
        }
    }
}
Note the following about this code:
- a. We now have the ReadFileAsync method, the asynchronous equivalent for the previously used method.
- b. We do have the same amount of delay, 500 milliseconds, but here we use Task.Delay instead of Thread.Sleep. The main difference is that the former is non-blocking while the latter is a blocking delay.
- c. Apart from these two differences, the code is functionally equivalent to the previous version in all aspects including the delay baked in.
- d. Pay attention to the return type of the action method, which is Task<string>.
- Rebuild the solution and make a GET to http://localhost:35535/api/values/1. Web API returns the same text, as expected. I’ve placed this step of making a GET from the browser immediately after a rebuild so that application is warmed up and ready to take the load generated by ab.
- Run the following command in a command box: ab -n 60 -c 60 http://localhost:35535/api/values/1. This is the same command we ran to take the baseline. The output is as follows.
C:>ab -n 60 -c 60 http://localhost:35535/api/values/1
This is ApacheBench, Version 2.0.41-dev <$Revision: 1.121.2.12 $> apache-2.0
Copyright (c) 1996 Adam Twiss, Zeus Technology Ltd, http://www.zeustech.net/
Copyright (c) 2006 The Apache Software Foundation, http://www.apache.org/

Benchmarking localhost (be patient).....done

Server Software:        Microsoft-IIS/8.0
Server Hostname:        localhost

Document Path:          /api/values/1
Document Length:        771 bytes

Concurrency Level:      60
Time taken for tests:   0.599034 seconds
Requests per second:    100.16 [#/sec] (mean)
Time per request:       599.034 [ms] (mean)
Time per request:       9.984 [ms] (mean, across all concurrent requests)
Transfer rate:          111.85 [Kbytes/sec] received

Percentage of the requests served within a certain time (ms)
  50%    560
  66%    570
  75%    575
  80%    577
  90%    579
  95%    583
  98%    583
  99%    584
100% 584 (longest request) - Now, with the async action method, there is a significant improvement in response times as well as the throughput.
- The numbers that you see in your run may be different from the ones you see here, based on the hardware configuration of your machine. But the important takeaway here is the overhead that is added on top of the 500 milliseconds baseline delay that we created. With an asynchronous action method the overhead is very small, and with a synchronous action method there is a huge overhead. 500 milliseconds delay is quite significant but as the delay tends to be smaller, the returns you get out of employing asynchronous action method tend to diminish. Also, if the long-running action is CPU-bound, async will not be very useful. Network-bound and I/O-bound long-running operations will be good candidates for asynchrony.
12.2 Pushing Real-time Updates to the Client
If the data returned by a service has the characteristic of changing rapidly over time, for example stock quotes, the traditional technique is for the client applications to poll the service repeatedly at regular interval. A client application makes a request, waits for the response to be returned by the service, inspects the response to see if it has gotten anything interesting and acts accordingly, and repeats this process again and again.
Server-Sent Events (SSEs), on the other hand, allows a unidirectional persistent connection between a client and service established as a result of the initial request made by the client, with the service continuing to push data to the client continuously through this connection, until the time the client drops the connection. This is more efficient than polling, but one consideration is the potentially higher number of open connections.
In the following exercise, you will use the PushStreamContent class to push real-time updates to the client. You will create a console application client as well as a JavaScript-based client to receive the updates from your web API. For the JavaScript client, you will use the Server-Sent Events (SSE) EventSource API, which is standardized as part of HTML5 by the W3C. All modern browsers support SSE, with Internet Explorer being a notable exception. We will use Google Chrome for this exercise.
SSEs have been around for a while but are somewhat eclipsed by later APIs like WebSockets that provide a richer protocol for bidirectional, full-duplex communication. Two-way channel is required for some scenarios but there are cases where a unidirectional push from the server to the client is sufficient. SSEs are better suited for this purpose. Also, SSEs just use the traditional HTTP. That means they do not require any special protocols or opening ports in the firewall and so on to implement your solution.
- Run Visual Studio as administrator.
- Open the solution Performant that we used in Exercise 12.1.
- Create a class Quote
, as shown in Listing 12-3. You can create this class in the Models folder.
Listing 12-3. The Quote Class
public class Quote
{
    public string Symbol { get; set; }
    public decimal Bid { get; set; }
    public decimal Ask { get; set; }
    public DateTime Time { get; set; }
} - Modify ValuesController, as shown in Listing 12-4. Add two static fields and an action method to handle GET. This code does the following:
- a. The first field is a timer that fires every two seconds. We will implement the callback method TimerCallback in the next step.
- b. The second field is a ConcurrentDictionary that stores the StreamWriter corresponding to each subscription. A client subscribes to the events by making a GET call to our controller. We use a ConcurrentDictionary so that the corresponding StreamWriter object can be removed from the dictionary when a client drops off.
- c. When a client makes a GET request, we create a new HttpResponseMessage using the PushStreamContent object and a text/event-stream media type. PushStreamContent takes in an Action as parameter to the constructor.
- d. To get around the same-origin policy, we send the Access-Control-Allow-Origin response header with a * but in production, you will need to be tighter and send only those origins that you want to allow access.
Listing 12-4. Changes to ValuesController
using System;
using System.Collections.Concurrent;
using System.IO;
using System.Net;
using System.Net.Http;
using System.Threading;
using System.Web.Http;
using Newtonsoft.Json;
using Performant.Models;
public class ValuesController : ApiController
{
    private static readonly Lazy<Timer> timer = new Lazy<Timer>(
                                                            () => new Timer(TimerCallback, null, 0, 2000));
    private static readonly
                    ConcurrentDictionary<StreamWriter, StreamWriter> subscriptions =
                                                new ConcurrentDictionary<StreamWriter, StreamWriter>();

    public HttpResponseMessage Get()
    {
        Timer t = timer.Value;

        Request.Headers.AcceptEncoding.Clear();

        HttpResponseMessage response = Request.CreateResponse();
        response.Headers.Add("Access-Control-Allow-Origin", "*");
        response.Content = new PushStreamContent(OnStreamAvailable, "text/event-stream");
        return response;
    }

    // More code goes here
} - Add the method shown in Listing 12-5 to ValuesController. The Action delegate passed to the PushStreamContent constructor will be this method. We create a StreamWriter using the incoming Stream and add it to the ConcurrentDictionary.
Listing 12-5. The Callback Method
private static void OnStreamAvailable(Stream stream, HttpContent headers,

TransportContext context)
{
            StreamWriter writer = new StreamWriter(stream);
            subscriptions.TryAdd(writer, writer);
} - Finally, we need to start sending events. How this can be done will depend on the business need. For example, you can implement a POST or a PUT action method, which can be called by some other entity to signal the controller to start pushing data to the clients. Or the controller can poll a source and on getting some interesting data, it can start pushing that data to all the clients. We will implement the latter approach, though I’ve just hard-coded the data; we do not poll an actual external source. The timer fires every two seconds to create a dummy Quote object, which is serialized to all the clients. Add the timer callback, as shown in Listing 12-6 to ValuesController. This code does the following:
- a. We do not call any service but just create a Quote object simulating real data from a quote service. I serialize the object into a JSON string. Pay attention to the two trailing new lines and the field name of data, as needed by SSE.
- b. We just loop through the StreamWriter objects available in the dictionary and write out the payload. If a client has dropped off, we get an exception and remove the subscription or the writer object from the dictionary and call Close on the writer.
Listing 12-6. The Timer Callback
private static void TimerCallback(object state)
{
    Random random = new Random();

    // Call the service to get the quote - hardcoding the quote here
    Quote quote = new Quote()
    {
        Symbol = "CTSH",
        Bid = random.Next(70, 72) + Math.Round((decimal)random.NextDouble(), 2),
        Ask = random.Next(71, 73) + Math.Round((decimal)random.NextDouble(), 2),
        Time = DateTime.Now
    };

    string payload = "data:" + JsonConvert.SerializeObject(quote) + "

";

    foreach (var pair in subscriptions.ToArray())
    {
        StreamWriter writer = pair.Value;

        try
        {
            writer.Write(payload);
            writer.Flush();
        }
        catch
        {
            StreamWriter disconnectedWriter;
            subscriptions.TryRemove(writer, out disconnectedWriter);

            if (disconnectedWriter != null)
                disconnectedWriter.Close();
        }
    }
} - We are done with the server-side implementation. Rebuild the solution to make sure it compiles.
We will now create a console application client to receive events from our web API.
- In the Solution Explorer, right-click Solution ‘Performant’ and choose Add ➤ New Project. Under Visual C# templates, select Windows and choose Console Application. Give it a name of your choice. Right-click this project in the Solution Explorer and select Set As Startup Project.
- Add the following references to the console application project: System.Net, System.Net.Http, and System.Net.Http.Formatting. The version is 4.0.0.0 for all the three. The first two assemblies will be present in Assemblies ➤ Framework and the last one in Assemblies ➤ Extensions in the Reference Manager window that opens up, as you select Add Reference after right-clicking References under the project in Solution Explorer.
- Modify the Program class of the console application, as shown in Listing 12-7. The Main method just calls the RunClient method, where all the action happens. Remember to replace port 35535 with the port used by your web API application. This code does the following:
- a. It creates a new instance of HttpClient class and calls the GetAsync method. Pay attention to the option HttpCompletionOption.ResponseHeadersRead. This indicates to HttpClient that the operation can complete as soon as a response is available and the headers are read, even if the entire content is not read yet.
- b. It then reads the bytes off the content stream and converts the bytes to a string and write it off to the console.
Listing 12-7. The Program Class
using System;
using System.IO;
using System.Net.Http;
using System.Text;

class Program
{
    static async void RunClient()
    {
        HttpClient client = new HttpClient();

        HttpResponseMessage response = await client.GetAsync(
                                               " http://localhost: 35535/api/values ",
                                                     HttpCompletionOption.ResponseHeadersRead);

        using (Stream stream = await response.Content.ReadAsStreamAsync())
        {
            byte[] buffer = new byte[512];
            int bytesRead = 0;

            while ((bytesRead = await stream.ReadAsync(buffer, 0, buffer.Length)) != 0)
            {
                string content = Encoding.UTF8.GetString(buffer, 0, bytesRead);
                Console.WriteLine(content);
            }
        }
    }

    static void Main(string[] args)
    {
        RunClient();

        Console.WriteLine("Press ENTER to Close");
        Console.ReadLine();
    }
} - Rebuild the solution. Right-click the Performant project in the Solution Explorer and select Debug ➤ Start New Instance.
- With the Performant project running, right-click the console application project in the Solution Explorer and select Debug ➤ Start New Instance.
- You will start getting the events in the form of JSON messages, pushed by our web API to the client, like so:
Press ENTER to Close
data:{"Symbol":"CTSH","Bid":71.44,"Ask":72.70,"Time":"2013-04-27T14:22:21.642857 2+05:30"}

data:{"Symbol":"CTSH","Bid":70.80,"Ask":72.15,"Time":"2013-04-27T14:22:23.654972 3+05:30"}

data:{"Symbol":"CTSH","Bid":70.15,"Ask":71.60,"Time":"2013-04-27T14:22:25.668087 5+05:30"}
- Instead of the client polling the web API, as soon as a new message is available, it is pushed in real time to the client.
- Let us now create a web application to receive these events. In the Solution Explorer, right-click ‘Solution Performant’ and choose Add ➤ New Project. Under Visual C# templates, select Web and choose ASP.MET MVC 4 Web Application. Choose the Basic template and give it a name of your choice. Right-click this project in the Solution Explorer and select Set as Startup Project.
- Configure Visual Studio to use Google Chrome, as shown in Figure 12-1. SSE is not supported in IE.
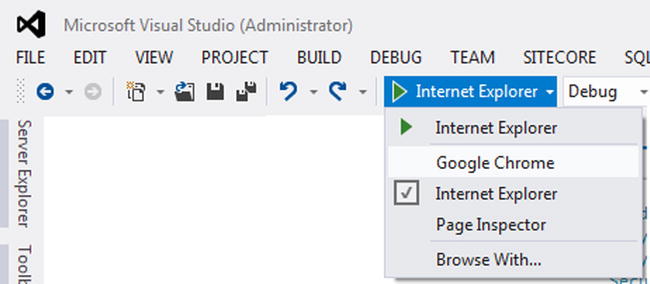
Figure 12-1. Using Google Chrome to browse
- Create an empty MVC controller with a name of HomeController. Also, create the view for the default Index action method generated by Visual Studio. You can right-click the action method and choose Add View and click Add.
- Copy and paste the code from Listing 12-8 into the view Index
.cshtml (Views/Home). We use the EventSource JavaScript API to receive the server sent events. Remember to replace port 35535 with the port used by your web API application.
Listing 12-8. /Home/Index View
@section scripts{
    <script type="text/javascript">

        if (!!window.EventSource) {
            var source = new EventSource(' http://localhost: 35535/api/values '),
            source.addEventListener('message', function (e) {
                var data = JSON.parse(e.data);

               var content = data.Symbol + ' Bid: ' + data.Bid +
                                                   ' Ask: ' + data.Ask + ' ' + data.Time;

               $('#messages').html(content);
            }, false);

            source.addEventListener('error', function (e) {
                if (e.readyState == EventSource.CLOSED) {
                    console.log("error!");
                }
            }, false);
        }
        else {
            alert('It is almost time to upgrade your browser!'),
        }

    </script>
}

<div id="messages"></div> - Rebuild the solution.
- Right-click the Performant project in the Solution Explorer and select Debug ➤ Start New Instance. Repeat this step for the other two projects as well: console application and MVC project.
Now, we have both the console application and the web application running side by side and receiving server-sent events.
- Place a break point in the catch block of the TimerCallback method in ValuesController in the Performant project.
- Now close the console application by bringing it to focus and pressing Enter. Verify that the next time the web API tries to send the event down to this closed application, an exception is thrown and as part of the handling, the StreamWriter object is removed from the dictionary.
12.3 Implementing Simple Web Caching
In this exercise, you will implement a simple web-caching mechanism. The term caching has different connotations. If you have ASP.NET experience, you will know of output caching and application data caching. The former is about storing the resource representation in the server or intermediaries or the user agent, while the latter is about storing the frequently-used application data in the server. Web or HTTP caching is defined in the HTTP specification http://www.w3.org/Protocols/rfc2616/rfc2616-sec13.html#sec13.
A Web cache is a cache of the web server responses such as the web pages, the images, and the style sheets, for later use. The purpose of web caching is to reduce the number of round trips, the network bandwidth, and the web server resource utilization. End users also perceive better performance. The web cache can be in a web browser, if one is involved, or any of the intermediate servers such as that of the ISP or any proxy servers in between. Expiration and validation are the two primary mechanisms associated with the caching. The expiration mechanism allows a response to be reused without checking with the server, thereby reducing the round trip while the validation mechanism minimizes the bandwidth usage.
What is cached need not always be a file such as an image or a CSS. Even ASP.NET Web API responses can be cached. An example of such a scenario would be a web API returning a master list such as list of codes that changes infrequently. By default, the ASP.NET Web API framework marks the response not to be cached by setting the value of the Cache-Control header to no-cache. The Cache-Control: max-age directive specifies the duration in seconds a cache can be used before it expires.
- Run Visual Studio and create a new ASP.NET MVC 4 Web Application. Give the project a name of WebCaching and click OK.
- Select the Web API template and click OK. You can leave the Create A Unit Test Project checkbox unchecked and the Razor option selected in the View Engine dropdown.
- Create a new model class Employee, as shown in Listing 12-9. Create this class in the Models folder.
Listing 12-9. The Employee Class
public class Employee
{
    public int Id { get; set; }
    public string FirstName { get; set; }
    public string LastName { get; set; }
} - Create an action filter with a name of CacheAttribute, as shown in Listing 12-10. This filter simply adds the Cache-Control response header like so: Cache-Control: must-revalidate, max-age=x, private. This basically means the response can be cached for ‘x’ seconds by the browser but not any intermediaries and that the web API requires revalidation of the cache on any subsequent use when the cache becomes stale.
Listing 12-10. The CacheAttribute Action Filter
using System;
using System.Net.Http.Headers;
using System.Web.Http.Filters;

public class CacheAttribute : ActionFilterAttribute
{
    public double MaxAgeSeconds { get; set; }

    public override void OnActionExecuted(HttpActionExecutedContext context)
    {
        if (this.MaxAgeSeconds > 0)
        {
            context.Response.Headers.CacheControl = new CacheControlHeaderValue()
            {
                MaxAge = TimeSpan.FromSeconds(this.MaxAgeSeconds),
                MustRevalidate = true,
                Private = true
            };
        }
    }
} - Create a new empty API controller with a name of EmployeesController
, as shown in Listing 12-11. There is an action method to handle GET, and we return a couple of hard-coded employees. The cache filter we created in the previous step has been applied to the action method with MaxAgeSeconds of 6 so that cache becomes stale every 6 seconds. We specify a small number here for the purpose of testing; typical production implementations do not specify such a small expiry time for cache.
Listing 12-11. EmployeesController
using System.Collections.Generic;
using System.Net;
using System.Net.Http;
using System.Web.Http;
using WebCaching.Models;

public class EmployeesController : ApiController
{
    [Cache(MaxAgeSeconds=6)]
    public HttpResponseMessage GetAllEmployees()
    {
        var employees = new Employee[]
        {
                new Employee()
                {
                        Id = 1,
                        FirstName = "John",
                        LastName = "Human"
                },
                new Employee()
                {
                        Id = 2,
                        FirstName = "Jane",
                        LastName = "Taxpayer"
                }
        };

        var response = Request.CreateResponse<IEnumerable<Employee>>
                                                            (HttpStatusCode.OK, employees);

        return response;
    }

} - Replace the code in the Index view (Views/Home/Index.cshtml) of the HomeController (MVC controller), which Visual Studio created by default, with the code shown in Listing 12-12. We use JavaScript to make an AJAX call to the GET action method of our API controller and render the resulting JSON in a DIV tag. I have included the time here to demonstrate that JavaScript runs and builds the unordered list items every time you click Get.
Listing 12-12. The /Home/Index View
@section scripts{
    <script type="text/javascript">
        $(document).ready(function () {
            $('#search').click(function () {
                $('#employees').empty();
                $.getJSON("/api/employees", function (data) {
                    $.each(data, function (i, employee) {
                        var now = new Date();
                        var ts = now.getHours() + ':' + now.getMinutes() + ':' + now.getSeconds();

                        var content = employee.Id + ' ' + employee.FirstName;
                        content = content + ' ' + employee.LastName + ' ' + ts;

                        $('#employees').append($('<li/>', { text: content }));
                    });
                });
            });
        });
    </script>
}
<div>
    <div>
        <h1>Employees Listing</h1>
        <input id="search" type="button" value="Get" />
    </div>
    <div>
        <ul id="employees" />
    </div>
</div> - Rebuild the solution. Open Fiddler and run the project from Visual Studio by pressing F5.
- When the home page is displayed, click Get. The data for the two employees we hard-coded in the controller are rendered as the unordered list, along with a time stamp.
- Keep clicking Get a few more times. Every time you click Get, the list is rebuilt with the timestamp changing every time.
- Look at the Fiddler capture. There will be only one web API call, in spite of your three or four clicks.
- Keep clicking Get a few more times. At this point, you will be able to see one more entry in the Fiddler capture. Since we have specified a cache expiry of 6 seconds, the GET call made by jQuery (internally XMLHttpRequest) is serviced from the browser cache itself for these six seconds. At the end of six seconds, the cache becomes stale and the browser allows the call to go through to the web API; and you will see an entry for this in Fiddler. For the cache hits, there will be no entry in Fiddler. This is web caching in action.
The greatest thing about web caching, unlike other caching techniques such as caching application data in the server, is that the server-side code is not doing any work at all. No work is clearly better than less work! Web caching can clearly give your web API a great performance boost, if done correctly. However, you must never cache sensitive data, especially in a public cache such as one maintained by a proxy.
- Let us now implement the validation mechanism using ETags. An ETag is a unique identifier assigned by the web server to identify a specific version of a resource representation. If the representation changes any time, a new ETag is assigned. The server sends the ETag header along with the response (see Figure 12-2). The client caches the response and the ETag. Subsequently, when the client makes a request for the same resource, the server will send the previously saved ETag in the If-None-Match request header. If the resource has not changed in the server, the server can just respond with a status code of 304 – Not Modified without sending the full response back. When the resource representation has changed, the server sends the new representation with the new ETag corresponding to the changed representation.

Figure 12-2. The ETag header and response
- The basic idea behind sending the 304 – Not Modified status is to save network bandwidth. If the response has not changed, there is no need to resend the entire response back. The server can simply return the status code and tell the client that what it got the last time is still valid. The important thing here is that the response must be cached at the client side for this to work. Though it is possible to use the ETag without web caching (as in the case of implementing the optimistic concurrency that you saw in Chapter 8), the ETags and web caching go hand in hand.
- Create an action filter with a name of EnableETag, as shown in Listing 12-13. This code does the following:
- a. The concurrent dictionary is used to store ETags generated. When it comes back in the If-None-Match request header, we can look up the dictionary to see if the resource representation cached is still valid. The drawback of using the dictionary is that it is stored at the AppDomain level. If your web API is load-balanced and you do not implement sticky session, this mechanism will not work. You might need to use a persistence store such as a database for this, but I use the dictionary because it keeps the code concise.
- b. In the OnActionExecuting method, check whether the method is GET and if so, look up the dictionary for the ETag in the If-None-Match request header. If the ETag is present in the dictionary, send back a 304 - Not Modified and short-circuit the pipeline processing. There is no need for the GET method to run. If ETag is not present, we do not short-circuit, and hence the action method will run.
- c. In the OnActionExecuted method, if the method is PUT or POST, just invalidate the ETags in the dictionary so that any subsequent GET with the If-None-Match request header containing the old ETag will result in the action method being run. If it is a GET, retrieve the ETag from the dictionary and send that in the ETag response header.
Listing 12-13. The EnableETag Action Filter
using System;
using System.Collections.Concurrent;
using System.Collections.Generic;
using System.Linq;
using System.Net;
using System.Net.Http;
using System.Net.Http.Headers;
using System.Web.Http.Controllers;
using System.Web.Http.Filters;

public class EnableETag : ActionFilterAttribute
{
    private static ConcurrentDictionary<string, EntityTagHeaderValue>
                                                               etags = new ConcurrentDictionary
                                                                   <string, EntityTagHeaderValue>();

    public override void OnActionExecuting(HttpActionContext context)
    {
        var request = context.Request;

        if (request.Method == HttpMethod.Get)
        {
            var key = GetKey(request);

            ICollection<EntityTagHeaderValue> etagsFromClient = request.Headers.IfNoneMatch;

            if (etagsFromClient.Count > 0)
            {
                EntityTagHeaderValue etag = null;
                if (etags.TryGetValue(key, out etag)
                                             && etagsFromClient.Any(t => t.Tag == etag.Tag))
                {
                    context.Response = new HttpResponseMessage(HttpStatusCode.NotModified);
                }
            }
        }
    }

    public override void OnActionExecuted(HttpActionExecutedContext context)
    {
        var request = context.Request;
        var key = GetKey(request);

        EntityTagHeaderValue etag = null;

        bool isGet = request.Method == HttpMethod.Get;
        bool isPutOrPost = request.Method == HttpMethod.Put ||
                                                        request.Method == HttpMethod.Post;

        if ((isGet && !etags.TryGetValue(key, out etag)) || isPutOrPost)
        {
            etag = new EntityTagHeaderValue(""" + Guid.NewGuid().ToString() + """);
            etags.AddOrUpdate(key, etag, (k, val) => etag);
        }

        if(isGet)
            context.Response.Headers.ETag = etag;
    }

    private string GetKey(HttpRequestMessage request)
    {
        return request.RequestUri.ToString();
    }
} - Apply the EnableETag filter on the GetAllEmployees action method of EmployeesController. Also, create an action method to handle POST and apply the EnableETag filter on that method as well, as shown in Listing 12-14.
Listing 12-14. Changes to EmployeesController
public class EmployeesController : ApiController
{
    [Cache(MaxAgeSeconds = 6)]
    [EnableETag]
    public HttpResponseMessage GetAllEmployees()
    {
        // Method is unchanged from the Listing 12-11
    }

    [EnableETag]
    public void Post(Employee employee)
    {
        // It is okay to do nothing here for this exercise
    }
} - Rebuild the solution. Open Fiddler and run the project from Visual Studio by pressing F5.
- When the home page is displayed, click Get. Keep clicking Get a few more times. Every time you click Get, the list is rebuilt with the timestamp changing every time.
- Look at the Fiddler capture. There will be only one web API call, as against your three or four clicks. As part of the response message of this GET, ETag header is returned.
- After six seconds, that is, after the cache expiry, same as the last time, an HTTP GET is made. Unlike last time, the call does not return 200 - OK and the JSON response. It just returns a 304 - Not Modified. As part of the request message, If-None-Match header was sent with the value same as the ETag. See Listing 12-15 for the HTTP request and responses.
Listing 12-15. HTTP Request and Response Messages
Initial GET Transaction

REQUEST
GET http://localhost:57925/api/employees HTTP/1.1
Accept: application/json, text/javascript, */*; q=0.01
Host: localhost:57925

RESPONSE
HTTP/1.1 200 OK
Cache-Control: must-revalidate, max-age=6, private
Content-Type: application/json; charset=utf-8
ETag: "0488a8df-c021-4cfa-88a9-78aa782c9cba"
Content-Length: 98

[{"Id":1,"FirstName":"John","LastName":"Human"},{"Id":2,"FirstName":"Jane","LastName":"Taxpayer"}]

Subsequet GET Transaction (After the cache expiry)

REQUEST
GET http://localhost:57925/api/employees HTTP/1.1
Accept: application/json, text/javascript, */*; q=0.01
If-None-Match: "0488a8df-c021-4cfa-88a9-78aa782c9cba"

RESPONSE
HTTP/1.1 304 Not Modified
Cache-Control: must-revalidate, max-age=6, private - Thus, we implemented the validation mechanism. The AJAX calls are serviced from the cache until the time the cache expires. On expiry, a call is made to the web API with the ETag that was received the previous time to check if the data is still valid. If it is valid, the status code of 304 is returned and the client gets another lease of 6 seconds, during which no HTTP call is made.
- From Fiddler, make a POST request to http://localhost:57925/api/employees. Adjust the port to reflect the port your application runs on. Use the request header of Content-Length: 0 in the Request Headers text box in the Composer tab of Fiddler.
- Since we have applied the EnableETag filter on the action method handling POST, the filter invalidates the ETag.
- Click Get again and see the Fiddler capture. See Listing 12-16. It is no longer a 304 – Not Modified but a 200 – OK. The response contains a new ETag now and the JSON is sent back in the response. For the subsequent GET requests, this new ETag will be used.
Listing 12-16. A GET Transaction after Invalidation
Request
GET http://localhost:57925/api/employees HTTP/1.1
Accept: application/json, text/javascript, */*; q=0.01
If-None-Match: "0488a8df-c021-4cfa-88a9-78aa782c9cba"

Response
HTTP/1.1 200 OK
Cache-Control: must-revalidate, max-age=6, private
Content-Type: application/json; charset=utf-8
ETag: "ddc8000d-3170-44c4-b154-7961ccc594ba"
Content-Length: 98

[{"Id":1,"FirstName":"John","LastName":"Human"},{"Id":2,"FirstName":"Jane","LastName":"Taxpayer"}]
The EnableETag filter accesses the dictionary using the URI as the key . This is acceptable only for the most simplistic requirements. The resource identified by the URI of http://localhost:57925/api/employees can have multiple representations. We currently cache one and assume that is the only representation possible. For example, you can have an XML and JSON representation for this resource, based on the Accept header. Also, you can have multiple language-based representations using Accept-Language. Based on the Accept-Encoding header, you can have gzip and deflate representations, and with Accept-Charset, you can have UTF-16 and UTF-8. Most of these are out-of-box and you can have your own custom values as well. If you think about the permutations and combinations, caching can get really complex, provided your web API is leveraging all these features.
The HTTP specification defines another header, Vary, which can be used by the server to indicate the set of request header fields the resource representation in the response depends on. In other words, the key must be based on all the headers in the Vary header. For example, a web API that supports different media types will specify a Vary header like so: Vary: Accept. The intermediaries and the browser must cache multiple representations for this URI based on the value in the Accept header.
The objective of this exercise was to introduce you to web caching but not to produce a production-strength caching mechanism. CacheCow, an open source implementation of HTTP caching, available in GitHub (https://github.com/aliostad/CacheCow) will be a good start, if you are interested in implementing a full-blown mechanism.
Summary
Performance is an indication of the responsiveness of an application. It can be measured in terms of latency or throughput. Latency is the time taken by an application to respond to an event, while throughput is the number of events that take place in a specified duration of time. Another quality attribute that is often used interchangeably with performance is scalability, which is the ability of an application to handle increased usage load without any (or appreciable) degradation of the performance. The topics of performance and scalability are vast, and this chapter covered only a few important areas in ASP.NET Web API, namely asynchronous action methods, pushing real-time updates to the client, and web caching.
Asynchronous action methods allow you to start a long running operation, return your thread to the pool, and then wake up on a different thread or the same thread, to resume the processing. The async and await keywords of C# 5.0 makes writing asynchronous methods easy. However, asynchronous methods are not suitable for CPU-bound operations. Using asynchronous methods for the operations that are network-bound or I/O-bound, as in the case of calling an external service or reading or writing large chunk of data from the hard disk, is typically beneficial.
If the data returned by a service has the characteristic of changing rapidly over time, the traditional technique is for the client applications to poll the service repeatedly at regular intervals. Server-Sent Events (SSE), on the other hand, allows a unidirectional persistent connection between a client and service established as a result of the initial request made by the client, with service continuing to push data to the client continuously through this connection, until the time the client drops the connection. ASP.NET Web API supports the PushStreamContent class to push real-time updates to the client. The Server-Sent Events (SSE) EventSource API, which is standardized as part of HTML5 by the W3C can be used by a JavaScript client to receive the updates from web API. All the modern browsers except IE support SSE.
A Web cache is a cache of the web server responses for later use. The purpose of web caching is to reduce the number of round trips, the network bandwidth, and the web server resource utilization. End users also perceive better performance. The web cache can be in a web browser, or any of the intermediate servers such as that of ISP or any proxy servers in between. Expiration and validation are the two primary mechanisms associated with the caching, making use of the Cache-Control and ETag response headers. The expiration mechanism allows a response to be reused without checking with the server, thereby reducing the round trips while the validation mechanism minimizes the bandwidth usage.
1 “C# 5, ASP.NET MVC 4, and asynchronous Web applications” by Steve Sanderson, Tech Days 2012.