
![]()
Template Engines: Jade and Handlebars
A template engine is a library or a framework that uses some rules/languages to interpret data and render views. In the case of web applications, views are HTML pages (or parts of them), but they can be JSON or XML files, or, in desktop programs, GUIs. For those of you familiar with the model–view–controller concept, templates belong to the view.
In web apps, it’s beneficial to use templates because we can generate an infinite number of pages dynamically with a single template! Another side benefit is when we need to change something; we can do it in one place only.
If we go back to the diagrams in the previous chapter (traditional vs. REST API approaches), we can deduce that templates can be compiled into HTML either server-side (traditional approach) or client-side (REST API approach). No matter which approach we take, the syntax of the libraries themselves remains intact.
In this chapter we cover the following:
- Jade syntax and features
- Jade standalone usage
- Handlebars syntax
- Handlebars standalone usage
- Jade and Handlebars usage in Express.js 4
- Project: adding Jade templates to Blog
Jade is a Node.js brother of Haml, in the sense that it uses whitespace and indentation as part of its language. Therefore, we need to be careful to follow the proper syntax.
You can follow the Jade syntax examples in this section, online, at the official web site’s demo page (http://jade-lang.com/demo) or at the @naltatis resource (http://naltatis.github.io/jade-syntax-docs/), or by writing standalone Node.js scripts (examples are presented in “Jade Standalone Usage,” which appears later in this chapter).
Tags
Any text at the beginning of a line—by default—is interpreted as an HTML tag. The main advantage of Jade is that this text renders both closing and opening tags for the HTML element, as well as the <></>symbols. Therefore, we save many keystrokes as developers writing in Jade!
The text following a tag and a space (e.g., tag <text>) is parsed as the inner HTML (i.e., content inside the element). For example, if we have the following Jade code:
Body
  div
    h1 Practical Node.js
    p The only book most people will ever need.
  div
    footer © Apress
The output of the template above will be:
<body>
<div>
<h1>Practical Node.js</h1>
<p>The only book most people will ever need.</p>
</div>
<div>
<footer>© Apress</footer>
</div>
</body>
Variables/Locals
Data that are passed to the Jade template are called locals. To output the value of a variable, use =. See the following examples:
h1= title
p= body
Locals:
{
  title: "Express.js Guide",
  body: "The Comprehensive Book on Express.js"
}
HTML output:
<h1>Express.js Guide</h1>
<p>The Comprehensive Book on Express.js</p>
Attributes are added by putting them into parentheses right after the tag name. They follow name=value format. In addition, multiple attributes need to be separated by a comma. For example,
div(id="content", class="main")
  a(href="http://expressjsguide.com", title="Express.js Guide", target="_blank") Express.js Guide
  form(action="/login")
    button(type="submit, value="save")
  div(class="hero-unit") Lean Node.js!
turns into
<div id="content" class="main"><a href="http://expressjsguide.com" title="Express.js Guide" target="_blank">Express.js Guide</a>
  <form action="/login">
    <button type="submit" value="save"></button>
  </form>
  <div class="hero-unit">Learn Node.js</div>
</div>
Sometimes, the value of an attribute needs to be dynamic. In this case, just use the variable name! The pipe, or |, allows us to write the content of the HTML node on the new line—in other words, the line with the pipe becomes inner text an example is as follows:
a(href=url, data-active=isActive)
label
  input(type="checkbox", checked=isChecked)
  |  yes / no
The template above is provided with locals:
{
  url: "/logout",
  isActive: true,
  isChecked: false
}
And they both, i.e., template and locals data, produce output:
<a href="/logout" data-active="data-active"></a>
<label>
  <input type="checkbox"/>yes / no
</label>
Note that the attribute with the value false is omitted from the HTML output. However, when no value is passed, true is assumed—for example,
input(type='radio', checked)
input(type='radio', checked=true)
input(type='radio', checked=false)
<input type="radio" checked="checked"/>
<input type="radio" checked="checked"/>
<input type="radio"/>
For convenience, we can write classes and IDs right after tag names. For example, we can then apply lead and center classes to a paragraph, and create a div element with the side-bar ID and pull-right class (again, the pipe signifies an inner text):
div#content
  p.lead.center
    | webapplog: where code lives
    #side-bar.pull-right
    span.contact.span4
      a(href="/contact") contact us
<div id="content">
  <p class="lead center">
    webapplog: where code lives
    <div id="side-bar" class="pull-right"></div>
    <span class="contact span4">
      <a href="/contact">contact us</a>
    </span>
  </p>
</div>
Note that if the tag name is omitted, div is used instead.
Text
Outputting raw text is done via |—for example,
div
  | Jade is a template engine.
  | It can be used in Node.js and in the browser JavaScript.
Sometimes, developers want to write chunks of content for script or style tags in the HTML! This is possible with a dot. For example, we can write inline front-end JavaScript like this:
script.
   console.log('Hello Jade!')
   setTimeout(function(){
    window.location.href='http://rpjs.co'
   },200))
   console.log('Good bye!')
<script>
  console.log('Hello Jade!')
  setTimeout(function(){
   window.location.href='http://rpjs.co'
  },200))
  console.log('Good bye!')
</script>
JavaScript Code
Contrary to the previous example, if we want to use any JavaScript at template compilation time—in other words, to write executable JavaScript code that manipulates the output of the Jade (i.e., HTML)—we can use the -, =, or != symbols. This might come in handy when we output HTML elements and inject JavaScript. Obviously, these types of things should be done carefully to avoid cross-site scripting (XSS) attacks. For example, if we want to define an array and output <> symbols, we can use !=.
- var arr = ['<a>','<b>','<c>']
ul
  - for (var i = 0; i< arr.length; i++)
    li
      span= i
      span!="unescaped: " + arr[i] + " vs. "
      span= "escaped: " + arr[i]
<ul>
<li><span>0</span><span>unescaped: <a> vs. </span><span>escaped: <a></span></li>
<li><span>1</span><span>unescaped: <b> vs. </span><span>escaped: <b></span></li>
<li><span>2</span><span>unescaped: <c> vs. </span><span>escaped: <c></span></li>
</ul>
![]() Tip One of the main differences between Jade and Handlebars is that the former allows pretty much any JavaScript in its code whereas the latter restricts programmers to only a handful of built-in and custom-registered helpers.
Tip One of the main differences between Jade and Handlebars is that the former allows pretty much any JavaScript in its code whereas the latter restricts programmers to only a handful of built-in and custom-registered helpers.
Comments
When it comes to comments, we have a choice to output them or not. For the former, use JavaScript style //; for the latter, use //-. For example,
// content goes here
p Node.js is a non-blocking I/O for scalable apps.
//- @todo change this to a class
p(id="footer") Copyright 2014 Azat
outputs
<!-- content goes here-->
<p>Node.js is a non-blocking I/O for scalable apps.</p>
<p id="footer">Copyright 2014 Azat</p>
Interestingly enough, in addition to the standard JavaScript code where the if statement can be used by prefixing it with -, we can use a minimalistic Jade alternative with no prefix and no parentheses—for example,
- var user = {}
- user.admin = Math.random()>0.5
if user.admin
    button(class="launch") Launch Spacecraft
else
   button(class="login") Log in
There’s also unless, which is equivalent to not or !.
Similar to conditions, iterators in Jade can be written simply with each—for example,
- var languages = ['php', 'node', 'ruby']
div
  each value, index in languages
    p= index + ". " + value
The HTML output is as follows:
<div>
  <p>0. php</p>
  <p>1. node</p>
  <p>2. ruby</p>
</div>
The same construction works with objects as well:
- var languages = {'php': -1, 'node': 2, 'ruby':1}
div
  each value, key in languages
    p= key + ": " + value
The Jade above is compiled into the HTML output:
<div>
  <p>php: -1</p>
  <p>node: 2</p>
  <p>ruby: 1</p>
</div>
Filters are used when there are blocks of texts written in a different language. For example, the filter for Markdown looks like this:
p
  :markdown
    # Practical Node.js

    [This book](http://expressjsguide.com) really helps to grasp many components needed for modern-day web development.
![]() Note The Markdown modules still need to be installed. The marked and markdown NPM packages are often used for this. There’s no need for an additional configuration, just install them in the project's local node_modules folder.
Note The Markdown modules still need to be installed. The marked and markdown NPM packages are often used for this. There’s no need for an additional configuration, just install them in the project's local node_modules folder.
Interpolation
Interpolation in Jade is achieved via #{name}. For example, to output title in a paragraph, do the following:
- var title = "Express.js Guide"
p Read the #{title} in PDF, MOBI and EPUB
The interpolation is processed at template compilation; therefore, don’t use it in executable JavaScript (-).:
Here’s an example of the case statement in Jade:
- var coins = Math.round(Math.random()*10)
case coins
  when 0
    p You have no money
  when 1
    p You have a coin
  default
    p You have #{coins} coins!
Mixins are functions that take parameters and produce some HTML. The declaration syntax is mixin name(param, param2,...), and the usage is +name(data). For example,
mixin row(items)
  tr
    each item, index in items
      td= item

mixin table(tableData)
  table
    each row, index in tableData
      +row(row)

- var node = [{name: "express"}, {name: "hapi"}, {name: "derby"}]
+table(node)
- var js = [{name: "backbone"}, {name: "angular"}, {name: "ember"}]
+table(js)
The template and data above produce this HTML:
<table>
  <tr>
    <td>express</td>
  </tr>
  <tr>
    <td>hapi</td>
  </tr>
  <tr>
    <td>derby</td>
  </tr>
</table>
<table>
  <tr>
    <td>backbone</td>
  </tr>
  <tr>
    <td>angular</td>
  </tr>
  <tr>
    <td>ember</td>
  </tr>
</table>
Include
include is a way to split logic into a separate file for the purpose of reusing it across multiple files. It’s a top-to-bottom approach; we dictate what to use in the file that includes another file. The file that includes is processed first (we can define locals there), then the included file is processed (we can use earlier defined locals).
To include a Jade template, use include /path/filename. For example, in file A:
include ./includes/header
Notice there’s no need for double or single quotes for the template name and its path.
It’s possible to traverse up the tree:
include ../includes/footer
But, there’s no way to use a dynamic value for the file and path (use a variable), because includes/partials are handled at compilation (not at runtime).
extend is a bottom-to-top approach (as oppose to include), in the sense that the included file commands which parts of the main file it wants to replace. The way it works is with extend filename and block blockname statements:
block header
  p some default text
block content
  p Loading ...
block footer
  p copyright
In file_b:
extend file_a
block header
  p very specific text
block content
  .main-content
Template engines are not always used with Node.js (and frameworks like Express.js). Sometimes, we might just want to use Jade in a standalone manner. The use cases include generating an e-mail template, precompiling Jade before deployment, and debugging. In this section, we do the following:
- Install a Jade module
- Create our first Jade file
- Create a Node.js program that uses the Jade file
- Compare jade.compile, jade.render, and jade.renderFile
To add a jade dependency to your project, or if you’re starting from scratch from an empty project folder, do the following:
- Create an empty node_modules folder with $ mkdir node_modules
- Install and add jade to package.json with $ npm install jade –save. See the results in Figure 4-1.
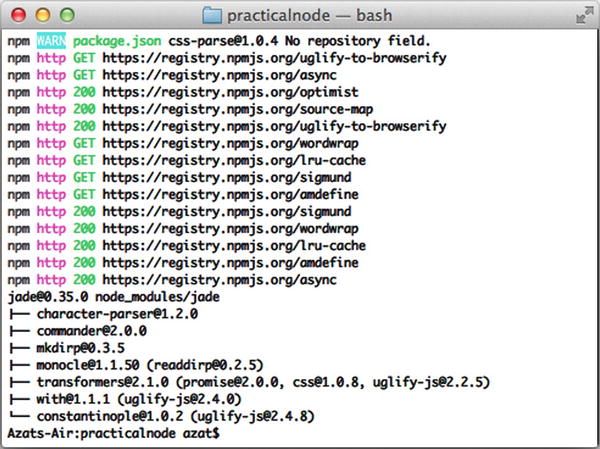
Figure 4-1. Installing Jade
Let’s say we have some Node.js script that sends e-mail and we need to use a template to generate HTML dynamically for e-mail. This is how it might look (file jade-example.jade):
.header
  h1= title
  p
.body
  p= body
.footer
  div= By
    a(href="http://twitter.com/#{author.twitter}")= author.name
  ul
    each tag, index in tags
      li= tag
In this case, our Node.js script needs to hydrate, or populate, this template with the following data:
- title: string
- body: string
- author: string
- tags: array
We can extract these variables from multiple sources (databases, file systems, user input, and so on). For example, in the jade-example.js file, we use hard-coded values for title, author, tags, but pass through a command-line argument for body:
var jade = require('jade'),
  fs = require('fs'),

var data = {
  title: "Practical Node.js",
  author: {
    twitter: "@azat_co",
    name: "Azat"
  },
  tags: ['express', 'node', 'javascript']
}
data.body = process.argv[2];

fs.readFile('jade-example.jade', 'utf-8', function(error, source){
  var template = jade.compile(source);
  var html = template(data)
  console.log(html)
});
In this way, when we run $ node jade-example.js 'email body', we get the output shown in Figure 4-2.
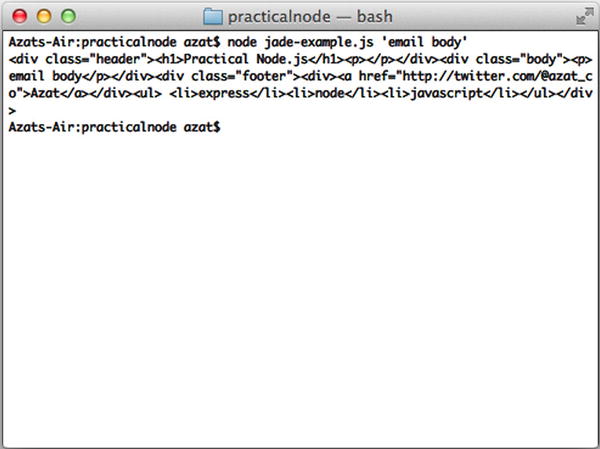
Figure 4-2. The result of jade-example output
The “prettified” HTML output is as follows:
<div class="header">
    <h1>Practical Node.js</h1>
    <p></p>
</div>
<div class="body">
    <p>email body</p>
</div>
<div class="footer">
    <div><a href="http://twitter.com/@azat_co"> Azat</a>
    </div>
    <ul>
        <li>express</li>
        <li>node</li>
        <li>javascript</li>
    </ul>
</div>
In addition to jade.compile(), the Jade API has the functions jade.render() and jade.renderFile(). For example, the previous file can be rewritten with jade.render():
var jade = require('jade'),
  fs = require('fs'),

var data = {
  title: "Practical Node.js",
  author: {
    twitter: "@azat_co",
    name: "Azat"
  },
  tags: ['express', 'node', 'javascript']
}
data.body = process.argv[2];

//jade.render
fs.readFile('jade-example.jade', 'utf-8', function(error, source){
  var html = jade.render(source, data)
  console.log(html)
});
Furthermore, with jade.renderFile, the jade-example.js file is even more compact:
var jade = require('jade'),
  fs = require('fs'),

var data = {
  title: "Practical Node.js",
  author: {
    twitter: "@azat_co",
    name: "Azat"
  },
  tags: ['express', 'node', 'javascript']
}
data.body = process.argv[2];

//jade.renderFile

jade.renderFile('jade-example.jade', data, function(error, html){
  console.log(html)
});
![]() Note Jade can also be used as a command-line tool after installing it with the -g or --global option via NPM. For more information, run jade -h or see the official documentation (http://jade-lang.com/command-line/).
Note Jade can also be used as a command-line tool after installing it with the -g or --global option via NPM. For more information, run jade -h or see the official documentation (http://jade-lang.com/command-line/).
To use Jade in a browser, you can use browserify (https://github.com/substack/node-browserify) and its jadeify (https://github.com/substack/node-jadeify) middleware.
![]() Note To use the same Jade templates on front-end (browser) and server sides, I recommend jade-browser (https://www.npmjs.org/package/jade-browser) by Storify, for which I was the maintainer for a time during my work there. jade-browser acts as an Express.js middleware and it exposes server-side templates to the browser along with a helpful utility functions.
Note To use the same Jade templates on front-end (browser) and server sides, I recommend jade-browser (https://www.npmjs.org/package/jade-browser) by Storify, for which I was the maintainer for a time during my work there. jade-browser acts as an Express.js middleware and it exposes server-side templates to the browser along with a helpful utility functions.
The Handlebars library is another template engine. It inherits from Mustache and, for the most part, is compatible with Mustache’s syntax. However, Handlebars adds more features (i.e., a superset).
Unlike Jade, by design, Handlebars was made so that developers can’t write a lot of JavaScript logic inside the templates. This helps to keep templates lean and related strictly to the representation of the data (no business logic).
Another drastic difference between Jade and Handlebars is that the latter requires full HTML code (<, >, and so on), and for this reason it could care less about whitespace and indentation.
A Handlebars expression is {{, some content, followed by }}, hence the name of the library (see the resemblance to handlebars on a bicycle?). For example, the Handlebars code:
<h1>{{title}}</h1>
<p>{{body}}</p>
with data:
{
  title: "Express.js Guide",
  body: "The Comprehensive Book on Express.js"
}
renders:
<h1>Express.js Guide</h1>
<p>The Comprehensive Book on Express.js</p>
In Handlebars, each is one of the built-in helpers; it allows you to iterate through objects and arrays. Inside the block, we can use @key for the former (objects), and @index for the later (arrays). In addition, each item is referred to as this. When an item is an object itself, this can be omitted and just the property name is used to reference the value of that property.
The following are examples of the each helper block in Handlebars:
<div>
{{#each languages}}
  <p>{{@index}}. {{this}}</p>
{{/each}}
</div>
The template above is supplied with this data:
{languages: ['php', 'node', 'ruby']}
And output this HTML upon compilation:
<div>
  <p>0. php</p>
  <p>1. node</p>
  <p>2. ruby</p>
</div>
By default, Handlebars escapes values. If you don’t want Handlebars to escape a value, use triple curly braces: {{{ and }}}.
As data, let’s use this object that has an array with some HTML tags (angle braces):
{
  arr: [
    '<a>a</a>',
    '<i>italic</i>',
    '<strong>bold</strong>'
  ]
}
To apply this Handlebars template to our data above (i.e., hydration):
<ul>
   {{#each arr}}
    <li>
      <span>{{@index}}</span>
      <span>unescaped: {{{this}}} vs. </span>
      <span>escaped: {{this}}</span>
    </li>
  {{/each}}
</ul>
The hydrated template produces this HTML:
<ul>
<li>
<span>0</span>
<span>unescaped: <a>a</a> vs. </span>
<span>escaped: <a>a</a></span>
</li>
<li>
<span>1</span>
<span>unescaped: <i>italic</i> vs. </span>
<span>escaped: <i>italic</i></span>
</li>
<li>
<span>2</span>
<span>unescaped: <strong>bold</strong> vs. </span>
<span>escaped: <strong>bold</strong></span>
</li>
</ul>
if is another built-in helper invoked via #. For example, this Handlebars code:
{{#if user.admin}}
  <button class="launch">Launch Spacecraft</button>
{{else}}
   <button class="login"> Log in</button>
{{/if}}
populated with data:
{
  user: {
    admin: true
  }
}
turns into this HTML output:
<button class="launch">Launch Spacecraft</button>
To inverse an if not ... (if ! ...) statement (convert negative to positive), we can harness the unless built-in helper block. For example, the previous code snippet can be rewritten with unless.
The Handlebars code that check the truthness of the admin flag (property user.admin):
{{#unless user.admin}}
   <button class="login"> Log in</button>
{{else}}
  <button class="launch">Launch Spacecraft</button>
{{/unless}}
We supply our template with this data that means that the user is the administrator:
{
  user: {
    admin: true
  }
}
The HTML output renders the launch button, which is available only to admins:
<button class="launch">Launch Spacecraft</button>
With
In case there’s an object with nested properties, and there are a lot of them, it’s possible to use with to pass the context.
We have this Handlebars code that is handling a user’s contact and address information:
{{#with user}}
  <p>{{name}}</p>
  {{#with contact}}
    <span>Twitter: @{{twitter}}</span>
  {{/with}}
  <span>Address: {{address.city}},
{{/with}}
{{user.address.state}}</span>
Then we merge the template with this data. Notice the properties’ names are the same as in the Handlebar template, there’s only one reference to the user object:
{user: {
  contact: {
    email: '[email protected]',
    twitter: 'azat_co'
  },
  address: {
    city: 'San Francisco',
    state: 'California'
  },
  name: 'Azat'
}}
The snippets above when compiled, produce HTML:
<p>Azat</p>
<span>Twitter: @azat_co</span>
<span>Address: San Francisco, California
</span>
To output comments, use regular HTML <!-- and -->. To hide comments in the final output, use {{! and }} or {{!-- and --}}. For example,
<!-- content goes here -->
<p>Node.js is a non-blocking I/O for scalable apps.</p>
{{! @todo change this to a class}}
{{!-- add the example on {{#if}} --}}
<p id="footer">Copyright 2014 Azat</p>
outputs
<!-- content goes here -->
<p>Node.js is a non-blocking I/O for scalable apps.</p>
<p id="footer">Copyright 2014 Azat</p>
Custom Handlebars helpers are similar to built-in helper blocks and Jade mixins. To use custom helpers, we need to create them as a JavaScript function and register them with the Handlebars instance.
This Handlebars template uses our custom helper table which we’ll register (i.e., define) later in the JavaScript/Node.js code:
{{table node}}
Here goes the JavaScript/Node.js that tells the Handlebars compiler what to do when it encounters the custom table function (i.e., print an HTML table out of the provided array):
Handlebars.registerHelper('table', function(data) {
  var str = '<table>';
  for (var i = 0; i < data.length; i++ ) {
    str += '<tr>';
    for (var key in data[i]) {
      str += '<td>' + data[i][key] + '</td>';
    };
    str += '</tr>';
  };
  str += '</table>';

  return new Handlebars.SafeString (str);
});
This is our table data:
{
  node:[
    {name: 'express', url: 'http://expressjs.com/'},
    {name: 'hapi', url: 'http://spumko.github.io/'},
    {name: 'compound', url: 'http://compoundjs.com/'},
    {name: 'derby', url: 'http://derbyjs.com/'}
   ]
}
The resulting HTML output looks like this:
<table>
    <tr>
        <td>express</td>
        <td>http://expressjs.com/</td>
    </tr>
    <tr>
        <td>hapi</td>
        <td>http://spumko.github.io/</td>
    </tr>
    <tr>
        <td>compound</td>
        <td>http://compoundjs.com/</td>
    </tr>
    <tr>
        <td>derby</td>
        <td>http://derbyjs.com/</td>
    </tr>
</table>
Includes or partials templates in Handlebars are interpreted by the {{>partial_name}} expression. Partials are akin to helpers and are registered with Handlebars.registerPartial(name, source), where name is a string and source is a Handlebars template code for the partial.
Standalone Handlebars Usage
Developers can install Handlebars via NPM with $ npm install handlebars or $ npm install handlebars --save, assuming there’s either node_modules or package.json in the current working directory (see the results of a sample installation in Figure 4-3).
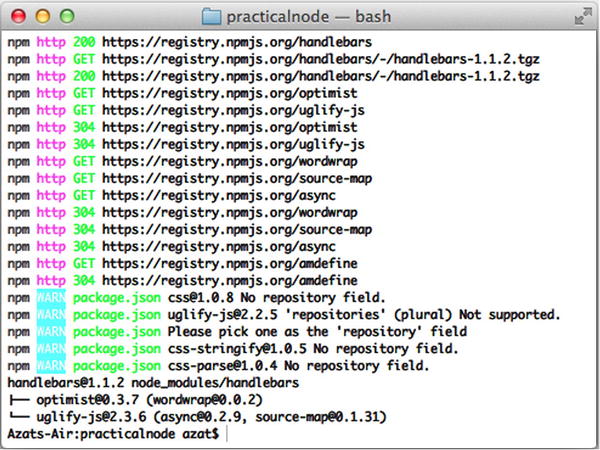
Figure 4-3. Installing Handlebars
![]() Note Handlebars can be installed via NPM as a command-line tool with the -g or --global options. For more information on how to use Handlebars in this mode, refer to the $ handlebar command or the official documentation (https://github.com/wycats/handlebars.js/#usage-1).
Note Handlebars can be installed via NPM as a command-line tool with the -g or --global options. For more information on how to use Handlebars in this mode, refer to the $ handlebar command or the official documentation (https://github.com/wycats/handlebars.js/#usage-1).
Here’s an example of standalone Node.js Handlebars usage from handlebars-example.js:
var handlebars = require('handlebars'),
  fs = require('fs'),

var data = {
  title: 'practical node.js',
  author: '@azat_co',
  tags: ['express', 'node', 'javascript']
}
data.body = process.argv[2];

fs.readFile('handlebars-example.html', 'utf-8', function(error, source){
  handlebars.registerHelper('custom_title', function(title){
    var words = title.split(' '),
    for (var i = 0; i < words.length; i++) {
      if (words[i].length > 4) {
        words[i] = words[i][0].toUpperCase() + words[i].substr(1);
      }
    }
    title = words.join(' '),
    return title;
  })
  var template = handlebars.compile(source);
  var html = template(data);
  console.log(html)
});
And the handlebars-example.html file that uses custom_title helper has this content that calls the helper and outputs some other properties:
<div class="header">
    <h1>{{custom_title title}}</h1>
</div>
<div class="body">
    <p>{{body}}</p>
</div>
<div class="footer">
    <div><a href="http://twitter.com/{{author.twitter}}">{{autor.name}}</a>
    </div>
    <ul>
      {{#each tags}}
        <li>{{this}}</li>
      {{/each}}
    </ul>
</div>
To produce this HTML when we run $ node handlebars-example.js 'email body', use the following:
<div class="header">
    <h1>Practical Node.js</h1>
</div>
<div class="body">
    <p>email body</p>
</div>
<div class="footer">
    <div><a href="http://twitter.com/"></a>
    </div>
    <ul>
        <li>express</li>
        <li>node</li>
        <li>javascript</li>
    </ul>
</div>
To use Handlebars in the browser, download the library in a straightforward manner from the official web site (http://handlebarsjs.com/) and include it in your pages. Alternatively, it’s possible to use just the runtime version from the same web site (which is lighter in size) with precompiled templates. Templates can be precompiled with the Handlebars command-line tool.
Jade and Handlebars Usage in Express.js 4
By default, Express.js 4.x (and 3.x) uses either a template extension provided to the res.render method or the default extension set by the view engine setting, to invoke the require and __express methods on the template library. In other words, for Express.js to utilize a template engine library out of the box, that library needs to have the __express method.
When the template engine library doesn’t provide the __express method, or a similar one with (path, options, callback) parameters, it’s recommended that you use Consolidate.js (https://github.com/visionmedia/consolidate.js/).
Here is a quick example of Consolidate.js for Express.js 4 (version 4.2.0 and Consolidate version is 0.10.0):
var express = require('express'),
  cons = require('consolidate'),
  app = express()

app.engine('html', cons.swig)

app.set('view engine', 'html')
app.set('views', __dirname + '/views')

var platforms = [
  { name: 'node' },
  { name: 'ruby' },
  { name: 'python' }
]

app.get('/', function(req, res){
  res.render('index', {
    title: 'Consolidate This'
  })
})

app.get('/platforms', function(req, res){
  res.render('platforms', {
    title: 'Platforms',
    platforms: platforms
  })
})

app.listen(3000)
console.log('Express server listening on port 3000')
Usually, the source code is in the GitHub repository and the snippet is in the ch4/consolidate folder.
For more information on how to configure Express.js settings and use Consolidate.js, refer to the Pro Express.js 4 book (Apress, 2014).
Jade is compatible with Express.js out of the box (in fact, it’s the default choice), so to use Jade with Express.js, you just need to install a template engine module jade (https://www.npmjs.org/package/jade) and provide an extension to Express.js via the view engine setting.).
For example, in the main server file we set the setting:
app.set('view engine', 'jade'),
![]() Note If you use $ express <app_name> command-line tool, you can add the option for engine support, i.e., –e option for EJS and –H for Hogan. This will add EJS or Hogan automatically to your new project. Without either of these options, the express-generator (versions 4.0.0-4.2.0) will use Jade.
Note If you use $ express <app_name> command-line tool, you can add the option for engine support, i.e., –e option for EJS and –H for Hogan. This will add EJS or Hogan automatically to your new project. Without either of these options, the express-generator (versions 4.0.0-4.2.0) will use Jade.
In the route file, we can call the template—for example, views/page.jade (the views folder name is another Express.js default, which can be overwritten with the view setting):
app.get('/page', function(req, res, next){
  //get the data dynamically
  res.render('page', data);
});
If we don’t specify the views engine setting, then the extension must be passed explicitly to res.render():
res.render('page.jade', data);
Contrary to Jade, the Handlebars library from http://handlebarsjs.com/ doesn’t come with the __express method, but there are a few options to make Handlebars work with Express.js:).
- consolidate: a Swiss-army knife of Express.js template engine libraries (shown above)
- hbs (https://github.com/donpark/hbs): wrapper library for Handlebars
- express-Handlebars (file://pchns-f01/TECHNOLOGY/BPR/Techutilities/Apress/Apress%20Outline/express3-handlebars): despite the name, this module should work just fine with Express.js 4 as well as version 3.x
Here’s how we can use hbs approach (extension hbs). Inside of the typical Express.js app code (i.e., configuration section of the main file that we launch with the $ node command) write the following statements:
...
app.set('view engine', 'hbs'),
...
Or, if another extension is preferable, such as html, we see the following:
...
app.set('view engine', 'html'),
pp.engine('html', require('hbs').__express);
...
The express3-handlebars approach usage is as follows:
...
app.engine('handlebars', exphbs({defaultLayout: 'main'}));
app.set('view engine', 'handlebars'),
...
Project: Adding Jade Templates to Blog
Last, we can continue with Blog. In this section we add main pages using Jade, plus add a layout and some partials:
- layout.jade: global app-wide template
- index.jade: home page with the list of posts
- article.jade: individual article page
- login.jade: page with a login form
- post.jade: page for adding a new article
- admin.jade: page to administer articles after logging in
Because the templates in this mini-project require data, we’ll skip the demo until the chapter 5 where we’ll plug in the MongoDB database. So the source code for the Jade templates is exactly the same as in the ch5 folder of the GitHub repository practicalnode: https://github.com/azat-co/practicalnode. Feel free to copy it from there or follow the instructions below.
Let’s open the project where we left off in the previous chapter and add layout.jade with the document type statement:
doctype html
![]() Note doctype 5 was deprecated around v1.0.
Note doctype 5 was deprecated around v1.0.
Now we can add the main tags of the page:
html
  head
The title of the each page is provided from the appTitle variable (aka, local):
title= appTitle
Then, in the head tag, we list all the front-end assets that we need app-wide (on each page):
    script(type="text/javascript", src="js/jquery-2.0.3.min.js")
    link(rel='stylesheet', href='/css/bootstrap-3.0.2/css/bootstrap.min.css')
    link(rel="stylesheet", href="/css/bootstrap-3.0.2/css/bootstrap-theme.min.css")
    link(rel="stylesheet", href="/css/style.css")
    script(type="text/javascript", src="/css/bootstrap-3.0.2/js/bootstrap.min.js")
    script(type="text/javascript", src="/js/blog.js")
    meta(name="viewport", content="width=device-width, initial-scale=1.0")
The main content lives in body which has the same level indentation as head:
body
Inside the body, we write an ID and some classes for the styles that we’ll add later:
    #wrap
      .container
The appTitle value is printed dynamically, but the p.lead element only has texts:
        h1.page-header= appTitle
        p.lead Welcome to example from Express.js Experience by
          a(href="http://twitter.com/azat_co") @azat_co
          |. Please enjoy.
The block sections can be overwritten by the children templates (templates that extend this file):
        block page
        block header
          div
Menu is a partial (i.e., an include) that is stored in the views/includes folder. Note the absence of quotation marks:
include includes/menu
In this block, we can display messages for users:
        block alert
          div.alert.alert-warning.hidden
Main content goes in this block:
        .content
          block content
Lastly, the footer looks as follows:
    block footer
      footer
        .container
          p
            | Copyright © 2014 | Issues? Submit to
            a(href="https://github.com/azat-co/blog-express/issues") GitHub
            | .
The full code of layout.jade is as follows:
doctype html
html
  head
    title= appTitle
    script(type="text/javascript", src="js/jquery-2.0.3.min.js")
    link(rel="stylesheet", href="/css/bootstrap-3.0.2/css/bootstrap.min.css")
    link(rel="stylesheet", href="/css/bootstrap-3.0.2/css/bootstrap-theme.min.css")
    link(rel="stylesheet", href="/css/style.css")
    script(type="text/javascript", src="/css/bootstrap-3.0.2/js/bootstrap.min.js")
    script(type="text/javascript", src="/js/blog.js")
    meta(name="viewport", content="width=device-width, initial-scale=1.0")
  body
    #wrap
      .container
        h1.page-header= appTitle
        p.lead Welcome to example from Express.js Experience by
          a(href="http://twitter.com/azat_co") @azat_co
          |. Please enjoy.
        block page
        block header
          div
            include includes/menu
        block alert
          div.alert.alert-warning.hidden
        .content
          block content
    block footer
      footer
        .container
          p
            | Copyright © 2014 | Issues? Submit to
            a(href="https://github.com/azat-co/blog-express/issues") GitHub
            | .
index.jade
Now we can look at the home page template index.jade that extends layout:
extends layout
We set the menu variable to index, so the menu include (i.e., menu.jade) can determine which tab to show as active:
block page
  - var menu = 'index'
The main content with the list of articles that comes from locals is as follows:
block content
  if (articles.length === 0)
    | There's no published content yet.
    a(href="/login") Log in
    |  to post and publish.
  else
    each article, index in articles
      div
        h2
          a(href="/articles/#{article.slug}")= article.title
The full code of index.jade is as follows:
extends layout

block page
  - var menu = 'index'
block content
  if (articles.length === 0)
    | There's no published content yet.
    a(href="/login") Log in
    |  to post and publish.
  else
    each article, index in articles
      div
        h2
          a(href="/articles/#{article.slug}")= article.title
Figure 4-4 shows how the home page looks after adding style sheets.
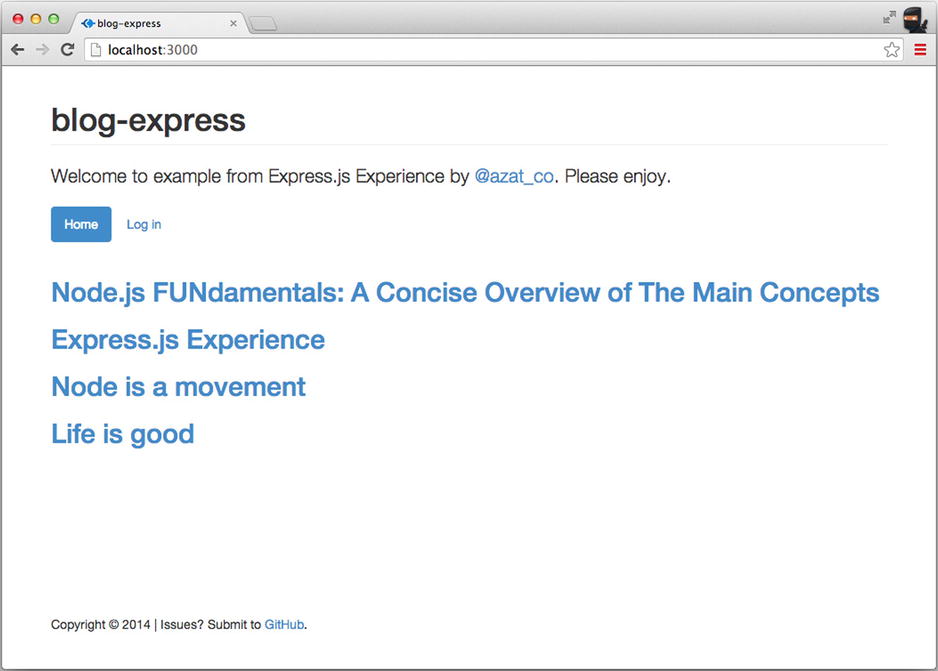
Figure 4-4. The home page
article.jade
The individual article page (Figure 4-5) is relatively unsophisticated because most of the elements are abstracted into layout.jade:
extends layout

block content
  p
    h1= title
    p= text
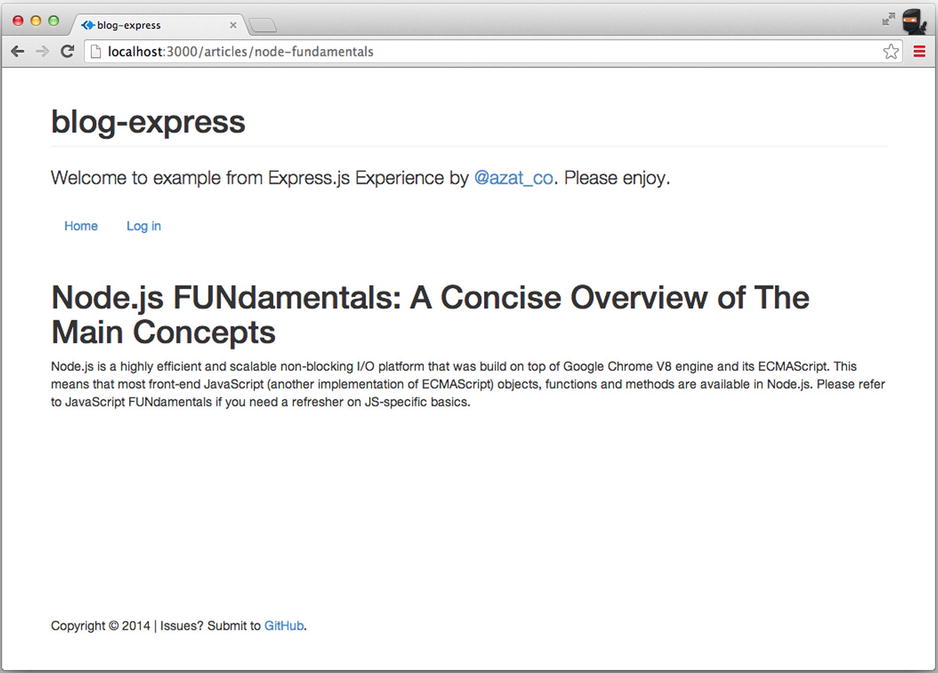
Figure 4-5. The article page
login.jade
Similarly, the login page contains only a form and a button (with the Twitter Bootstrap classes/markup):
extends layout

block page
  - var menu = 'login'

block content
  .col-md-4.col-md-offset-4
    h2 Log in
    div= error
    div
      form(action="/login", method="POST")
        p
          input.form-control(name="email", type="text", placeholder="[email protected]")
        p
          input.form-control(name="password", type="password", placeholder="***")
        p
          button.btn.btn-lg.btn-primary.btn-block(type="submit") Log in
Figure 4-6 shows how the login page looks.
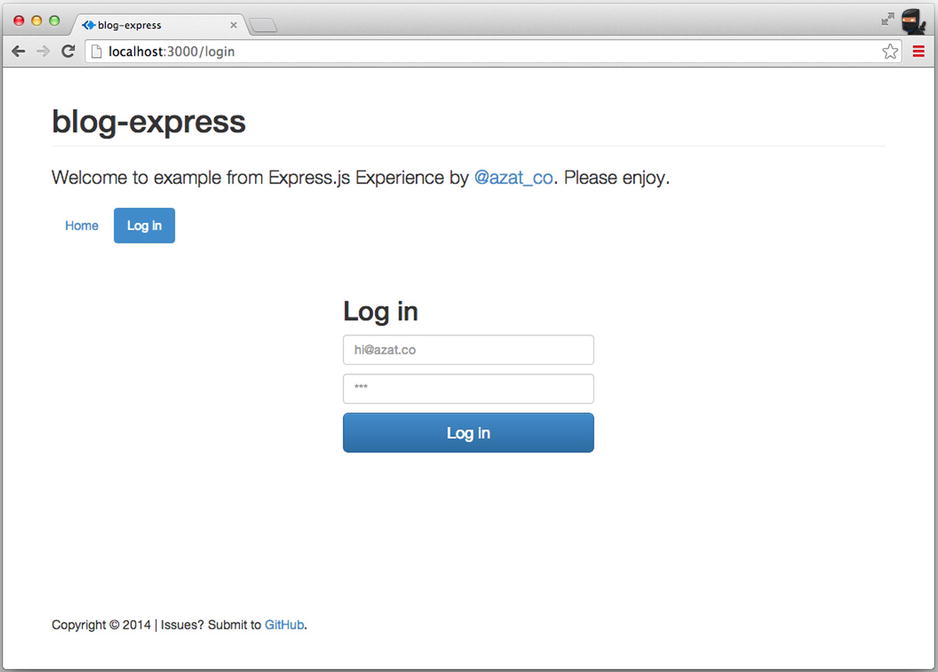
Figure 4-6. The login page
post.jade
The post page (Figure 4-7) has another form. This time, the form contains a text area element:
extends layout
block page
  - var menu = 'post'
block content

    h2 Post an Article
    div= error
    div.col-md-8
      form(action="/post", method="POST", role="form")
        div.form-group
          label(for="title") Title
          input#title.form-control(name="title", type="text", placeholder="JavaScript is good")
        div.form-group
          label(for="slug") Slug
          input#slug.form-control(name="slug", type="text", placeholder="js-good")
          span.help-block This string will be used in the URL.
        div.form-group
          label(for="text") Text
          textarea#text.form-control(rows="5", name="text", placeholder="Text")
        p
          button.btn.btn-primary(type="submit") Save

Figure 4-7. The post page
admin.jade
The admin page (Figure 4-8) has a loop of articles just like the home page. In addition, we can include a front-end script (js/admin.js) specific to this page:
extends layout

block page
  - var menu = 'admin'

block content
  div.admin
    if (articles.length === 0 )
      p
        | Nothing to display. Add a new
        a(href="/post") article
        |.
    else

      table.table.table-stripped
        thead
          tr
            th(colspan="2") Actions
            th Post Title
        tbody
          each article, index in articles
            tr(data-id="#{article._id}", class=(!article.published)?'unpublished':'')
              td.action
                button.btn.btn-danger.btn-sm.remove(type="button")
                  span.glyphicon.glyphicon-remove(title="Remove")
              td.action
                button.btn.btn-default.btn-sm.publish(type="button")
                  span.glyphicon(class=(article.published)?"glyphicon-pause":"glyphicon-play", title=(article.published)?"Unpublish":"Publish")
              td= article.title
      script(type="text/javascript", src="js/admin.js")
We use interpolation to print article IDs as attributes data-id:
tr(data-id="#{article._id}", class=(!article.published)?'unpublished':'')
And, a conditional (ternary) operator (https://github.com/donpark/hbs) is used for classes and title attributes. Remember, it’s JavaScript!
span.glyphicon(class=(article.published)?"glyphicon-pause":"glyphicon-play", title=(article.published)?"Unpublish":"Publish")

Figure 4-8. The admin page
Summary
You learned about Jade and Handlebars templates (variables, iterations, condition, partials, unescaping, and so forth), and how to use them in a standalone Node.js script or within Express.js. In addition, the main pages for Blog were created using Jade.
In the next chapter we examine an important aspect of modern web development and software engineering: test-driven development. We look at the Mocha module and write some tests for Blog in true TDD/BDD style. In addition, the next chapter deals with adding a database to Blog routes to populate these templates, and shows you how to turn them into working HTML pages!