
App Service overview
App Service plans
Web Apps deployment and configuration
Publishing a web application
CI/CD with Web Apps
Auto-scaling with Web Apps
Web Apps monitoring
Docker on Azure
Azure Container Registry (ACR)
Azure Container Instances (ACI)
Azure Kubernetes Service (AKS)

Microsoft’s compute decision tree flowchart (Source: https://docs.microsoft.com/en-us/azure/architecture/guide/technology-choices/compute-decision-tree)
App Service Overview
ASP.NET (Windows)
ASP.NET Core (Windows or Linux)
PHP (Windows or Linux)
Java (Windows or Linux)
Python (Linux)
Ruby (Linux)
Node.js (Windows or Linux)
One of the main advantages of using App Service is built-in high availability and auto-scaling functions. From an operating system perspective, both Windows and Linux are supported (in most cases – we will cover options later in the chapter). An additional benefit of moving to PaaS solutions is using various DevOps capabilities, like continuous deployment from Azure DevOps or GitHub and other similar CI/CD tools.
The App Service feature that developers should have in mind is that it automatically patches OS and language frameworks. If the application depends on a specific version of a framework, we need to include it in the build pipelines.
App Service Plans
Region (e.g., West Europe)
Number of VM instances
Size of VM instances
Pricing tier (currently available are Free, Shared, Basic, Standard, Premium, PremiumV2, PremiumV3, Isolated – they are offering different options)
Free and Shared: They are considered Shared compute tiers. That means that our App Service could be on the same VM as, for example, the App Service of another customer. Scaling out is not available.
- Basic, Standard, and Premium (V1, V2, V3) have dedicated compute resources:
The Basic tier offers to scale for up to three instances and a custom domain option.
The Standard tier offers scaling for up to ten instances, a custom domain, a maximum of five staging slots, a maximum of ten daily backups, and possible use of Traffic Manager (will be covered in Chapter 9).
The Premium tier adds up to 20 staging slots and offers a maximum of 50 daily backups and scaling for up to 20 instances.
The Isolated tier also runs on a dedicated VM, but it offers network isolation by being connected to a dedicated virtual network. It has a maximum of scale-out options.
Scale-up: Changing the tier of the App Service plan
Scale-out: Changing the number of instances within the plan
Auto-scaling offers us an option to support the high demand for our application. We can manually scale resources or set custom policies that automatically scale our App Service based on metric thresholds.
Creating App Service
For this resource, too, we will first show how to create it via Azure Portal and then automate the same process differently.
Azure Portal

Resource Group where App Service will be deployed, Name, Operating System, Region, and Tier
We can then review and create our resource.
ARM Template, PowerShell, and Azure CLI
Since the deployment code could be pretty big, all ARM template, Azure PowerShell, and Azure CLI scripts are stored in the Apress GitHub account, available at the following URL:
Web Apps Deployment and Configuration
Web apps are actual applications written in one of the mentioned languages, deployed to an App Service plan. When we deploy the initial one out of the box, we will get base template code, which we can then modify.
Creating a Web App
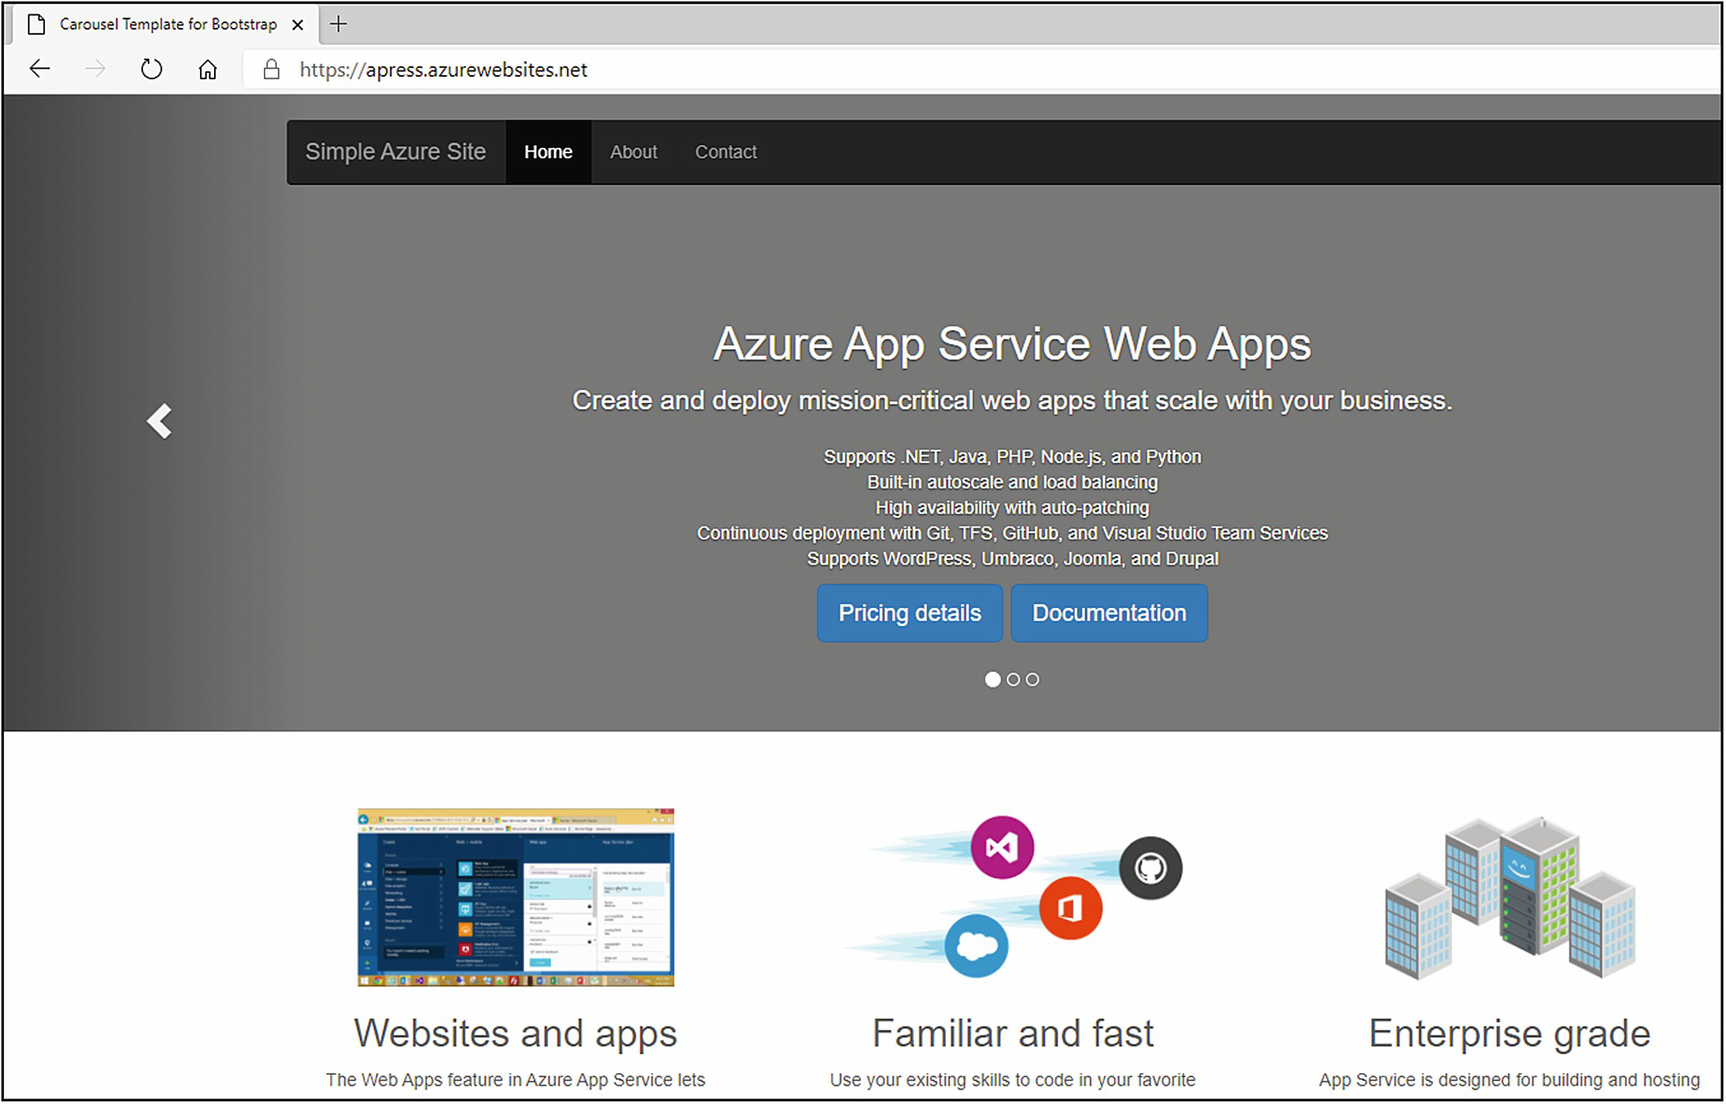
We will now go through the process of creating a base web app with Microsoft’s demo template within. Later, we will learn how we can change it and deploy our own.
Azure Portal
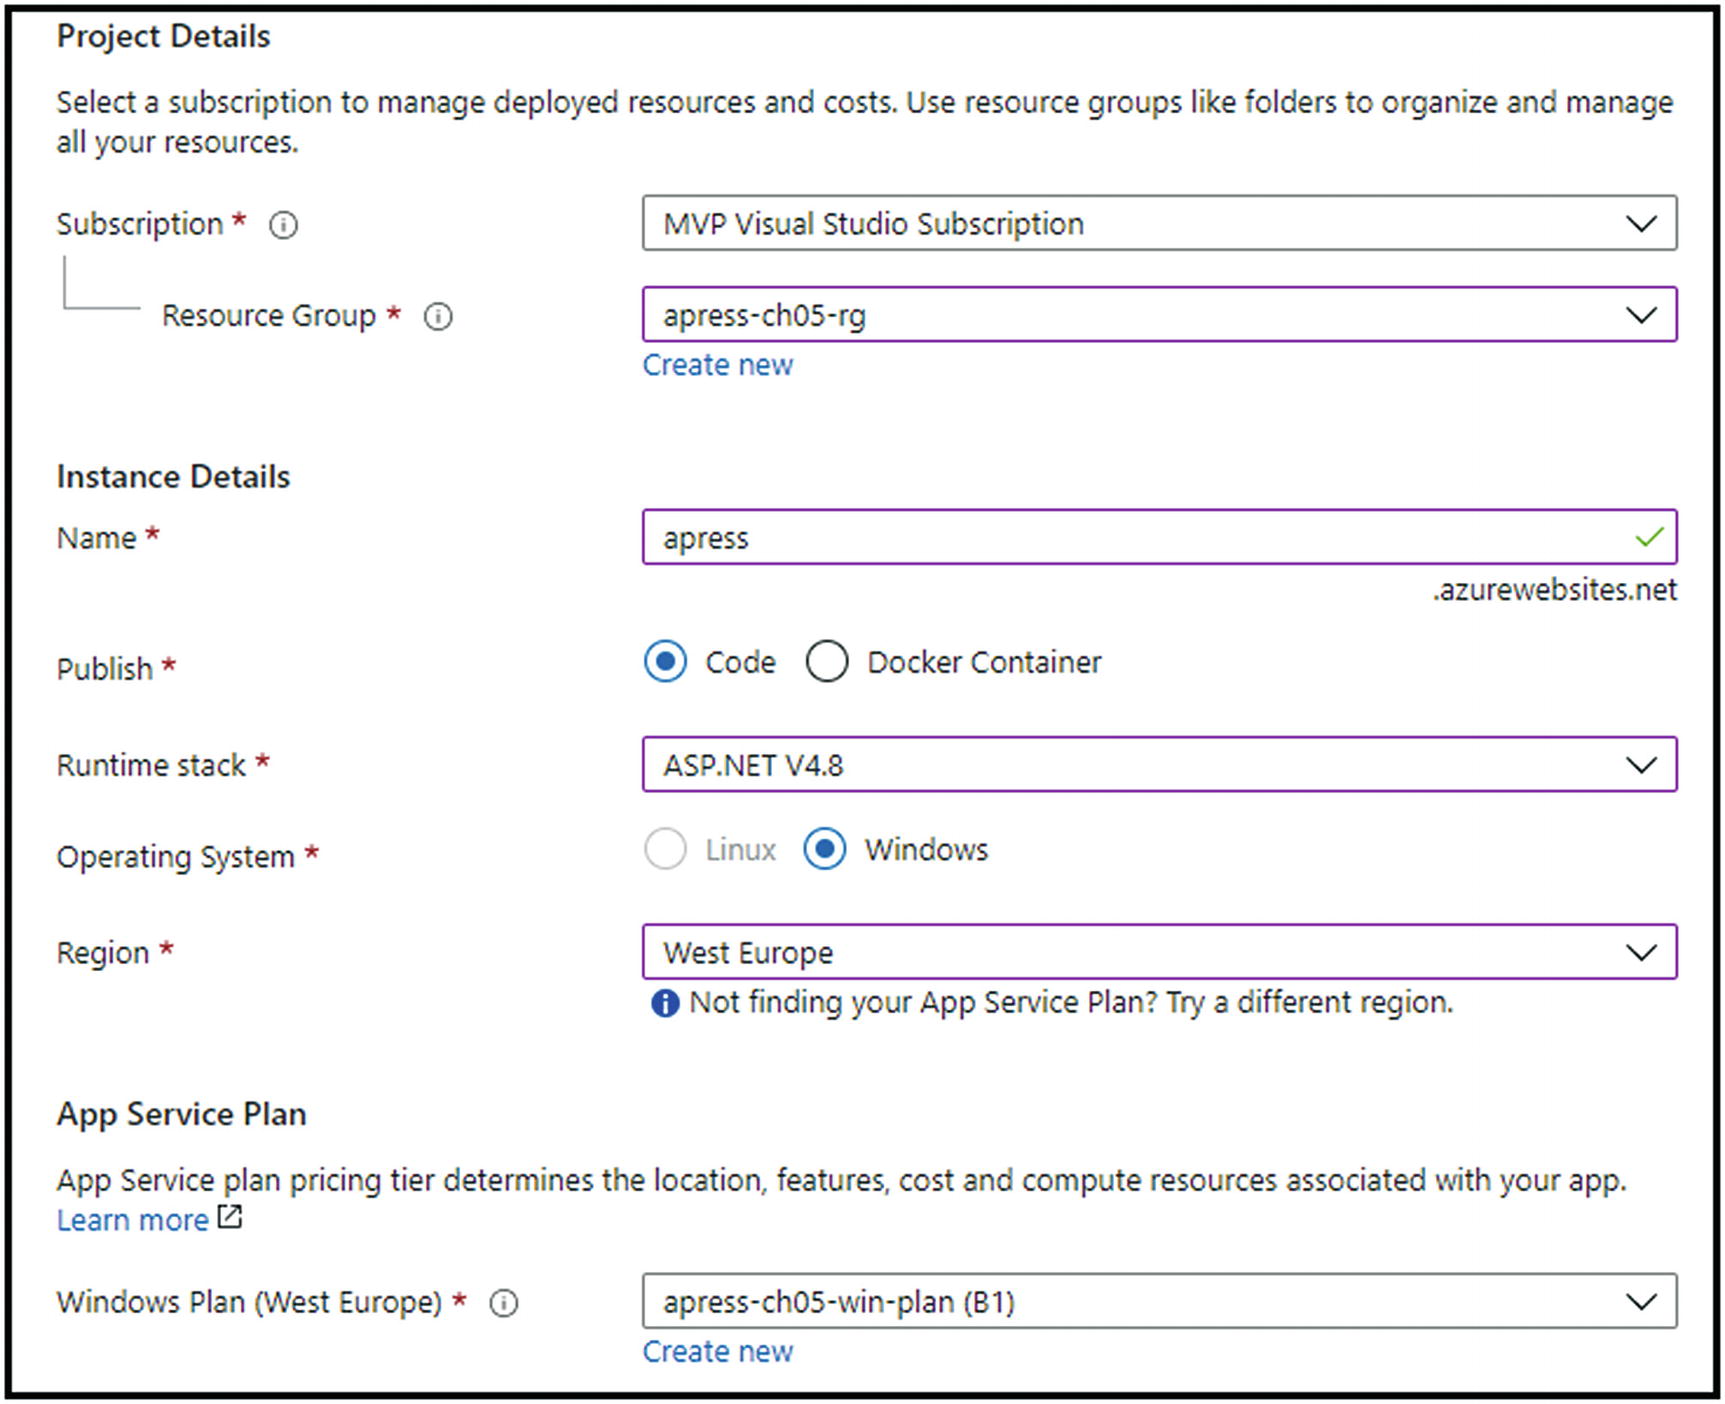
Provide the resource group name

Confirmation via the demo template
ARM Template, PowerShell, and Azure CLI
Since the deployment code could be pretty big, all ARM template, Azure PowerShell, and Azure CLI scripts are stored in the Apress GitHub account, available at the following URL:
Publishing a Web Application
Now that we have successfully deployed our web app, it is time to work on deploying our code into it. As always, we have multiple choices to do that.
Running from the Package
Azure App Service gives us an option to run our app directly from a deployment ZIP package file. To use this option, we need to create a ZIP archive of everything in our project (should contain files like index.html, index.php, and app.js). The uploaded ZIP will be mounted as the read-only wwwroot directory.
Deploying a ZIP
The same ZIP that was created in the previous step can be deployed to a web app. In this case, our project files will be deployed to a default folder (/home/site/wwwroot) in the app. To deploy the package, we need to visit the https://apress.scm.azurewebsites.net/ZipDeployUI page and drag the ZIP file to the file explorer area on the web page.
Deploying via FTP

Choose Deployment Center and FTP
This will give us the necessary parameter information for the deployment – FTPS Endpoint, Username, and Password.
Cloud Sync
With this option, we can use services like Dropbox and OneDrive to sync our content. We can find these options under the same Deployment Center menu.
Continuous Deployment
Continuous deployment for custom containers – we will cover this later in the chapter.
Deploying from Local Git
Confirming results
Deploying via GitHub Actions
GitHub actions can easily automate software workflows, using CI/CD directly from GitHub (not part of this book).
Deploy Using the ARM Template
A great example provided by Microsoft can be found on this link – https://github.com/azure-appservice-samples/ToDoApp.
Click the Deploy to Azure button and populate parameters.
CI/CD with Web Apps
Within this part of the chapter, we will go through the process of creating an organization in Azure DevOps. Then we will connect it with our Azure subscription and start building the first CI/CD pipelines for our application. When we visit the page dev.azure.com, we will be taken to the home page of Azure DevOps. There, we need to log in with a Microsoft account.
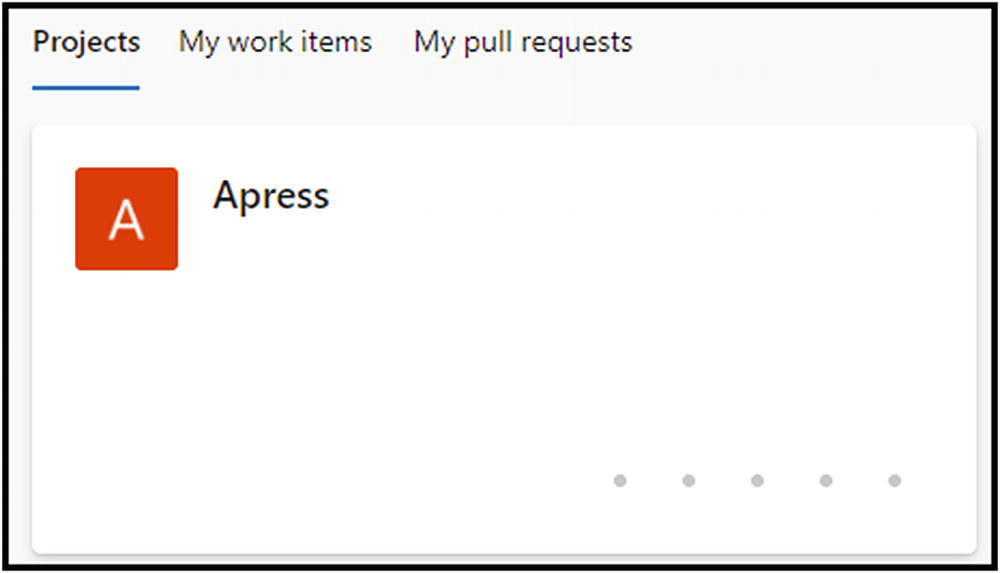
Create a project
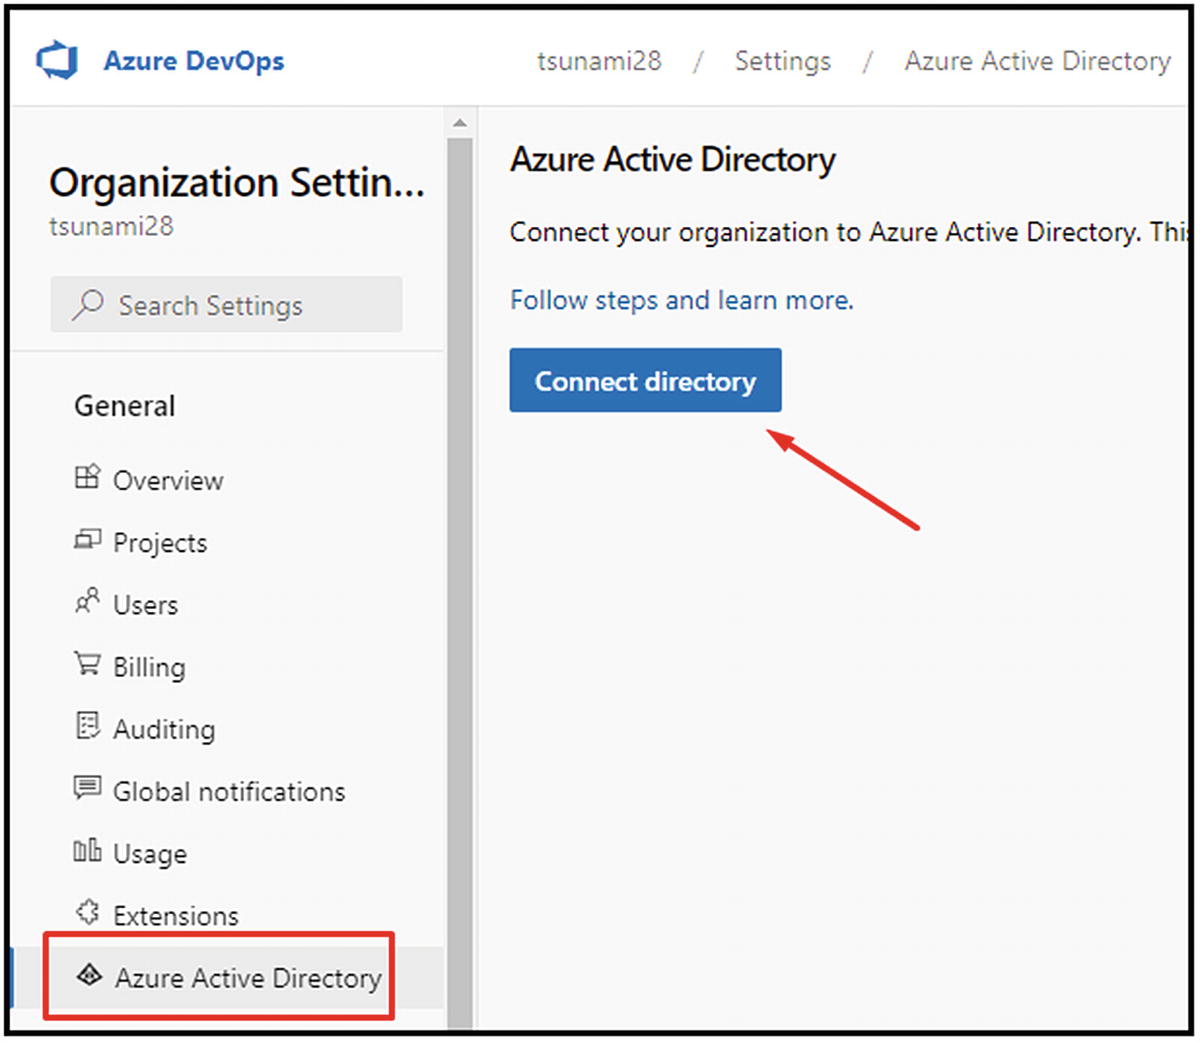
Choose Azure Active Directory and Connect directory
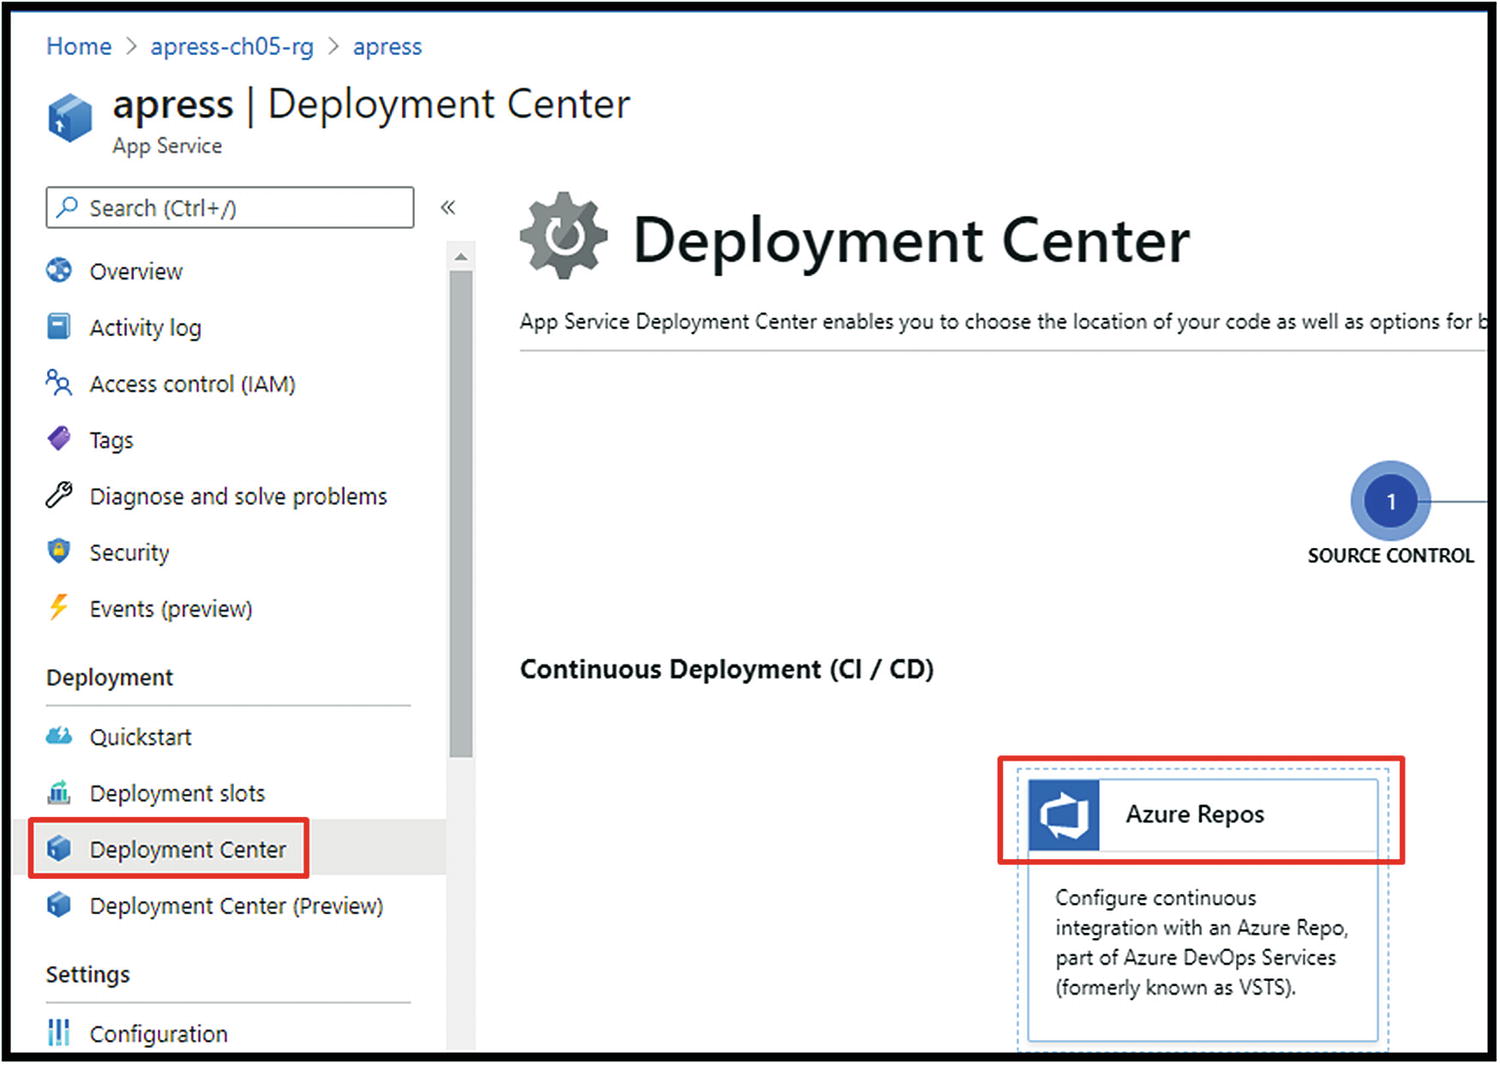
Choose Deployment Center➤ Azure Repos
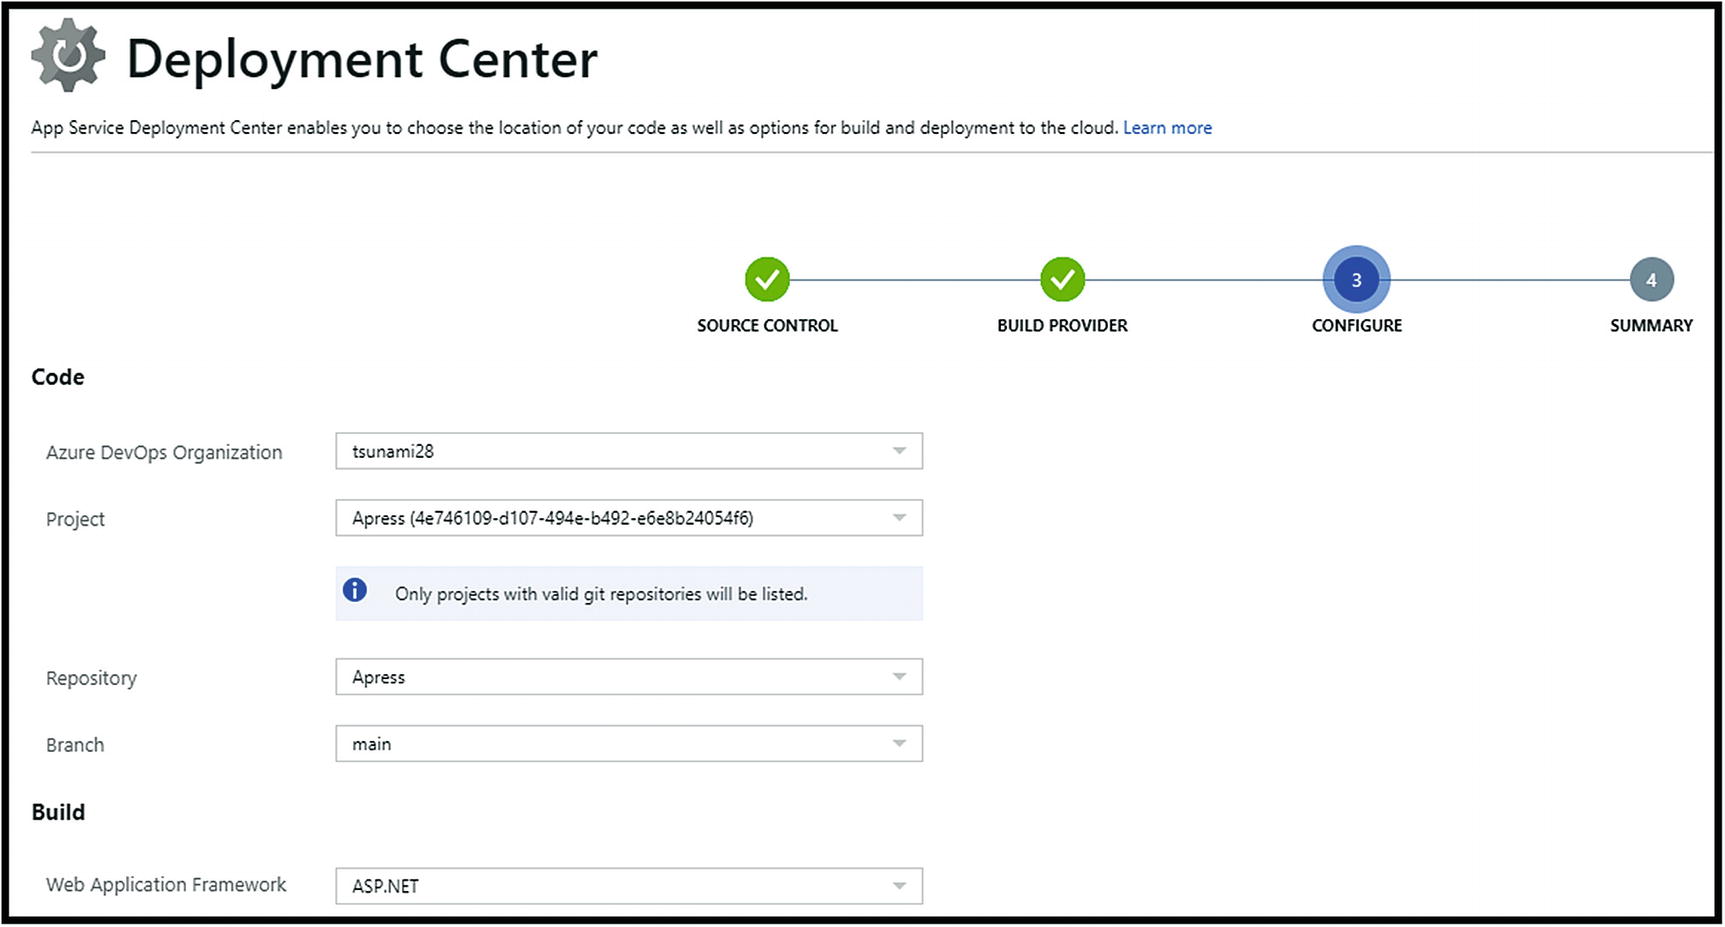
Choose Azure Pipelines and continue
Ending this process will create all needed CI/CD pipelines within the Azure DevOps project. We can now switch to our Azure DevOps project and continue working on our code. Each new push to the repository will trigger a new build. A successful build will then trigger release. That easy. Furthermore, we now have an automated CI/CD process for our application.
Blue-Green Deployment
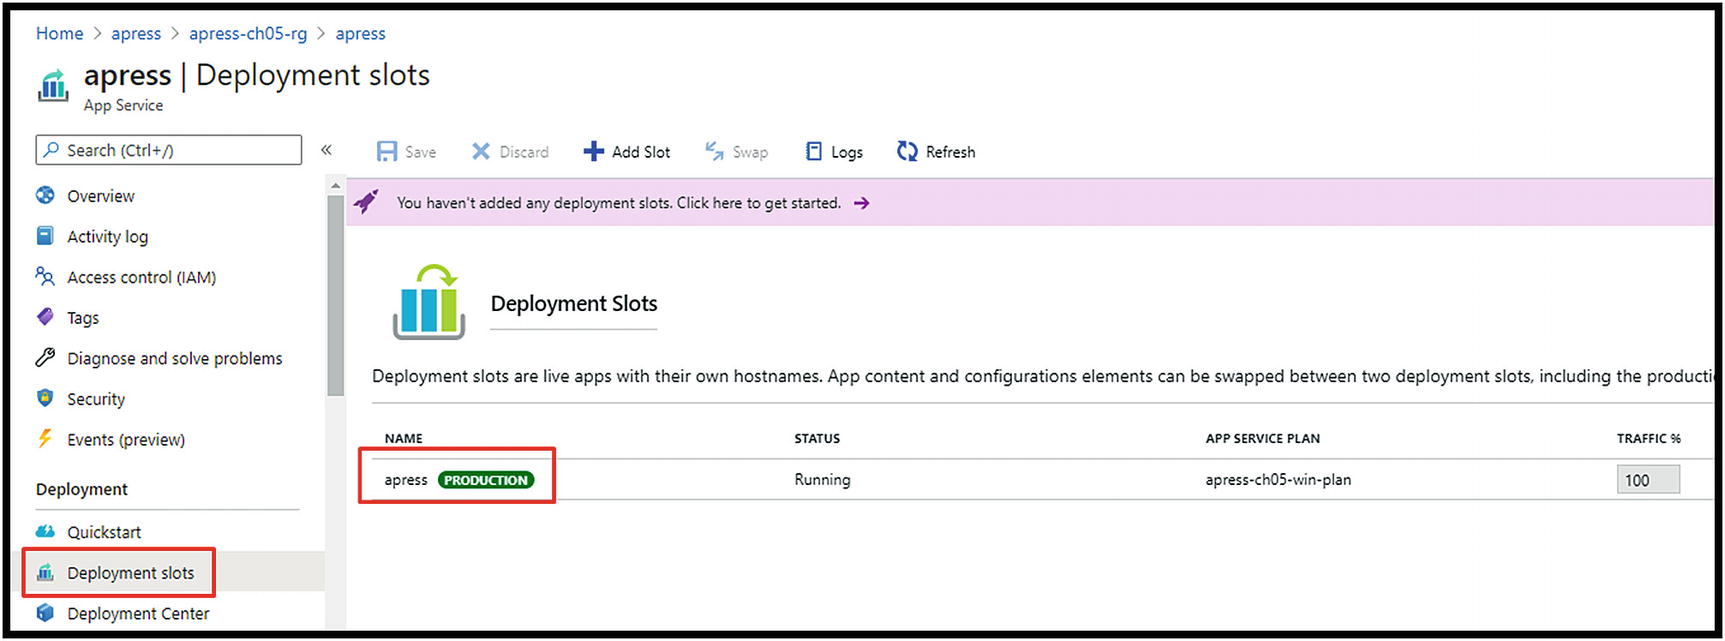
App Service, by default, has one deployment slot named Production
We can easily add additional slots for our environments (Dev, Test, QA). Besides giving it a name, we can choose to clone the current state from the Production slot.
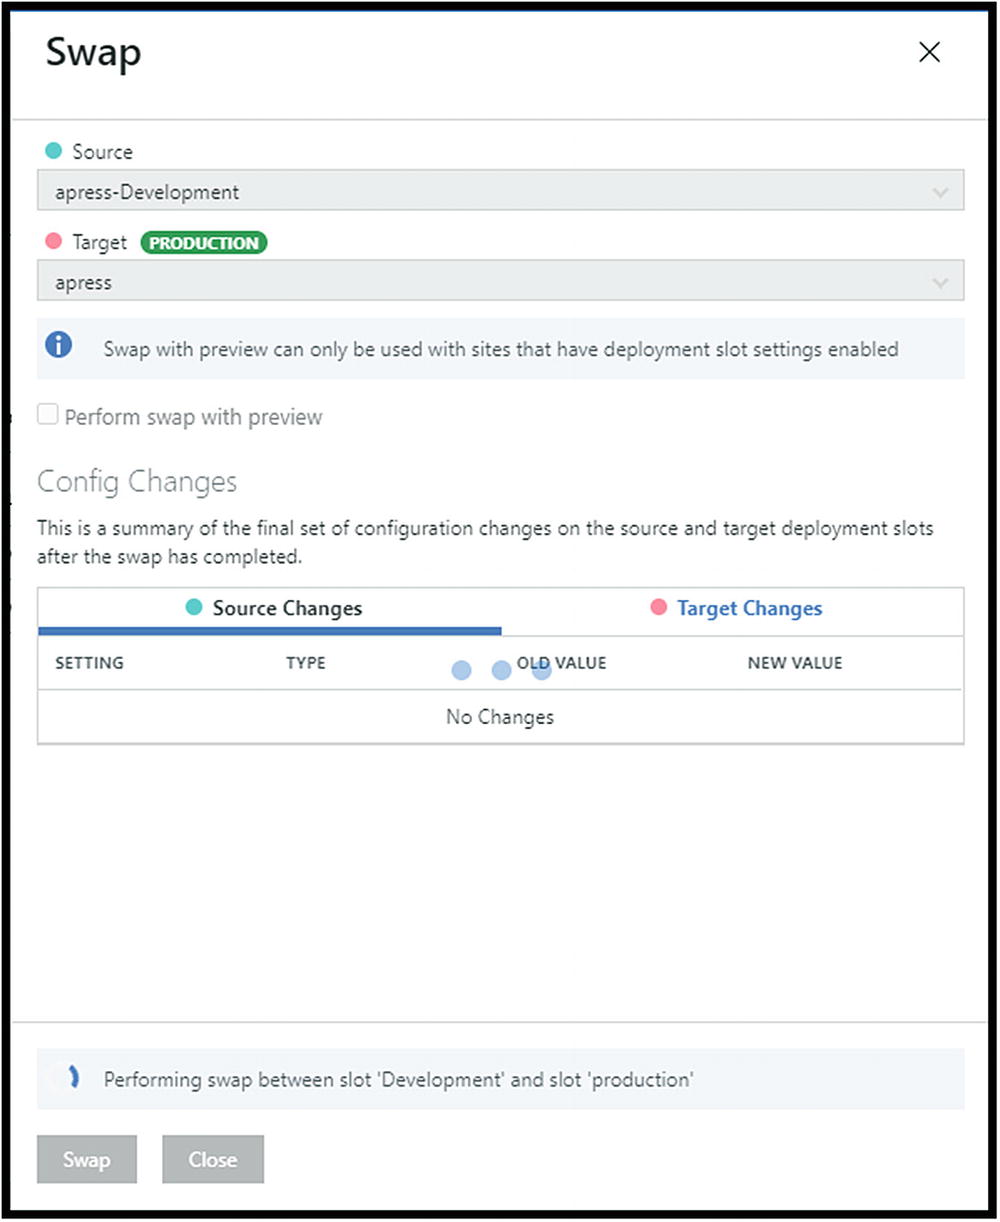
When testing new features or changes is complete, click to swap the slots
If, by any chance, we notice that there is a problem with the new code, we can always make an additional swap reverting to the previous state. All this is done with minimal downtime. One more thing we can use before swapping is traffic percentage – this gives us the option to send a specific % of traffic to the Development slot and track further how the new code is working with the load of the Production one.
Auto-scaling with Web Apps
Scale-up
Scale-out

Auto-scaling can be achieved based on the scale-out scenario
To use this feature in an automated way, we need to create rules that will trigger both the increase and decrease in the number of instances (scale-out or scale-in), as shown in Figure 5-14.
CPU percentage
Memory percentage
Data in or out
Disk or HTTP queue length

Create rules that trigger both the increase and the decrease in the number of instances (scale-out or scale-in)
It is also essential to set the minimum and the maximum number of instances. That could save us from potential money loss in case of an unpredictable scale-out.
Web Apps Monitoring
Alerts: It is possible to create alert rules that will trigger a specific action (Figure 5-15). For example, we can monitor the number of connections, and if it goes beyond a specific value, the Send email action will be triggered.

It is possible to create alert rules that will trigger a specific action
Metrics: This is live monitoring of the different App Service metrics. They can also be added to the dashboard for teams monitoring apps in real time.
Logs: They are powered by Azure Log Analytics. To use them, we need to set a few more things so that our App Service sends data to the Log Analytics workspace (LAW).
Diagnostic settings: This is where we set all the available logs to be sent to LAW (Figure 5-16).
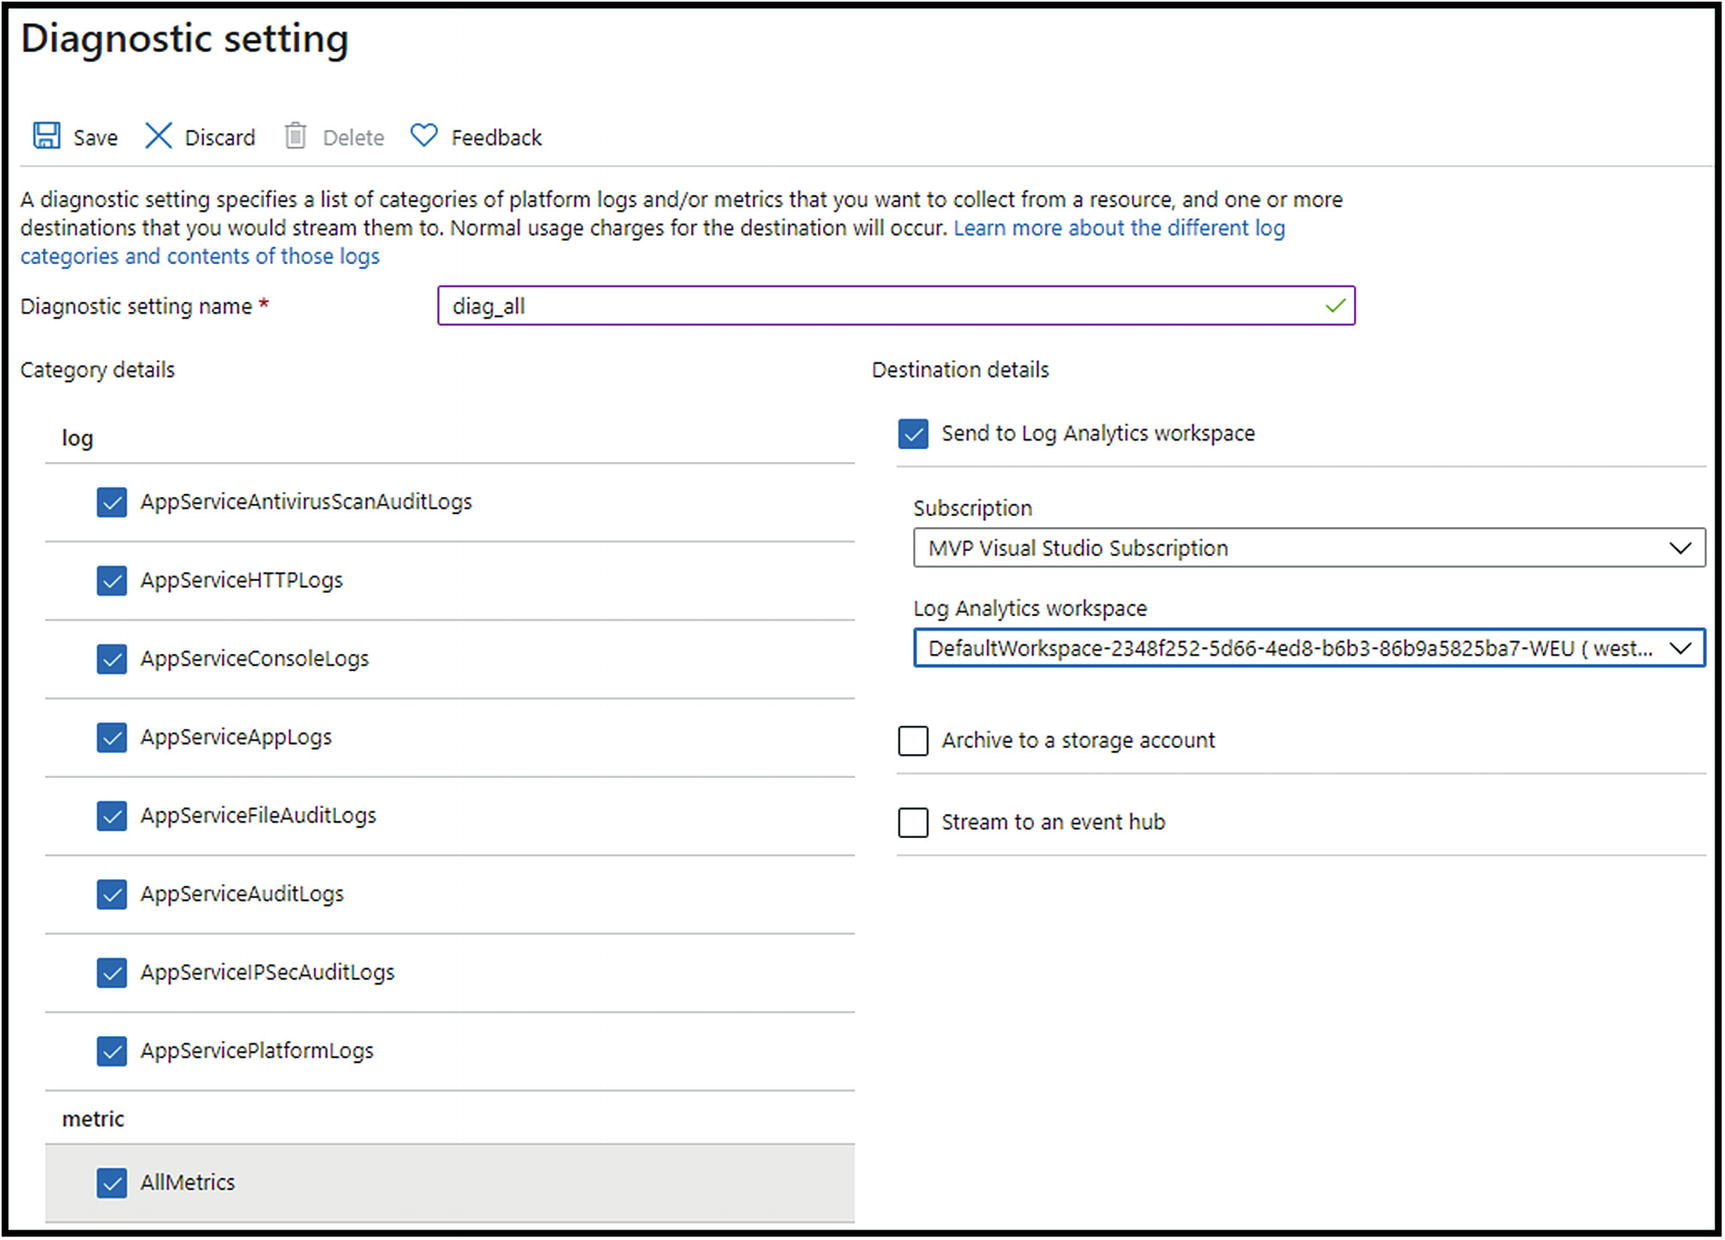
Set all the available logs to be sent to LAW
App Service logs: Here, we can enable additional/detailed logging if we need to troubleshoot the behavior of our application.
Log stream: Live representation of the application logs.
After we have set diagnostic settings and our App Service started sending data to the Log Analytics workspace, we can start using logs and the Microsoft Kusto query language to read needed data. Many predefined queries can help us in the beginning.
Docker on Azure
Docker is the most popular container management and imaging platform. It enables us to efficiently work with containers on any operating system that supports the Docker platform. Along with the many operating systems, including Windows and various Linux distributions, today we can find Docker on Azure in many different variations.
Azure Container Registry (ACR)
Azure Container Registry is a service that provides us with the ability to build, store, and manage container images in a private Docker registry. It is used as a repository for our container images to be pulled to various targets like Azure Kubernetes Service, Docker Swarm, App Service, and others.
Since it is based on the open source Docker Registry 2.0, we can use standard Docker commands against it. We will later show when and how to do that.
Creating Azure Container Registry
Before we explain the usage of ACR, let us see how to create it in already known ways.
Azure Portal
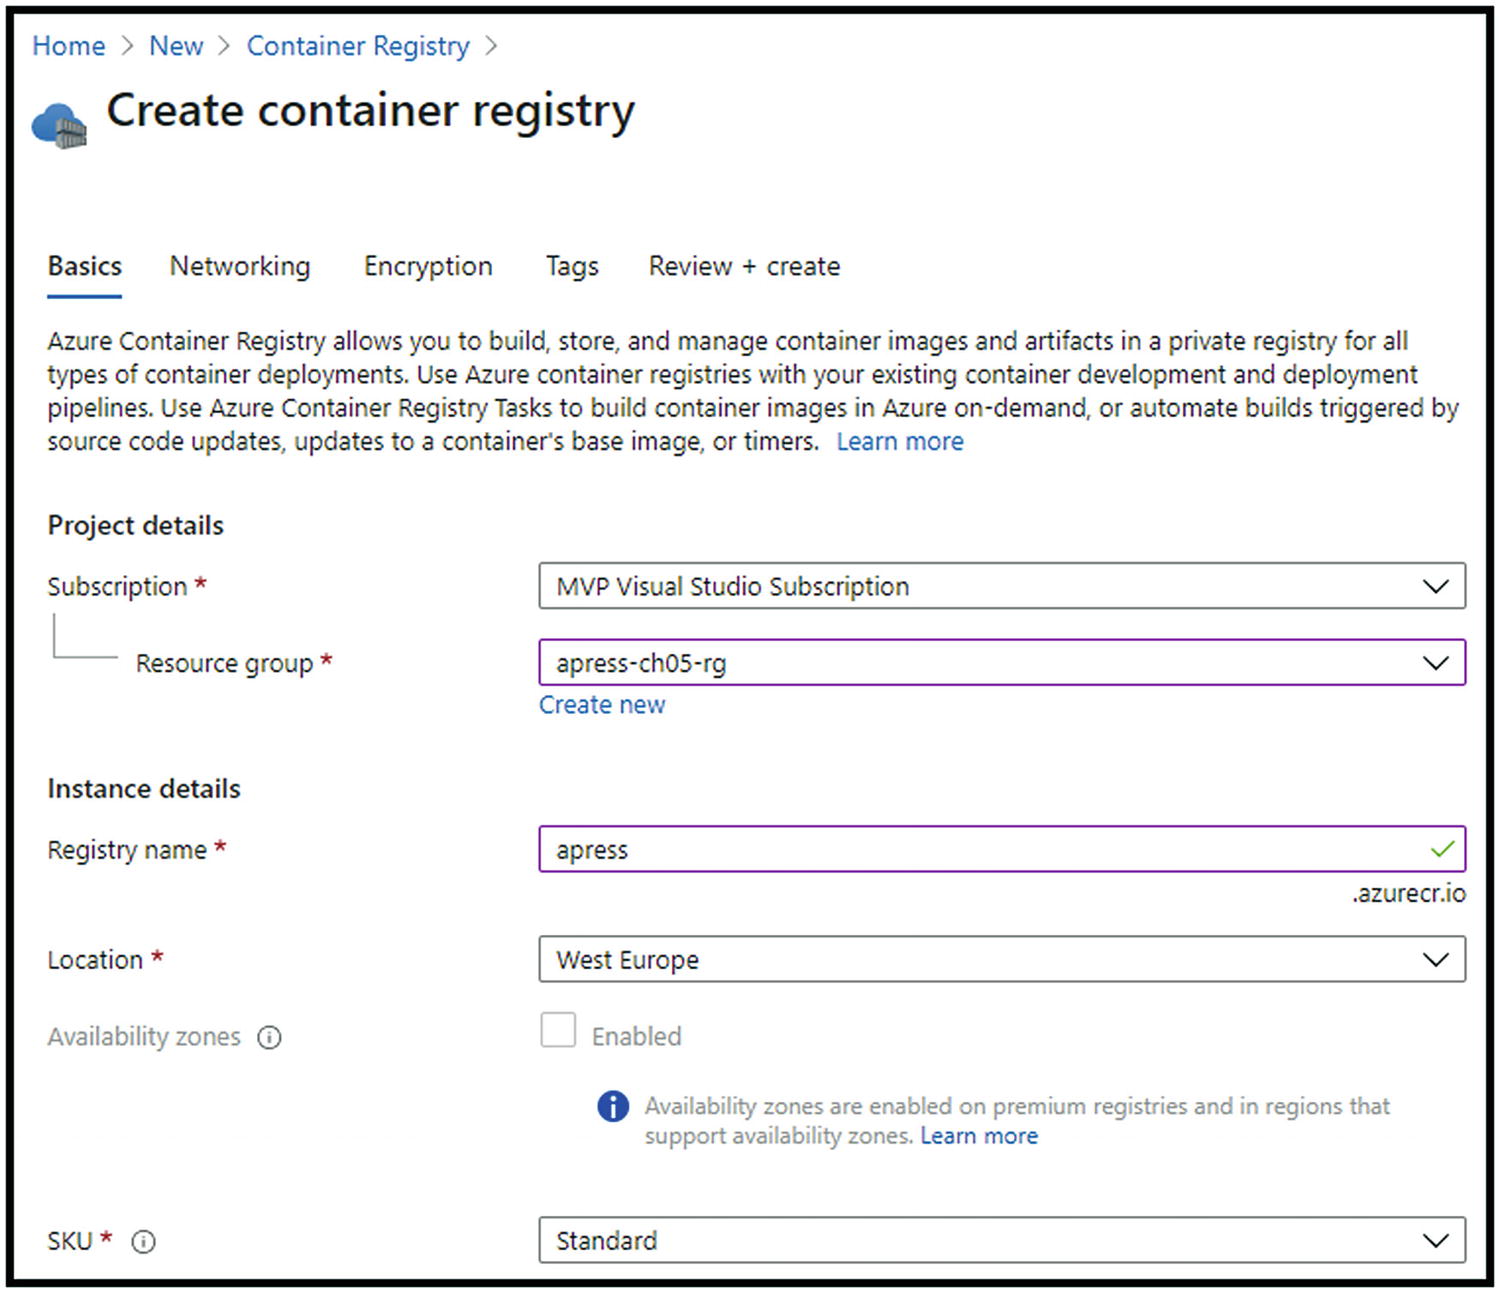
Population the fields
Since we have chosen to go with Standard SKU, Private Endpoint and Encryption are not available (need Premium for both). We can now review and create our resource.
ARM Template, PowerShell, and Azure CLI
Since the deployment code could be pretty big, all ARM template, Azure PowerShell, and Azure CLI scripts are stored in the Apress GitHub account, available at the following URL:
https://github.com/Apress/pro-azure-admin-and-automation

Enable admin user access
Azure Container Instances
Azure Container Instances is a service that provides us with the fastest way to run a container in Azure. It is the best solution for isolated containers. With Azure Container Instances, we avoid provisioning and managing VMs or App Service as host for our containers. During the creation of the Container Instance, we can specify a DNS name for our application and make it reachable over the Internet.
ACI offers exact specifications of CPU and memory, and we are billed by the second of our application uptime. It offers connectivity via an Azure virtual network. That means that it can communicate securely with other resources within the VNet or through peering.
Creating Azure Container Instances
With the already known options, we will see how easy and quickly it is to create an Azure Container Instance and be live with the containerized application.
Azure Portal
After choosing Create a resource, we should search for “container instances.” We need to provide a resource group for deployment, name, region, and – the most crucial parameter – image source (Figure 5-19).
QuickStart images: Provided by Microsoft
Azure Container Registry: If we have built one of our own
Docker Hub or other registries
“mcr.microsoft.com/azuredocs/aci-helloworld:latest”

Provide a resource group for deployment, name, region, and – the most crucial parameter – image source
After successful deployment, we should be able to open the FQDN assigned to the instance.
ARM Template, PowerShell, and Azure CLI
Since the deployment code could be pretty big, all ARM template, Azure PowerShell, and Azure CLI scripts are stored in the Apress GitHub account, available at the following URL:
Azure Kubernetes Service
Azure Kubernetes Service is a Microsoft offering for deploying a managed Kubernetes cluster. Since it is a hosted service, Microsoft is responsible for health monitoring, maintenance, and managing the masters. AKS offers us a full container orchestration, service discovery across containers, automatic scaling, and coordinated application upgrades.
From a security perspective, AKS is protected by Kubernetes role-based access control. With RBAC, we can manage who can access resources and namespaces and with which level of access. It can also be integrated with Azure AD.
For already more than two years, Azure Kubernetes Service can be monitored by Azure Monitor. This way, we can monitor the health and performance of the clusters. AKS nodes are based on Azure virtual machines, which means that they can be upgraded and scaled on the same basis. As it supports deployment into a virtual network, pods in a cluster can communicate with each other through peering with other Azure resources or through ExpressRoute with on-premises resources.
Creating Azure Kubernetes Cluster
Azure Portal
Deployment of Azure Kubernetes Service via Azure Portal is no different from any other service. After choosing Create a resource, we need to search for “kubernetes service.” When we choose to create it, we will need to provide the resource group name, Kubernetes cluster name, region, zones, version, node (virtual machine) size, and initial number of nodes. The next step is to define node pools – we will have one predefined. We now need to choose the authentication method, networking options, monitoring, and possible integration with Azure Policy. Finally, review and create the resource.
ARM Template, PowerShell, and Azure CLI
Since the deployment code could be pretty big, all ARM template, Azure PowerShell, and Azure CLI scripts are stored in the Apress GitHub account, available at the following URL:
Chapter Recap
In this chapter, we have learned more about the most used Platform-as-a-Service product – App Service. We have seen how easily we can use it to deploy our applications and even Docker containers. We have also covered the basic deployment of Azure Kubernetes Service.
In the next chapter, we will talk about one of the most used Azure services. We will cover the types and use cases for it.