
![]()
Refactoring the Example: Part I
In the previous chapters, I showed you each functional area in isolation: how to deal with events, how to manipulate the DOM (Domain Object Model), and so on. The real power and flexibility of jQuery arise when you combine these features, and in this chapter, I am going to demonstrate the combination by refactoring the flower shop example document.
All of the changes that I make in this chapter are in the script element. I have not changed the underlying HTML of the example document. As with most jQuery features, there are many different routes to achieving the same result. The approaches I take in this chapter reflect the parts of jQuery that I like the most and the way that I tend to think about the DOM. You may have a different mental model and prefer different combinations of methods. It really doesn’t matter, and there is no single correct way of using jQuery.
Reviewing the Example Document
I started this book with a simple example document, a basic flower shop page. In the chapters that followed, I used jQuery to select elements from the document, explore and rearrange its DOM, listen to events, and apply effects to its elements. Before I start to refactor the example, let’s look back to where I started. Listing 11-1 shows the basic document.
Listing 11-1. The Basic Example Document
<!DOCTYPE html>
<html>
<head>
    <title>Example</title>
    <script src="jquery-2.0.2.js" type="text/javascript"></script>
    <link rel="stylesheet" type="text/css" href="styles.css"/>
    <script type="text/javascript">
        $(document).ready(function() {
             // jQuery statements will go here
        });
    </script>
</head>
<body>
    <h1>Jacqui's Flower Shop</h1>
    <form method="post">
        <div id="oblock">
            <div class="dtable">
                <div id="row1" class="drow">
                    <div class="dcell">
                        <img src="aster.png"/><label for="aster">Aster:</label>
                        <input name="aster" value="0" required />
                    </div>
                    <div class="dcell">
                        <img src="daffodil.png"/><label for="daffodil">Daffodil:</label>
                        <input name="daffodil" value="0" required />
                    </div>
                    <div class="dcell">
                        <img src="rose.png"/><label for="rose">Rose:</label>
                        <input name="rose" value="0" required />
                    </div>
                </div>
                <div id="row2"class="drow">
                    <div class="dcell">
                        <img src="peony.png"/><label for="peony">Peony:</label>
                        <input name="peony" value="0" required />
                    </div>
                    <div class="dcell">
                        <img src="primula.png"/><label for="primula">Primula:</label>
                        <input name="primula" value="0" required />
                    </div>
                    <div class="dcell">
                        <img src="snowdrop.png"/><label for="snowdrop">Snowdrop:</label>
                        <input name="snowdrop" value="0" required />
                    </div>
                </div>
            </div>
        </div>
        <div id="buttonDiv"><button type="submit">Place Order</button></div>
    </form>
</body>
</html>
I have highlighted the script element, because that’s where you spend your time in this book. I have put in the ubiquitous jQuery handler for the ready event, but that’s all. There are no other JavaScript statements. You can see how the unvarnished document appears in the browser in Figure 11-1.

Figure 11-1. The basic example document
Adding Additional Flower Products
The first change I make is to add some additional flowers to the shop. I want to do this to demonstrate how you can create elements in a loop. Listing 11-2 shows the script element with the additions.
Listing 11-2. Adding Products to the Page
...
<script type="text/javascript">
    $(document).ready(function() {
        var fNames = ["Carnation", "Lily", "Orchid"];
        var fRow = $("<div id=row3 class=drow/>").appendTo("div.dtable");
        var fTemplate = $("<div class=dcell><img/><label/><input/></div>");
        for (var i = 0; i < fNames.length; i++) {
            fTemplate.clone().appendTo(fRow).children()
                .filter("img").attr("src", fNames[i] + ".png").end()
                .filter("label").attr("for", fNames[i]).text(fNames[i]).end()
                .filter("input").attr({name: fNames[i], value: 0, required: "required"})
        }
    });
</script>
...
I have defined the three additional types of flower (Carnation, Lily, and Orchid) and created a new div element that is assigned to the drow class and that I append to the existing div element that acts as a table in the CSS (Cascading Style Sheet) table layout model.
...
var fNames = ["Carnation", "Lily", "Orchid"];
var fRow = $("<div id=row3 class=drow/>").appendTo("div.dtable");
...
I then define a skeletal set of elements; these describe the structure of elements that I want for each product but don’t contain any of the attributes that distinguish one flower from another.
...
var fTemplate = $("<div class=dcell><img/><label/><input/></div>");
...
I use the skeletal elements as a simple template, cloning them for each of the flowers I want to add and using the name of the flower to add the attributes and values.
...
for (var i = 0; i < fNames.length; i++) {
    fTemplate.clone().appendTo(fRow).children()
        .filter("img").attr("src", fNames[i] + ".png").end()
        .filter("label").attr("for", fNames[i]).text(fNames[i]).end()
        .filter("input").attr({name: fNames[i], value: 0, required: "required"})
}
...
I use the filter and end methods to narrow and broaden the selection and the attr method to set the attribute values. I end up with a fully populated set of elements for each new flower, inserted into the row-level div element, which in turn is inserted into the table-level element. You can see the effect in Figure 11-2.
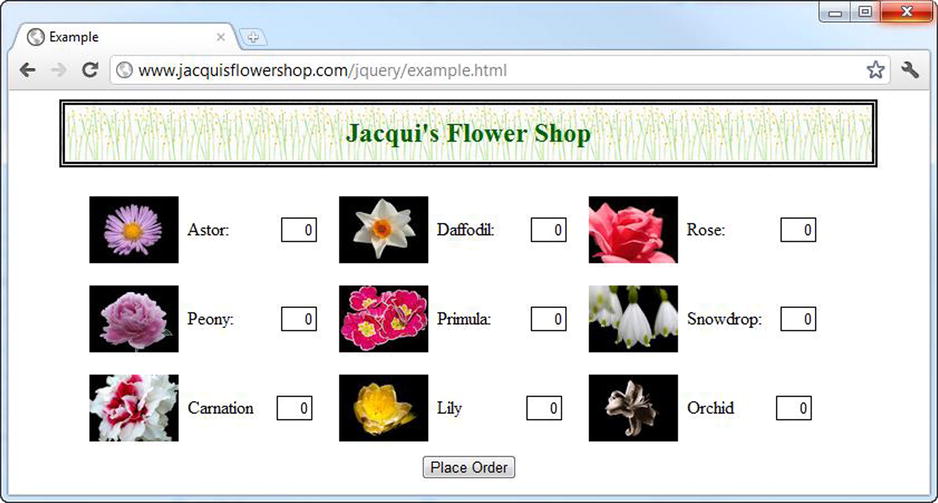
Figure 11-2. Adding new flowers to the page
One nice jQuery feature evident in this example is the way you can select and navigate around elements that are not attached to the main document. The template elements are not part of the document when I clone them, but I can still use the children and filter methods to narrow down the selection.
Adding the Carousel Buttons
I am going to create a simple carousel that will let the user page through sets of flowers. To begin with, I need left and right buttons for the pagination. Listing 11-3 shows how I added them to the document.
Listing 11-3. Adding the Carousel Buttons
...
<script type="text/javascript">
    $(document).ready(function() {

        var fNames = ["Carnation", "Lily", "Orchid"];
        var fRow = $("<div id=row3 class=drow/>").appendTo("div.dtable");
        var fTemplate = $("<div class=dcell><img/><label/><input/></div>");
        for (var i = 0; i < fNames.length; i++) {
            fTemplate.clone().appendTo(fRow).children()
                .filter("img").attr("src", fNames[i] + ".png").end()
                .filter("label").attr("for", fNames[i]).text(fNames[i]).end()
                .filter("input").attr({name: fNames[i], value: 0, required: "required"})
        }

        $("<a id=left></a><a id=right></a>").prependTo("form")
            .css({
                "background-image": "url(leftarrows.png)",
                "float": "left",
                "margin-top": "15px",
                display: "block", width: 50, height: 50
            }).click(handleArrowPress).hover(handleArrowMouse)

        $("#right").css("background-image", "url(rightarrows.png)").appendTo("form");


        $("#oblock").css({float: "left", display: "inline", border: "thin black solid"});
        $("form").css({"margin-left": "auto", "margin-right": "auto", width: 885});

        function handleArrowMouse(e) {
        }

        function handleArrowPress(e) {
        }
    });
</script>
...
I define a pair of a elements, prepend them to the form element, and use the css method to apply values for a number of different properties.
...
$("<a id=left></a><a id=right></a>").prependTo("form")
    .css({
        "background-image": "url(leftarrows.png)",
        "float": "left",
        "margin-top": "15px",
        display: "block",width: 50, height: 50
}).click(handleArrowPress).hover(handleArrowMouse)
...
The key property is background-image, which I set to leftarrows.png. You can see this image in Figure 11-3.

Figure 11-3. The leftarrows.png image
This image contains three different arrows in a combined image. Each individual arrow is 50 pixels wide, and by setting the width and height properties to 50, I make sure that only one of the individual arrows is showing at any time. I use the click and hover methods to define handler functions for the click, mouseenter, and mouseexit events.
...
$("<a id=left></a><a id=right></a>").prependTo("form")
    .css({
        "background-image": "url(leftarrows.png)",
        "float": "left",
        "margin-top": "15px",
        display: "block", width: 50, height: 50
}).click(handleArrowPress).hover(handleArrowMouse)
...
The handleArrowPress and handleArrowMouse functions are empty but I’ll populate them in a moment. At this point, I have two a elements, both displaying left-facing arrows and both next to one another in the form element. I created and formatted the a elements together because most of the configuration is common, but now it is time to move and tailor the right button, which I do as follows:
...
$("#right").css("background-image", "url(rightarrows.png)").appendTo("form");
...
I use the append method to move the element to the end of the form element and use the css method to change the background-image property to use the rightarrows.png. You can see this image in Figure 11-4.

Figure 11-4. The rightarrows.png image
Using combined images like this is a common technique, because it avoids the browser having to incur the overhead of making three different requests to the server to get three closely related images. You’ll see how you can use this kind of image when I fill in the handleArrowMouse function shortly. You can see how the page looks in Figure 11-5.

Figure 11-5. The intermediate state for the example document
Dealing with the Submit Button
As you can see from Figure 11-5, my example is in an intermediate state. New features have appeared, but I have not properly dealt with some of the existing elements. The most significant of these is the Place Order button that submits the form. Listing 11-4 shows the additions to the script to deal with this element (and add a new feature).
Listing 11-4. Dealing with the Submit Button
...
<script type="text/javascript">
    $(document).ready(function() {

        var fNames = ["Carnation", "Lily", "Orchid"];
        var fRow = $("<div id=row3 class=drow/>").appendTo("div.dtable");
        var fTemplate = $("<div class=dcell><img/><label/><input/></div>");
        for (var i = 0; i < fNames.length; i++) {
            fTemplate.clone().appendTo(fRow).children()
                .filter("img").attr("src", fNames[i] + ".png").end()
                .filter("label").attr("for", fNames[i]).text(fNames[i]).end()
                .filter("input").attr({name: fNames[i], value: 0, required: "required"})
        }

        $("<a id=left></a><a id=right></a>").prependTo("form")
            .css({
                "background-image": "url(leftarrows.png)",
                "float": "left",
                "margin-top": "15px",
                display: "block", width: 50, height: 50
            }).click(handleArrowPress).hover(handleArrowMouse)

        $("#right").css("background-image", "url(rightarrows.png)").appendTo("form");

        $("h1").css({"min-width": "0", width: "95%",});
        $("#row2, #row3").hide();
        $("#oblock").css({float: "left", display: "inline", border: "thin black solid"});
        $("form").css({"margin-left": "auto", "margin-right": "auto", width: 885});

        var total = $("#buttonDiv")
            .prepend("<div>Total Items: <span id=total>0</span></div>")
            .css({clear: "both", padding: "5px"});
        $("<div id=bbox />").appendTo("body").append(total).css("clear: left");

        function handleArrowMouse(e) {
        }

        function handleArrowPress(e) {

        }
    });
</script>
...
To accommodate the changes in the layout caused by the carousel buttons, I have moved the div that contains the button element (it has an id of buttonDiv) to be inside a new div element, which, in turn, I have appended to the body element. This moves the button to a position where it returns to the bottom of the page. I have also added a div and a span element. These will be used to display the total number of products that the user has selected.
...
var total = $("#buttonDiv")
    .prepend("<div>Total Items: <span id=total>0</span></div>")
    .css({clear: "both", padding: "5px"});
$("<div id=bbox />").appendTo("body").append(total).css("clear: left");
...
The next change for this section is to hide two of the rows of products. This is so that you can reveal them to the user when they click the carousel buttons.
...
$("#row2, #row3").hide();
...
I have also tweaked the style of the h1 element to match the revised layout style.
...
$("h1").css({"min-width": "0", width: "95%",});
...
You can see the effect of these changes in Figure 11-6.
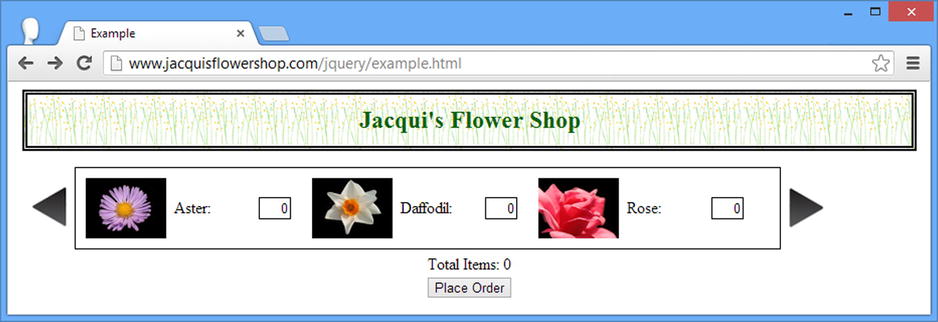
Figure 11-6. Dealing with the submit button and tidying the CSS
Implementing the Carousel Event Handler Functions
The next step is to implement the functions that handle events for the carousel buttons. I am going to deal with the mouseenter and mouseexit events, which are handled by the handleArrowMouse function. Listing 11-5 shows the implementation of this function.
Listing 11-5. Handling the Arrow Button Mouse Events
...
function handleArrowMouse(e) {
   var propValue = e.type == "mouseenter" ? "-50px 0px" : "0px 0px";
   $(this).css("background-position", propValue);
}
...
The trick to dealing with combined images is to use the background-position property to shift the image so that only the part I want is visible. Although there are three images in my sets of arrows, I am going to use only two of them. The darkest image will be shown normally, and the middle image will be shown when the mouse is hovering over the element. You could use the remaining arrow to represent a button being clicked or being disabled, but I want to keep things simple. You can see the two states that the images represent in Figure 11-7.

Figure 11-7. The two states of the arrow buttons
The handleArrowPress function is responsible for creating the carousel effect, allowing the user to page through the rows of flowers. Listing 11-6 shows the implementation of this function.
Listing 11-6. Implementing the handleArrowPress Function
...
function handleArrowPress(e) {
    var elemSequence = ["row1", "row2", "row3"];
    var visibleRow = $("div.drow:visible");
    var visibleRowIndex = jQuery.inArray(visibleRow.attr("id"), elemSequence);

    var targetRowIndex;
    if (e.target.id == "left") {
        targetRowIndex = visibleRowIndex - 1;
        if (targetRowIndex < 0) {targetRowIndex = elemSequence.length -1};
    } else {
        targetRowIndex = (visibleRowIndex + 1) % elemSequence.length;
    }

    visibleRow.fadeOut("fast", function() {
        $("#" + elemSequence[targetRowIndex]).fadeIn("fast")});
}
...
The first three statements in this function set up the basic data you need.
...
var elemSequence = ["row1", "row2", "row3"];
var visibleRow = $("div.drow:visible");
var visibleRowIndex = jQuery.inArray(visibleRow.attr("id"), elemSequence);
...
The first statement defines the set of id attribute values for the row elements. The second statement uses jQuery to get the visible row, which I then use to determine the index of the visible row in the array of row id values. (I do this using the inArray utility method, which I explain in Chapter 34.) So, I know which row is visible and where in the sequence of rows I am. My next step is to figure out the index of the row that will be displayed next.
...
var targetRowIndex;
if (e.target.id == "left") {
    targetRowIndex = visibleRowIndex - 1;
    if (targetRowIndex < 0) {targetRowIndex = elemSequence.length -1};
} else {
    targetRowIndex = (visibleRowIndex + 1) % elemSequence.length;
}
...
In almost any other programming language, I could use the modulo operator to figure out the index of the next row to display, but the JavaScript implementation of modulo math doesn’t support negative values properly. So, if the user clicks the left button, I check for array bounds manually; I do it using the % operator if the user clicks the right button. Once I have figured out the currently visible element and the element to display next, I use jQuery effects to animate a transition from one to the other.
...
visibleRow.fadeOut("fast", function() {
    $("#" + elemSequence[targetRowIndex]).fadeIn("fast")});
...
I have used the fadeOut and fadeIn methods because they work nicely with my CSS table-style layout. I use a callback in the first effect to trigger the second and perform both effects using the fast time span. There is no change in the static layout of the page, but the arrow buttons now take the user from one row of flowers to the next, as shown in Figure 11-8.
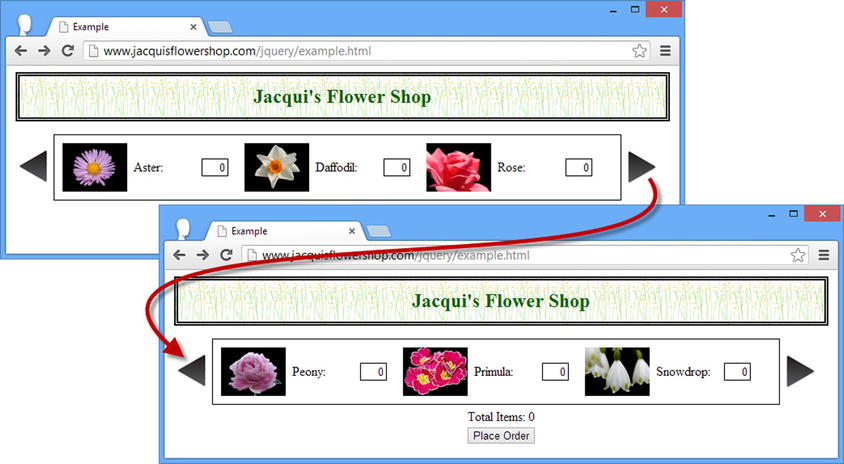
Figure 11-8. Providing a carousel of product rows
Totaling the Product Selection
The last change is to wire up the item total so that the total number of flowers selected in individual input fields is shown under the product carousel. Listing 11-7 shows the changes to the script.
Listing 11-7. Wiring Up the Product Total
...
<script type="text/javascript">
    $(document).ready(function() {

        var fNames = ["Carnation", "Lily", "Orchid"];
        var fRow = $("<div id=row3 class=drow/>").appendTo("div.dtable");
        var fTemplate = $("<div class=dcell><img/><label/><input/></div>");
        for (var i = 0; i < fNames.length; i++) {
            fTemplate.clone().appendTo(fRow).children()
                .filter("img").attr("src", fNames[i] + ".png").end()
                .filter("label").attr("for", fNames[i]).text(fNames[i]).end()
                .filter("input").attr({name: fNames[i], value: 0, required: "required"})
        }

        $("<a id=left></a><a id=right></a>").prependTo("form")
            .css({
                "background-image": "url(leftarrows.png)",
                "float": "left",
                "margin-top": "15px",
                display: "block", width: 50, height: 50
            }).click(handleArrowPress).hover(handleArrowMouse)

        $("#right").css("background-image", "url(rightarrows.png)").appendTo("form");

        $("h1").css({"min-width": "0", width: "95%",});
        $("#row2, #row3").hide();
        $("#oblock").css({float: "left", display: "inline", border: "thin black solid"});
        $("form").css({"margin-left": "auto", "margin-right": "auto", width: 885});

        var total = $("#buttonDiv")
            .prepend("<div>Total Items: <span id=total>0</span></div>")
            .css({clear: "both", padding: "5px"});
        $("<div id=bbox />").appendTo("body").append(total).css("clear: left");

        $("input").change(function(e) {
            var total = 0;
            $("input").each(function(index, elem) {
                total += Number($(elem).val());
            });
            $("#total").text(total);
        });

        function handleArrowMouse(e) {
           var propValue = e.type == "mouseenter" ? "-50px 0px" : "0px 0px";
           $(this).css("background-position", propValue);
        }

        function handleArrowPress(e) {
            var elemSequence = ["row1", "row2", "row3"];

            var visibleRow = $("div.drow:visible");
            var visibleRowIndex = jQuery.inArray(visibleRow.attr("id"), elemSequence);

            var targetRowIndex;

            if (e.target.id == "left") {
                targetRowIndex = visibleRowIndex - 1;
                if (targetRowIndex < 0) {targetRowIndex = elemSequence.length -1};
            } else {
                targetRowIndex = (visibleRowIndex + 1) % elemSequence.length;
            }
            visibleRow.fadeOut("fast", function() {
                $("#" + elemSequence[targetRowIndex]).fadeIn("fast")});
        }

    });
</script>
...
In this addition, I select the input element in the document and register a handler function that gets the value from each, sums it, and sets it as the content for the span element I added earlier. You can see the effect in Figure 11-9.
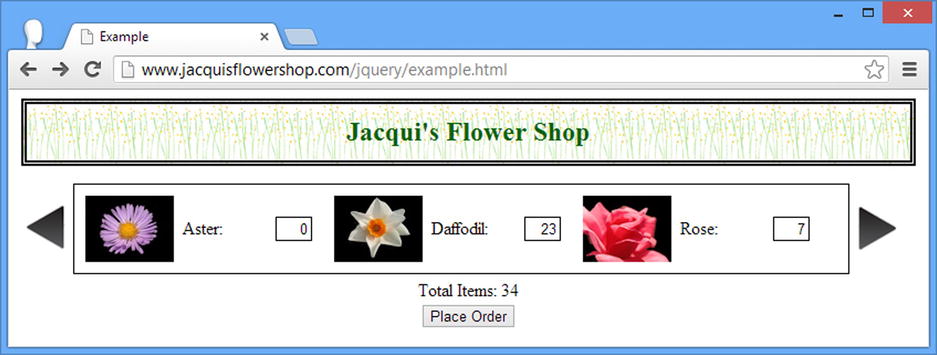
Figure 11-9. Displaying the product selection total
The total shows the sum of all of the input elements and not just the ones that are currently visible (although it would be a simple matter to use the other approach).
I have made some sweeping changes to the example document, but all of them were made with jQuery. This means that I have effectively created two tiers of document, one for JavaScript-enabled browsers and one for non-JavaScript browsers, Figure 11-10 shows what happens when you disable JavaScript and view the example document.
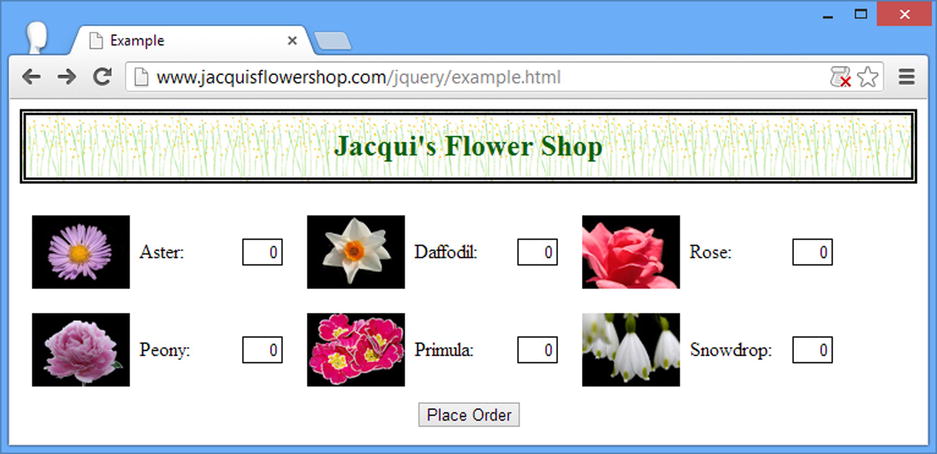
Figure 11-10. Disabling JavaScript and viewing the example document
I am back where I started. With a little planning and forethought, I can offer non-JavaScript clients a set of functionality that still lets them interact with your page or application. This is generally a good idea; there are a lot of large corporations that manage IT (information technology) centrally and disable JavaScript as a security precaution. (Well, sort of. When working for such organizations for many years, I came to believe that these policies didn’t actually stop staff from using JavaScript; they simply created incentives to find loopholes and workarounds.)
Summary
In this chapter, I showed you how to combine the techniques from previous chapters to refactor the example document. I added new content programmatically, created a simple carousel of products, and created a total that displays the overall number of selected items. Along the way, I tweaked the DOM and CSS to accommodate these changes, all in a way that lets non-JavaScript browsers fall back to a document that remains useful.
In the next part of this book, I’ll continue to build on this example, bringing in ever more jQuery features to flesh out the functionality. For the most part, I’ll apply these to the original example document so as to focus on each feature in turn, but in Chapter 16, I'll refactor the example again to bring in more features.