We’ve come a long way, and it has all led to this final project. It’s time to challenge yourself by building a game on your own. It’s a game you’re capable of building if you’ve been following along.
In this chapter, I’m going to explain how I would recreate another popular game. You’re free to follow my guidance, or to deviate if you can think of a better approach or mechanic for your version.
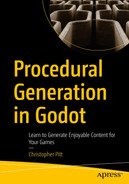
This War of Mine
This War of Mine is a game in which you are again trying to survive in a besieged city. That’s where the similarity with Invasion ends. It’s a beautiful 2D simulation strategy game, in which you try to feed and comfort the people under your roof.

A 2 D game view of a broken 2 storey house with the text day 6, time, temperature, our things end the day, and it's all getting too hard, with human characters, along with three posters.
Surviving in a broken house
It’s a somber and often hopeless setting and a punishing game. You spend much of the game making the best out of bad situations. Despite the setting, This War of Mine is a masterpiece of game design and implementation.
Characters can only interact with something when they get close enough to it.
Characters can navigate to it by walking along floors and up stairs or ladders.

An illustration depicts how a character uses stairs to reach the fridge, which is navigated using arrows.
Navigating the house
There are other types of levels, but I want to focus on this main one because it’s where you spend most of your time. Each new game begins with a randomly generated house and a selection of survivors.
The survivors you begin with determine the difficulty you will have. Some survivors have illnesses or dependencies on rare resources. There are also modes where you get a random selection of survivors.
Random starting survivors
Random house generation
Movement through the house
Interaction with house repairs, eating food, resting, looting
Hunger and hope meters for each survivor
You can, of course, choose to implement more or fewer of these. I’ll suggest how I would do it, but the actual implementation is up to you.
Getting Set Up
Main menu screen
Settings screen
New game screen (save slot management)
Play screen
End-of-day summary screen
End-of-game summary screen
This kind of game doesn’t need a win condition. “Survive for the longest time” is enough of a goal. If you want to limit that at a certain number of days, then you’d also need a winning summary screen.
You’re already familiar with how to set the UI elements up for this screen. Start with the usual MarginContainer, CenterContainer, VBoxContainer, and various other controls. Then, check out themes for your UI elements.
Custom themes are inherited, so you can save the theme as a resource and link it to every parent control node. The child control nodes will have the theme automatically applied:

A diagram depicts the custom theme, which is automatically applied to the button when attached to the margin container, followed by the center and V Box containers.
Nested controls inherit themes
I’d use the Screens global, along with screen transitions, as we did when recreating Invasion. I might also tinker with a different shader effect. I’m no expert, but there are plenty of shaders to be found on the Godot Shaders website.
We haven’t spent any time talking about how to generate sounds, because it’s not been the focus of this book. That doesn’t mean sounds are unimportant. At this point, I’d make some menu music or look for some menu music and sounds to play when the player clicks on a menu button.
If you’re looking for advanced tools, search for “Digital Audio Workbench.” They are usually quite pricey, though.
www.aseprite.org (not free, but recommended)
If you’re looking for more free game assets, don’t forget about Kenney’s website.
Generating Levels
When generating levels, I’d stick to the approach we’ve been using. You can create pixel art layouts for each different room and render them as tiles or nodes. We don’t need to plan out the whole level – only uniformly sized rooms that we can randomly place in room slots.
It might be a bit more tricky if you want to misalign the rooms on each floor. In that case, the layout image should contain options for whole floors.
There’s still plenty you can do to randomize the layout inside each floor. You can use the collective nodes we learned about while making Invasion. You can even mirror the floors or rooms.
Into those floor layouts, I’d dedicate a special pixel color for points on a path so that we can map the walkable area. When drawing the floors or rooms, we could create a Path2D or a NavigationRegion2D for the characters to move along.
If you are sticking to path-based navigation, this is how that could work:

An illustration shows three floors with stairs, and the nodes are used for navigation.
Navigating along Path2D nodes
We learned about paths in Chapter 11, so refer to that for a refresher. We don’t actually need to create the links between the Path2D nodes, either. The approach we learned about finds the closest points between two paths and travels through them.
Some levels in This War of Mine feature rooms that are closed off until a character clears a path or picks a lock. We can achieve this by creating separate paths blocked by nearby doors:

A graphical illustration presents floor 3 with a door, the path before and after the door is indicated by different colored nodes, which are used for navigation.
Conditionally available paths
We can define a “door” pixel and a different “path” pixel that creates a path automatically disabled until an adjacent door is cleared.
While disabled, the path shouldn’t be navigable. I expect you’ll have to bring it into or out of certain groups and filter on those groups when you’re looking for available paths to traverse.
More advanced stuff, to be sure.
Selecting Starting Characters
A big part of what makes This War of Mine replayable is the variety of characters you can start with and gain.
You can add hope, hunger, and health to each character, but…
Some characters can have lower or higher starting values for these.
Feeding certain foods or performing certain activities can increase or decrease these values.
Feeding certain addictive resources can cause addiction (like coffee, cigarettes, etc.).
Keeping characters with addictions “topped up” can give them more hope or less hunger than usual.
Failing to provide these resources to characters can cause their hope or health to drain faster.
There’s no limit on what you can add to these systems; and managing them is a major focus of This War of Mine. I’d suggest you decide the features you want to add up front and stick to implementing those.
Scope creep can kill your project at this point.
Interacting with Objects in the World
As we learned in Chapter 12, we can achieve interaction using Area2D nodes near to each other. This could be an interactable node attached to the fridge or a door or a bed. If the characters can move within the range of the object, then they might be able to interact with it.
This War of Mine sometimes requires characters to “open” containers before being able to loot them using tools and time.
A bed needs to be vacant for a character to sleep.
A cupboard needs to be openable before a character can loot it.
You need enough food to be able to cook.
You need the correct building materials to be able to repair a broken wall.
Characters that sleep can heal and regain some hope or lose some tiredness.
Characters that eat can lose hunger.
All characters living in the house can gain some hope when one of them repairs part of the house.
This War of Mine also has randomized events that happen overnight, such as break-ins and attacks. The more you repair the house, the less frequent or severe they tend to be. That’s an interesting mechanic!
Ending the Day
After a set amount of time, the day should end. This is a good time to remind the player how they are doing and to start random events or allow characters to leave the house.
We should show an end-of-day screen. This can display days survived, remaining food, and a general summary of the health and hope of the current characters.
You can decide whether to deduct a fixed amount of hunger at this point, or do so during the day. The length of the day is also something you get to decide, since it won’t match the passage of time in the real world.
Deciding When to End the Game
When a character’s hope gets to zero → they leave in the night.
When a character’s health gets to zero → they die.
When there are no more characters in the house → the game is over.
We can determine the final score based on how long the characters have survived for and how many good things they did while in the house. When characters interact with each other in a positive way, or do things to enrich the lives of other characters, we can count this as a good thing.
This “good things” system might be overkill. I’m throwing ideas out there for you to think about.
All that is to say, the game must end. When it does, you can show the game-over summary screen.
Unlocking New Levels and Characters
You can encourage players to replay your game by allowing them to unlock new levels and characters after having played a certain way or for a certain amount of time.
The point isn’t to force them to grind. It should be a nice reward for immersing them in a dystopia; and it will allow them to try new styles of play.
You can make the unlocked levels larger or longer or with more random events. You can even represent these new levels on an interactive map:

A diagram depicts the duplex, which is connected to the mansion, shack, and shopping mall along with the survival nights, and is situated between the bandit camp and the war zone.
Allowing the player to choose the challenge
A Note About Mobile Game Development
It’s no accident that the games we have built could mostly work on a touch screen. I am a fan of building games that can work well on a touch screen because those are the kinds of games I like to make for my kids.
You can build this game without ever needing the player to type something, or otherwise press a button on a keyboard. If you manage to keep this approach, you’ll also be able to publish your game to Android and Apple tablets and phones.
I have published many games to these platforms, and it’s a wonderful feeling being able to play a game you’ve made on a mobile device you own.
It’s also why I have used MarginContainer as the main node for my screen scenes. You can adjust the margins of MarginContainer to account for phone buttons, notification areas, and notches.
It’s a bit more work to support different screen sizes, but it’s worth it for the joy players will get from being able to play your games on the devices they have on hand.
Taking It One Step at a Time
It’s easy for me to sit here and tell you how I would build this game, when you are the one who has to build it. Indie game development can sometimes feel like you’re wearing all the hats and nobody is helping.
Take things one step at a time.
Start with a small scope, create a task list, give yourself a deadline. Then, begin the process of cutting scope or deprioritizing non-essential features so that you can launch on time.
For every game I’ve published, five more concepts have died. I’m talking as much to myself as I am to you. Keep at it and you can realize your dreams of making games you and your friends and family can enjoy.
Thank You for Reading This Far
It’s time I got going. I want to thank you for reading through this book. I hope it’s been as much fun for you to follow along as it was for me to write. This was my first book as an indie game developer, so I’m sure there is room for improvement.
I want to echo what I said before. If you have questions, or things aren’t working, then please reach out to me and ask questions. I love talking about this stuff, and it’s the least I can do to point you in the right direction.
Twitter: assertchris
Email: cgpitt@gmail.com