
Chapter 3
Setting Up Your Development Environment
What's In This Chapter?
- Understanding the development environments used in this book
- Installing the development tools
- Installing the platform SDKs
- Organizing multiplatform projects and code
- Navigating the sample code
In this chapter you are exposed to all the tools used throughout the book to build and run the sample code. Some information on organizing your multiple platform code bases is also presented.
In preparation for installing your development tools, you need to know in advance what platforms you are interested in supporting. Glance at Table 3.1 to ensure you have the proper hardware and operating systems available to you.
Table 3.1 Operating Environment Required for Target Platforms
| Development Target | Mac OSX | Windows |
| iOS/MonoTouch | X | |
| Android/Mono for Android | X | X |
| WebKit/ASP.NET | X | |
| Windows Phone | X |
Getting Your Development Tools
All the samples in this book are provided in project files that require Microsoft Visual Studio for Windows or MonoDevelop for Mac OSX to build, deploy, and run. In some cases the code can be built in other ways, but these tools are the most commonly available to enterprise developers. You can explore alternative ways to build the samples as an exercise if you are interested in pursuing those avenues.
Because this book focuses on cross-platform development, little is said about the native platform tools except where they are needed.
Installing Microsoft Visual Studio
Visual Studio 2010, which runs only on a PC running Windows, is required to build, deploy, and run all the Windows Phone 7, Mobile Web (WebKit), and Console sample code referenced in this book. The Android samples can be built in Visual Studio or MonoDevelop (discussed later in this chapter), but Mono for Android support is most stable on the Windows platform with Visual Studio 2010.
1. Obtain a copy of the Professional, Premium, or Ultimate versions of Visual Studio 2010. Other versions do not include the tools needed to build these projects. See Microsoft's Visual Studio website at www.microsoft.com/visualstudio for answers to any questions you may have on hardware requirements or on the different versions available from Microsoft.
2. Locate and run the program setup from the DVD or other mounted media. You will be greeted by the window, as shown in Figure 3.1.
3. Click the highlighted and underlined Install Microsoft Visual Studio 2010 link. Upon starting, the Installation Wizard checks the Windows version you are using and the installed components, as shown in Figure 3.2. When it determines all is well, the wizard prompts you to begin, as illustrated in Figure 3.3.
4. Read and accept the licensing terms; then click Next. You are now presented with options (see Figure 3.4) for what to install and where to install Visual Studio. The disk space requirements are also listed. You can also customize which languages and tools to install, but use the default installation settings. When initiated, the setup takes a fair amount of time.
5. Click Next and get comfortable. About halfway through the installation, you will be prompted to restart Windows. This is necessary to complete the installation of Visual Studio.
![]() Occasionally, Visual Studio installation will not continue after restarting Windows. If this happens, locate the Setup application you started the installation from initially and restart the installation. After a few initial prompts, it will continue where it left off.
Occasionally, Visual Studio installation will not continue after restarting Windows. If this happens, locate the Setup application you started the installation from initially and restart the installation. After a few initial prompts, it will continue where it left off.
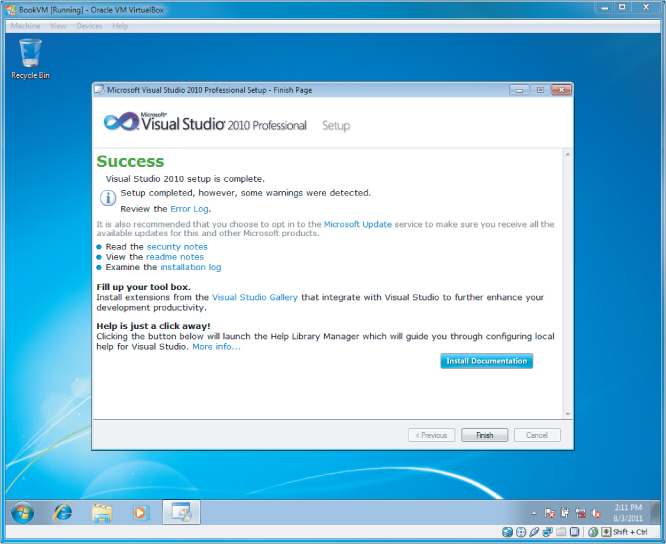
6. After Windows restarts, log in. Setup should continue. When Visual Studio 2010 setup is complete, the window shown in Figure 3.5 displays.
7. Now that you have Visual Studio 2010 installed, you need to find, download, and install the latest Visual Studio 2010 Service Packs. You can find a link to the download from Microsoft's Visual Studio website at www.microsoft.com/visualstudio under the Products menu. After you have it downloaded, locate the downloaded file, and run it. The Service Pack is a small initial download, but expect the installation to take an hour or more.
![]() The Windows Phone 7 SDK requires Visual Studio 2010 with the latest available service pack installed. As of this writing, Service Pack 1 is the latest available service pack.
The Windows Phone 7 SDK requires Visual Studio 2010 with the latest available service pack installed. As of this writing, Service Pack 1 is the latest available service pack.
Figure 3.1 The Visual Studio Professional Installation Wizard helps you start.
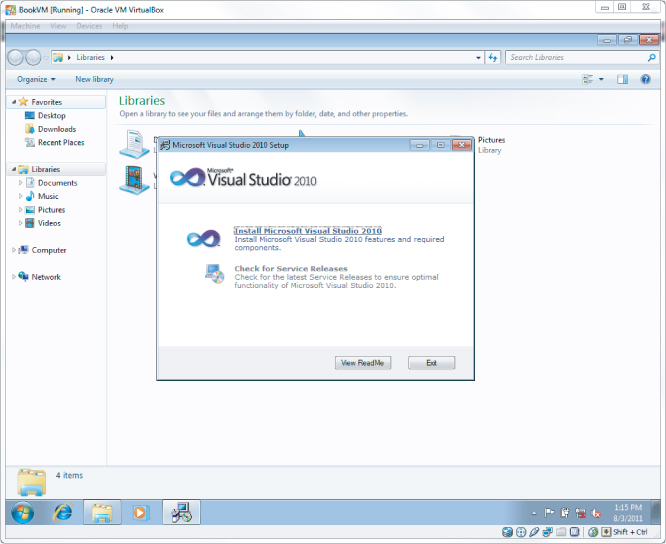
Figure 3.2 The Visual Studio Professional Installation Wizard checks your system in preparation for installation.
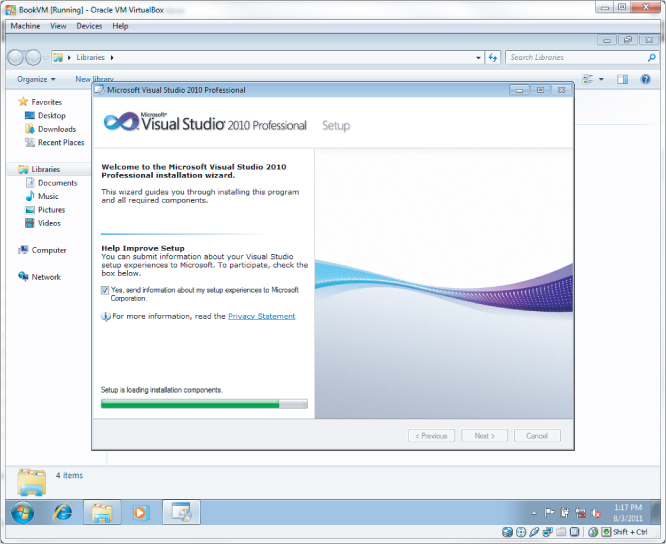
Figure 3.3 Be sure to close down other applications and accept the license terms.
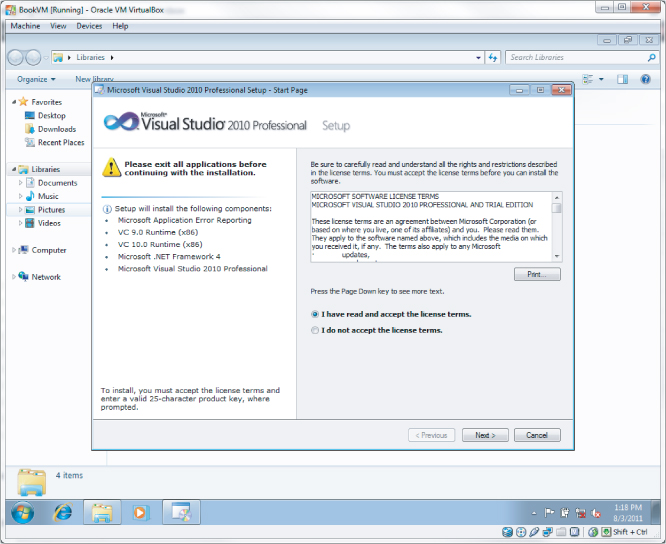
Figure 3.4 Stick with the default options whenever possible.
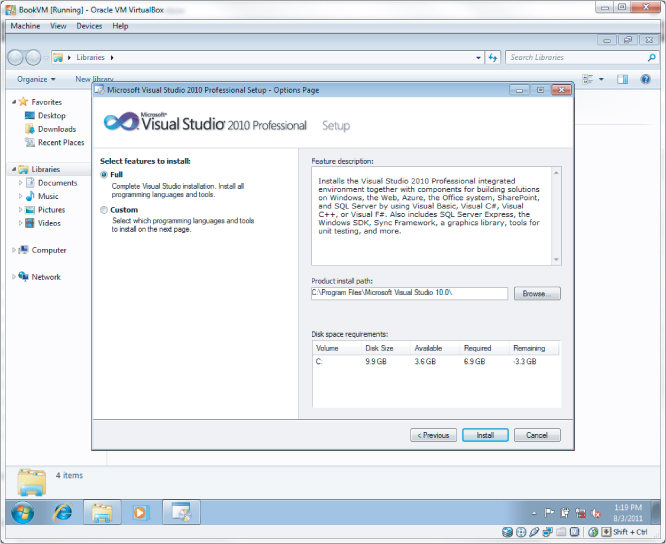
Figure 3.5 Visual Studio installation is now complete.
Installing Internet Information Services (IIS)
After installing Visual Studio, you need to make certain to enable Internet Information Services (IIS) to build, deploy, and run the WebKit sample code. If you aren't interested in the WebKit samples and don't want to install IIS, you can get by without installing it, but you get an error when opening the solution files. You can safely ignore the error and remove the offending projects from the solution if you want to.
1. Click the Windows Start button, and then click the Control Panel item from the Windows Start menu.
2. If the Control Panel is in Category view, select the Programs item, then select Programs and Features. If the Windows Control Panel is in larger or small icons view, select Programs and Features. The result should be as illustrated in Figure 3.6.
The page heading reads Uninstall or Change a Program, but the item you are looking for is on the left of the window and is titled Turn Windows Features On or Off. This option is highlighted in Figure 3.7.
3. Click Turn Windows features on or off. At this time a dialog window displays with a hierarchical list of Windows features in which checked items are already installed and unchecked are not. By default Internet Information Services will be unexpanded in the list and will not have a check mark or filled-in box in front of it.
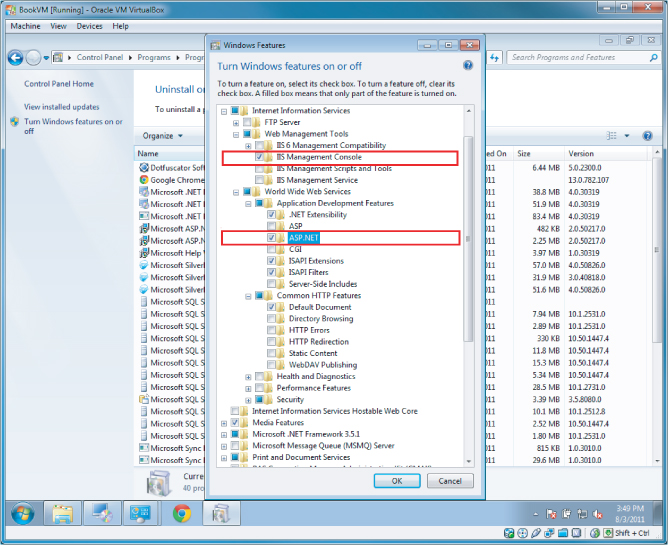
4. Expand the Internet Information Services item and all items below it. Your list should look like the list in Figure 3.8, but with none of the items checked off.
5. Click the check boxes for IIS Management Console and ASP.NET to select them. As a result of checking these items, other items in the list will automatically be checked. After selecting the items, your list should match Figure 3.8.
6. Click OK. Installation of IIS is complete after Windows has had enough time to install additional files and services. A restart may be required.
At this point you can build, run, and debug ASP.NET solutions.
Figure 3.6 The Control Panel Programs and Features group provides the option you are looking for.
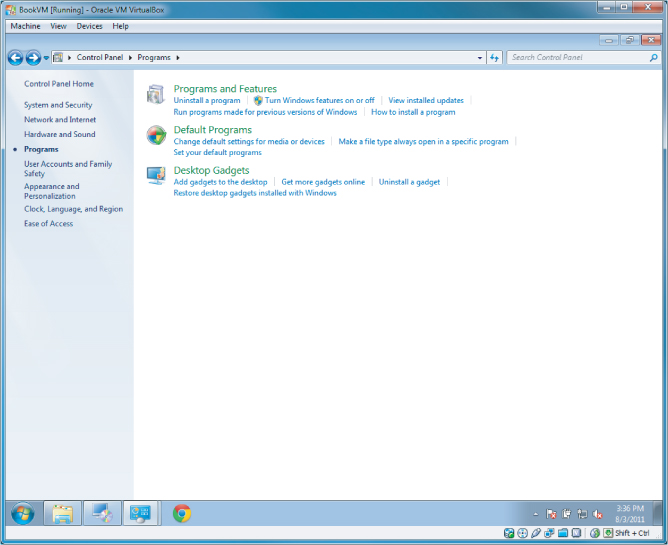
Figure 3.7 Turn on Windows features.
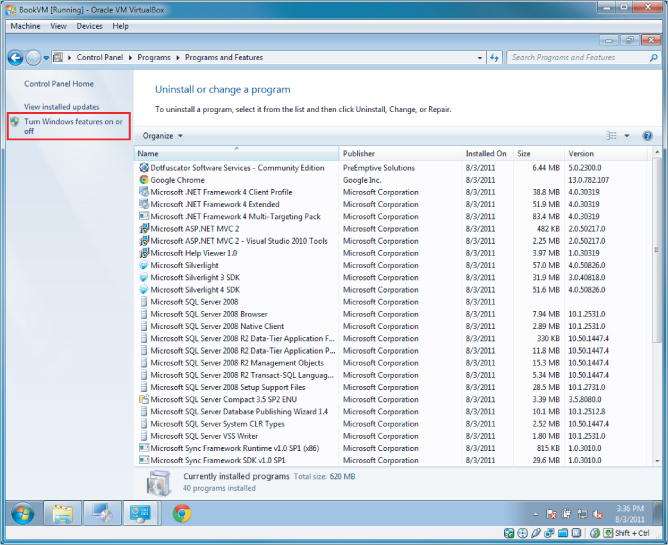
Figure 3.8 Select IIS Management Console and ASP.NET to continue the installation process.
Installing MonoDevelop for Mac
MonoDevelop for Mac OSX is required to build and run MonoTouch projects and optionally can be used to build and run the Mono for Android sample projects. The iOS SDKs require that development be done solely on an Intel-based Macintosh (any flavor) running Mac OSX 10.6 or newer.
MonoDevelop for all platforms is available for download from http://monodevelop.com/download. Up-to-date installation instructions are available there for all supported platforms.
Determining the Correct Version
First, determine which version of Mono Framework and MonoDevelop you need to install by taking into account the platforms you are targeting. Currently MonoTouch and Mono for Android require you to install the latest stable version — MonoDevelop 2.8 or later. Verify the versions required by MonoTouch and Mono for Android before you proceed.
Installing the Mono Framework
1. Download the latest stable version of Mono (2.10.3 at this writing) from www.go-mono.com. Choose either the Runtime or SDK option for Intel.
2. After the download completes, use the Finder to view the Downloads folder, and look for a file that starts with “MonoFramework” and ends with “.x86.dmg”. The name of the file also includes the version of the Mono framework that you downloaded.
3. Double-click the file. It displays the unpackaged version, as shown in Figure 3.9.
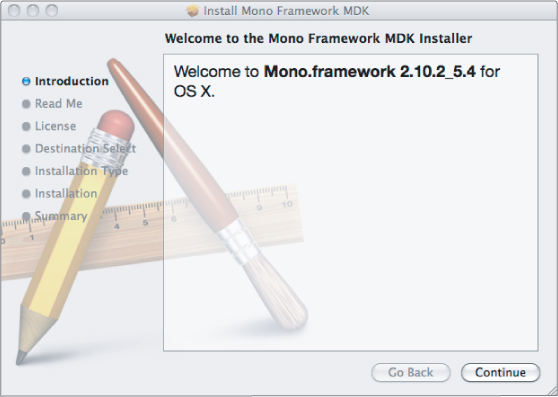
4. Double-click the package file. The window shown in Figure 3.10 displays.
5. Click Continue through each step in the installer, accepting the licensing terms and other installation options and choosing the defaults.
Figure 3.9 The icon represents the Mono Framework installation package.
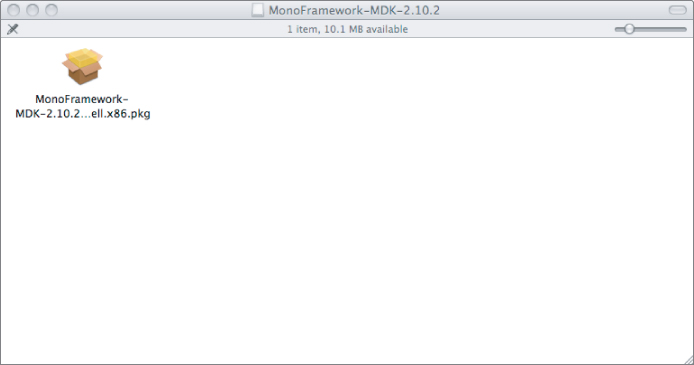
Figure 3.10 The Mono Framework Installer guides you through the installation process.
Installing MonoDevelop
Now that you have the Mono Framework installed, go to http://monodevelop.com/download to find and select the version of MonoDevelop you need for the mobile platforms you will work with (iOS and/or Android). Then select the Mac as discussed previously and download the installation package. Figure 3.11 shows the options as described for the latest version of MonoDevelop for Mac OSX.
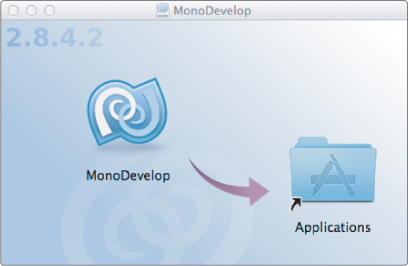
1. Use the Finder to view the Downloads folder, and look for a Disk Image file that starts with MonoDevelop. The name of the file should also include the version of the MonoDevelop that you downloaded.
2. Double-click the file to start the installation, as shown in Figure 3.12. Drag and drop the MonoDevelop icon into the Applications folder and installation will be complete.
That completes the installation of the development tools; next you move on to installing the device frameworks.
![]() You should not skip ahead to installing MonoTouch or Mono for Android because they are dependent on their respective SDKs. If you skip ahead, you may have to reinstall the framework from scratch or manually set up the paths to the SDKs manually.
You should not skip ahead to installing MonoTouch or Mono for Android because they are dependent on their respective SDKs. If you skip ahead, you may have to reinstall the framework from scratch or manually set up the paths to the SDKs manually.
Figure 3.11 Select the appropriate options for your MonoDevelop Installer download.
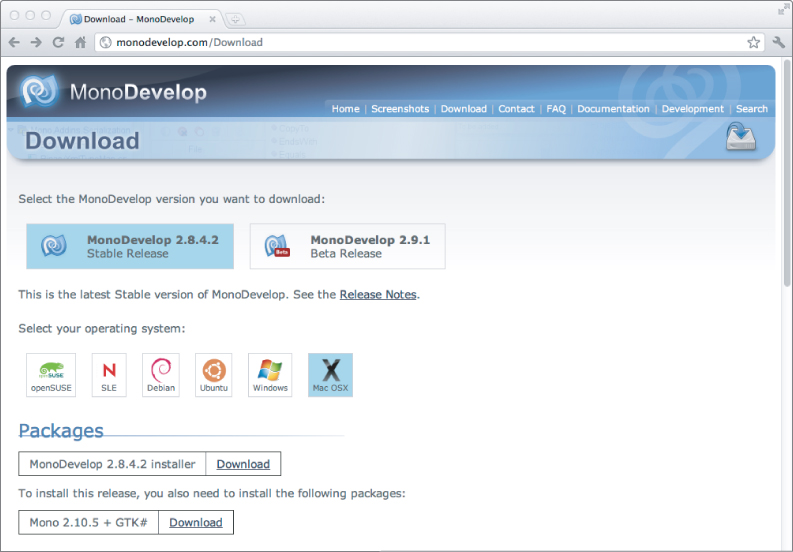
Figure 3.12 Copy MonoDevelop to Applications.
Now that you have the development environments installed for the platforms you are interested in developing for, you can install the SDKs for those environments. If you plan to support WebKit on any of the platforms discussed in this section, you should still install the SDKs because they include emulators and simulators for the target platforms. The emulators and simulators described here all have a web browser and can be used to test your mobile web implementation without using a device.
Installing the Windows Phone SDK
Visual Studio does not include Windows Phone support out-of-the-box. You must download and install the Windows Phone stack from Microsoft's MSDN site at http://create.msdn.com. In addition to the development stack downloads, the site houses links, articles, and documentation. This book and its samples were written using Windows Phone Developer Tools 7.1. All the features used in the book should be compatible with later versions; just find the latest version of the Windows Phone Developer tools and any provided updates from the site.
The Windows Phone Developers Tools contain the additional tools you need to build Windows Phone Applications. It contains code libraries, emulators, sample code, and much more. As a side note, you will notice the initial download is small, but the install pulls all its content from Microsoft's servers and can easily take an hour as the installed size of the update was nearly two gigabytes.
1. Go to create.msdn.com, then click the Download the Free Tools image.
2. Click the Download the SDK 7.1 link.
3. Select the appropriate language (defaults to English) and click the Download button, and the download will begin.
4. Run the downloaded file from your Downloads folder, or from wherever your web browser places download files by default. The installation process asks for your acceptance of the licensing terms. Once you accept, the installer downloads all the required components and then installs them.
5. When completed, start Visual Studio and select File ⇒ New ⇒ Project. Go down the list under C# projects, and you should find a section titled “Silverlight for Windows Phone.” The project templates in Figure 3.13 should be available if installation was successful.
6. After installing the Windows Phone SDK, you can also start the Windows Phone Emulator for testing websites without starting Visual Studio 2010 or start a Windows Phone project. Simply go to the Windows Start Button ⇒ All Programs ⇒ Windows Phone Developer Tools ⇒ Windows Phone Emulator and select it to run the emulator. Figure 3.14 shows an example of the emulator displaying a web page.
Figure 3.13 These templates for Windows Phone 7 project types should be available.

Preparing for iOS Development
To develop for iOS devices, you need the iOS SDK. MonoTouch uses the iOS SDK and its compiler to generate code from compiled .NET assemblies. This section goes over the installation of those components.
![]() Be aware before you start that the Xcode developer tools require you to run Mac OSX 10.6 or newer.
Be aware before you start that the Xcode developer tools require you to run Mac OSX 10.6 or newer.
Figure 3.14 The Windows Phone Emulator can display a web page.
Installing the iOS SDK (iPod/iPhone/iPad)
Download and install Xcode and the iOS SDK as a single Disk Image file (.DMG) from http://developer.apple.com/ios. All versions of the iOS SDKs are bundled with Xcode, and you must have an Apple ID to download them. Select the latest version of the Xcode and iOS bundle that is available.
This is a single, large download (over 4.5GB). It contains the entire Xcode development environment and a version of iOS SDK. Like the Windows Phone 7 Developer tools, be prepared to wait. Included in the package are the developer's tools and iPad and iPhone simulators. Look for Xcode under the Applications directory, start it up, and make sure all installed properly. Figure 3.15 shows the Xcode development environment.
As with the Windows Phone emulator, you can test your code or your WebKit websites without using an actual device. Unlike the Windows Phone SDK, the iOS SDK provides a simulator instead of an emulator. The difference is that the code generated for a simulator is different from the code generated for an actual target device. For example, when installing an application to the Windows Phone emulator, you can install the identical code you would use on an actual phone, but with a simulator the code must be rebuilt to target an actual device. This is important in two ways. The first being that code you test against the simulator is significantly different than the code you would test against an actual device. Second, the simulator is much faster than an actual device because it's built against your development machine, uses your computer's hardware natively, and can give false expectations of how fast your application will run on an actual iPhone or iPad. This is significant in that it highlights why it is important to test the performance of your application on a real device to make certain it meets your user's expectations.
Figure 3.15 The Xcode development environment looks like this when it runs after installation.
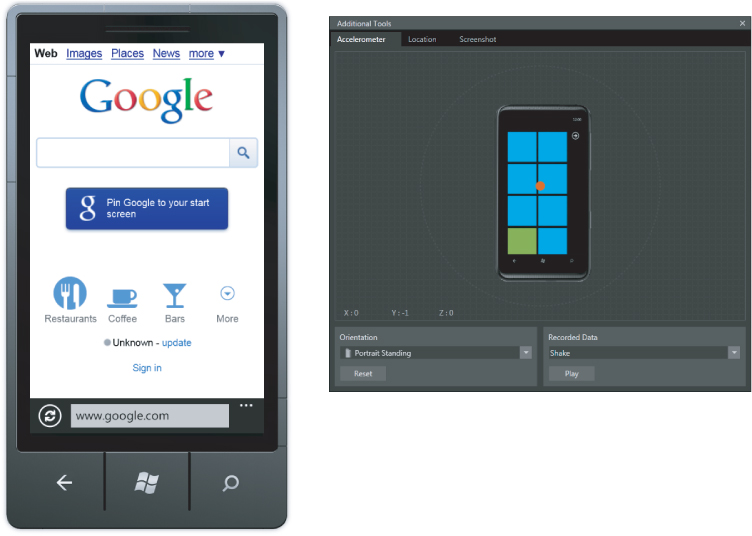
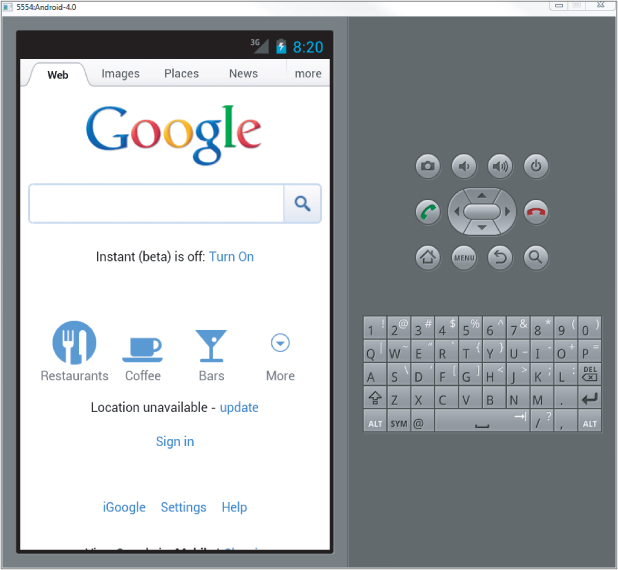
To start the emulator without working in either Xcode or MonoDevelop, open Finder, and browse to Developer ⇒ Platforms ⇒ iPhoneSimulator.platform ⇒ Developer ⇒ Applications ⇒ iOS Simulator where you can find the simulator application. Just double-click the application icon to start the simulator. Figure 3.16 shows Google running in the mobile Safari browser in the simulator.
Figure 3.16 The Google application is running in the iPhone simulator.

Installing MonoTouch
Download MonoTouch from http://xamarin.com/trial or if you purchased a licensed copy from http://ios.xamarin.com/download. The only difference between the trial and the licensed versions is that you need the licensed version to install to an actual device. The trial versions do not include the software needed to generate an app that can run on the physical device, so you must reinstall the software when you move from the trial version to the licensed version.
1. Start the installation by selecting the installer from the Downloads folder. You will be presented with a window containing a package install as you were when installing the Mono Framework. Double-click on the icon in the folder that comes up and you get the window shown in Figure 3.17.
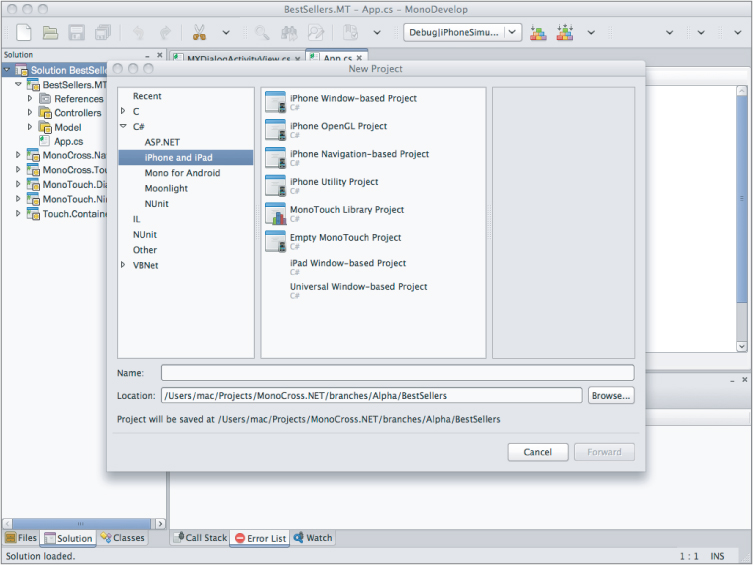
2. After the installation finishes, start MonoDevelop from Applications, and select File ⇒ New Solution. You should see the MonoTouch templates, as shown in Figure 3.18. At this point your MonoTouch installation is complete; no further configuration is required to do iOS development with MonoTouch.
Figure 3.17 The MonoTouch installation application will provide steps to a successful installation.
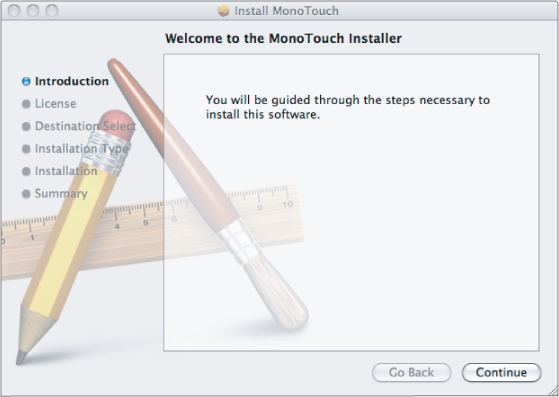
Figure 3.18 Your MonoTouch project templates are available in MonoDevelop.
Preparing for Android Development
Following is a quick walk-through of the installation of the Android development environment for both Windows and Mac OSX installation. The native tools for Android are all Java-based, and as such, the installation is largely the same for both Windows and Mac. Differences between the platforms are noted in the installation steps.
Installing the Java JDK
If you are running a version of Mac OSX prior to 10.7 Lion, you do not need to download and install the JDK because it is included natively in all Mac OSX installations. For versions 10.7 and beyond, find a Mac OSX version of the JDK that is available from the URL in step 1.
1. If you are installing to a Windows PC, download and install a 32-bit version of the Java JDK (Java Development Kit) from www.oracle.com/technetwork/java/javase/downloads.
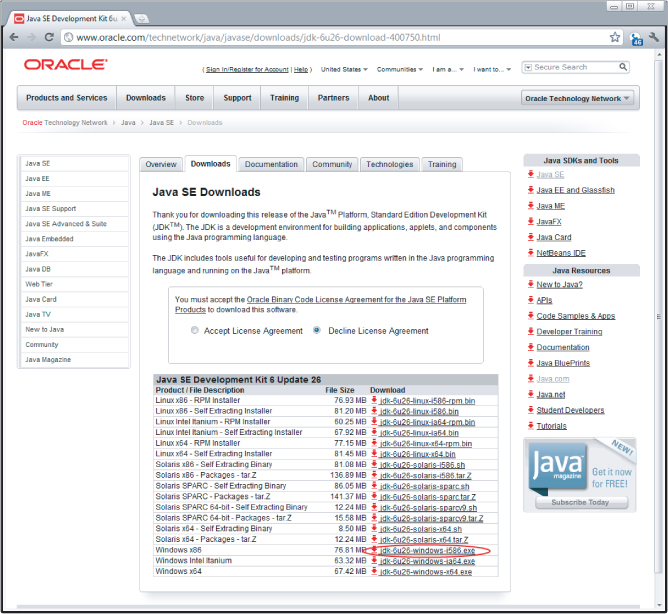
The download link of the version you need for development can be a bit hard to find; however, the download filename should be something like jdk-6u26-windows-i586.exe, where the 6u26 is the version number, as in Java version 6 update 26. Do not install the Version 7 Java JDK; it does not work for Android development at this time. See Figure 3.19 for a little help in selecting the correct version for Android development, because the Oracle download site can be a bit confusing for non-Java developers. You see the current version circled.
2. Start the installation by running the installer. The normal Installation Wizard displays, where you must accept terms of service and installation location.
Figure 3.19 Select the correct version of the Java JDK.
Installing the Android SDK
Google provides several installation options for the Android SDK; the simplest is to first install the starter kit it provides.
1. Download the Android Developer Starter Kit from http://developer.android.com/sdk/index.html.
2. If installing to a Windows PC, the native installer (.EXE) version is recommended because it sets up some of your environment for you, which can help later, and it makes it easier to uninstall in the future should that be needed. Also install it somewhere outside your Program Files directory because that can cause issues later with Windows security protections in some cases, particularly if you don't have admin rights to your PC. Figure 3.20 shows the install location changed to a directory named Android off the root of the primary hard drive.
If installing to a Mac OSX machine, just move the extracted folder to a convenient location. A folder titled Android off the primary hard drive would also be a good selection because it is easy to find and remember.
In either case remember where you place it. You need to tell your MonoDevelop or Visual Studio where the Android SDK is located.
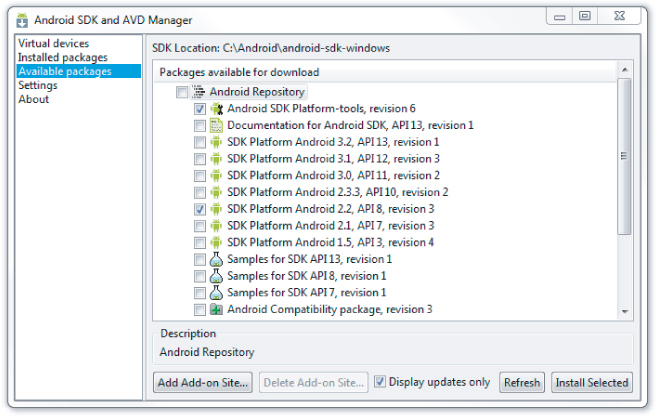
3. Using Explorer in Windows or Finder in Mac OSX, look in the directory where you just installed the Android Starter Kit, and go to the Tools directory; then run the android batch command file. This starts the Android Platform Manager via the command line terminal. Select Available Packages from the left window pane, and check off at least one Platform from the list and any tool updates. See Figure 3.21 for an idea of what this looks like upon completion.
Looking at Figure 3.21, you might have noticed that there are several SDK platforms available and many other items in the available packages. The SDK packages are quite large, so choose only those that you need. If you don't know which version to select, note that SDK Platform 2.2 is the most prevalent on Android phones and SDK Platforms 3.X are meant only for tablets. Android 4.0 and beyond are combined. Additionally, add the latest version of the SDK Platform tools. Mono for Android uses them to package and deploy your solutions.
4. You may be required to start the installation several times if there are dependencies among the platforms and the SDK tools. Carefully watch the progress because there is only minimal warning when the installation completes. You also need to return to the Android Platform Manager whenever you need to update or add new versions of the Android platform.
Figure 3.20 The Android SDK Windows installer prompts you for the installation location.
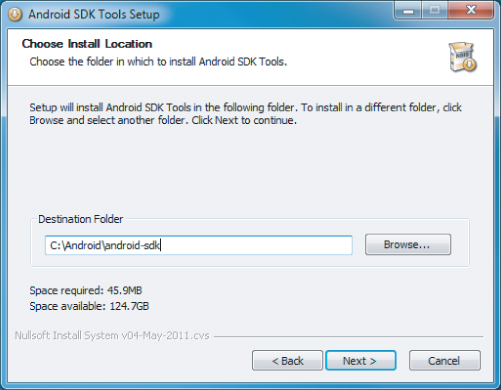
Figure 3.21 Select the appropriate downloads available from the AVD Manager.
Now that you've installed the SDK platforms tools, you are done with the Android-specific installation. Now take a quick look at configuring and using the emulator.
Adding a Virtual Device
Unlike the Windows Phone emulator and iOS simulator, Android emulators must be created and configured. Although it requires a bit more work, it enables you to create emulators that more accurately depict actual devices for both testing and debugging purposes.
1. From the Andriod SDK and AVD Manager, select Virtual Devices from the left pane, as shown in Figure 3.22.
2. Click New.
3. Give this instance a name, then select an Android platform version from the dropdown list and an amount of memory for the external memory card. Add any other hardware attributes you'd like your emulator to have. In Figure 3.22 several are filled in to give you an idea.
One particularly useful additional attribute is Device Ram Size; this enables you to specify the amount of memory Android and your program have to run in on the emulator. By default, the amount of memory allocated will be 256MB, far below your average device. Adding more memory can make debugging and running your program much faster. For additional resources, go to http://developer.android.com and look for the section on the Android emulator.
4. Click Create AVD. This can take a minute or two, so be patient.
5. When complete you will be back to the AVD manager; select the emulator instance you just created, and click Start.
6. The emulator comes up and goes through its boot sequence and then is available for interaction. Figure 3.23 shows the emulator running its built-in browser.
Figure 3.22 You can create an Emulator Image from the AVD Manager.
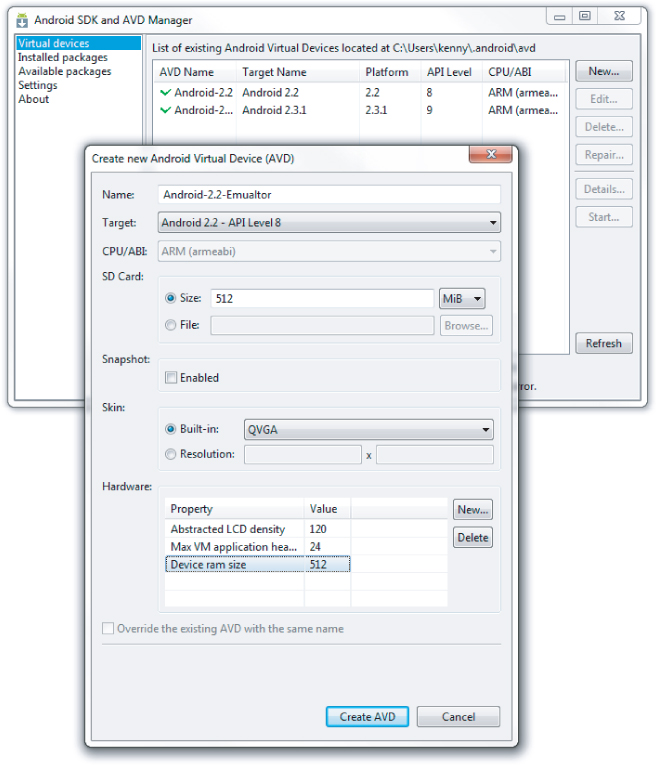
Figure 3.23 You can use the browser in the Android emulator to test your web solutions.
You now have an emulator instance to use for development and testing. You can add more instances that mimic different hardware configurations at any point.
Installing Eclipse
At this point you have enough of the Android SDK installed to run and build the samples; however, you should also install the Eclipse development environment and Android plug-ins for Eclipse. There is at least one good reason for this: the functionality of the Eclipse plug-ins for Android to visually edit and preview Android layout files. No external tool or Mono for Android, itself, has this capability. You can come back to this section at a later time because it has no effect on developing in Mono for Android.
Download and install the most recent version of Eclipse Classic from www.eclipse.org/downloads. Make certain you get the version labeled the 32-bit version because the Eclipse Plug-In for Android supports only the 32-bit version of Eclipse at this time. Eclipse is a self-contained environment in that it doesn't have or need an installer.
- On Windows you can just copy the extracted directory to the Program Files subdirectory and create a shortcut on the desktop.
- On Mac OSX you can just copy the extracted directory to the Applications folder.
Installing the Android Plug-In for Eclipse
To install the Android Plug-In for Eclipse, start Eclipse:
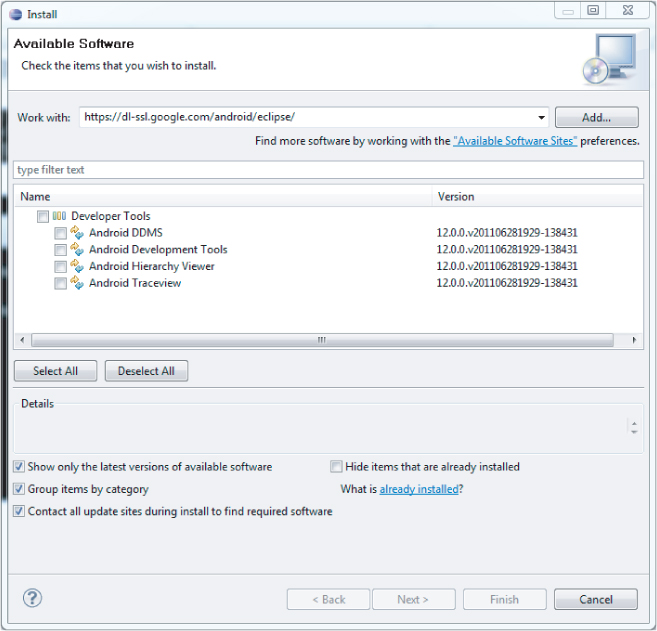
1. Select Help ⇒ Install New Software. The Install window pictured in Figure 3.24 displays.
2. Click the Add button, put Android Plugin in the name field and https://dl-ssl.google.com/android/eclipse/ in the Location field, and then click OK. When the window closes, the Developer Tools and the other items shown in Figure 3.24 should be present.
3. Check the box in front of Developer Tools, and click Next through the next few pages and accept the licensing terms. Upon completion, the Finish button should be active.
4. Click Finish. The Android plug-in for Android installs.
Figure 3.24 After you install the Eclipse Android plug-in, a number of developer tools are available.
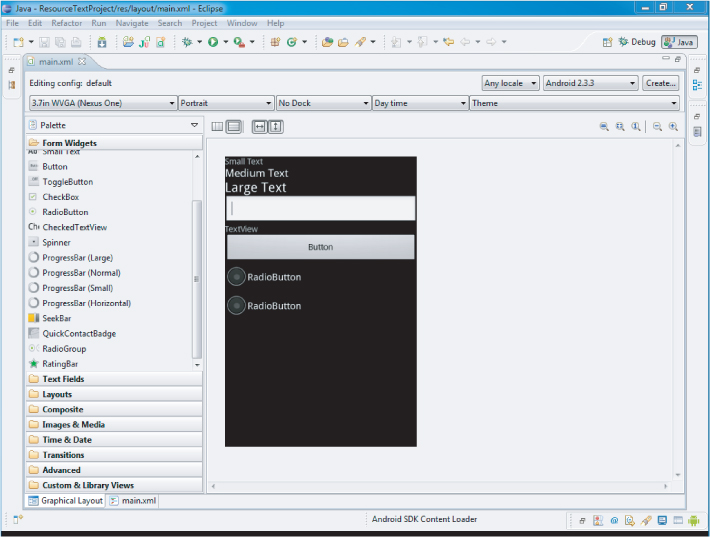
Upon successful installation, you can create a new utility project and add a layout file to try out the various design tools that the Android plug-in provides. Figure 3.25 illustrates what the workspace is like. For more information on using the Android plug-in in Eclipse, see http://developer.android.com.
Figure 3.25 Use Eclipse with an Android plug-in to test out your Layout files.
Installing Mono for Android
Download and install Mono for Android from http://xamarin/trial. Click Run.
Configuring Mono for Android in Visual Studio
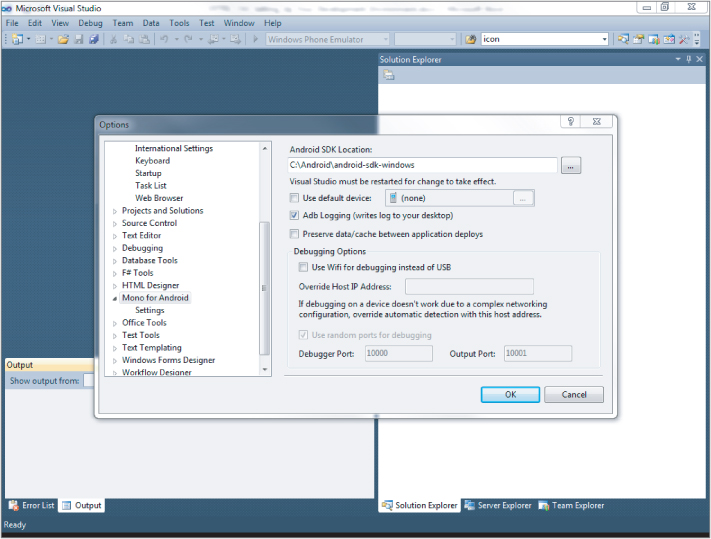
Configure the Android SDK location by first starting Visual Studio 2010.
1. Select Tools ⇒ Options from the drop-down menu.
2. In the left pane, scroll down until you find Mono for Android, and select it.
3. Either type in or use the browse file dialog to locate your specific Android SDK Location, as shown in Figure 3.26.
Figure 3.26 You will need to specify the location of the Android SDK for Visual Studio.
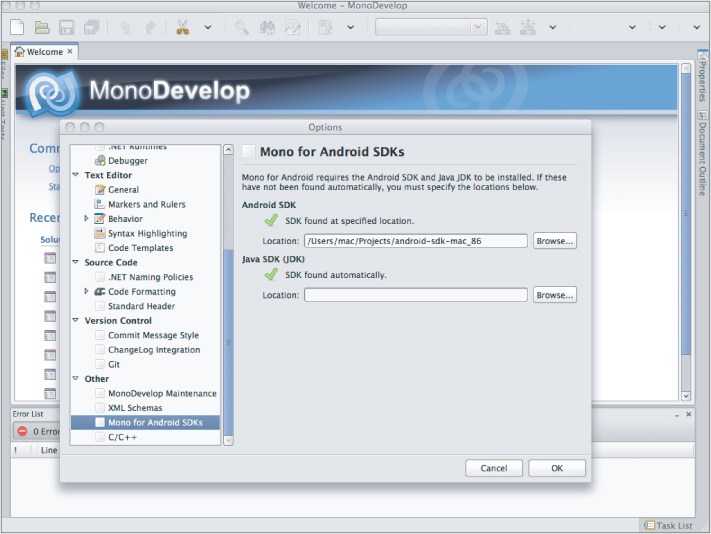
Configuring Mono for Android in MonoDevelop
Configuring the Mono for Android is much the same as in Visual Studio.
1. Select Tools ⇒ Options from the drop-down menu.
2. In the left pane, scroll down until you find Mono for Android located under the Other section, and select it.
3. Either type in or use the browse file dialog to locate your specific Android SDK location. Figure 3.27 shows the Options configuration dialog.
Figure 3.27 MonoDevelop requires you to specify the location of the Android SDK.
At this point you can create Mono for Android projects and build and run your code.
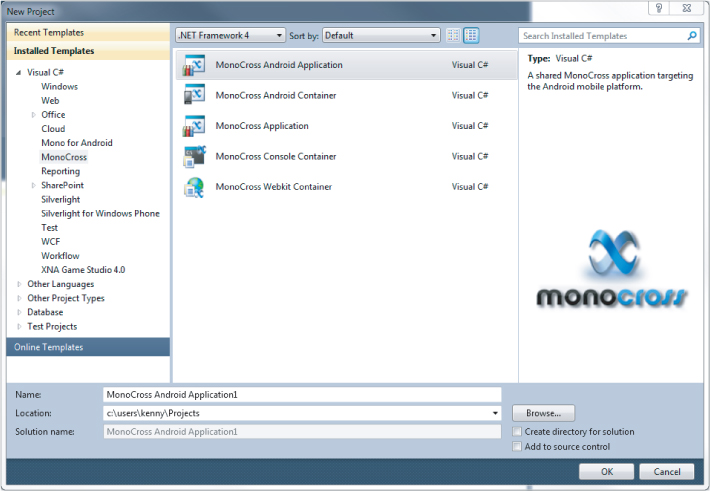
Installing MonoCross Project Templates
The majority of samples in this book revolve around a Model View Controller (MVC) cross-platform framework called MonoCross. As a convenience, project templates have been built that can add the appropriate references and add stub code for you to do your own implementations. You can either extend the provided samples as a starting point or use the templates; how you want to utilize the code and the templates is up to you.
The latest versions of the MonoCross templates for Visual Studio are available from the MonoCross code repository at www.monocross.net, in the Downloads section, and should be labeled appropriately. The MonoCross templates for MonoDevelop are available through the MonoDevelop Add-in Manager.
Installing MonoCross Templates for Visual Studio 2010
The MonoCross templates for Visual Studio contain project templates for Android, Windows Phone, WebKit, and Console MonoCross bindings. In addition, there are class templates for the base classes exposed for these platforms.
1. Download the latest version of MonoCross Templates.zip.
2. Extract the MonoCross Templates.vsix package from the zip file.
3. Double-click on the MonoCross Templates.vsix file from the Download folder.
4. Follow the installation instructions displayed by the Visual Studio Extension Manager.
5. Start Visual Studio, or restart if you already had it running.
6. In Visual Studio, select Tools ⇒ Extension Manager. You should now see the MonoCross Templates for Visual Studio in the list of installed extensions, as shown in Figure 3.28.
Figure 3.28 You now have access to a variety of MonoCross project templates for Visual Studio.
Installing the MonoCross Templates for MonoDevelop
The MonoCross templates for MonoDevelop contain the project and class templates for Mono for Android and MonoTouch MonoCross bindings.
1. Start MonoDevelop.
2. In MonoDevelop, select Tools ⇒ Add-in Manager and select the Gallery tab.
3. Select the MonoCross MonoDevelop Templates installation package for Mac OS.
A number of templates are available to you for building your cross-platform solutions from the new Project dialog.
Installing the MonoCross Utilities
Over time the authors have made an attempt to insulate the developer from platform differences that manage to make their way through the use of a single unified framework running on different platforms. The results of this effort are the MonoCross Utilities. This library is available for download from www.monocross.net. Usage of the library is covered extensively in Chapter 10, “Using MonoCross Utilities.”
When you are developing multiplatform solutions, the organization of the code base is important. If you don't have a standard in place from the start, your code base will become hard to navigate, and adding multiple platforms and project types into the mix can make it even worse. Following standard practices such as having your project names match your assembly names and your assembly names match their directory names goes a long way toward keeping track of what you're working on and where it resides in a source control tree hierarchy and on disk.
The biggest issues that break the standard project in terms of maintaining a common code base with shared code across multiple platforms are as follows:
- Different platforms sharing the same code in the same directory/project
- The same application with separate implementations
- Similar assemblies with platform-specific code
- Code files with the same class name targeted for different platforms
To solve the first issue, different platforms sharing code in the same directory, it is possible to keep multiple projects files in the same directory as the shared code, but to clarify what code goes with what platform, add a two-letter platform name to the end of the project. For example, MonoCross has an assembly of shared code with the directory name and name space of MonoCross.Navigation. The project name for common Windows targets keeps that same name, with the Android version taking the name MonoCross.Navigation.MD and the iOS version taking the name MonoCross.Navigation.MT, and so on. In addition, the assemblies take on the name of the project to reduce the chance of mixing up the platform that the assembly is built for when copying around assemblies built for different platforms. This naming convention also enables you to keep the assemblies in the same directory when statically referencing them.
Table 3.2 shows the extensions and platform names used in the examples provided here.
Table 3.2 Platform Names and Abbreviations
| Short Platform Name | Abbreviation |
| Windows | None (WebKit, Console, Windows Forms) |
| Droid | MD (Android [MonoDroid]) |
| Touch | MT (MonoTouch) |
| WindowsPhone | WP |
| Windows Presentation Foundation | WPF |
To solve the second issue, in which the same application may have several implementations, add a prefix to the directory. The application had its own directory, and each platform that the application is built for has its own directory beneath it, so prefix the full common platform name. Take an application named CustomerManangement having an implementation for WebKit, Android, and Windows Phone. Under a directory CustomerManagement you can have three directories named WindowsPhone.Container, WebKit.Container, and Droid.Container that have the project and code files for each platform.
When you have similar assemblies with platform-specific code, the third issue, use the platform name to designate unshared code in a similar assembly with a common name followed by the platform name. For example, in MonoCross you can have platform-specific implementations that derive from a common base. So use the common base MonoCross and append the platform names, resulting in MonoCross.Touch, MonoCross.Droid, and MonoCross.WindowsPhone.
To solve the fourth issue, having code files with the same class name targeted for different platforms, use the same convention as the first. If you have an implementation of the BarcodeReader class that will have different implementations on different platforms, you can use the same name and interface across those platforms and keep the files in the same directory, for example, BarcodeReader.MD.cs and BarcodeReader.WP.cs would house the same classes but with platform-specific implementations.
Figure 3.29 shows how items referenced with this naming convention appear in the Visual Studio Solution Explorer.
Figure 3.29 Naming conventions help organize your cross platform projects and solutions.
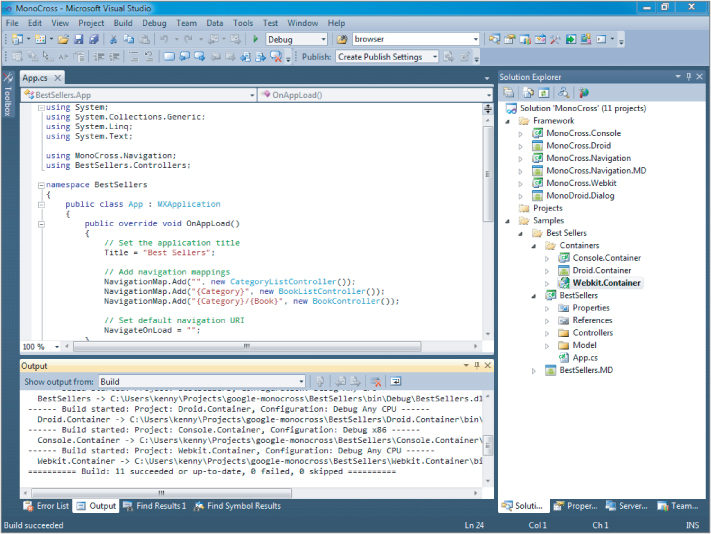
As you work through the examples in this book, you may choose either to type in all the code manually, or to use the source code files that accompany the book. All the source code used in this book is available for download at www.wrox.com. When at the site, simply locate the book's title (use the Search box or one of the title lists) and click the Download Code link on the book's detail page to obtain all the source code for the book. Code that is included on the website is highlighted by the following icon:

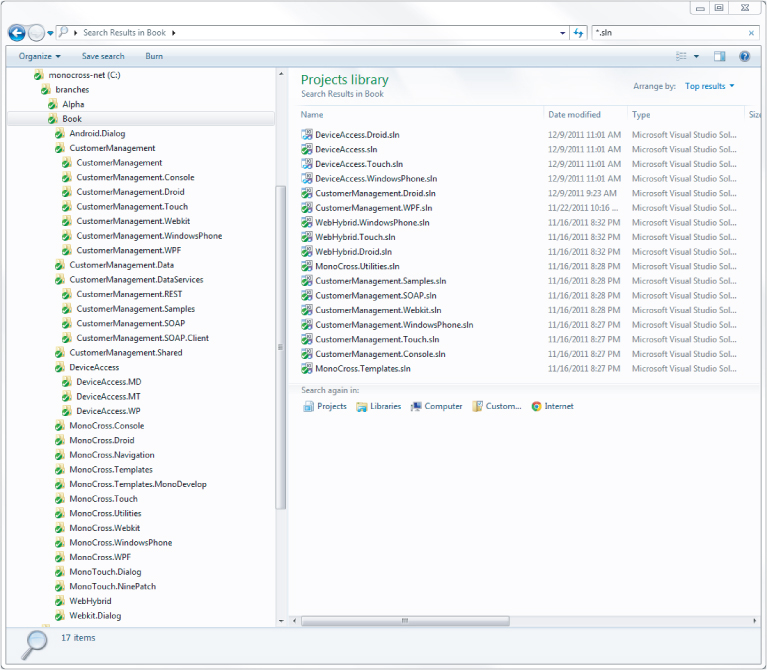
The code in the book is largely organized as we suggest you organize your completed projects and follows the conventions set forth in the section “Organizing Your Solutions.” Figure 3.30 shows the project structure and the solution files for all the sample applications. Unfortunately this isn't the easiest to follow as you go through the chapters because the files are a final product instead of snippets that follow from chapter to chapter as they would for a book dedicated to teaching individual coding concepts. So if you want to look over and run the code before a particular section is wrapped up in an application, you can build and run any of the code at any time.
Figure 3.30 If you are looking for a Visual Studio Solution from the book, you can find it here.
The Chapter 4, “The MonoCross Pattern,” introduces the Model-View-Controller concepts with a cross-platform concept, and Chapter 5, “Building Shared Applications,” covers building the platform independent code, which iswrapped up in Chapter 6, “Building MonoCross Containers.” If you want to sample the code and concepts from those chapters, you can build and run the code from the CustomerManagement.Console, CustomerManagement.Touch, CustomerManagement.Droid or CustomerManagement.WebKit directory. The solution files in these folders are independent and complete and can be run individually.
Chapter 7, “Designing and Building Data Services,” covers the server-side services built and consumed by the mobile applications and can be found in the solution files in the CustomerManagement.Data directory.
Chapter 8, “Consuming Data Services,” and Chapter 10 “Using the MonoCross Utilities” code the client side consumption, storage, and manipulation data. The sample code from those chapters can be found in the CustomerManagement.DataServices and CustomerManagement.Samples directories.
Chapter 9, “Accessing the Device,” covers different aspects of direct device access and how you can use mobile specific aspects found in most mobile applications within your applications in a consistent manner, making your applications easier to manage.
Chapter 11, “Hybrid Applications,” covers web hybrid applications. The sample code for those is available in the WebHybrid solutions directories WebHybrid.Touch, WebHybrid.Droid and WebHybrid.WindowsPhone.
Chapter 12, “Delivering Applications to the Enterprise,” covers extending the concepts beyond mobile devices and shows how you can move your server side services into the cloud and your applications to Windows Presentation Foundation.
Explore the sample code and the chapters in any order you find of interest to you, either before or after reading the chapters that cover the code within.
Continuous Integration (CI) generally consists of a combination of building, running unit tests, and deploying finished applications. Both Visual Studio and MonoDevelop come with command-line tools that enable solutions and projects to be built and deployed automatically. These tools also work for solutions that contain the additional platforms discussed in this book. In addition, although not covered here, these tools support the creation and signing of a redistributable application via project settings. As a result, with effort, you can work multiple platform builds into your normal CI work flow.
In this chapter, you learned how to install all the platforms and frameworks needed for mobile development. You've gone through installing the Visual Studio and MonoDevelop development environments needed to build your mobile solutions. You've installed the mobile frameworks and mobile SDKs for the Android, iOS, and Windows Phone. You've also seen each of the device emulators for these platforms and how they can be of use in testing mobile websites.
Just keep reading, and in the next chapter, you'll be introduced to the MonoCross pattern. The chapter discusses the problems you are likely to face in developing for multiple platforms and supply you with answers. You'll find observations that can help you be successful in developing and deploying your solutions.